• State-of-the-Art Cree LED Technology
• CNC Machined Aluminum Alloy for durability
• 6 Lighting Modes (Hi-Low-Boost-SteadyPulse-Daylight Flash-Walking)
• 2-in-1 SteadyPulse illumination to see and be seen
• Integrated Low Battery Indicator
• Rechargeable high-capacity Li-Ion battery
• Smart Charger elimates charge time guesswork (100-240 volts)
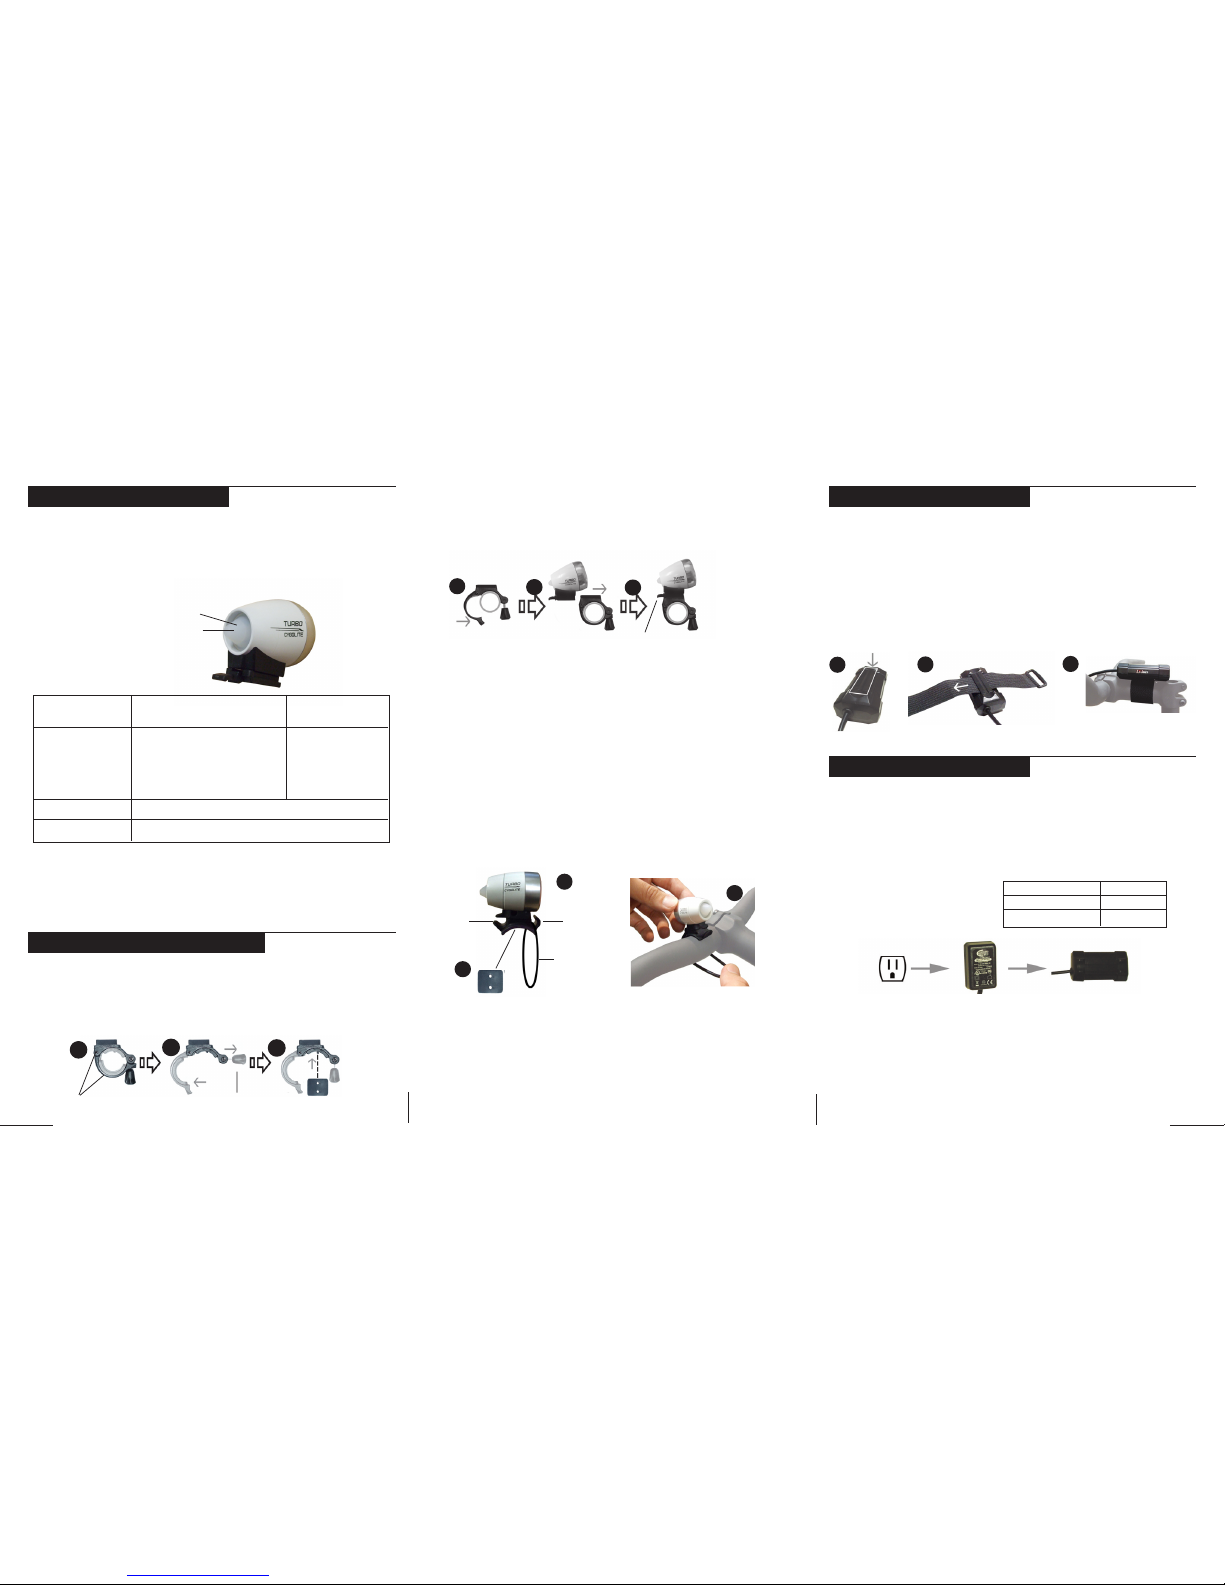
• Quick Release Bracket fits oversized & standard sized handlebars (Turbo 800)
• “O-Ring” Handlebar mounts for oversized & standard sized handlebars (Turbo Mini 400)
OPERATION MANUALOPERATION MANUAL
OPERATION MANUALOPERATION MANUAL
OPERATION MANUAL
CONTENTS
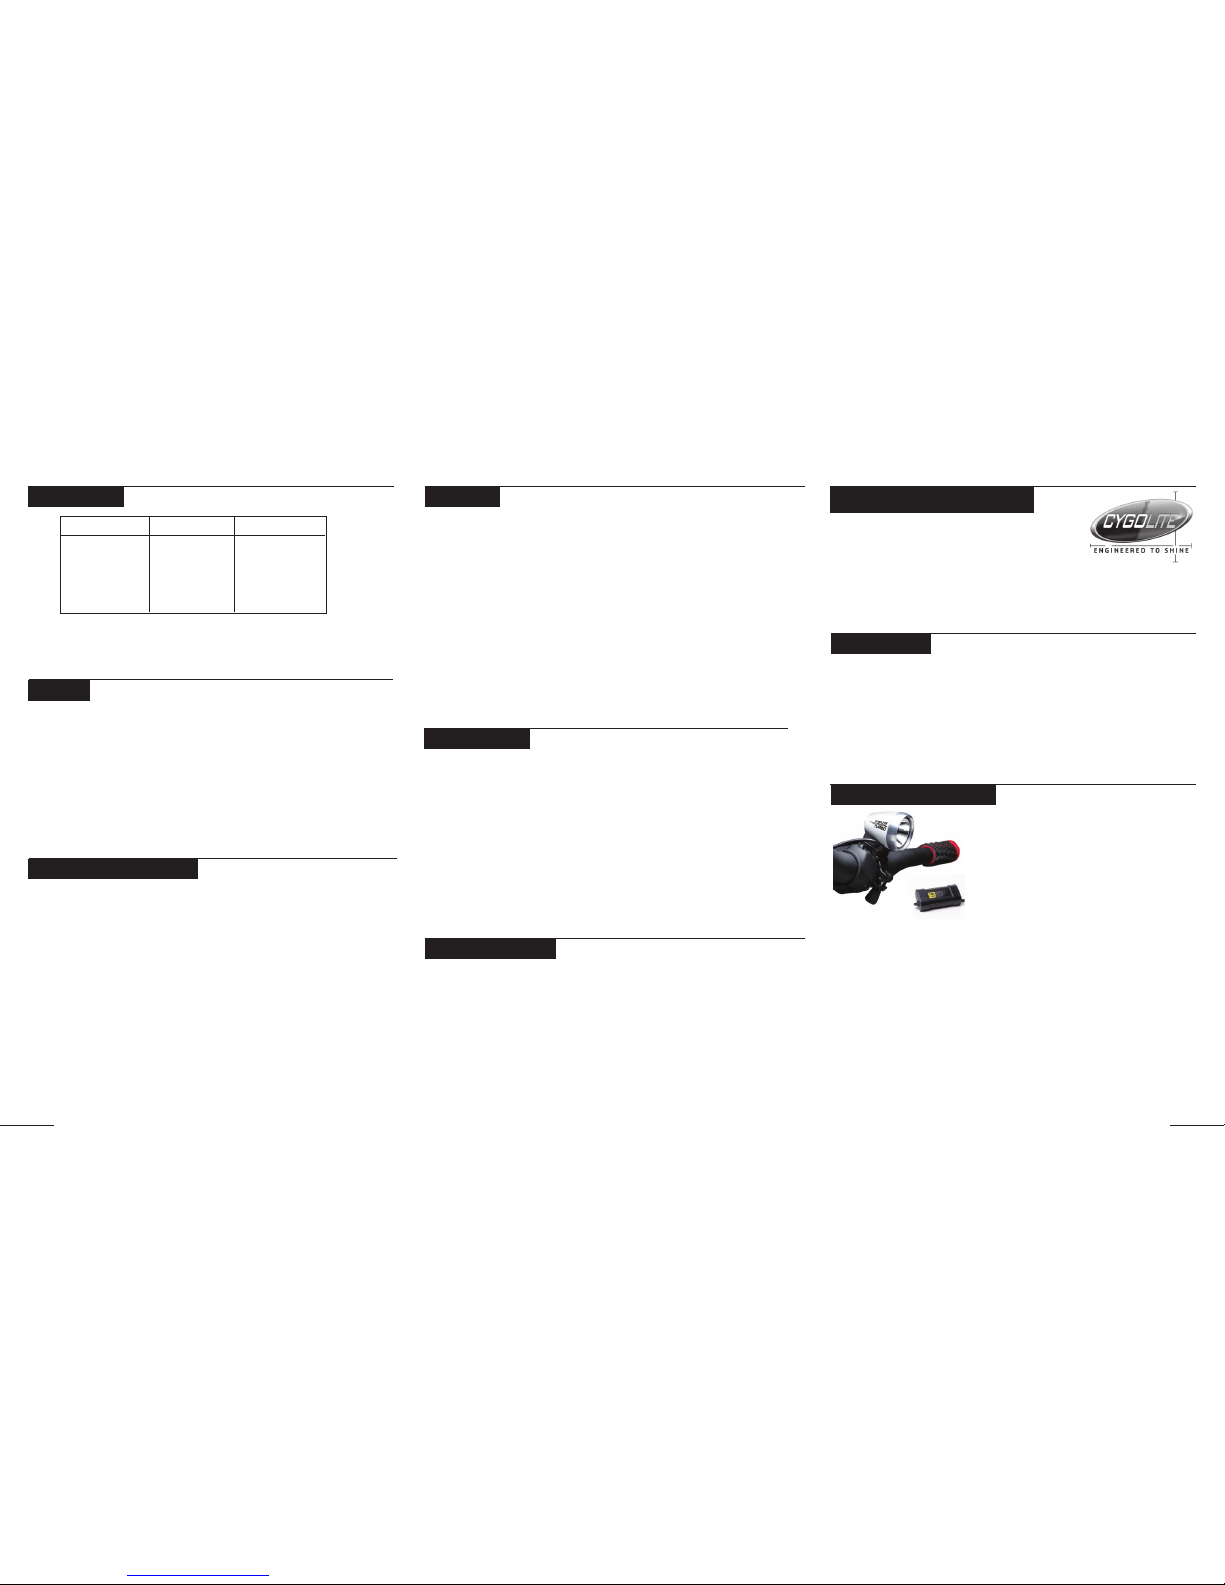
• High-BrightnessLEDHeadlight
• RechargeableLi-Ion Battery with Velcro Strap
• SmartRapidCharger
• Quick-Release Handlebar Bracket (Turbo 800)
• O
-Ring Handlebar Mount Straps (Turbo Mini 400)
• Helmet
Mount kit (Turbo Mini 400)
•OperationManual
Congratulations on your purchase of the Turbojet High-Brightness LED
headlight. The Turbojet series features 2 lighting systems, the Turbo 800
& Turbo Mini 400. Please refer to this manual to operate your Turbo
safely & properly.
High Brightness LED Lighting System
with Rechargeable Li-ion Battery for Cycling
CAUTION:
· Headlight may get hot during use. Use caution when handling.
· Unplug the headlight from battery when not in use.
· Unplug connectors by the plug, never by the cable.
· Do not modify or substitute any parts with Non-Cygolite parts.
· Do not open headlight case.
· Provide adequate airflow to the headlight to cool during use.
· Do not operate or submerge any part of the system under water.
· Do not operate the light unattended.
· Keep headlight away from combustible materials.
· Do not package headunit when hot or immediately after use.
· This light is for bicycle use only.
· State laws regarding flashing bicycle lights may vary among states. Use the
flashing modes in accordance to your local state laws as well as Federal law.
CYGOLITE
1307-A EAST SAINT GERTRUDE PL., SANTA ANA, CA 92705 USA
PHONE: (714) 437-7752 FAX: (714) 437-7962
www.cygolite.com
In the USA, the Turbo comes with a lifetime limited warranty on the light
housing and one year warranty on electrical parts, against any defective part
or craftsmanship. The battery is warranted up to 6 months after the original
date of purchase. If the unit is under warranty, Cygolite will repair or replace
defective components at no charge provided the product has not been
subject to misuse, abuse, or non-Cygolite authorized alteration, modification
or repair. Warranted products requiring service must receive a Return
Merchandise Authorization number (RMA#) from customer service. The
original receipt (INCLUDING DATE) is required on all warranty repairs.
Shipping costs inccurred from shipping warranty or repair items from the
customer to Cygolite are covered by the customer. For warranty issues
outside the USA, contact the retailer where the purchase was made.
The headlight will not turn on.
· Make sure the power button was firmly pressed.
· Make sure battery cable is properly connected.
· Make sure the battery is fully charged.
The headlight turns off over rough terrain.
· Make sure the battery cable is securely plugged in with the headlight
cable.
· Make sure the battery cable is fastened to the handlebar to minimize
cable vibration.
All Cygolite products are backed by Cygolite’s warranty, providing quality,
craftsmanship and the assistance of our knowledgeable staff. If any support
is needed, we will assist with 48 hour turnarounds on parts and service. For
questions, problems, and/or authorized CYGOLITE parts contact us.
The Turbo is designed to be used on bikes in some of the most extreme
outdoor conditions. Over time, dust and dirt may hinder the connections on
your headlight. To prevent this from happening, ensure that the headlight is
clean after every ride.
Wipe the headlight down with a damp cloth. Do not submerge the battery or
headlight in water.
The High-Brightness LED has extensive life so bulb replacement is not
required.
* Turbo 800 Shown
Q: When should I charge my battery?
· The battery can be charged any time. We recommend fully charging the
battery every charge.
Q: Can I leave my battery on the charger for extended periods of time?
· The Smart Rapid charger prevents damage from overcharging but, like all
electrical appliances, we recommend unplugging the battery and charger
once the battery is fully charged.
Q: Are parts interchangeable between the Turbo 800 and Turbo Mini 400?
· No, the parts for the Turbo 800 & Turbo Mini 400 are specific to each
light & are not interchangeable.
Q: Can I use non-Cygolite parts for this unit?
· No, Cygolite parts are manufactured to specific quality specifications.
Use of non-Cygolite parts will void the warranty and may cause damage
to the light.
SYSTEM CONTENTSSYSTEM CONTENTS
SYSTEM CONTENTSSYSTEM CONTENTS
SYSTEM CONTENTS
FEATURESFEATURES
FEATURESFEATURES
FEATURES
CARECARE
CARECARE
CARE
TROUBLESHOOTINGTROUBLESHOOTING
TROUBLESHOOTINGTROUBLESHOOTING
TROUBLESHOOTING
F.A.Q.sF.A.Q.s
F.A.Q.sF.A.Q.s
F.A.Q.s
WARRANTYWARRANTY
WARRANTYWARRANTY
WARRANTY
COMMITMENTCOMMITMENT
COMMITMENTCOMMITMENT
COMMITMENT
TURBOJET SERIESTURBOJET SERIES
TURBOJET SERIESTURBOJET SERIES
TURBOJET SERIESTM
RUN TIMERUN TIME
RUN TIMERUN TIME
RUN TIME
High
Low
Boost
SteadyPulse*
Daylight Flash
LIGHTING MODES TURBO 800 TURBO MINI 400
3 hrs
9 hrs
2 hrs
4
24 hrs
2:45 hrs
15 hrs
2 hrs
4
23 hrs
NOTE: *SteadyPulse mode combines steady brightness to see and
alerting flash to be seen into one mode. It is made especially for riding at
night in high traffic areas.