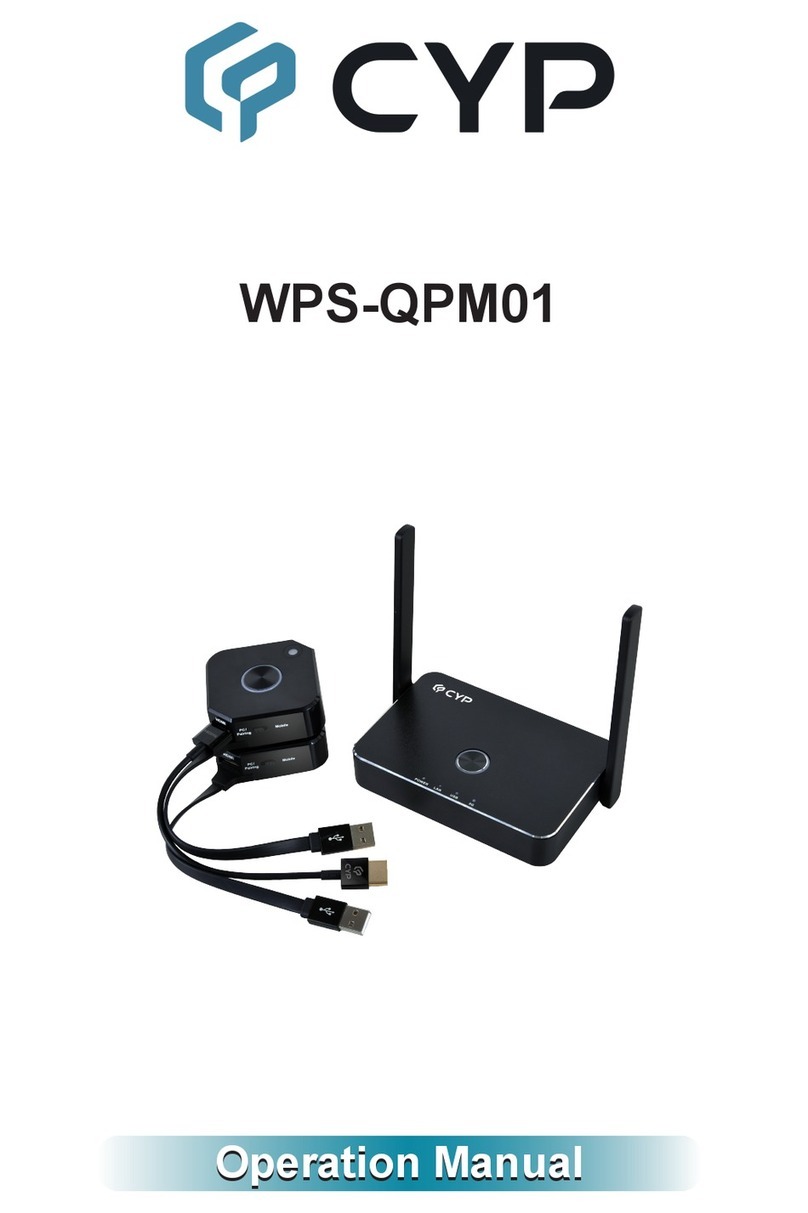
CYP Hyshare Pro User manual

Operation Manual
Operation Manual
A Wireless Presentation System
WPS-HP201
Hyshare Pro


DISCLAIMERS
The information in this manual has been carefully checked and is believed
to be accurate. Cypress Technology assumes no responsibility for any
infringements of patents or other rights of third parties which may result from
its use.
Cypress Technology assumes no responsibility for any inaccuracies that
may be contained in this document. Cypress also makes no commitment to
update or to keep current the information contained in this document.
Cypress Technology reserves the right to make improvements to this
document and/or product at any time and without notice.
COPYRIGHT NOTICE
No part of this document may be reproduced, transmitted, transcribed,
stored in a retrieval system, or any of its part translated into any language
or computer le, in any form or by any means—electronic, mechanical,
magnetic, optical, chemical, manual, or otherwise—without express written
permission and consent from Cypress Technology.
© Copyright 2018 by Cypress Technology.
All Rights Reserved.
TRADEMARK ACKNOWLEDGMENTS
All products or service names mentioned in this document are trademarks of
the companies with which they are associated.

SAFETY PRECAUTIONS
Please read all instructions before attempting to unpack, install or operate
this equipment and before connecting the power supply. Please keep the
following in mind as you unpack and install this equipment:
• Always follow basic safety precautions to reduce the risk of re,
electrical shock and injury to persons.
• To prevent re or shock hazard, do not expose the unit to rain, moisture
or install this product near water.
• Never spill liquid of any kind on or into this product.
• Never push an object of any kind into this product through any openings
or empty slots in the unit, as you may damage parts inside the unit.
• Do not attach the power supply cabling to building surfaces.
• Use only the supplied power supply unit (PSU). Do not use the PSU if it
is damaged.
• Do not allow anything to rest on the power cabling or allow any weight to
be placed upon it or any person walk on it.
• To protect the unit from overheating, do not block any vents or openings
in the unit housing that provide ventilation and allow for sucient space
for air to circulate around the unit.
• Please completely disconnect the power when the unit is not in use to
avoid wasting electricity.
VERSION HISTORY
REV. DATE SUMMARY OF CHANGE
RDV1 2022/07/11 Preliminary release

CONTENTS
1. Introduction...................................................... 1
2. Applications ..................................................... 1
3. Package Contents ........................................... 1
4. System Requirements..................................... 1
5. Features............................................................ 2
6. Operation Controls and Functions ................ 3
6.1 Front Panel.................................................. 3
6.2 Rear Panel................................................... 4
7. Installation........................................................ 5
7.1 Wall Mounting.............................................. 5
7.2 Cable Connection & Startup........................ 5
8. System Conguration ..................................... 6
8.1 Web Access................................................. 6
8.2 Web Landing Page...................................... 6
8.3 General Settings.......................................... 8
8.3.1 Basic Tab............................................ 8
8.3.2 Resolution Tab.................................... 9
8.3.3 Date & Time Tab............................... 10
8.4 Network Settings ....................................... 11
8.4.1 Wi-Fi Tab .......................................... 11
8.4.2 Ethernet Tab ..................................... 13
8.4.3 Typical Congurations ...................... 14
8.5 Administration Settings.............................. 16
8.5.1 Update Tab ....................................... 16
8.5.2 Password & Conguration Tab ......... 17
8.6 Power Settings .......................................... 18
9. App And Web Browser Sharing ................... 19
9.1 Download the Hyshare Pro App ................ 19
9.2 Operation of the Hyshare Pro App............. 19
9.3 Web Browser Sharing................................ 23

9.4 AirPlay and Google Cast ........................... 24
9.4.1 AirPlay .............................................. 24
9.4.2 Google Cast ..................................... 24
10. Osd Menu Operation ................................... 25
10.1 Information Panel .................................... 25
10.2 Managing Multiple Shared Sources......... 25
10.3 Control Panel........................................... 26
10.4 Collaboration Features ............................ 28
10.4.1 Floating Menu................................. 28
10.4.2 Save Screenshots .......................... 29
11. Connection Diagram.................................... 30
12. Specications .............................................. 31
12.1 Technical Specications .......................... 31
12.2 Video Specications ................................ 32
12.3 Audio Specications ................................ 34
12.3.1 Digital Audio ................................... 34
12.3.2 Analog Audio .................................. 34
12.4 Cable Specications................................ 35
13. Acronyms ..................................................... 36
14. Compliance Statements.............................. 38
14.1 FCC Statement........................................ 38
14.2 FCC RF Radiation Exposure Statement.. 39
14.3 Declaration of Conformity........................ 39
14.4 WEEE...................................................... 39
14.5 General Warnings.................................... 40
15. Warranty Policy ........................................... 41
15.1 Warranty Period....................................... 41
15.2 Repairs Under Warranty.......................... 41
15.3 Exclusions from Warranty........................ 42

1
1. INTRODUCTION
The Hyshare Pro is a high-performance Wireless Presentation System,
which provides a smooth wireless screen-casting experience, letting the
users free themselves from messy cables and complicated systems. With
its simple installation and setup, users can easily share their presentations
and screens in meetings or classrooms. Hyshare Pro comes with a user-
friendly app interface as well! Just launch it on a host computer, smart
phone or tablet and the user can show their presentation instantly. Hyshare
Pro supports cross-platform collaboration and communication, including
Windows, macOS, Android, and iOS systems.
2. APPLICATIONS
• Meeting room collaboration
• Interactive classrooms
3. PACKAGE CONTENTS
• 1× Hyshare Pro Wireless Presentation System
• 1× 12V/2A DC Power Adapter
• 2× Antenna
• 1× Quick Start Guide
4. SYSTEM REQUIREMENTS
• Desktop computer or mobile phone/tablet source device.
• Desktop computers must be running a Windows 10 (or later) or macOS
10.14 (or later) operating system.
• Mobile phones and tablets must be running an Android 8.1 (or later) or iOS
12 (or later) operating system.
• HDMI receiving equipment such as an HDTV or monitor.

2
5. FEATURES
• Supports up to 4K@30Hz video output.
• Entire desktop/screen or specic window sharing via browser (Chrome or
Edge) or dedicated app.
• Multiview output can display up to 4 sources simultaneously with manual
user control over layout placement.
• Supports optional 4-digit connection code and data transfer encryption to
protect shared screen content.
• Supports up to 20 users connected to a single Hyshare Pro unit.
• Includes collaboration tools, including screen capture, annotation, and
whiteboard functionality.
• Able to remotely monitor the Hyshare Pro unit’s video output through use
of the app on a source device.
• Touchback capability allows a connected computer to be controlled from
the shared output on a touch display.
• Moderation mode allows management of which source devices are
currently shown on the video output via the unit’s OSD.
• Supports WPA2 and 802.1x EAP for secure Wi-Fi connections.
• Compatible with many modern operating systems, including: Windows
(10+), macOS (10.14+), Android (8.1+), and iOS (12+)
• Easy control and conguration of the unit via WebGUI.
• 3 year warranty

3
6. OPERATION CONTROLS AND FUNCTIONS
6.1 Front Panel
USB USB
321
1Power Button: Press this button to power the unit on (blue) or place it
into stand-by mode (red). If the unit has been placed into suspend mode,
via the WebGUI, the LED will be o.
Note: To factory reset the unit, press and hold the power button for 6~7
seconds (a reset warning message will show on the video output after 3
seconds).
2USB 3.0 (Type-C) Port: Connect directly to a USB-C external storage
device, such as a USB ash drive, for the storage of screenshots, etc.
Note:Thisportonlysupportstheconnectionofamouse,ashdrive,or
touch panel. Keyboards and external hard drives are not supported.
3USB 3.0 (Type-A) Port: Connect directly to a standard USB peripheral
such as a mouse to control the OSD mouse pointer or to a ash drive for
the storage of screenshots, etc.
Note:Thisportonlysupportstheconnectionofamouse,ashdrive,or
touch panel. Keyboards and external hard drives are not supported.

4
6.2 Rear Panel
DC 12VLANVGA OUTUSBHDMI OUTLINE OUT
17654321
1Antenna Connections: Connect to the provided antennas by carefully
screwing them onto these 2 ports.
Note: The antennas should be oriented so as to be perpendicular to the
preferred Wi-Fi broadcast plane.
2LINE OUT Port: Connect to powered speakers, headphones, or an
amplier for analog stereo audio output.
3HDMI OUT Port: Connect to an HDMI TV, monitor, or amplier for digital
video and audio output.
4USB 2.0 (Type-A) Port: Connect directly to a standard USB peripheral
such as a mouse or touch panel to control the OSD mouse pointer.
Note:Thisportonlysupportstheconnectionofamouse,ashdrive,or
touch panel. Keyboards and external hard drives are not supported.
5VGA OUT Port: Connect to a VGA monitor or display for analog video
output.
6LAN Port: Connect directly, or through a network switch, to your PC/
laptop to control the unit via WebGUI.
Note: If the connected network switch supports the 802.3af PoE (Power
over Ethernet) standard, this unit can be powered directly via this port.
7DC 12V Port: Plug the 12V DC power adapter into this port and connect
it to an AC wall outlet for power.
Note: Optional, not needed if the unit is powered via PoE.

5
7. INSTALLATION
7.1 Wall Mounting
Step 1) Drill two screw starter holes into the mounting wall with 140mm
space between them, as shown in the image below. Use screw
anchors if needed.
140 mm
3.3 mm
Ø 6 mm
Step 2) Drive a screw into each hole, leaving a small gap between the wall
and the screw head.
Screw Head Diameter: Between 5.5 ~ 6 mm.
Screw Rod Diameter: Less than 3.3 mm.
Step 3) Carefully hang the unit on both screw heads by tting them into the
cross-shaped holes on the back of the unit, and slide it downwards
until it is xed in place.
Note: Suggested height of wall mount is lower than 3 meters.
7.2 Cable Connection & Startup
Step 1) Connect to a display with an HDMI or VGA cable.
Step 2) Plug in the power supply (or connect the Ethernet cable, if powered
via PoE). The unit’s boot logo will show on the screen.
Step 3) Plug in a USB mouse, or USB cable connected to a touch-capable
display, to activate the onscreen mouse functionality. (Optional)
Note: The default video output is HDMI only. If necessary, change
the video output to "HDMI and VGA" through the WebGUI.

6
8. SYSTEM CONFIGURATION
8.1 Web Access
Step 1) Make sure your computer and the Hyshare Pro are both connected
to the same network, either through a wired Ethernet connection (via
a local network switch), or through the unit’s Wi-Fi network.
Note: The Hyshare Pro’s default SSID is “WPS-HP210-xxxx” where
xxxx is the last 4 characters of its MAC address and the default Wi-
Fi password is “00000000”.
Step 2) Find the Hyshare Pro’s IP address by connecting it to an HDMI
display and checking the upper left corner of the OSD.
Step 3) Type the IP address into your computer’s web browser.
Note: Depending on the browser version used, it might be necessary
to accept a security exception to access the page.
Step 4) You should now see the Web Landing Page.
8.2 Web Landing Page
1) Administrator Login: Click the gear icon ( ) in the upper right of
the screen to login to the unit as an administrator and access the
conguration pages.
Note: The default administrator password is “admin”, and it is strongly
suggestedtochangethedefaultadministratorpasswordthersttime
youcongureyourunit.Youwillbeautomaticallyloggedoutifidlefor15
minutes.

7
2) Browser Sharing: Click on the “Start” button in the middle of the screen
to connect to begin sharing your desktop to the currently connected unit.
Note: Browser sharing is not available if the unit is in “Moderation Mode”.
3) Download App: Download the app for the preferred operating system.
Note: Operational details for the app are provided in Section 9.
■ Windows: Click the “Windows” button to download the install le
for the standard app for use on Windows PC. Save the le (*.msi
format), to an easily ndable location, and then execute it to install
the software.
■ Windows Install-free Version: A special self-contained version of
the app, designed for use on PCs where installation is not an option,
is also available. Click on the “Use Install-Free Version” link below
the main Windows link to download the le (*.exe format) and save it
to an easily ndable location.
Note: The install-free version does not support the upgrade and quick
join functions, and setting changes are not saved upon exit.
■ macOS: Click the “macOS” button to download the install le for the
standard app for use on Macintosh computers. Save the le (*.dmg
format), to an easily ndable location, and then execute it to install
the software.
■ Quick Join: Clicking the Quick Join button will generate a shortcut
le (*.qj format) that can be saved in a convenient location (on the
desktop, for example) that when double-clicked will automatically
start the Hyshare Pro app and connect to the relevant Hyshare Pro
unit.
Note:UseoftheQuickJoinshortcutlerequirestheapptoalready
be installed on the computer. Not compatible with the install-free
version of the app.

8
8.3 General Settings
8.3.1 Basic Tab
The Basic tab provides control over outward facing aspects of the unit, such
as the unit’s name, login code, OSD background, etc. Changes to this page
will only take eect after pressing the “Apply” button and some changes may
require the unit to reboot.
1) Station Name: The unit’s display name shown on the standby screen
and Hyshare Pro App’s station list. It will also be used as the SSID (Wi-Fi
name) for the wireless access point.
Note: The name can be up to 16 characters long, and must be ASCII text
(limited to letters, numbers, or the hyphen character).
2) Login Code: Set the numerical code, if any, that must be entered to
share a screen on the unit.
Note: This code will be displayed on the unit’s OSD.
■ Random: Login code requirement enabled, randomly generated
4-digit number.
Note: A new code will be generated when the unit is rebooted or
when the sharing screen is disconnected.
■ No Code: Login code requirement disabled.
■ Fixed: Login code requirement enabled, user assigned 4-digit
number.

9
3) Background Image: Select the background image to use on the output’s
OSD. The rst 2 options are built in (and un-removable). Custom
backgrounds can be uploaded or deleted by clicking on any of the
remaining 4 image blocks.
Note: The image format must be PNG or JPEG. A width/height ratio
between1.5~2.0:1witharesolutionbelow3840x2160isrecommended.
4) Allow Remote View: Enabling this setting allows all users in the session
to view the main screen via the Hyshare Pro App.
5) Language: Use the dropdown to select the preferred display language
for the unit’s interface.
6) Reboot: Click the “Reboot” button at the top of the screen to reboot the
unit.
7) Log Out: Click the “Log out” button at the top of the screen to log out of
the administrator account and return to the landing page.
8.3.2 Resolution Tab
The Resolution tab provides control over the unit’s video output. Changes
to this page will only take eect after pressing the “Apply” button and some
changes may require the unit to reboot.
1) Video Output: Select the unit’s video output mode. Output can be over
HDMI only, or both HDMI and VGA.
Note: When set to “HDMI and VGA”, the maximum output resolution is
1080p.

10
2) Resolution: Use the dropdown to select the preferred output resolution.
This is set to “Auto” by default.
Note: The available resolutions depend on the EDID of the connected
monitor. When Video Output is set to “HDMI and VGA”, both outputs will
use the same resolution.
3) Output Resolution: Displays the unit’s current output resolution.
8.3.3 Date & Time Tab
The Date & Time tab provides control over the unit’s internal clock. Changes
to this page will only take eect after pressing the “Apply” button and some
changes may require the unit to reboot.
Note: Time synchronization is necessary for screen sharing. Please ensure
the date and time is set correctly on all involved devices.
1) Set Time Automatically: Enable this to have the unit automatically set its
time using the designated time server.
2) 24 Hour Format: Enable or disable the 24-hour clock display format.
3) Time Server: Set the network time server to use when the unit is
congured to set the time automatically.
4) Time Zone: Use the dropdown to select the preferred `time zone.
5) Year/ Month/ Date: Manually set the year, month, and day when “Set
Time Automatically” is disabled.
Note: When “Set Time Automatically” is enabled, editing is disabled and
thiseldwillonlydisplaythecurrentlyassigneddate.

11
6) Time: Manually set the time when “Set Time Automatically” is disabled.
Note: When “Set Time Automatically” is enabled, editing is disabled and
thiseldwillonlydisplaythecurrentlyassignedtime.
8.4 Network Settings
8.4.1 Wi-Fi Tab
The Wi-Fi tab provides control over how the unit integrates into the local
wireless networking environment. Changes to this page will only take eect
after pressing the “Apply” button and some changes may require the unit to
reboot.
Note: It is strongly recommended to connect to the unit via a wired LAN
connection(SeeSection8.4.2)whenmodifyingtheWi-Ficonguration.
1) Wi-Fi AP (Access Point) Conguration: Select one of the 3 options to
dene how the unit’s Wi-Fi access is managed.
■ Hyshare Pro as AP: The unit’s Wi-Fi will act as an independent
wireless network access point allowing direct connections for screen
sharing. It will announce an SSID (if not hidden) to facilitate easy
discovery by local devices.
– SSID:
The name used by this unit to announce itself as a Wi-Fi
access point. This will always match the unit’s currently assigned
station name (See Section 8.3.1). If desired, the SSID can be
hidden from public Wi-Fi scans.

12
– Security: Enable or disable WPA2 connection security. It is
strongly recommended to always use WPA2 and it is enabled by
default. The current password can be revealed by clicking on the
“eye” icon. The default password is “00000000”.
Note: WPA2 passwords should be 8 to 16 characters long.
– Band: Select the broadcast band (5GHz or 2.4GHz) for the Wi-Fi
radio. 5GHz is set by default, and is recommended.
– Network Mode: Set the Wi-Fi network routing behavior of the
unit. Selecting “NAT” will create an independent local subnet
for connected devices. Selecting “Bridge” will make the unit’s
network transparent and place connected devices into the parent
network’s subnet. NAT is set by default.
– Gatekeeper: Select “Allow all” (default), “Internet only” or “Block
all”. When the station is connected via a wired Ethernet cable,
selecting “Allow all” will let the user access any point on the
network; selecting “Internet only” allows the user to only access
webpages (http or https); selecting “Block all” allows the user to
only access the Hyshare Pro WebGUI.
■ Hyshare Pro connects to another AP: The unit will connect to and
use another local Wi-Fi network as the access point for connections
and to obtain network access. Devices sharing their screens will need
to connect to the same local Wi-Fi network.
– Connecting: Click on “Scan” to have the unit create a list of local
access points. Once you nd the access point you intend to use,
click on it and ll in the requested information to complete the
connection. If the network you want to connect to has a hidden
SSID, you can click on “Add” to manually add it to the list.
■ Hyshare Pro Wi-Fi o: Selecting this completely disables the
unit’s Wi-Fi radio. Access will only be allowed via the local Ethernet
connection.
2) Wi-Fi MAC Address: Shows the MAC address used by the unit’s Wi-Fi
radio.

13
8.4.2 Ethernet Tab
The Ethernet tab provides control over how the unit integrates into the local
wired networking environment; specically, how the unit denes the IP
address used when accessing the WebGUI. Changes to this page will only
take eect after pressing the “Apply” button and some changes may require
the unit to reboot.
1) Obtain IP Address: Choose the method of dening the unit’s Ethernet
IP address. Selecting “DHCP” will have the unit attempt to automatically
obtain an IP address from a local DHCP server. Selecting “Static” allows
the user to manually enter the preferred IP address information below.
2) Ethernet MAC Address: Shows the MAC address used by the unit’s
Ethernet port.
3) IP Address: Displays the currently assigned IP address. In Static mode,
manual entry is allowed.
4) Subnet Mask: Displays the currently assigned subnet mask. In Static
mode, manual entry is allowed.
5) Gateway: Displays the currently assigned gateway address. In Static
mode, manual entry is allowed.
6) DNS 1 & 2: Displays the currently assigned DNS addresses. In Static
mode, manual entry is allowed.
Note:Insomenetworkenvironments,botheldsmaynotbelledin.

14
8.4.3 Typical Congurations
1) Hyshare Pro Standalone Wi-Fi Network (Default): In this conguration
the Hyshare Pro will operate as a wholly independent wireless access
point with no access to a local network or the internet.
Step 1) Ensure the unit is connected to the same internal network
as your computer via Ethernet cable and connect to the
conguration page using a web browser.
Note: The unit’s IP address can be obtained from the OSD.
Step 2) Log into the unit as administrator and browse to the Network/Wi-
Fi page. Choose “Hyshare Pro as AP”.
Step 3) Congure the Wi-Fi settings based on your preferences (in most
cases, the default settings are ne).
Note: It is strongly recommended to change the default WPA2
password (00000000).
Step 4) Click the “Apply” button.
Step 5) Remove Ethernet cable from the unit.
Step 6) Connect to the unit’s SSID via Wi-Fi on the device you wish to
share a screen from and initiate sharing normally. (Please see
Section 9 for more details)
2) Hyshare Pro Uses the Organization’s Wi-Fi LAN: In this conguration
the Hyshare Pro will connect to the organization’s Wi-Fi and use it as the
wireless access connection point.
Step 1) Ensure the unit is connected to the same internal network
as your computer via Ethernet cable and connect to the
conguration page using a web browser.
Note: The unit’s IP address can be obtained from the OSD.
Step 2) Log into the unit as administrator and browse to the Network/Wi-
Fi page. Choose “Hyshare Pro connects to another AP” and click
the “Apply” button.
Step 3) Click on “Scan” and then select (and log into if necessary) the
preferred Wi-Fi SSID from the provided list.
Step 4) After the connection is successful, remove the Ethernet cable
from the unit. The new IP address will show on the OSD.
Step 5) Connect to the organization’s Wi-Fi SSID on the device you wish
to share a screen from and initiate sharing normally. (Please see
section 9 for more details)
This manual suits for next models
1
Table of contents
Other CYP Projector Accessories manuals