manuals.online logo
Brands
  1. Home
  2. •
  3. Brands
  4. •
  5. Sony
  6. •
  7. Projector Accessories
  8. •
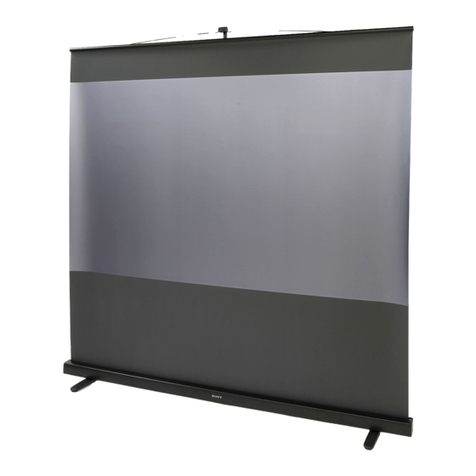
  9. Sony VPS-80DS User manual

Sony VPS-80DS User manual

SONY:
Projector Screen
3-210-143-02
(1)
QXm~~fi
(JP)
Operating Instructions (GB)
Mode d'emploi. (FR)
Bedienungsanleitung (DE)
Manual de instrucciones (ES)
Istruzioni per d'uso (IT)
{imi~JJ~~
(CS)
d:>Rl,
\J:l:fl,
\tc.tc=t!~
b
ti'e"3
L:c!'l,
\~g
0
I
A\
~tt:.1
~:i:O)rc61)O);3:i~}J;IW~rqS16L,
IC,
*w~
A~~~IL16
ill
i!5
C
0LCb'dBfJ*90
LO)~$tBJj~I~Id:,
~6~~~jj
<'rc61JO)m~U;j:~~IJ!c~aEJO)!t5Z
fJ
J,&L,
If]\
rC~/TdJ
-CL,1*90
c::O)~B~iJ~~<as~dj.O)"3~,
~B6~~:i:IL<Di92
L,
1<
recL,
10
<D~jtOil~16J
rcdBcld:,
L,
I-::JCt>~sn0
c
L~ILt~\9"1*
~
G
-C
<
recL,
10
VPS-80DS
©
2007
Sony Corporation Printed
in
Japan
CDynaClear
Screen
English
Warning
•Do not lean the screen case against awall.
If
the screen case falls, it may cause to injury. When you store the screen
case, place it on aflat surface.
•Do not place the screen near adevice used to produce flames such
as
a
fireplace, agas range, or an oil heater, etc.
The screen surface
is
made from athin material. It may catch afire from
adevice producing flames.
Caution
•Do not touch both edges
of
the screen surface.
The screen surface is made from athin material.
If
you touch the edges
and rub the screen surface, it may cause an injury such
as
cuts.
•Do not place the screen near awindy place.
If
you place the screen near an air conditioner, fan
or
awindow, the
screen may fall. This may cause an injury.
This may cause the projected image to sway as well.
•Do not place the screen on an unstable surface.
If
you place the screen on an unstable surface such as an unsteady rack
or shelf, the screen may fall. When you install the screen, adjust the
stands in avertical position against the screen case.
•When you adjust the height
of
the screen or store the screen, be sure to
unlock the screen pole by holding it with your hand.
If
you unlock the screen pole without holding it, the moving part on
the upper part
of
the screen pole may drop quickly. This may cause an
injury or damage to the screen, such as ahandle distortion.
•Do not hang from the screen.
If
you hang from the screen surface
or
the screen pole after the
installation
of
the screen, it may fall and cause an injury.
•Do not wind in or catch your finger when storing the screen.
Be careful not
to
wind
in
your finger when storing the screen surface. Also,
be careful not
to
catch your finger when storing the screen pole or stands.
Precautions
Installation ofthe screen
When installing the projector on aceiling, aclear and optimum image may
not be projected, due to the features
of
the projector.
For details on installation, refer to "Example
of
installation position"
of
this
operating instruction.
4
7:i1'7.:$'-
Adjuster
Ajusteur
Klemme
Ajustador
Dlspositivo
dl
regolazlone
iI!I;I"!§
7.:7
'j-/;t(-}v:7'j
",7
Screen Pole
Clip
Clip
du
poteau de I'ecran
Leinwandstutzenklammer
Pinza del
mastll
de
la pantalla
Ganclo per I'asta
dello
schermo
1iI1IIJ!i:ttJl<
'·t@aail
A~
1J-';I;t:-JlllScreen
Pole/Poteau
de
l'ecranlLeinwandstutzelMastil
de
la pantallalAata
delle
schermolJllIIJJ!i:tt
3
/\/
~Jv
Handle
Poignee
Griff
As.
Maniglia
'j'li'j
7.?I)-;Jilii
Screen Surface
Surface de
I'eeran
Leinwandllache
Superficie
de
la
pantalla
Superflcie
della
schermo
JlIIIJilii
7.:7'j-/;f(-}v,",,,,
~
Screen Pole Head
Tete
du
poteau
de
I'eeran
LelnwandstOtzenkop'
Cabezal del mastil
de
la
pantalla
Testa dell'asta
dello
schermo
JlIlIIJ!i:tt3l.o
"Fl.ti't'
':ttPIMiil
~~~~::'
__
-----------~7.:$'/t'
Stands
Soeles
Stander
Soportes
Sostegnl
Il!Ii
7.:7'j-:I1f(-}V
Screen Pole
Poteau de ,'eers"
LeinwandstOtze
Mastll
de
la pantalla
Asia
della
schermo
1iI1IIJ!i:tt
~
~
mrrli11l/Setup diagram/Diagramme d'instaliationlDiagrama de instalaci6n1MontagezeichnunglSchema di montaggiol
ffi~OO
2
•Hold the screen pole securely when adjusting the height.
•Be sure to lock the adjuster after you finish adjusting the height or store
the screen surface.
•Be sure the screen pole is locked securely into the screen pole clip when
you store the screen.
Set the projector screen after you have finished assembling
it.
To
slore the
screen surface, carry out the procedures in the order from 4to
1.
The
visual range while setting the screen will differ depending on the
projecting distance
of
the projector.
For details, see the operating instruction
of
your projector.
1Turn the stands on both sides
of
the screen 90 degrees, and then put the
screen on alevel floor.
2Pull out the screen pole and make it stand vertical.
3Pull out the screen surface by holding the handle with both hands, and
then hang the handle on the screen pole head.
4Unlock the adjuster, then adjust the height by extending the screen pole.
Reglez I'ecran du projecteur apres I'avoir assemble. Pour enrouler la
surface de l'ecran, suivez la procedure en remontant du point 4
au
point
I.
La portee visuelle lors du reglage de I'ecran depend de
la
distance de
projection du projectcur.
Pour plus
de
details ace sujet, consultez
le
mode d'emploi de votre projecleur.
1Faites pivoter les socles de chaque cote de l'ecran de 90 degres, puis
posez I'ecran sur une surface plane.
2Sortez
Ie
poteau de I'ecran et
mcttez~lc
en position verticale.
3Deroulez la surface de l'ecran en tenant la poignee des deux mains, puis
accrochez la poignee ala tete du poteau de l'ecran.
4Deverrouillez I'ajusteur, puis reglez
la
hauteur
en
etirant
Ie
poteau de I'ecran.
';'4"6,,·.
•Tenez
Ie
poteau de l'ecran fermement lorsque vous reglez
la
hauteur.
•Assurez-vous de bien verrouiller I'ajusteur une fois
la
hauteur ajustee ou
lars du stackage de la surface de I'ecran.
•Assurez-vous du verrouillage securise du poteau de I'ecran dans son clip
lorsque vous stockez I'ecran.
70:iI
:75'-
7.:71)-
/O)I<§J7rn::Hr::>
l::/)'5~i!!1iJ
l::<
teel,
\0
JIJIIflB'Jljo,
4/)'
51
o)lIli1~C''FIIIIFHr::>
l::<
teel,
\0
~mlO)c;;:o)1li!iJ'i~ljo,
70VI:75'-O)jj)MiJ'i~IL:d;::>l::l!I,rJIJ*90
~iJ<
IH)~l,
\0)7oV
I
:75'-o)!&ID~a)jm%L~
<
teC-l,
\.
1
1i:'50)7.:$'/
t'% 90' IElliic-t!"l::.
>J<'l'1;l:Ii1<1L:1II<0
2
7.:7'j-/;t(-M!:!I!iIIlL:lL<::Qo
3
/\/
t'Jv~~:><::7.?
1)-/~~'lI;;:WiJ.
iiIii'FC'I\/
t'}v~~"51;l:
/)'57.?'j-;;;t(-)v"",
t'1c:!JI:tQo
4
7:;1'7.:$'-o)D",?~ljo~iJ.
7.?I)-;;;t(-}v~i"'l;tiJ<::7.?
1)-;;~O)lIli<!~lIIIIg"§"Qo
Il!!iI!D
•
~c-O)l]~B'Jljo,
:A:7I)-;;;f,-)v~iJ:>/)'IJJ!J!::>l::<teC-l,\.
•
i'O\<!%O)l]~iJtc1J1:"",:A:7I)-;;JIJIIflB'Jljo,
®g-7V1':A5J-%O",
:7
iJ
l::<teC-l,\o
·7.:7')-;;JIJIIfllJ'tljo, :A:7I)-;;;f,-}l,/)'ljog-f\1;l:l,\d;31L:. 7.:7
1)-;;;I(-)l,:7
I) ",71L:iJ::>/)'1J cJ1lliJiMvC'<tec-l,\o
!&1J,l~1l)j1!l
(::til)
80-{;;7'JiIEi'J-{
1"7.:7
'
)-;;
?HB'l;1i; 1811(W) x1775(H) x300(0)
mm
JIJIIfl'l;1i;1811(W) x110(H) x
128(0)mm
:A:7U-;;ij-{X
1771(W) x997(H)
mm
1!t!l151
kg
1::"-:7?'-{;;
21
±20%
'¥1i1!l"J
20'
lR*Ij)~ij-{X
80-{;;7'
Supplied
accessories
Specifications Operating Instruction (this manual)
80
inch image compatible wide screen
Maximum dimensions
1811
(W) x1775 (H) x300 (D)
mm
(71
'/o(W)x
70
(H)x
11
'I'
(D) inches)
Storage dimensions
1811
(W)
x110 (H) x128
(D)
mm
(71
'/o(W)x
4
'/o(H)x
5
'I.
(D)
inches)
Screen Size
1771
(W) x997 (H) mm
(69
'I'
(W)x
39
'I. (H) inches)
Mass 5.1 kg
(11
1b
04 oz)
Peak Gain
2.1
±20%
HalfGain Angles 20°
Maximum Projecting Size
80
inches
Accessoires
foumis
Fiche
technique
Mode d'emploi (ce manuel)
Beran large compatible avec une image
de
80 pouces
Dimensions max.
1811
(L) x1775 (H) x300 (P) mm
(71
'/'iL)
x70 (H) x
11
'Is
(P) pouees)
Dimensions lars du stockage
1811
(L)
x110 (H) x128 (P) mm
(71
'I' (L) x 4 'I' (H) x 5
'I.
(P) pouees)
Taille de I'ecran
1771
(L) x997 (H) mm
(69
'I'
(L)
x
39
'I'
(H) pouces)
Poids
5,1
kg
(11
Ib
04 oz)
Gain max.
2,
I±20%
Angle du gain moyen 20°
Taille maximale de projection 80 pouees
Stellen Sie die Projektorleinwand auf, nachdem Sie sie fertig montiert
haben. Zum Verstauen
der
LeinwandfHiche
fUhren
Sie die Schritte
in
der
Reihenfolge von 4bis Iaus.
Die BildgroBc bci
der
Aufstellung der Leinwand hangt von der
Projektionsentfernung des Projektors
abo
Einzelheiten
dam
finden Sie in der Bedienungsanleitung lhres Projektors.
1Drehen Sie die Stander
auf
beiden Seiten der Leinwand
auf
einen Winkel
von
CiO°,
und stellen Sie dann die Leinwand
auf
einen ebenen Boden.
2Ziehen Sie die Leinwandsliitze
in
Senkrechtstellung heraus.
3Ziehen Sie die LeinwandfHiche mil beiden Handen am Griff heraus, und
hangen Sie dann den Griffan den Leinwandsliitzenkopf.
4Entriegeln Sie die Klemme, und stellen Sie dann die Hohe durch
Ausziehen der Leinwandsttitze ein.
•Halten Sie die Leinwandsttitze beim Einstellen der Hohe sicher fest.
•Verriegeln Sic die Klemme, nachdem Sie die Hohe eingestellt oder die
Leinwandftache verstaut haben.
•Vergewissern Sie sich beim Verslauen der Leinwand, dass die
Leinwandsttitze einwandfrei
in
die Leinwandsttitzenklammer eingerastet
ist.
Mitgeliefertes
Zubehiir
Bedienungsanleitung (vorliegendcs Handbuch)
Technische
Oaten
80-ZoII·Bild-kompatible Breitleinwand
Maximale Abmessungen
1811
(B) x1775 (H) x300
(T)
mm
Lagerabmessungen
1811
(B)x
110(H)x
128
(T)
mm
Leinwandflache
1771
(B) x997
(H)mm
Gewicht 5, Ikg
Peak-Gain
2,
I±20%
Half-Gain Winkel 20°
.Maximale ProjektionsgroBe 80 Zoll
~Iilliflf1lJ/Example
of
installation positionlExemple d'une position d'installationiBeispiel der InstallationspositionlEjemplo de posicion de
instalaci6n1Esempio di poslzione di
Installazionel3i~m.ffi;iJ!I
d
f----.---It+----------------H*
eb
c
!!lUi::
mm
(.{
;;T)
fUnil: mm (inches)/Unile:
mm
(pouces)IEinheit: mm (Zoll)/Unidad: mm (pulgadas)IUnilll: mm (polliciyJlli;l,
_*<lIl:'t)
•bcd•t
),-(l/"Jv
7m!I?9-iltiIUli<!
lIll!llll~1I>1U
lIlill1l!l(;lIIl
A~U-:;1z:;9-·
;Z?I)-;;~Ii\
eye level height
of
projector minimum projection optimum viewing distance height
of
the center
of
height
of
the whole
nlveau des yeux hauteur du projecteur distance distance optlmale de screen· screen
Augenhohe Hohe des Projektors distance mlnlmale de vision hauteur du centre de hauteur totale de l'eeran
nlvel de los ojos altura del proyector projection optlmale I'ecran· Hohe der gesamten
allezza degli occhl altezza del prolettore mlnlmale Betrachtungsentternung Hohe der Leinwandmitte· Lelnwand
,"IJI!iI!1I
llllHll/lli1l Projektlonsentternung dlstancla optima de vision altura del centro de
la
altura de
la
pantalla
dlstancla m(nlma de dlstanza di visuallzzazlone pantalla· completa
proyeccl6n ottlmale altezza del centro dello
altena
totale dello
minima distanza dl
.fill!Wll!/Ili
schermo·
schermo
prolezlone 1iI.'!',t>/IliIl· liI.flH$/Ili1l
.'J\lll~II>/Ili
850-950
500
(193/4) 2400 (94
'I»
3500-4000
650 (25
51')
1382 (54
'I»
(33 1
/2
-
37
1/2)
(137'/1-157
1
/2)
•
a~
bo)li\<!o)<1'.c,I~
e
D'<
~J:31~Oll:iiIi<r~<!~
'.
1iIi!l1JlI91iJ"'S;IIH.k~
'ror~11"'~.
•Set the screen so lhat height
of
eis
at
the midpoint
of
heighl
of
aand b. The besl piclUre quality can be enjoyed.
•Reglez !'€eran pour que la haulCur esoil
au
milieu des hauteurs ael bafin de beneficier
d'une
qualite oplimale de rimage.
•Stellen Sie die Leinwand so ein, dass die Hohe von eam Millelpunkt der
HOhe
\'on aund bliegl. So kommen Sic
in
den Genuss der besten Bildqualil3t.
•Coloque
la
panlalla de modo que la altura
de
ese encuentre en el punto medio
de
altura entre a y b. As! disfrulani de la mejor calidad de imagen.
•Posizionare
10
schermo in modo che
I'alteua
di he" sia amela
fra
"a"
e"b". Cosl si OItem
101
migliore qualii3 dell'immagine.
•iIIllllil.iIlillleiili1:!'l.II.fObfl']"'Ji.iill
••
i!l$DJI;(/iI(llt~J.fillJ.ll!
••
iOi~O)i~Jm~
a3fNml,
\JJj~~
asn~~~~cO)rdll,
\abtt
71\-
br::.-:;J •http://www.sony.co.jp/SonyDrive/
r~
=-
~":7-{
"j'J
la:,
~
=
-O)iffi§El'~¥&2::":7
-{"7
A
57
-{
)
lJ~
eRg.@
*-bI'-\-:lCg0
r~<®.@LMrD'J
r~~~~
r:J3
'Yr:::;~'/~~
la:,
m-bl'-\-:l~e53m<ic~l'o
asg~c:~~~:;~-
• T
t::'~
-{
t'
)11*··
~
0570-00-331
1
(~~
c
"LtJ\
S
CtJ
mpjJm~2i*-1
c
e~lJml
'ic:icI1*g-)
.utmlli!
·
PHSco)C:'ljml~*·······
03-5448-331
1
(7~'5"-{""\7
)lJtJ\e~IJmc~td:l
'~i3'Id:"L!5S~LfIJm
<
ic~l
,)
•
FAX·
·0466-31
-2595
~{'.t~r8~
:
F3
-----!I[IliB 9:00-----20:00
±.
B .
tltB
9:00-----1
7:00
*d:)~~2ila:§I1.J-gFEJiE\~I;:-cd:)~11
G.
pjgl;:JiE\
LI-cwr~o)~E1~~tJ\~1iE\
G*g
0
Ia:Ll6f)I;:Lm#~~c~lJ,
;XI;:-g~pjlL::-t:JLrm~1JT::j'Ij~~~WGL<ic~l'o
~1R~~Ia:~~I;::1d:.@"L2::tJ\®1J
*gO)c,
eg~ill
'*g
0
1 :
1~I!~f1
2:~m~~~~~~~bn.@effi~
3 :
d:)~~mfEl~
4 :
-to)1tBO)
L:f§~~
http://www.sony.net!
LO)~B~.I~iS.
70%
CJ..to)M~.c
VQC(
.~~~.it
A
~qe.,)
1tD~qe.,jm~~:';=F~~mLJ
~\"~9
0
...
Printed
on
70%
or
more
recycled
paper
using
vac
(Volatile
Organic
Compound)-free
vegetable
oil
based
ink.
SONY@
~
~
VPS-80DS
fJlII
0)
A?U-;:In-}IIJ71f:19-1<:::>l,\"c
A?
1j-:;1J-)l/P5"79-~A?
Ij-
:;fi3jOJI
'Y
:ilL:,
LOJ~Bft.I~)I[fjc!ll(
lJi111OJS;;t,
A?
Ij-
:;~2i~ffl<
rcc!L,
~o
About the Screen Curl Adaptors
When you use the screen, attach the Screen Curl Adaptors to both the edges
of
the screen surface by following the steps below.
Les adaptateurs d'enroulement
d'ecran
Lorsque vous utilisez l'ecran, fixez les adaptateurs d'enroulement d'ecran aux
deux bords de la surface de
I'
ecran, en suivant les etapes ci-dessous.
Info zu den Leinwandspannern
Bringen Sie zur Benutzung der Leinwand die Leinwandspanner an beiden
Seitenkanten der Leinwandflache gemaB den folgenden Schritten an.
Acerca de los adaptadores correctores de ondulacion de la pantalla
Cuando use la pantalla, monte los adaptadores correctores de ondulaci6n de la
pantalla aambos bordes de la superficie de la pantalla, segun los pasos que se
indican acontinuaci6n.
©2007 Sony Corporation Printed in Japan 3·218·660·01(1)
Informazioni
suUe
cornici antiarricciatura
deUo
schermo
Quando si monta
10
schermo, montare
Ie
comici antiarricciatura su ambedue i
bordi della superficie dello schenno procedendo come segue.
..
*TljUIl~II!IHg
~fflnHiBt.
i~n.:mr"f9IjiJ7lJl.
~m.:ffEllift~3(~frm.iIDfj(JiWillo
~
~
When you store the screen, be sure
to
remove the Screen Curl Adaptors first,
then store the screen,
c"5
StJ'-1]1c!5H:::i1lIlJ
11"1:t-6>
0
1
A?
Ij-::Jt.J-)v7"$f?'$'-I;:::A?!J
-::Jifii~~i*cl~g-nt:>Ita:I,'J::5
l;:::tiI~I;:::~#~tJo
2
A?
!J-::Jt.J-)v7"$f?'$'-~~5ta:t:>IS~:>
<b
C..tJJ"-A
51"
~c!
tt.Qo
3
A?!J
-::Jt.J-)v7"1f?'$'-(JYT-:!~A?
Ij-::J(J)T-?'I;:::Mb8b
tt"("~~g.Qo
4
=t:J5-JJ~Fc.I\j~.cllib1;j1:t.Qo
EI'B
A?
Ij-
YJl5l~ffi!jI;:::IcJ:A?
Ij-
YtJ-)[;751'?'5'-1c!£'9'5'CI;:::Ili(
IJ
1cl:9'
L,-'CtJ'S,
A?
Ij-
Y1c!JI5l~
L'-'C
<
rcc!l,
\0
Attach one Screen Curl Adaptor to either side
of
the screen first.
1Insert the screen surface securely into the Screen Curl Adaptor so that there
is
no area
of
the screen not inserted,
2By holding the Screen Curl Adaptor, slide the screen upwards slowly,
3Attach the tape on the Screen Curl Adaptor to the matching piece
of
the tape
on the screen, then fasten the tape down,
4Repeat the above steps to attach the other Screen Curl Adaptor.
'T-"7
fTapesIBandes
adhesives/Banderl
CintasiNastrilJEiEl1Ull
A?
!J
-::Jiii/Screen Surface/Surface de I'ecran/Leinwandfliiche/
Superficie de
la
pantalialSuperficie delle schermo/Maili
4
,
A?
!J-::J'1J-II/J'$f:!$'-
/
Screen
Curl
Adaptors/Adaptateurs
d'enroulement d'ecran/
Leinwandspanner/Adaptadores
correctores de ondulaci6n de
la
pantalialCornici antiarricciatura delle
schermo/Ma~d!l+tB
Fixez d'abord
un
adaptateur d'enroulement d'ecran de chaque cote de l'ecran.
1lnserez la surface de I'ecran ferrnement dans I'adaptateur d'enroulement
d'ecran, de sorte qu'il
n'y
ait aucune partie de I'ecran non inseree.
2Tout en tenant l'adaptateur d'enroulement d'ecran, faites glisser lentement
l'
ecran vers
Ie
haut.
3Fixez la bande adhesive de l'adaptateur d'enroulement d'ecran sur
la
piece de
fixation du ruban sur I'ecran, puis collez
la
bande adhesive du haut vers
Ie
bas.
4Repetez
les
etapes ci-dessus pour
fixer
I'
autre adaptateur
d'
enroulement
d'
ecran.
Ii!II!!l!I
Avant de ranger I'ecran, vous devez d'abord retirer les adaptateurs
d'enroulement d'ecran.
Bringen Sie zuerst einen Leinwandspanner aufeiner Seite an.
1Fiihren Sie die Kante der LeinwandfHiche korrekt und vollstandig in den
Leinwandspanner ein.
2Ziehen Sie die Leinwand langsam hoch, wahrend Sie den Leinwandspanner
halten.
3Richten Sie das Band am Leinwandspanner auf das entsprechende Bandstiick
an
der Leinwand aus, und k1eben Sie dann das Band fest.
4Wiederholen Sie die obigen Schritte zur Anbringung des anderen
Leinwandspanners.
Montare innanzi tutto una cornice antiarricciatura dello scherrno su uno dei due
lati
di
quest'ultimo,
1Inserire completamente
la
superficie dello scherrno nella cornice
antiarricciatura.
2Afferrando la cornice antiarricciatura della scherrno, fare scorrere lentamente
10
schermo verso I'alto,
3Fissare il nastro della cornice antiarricciatura della schermo alia parte
corrispondente sullo scherrno, quindi bloccarlo verso il basso.
4Ripetere ipassi precedenti per montare I'altra cornice antiarricciatura dello
scherrno.
Quando si smonta
10
schermo, smontare innanzi tutto
Ie
cornici
antiarricciatura.
..
Denken Sie vor dem Einrollen der Leinwand daran, die Leinwandspanner
zu
entfemen.
Monte primero un adaptador corrector de ondulaci6n de
la
pantalla aun lade de
la pantalla.
Inserte firrnemente la superficie de la pantalla en un adaptador corrector de
ondulaci6n de
la
pantalla de modo que no quede ninguna zona de la pantalla
sin insertar.
2Sujete el adaptador corrector de ondulaci6n de la pantalla ydeslice la
pantalla hacia arriba lentamente.
3
Siuk
la
cinta del adaptador corrector de ondulaci6n sobre la pieza de cinta
correspondiente de la pantalla
y,
acontinuaci6n, presione la cinta.
4Repita los pasos anteriores para montar el otro adaptador corrector de
ondulaci6n de
la
pantalla.
§5'C~-~m.ff~M~~~ffm.~-~o
1
~m.1ID$~±lMmAm.ff~f1~,
::f~ll1rFl:f{iiJ7I,:tmA~ffil7to
2
tlHEm.1IDff~f1~,
1't1't:tt!l!"J
LJfJl>IJm.
0
3~m.ff~M~L~~ft.ro~~~m.L~~~~ft.mL,
~m
11.'1A~.roff'JiL
4
:!I!~L~Z!'W,
~~Jj-~m.ff~f1~o
III
ff~m.~,~~~§5'C~rm~ff~M~,
~mff~m~o
Cuando guarde la pantalla, no olvide quitar antes los adaptadores correctores
de ondulaci6n de la pantalla.
I5m1
A?U-~~~~.~~~.~~~~.
•
A?Ij-
::JlfiZ~8~,
A?Ij-
::JJte-J
l;~~J¥~rC**A?Ij-
::J1J'~I~~1J'~c,
A?Ij-
::J"'.Y~C?:J-VA$7-
c~~I~<!etl<f3-tn1J'®1J*9
0
L:5~~~l
~
*90
•
A?Ij-
::J~x~~I~J
\::J~J
l;~t¥~rc**~~<
IJS
1~~lj-c~x~G
-c
<rc.<!
l
~o
•
A?Ij-::J~®~n~&~c~~,
A?Ij-::J~~.~~mn~®1J*90
*51J'llfj]1~JSi®!to/.JI~,
i~fflGtcJ:l
~c<rc.<!l
~o
•
A?Ij-
::J~~~~,
lfiZ~8~1~,
A?Ij-
::J~®1r;QUiffiI~~~ntcJl
~~31~L:5t
~~l
~*9
0
*nl~A?Ij-
::J~®L
~~$!1JB~I~A?Ij-
::JI'.Y:Jc~~t)]~
r.:1J9~<f3-tn1J'®1J*9
0
•
A?Ij-
::J~ffl"5~J3\~I~*1*~ffl~
-c~<!l
~o
A?Ij-
::JJte-J
l;~:t~~r.:
~'i3'A?Ij-
::JJte-
Jl;?1j'.Y71J'51~9"n
-c111J'®@:~I~tcJ:~<f3-tn1J'®1J
*90
•
~filJ®<f3-tn1J'®1J*9®CA?Ij-
::J1~tJr.:n1J'1J'5tcJ:l
~~3L:5~~~l
~
*90
SONY:
©2007 Sony Corporation Printed in Japan
VPS-80DS
3-217-954-02(1)
Precautions on storing, installing, and carrying
the
screen
•Take caution when storing the screen.
If
the screen suddenly falls while you are
holding the screen pole to store the screen, you
may
catch
your
hand
between the
screen head
and
the adjuster.
•
When
storing the screen, keep holding the handle
and
slowly lower the screen.
•
When
wiping the screen surface clean, the screen surface may be damaged. Use
onlysoft cloths.
•
Do
not
touch both edges
of
the screen surface when installing
or
storing the
screen. The screen edges may cause cuts while you are adjusting the height
or
storing the screen surface.
•
When
carrying the screen, hold the screen itself.
If
you carry
the
screen
by
holding
the screen pole, the screen may separate from the screen pole grip
and
fall. This
may cause
an
injury.
•
Do
not
lean
on
the screen,
or
the screen may fall.
Precautions relatives au rangement, aI'installation
et
au
transport
de
I'ecran
•Soyez
prudent
lorsque vous rangez l'ecran.
Si
l'ecran tombe
brusquement
lorsque
vous tenez
Ie
poteau de l'ecran
pour
ranger celui-ci, vous risquez de vous coincer
la
main
entre la tete et l'ajusteur.
•Lorsque vous rangez l'ecran, abaissez-Ie lentement sans
lkher
la poignee.
•
II
Ya risque
d'endommagement
de l'ecran lorsque l'on essuie sa surface. Utilisez
uniquement
des chiffons doux.
•Ne touchez pas les deux bords de la surface de l'ecran lors de l'installation
ou
du
rangement de ce dernier.
Les
bords de l'ecran peuvent vous couper lorsque vous
reglez la
hauteur
ou
lorsque vous rangez la surface de l'ecran.
•Tenez l'ecran lui-meme lorsque vous
Ie
transportez.
Si
vous portez l'ecran en
Ie
tenant
par
Ie
poteau, l'ecran risque de se detacher de la poignee
du
poteau et de
tomber. Ceci
peut
provoquer des blessures. .
•Ne vous appuyez pas
sur
l'ecran car cela risquerait de
Ie
faire tomber.

Other Sony Projector Accessories manuals

Sony Vision Exchange PEQ-C100 Reference guide

Sony

Sony Vision Exchange PEQ-C100 Reference guide

Sony SU-HS2 User manual

Sony

Sony SU-HS2 User manual

Sony EOB6635 User manual

Sony

Sony EOB6635 User manual

Sony LMP-C280 User manual

Sony

Sony LMP-C280 User manual

Sony SU-XWQ005 User manual

Sony

Sony SU-XWQ005 User manual

Sony LMP-H202 User manual

Sony

Sony LMP-H202 User manual

Sony HCS-W80 User manual

Sony

Sony HCS-W80 User manual

Sony VCL-CPJ07 User manual

Sony

Sony VCL-CPJ07 User manual

Sony LMP-F230 User manual

Sony

Sony LMP-F230 User manual

Sony XL-5300 User manual

Sony

Sony XL-5300 User manual

Sony LMP-H400 User manual

Sony

Sony LMP-H400 User manual

Sony XL-5300 User manual

Sony

Sony XL-5300 User manual

Sony PAM-200 User manual

Sony

Sony PAM-200 User manual

Sony Vision Exchange PEQ-C100 Quick setup guide

Sony

Sony Vision Exchange PEQ-C100 Quick setup guide

Sony VID-P50 User manual

Sony

Sony VID-P50 User manual

Sony Operating Instructions LMP-H160 User manual

Sony

Sony Operating Instructions LMP-H160 User manual

Sony LMP-Q130 User manual

Sony

Sony LMP-Q130 User manual

Sony REA-C1000 User manual

Sony

Sony REA-C1000 User manual

Sony VPL-VW11HT - Lcd Video Projector User guide

Sony

Sony VPL-VW11HT - Lcd Video Projector User guide

Sony LMP-H200 User manual

Sony

Sony LMP-H200 User manual

Sony VPL-AW15VPS User manual

Sony

Sony VPL-AW15VPS User manual

Sony LMP-P200 User manual

Sony

Sony LMP-P200 User manual

Sony LMP-Q120 User manual

Sony

Sony LMP-Q120 User manual

Sony LMP-H700 User manual

Sony

Sony LMP-H700 User manual

Popular Projector Accessories manuals by other brands

TiGHT AV SW-H411A manual

TiGHT AV

TiGHT AV SW-H411A manual

Displays2go PROJWM03LBK installation manual

Displays2go

Displays2go PROJWM03LBK installation manual

SIIG CE-H25Y11-S1 user manual

SIIG

SIIG CE-H25Y11-S1 user manual

Accessory Power USA GEAR PRO Series user guide

Accessory Power

Accessory Power USA GEAR PRO Series user guide

peerless-AV ACC 912 Installation and assembly

peerless-AV

peerless-AV ACC 912 Installation and assembly

Pyle PRJTP42 Installation and operation

Pyle

Pyle PRJTP42 Installation and operation

Eiki PjNET-10 Installation and operation

Eiki

Eiki PjNET-10 Installation and operation

Barco R812302K installation manual

Barco

Barco R812302K installation manual

Navitar 369MCZ125 installation guide

Navitar

Navitar 369MCZ125 installation guide

Panamorph CineVista installation manual

Panamorph

Panamorph CineVista installation manual

Epson BrightLink Solo Interactive Module (IU-01 Quick setup guide

Epson

Epson BrightLink Solo Interactive Module (IU-01 Quick setup guide

Navitar NuView 489MCL1625 installation instructions

Navitar

Navitar NuView 489MCL1625 installation instructions

Wize PR3XL instruction manual

Wize

Wize PR3XL instruction manual

Future Automation PH2 installation instructions

Future Automation

Future Automation PH2 installation instructions

Elite Screens VMAX99XWS2 manual

Elite Screens

Elite Screens VMAX99XWS2 manual

Acer CastMaster Touch quick start guide

Acer

Acer CastMaster Touch quick start guide

ViewSonic PJ-PEN-003 user guide

ViewSonic

ViewSonic PJ-PEN-003 user guide

Epson ELPWR01 user guide

Epson

Epson ELPWR01 user guide

manuals.online logo
manuals.online logoBrands
  • About & Mission
  • Contact us
  • Privacy Policy
  • Terms and Conditions

Copyright 2025 Manuals.Online. All Rights Reserved.