manuals.online logo
Brands
  1. Home
  2. •
  3. Brands
  4. •
  5. D-Link
  6. •
  7. Network Router
  8. •
  9. D-Link DI-106 Series Installation guide

D-Link DI-106 Series Installation guide

Other manuals for DI-106 Series

1

Other D-Link Network Router manuals

D-Link Air Xpert DI-774 User manual

D-Link

D-Link Air Xpert DI-774 User manual

D-Link DSL-2640U User manual

D-Link

D-Link DSL-2640U User manual

D-Link DSL-502G User manual

D-Link

D-Link DSL-502G User manual

D-Link AirPremier N DAP-2690 User manual

D-Link

D-Link AirPremier N DAP-2690 User manual

D-Link DSL-2640U User manual

D-Link

D-Link DSL-2640U User manual

D-Link DES-3010F User manual

D-Link

D-Link DES-3010F User manual

D-Link DSL-2540B - ADSL2/2+ Modem With EN Router User manual

D-Link

D-Link DSL-2540B - ADSL2/2+ Modem With EN Router User manual

D-Link DIR-865L User manual

D-Link

D-Link DIR-865L User manual

D-Link DSL-2520U User manual

D-Link

D-Link DSL-2520U User manual

D-Link DSL-526E User manual

D-Link

D-Link DSL-526E User manual

D-Link DWR-910 User manual

D-Link

D-Link DWR-910 User manual

D-Link DI-524UP User manual

D-Link

D-Link DI-524UP User manual

D-Link DIR-611 User manual

D-Link

D-Link DIR-611 User manual

D-Link DSR-250 User manual

D-Link

D-Link DSR-250 User manual

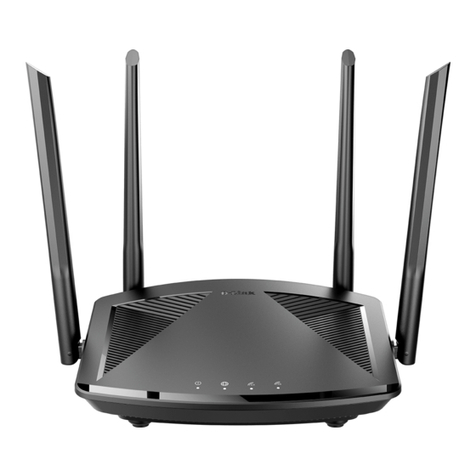
D-Link EAGLE PRO AI AX1500 M15 User manual

D-Link

D-Link EAGLE PRO AI AX1500 M15 User manual

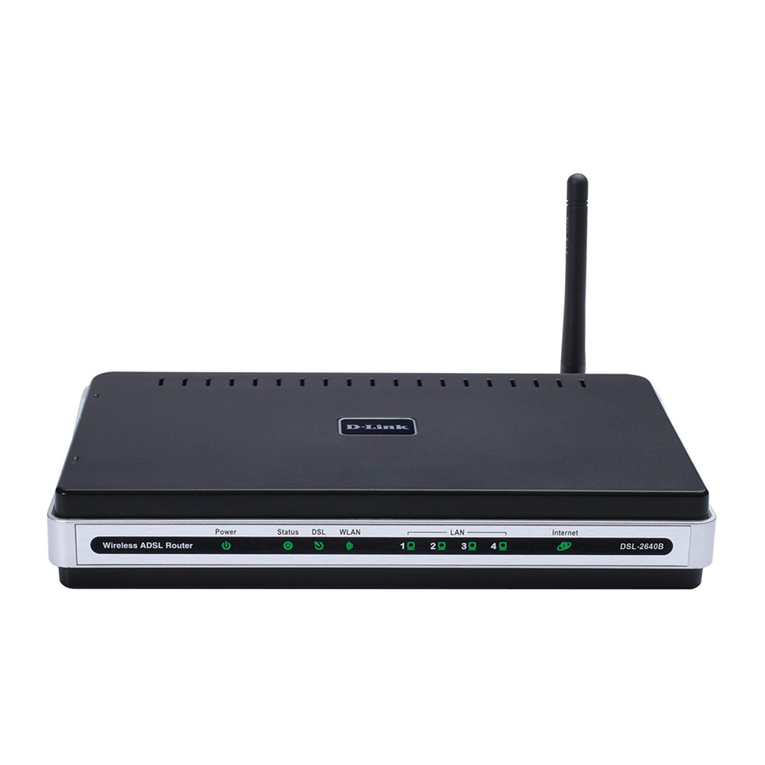
D-Link DSL-2640B User manual

D-Link

D-Link DSL-2640B User manual

D-Link DIR-625 Router User manual

D-Link

D-Link DIR-625 Router User manual

D-Link 2Voice + 4SW VoIP Router DVG-1402S User manual

D-Link

D-Link 2Voice + 4SW VoIP Router DVG-1402S User manual

D-Link DIR-120 User manual

D-Link

D-Link DIR-120 User manual

D-Link AC1200 User manual

D-Link

D-Link AC1200 User manual

D-Link DES-3204 User manual

D-Link

D-Link DES-3204 User manual

D-Link DIR-862L User manual

D-Link

D-Link DIR-862L User manual

D-Link DWM-312W User manual

D-Link

D-Link DWM-312W User manual

D-Link DIR-615 - Wireless N Router User manual

D-Link

D-Link DIR-615 - Wireless N Router User manual

Popular Network Router manuals by other brands

TRENDnet TEW-435BRM - 54MBPS 802.11G Adsl Firewall M Quick installation guide

TRENDnet

TRENDnet TEW-435BRM - 54MBPS 802.11G Adsl Firewall M Quick installation guide

Siemens SIMOTICS CONNECT 400 manual

Siemens

Siemens SIMOTICS CONNECT 400 manual

Alfa Network ADS-R02 Specifications

Alfa Network

Alfa Network ADS-R02 Specifications

Barracuda Networks Link Balancer quick start guide

Barracuda Networks

Barracuda Networks Link Balancer quick start guide

ZyXEL Communications ES-2024PWR Support notes

ZyXEL Communications

ZyXEL Communications ES-2024PWR Support notes

HPE FlexNetwork 5510 HI Series Openflow configuration guide

HPE

HPE FlexNetwork 5510 HI Series Openflow configuration guide

Allied Telesis AT-AR236E quick start guide

Allied Telesis

Allied Telesis AT-AR236E quick start guide

ADTRAN NetVanta 3458-PoE quick start

ADTRAN

ADTRAN NetVanta 3458-PoE quick start

C&H Technologies EM405-8 manual

C&H Technologies

C&H Technologies EM405-8 manual

Huawei WiFi Mesh 3 Product description

Huawei

Huawei WiFi Mesh 3 Product description

Addonics Technologies ISC8P2G-S Quick install guide

Addonics Technologies

Addonics Technologies ISC8P2G-S Quick install guide

Atel W02 Arch+ Faqs

Atel

Atel W02 Arch+ Faqs

Allnet ALL0333AU user guide

Allnet

Allnet ALL0333AU user guide

Sercomm Genesis OC3505D Quick installation guide

Sercomm

Sercomm Genesis OC3505D Quick installation guide

Billion BIPAC 5102 Series user manual

Billion

Billion BIPAC 5102 Series user manual

TP-Link TD-8817 QIG

TP-Link

TP-Link TD-8817 QIG

Motorola MR1900 user guide

Motorola

Motorola MR1900 user guide

Cisco SOHO Series Regulatory compliance and safety information

Cisco

Cisco SOHO Series Regulatory compliance and safety information

manuals.online logo
manuals.online logoBrands
  • About & Mission
  • Contact us
  • Privacy Policy
  • Terms and Conditions

Copyright 2025 Manuals.Online. All Rights Reserved.

D-Link Co.,_______________________________________________________________________ FAQ
FAQ: 1
D-Link Router Family Frequently Asked Questions (FAQ)
Part I: General Product Overview Questions
1. What is the Router product family?
The Router family of products are a set of multiprotocol remote
access routers that deliver a feature-rich, reliable, and secure
interconnection between your LAN and the remote network such as
Internet or Corporate network via ISDN. The Router product’s
unique features make the interconnection flexible and easy to
upgrade. Router supports IP routing, IPX routing, and
Transparent Bridging. It supports Ethernet, ISDN, and POTS port.
Router can be managed via either RS-232 or Telnet. Its menu-
driven System Management Terminal provides an easy-to-use
interface.
2. What ISDN switches and B Channel protocols are supported by the
Router?
The Router supports the following ISDN switches:
European switches:
DSS1 (also used in other countries)
1TR6
North American switches:
AT&T: NI1, Point-to-Point, Point to Multipoint
Northern Telecom DMS100: NI1, Custom
The Router supports the PPP protocol in the B channels.
3. What are some of the major applications for the Router?
Some of the major applications of the Router include:
Internet Access
The Router can be set up to access the Internet in 15 minutes.
In addition, the Router provides an economic way for small office
to connect to Internet (see Subject 8 for Internet Single User
Account).
LAN-to-LAN Connection
The Router can dial to or answer calls from another remote access
router connected to a different network. The Router supports
TCP/IP, Novell IPX routing and has the capability to bridge any
Ethernet protocol.
Telecommuting Server
The Router allows remote users to dial-in and gain access to your
LAN. This feature enables users that have workstations with
remote access capabilities, e.g., Windows 95, to access the
network resources without physically being in the office.
4. What are the benefits of the Router over other vendors’
products?
D-Link Co.,_______________________________________________________________________ FAQ
FAQ: 2
The Router incorporates features not present on most of their
competitors' products.
Internet Single User Account (SUA) Support
Please see Subject 9 for details.
Multiprotocol Router
The Router is the only remote access router supporting IP
Routing, IPX routing, and Transparent Bridge.
Telecommuting Server
In addition to providing both ISDN and modem access for remote
users, the Router also support dynamic IP address assignment and
Windows 95 compatibility. This makes the Router an ideal product
for serving Windows 95 telecommuter and mobile users. The Router
offers support for these accounts that will allow multiple users
on the LAN (Local Area Network) to access the Internet
concurrently for the cost of a single user.
5. What other Remote Access Servers are compatible with the Router?
The Router has successfully gone through PPP MP compatibility
tests with 30+ vendors in October, 1996 at Pacific Bell.
Furthermore, the Router has been tested extensively with Cisco
routers and Ascend routers (both Max and Pipeline).
6. How to do factory reset for the router?
There is a file called “default.cfg” which be included with
shipping diskette. Use this file to restore to the factory
setting. Select SMT Menu 24.6 'Restore Configuration' and
transfer this file by X-modem file transfer. After file download
complete, the router is in factory setting.
Part II: Application Setup Questions
1. What does my computer need to connect to the Router?
You will need an ethernet card that supports a 10baseT (RJ-45
jack) ethernet interface.
If you intend to connect your computer directly to the Router
without a hub in between, you will need to use a ‘crossover’
cable and a 10baseT ethernet card. The ‘crossover’ cable is a 4-
pair RJ-45 cable with pins #1 and #3 swapped, and pins #2 and #6
swapped.
To initially configure your Router, you need to have an RS-232
cable and a communications program on your computer.
In order to access the WAN (Wide Area Network) on the Router's
ISDN connection, you need to have a Ethernet connection in your
computer.
2. How can I remotely configure my Router using a modem?
D-Link Co.,_______________________________________________________________________ FAQ
FAQ: 3
You can configure your Router remotely through a modem call.
This setup requires an external ‘local’ modem.
Local Remote
v v
[Router]--[Null Modem]-[Modem]--(phone line)--[Modem]-[Computer]
^
RS-232 Cable
The procedure for this setting up this application is as follows:
- Set the modem on the ‘local’ end to IGNORE DTR
- Set the modem on the ‘local’ end to Auto Answer (ATS0=1)
- Set the Router Port Speed (menu 24.2) to be 19200 if the
‘local’ modem is a 14.4K, and 38400 if it is faster (
28.8K+)
- Dial the ‘local’ modem with the ‘remote’ modem.
3. How can I set up my Router as an Internet Firewall?
The Router has easily customizable filter sets that you can use
to set it up as an Internet Firewall. To do this, set the
filters to do the following:
Allow ARP/ICMP/PING packets
Allow TCP/UDP traffic to ports > 1023
Allow HTTP, SMTP, NNTP, DNS
Block everything else inbound from the Internet
Here's an example in Router:
A branch office wants to allow all Packet from headquarter
through Internet, but would like to setup a Internet firewall to
block other intrusion:
a. Allow all packets from headquarter 192.168.1.0/24 network
Menu 21.1.1 - TCP/IP Filter Rule
Filter #: 1,1
Filter Type= TCP/IP Filter Rule
Active= Yes
IP Protocol= 0 IP Source Route= No
Destination: IP Addr= 0.0.0.0
IP Mask= 0.0.0.0
Port #= 0
Port # Comp= None
Source: IP Addr= 192.168.1.0
IP Mask= 255.255.255.0
Port #= 0
Port # Comp= None
TCP Estab= N/A
More= No Log= None
Action Matched= Forward
^^^^^^^^
Action Not Matched= Check Next Rule
D-Link Co.,_______________________________________________________________________ FAQ
FAQ: 4
b. Allow ICMP (including PING)
Menu 21.1.2 - TCP/IP Filter Rule
Filter #: 1,2
Filter Type= TCP/IP Filter Rule
Active= Yes
IP Protocol= 1 IP Source Route= No
^^^^^^^^^^^^^^^
Destination: IP Addr= 0.0.0.0
IP Mask= 0.0.0.0
Port #= 0
Port # Comp= None
Source: IP Addr= 0.0.0.0
IP Mask= 0.0.0.0
Port #= 0
Port # Comp= None
TCP Estab= N/A
More= No Log= None
Action Matched= Forward
^^^^^^^^
Action Not Matched= Check Next Rule
c. Allow UDP traffic to ports > 1023
Menu 21.1.3 - TCP/IP Filter Rule
Filter #: 1,3
Filter Type= TCP/IP Filter Rule
Active= Yes
IP Protocol= 17 IP Source Route= No
^^^^^^^^^^^^^^^
Destination: IP Addr= 0.0.0.0
IP Mask= 0.0.0.0
Port #= 1023
^^^^
Port # Comp= Greater
^^^^^^^
Source: IP Addr= 0.0.0.0
IP Mask= 0.0.0.0
Port #= 0
Port # Comp= None
TCP Estab= N/A
More= No Log= None
Action Matched= Forward
^^^^^^^
Action Not Matched= Check Next Rule
d. Allow TCP for ports > 1023, and drop all other packets.
Menu 21.1.4 - TCP/IP Filter Rule
Filter #: 1,4
Filter Type= TCP/IP Filter Rule
D-Link Co.,_______________________________________________________________________ FAQ
FAQ: 5
Active= Yes
IP Protocol= 6 IP Source Route= No
^^^^^^^^^^^^^^^
Destination: IP Addr= 0.0.0.0
IP Mask= 0.0.0.0
Port #= 1023
^^^^
Port # Comp= Greater
^^^^^^^
Source: IP Addr= 0.0.0.0
IP Mask= 0.0.0.0
Port #= 0
Port # Comp= None
TCP Estab= No
More= No Log= None
Action Matched= Forward
^^^^^^^
Action Not Matched= Drop <== This is IMPORTANT!!
^^^^
e. The Menu 21.1 will look like
Menu 21.1 - Filter Rules Summary
# A Type Filter Rules M m n
- - ---- ------------------------------------------------------------------- - - -
1 Y IP Pr=0, SA=192.168.1.0, DA=0.0.0.0 N F N
2 Y IP Pr=1, SA=0.0.0.0, DA=0.0.0.0 N F N
3 Y IP Pr=17, SA=0.0.0.0, DA=0.0.0.0, DP>1023 N F N
4 Y IP Pr=6, SA=0.0.0.0, DA=0.0.0.0, DP>1023 N F D
5 N
6 N
f. Plug it to Menu 11.1 Input Filter Sets.
g. If you have any server application running inside of your
network, such as Domain Name Server, then you need to insert
another filter before rule 4. For DNS, the filter rule will
look like the following:
Menu 21.1.4 - TCP/IP Filter Rule
Filter #: 1,4
Filter Type= TCP/IP Filter Rule
Active= Yes
IP Protocol= 17 IP Source Route= No
^^^^^^^^^^^^^^^
Destination: IP Addr= 0.0.0.0
IP Mask= 0.0.0.0
Port #= 53
^^
Port # Comp= Equal
^^^^^
Source: IP Addr= 0.0.0.0
IP Mask= 0.0.0.0
Port #= 0
D-Link Co.,_______________________________________________________________________ FAQ
FAQ: 6
Port # Comp= None
TCP Estab= No
More= No Log= None
Action Matched= Forward
^^^^^^^
Action Not Matched= Check Next Rule
h. The your Menu 21.1 will look like
Menu 21.1 - Filter Rules Summary
# A Type Filter Rules M m n
- - ---- ------------------------------------------------------------------- - - -
1 Y IP Pr=0, SA=192.168.1.0, DA=0.0.0.0 N F N
2 Y IP Pr=1, SA=0.0.0.0, DA=0.0.0.0 N F N
3 Y IP Pr=17, SA=0.0.0.0, DA=0.0.0.0, DP>1023 N F N
4 Y IP Pr=17, SA=0.0.0.0, DP=53, DA=0.0.0.0 N F N
5 Y IP Pr=6, SA=0.0.0.0, DA=0.0.0.0, DP>1023 N F D
6 N
i. Sometimes Internet application such as vedio conference need to
use the UDP server port, then you have to be careful in setting
up the firewall filter.
4. How do I configure the Router as a Remote Access Server?
Configuring the Router is made simple by the SMT (System Management Terminal), a menu
driven user interface. To configure the Router for use as a Remote Access Server, follow these
steps.
4.a Windows 95 Remote User
Configure all the necessary parameters in Menu 13 for the Windows 95 Remote User. Then add a
Remote User by configuring Menu 14. For a more detailed description of these Menus, please see
the Router User's Manual.
4.b Other PPP Packages
The Router is compatible with many other PPP packages running in various platforms such as
Windows 3.1x, Mac, Unix. Please check with D-Link on the compatibility list.
5. How do I configure my Router for my applications?
5.a Internet Access
My-net
|
O--|
|---[Router]---------( ISP )
O--| ^ ^ ^
| A A C
The Router can allow multiple hosts on the LAN (My-net) to access the Internet through an ISP
(Internet Service Provider). In this configuration, the Router is assigned a unique Ethernet IP
address on ‘My-net’ (A). This address (A) will be also used to negotiate the connection with the
ISP. Note that the IP address on ‘My-net’ are not hidden from the ISP and the rest of the Internet.
D-Link Co.,_______________________________________________________________________ FAQ
FAQ: 7
In Menu 1:
-Set Route IP to ‘Yes’.
In Menu 3.2:
- Set IP Address to an address on ‘My-net’ (A).
In Menu 4:
- Set ISP IP Addr to ‘C’.
- Make sure Single User Account is set to ‘No’.
In order for the nodes on ‘My-net’ to access the Internet, they
need to have two items configured. First, the should set their
‘default gateway’ to the IP address of the Router (A). Second,
they need to set their Domain Name Server address. If the LAN
has a DNS present, use this address. Otherwise, you will have to
obtain the DNS IP address from the ISP (not C).
5.b Internet Access with SUA
My-net
|
O--|
|---[Router]---------(ISP)
O--| ^ ^ ^
| A B C
The Router allows multiple hosts on the LAN (My-net) to share a
single IP address in the Internet. This address will be assigned
by your ISP and is indicated in the above diagram by ‘B’. Note
that the IP addresses on ‘My-net’ are hidden from the ISP and the
rest of the Internet.
In Menu 1:
- Set Route IP to ‘Yes’.
In Menu 3.2:
- Set IP Address to an address on ‘My-net’ (A).
In Menu 4:
- Set ISP IP Addr to ‘C’.
- Set Single User Account to ‘Yes’.
- Set Single User Account: IP Addr to ‘B’. If the ISP
assigns this address dynamically, leave this field blank or
enter ‘0.0.0.0’
- Set Single User Account: Server IP Addr to the IP address
of a server station on ‘My-net’. If the LAN has a Domain Name
Server (DNS) station on it, the IP address of that station
must be entered in this field (otherwise, this field is not
required).
In order for the nodes on ‘My-net’ to access the Internet, they
need to have two items configured. First, the should set their
‘default gateway’ to the LAN IP address of the Router (A).
Second, they need to set their Domain Name Server address. If
the LAN has a DNS present, use this address. Otherwise, you will
have to obtain the DNS IP address from the ISP (not C).
D-Link Co.,_______________________________________________________________________ FAQ
FAQ: 8
5.c LAN to LAN for TCP/IP
My-net Rem-net
| |
O--| |--O
|---[Router]-----------[ISDN Router]---|
O--| ^ ^ |--O
| A B |
The Router can allow multiple hosts on the LAN (My-net) to access
a remote network’s resources. In this configuration, the Router
is assigned a unique Ethernet IP address on ‘My-net’ (A).
Similarly, the remote ISDN router is issued a unique Ehternet IP
address on ‘Rem-net’ (B). These addresses (A and B) will be also
used to negotiate the connection between ‘My-net’ and ‘Rem-net’.
In Menu 1:
- Set Route IP to ‘Yes’.
In Menu 3.2:
- Set IP Address to an address on ‘My-net’ (A).
In Menu 11.1:
- Set Route to ‘IP’.
- Set Rem IP Addr to the IP address of the remote ISDN router
(B).
- Select ‘Yes’ to editing the IP options.
In Menu 11.3:
- Set Rem Subnet Mask to the subnet mask for the remote
network.
The remote ISDN router (Cisco, Ascend...etc.) will have to
complete similar configuration changes in order to talk to the
Router.
5.d LAN to LAN for IPX
1. Router on the NetWare server side
My-net Rem-net
| |
O--| |--O
|---[Router]-----------[ISDN Router]---|
O--| ^ ^ |--O
^ | A B | ^
| |
NetWare NetWare
Server Client
The Router can accept calls from a remote router to
negotiate IPX routing. In this configuration, the stations
on the remote network (Rem-net) will have access to the IPX
network resources available on ‘My-net’ and vice versa.
D-Link Co.,_______________________________________________________________________ FAQ
FAQ: 9
In Menu 1:
- Set Route IPX to ‘Yes’.
In Menu 3.3:
- Determine what frame type the client and server(s)
stations are using and set the appropriate frame type
to ‘Yes’. The Router will not be able to
communicate with the nodes unless the frame types are
the same.
- Set Seed Router to ‘No’. The Router will obtain the
network numbers from the RIP broadcasts across the
LAN.
In Menu 11.1:
- Set Call Direction to ‘Incoming’.
- Set Route to ‘IPX’, and select ‘Yes’ to editing the
IPX options.
In Menu 11.3:
- Set Dial-On-Query to ‘No’.
- Set Rem LAN Net # to the external network number of
the remote network (B).
The remote ISDN router (Cisco, Ascend...etc.) will have to
complete similar configuration changes in order to talk to
the Router.
2. Router on the NetWare client side
My-net Rem-net
| |
O--| |--O
|---[Router]-----------[ISDN Router]---|
O--| ^ ^ |--O
^ | A B | ^
| |
NetWare NetWare
Client Server
The Router can place calls to a remote ISDN router to
negotiate IPX routing. In this configuration, the stations
on the LAN (My-net) will have access to the IPX NetWare
server and other network resources available on ‘Rem-net’
and vice versa. Note that in this setup, there is no
NetWare server on ‘My-net’.
In Menu 1:
- Set Route IPX to ‘Yes’.
In Menu 3.3:
- Determine what frame type the client station(s) are
using and set the appropriate frame type to ‘Yes’.
The Router will not be able to communicate with the
nodes unless the frame types are the same.
- Set Seed Router to ‘Yes’.
In Menu 11.1:
D-Link Co.,_______________________________________________________________________ FAQ
FAQ: 10
- Set Call Direction to ‘Outgoing’.
- Set Route to ‘IPX’, and select ‘Yes’ to editing the
IPX options.
In Menu 11.3:
- Set Dial-On-Query to ‘Yes’.
- Set Rem LAN Net # to the internal network number of
the remote NetWare server.
The remote ISDN router (Cisco, Ascend...etc.) will have to
complete similar configuration changes in order to talk to
the Router.
3. NetWare servers on both sides of the link
My-net Rem-net
| |
O--| |--O
|---[Router]-----------[ISDN Router]---|
O--| ^ ^ |--O
^ | A B | ^
| |
NetWare NetWare-+
Server = Server_1 Server = erver_2
Net number = 111 Net number = 222
The Router can place calls to a remote ISDN router to
negotiate IPX routing. In this configuration, the stations
on the LAN (My-net) will have access to the IPX NetWare
server on their own network. If the client stations on
‘My-net’ want to access the remote NetWare server
(Server_2), then they will need to configure a static route
for that Router.
In Menu 1:
- Set Route IPX to ‘Yes’.
In Menu 3.3:
- Determine what frame type the client station(s) are
using and set the appropriate frame type to ‘Yes’.
The Router will not be able to communicate with the
nodes unless the frame types are the same.
- Set Seed Router to ‘No’.
In Menu 11.1:
- Set Call Direction to ‘Outgoing’.
- Set Route to ‘IPX’, and select ‘Yes’ to editing the
IPX options.
In Menu 11.3:
- Set Dial-On-Query to ‘Yes’.
- Set Rem LAN Net # to the external network number of
the remote network (B).
In Menu 12.2
- Set Server Name to ‘Server_2’ (The name configured
for the server).