04
02 | PRODUCT DESCRIPTION
Use the DÖRR Solar Panel SP-1500 with internal 1500mAh Li-Ion battery for a
sustainable and significant longer runtime of your game & surveillance camera
DÖRR SnapShot Cloud 4G or other devices with 12 Volt socket. The advanced
solar panel with a maximum output power of 2 Watts does not require direct sun-
light – it produces enough energy even during dismal weather and in winter time.
This makes a continuously autarkic surveillance possible. Protected according to
IP54 protection class the solar panel defies even bad weather conditions. With the
supplied bracket, the solar panel can either be firmly screwed to a wall or attached
to a tree using the mounting strap. Adjust the solar panel towards the sun with the
movable joints of the bracket.
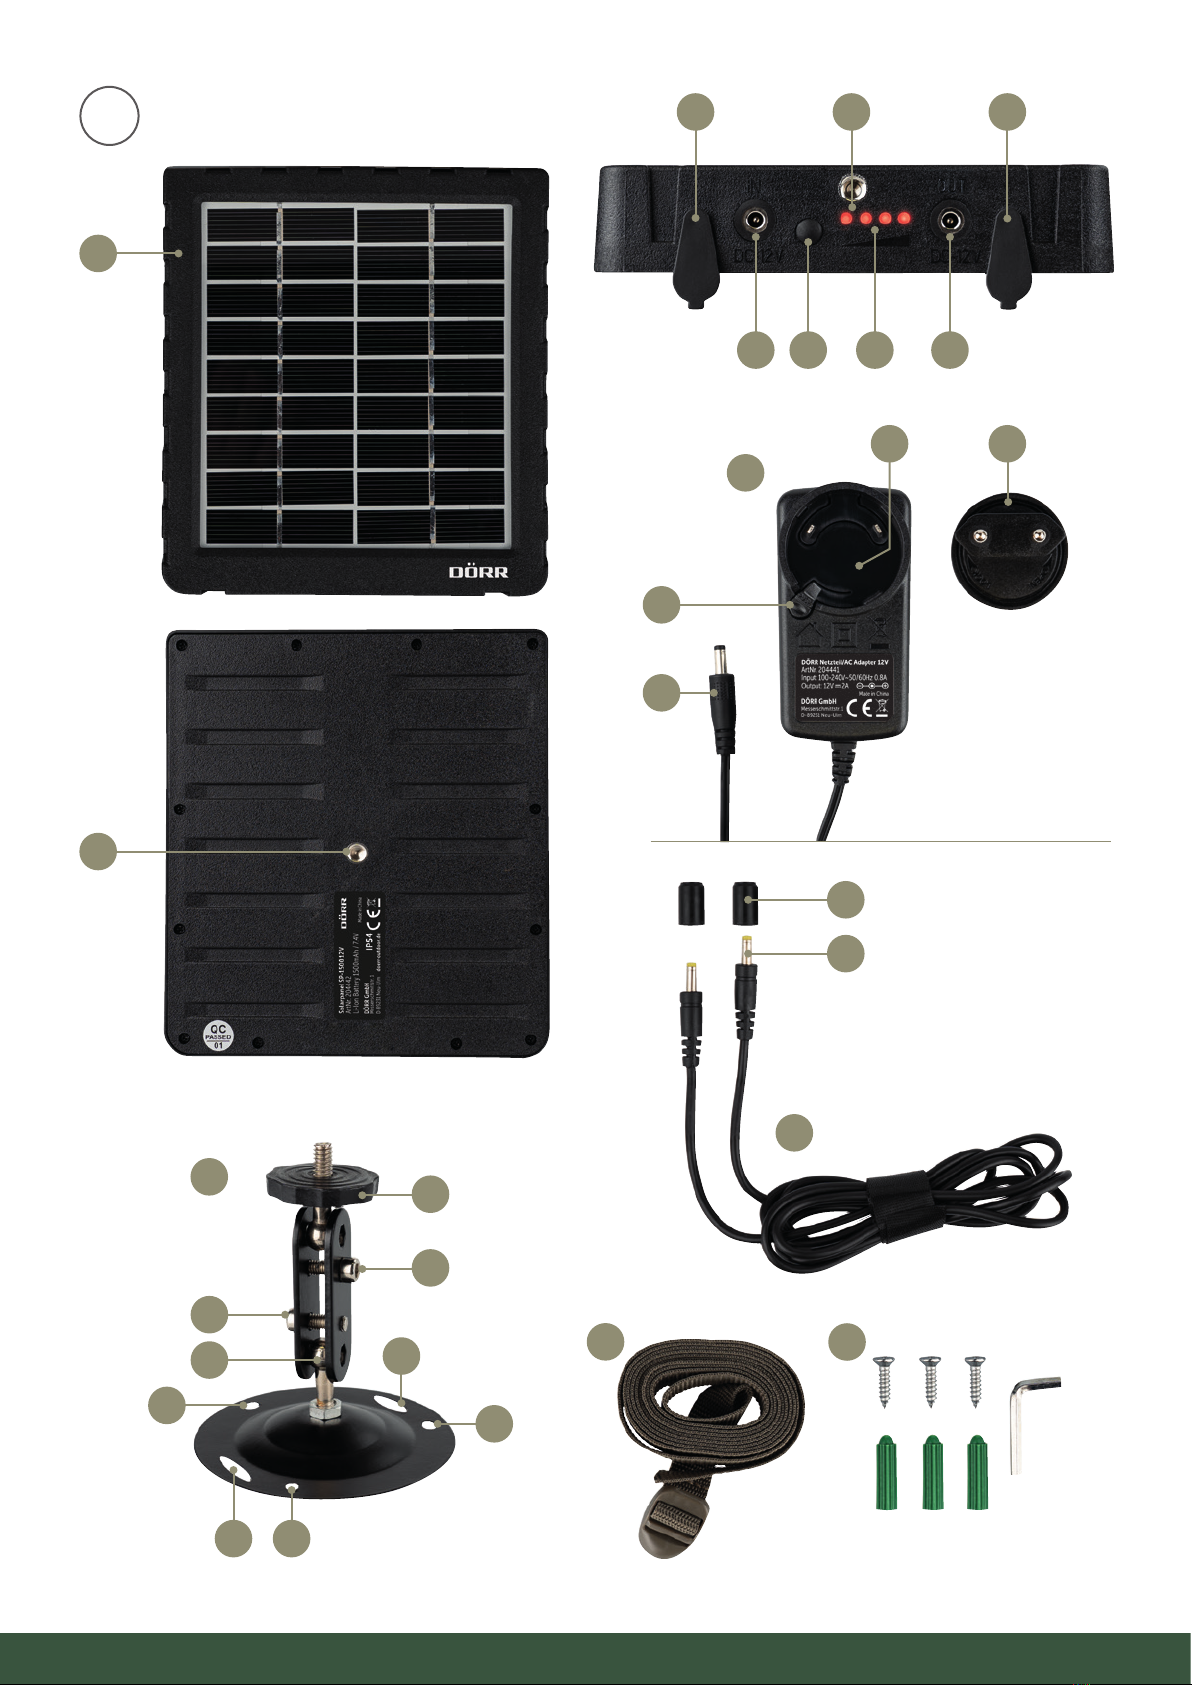
03 | NOMENCLATURE
01 Solar panel
02 Charging socket IN DC 12 V for AC adapter
02a) Rubber cover IN
03 Button for LED indicator
04 LED charging-/capacity indicator
05 Connection thread ¼"
06 Output socket OUT DC12V
06a) Rubber cover OUT
07 Connection thread ¼"
08 AC adapter
08a) Socket for EU Adapter
08b) Release button
08c) Connection plug
08d) EU adapter
09 Connection cable
09a) Rubber protection
09b) DC barrel connectors
10 Bracket
10a) 3 holes for screw fastening
10b) 2 eyelets for mounting strap
10c) Ball joint
10d) Allen screw 1
10e) Allen screw 2
10f) Ball head with ¼" threaded screw
11 Mounting strap
12 Mounting kit (3 screws with dowels, Allen key)
04 |FIRST COMMISSIONING
Before first use, please fully charge the built-in Li-Ion battery:
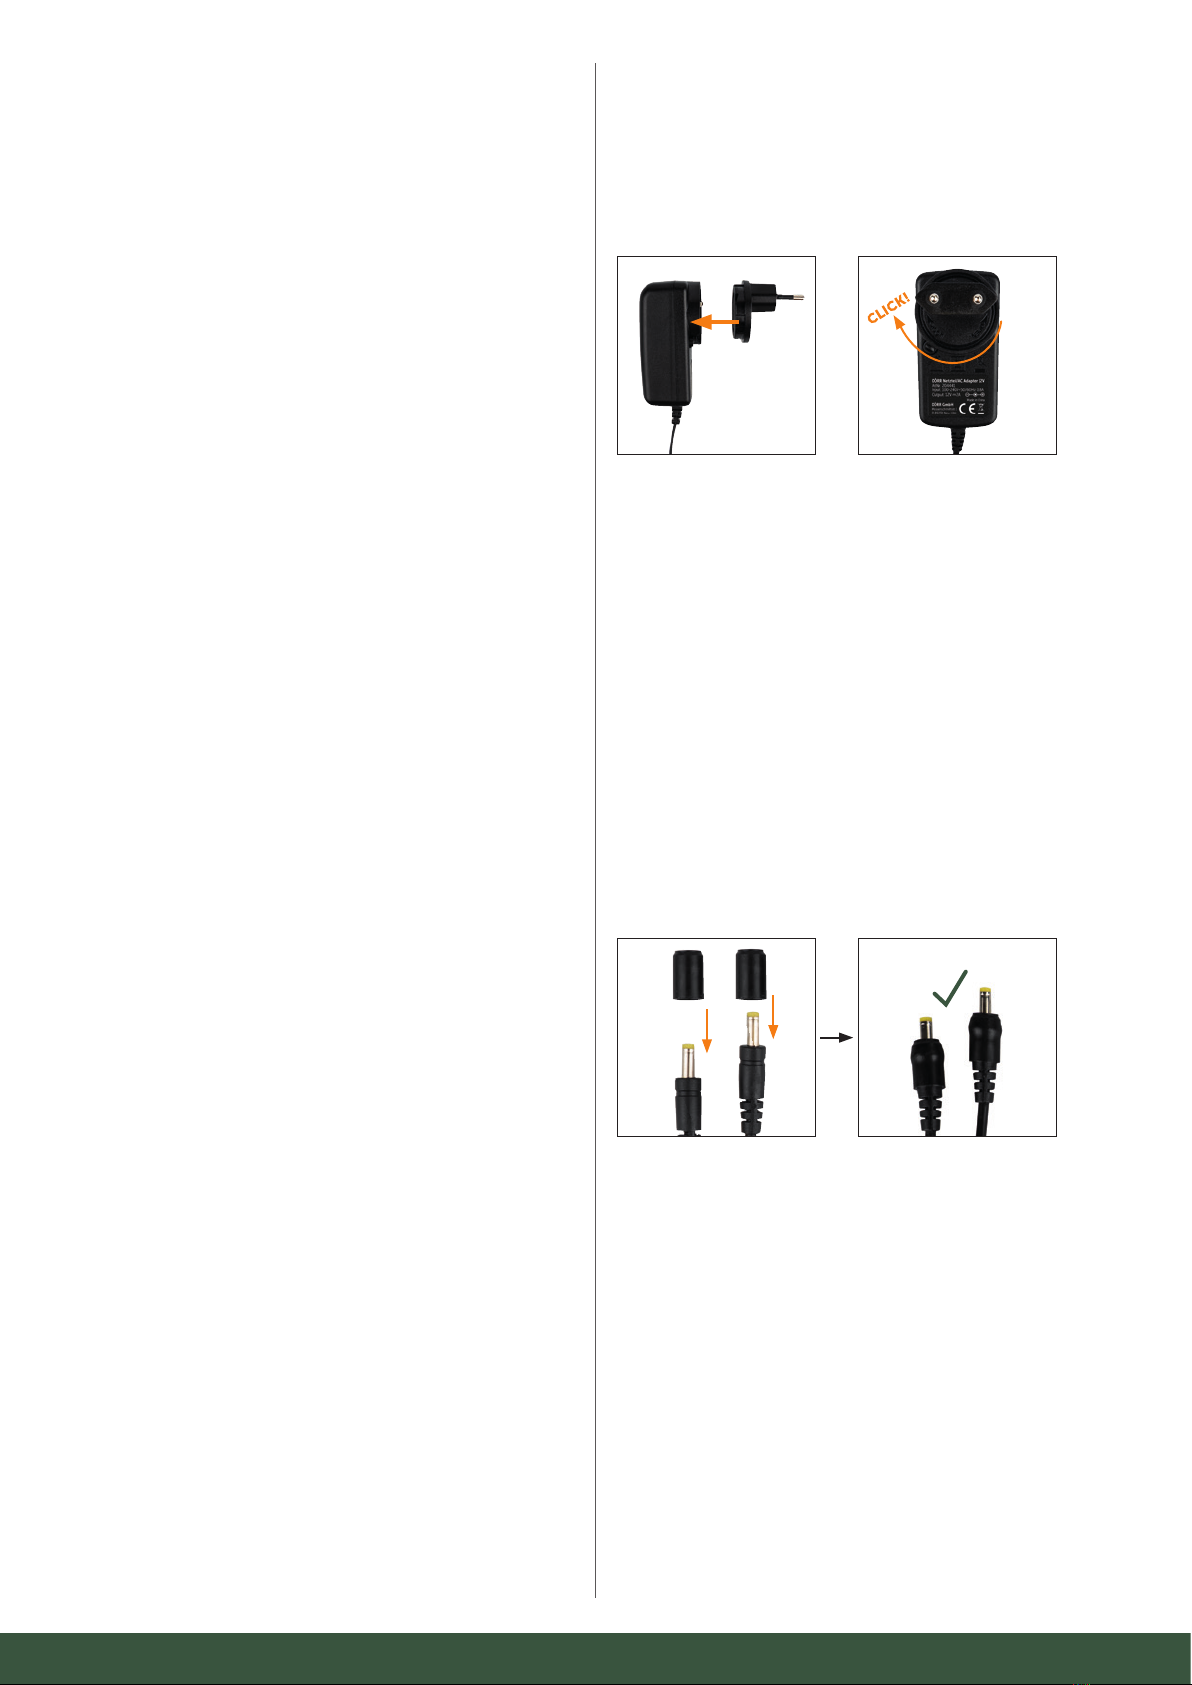
Place the EU adapter (08d) on the socket (08a) of the AC adapter (08). Turn the EU
adapter (08d) clockwise (direction LOCK) until it snaps into place audibly.
Open the rubber cover IN (02a) on the solar panel and connect the connection plug
(08c) with the charging socket IN (02). Plug the AC adapter (08) into a power outlet.
While charging the LED charging indicator (04) will flash in red. When the solar pa-
nel is fully charged, the LED charging-/capacity indicator (04) will light up in red
constantly.
Remove the connection plug (08c) from solar panel and the power outlet. Close the
charging socket (02) with the rubber cover (02a).
05 | OPERATION APPLICATION EXAMPLE WITH DÖRR
SNAPSHOT CLOUD 4G CAMERA
Pull the 2 rubber protectors (09a) over the both DC barrel connectors (09b) of the
connection cable to ensure optimum seal.
Open the rubber cover OUT (06a) on the solar panel. Then plug the connection
cable (09) into the output socket OUT (06) of your solar panel and the other end
into the "Connection external battery" of your SnapShot 4G Camera. Turn on the
camera – the solar panel will recognise when a consuming device is connected and
starts the power supply.
When alkaline/rechargeable batteries are inserted in your SnapShot Cloud 4G ca-
mera you do not need to remove them when using the solar panel. Your camera will
automatically use the inserted battery power, as soon as the external power supply
from the solar panel is disconnected.