daewon SPK+1 User manual

USER MANUAL
SPK+

※ Installation, maintenance and repairing
- Before the installation 5
- Safety precaution 6
- Safety label 8
- Product contents 10
- Product information 12
- Product installation information 13
- Regular cleaning 19
- Maintenance 20
- Troubleshooting 22
※Operation
Basic operation
- To start 24
- To finish 26
※User manual
- Main display information 28
- Set user level 36
※Supervisor manual
- Set user level 38
- Supervisor menu 39
- Material mode 40
- Feeder configuration display 42
System configuration
- System backup 44
- System restore 45
- Sensor check 46
- Cleaning Check 47
- Program version 48
SPK+ | Contents 1
2DAEWON GSI

※Supervisor manual
Camera configuration
- Reject count 49
- Set camera sensitivity (2D) 51
- Set camera sensitivity (RGB) 55
Ejector
- Monitoring 60
- Count 62
- Test 63
※Engineer manual
- Set user level 65
- Engineer menu 66
- System util 67
Camera configuration
- Waveform 68
- Configuration 69
- Select sensitivity 72
- Eject monitoring 73
※Installation plan
- Installation plan 74
3
SPK+ | Contents 2
DAEWON GSI

Installation,
maintenance
and repairing
SPK+

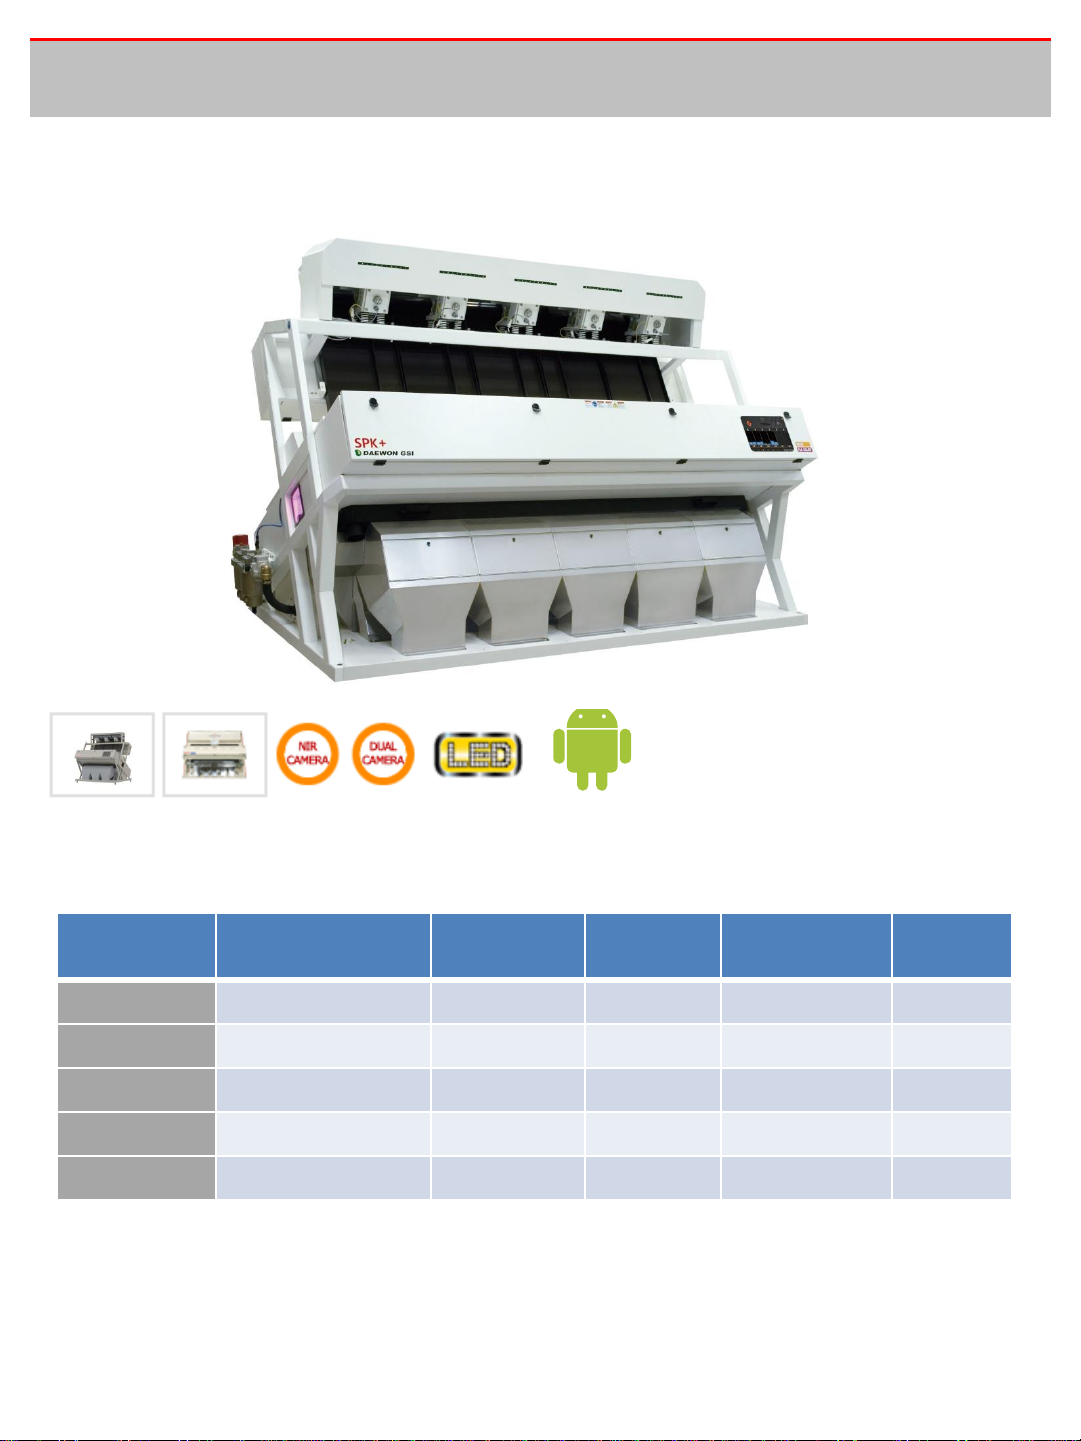
SPK+ | Before the installation
It is necessary to have full knowledge of the installation requirement.
It is only possible to deal with the troubles one may experience during the installation when
considered below. Please fully understand below before inspection.
Installation condition
Location
The surface must be horizontal.
The system shouldn’t be interfered from vibration by surrounding machines or equipments when
installed in a plant or structure.
Vibration may causes in malfunction of the image processing unit.
Finish all the welding before the installation. The residues from welding may cause deformation of the
system structure.
Environment
Operation temperature is between 0℃ to 45 ℃.
The location must be cool and dust free
Lighting
Installing location shouldn’t have great difference of the intensity of the illumination
Keep the system away from direct light from sun or fluorescent light.
Make sure that the system is not under direct sun light during the day time.
Use a curtain if it is necessary.
Clearance
Please make sure that there is enough clearance for A/S or repairing.
The front and back of the machine should have enough clearance for repairing or maintenance.
Plan the cable route properly for the maintenance of the feed hopper and the vibrator connected to
the feeder.
The front of the machine needs clearance for the discharge of sorted material or changing chutes.
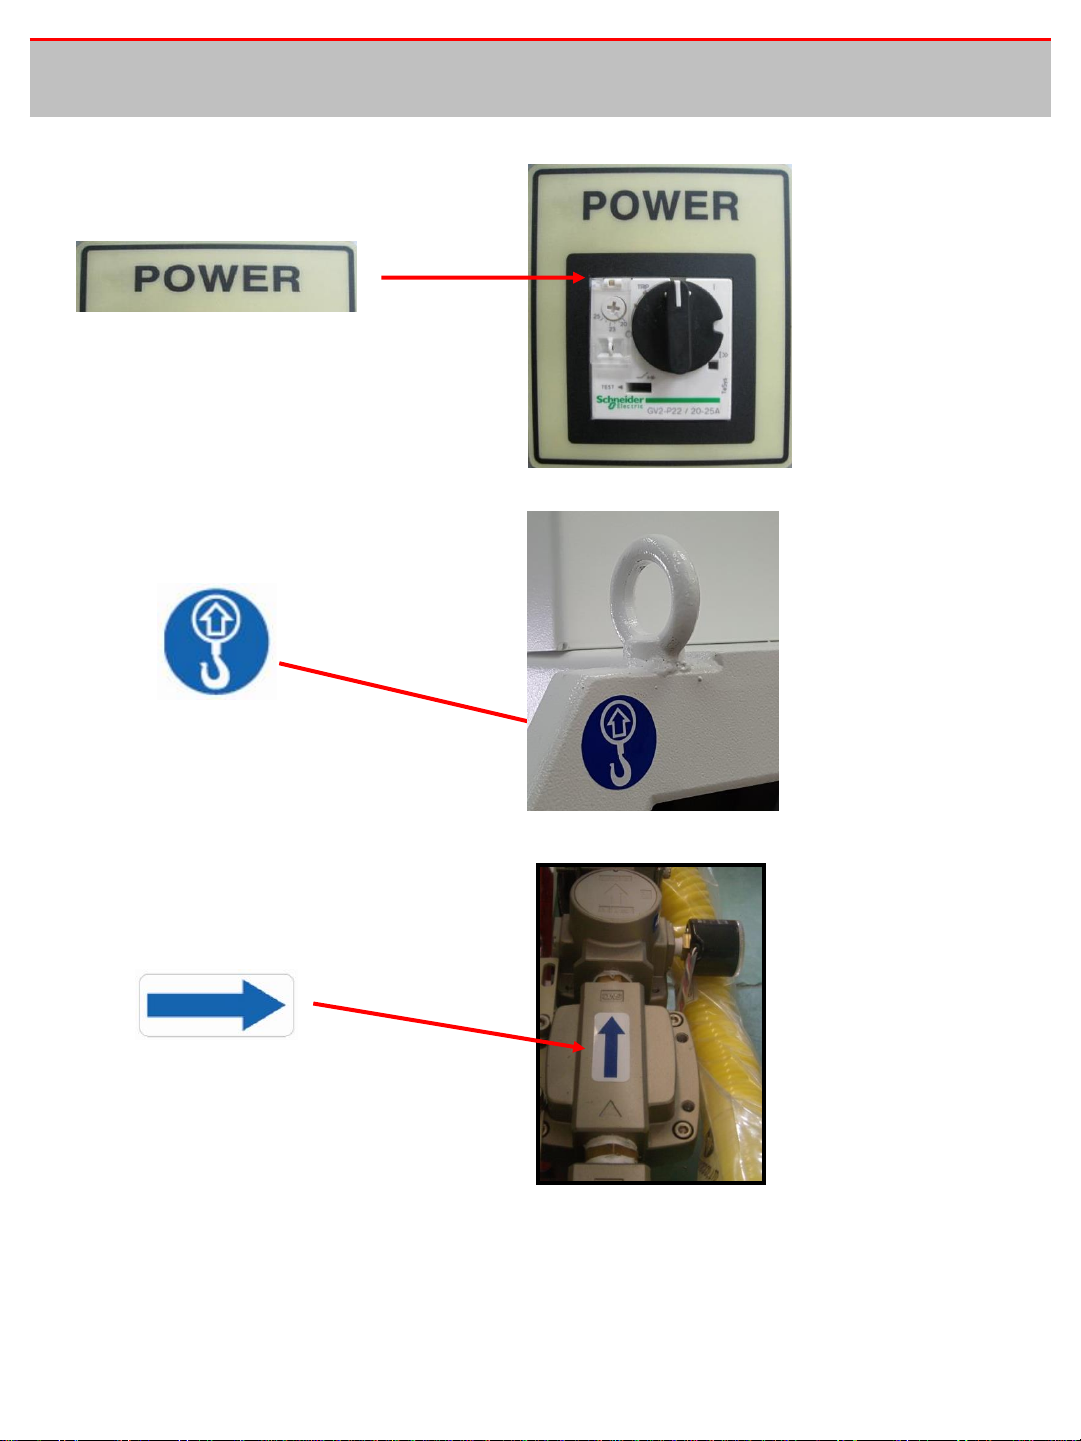
Main circuit breaker
Please use a circuit breaker for the main power.
The system is installed with a circuit breaker but use circuit breaker at the main power supplier to
ensure safety.
5DAEWON GSI

General
For the SPK+.
•The equipment or operation may damaged when ’Caution’ sign is ignored.
•The operator may get damaged or injured when ‘Warning’ sign is ignored..
'WARNING‘
1. Stop the air supply and discharge remaining air before changing or repairing system parts.
2. Please follow the manual to inspect the system’s PCBs without any arbitrary action
3. Do not remove any safety fence during the system is operating. Restore all the safety fence after
inspection for safe system operation..
4. Keep clear from imaging parts or maintenance area as there are many dynamic parts when air / power
is supplied.
5. Please wear protective goggle during sampling to avoid eye injury when the system operates.
'CAUTION'
1. Do not diagnose or change system’s PCBs without full understanding of procedure.
2. Semiconductor parts are vulnerable to static discharge. Wear anti-static wrist strap and use a lead coil
to avoid damage of the electro components.
Please connect wrist strap to the earth terminal.
3. Handle or change PCBs with antistatic equipment.
i) Prevent static discharge by anti-static wrist strap in work space or around equipments.
- Do not touch power supply terminal without antistatic measures.
- Keep the PCBs in anti-static plastic bags.
ii) Shut down main power when removing / changing PCBs..
6
SPK+ | Safety precaution
DAEWON GSI

‘WARNING’
1. Main switch is also emergency switch. In emergency case, turn off color sorter with this main switch.
‘CAUTION’
1. Rear door is heavy. Recommend to open rear door with two people.
SPK+ | Safety precaution 2
7DAEWON GSI

The mark of "Hazardous voltage"
warns to be injured from the electric
shock.
The mark of "Burn hazard" warns to be
burned.
"Acknowledge of manual"
"Earth mark”
Safety label
SPK+ | Safety label 1
Safety label
Attach safety label at the dangerous regions.
-The orange color label expresses the behaviors to be prohibited.
-The yellow color label expresses the dangerous situations.
-The sky blue color label expresses the general matters to be observed.
8DAEWON GSI

"Main power"
"Crane loop-adhered location"
"Compressed air flow direction"
SPK+ | Safety label 2
9DAEWON GSI

SPK+ –Product contents
Specification
★The specifications and designs can be changed without any notice. The capacity depends on impurity ratio
10DAEWON GSI
Model Dimension
(WxLxH)
Input to
M/C(ton/hr) Power(kw) Compressor
Power(HP) Channel
SPK+1 1015x1400x1790
1~3 2 10 84
SPK+2 EXP
1825x1400x1790
2~6 2.5 20 128
SPK+3 1825x1400x1790
3~9 3 20 252
SPK+4 EXP
2615x1400x1790
4~12 4 30 336
SPK+5 2615x1400x1790
5~15 4.5 30 420

Front camera
Feeder
Accept/reject receptacle
Shutes
Rear camera
fig 1.1 : Parts description
Camera cooling fan
LCD panel Power
Air reservoir
fig 2.1 : Parts description
SPK+ | Product information
SPK+ SERIES, DAEWON GSI is optical grain color sorter with high capacity and
high sorting ability.
SPK+ requires minimum installation space with easy moving and keeping.
11DAEWON GSI

fig 3.1 : Minimum space required
SYSTEM
1.0m
0.5m
1.0m
0.5m
SPK+ | Product installation information 1
1. Do not install at the location with condition below
- Room temperature above 40℃
- Room temperature below 0℃
- Humid with dew form
- Vibration from other than the system
- Location with static discharge
- Location with high voltage and chemicals
2. Keep the clearance as the Illustration 3.1 for the operation and maintenance.
3. Never weld directly to the system.
Please cover the system when it is necessary to weld next to the system.
4. Supply AC380V 50Hz, 60Hz after installing primary circuit breaker.
5. Connect the earth cable.
6. Arrange air-compressor as the system requires compressed air for air-guns.
Arrange suitable air compressor, dryer, cooler and filters for optimum
performance of the system
Refer to the air-compressor manual for the air-compressor management.
12DAEWON GSI

SPK+ | Product installation information 2
Power supply connection
Requirement
Understand cable connection drawing and connect the earth before laying out power cable.
Check the end point of the earth and make sure it is firmly connected.
Check the power supply connection refer to the system’s data or tag.
Check for any static discharge or momentary high-voltage after the power supply connection is made.
Do not connect any other motors at the power supply to prevent any induced current.
The main power supply must be connected with circuit breaker with fuses to protect the system from
power failure.
Attention : It is recommended that the power supply connection to be done by an electrical engineer.
Installation procedure
1. Supply the power using circuit breakers and fuses after connecting earth
Insulate front and side of the system, then remove the cover.
2. The color of main power supply cable is distinguished as below
AC power supply : black
Earth : yellow/green
3. Connect the earth cable from the main power cable to the earth connector.
Refer to the earth connection requirement.
Connect AC power supply cable to the terminal L1, L2, L3 and L4.
4. Tie the cables firmly with cable tie, then insert in cable ducts.
5. Close the cover.
13DAEWON GSI

fig 4.1 : Air unit fig 4.2 : Air tube connector
SPK+ | Product installation information 3
Compressed air supply connection
Requirement
Keep the dust or oil out of the compressed air supply.
Dust or oil may result in malfunction of the air gun nozzles.
This will deteriorate sorting ability.
The system is installed with air filer but install oil filter prior to the compressor.
Warning : The air filtering system in the system is based on the factories air filtering system but use both
system together.
The pressure of the compressed air must not exceed the set value from engineers.
Air valve
Positioned between the filter and regulator.
Opens when the knob is turned clockwise.
Closes when the knob is turned anti-clockwise.
Pay attention for the violent air blow within the system when the valve is switched off.
※ SPK+ Is installed with quick connectors so there will be air leakage under the condition below.
『When the cutting plane of the tube is not the perfect circular shape』
『When the tube is not pushed to the end』
『When the ‘O-ring’is missing』
14DAEWON GSI

fig 5.1 : pressure gauge fig 5.2 : pressure gauge fig 5.3 : pressure gauge
SPK+ | Product installation information 4
Air pressure configuration
-Configure the air pressure refer to the pressure gauge.
1)Pull down the knob until it ‘clicks’ as shown in the Illustration 5.1
2)Turn the knob until the gauge presents the set value from engineer as shown in the illustration 5.2
3)Push up the knob when the pressure reached set value from the engineer as shown in illustration 5.3
Pressure regulator valve
Located between the air filter and regulator
This valve configures the air pressure of the air guns and the pressure is presented at the gauge.
The pressure is configured turning the knob.
The system requires higher air pressure when the size of the sorting target increases.
Attention –Never set the pressure value over / below engineer’s set value as it will damage ejector.
No one removes the air-gun except Daewon GSI‘s engineers as it is sophisticatedly assembled and
tested by Daewon GSI.
The air leakage will result in deterioration of the operation and also the repairing / re-installing is
extremely difficult.
15DAEWON GSI

Turn off the power.
Wipe the bran or any impurities
out with a smooth piece of cloth
Clean the camera cooling system
with a smooth piece of cloth to
avoid scratch
SPK+ | Regular cleaning 1
It requires regular cleaning to maintain sorting ability and cleanness.
The sorting ability will be deteriorated without regular cleaning.
The cleaning procedure is shown below.
16DAEWON GSI

Clean superiority/inferiority outlet
with A piece of smooth cleaning
cloth to prevent any
scratches.
Clean the surface of the system
with a piece of smooth
cleaning cloth to prevent any
scratches.
Clean the windows of the system
with a piece of smooth cleaning
cloth to prevent any scratches..
SPK+ | Regular cleaning 2
17DAEWON GSI

Inspection window
Let the air out
by opening the valve
SPK+ | Regular cleaning 3
Air-unit Inspection
Check the windows and remove any water collected in the unit on a regular basis.
Attention : Air in the compressor must be discharged after the system stopped.
18DAEWON GSI

2. Open the rear camera door
with a key provided together.
1. Turn off the power and close
the air-unit valve to stop the
air flow.
3. Open the inner door
SPK+ | Maintenance 1
◆Replacing the air-guns
The sorting ability deteriorate when the air-gun doesn’t work or the air pressure is low.
In this case the air gun must be replaced.
Attention : Turn off the power and close the air-unit valve before the replacement
19DAEWON GSI

※ Attention
Daewon GSI is not responsible for any result occurred by replacing air-guns
without permission
4. Then you will be able to locate
the air-guns
5. Remove the air-guns by
pressing the upper part of air-
guns.
6. The procedure for installing
new air-guns is the other way
around.
SPK+ | Maintenance 2
20DAEWON GSI
This manual suits for next models
5
Table of contents
Popular Farm Equipment manuals by other brands

HE-VA
HE-VA Combi-Disc Series operating instructions

TTI
TTI WeedControl 12VSPT-TTI INSTRUCTIONS FOR ASSEMBLY, OPERATION, SERVICING & STORAGE

Smithco
Smithco AER 8 Series Operator's and service manual

Hi-Way
Hi-Way E2020XT Assembly/operators/parts manual

Blue Diamond
Blue Diamond POWER RAKE Operation and maintenance manual

MacDon
MacDon M2170NT Operator's manual