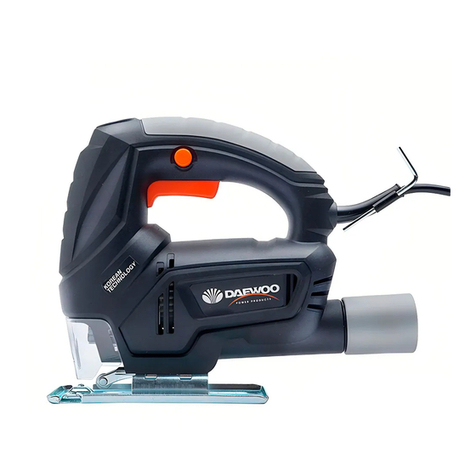
Daewoo DALJS18-1 User manual

Manufactured under license of Daewoo International Corporation, Korea
Fabricado bajo licencia de Daewoo International Corporation, Corea
www.daewoopowerproducts.com
USER'S MANUAL / MANUAL DE USUARIO
DALJS18-1
Lithium Jig saw/ Sierra caladora a batería de litio
1. SAFETY AND OPERATING INSTRUCTIONS
For your own safety and for the safety of others, please read these instructions carefully before
using this appliance. It will help you understand your product more easily and avoid unnecessary
risks.
Keep this instruction manual in a safe place for future use.
General Safety Rules
WARNING Read all safety warnings and all instructions Failure to follow all warnings and
instructions may result in electric shock, fire and/or serious injury.
Save all warnings and instructions for future reference
The term “power tool” in the warnings refer to your mains operated (corded) power tool or battery
operated (cordless) power tool.
SAVE THESE INSTRUCTIONS
1) Work area
a) Keep work area clean and well lit. Cluttered and dark areas invite accidents.
b) Do not operate power tools in explosive atmospheres, such as in the presence offlammable
liquids, gases or dust. Power tools create sparks which may ignite the
dust or fumes.
c) Keep children and bystanders away while operating a power tool. Distractions cancause you to
lose control.
2) Electrical safety
a) Power tool plugs must match the outlet. Never modify the plug in any way. Do not
use any adapter plugs with earthed (grounded) power tools. Unmodified plugs and matching outlets
will reduce risk of electric shock.
b) Avoid body contact with earthed or grounded surfaces such as pipes, radiators,ranges and
refrigerators. There is an increased risk of electric shock if your body isearthed or grounded.
c) Do not expose power tools to rain or wet conditions. Water entering a power toolwill increase the
risk of electric shock.
d) Do not abuse the cord. Never use the cord for carrying, pulling or unplugging thepower tool. Keep
cord away from heat, oil, sharp edges or moving parts. Damagedor entangled cords increase the
risk of electric shock.
e) When operating a power tool outdoors, use an extension cord suitable for outdoor use. Use
of a cord suitable for outdoor use reduces the risk of electric shock.
3) Personal safety
a) Stay alert, watch what you are doing and use common sense when operating a power tool. Do
not use a power tool while you are tired or under the influence of drugs, alcohol or medication. A
moment of inattention while operating power tools may result in serious personal injury.
b) Use safety equipment. Always wear eye protection. Safety equipment such as dust
mask, non-skid safety shoes, hard hat, or hearing protection used for appropriate conditions will
reduce personal injuries.
c) Avoid accidental starting. Ensure the switch is in the off position before plugging in. Carrying
power tools with your finger on the switch or plugging in power tools that have the switch on invites
accidents.
d) Remove any adjusting key or wrench before turning the power tool on. A wrench or a key left
attached to a rotating part of the power tool may result in personal injury.
e) Do not overreach. Keep proper footing and balance at all times. This enables better control of the
power tool in unexpected situations.
f) Dress properly. Do not wear loose clothing or jewellery. Keep your hair, clothing and gloves away
from moving parts. Loose clothes, jewellery or long hair can be caught in moving parts.
g) If devices are provided for the connection of dust extraction and collectionfacilities, ensure
these are connected and properly used. Use of these devices can reduce dust related hazards.
4) Power tool use and care
a) Do not force the power tool. Use the correct power tool for your application. The correct power
tool will do the job better and safer at the rate for which it was designed.
b) Do not use the power tool if the switch does not turn it on and off. Any power tool that cannot be
controlled with the switch is dangerous and must be repaired.
c) Disconnect the plug from the power source before making any adjustments, changing acces-
sories, or storing power tools. Such preventive safety measures reduce the risk of starting the
power tool accidentally.
d) Store idle power tools out of the reach of children and do not allow persons unfamiliar with the
power tool or these instructions to operate the power tool. Power tools are dangerous in the hands
of untrained users.
e) Maintain power tools. Check for misalignment or binding of moving parts, breakage of parts and
any other condition that may affect the power tools operation. If damaged, have the power tool
repaired before use. Many accidents are caused by poorly maintained power tools.
f) Keep cutting tools sharp and clean. Properly maintained cutting tools with sharp cutting edges
are less likely to bind and are easier to control.
g) Use the power tool, accessories and tool bits etc., in accordance with these instructions and in
the manner intended for the particular type of power tool, taking into account the working condi-
tions and the work to be performed. Use of the power tool for operations different from intended
could result in a hazardous situation.
5) Service
a) Have your power tool serviced by a qualified repair person using only identical replacement parts.
This will ensure that the safety of the power tool is maintained.
Hold power tool by insulated gripping surfaces, when performing an operation where the cutting
accessory may contact hidden wiring or its own cord. Cutting accessory contacting a "live" wire
may make exposed metal parts of the power tool "live" and could give the operator an electric
shock.
2. TECHNICAL DATA
Power: 18 V
No load speed: 0-2500 spm
Stroke length: 25 mm
Max. cutting capacity:
- in wood: 50 mm
- in metal: 8 mm
Pendulum setting: 3 + off
Dual bevel adjustment: 0-45°
• That the declared vibration total value has been measured in accordance with a standard test
method and may be used for comparing one tool with another;
• That the declared vibration total value may also be used in a preliminary assessment of exposure.
WARNING
• That the vibration emission during actual use of the power tool can differ from the declared total
value depending on the ways in which the tool is used; and
• Of the need to identify safety measures to protect the operator that are based on an estimation of
exposure in the actual conditions of use (taking account of all parts of the operating cycle such as
the times when the tool is switched off and when it is running idle in addition to the trigger time).
3. EXPLANATION OF SYMBOLS
In this manual and/or on the machine the following symbols are used:
In accordance with essential applicable safety standards of European directives
Class II tools symbol
Waste electrical products should not be disposed of with household waste.
Please recycle where facilities exist. Check with your local Authority or retailer
for recycling advice.
Read this manual thoroughly before operating the saw.
This device is to be exclusively for private use! It is not fit for commercial use! Warning: when wor-
king with electrical devices the following prevention and safety instructions are to be observed to
avoid fires, electric shocks and physical injuries!
Inserting the Saw Blade
1. Remove the mains plug from the socket and ensure that the on and off switch is not locked with
the locking button.
2. Push up the transparent eye protection,
3. Loosen the hexagon screws on the saw blade-fixing device with the offset hexagon bar key
supplied, and push the saw blade as far as possible into the fixing device. Ensure that the teeth of
the saw blade are pointing to the front!
4. Slightly tighten the hexagon screws alternately in order to position the saw blade. Then turn, the
screws until they are completely tight.
5. Push the transparent eye protection down again. The spanner can be pushed into the holder for
safekeeping.
Adjusting the Guide Roller
For greater accuracy during sawing, the device 4 is fitted with a guide roller. This roller should be
adjusted in such a way that it touches the back edge of the saw blade during cutting.
• Ensure that the on and off switch is not pressed or locked in place and that the mains plug is not
inserted in the socket!
• Loosen the hexagon screws of the shoe of the saw.
• Push the guide roller forwards until It touches the back edge of the saw blade.
• Tighten the hexagon screws again.
NOTE: If the guide roller axle is oiled occasionally, thie will extend the working life of the guide roller!
One drop of resin-free oil is sufficient!
Initial Operation
1. Ensure that the on and off switch is not pressed or locked in place with the locking button. that
the saw blade is fitted tightly in the saw btade fixing device and that the hexagon screws of the shoe
of the saw are tight! Push down the transparent eye protection.
2. Insert the mains plug into a correctly installed 230volt, 50-hertz socket.
3. Bring the saw up to the object to be cut.
4. Press the on and off switch In order to switch on the machine. For continuous operation the on
and off switch can be locked in place with the locking button. In order to release this, press the on
and off switch as far as possible and then let it go. The locking button will automatically jump back
to the original position.
5. After use the mains plug should be removed from the socket.
NOTE: Do not cut directly into the workpiece with the saw blade, but first drill a corresponding hole
from which to start cutting!
Adjustment for the Bevel Cut
The shoe of the saw can be adjusted as follows on both sides up to an angle of 45°:
1. Remove the mains plug from the socket and ensure that the on and off switch is not locked in
place with the locking button.
2. Loosen (but do not remove) the hexagon screws of the shoe of the saw with the offset hexagon
key provided.
3. Pull the shoe of the saw back slightly and adjust the desired angle according to the scale on the
shoe.
4. If necessary, adjust the guide roller again (see "Adjusting the Guide Roller").
Tighten the hexagon screws of the shoe of the saw again.
5. Tighten the hexagon screws of the shoe of the saw again.
6. For most jobs the graduation of the scale on the shoe of the saw is accurate enough.
However, in the case of very precise angle cuts you should use an angle-measuring device! The
accuracy of the angle can be tested with a test cut into waste material.
7. In order to return the shoe of the saw to the original position, remove the mains plug from the
socket and ensure that the on and off switch is not locked in place with the locking button.
8. Release the hexagon screws of the shoe of the saw.
9. Align the shoe of the saw at an angle of approximately 90° to the saw blade and push it forwards
in the direction of the saw blade. Take care with the hexagon screws of the shoe of the saw. These
must not be covered by the shoe. If they are, pull the shoe back slightly.
10. If necessary, readjust the guide roller (see "Adjusting the Guide Roller") and tighten the hexagon
screws of the shoe of the saw again.
Setting the Number of Strokes
In order tot ensure high quality sawing it is necessary to adapt the number of strokes of the saw
blade to the material which is to be sawn. The correct speed can be set with the regulator (1). The
following table shows the ideal speed for the relevant materials:
4. MAINTENANCE
• The eye protector, air slits and motor housing should be kept as free of dust and dirt as possible.
• Rub off the device with a clean cloth or use compressed air at a low pressure to blow out any dust
or dirt. Excessive amounts of metal dust may result in electricity from the internal components
being conducted on to exposed metal parts!
• if the replacement of the supply cord is necessary, this has to be done by the manufacturer or his
agent in order to avoid a safety hazard.
Cleaning and Care
• Remove the mains plug from the socket and ensure that the on and off switch is not locked in
place with the locking button. For cleaning, use a slightly damp - but not wet -cloth! Do not use any
additional abrasive materials (petrol, turpentine etc) as these may damage the plastic housing! The
use of a mild soap is recommended! Ensure that moisture does not get into the machine! After
cleaning, wipe the device with a dry cloth!
WARNING! This machine produces an electromagnetic field during operation. This field may under
some circumstances interfere with active or passive medical implants. To reduce the risk of serious
or fatal injury, we recommend persons with medical implants to consult their physician and the
medical implant manufacturer before operating this machine.

INDEX
1. SAFETY AND OPERATING INSTRUCTIONS
........................................................................................ 2
2. TECHNICAL DATA
.................................................................................................................................. 3
3. EXPLANATION OF SYMBOLS ................................................................................................................ 4
4. MAINTENANCE ....................................................................................................................................... 6
WARRANTY ................................................................................................................................................. 7
ÍNDICE
1. INTRUCCIONES DE SEGURIDAD Y OPERACIÓN
.............................................................................. 8
2. ESPECIFICACIONES TÉCNICAS
........................................................................................................ 10
3. EXPLICACIÓN DE SÍMBOLOS ............................................................................................................. 11
4. MANTENIMIENTO ................................................................................................................................. 13
GARANTÍA ................................................................................................................................................. 14
1
1. SAFETY AND OPERATING INSTRUCTIONS
For your own safety and for the safety of others, please read these instructions carefully before
using this appliance. It will help you understand your product more easily and avoid unnecessary
risks.
Keep this instruction manual in a safe place for future use.
General Safety Rules
WARNING Read all safety warnings and all instructions Failure to follow all warnings and
instructions may result in electric shock, fire and/or serious injury.
Save all warnings and instructions for future reference
The term “power tool” in the warnings refer to your mains operated (corded) power tool or battery
operated (cordless) power tool.
SAVE THESE INSTRUCTIONS
1) Work area
a) Keep work area clean and well lit. Cluttered and dark areas invite accidents.
b) Do not operate power tools in explosive atmospheres, such as in the presence offlammable
liquids, gases or dust. Power tools create sparks which may ignite the
dust or fumes.
c) Keep children and bystanders away while operating a power tool. Distractions cancause you to
lose control.
2) Electrical safety
a) Power tool plugs must match the outlet. Never modify the plug in any way. Do not
use any adapter plugs with earthed (grounded) power tools. Unmodified plugs and matching outlets
will reduce risk of electric shock.
b) Avoid body contact with earthed or grounded surfaces such as pipes, radiators,ranges and
refrigerators. There is an increased risk of electric shock if your body isearthed or grounded.
c) Do not expose power tools to rain or wet conditions. Water entering a power toolwill increase the
risk of electric shock.
d) Do not abuse the cord. Never use the cord for carrying, pulling or unplugging thepower tool. Keep
cord away from heat, oil, sharp edges or moving parts. Damagedor entangled cords increase the
risk of electric shock.
e) When operating a power tool outdoors, use an extension cord suitable for outdoor use. Use
of a cord suitable for outdoor use reduces the risk of electric shock.
3) Personal safety
a) Stay alert, watch what you are doing and use common sense when operating a power tool. Do
not use a power tool while you are tired or under the influence of drugs, alcohol or medication. A
moment of inattention while operating power tools may result in serious personal injury.
b) Use safety equipment. Always wear eye protection. Safety equipment such as dust
mask, non-skid safety shoes, hard hat, or hearing protection used for appropriate conditions will
reduce personal injuries.
c) Avoid accidental starting. Ensure the switch is in the off position before plugging in. Carrying
power tools with your finger on the switch or plugging in power tools that have the switch on invites
accidents.
d) Remove any adjusting key or wrench before turning the power tool on. A wrench or a key left
attached to a rotating part of the power tool may result in personal injury.
e) Do not overreach. Keep proper footing and balance at all times. This enables better control of the
power tool in unexpected situations.
f) Dress properly. Do not wear loose clothing or jewellery. Keep your hair, clothing and gloves away
from moving parts. Loose clothes, jewellery or long hair can be caught in moving parts.
g) If devices are provided for the connection of dust extraction and collectionfacilities, ensure
these are connected and properly used. Use of these devices can reduce dust related hazards.
4) Power tool use and care
a) Do not force the power tool. Use the correct power tool for your application. The correct power
tool will do the job better and safer at the rate for which it was designed.
b) Do not use the power tool if the switch does not turn it on and off. Any power tool that cannot be
controlled with the switch is dangerous and must be repaired.
c) Disconnect the plug from the power source before making any adjustments, changing acces-
sories, or storing power tools. Such preventive safety measures reduce the risk of starting the
power tool accidentally.
d) Store idle power tools out of the reach of children and do not allow persons unfamiliar with the
power tool or these instructions to operate the power tool. Power tools are dangerous in the hands
of untrained users.
e) Maintain power tools. Check for misalignment or binding of moving parts, breakage of parts and
any other condition that may affect the power tools operation. If damaged, have the power tool
repaired before use. Many accidents are caused by poorly maintained power tools.
f) Keep cutting tools sharp and clean. Properly maintained cutting tools with sharp cutting edges
are less likely to bind and are easier to control.
g) Use the power tool, accessories and tool bits etc., in accordance with these instructions and in
the manner intended for the particular type of power tool, taking into account the working condi-
tions and the work to be performed. Use of the power tool for operations different from intended
could result in a hazardous situation.
5) Service
a) Have your power tool serviced by a qualified repair person using only identical replacement parts.
This will ensure that the safety of the power tool is maintained.
Hold power tool by insulated gripping surfaces, when performing an operation where the cutting
accessory may contact hidden wiring or its own cord. Cutting accessory contacting a "live" wire
may make exposed metal parts of the power tool "live" and could give the operator an electric
shock.
2. TECHNICAL DATA
Power: 18 V
No load speed: 0-2500 spm
Stroke length: 25 mm
Max. cutting capacity:
- in wood: 50 mm
- in metal: 8 mm
Pendulum setting: 3 + off
Dual bevel adjustment: 0-45°
• That the declared vibration total value has been measured in accordance with a standard test
method and may be used for comparing one tool with another;
• That the declared vibration total value may also be used in a preliminary assessment of exposure.
WARNING
• That the vibration emission during actual use of the power tool can differ from the declared total
value depending on the ways in which the tool is used; and
• Of the need to identify safety measures to protect the operator that are based on an estimation of
exposure in the actual conditions of use (taking account of all parts of the operating cycle such as
the times when the tool is switched off and when it is running idle in addition to the trigger time).
3. EXPLANATION OF SYMBOLS
In this manual and/or on the machine the following symbols are used:
In accordance with essential applicable safety standards of European directives
Class II tools symbol
Waste electrical products should not be disposed of with household waste.
Please recycle where facilities exist. Check with your local Authority or retailer
for recycling advice.
Read this manual thoroughly before operating the saw.
This device is to be exclusively for private use! It is not fit for commercial use! Warning: when wor-
king with electrical devices the following prevention and safety instructions are to be observed to
avoid fires, electric shocks and physical injuries!
Inserting the Saw Blade
1. Remove the mains plug from the socket and ensure that the on and off switch is not locked with
the locking button.
2. Push up the transparent eye protection,
3. Loosen the hexagon screws on the saw blade-fixing device with the offset hexagon bar key
supplied, and push the saw blade as far as possible into the fixing device. Ensure that the teeth of
the saw blade are pointing to the front!
4. Slightly tighten the hexagon screws alternately in order to position the saw blade. Then turn, the
screws until they are completely tight.
5. Push the transparent eye protection down again. The spanner can be pushed into the holder for
safekeeping.
Adjusting the Guide Roller
For greater accuracy during sawing, the device 4 is fitted with a guide roller. This roller should be
adjusted in such a way that it touches the back edge of the saw blade during cutting.
• Ensure that the on and off switch is not pressed or locked in place and that the mains plug is not
inserted in the socket!
• Loosen the hexagon screws of the shoe of the saw.
• Push the guide roller forwards until It touches the back edge of the saw blade.
• Tighten the hexagon screws again.
NOTE: If the guide roller axle is oiled occasionally, thie will extend the working life of the guide roller!
One drop of resin-free oil is sufficient!
Initial Operation
1. Ensure that the on and off switch is not pressed or locked in place with the locking button. that
the saw blade is fitted tightly in the saw btade fixing device and that the hexagon screws of the shoe
of the saw are tight! Push down the transparent eye protection.
2. Insert the mains plug into a correctly installed 230volt, 50-hertz socket.
3. Bring the saw up to the object to be cut.
4. Press the on and off switch In order to switch on the machine. For continuous operation the on
and off switch can be locked in place with the locking button. In order to release this, press the on
and off switch as far as possible and then let it go. The locking button will automatically jump back
to the original position.
5. After use the mains plug should be removed from the socket.
NOTE: Do not cut directly into the workpiece with the saw blade, but first drill a corresponding hole
from which to start cutting!
Adjustment for the Bevel Cut
The shoe of the saw can be adjusted as follows on both sides up to an angle of 45°:
1. Remove the mains plug from the socket and ensure that the on and off switch is not locked in
place with the locking button.
2. Loosen (but do not remove) the hexagon screws of the shoe of the saw with the offset hexagon
key provided.
3. Pull the shoe of the saw back slightly and adjust the desired angle according to the scale on the
shoe.
4. If necessary, adjust the guide roller again (see "Adjusting the Guide Roller").
Tighten the hexagon screws of the shoe of the saw again.
5. Tighten the hexagon screws of the shoe of the saw again.
6. For most jobs the graduation of the scale on the shoe of the saw is accurate enough.
However, in the case of very precise angle cuts you should use an angle-measuring device! The
accuracy of the angle can be tested with a test cut into waste material.
7. In order to return the shoe of the saw to the original position, remove the mains plug from the
socket and ensure that the on and off switch is not locked in place with the locking button.
8. Release the hexagon screws of the shoe of the saw.
9. Align the shoe of the saw at an angle of approximately 90° to the saw blade and push it forwards
in the direction of the saw blade. Take care with the hexagon screws of the shoe of the saw. These
must not be covered by the shoe. If they are, pull the shoe back slightly.
10. If necessary, readjust the guide roller (see "Adjusting the Guide Roller") and tighten the hexagon
screws of the shoe of the saw again.
Setting the Number of Strokes
In order tot ensure high quality sawing it is necessary to adapt the number of strokes of the saw
blade to the material which is to be sawn. The correct speed can be set with the regulator (1). The
following table shows the ideal speed for the relevant materials:
4. MAINTENANCE
• The eye protector, air slits and motor housing should be kept as free of dust and dirt as possible.
• Rub off the device with a clean cloth or use compressed air at a low pressure to blow out any dust
or dirt. Excessive amounts of metal dust may result in electricity from the internal components
being conducted on to exposed metal parts!
• if the replacement of the supply cord is necessary, this has to be done by the manufacturer or his
agent in order to avoid a safety hazard.
Cleaning and Care
• Remove the mains plug from the socket and ensure that the on and off switch is not locked in
place with the locking button. For cleaning, use a slightly damp - but not wet -cloth! Do not use any
additional abrasive materials (petrol, turpentine etc) as these may damage the plastic housing! The
use of a mild soap is recommended! Ensure that moisture does not get into the machine! After
cleaning, wipe the device with a dry cloth!
WARNING! This machine produces an electromagnetic field during operation. This field may under
some circumstances interfere with active or passive medical implants. To reduce the risk of serious
or fatal injury, we recommend persons with medical implants to consult their physician and the
medical implant manufacturer before operating this machine.

2
1. SAFETY AND OPERATING INSTRUCTIONS
For your own safety and for the safety of others, please read these instructions carefully before
using this appliance. It will help you understand your product more easily and avoid unnecessary
risks.
Keep this instruction manual in a safe place for future use.
General Safety Rules
WARNING Read all safety warnings and all instructions Failure to follow all warnings and
instructions may result in electric shock, fire and/or serious injury.
Save all warnings and instructions for future reference
The term “power tool” in the warnings refer to your mains operated (corded) power tool or battery
operated (cordless) power tool.
SAVE THESE INSTRUCTIONS
1) Work area
a) Keep work area clean and well lit. Cluttered and dark areas invite accidents.
b) Do not operate power tools in explosive atmospheres, such as in the presence offlammable
liquids, gases or dust. Power tools create sparks which may ignite the
dust or fumes.
c) Keep children and bystanders away while operating a power tool. Distractions cancause you to
lose control.
2) Electrical safety
a) Power tool plugs must match the outlet. Never modify the plug in any way. Do not
use any adapter plugs with earthed (grounded) power tools. Unmodified plugs and matching outlets
will reduce risk of electric shock.
b) Avoid body contact with earthed or grounded surfaces such as pipes, radiators,ranges and
refrigerators. There is an increased risk of electric shock if your body isearthed or grounded.
c) Do not expose power tools to rain or wet conditions. Water entering a power toolwill increase the
risk of electric shock.
d) Do not abuse the cord. Never use the cord for carrying, pulling or unplugging thepower tool. Keep
cord away from heat, oil, sharp edges or moving parts. Damagedor entangled cords increase the
risk of electric shock.
e) When operating a power tool outdoors, use an extension cord suitable for outdoor use. Use
of a cord suitable for outdoor use reduces the risk of electric shock.
3) Personal safety
a) Stay alert, watch what you are doing and use common sense when operating a power tool. Do
not use a power tool while you are tired or under the influence of drugs, alcohol or medication. A
moment of inattention while operating power tools may result in serious personal injury.
b) Use safety equipment. Always wear eye protection. Safety equipment such as dust
mask, non-skid safety shoes, hard hat, or hearing protection used for appropriate conditions will
reduce personal injuries.
c) Avoid accidental starting. Ensure the switch is in the off position before plugging in. Carrying
power tools with your finger on the switch or plugging in power tools that have the switch on invites
accidents.
d) Remove any adjusting key or wrench before turning the power tool on. A wrench or a key left
attached to a rotating part of the power tool may result in personal injury.
e) Do not overreach. Keep proper footing and balance at all times. This enables better control of the
power tool in unexpected situations.
f) Dress properly. Do not wear loose clothing or jewellery. Keep your hair, clothing and gloves away
from moving parts. Loose clothes, jewellery or long hair can be caught in moving parts.
g) If devices are provided for the connection of dust extraction and collectionfacilities, ensure
these are connected and properly used. Use of these devices can reduce dust related hazards.
4) Power tool use and care
a) Do not force the power tool. Use the correct power tool for your application. The correct power
tool will do the job better and safer at the rate for which it was designed.
b) Do not use the power tool if the switch does not turn it on and off. Any power tool that cannot be
controlled with the switch is dangerous and must be repaired.
c) Disconnect the plug from the power source before making any adjustments, changing acces-
sories, or storing power tools. Such preventive safety measures reduce the risk of starting the
power tool accidentally.
d) Store idle power tools out of the reach of children and do not allow persons unfamiliar with the
power tool or these instructions to operate the power tool. Power tools are dangerous in the hands
of untrained users.
e) Maintain power tools. Check for misalignment or binding of moving parts, breakage of parts and
any other condition that may affect the power tools operation. If damaged, have the power tool
repaired before use. Many accidents are caused by poorly maintained power tools.
f) Keep cutting tools sharp and clean. Properly maintained cutting tools with sharp cutting edges
are less likely to bind and are easier to control.
g) Use the power tool, accessories and tool bits etc., in accordance with these instructions and in
the manner intended for the particular type of power tool, taking into account the working condi-
tions and the work to be performed. Use of the power tool for operations different from intended
could result in a hazardous situation.
5) Service
a) Have your power tool serviced by a qualified repair person using only identical replacement parts.
This will ensure that the safety of the power tool is maintained.
Hold power tool by insulated gripping surfaces, when performing an operation where the cutting
accessory may contact hidden wiring or its own cord. Cutting accessory contacting a "live" wire
may make exposed metal parts of the power tool "live" and could give the operator an electric
shock.
2. TECHNICAL DATA
Power: 18 V
No load speed: 0-2500 spm
Stroke length: 25 mm
Max. cutting capacity:
- in wood: 50 mm
- in metal: 8 mm
Pendulum setting: 3 + off
Dual bevel adjustment: 0-45°
• That the declared vibration total value has been measured in accordance with a standard test
method and may be used for comparing one tool with another;
• That the declared vibration total value may also be used in a preliminary assessment of exposure.
WARNING
• That the vibration emission during actual use of the power tool can differ from the declared total
value depending on the ways in which the tool is used; and
• Of the need to identify safety measures to protect the operator that are based on an estimation of
exposure in the actual conditions of use (taking account of all parts of the operating cycle such as
the times when the tool is switched off and when it is running idle in addition to the trigger time).
3. EXPLANATION OF SYMBOLS
In this manual and/or on the machine the following symbols are used:
In accordance with essential applicable safety standards of European directives
Class II tools symbol
Waste electrical products should not be disposed of with household waste.
Please recycle where facilities exist. Check with your local Authority or retailer
for recycling advice.
Read this manual thoroughly before operating the saw.
This device is to be exclusively for private use! It is not fit for commercial use! Warning: when wor-
king with electrical devices the following prevention and safety instructions are to be observed to
avoid fires, electric shocks and physical injuries!
Inserting the Saw Blade
1. Remove the mains plug from the socket and ensure that the on and off switch is not locked with
the locking button.
2. Push up the transparent eye protection,
3. Loosen the hexagon screws on the saw blade-fixing device with the offset hexagon bar key
supplied, and push the saw blade as far as possible into the fixing device. Ensure that the teeth of
the saw blade are pointing to the front!
4. Slightly tighten the hexagon screws alternately in order to position the saw blade. Then turn, the
screws until they are completely tight.
5. Push the transparent eye protection down again. The spanner can be pushed into the holder for
safekeeping.
Adjusting the Guide Roller
For greater accuracy during sawing, the device 4 is fitted with a guide roller. This roller should be
adjusted in such a way that it touches the back edge of the saw blade during cutting.
• Ensure that the on and off switch is not pressed or locked in place and that the mains plug is not
inserted in the socket!
• Loosen the hexagon screws of the shoe of the saw.
• Push the guide roller forwards until It touches the back edge of the saw blade.
• Tighten the hexagon screws again.
NOTE: If the guide roller axle is oiled occasionally, thie will extend the working life of the guide roller!
One drop of resin-free oil is sufficient!
Initial Operation
1. Ensure that the on and off switch is not pressed or locked in place with the locking button. that
the saw blade is fitted tightly in the saw btade fixing device and that the hexagon screws of the shoe
of the saw are tight! Push down the transparent eye protection.
2. Insert the mains plug into a correctly installed 230volt, 50-hertz socket.
3. Bring the saw up to the object to be cut.
4. Press the on and off switch In order to switch on the machine. For continuous operation the on
and off switch can be locked in place with the locking button. In order to release this, press the on
and off switch as far as possible and then let it go. The locking button will automatically jump back
to the original position.
5. After use the mains plug should be removed from the socket.
NOTE: Do not cut directly into the workpiece with the saw blade, but first drill a corresponding hole
from which to start cutting!
Adjustment for the Bevel Cut
The shoe of the saw can be adjusted as follows on both sides up to an angle of 45°:
1. Remove the mains plug from the socket and ensure that the on and off switch is not locked in
place with the locking button.
2. Loosen (but do not remove) the hexagon screws of the shoe of the saw with the offset hexagon
key provided.
3. Pull the shoe of the saw back slightly and adjust the desired angle according to the scale on the
shoe.
4. If necessary, adjust the guide roller again (see "Adjusting the Guide Roller").
Tighten the hexagon screws of the shoe of the saw again.
5. Tighten the hexagon screws of the shoe of the saw again.
6. For most jobs the graduation of the scale on the shoe of the saw is accurate enough.
However, in the case of very precise angle cuts you should use an angle-measuring device! The
accuracy of the angle can be tested with a test cut into waste material.
7. In order to return the shoe of the saw to the original position, remove the mains plug from the
socket and ensure that the on and off switch is not locked in place with the locking button.
8. Release the hexagon screws of the shoe of the saw.
9. Align the shoe of the saw at an angle of approximately 90° to the saw blade and push it forwards
in the direction of the saw blade. Take care with the hexagon screws of the shoe of the saw. These
must not be covered by the shoe. If they are, pull the shoe back slightly.
10. If necessary, readjust the guide roller (see "Adjusting the Guide Roller") and tighten the hexagon
screws of the shoe of the saw again.
Setting the Number of Strokes
In order tot ensure high quality sawing it is necessary to adapt the number of strokes of the saw
blade to the material which is to be sawn. The correct speed can be set with the regulator (1). The
following table shows the ideal speed for the relevant materials:
4. MAINTENANCE
• The eye protector, air slits and motor housing should be kept as free of dust and dirt as possible.
• Rub off the device with a clean cloth or use compressed air at a low pressure to blow out any dust
or dirt. Excessive amounts of metal dust may result in electricity from the internal components
being conducted on to exposed metal parts!
• if the replacement of the supply cord is necessary, this has to be done by the manufacturer or his
agent in order to avoid a safety hazard.
Cleaning and Care
• Remove the mains plug from the socket and ensure that the on and off switch is not locked in
place with the locking button. For cleaning, use a slightly damp - but not wet -cloth! Do not use any
additional abrasive materials (petrol, turpentine etc) as these may damage the plastic housing! The
use of a mild soap is recommended! Ensure that moisture does not get into the machine! After
cleaning, wipe the device with a dry cloth!
WARNING! This machine produces an electromagnetic field during operation. This field may under
some circumstances interfere with active or passive medical implants. To reduce the risk of serious
or fatal injury, we recommend persons with medical implants to consult their physician and the
medical implant manufacturer before operating this machine.

3
1. SAFETY AND OPERATING INSTRUCTIONS
For your own safety and for the safety of others, please read these instructions carefully before
using this appliance. It will help you understand your product more easily and avoid unnecessary
risks.
Keep this instruction manual in a safe place for future use.
General Safety Rules
WARNING Read all safety warnings and all instructions Failure to follow all warnings and
instructions may result in electric shock, fire and/or serious injury.
Save all warnings and instructions for future reference
The term “power tool” in the warnings refer to your mains operated (corded) power tool or battery
operated (cordless) power tool.
SAVE THESE INSTRUCTIONS
1) Work area
a) Keep work area clean and well lit. Cluttered and dark areas invite accidents.
b) Do not operate power tools in explosive atmospheres, such as in the presence offlammable
liquids, gases or dust. Power tools create sparks which may ignite the
dust or fumes.
c) Keep children and bystanders away while operating a power tool. Distractions cancause you to
lose control.
2) Electrical safety
a) Power tool plugs must match the outlet. Never modify the plug in any way. Do not
use any adapter plugs with earthed (grounded) power tools. Unmodified plugs and matching outlets
will reduce risk of electric shock.
b) Avoid body contact with earthed or grounded surfaces such as pipes, radiators,ranges and
refrigerators. There is an increased risk of electric shock if your body isearthed or grounded.
c) Do not expose power tools to rain or wet conditions. Water entering a power toolwill increase the
risk of electric shock.
d) Do not abuse the cord. Never use the cord for carrying, pulling or unplugging thepower tool. Keep
cord away from heat, oil, sharp edges or moving parts. Damagedor entangled cords increase the
risk of electric shock.
e) When operating a power tool outdoors, use an extension cord suitable for outdoor use. Use
of a cord suitable for outdoor use reduces the risk of electric shock.
3) Personal safety
a) Stay alert, watch what you are doing and use common sense when operating a power tool. Do
not use a power tool while you are tired or under the influence of drugs, alcohol or medication. A
moment of inattention while operating power tools may result in serious personal injury.
b) Use safety equipment. Always wear eye protection. Safety equipment such as dust
mask, non-skid safety shoes, hard hat, or hearing protection used for appropriate conditions will
reduce personal injuries.
c) Avoid accidental starting. Ensure the switch is in the off position before plugging in. Carrying
power tools with your finger on the switch or plugging in power tools that have the switch on invites
accidents.
d) Remove any adjusting key or wrench before turning the power tool on. A wrench or a key left
attached to a rotating part of the power tool may result in personal injury.
e) Do not overreach. Keep proper footing and balance at all times. This enables better control of the
power tool in unexpected situations.
f) Dress properly. Do not wear loose clothing or jewellery. Keep your hair, clothing and gloves away
from moving parts. Loose clothes, jewellery or long hair can be caught in moving parts.
g) If devices are provided for the connection of dust extraction and collectionfacilities, ensure
these are connected and properly used. Use of these devices can reduce dust related hazards.
4) Power tool use and care
a) Do not force the power tool. Use the correct power tool for your application. The correct power
tool will do the job better and safer at the rate for which it was designed.
b) Do not use the power tool if the switch does not turn it on and off. Any power tool that cannot be
controlled with the switch is dangerous and must be repaired.
c) Disconnect the plug from the power source before making any adjustments, changing acces-
sories, or storing power tools. Such preventive safety measures reduce the risk of starting the
power tool accidentally.
d) Store idle power tools out of the reach of children and do not allow persons unfamiliar with the
power tool or these instructions to operate the power tool. Power tools are dangerous in the hands
of untrained users.
e) Maintain power tools. Check for misalignment or binding of moving parts, breakage of parts and
any other condition that may affect the power tools operation. If damaged, have the power tool
repaired before use. Many accidents are caused by poorly maintained power tools.
f) Keep cutting tools sharp and clean. Properly maintained cutting tools with sharp cutting edges
are less likely to bind and are easier to control.
g) Use the power tool, accessories and tool bits etc., in accordance with these instructions and in
the manner intended for the particular type of power tool, taking into account the working condi-
tions and the work to be performed. Use of the power tool for operations different from intended
could result in a hazardous situation.
5) Service
a) Have your power tool serviced by a qualified repair person using only identical replacement parts.
This will ensure that the safety of the power tool is maintained.
Hold power tool by insulated gripping surfaces, when performing an operation where the cutting
accessory may contact hidden wiring or its own cord. Cutting accessory contacting a "live" wire
may make exposed metal parts of the power tool "live" and could give the operator an electric
shock.
2. TECHNICAL DATA
Power: 18 V
No load speed: 0-2500 spm
Stroke length: 25 mm
Max. cutting capacity:
- in wood: 50 mm
- in metal: 8 mm
Pendulum setting: 3 + off
Dual bevel adjustment: 0-45°
Sound level LpA: 82.0 dB (A)
Sound level LwA: 93.0 dB (A)
Vibration:
ah,B = 5,658 m²/s
ah,M = 5,459 m²/s
Includes: punch base plate, chip blower, parallel
guide and laser.
• That the declared vibration total value has been measured in accordance with a standard test
method and may be used for comparing one tool with another;
• That the declared vibration total value may also be used in a preliminary assessment of exposure.
WARNING
• That the vibration emission during actual use of the power tool can differ from the declared total
value depending on the ways in which the tool is used; and
• Of the need to identify safety measures to protect the operator that are based on an estimation of
exposure in the actual conditions of use (taking account of all parts of the operating cycle such as
the times when the tool is switched off and when it is running idle in addition to the trigger time).
3. EXPLANATION OF SYMBOLS
In this manual and/or on the machine the following symbols are used:
In accordance with essential applicable safety standards of European directives
Class II tools symbol
Waste electrical products should not be disposed of with household waste.
Please recycle where facilities exist. Check with your local Authority or retailer
for recycling advice.
Read this manual thoroughly before operating the saw.
This device is to be exclusively for private use! It is not fit for commercial use! Warning: when wor-
king with electrical devices the following prevention and safety instructions are to be observed to
avoid fires, electric shocks and physical injuries!
Inserting the Saw Blade
1. Remove the mains plug from the socket and ensure that the on and off switch is not locked with
the locking button.
2. Push up the transparent eye protection,
3. Loosen the hexagon screws on the saw blade-fixing device with the offset hexagon bar key
supplied, and push the saw blade as far as possible into the fixing device. Ensure that the teeth of
the saw blade are pointing to the front!
4. Slightly tighten the hexagon screws alternately in order to position the saw blade. Then turn, the
screws until they are completely tight.
5. Push the transparent eye protection down again. The spanner can be pushed into the holder for
safekeeping.
Adjusting the Guide Roller
For greater accuracy during sawing, the device 4 is fitted with a guide roller. This roller should be
adjusted in such a way that it touches the back edge of the saw blade during cutting.
• Ensure that the on and off switch is not pressed or locked in place and that the mains plug is not
inserted in the socket!
• Loosen the hexagon screws of the shoe of the saw.
• Push the guide roller forwards until It touches the back edge of the saw blade.
• Tighten the hexagon screws again.
NOTE: If the guide roller axle is oiled occasionally, thie will extend the working life of the guide roller!
One drop of resin-free oil is sufficient!
Initial Operation
1. Ensure that the on and off switch is not pressed or locked in place with the locking button. that
the saw blade is fitted tightly in the saw btade fixing device and that the hexagon screws of the shoe
of the saw are tight! Push down the transparent eye protection.
2. Insert the mains plug into a correctly installed 230volt, 50-hertz socket.
3. Bring the saw up to the object to be cut.
4. Press the on and off switch In order to switch on the machine. For continuous operation the on
and off switch can be locked in place with the locking button. In order to release this, press the on
and off switch as far as possible and then let it go. The locking button will automatically jump back
to the original position.
5. After use the mains plug should be removed from the socket.
NOTE: Do not cut directly into the workpiece with the saw blade, but first drill a corresponding hole
from which to start cutting!
Adjustment for the Bevel Cut
The shoe of the saw can be adjusted as follows on both sides up to an angle of 45°:
1. Remove the mains plug from the socket and ensure that the on and off switch is not locked in
place with the locking button.
2. Loosen (but do not remove) the hexagon screws of the shoe of the saw with the offset hexagon
key provided.
3. Pull the shoe of the saw back slightly and adjust the desired angle according to the scale on the
shoe.
4. If necessary, adjust the guide roller again (see "Adjusting the Guide Roller").
Tighten the hexagon screws of the shoe of the saw again.
5. Tighten the hexagon screws of the shoe of the saw again.
6. For most jobs the graduation of the scale on the shoe of the saw is accurate enough.
However, in the case of very precise angle cuts you should use an angle-measuring device! The
accuracy of the angle can be tested with a test cut into waste material.
7. In order to return the shoe of the saw to the original position, remove the mains plug from the
socket and ensure that the on and off switch is not locked in place with the locking button.
8. Release the hexagon screws of the shoe of the saw.
9. Align the shoe of the saw at an angle of approximately 90° to the saw blade and push it forwards
in the direction of the saw blade. Take care with the hexagon screws of the shoe of the saw. These
must not be covered by the shoe. If they are, pull the shoe back slightly.
10. If necessary, readjust the guide roller (see "Adjusting the Guide Roller") and tighten the hexagon
screws of the shoe of the saw again.
Setting the Number of Strokes
In order tot ensure high quality sawing it is necessary to adapt the number of strokes of the saw
blade to the material which is to be sawn. The correct speed can be set with the regulator (1). The
following table shows the ideal speed for the relevant materials:
4. MAINTENANCE
• The eye protector, air slits and motor housing should be kept as free of dust and dirt as possible.
• Rub off the device with a clean cloth or use compressed air at a low pressure to blow out any dust
or dirt. Excessive amounts of metal dust may result in electricity from the internal components
being conducted on to exposed metal parts!
• if the replacement of the supply cord is necessary, this has to be done by the manufacturer or his
agent in order to avoid a safety hazard.
Cleaning and Care
• Remove the mains plug from the socket and ensure that the on and off switch is not locked in
place with the locking button. For cleaning, use a slightly damp - but not wet -cloth! Do not use any
additional abrasive materials (petrol, turpentine etc) as these may damage the plastic housing! The
use of a mild soap is recommended! Ensure that moisture does not get into the machine! After
cleaning, wipe the device with a dry cloth!
WARNING! This machine produces an electromagnetic field during operation. This field may under
some circumstances interfere with active or passive medical implants. To reduce the risk of serious
or fatal injury, we recommend persons with medical implants to consult their physician and the
medical implant manufacturer before operating this machine.

4
1. SAFETY AND OPERATING INSTRUCTIONS
For your own safety and for the safety of others, please read these instructions carefully before
using this appliance. It will help you understand your product more easily and avoid unnecessary
risks.
Keep this instruction manual in a safe place for future use.
General Safety Rules
WARNING Read all safety warnings and all instructions Failure to follow all warnings and
instructions may result in electric shock, fire and/or serious injury.
Save all warnings and instructions for future reference
The term “power tool” in the warnings refer to your mains operated (corded) power tool or battery
operated (cordless) power tool.
SAVE THESE INSTRUCTIONS
1) Work area
a) Keep work area clean and well lit. Cluttered and dark areas invite accidents.
b) Do not operate power tools in explosive atmospheres, such as in the presence offlammable
liquids, gases or dust. Power tools create sparks which may ignite the
dust or fumes.
c) Keep children and bystanders away while operating a power tool. Distractions cancause you to
lose control.
2) Electrical safety
a) Power tool plugs must match the outlet. Never modify the plug in any way. Do not
use any adapter plugs with earthed (grounded) power tools. Unmodified plugs and matching outlets
will reduce risk of electric shock.
b) Avoid body contact with earthed or grounded surfaces such as pipes, radiators,ranges and
refrigerators. There is an increased risk of electric shock if your body isearthed or grounded.
c) Do not expose power tools to rain or wet conditions. Water entering a power toolwill increase the
risk of electric shock.
d) Do not abuse the cord. Never use the cord for carrying, pulling or unplugging thepower tool. Keep
cord away from heat, oil, sharp edges or moving parts. Damagedor entangled cords increase the
risk of electric shock.
e) When operating a power tool outdoors, use an extension cord suitable for outdoor use. Use
of a cord suitable for outdoor use reduces the risk of electric shock.
3) Personal safety
a) Stay alert, watch what you are doing and use common sense when operating a power tool. Do
not use a power tool while you are tired or under the influence of drugs, alcohol or medication. A
moment of inattention while operating power tools may result in serious personal injury.
b) Use safety equipment. Always wear eye protection. Safety equipment such as dust
mask, non-skid safety shoes, hard hat, or hearing protection used for appropriate conditions will
reduce personal injuries.
c) Avoid accidental starting. Ensure the switch is in the off position before plugging in. Carrying
power tools with your finger on the switch or plugging in power tools that have the switch on invites
accidents.
d) Remove any adjusting key or wrench before turning the power tool on. A wrench or a key left
attached to a rotating part of the power tool may result in personal injury.
e) Do not overreach. Keep proper footing and balance at all times. This enables better control of the
power tool in unexpected situations.
f) Dress properly. Do not wear loose clothing or jewellery. Keep your hair, clothing and gloves away
from moving parts. Loose clothes, jewellery or long hair can be caught in moving parts.
g) If devices are provided for the connection of dust extraction and collectionfacilities, ensure
these are connected and properly used. Use of these devices can reduce dust related hazards.
4) Power tool use and care
a) Do not force the power tool. Use the correct power tool for your application. The correct power
tool will do the job better and safer at the rate for which it was designed.
b) Do not use the power tool if the switch does not turn it on and off. Any power tool that cannot be
controlled with the switch is dangerous and must be repaired.
c) Disconnect the plug from the power source before making any adjustments, changing acces-
sories, or storing power tools. Such preventive safety measures reduce the risk of starting the
power tool accidentally.
d) Store idle power tools out of the reach of children and do not allow persons unfamiliar with the
power tool or these instructions to operate the power tool. Power tools are dangerous in the hands
of untrained users.
e) Maintain power tools. Check for misalignment or binding of moving parts, breakage of parts and
any other condition that may affect the power tools operation. If damaged, have the power tool
repaired before use. Many accidents are caused by poorly maintained power tools.
f) Keep cutting tools sharp and clean. Properly maintained cutting tools with sharp cutting edges
are less likely to bind and are easier to control.
g) Use the power tool, accessories and tool bits etc., in accordance with these instructions and in
the manner intended for the particular type of power tool, taking into account the working condi-
tions and the work to be performed. Use of the power tool for operations different from intended
could result in a hazardous situation.
5) Service
a) Have your power tool serviced by a qualified repair person using only identical replacement parts.
This will ensure that the safety of the power tool is maintained.
Hold power tool by insulated gripping surfaces, when performing an operation where the cutting
accessory may contact hidden wiring or its own cord. Cutting accessory contacting a "live" wire
may make exposed metal parts of the power tool "live" and could give the operator an electric
shock.
2. TECHNICAL DATA
Power: 18 V
No load speed: 0-2500 spm
Stroke length: 25 mm
Max. cutting capacity:
- in wood: 50 mm
- in metal: 8 mm
Pendulum setting: 3 + off
Dual bevel adjustment: 0-45°
• That the declared vibration total value has been measured in accordance with a standard test
method and may be used for comparing one tool with another;
• That the declared vibration total value may also be used in a preliminary assessment of exposure.
WARNING
• That the vibration emission during actual use of the power tool can differ from the declared total
value depending on the ways in which the tool is used; and
• Of the need to identify safety measures to protect the operator that are based on an estimation of
exposure in the actual conditions of use (taking account of all parts of the operating cycle such as
the times when the tool is switched off and when it is running idle in addition to the trigger time).
3. EXPLANATION OF SYMBOLS
In this manual and/or on the machine the following symbols are used:
In accordance with essential applicable safety standards of European directives
Class II tools symbol
Waste electrical products should not be disposed of with household waste.
Please recycle where facilities exist. Check with your local Authority or retailer
for recycling advice.
Read this manual thoroughly before operating the saw.
This device is to be exclusively for private use! It is not fit for commercial use! Warning: when wor-
2
3
4
5
6
1
king with electrical devices the following prevention and safety instructions are to be observed to
avoid fires, electric shocks and physical injuries!
Inserting the Saw Blade
1. Remove the mains plug from the socket and ensure that the on and off switch is not locked with
the locking button.
2. Push up the transparent eye protection,
3. Loosen the hexagon screws on the saw blade-fixing device with the offset hexagon bar key
supplied, and push the saw blade as far as possible into the fixing device. Ensure that the teeth of
the saw blade are pointing to the front!
4. Slightly tighten the hexagon screws alternately in order to position the saw blade. Then turn, the
screws until they are completely tight.
5. Push the transparent eye protection down again. The spanner can be pushed into the holder for
safekeeping.
Adjusting the Guide Roller
For greater accuracy during sawing, the device 4 is fitted with a guide roller. This roller should be
adjusted in such a way that it touches the back edge of the saw blade during cutting.
• Ensure that the on and off switch is not pressed or locked in place and that the mains plug is not
inserted in the socket!
• Loosen the hexagon screws of the shoe of the saw.
• Push the guide roller forwards until It touches the back edge of the saw blade.
• Tighten the hexagon screws again.
NOTE: If the guide roller axle is oiled occasionally, thie will extend the working life of the guide roller!
One drop of resin-free oil is sufficient!
Initial Operation
1. Ensure that the on and off switch is not pressed or locked in place with the locking button. that
the saw blade is fitted tightly in the saw btade fixing device and that the hexagon screws of the shoe
of the saw are tight! Push down the transparent eye protection.
2. Insert the mains plug into a correctly installed 230volt, 50-hertz socket.
3. Bring the saw up to the object to be cut.
4. Press the on and off switch In order to switch on the machine. For continuous operation the on
and off switch can be locked in place with the locking button. In order to release this, press the on
and off switch as far as possible and then let it go. The locking button will automatically jump back
to the original position.
5. After use the mains plug should be removed from the socket.
NOTE: Do not cut directly into the workpiece with the saw blade, but first drill a corresponding hole
from which to start cutting!
Adjustment for the Bevel Cut
The shoe of the saw can be adjusted as follows on both sides up to an angle of 45°:
1. Remove the mains plug from the socket and ensure that the on and off switch is not locked in
place with the locking button.
2. Loosen (but do not remove) the hexagon screws of the shoe of the saw with the offset hexagon
key provided.
3. Pull the shoe of the saw back slightly and adjust the desired angle according to the scale on the
shoe.
1. Eye protection
2. Saw blade fixing device
3. Guide roller
4. Shoe of the saw
5. Holder for offset hexagon bar key
6. On and off switch
4. If necessary, adjust the guide roller again (see "Adjusting the Guide Roller").
Tighten the hexagon screws of the shoe of the saw again.
5. Tighten the hexagon screws of the shoe of the saw again.
6. For most jobs the graduation of the scale on the shoe of the saw is accurate enough.
However, in the case of very precise angle cuts you should use an angle-measuring device! The
accuracy of the angle can be tested with a test cut into waste material.
7. In order to return the shoe of the saw to the original position, remove the mains plug from the
socket and ensure that the on and off switch is not locked in place with the locking button.
8. Release the hexagon screws of the shoe of the saw.
9. Align the shoe of the saw at an angle of approximately 90° to the saw blade and push it forwards
in the direction of the saw blade. Take care with the hexagon screws of the shoe of the saw. These
must not be covered by the shoe. If they are, pull the shoe back slightly.
10. If necessary, readjust the guide roller (see "Adjusting the Guide Roller") and tighten the hexagon
screws of the shoe of the saw again.
Setting the Number of Strokes
In order tot ensure high quality sawing it is necessary to adapt the number of strokes of the saw
blade to the material which is to be sawn. The correct speed can be set with the regulator (1). The
following table shows the ideal speed for the relevant materials:
4. MAINTENANCE
• The eye protector, air slits and motor housing should be kept as free of dust and dirt as possible.
• Rub off the device with a clean cloth or use compressed air at a low pressure to blow out any dust
or dirt. Excessive amounts of metal dust may result in electricity from the internal components
being conducted on to exposed metal parts!
• if the replacement of the supply cord is necessary, this has to be done by the manufacturer or his
agent in order to avoid a safety hazard.
Cleaning and Care
• Remove the mains plug from the socket and ensure that the on and off switch is not locked in
place with the locking button. For cleaning, use a slightly damp - but not wet -cloth! Do not use any
additional abrasive materials (petrol, turpentine etc) as these may damage the plastic housing! The
use of a mild soap is recommended! Ensure that moisture does not get into the machine! After
cleaning, wipe the device with a dry cloth!
WARNING! This machine produces an electromagnetic field during operation. This field may under
some circumstances interfere with active or passive medical implants. To reduce the risk of serious
or fatal injury, we recommend persons with medical implants to consult their physician and the
medical implant manufacturer before operating this machine.

5
1. SAFETY AND OPERATING INSTRUCTIONS
For your own safety and for the safety of others, please read these instructions carefully before
using this appliance. It will help you understand your product more easily and avoid unnecessary
risks.
Keep this instruction manual in a safe place for future use.
General Safety Rules
WARNING Read all safety warnings and all instructions Failure to follow all warnings and
instructions may result in electric shock, fire and/or serious injury.
Save all warnings and instructions for future reference
The term “power tool” in the warnings refer to your mains operated (corded) power tool or battery
operated (cordless) power tool.
SAVE THESE INSTRUCTIONS
1) Work area
a) Keep work area clean and well lit. Cluttered and dark areas invite accidents.
b) Do not operate power tools in explosive atmospheres, such as in the presence offlammable
liquids, gases or dust. Power tools create sparks which may ignite the
dust or fumes.
c) Keep children and bystanders away while operating a power tool. Distractions cancause you to
lose control.
2) Electrical safety
a) Power tool plugs must match the outlet. Never modify the plug in any way. Do not
use any adapter plugs with earthed (grounded) power tools. Unmodified plugs and matching outlets
will reduce risk of electric shock.
b) Avoid body contact with earthed or grounded surfaces such as pipes, radiators,ranges and
refrigerators. There is an increased risk of electric shock if your body isearthed or grounded.
c) Do not expose power tools to rain or wet conditions. Water entering a power toolwill increase the
risk of electric shock.
d) Do not abuse the cord. Never use the cord for carrying, pulling or unplugging thepower tool. Keep
cord away from heat, oil, sharp edges or moving parts. Damagedor entangled cords increase the
risk of electric shock.
e) When operating a power tool outdoors, use an extension cord suitable for outdoor use. Use
of a cord suitable for outdoor use reduces the risk of electric shock.
3) Personal safety
a) Stay alert, watch what you are doing and use common sense when operating a power tool. Do
not use a power tool while you are tired or under the influence of drugs, alcohol or medication. A
moment of inattention while operating power tools may result in serious personal injury.
b) Use safety equipment. Always wear eye protection. Safety equipment such as dust
mask, non-skid safety shoes, hard hat, or hearing protection used for appropriate conditions will
reduce personal injuries.
c) Avoid accidental starting. Ensure the switch is in the off position before plugging in. Carrying
power tools with your finger on the switch or plugging in power tools that have the switch on invites
accidents.
d) Remove any adjusting key or wrench before turning the power tool on. A wrench or a key left
attached to a rotating part of the power tool may result in personal injury.
e) Do not overreach. Keep proper footing and balance at all times. This enables better control of the
power tool in unexpected situations.
f) Dress properly. Do not wear loose clothing or jewellery. Keep your hair, clothing and gloves away
from moving parts. Loose clothes, jewellery or long hair can be caught in moving parts.
g) If devices are provided for the connection of dust extraction and collectionfacilities, ensure
these are connected and properly used. Use of these devices can reduce dust related hazards.
4) Power tool use and care
a) Do not force the power tool. Use the correct power tool for your application. The correct power
tool will do the job better and safer at the rate for which it was designed.
b) Do not use the power tool if the switch does not turn it on and off. Any power tool that cannot be
controlled with the switch is dangerous and must be repaired.
c) Disconnect the plug from the power source before making any adjustments, changing acces-
sories, or storing power tools. Such preventive safety measures reduce the risk of starting the
power tool accidentally.
d) Store idle power tools out of the reach of children and do not allow persons unfamiliar with the
power tool or these instructions to operate the power tool. Power tools are dangerous in the hands
of untrained users.
e) Maintain power tools. Check for misalignment or binding of moving parts, breakage of parts and
any other condition that may affect the power tools operation. If damaged, have the power tool
repaired before use. Many accidents are caused by poorly maintained power tools.
f) Keep cutting tools sharp and clean. Properly maintained cutting tools with sharp cutting edges
are less likely to bind and are easier to control.
g) Use the power tool, accessories and tool bits etc., in accordance with these instructions and in
the manner intended for the particular type of power tool, taking into account the working condi-
tions and the work to be performed. Use of the power tool for operations different from intended
could result in a hazardous situation.
5) Service
a) Have your power tool serviced by a qualified repair person using only identical replacement parts.
This will ensure that the safety of the power tool is maintained.
Hold power tool by insulated gripping surfaces, when performing an operation where the cutting
accessory may contact hidden wiring or its own cord. Cutting accessory contacting a "live" wire
may make exposed metal parts of the power tool "live" and could give the operator an electric
shock.
2. TECHNICAL DATA
Power: 18 V
No load speed: 0-2500 spm
Stroke length: 25 mm
Max. cutting capacity:
- in wood: 50 mm
- in metal: 8 mm
Pendulum setting: 3 + off
Dual bevel adjustment: 0-45°
• That the declared vibration total value has been measured in accordance with a standard test
method and may be used for comparing one tool with another;
• That the declared vibration total value may also be used in a preliminary assessment of exposure.
WARNING
• That the vibration emission during actual use of the power tool can differ from the declared total
value depending on the ways in which the tool is used; and
• Of the need to identify safety measures to protect the operator that are based on an estimation of
exposure in the actual conditions of use (taking account of all parts of the operating cycle such as
the times when the tool is switched off and when it is running idle in addition to the trigger time).
3. EXPLANATION OF SYMBOLS
In this manual and/or on the machine the following symbols are used:
In accordance with essential applicable safety standards of European directives
Class II tools symbol
Waste electrical products should not be disposed of with household waste.
Please recycle where facilities exist. Check with your local Authority or retailer
for recycling advice.
Read this manual thoroughly before operating the saw.
This device is to be exclusively for private use! It is not fit for commercial use! Warning: when wor-
king with electrical devices the following prevention and safety instructions are to be observed to
avoid fires, electric shocks and physical injuries!
Inserting the Saw Blade
1. Remove the mains plug from the socket and ensure that the on and off switch is not locked with
the locking button.
2. Push up the transparent eye protection,
3. Loosen the hexagon screws on the saw blade-fixing device with the offset hexagon bar key
supplied, and push the saw blade as far as possible into the fixing device. Ensure that the teeth of
the saw blade are pointing to the front!
4. Slightly tighten the hexagon screws alternately in order to position the saw blade. Then turn, the
screws until they are completely tight.
5. Push the transparent eye protection down again. The spanner can be pushed into the holder for
safekeeping.
Adjusting the Guide Roller
For greater accuracy during sawing, the device 4 is fitted with a guide roller. This roller should be
adjusted in such a way that it touches the back edge of the saw blade during cutting.
• Ensure that the on and off switch is not pressed or locked in place and that the mains plug is not
inserted in the socket!
• Loosen the hexagon screws of the shoe of the saw.
• Push the guide roller forwards until It touches the back edge of the saw blade.
• Tighten the hexagon screws again.
NOTE: If the guide roller axle is oiled occasionally, thie will extend the working life of the guide roller!
One drop of resin-free oil is sufficient!
Initial Operation
1. Ensure that the on and off switch is not pressed or locked in place with the locking button. that
the saw blade is fitted tightly in the saw btade fixing device and that the hexagon screws of the shoe
of the saw are tight! Push down the transparent eye protection.
2. Insert the mains plug into a correctly installed 230volt, 50-hertz socket.
3. Bring the saw up to the object to be cut.
4. Press the on and off switch In order to switch on the machine. For continuous operation the on
and off switch can be locked in place with the locking button. In order to release this, press the on
and off switch as far as possible and then let it go. The locking button will automatically jump back
to the original position.
5. After use the mains plug should be removed from the socket.
NOTE: Do not cut directly into the workpiece with the saw blade, but first drill a corresponding hole
from which to start cutting!
Adjustment for the Bevel Cut
The shoe of the saw can be adjusted as follows on both sides up to an angle of 45°:
1. Remove the mains plug from the socket and ensure that the on and off switch is not locked in
place with the locking button.
2. Loosen (but do not remove) the hexagon screws of the shoe of the saw with the offset hexagon
key provided.
3. Pull the shoe of the saw back slightly and adjust the desired angle according to the scale on the
shoe.
4. If necessary, adjust the guide roller again (see "Adjusting the Guide Roller").
Tighten the hexagon screws of the shoe of the saw again.
5. Tighten the hexagon screws of the shoe of the saw again.
6. For most jobs the graduation of the scale on the shoe of the saw is accurate enough.
However, in the case of very precise angle cuts you should use an angle-measuring device! The
accuracy of the angle can be tested with a test cut into waste material.
7. In order to return the shoe of the saw to the original position, remove the mains plug from the
socket and ensure that the on and off switch is not locked in place with the locking button.
8. Release the hexagon screws of the shoe of the saw.
9. Align the shoe of the saw at an angle of approximately 90° to the saw blade and push it forwards
in the direction of the saw blade. Take care with the hexagon screws of the shoe of the saw. These
must not be covered by the shoe. If they are, pull the shoe back slightly.
10. If necessary, readjust the guide roller (see "Adjusting the Guide Roller") and tighten the hexagon
screws of the shoe of the saw again.
Setting the Number of Strokes
In order tot ensure high quality sawing it is necessary to adapt the number of strokes of the saw
blade to the material which is to be sawn. The correct speed can be set with the regulator (1). The
following table shows the ideal speed for the relevant materials:
4. MAINTENANCE
• The eye protector, air slits and motor housing should be kept as free of dust and dirt as possible.
• Rub off the device with a clean cloth or use compressed air at a low pressure to blow out any dust
or dirt. Excessive amounts of metal dust may result in electricity from the internal components
being conducted on to exposed metal parts!
• if the replacement of the supply cord is necessary, this has to be done by the manufacturer or his
agent in order to avoid a safety hazard.
Cleaning and Care
• Remove the mains plug from the socket and ensure that the on and off switch is not locked in
place with the locking button. For cleaning, use a slightly damp - but not wet -cloth! Do not use any
additional abrasive materials (petrol, turpentine etc) as these may damage the plastic housing! The
use of a mild soap is recommended! Ensure that moisture does not get into the machine! After
cleaning, wipe the device with a dry cloth!
WARNING! This machine produces an electromagnetic field during operation. This field may under
some circumstances interfere with active or passive medical implants. To reduce the risk of serious
or fatal injury, we recommend persons with medical implants to consult their physician and the
medical implant manufacturer before operating this machine.

6
1. SAFETY AND OPERATING INSTRUCTIONS
For your own safety and for the safety of others, please read these instructions carefully before
using this appliance. It will help you understand your product more easily and avoid unnecessary
risks.
Keep this instruction manual in a safe place for future use.
General Safety Rules
WARNING Read all safety warnings and all instructions Failure to follow all warnings and
instructions may result in electric shock, fire and/or serious injury.
Save all warnings and instructions for future reference
The term “power tool” in the warnings refer to your mains operated (corded) power tool or battery
operated (cordless) power tool.
SAVE THESE INSTRUCTIONS
1) Work area
a) Keep work area clean and well lit. Cluttered and dark areas invite accidents.
b) Do not operate power tools in explosive atmospheres, such as in the presence offlammable
liquids, gases or dust. Power tools create sparks which may ignite the
dust or fumes.
c) Keep children and bystanders away while operating a power tool. Distractions cancause you to
lose control.
2) Electrical safety
a) Power tool plugs must match the outlet. Never modify the plug in any way. Do not
use any adapter plugs with earthed (grounded) power tools. Unmodified plugs and matching outlets
will reduce risk of electric shock.
b) Avoid body contact with earthed or grounded surfaces such as pipes, radiators,ranges and
refrigerators. There is an increased risk of electric shock if your body isearthed or grounded.
c) Do not expose power tools to rain or wet conditions. Water entering a power toolwill increase the
risk of electric shock.
d) Do not abuse the cord. Never use the cord for carrying, pulling or unplugging thepower tool. Keep
cord away from heat, oil, sharp edges or moving parts. Damagedor entangled cords increase the
risk of electric shock.
e) When operating a power tool outdoors, use an extension cord suitable for outdoor use. Use
of a cord suitable for outdoor use reduces the risk of electric shock.
3) Personal safety
a) Stay alert, watch what you are doing and use common sense when operating a power tool. Do
not use a power tool while you are tired or under the influence of drugs, alcohol or medication. A
moment of inattention while operating power tools may result in serious personal injury.
b) Use safety equipment. Always wear eye protection. Safety equipment such as dust
mask, non-skid safety shoes, hard hat, or hearing protection used for appropriate conditions will
reduce personal injuries.
c) Avoid accidental starting. Ensure the switch is in the off position before plugging in. Carrying
power tools with your finger on the switch or plugging in power tools that have the switch on invites
accidents.
d) Remove any adjusting key or wrench before turning the power tool on. A wrench or a key left
attached to a rotating part of the power tool may result in personal injury.
e) Do not overreach. Keep proper footing and balance at all times. This enables better control of the
power tool in unexpected situations.
f) Dress properly. Do not wear loose clothing or jewellery. Keep your hair, clothing and gloves away
from moving parts. Loose clothes, jewellery or long hair can be caught in moving parts.
g) If devices are provided for the connection of dust extraction and collectionfacilities, ensure
these are connected and properly used. Use of these devices can reduce dust related hazards.
4) Power tool use and care
a) Do not force the power tool. Use the correct power tool for your application. The correct power
tool will do the job better and safer at the rate for which it was designed.
b) Do not use the power tool if the switch does not turn it on and off. Any power tool that cannot be
controlled with the switch is dangerous and must be repaired.
c) Disconnect the plug from the power source before making any adjustments, changing acces-
sories, or storing power tools. Such preventive safety measures reduce the risk of starting the
power tool accidentally.
d) Store idle power tools out of the reach of children and do not allow persons unfamiliar with the
power tool or these instructions to operate the power tool. Power tools are dangerous in the hands
of untrained users.
e) Maintain power tools. Check for misalignment or binding of moving parts, breakage of parts and
any other condition that may affect the power tools operation. If damaged, have the power tool
repaired before use. Many accidents are caused by poorly maintained power tools.
f) Keep cutting tools sharp and clean. Properly maintained cutting tools with sharp cutting edges
are less likely to bind and are easier to control.
g) Use the power tool, accessories and tool bits etc., in accordance with these instructions and in
the manner intended for the particular type of power tool, taking into account the working condi-
tions and the work to be performed. Use of the power tool for operations different from intended
could result in a hazardous situation.
5) Service
a) Have your power tool serviced by a qualified repair person using only identical replacement parts.
This will ensure that the safety of the power tool is maintained.
Hold power tool by insulated gripping surfaces, when performing an operation where the cutting
accessory may contact hidden wiring or its own cord. Cutting accessory contacting a "live" wire
may make exposed metal parts of the power tool "live" and could give the operator an electric
shock.
2. TECHNICAL DATA
Power: 18 V
No load speed: 0-2500 spm
Stroke length: 25 mm
Max. cutting capacity:
- in wood: 50 mm
- in metal: 8 mm
Pendulum setting: 3 + off
Dual bevel adjustment: 0-45°
• That the declared vibration total value has been measured in accordance with a standard test
method and may be used for comparing one tool with another;
• That the declared vibration total value may also be used in a preliminary assessment of exposure.
WARNING
• That the vibration emission during actual use of the power tool can differ from the declared total
value depending on the ways in which the tool is used; and
• Of the need to identify safety measures to protect the operator that are based on an estimation of
exposure in the actual conditions of use (taking account of all parts of the operating cycle such as
the times when the tool is switched off and when it is running idle in addition to the trigger time).
3. EXPLANATION OF SYMBOLS
In this manual and/or on the machine the following symbols are used:
In accordance with essential applicable safety standards of European directives
Class II tools symbol
Waste electrical products should not be disposed of with household waste.
Please recycle where facilities exist. Check with your local Authority or retailer
for recycling advice.
Read this manual thoroughly before operating the saw.
This device is to be exclusively for private use! It is not fit for commercial use! Warning: when wor-
king with electrical devices the following prevention and safety instructions are to be observed to
avoid fires, electric shocks and physical injuries!
Inserting the Saw Blade
1. Remove the mains plug from the socket and ensure that the on and off switch is not locked with
the locking button.
2. Push up the transparent eye protection,
3. Loosen the hexagon screws on the saw blade-fixing device with the offset hexagon bar key
supplied, and push the saw blade as far as possible into the fixing device. Ensure that the teeth of
the saw blade are pointing to the front!
4. Slightly tighten the hexagon screws alternately in order to position the saw blade. Then turn, the
screws until they are completely tight.
5. Push the transparent eye protection down again. The spanner can be pushed into the holder for
safekeeping.
Adjusting the Guide Roller
For greater accuracy during sawing, the device 4 is fitted with a guide roller. This roller should be
adjusted in such a way that it touches the back edge of the saw blade during cutting.
• Ensure that the on and off switch is not pressed or locked in place and that the mains plug is not
inserted in the socket!
• Loosen the hexagon screws of the shoe of the saw.
• Push the guide roller forwards until It touches the back edge of the saw blade.
• Tighten the hexagon screws again.
NOTE: If the guide roller axle is oiled occasionally, thie will extend the working life of the guide roller!
One drop of resin-free oil is sufficient!
Initial Operation
1. Ensure that the on and off switch is not pressed or locked in place with the locking button. that
the saw blade is fitted tightly in the saw btade fixing device and that the hexagon screws of the shoe
of the saw are tight! Push down the transparent eye protection.
2. Insert the mains plug into a correctly installed 230volt, 50-hertz socket.
3. Bring the saw up to the object to be cut.
4. Press the on and off switch In order to switch on the machine. For continuous operation the on
and off switch can be locked in place with the locking button. In order to release this, press the on
and off switch as far as possible and then let it go. The locking button will automatically jump back
to the original position.
5. After use the mains plug should be removed from the socket.
NOTE: Do not cut directly into the workpiece with the saw blade, but first drill a corresponding hole
from which to start cutting!
Adjustment for the Bevel Cut
The shoe of the saw can be adjusted as follows on both sides up to an angle of 45°:
1. Remove the mains plug from the socket and ensure that the on and off switch is not locked in
place with the locking button.
2. Loosen (but do not remove) the hexagon screws of the shoe of the saw with the offset hexagon
key provided.
3. Pull the shoe of the saw back slightly and adjust the desired angle according to the scale on the
shoe.
4. If necessary, adjust the guide roller again (see "Adjusting the Guide Roller").
Tighten the hexagon screws of the shoe of the saw again.
5. Tighten the hexagon screws of the shoe of the saw again.
6. For most jobs the graduation of the scale on the shoe of the saw is accurate enough.
However, in the case of very precise angle cuts you should use an angle-measuring device! The
accuracy of the angle can be tested with a test cut into waste material.
7. In order to return the shoe of the saw to the original position, remove the mains plug from the
socket and ensure that the on and off switch is not locked in place with the locking button.
8. Release the hexagon screws of the shoe of the saw.
9. Align the shoe of the saw at an angle of approximately 90° to the saw blade and push it forwards
in the direction of the saw blade. Take care with the hexagon screws of the shoe of the saw. These
must not be covered by the shoe. If they are, pull the shoe back slightly.
10. If necessary, readjust the guide roller (see "Adjusting the Guide Roller") and tighten the hexagon
screws of the shoe of the saw again.
Setting the Number of Strokes
In order tot ensure high quality sawing it is necessary to adapt the number of strokes of the saw
blade to the material which is to be sawn. The correct speed can be set with the regulator (1). The
following table shows the ideal speed for the relevant materials:
4. MAINTENANCE
• The eye protector, air slits and motor housing should be kept as free of dust and dirt as possible.
• Rub off the device with a clean cloth or use compressed air at a low pressure to blow out any dust
or dirt. Excessive amounts of metal dust may result in electricity from the internal components
being conducted on to exposed metal parts!
• if the replacement of the supply cord is necessary, this has to be done by the manufacturer or his
agent in order to avoid a safety hazard.
Cleaning and Care
• Remove the mains plug from the socket and ensure that the on and off switch is not locked in
place with the locking button. For cleaning, use a slightly damp - but not wet -cloth! Do not use any
additional abrasive materials (petrol, turpentine etc) as these may damage the plastic housing! The
use of a mild soap is recommended! Ensure that moisture does not get into the machine! After
cleaning, wipe the device with a dry cloth!
WARNING! This machine produces an electromagnetic field during operation. This field may under
some circumstances interfere with active or passive medical implants. To reduce the risk of serious
or fatal injury, we recommend persons with medical implants to consult their physician and the
medical implant manufacturer before operating this machine.
Material
Speed
Wood
high
Metal
low
PVC, Ceramics
medium

8
1. INSTRUCCIONES DE SEGURIDAD Y OPERACIÓN
Por su propia seguridad y la de los demás, por favor lea estas instrucciones cuidadosamente antes
de utilizar el dispositivo. Éste lo ayudara a entender su producto más fácilmente y evitará riesgos
innecesarios.
Mantenga este manual de instrucciones en un lugar seguro para uso futuro.
Reglas generales de seguridad
ADVERTENCIA Lea toda las instrucciones. El incumplimiento de las siguientes instrucciones puede
provocar descargas eléctricas, incendios y / o lesiones graves.
Guarde todas las advertencias e instrucciones para futuras referencias. El término "herramienta
eléctrica" en las advertencias hace referencia a su máquina (con cable) o con baterías (sin cable).
GUARDE ESTAS INSTRUCCIONES
1) Área de trabajo
a) Mantenga el área de trabajo limpia y bien iluminada. Las áreas desordenadas u oscuras pueden
provocar accidentes.
b) No opere herramientas eléctricas en atmósferas explosivas, como en la presencia de líquidos
inflamables, gases o polvos. Las herramientas eléctricas producen chispas que pueden encender el
polvo o los vapores.
c) Mantenga a los niños y transeúntes alejados mientras opera la herramienta eléctrica. Las distrac-
ciones pueden hacer que pierda el control.
2) Seguridad eléctrica
a) Nunca modifique el enchufe de ninguna manera. No use enchufes adaptadores con herramientas
eléctricas conectadas a tierra. Los enchufes no modificados y las tomas correspondientes reduci-
rán el riesgo de descarga eléctrica.
b) Evite el contacto del cuerpo con superficies puestas a tierra o puestas a tierra, como tuberías,
radiadores, estufas y refrigeradores. Existe un mayor riesgo de descarga eléctrica si su cuerpo está
conectado a tierra o a tierra.
c) No exponga las herramientas eléctricas a la lluvia ni a las condiciones de humedad. El agua que
ingresa a una herramienta eléctrica aumentará el riesgo de descarga eléctrica.
d) No abuse del cable. Nunca use el cable para transportar, tirar o desenchufar la herramienta de
potencia. Mantenga el cable alejado del calor, aceite, bordes afilados o partes móviles. Los cables
dañados o enredados aumentan el riesgo de descarga eléctrica.
e) Al operar una herramienta eléctrica en exteriores, use un cable de extensión adecuado para uso
en exteriores. El uso de un cable adecuado para uso en exteriores reduce el riesgo de descarga
eléctrica.
3) Seguridad personal
a) Manténgase alerta, observe lo que está haciendo y use el sentido común cuando utilice una
herramienta eléctrica. No use una herramienta eléctrica mientras esté cansado o bajo la influencia
de drogas, alcohol o medicamentos. Un momento de falta de atención mientras usa herramientas
eléctricas puede ocasionar lesiones personales graves.
b) Usar equipo de seguridad. Siempre use protección para los ojos. El equipo de seguridad como la
máscara contra el polvo, zapatos de seguridad, antideslizantes, casco o protección auditiva utiliza-
dos para las condiciones adecuadas reducirá las lesiones personales.
c) Evite el arranque accidental. Asegúrese de que el interruptor esté en la posición de apagado
antes de enchufarlo. Llevar herramientas eléctricas con el dedo en el interruptor o enchufar las
herramientas eléctricas que tienen el interruptor encendido invita a accidentes.
d) Retire cualquier llave de ajuste o llave antes de encender la herramienta eléctrica. Una llave
dejada unida a una parte giratoria de la herramienta eléctrica puede ocasionar lesiones personales.
e) No se exceda. Mantenga la postura y el equilibrio en todo momento. Esto permite un mejor
control de la herramienta eléctrica en situaciones inesperadas.
f) Vístase apropiadamente. No use ropa suelta o joyas. Mantenga el cabello, la ropa y los guantes
alejados de las piezas móviles. La ropa suelta, las joyas o el pelo largo pueden quedar atrapados en
las piezas móviles.
g) Si se proporcionan dispositivos para la conexión de las instalaciones de extracción y recolección
de polvo, asegúrese de que estén conectados y se usen correctamente. El uso de estos dispositi-
vos puede reducir los riesgos relacionados con el polvo.
4) Uso y cuidado de la herramienta eléctrica
a) No fuerce la herramienta eléctrica. Use la herramienta eléctrica correcta para su aplicación. La
herramienta eléctrica correcta hará el trabajo mejor y más seguro a la velocidad para la que fue
diseñada.
b) No use la herramienta eléctrica si el interruptor no la enciende y apaga. Cualquier herramienta
eléctrica que no pueda controlarse con el interruptor es peligrosa y debe repararse.
c) Desconecte el enchufe de la fuente de alimentación antes de hacer cualquier ajuste, cambio de
accesorios o almacenamiento de herramientas eléctricas. Dichas medidas preventivas de seguri-
dad reducen el riesgo de iniciar la herramienta eléctrica accidentalmente.
d) Guarde las herramientas eléctricas inactivas fuera del alcance de los niños y no permita que las
personas que no estén familiarizadas con la herramienta eléctrica o estas instrucciones operen la
herramienta eléctrica. Las herramientas eléctricas son peligrosas en manos de usuarios no entrena-
dos.
e) Mantener herramientas eléctricas. Compruebe si hay desalineación o atascamiento de piezas
móviles, roturas de piezas y cualquier otra condición que pueda afectar el funcionamiento de las
herramientas eléctricas. Si está dañada, haga reparar la herramienta eléctrica antes de usarla.
Muchos accidentes son causados por herramientas eléctricas mal mantenidas.
f) Mantenga las herramientas de corte, afiladas y limpias. Las herramientas de corte correctamente
mantenidas con bordes de corte afilados tienen menos probabilidades de atascarse y son más
fáciles de controlar.
g) Utilice la herramienta eléctrica, los accesorios y los bits de la herramienta, etc., de acuerdo con
estas instrucciones y de la manera prevista para el tipo particular de herramienta eléctrica, tenien-
do en cuenta las condiciones de trabajo y el trabajo que se realizará. El uso de la herramienta
eléctrica para operaciones diferentes de las previstas podría dar como resultado una situación
peligrosa.
5) Servicio
a) Haga reparar su herramienta eléctrica por un técnico de reparación calificado que use solo
repuestos idénticos. Esto asegurará que se mantenga la seguridad de la herramienta eléctrica.
Sostenga la herramienta eléctrica por las superficies de agarre aisladas, cuando realice una opera-
ción donde el accesorio de corte pueda entrar en contacto con un cableado oculto o con su propio
cable. El accesorio de corte que entra en contacto con un cable "activo" puede hacer que las
partes metálicas expuestas de la herramienta "vivan" y puedan provocar una descarga eléctrica al
operador.
2. ESPECIFICACIÓN TÉCNICA
Potencia: 18 V
Velocidad sin carga: 0-2500 spm
Longitud de golpe: 25 mm.
Max. capacidad de corte:
- En madera: 50 mm.
- En metal: 8 mm.
Ajuste del péndulo: 3 + apagado
Ajuste biselado dual: 0-45 °
Nivel de sonido LpA: 82.0 dB (A)
Nivel de sonido LwA: 93.0 dB (A)
Vibración:
ah,B = 5,658 m²/s
ah,M = 5,459 m²/s
Incluye: placa base punzonadora, soplador de viruta, guía paralela y láser.
• el valor total de la vibración declarada ha sido medido de acuerdo con un
método de prueba estándar y se puede usar para comparar una herramienta con otra;
• el valor total de la vibración declarada también se puede usar en una evaluación preliminar de la
exposición.
Advertencia:
• La emisión de vibraciones durante el uso real de la herramienta eléctrica puede diferir del valor
total declarado según las formas en que se utiliza la herramienta; y la necesidad de identificar
medidas de seguridad para proteger al operador que se basen en una estimación de la exposición
en las condiciones reales de uso (teniendo en cuenta todas las partes del ciclo operativo, como los
momentos en que se apaga la herramienta y cuándo funcionando en ralentí además del tiempo de
disparo).
4. MANTENIMIENTO
• El protector ocular, las ranuras de aire y la carcasa del motor deben mantenerse libres de polvo y
suciedad.
• Frote el dispositivo con un paño limpio o use aire comprimido a baja presión para eliminar el polvo
o la suciedad. Las cantidades excesivas de polvo de metal pueden provocar que la electricidad
proveniente de los componentes internos se conduzca a las partes metálicas expuestas!
• si es necesario reemplazar el cable de suministro, esto debe hacerlo el fabricante o su agente
para evitar riesgos de seguridad.
Limpieza y cuidado
• Retire el enchufe de la toma de corriente y asegúrese de que el interruptor de encendido y apaga-
do no esté bloqueado con el botón de bloqueo. Para la limpieza, use una tela ligeramente húmeda,
¡pero no mojada! No use materiales abrasivos adicionales (gasolina, trementina, etc.) ya que
pueden dañar la carcasa de plástico. ¡Se recomienda el uso de un jabón suave! ¡Asegúrate de que
no entre humedad en la máquina! Después de limpiar, limpie el dispositivo con un paño seco!
ADVERTENCIA!
Esta máquina produce un campo electromagnético durante la operación. Este campo puede, en
algunas circunstancias, interferir con implantes médicos activos o pasivos. Para reducir el riesgo de
lesiones graves o fatales, recomendamos a las personas con implantes médicos que consulten a su
médico y al fabricante del implante médico antes de operar esta máquina.
2. Inserte el enchufe de red en una toma de corriente de 230 voltios y 50 hertzios correctamente
instalada.
3. Acerque la sierra al objeto que va a cortar.
4. Presione el interruptor de encendido y apagado para encender la máquina. Para un funciona-
miento continuo, el interruptor de encendido y apagado puede bloquearse en su lugar con el botón
de bloqueo. Para liberar esto, presione el interruptor de encendido y apagado tanto como sea
posible y luego suéltelo. El botón de bloqueo saltará automáticamente a la posición original.
5. Después del uso, el enchufe de la red eléctrica debe quitarse del enchufe.
NOTA: No corte directamente en la pieza de trabajo con la hoja de la sierra, sino primero taladre un
orificio correspondiente desde el cual comenzar a cortar!
Ajuste para el corte de bisel
El pie de la sierra se puede ajustar de la siguiente manera en ambos lados hasta un ángulo de 45°:
1. Retire el enchufe de la toma de corriente y asegúrese de que el interruptor de encendido y apaga-
do no esté bloqueado con el botón de bloqueo.
2. Afloje (pero no quite) los tornillos hexagonales del pie de la sierra con la llave hexagonal compen-
sada provista.
3. Tire ligeramente hacia atrás del pie de la sierra y ajuste el ángulo deseado de acuerdo con la
escala del mismo.
4. Si es necesario, ajuste el rodillo guía nuevamente (consulte "Ajuste del rodillo guía").
5. Apriete los tornillos hexagonales del pie de la sierra nuevamente.
6. Para la mayoría de los trabajos, la graduación de la escala en el pie de la sierra es lo suficiente-
mente precisa.
Sin embargo, en el caso de cortes de ángulos muy precisos, debe utilizar un dispositivo de medi-
ción de ángulos. La precisión del ángulo se puede probar con un corte de prueba en material de
desecho.
7. Para volver a colocar el pie de la sierra en su posición original, retire el enchufe de la toma de
corriente y asegúrese de que el interruptor de encendido y apagado no esté bloqueado con el
botón de bloqueo.
8. Suelte los tornillos hexagonales del pie de la sierra.
9. Alinee el pie de la sierra en un ángulo de aproximadamente 90 ° con respecto a la hoja de la
sierra y empújelo hacia adelante en la dirección de la hoja de la sierra. Tenga cuidado con los
tornillos hexagonales del pie de la sierra. Estos no deben ser cubiertos por el mismo. Si lo son, tire
del pie un poco hacia atrás.
10. Si es necesario, vuelva a ajustar el rodillo de guía (consulte "Ajuste del rodillo de guía") y vuelva
a apretar los tornillos hexagonales del pie de la sierra.
Establecer el número de golpes
Para garantizar un aserrado de alta calidad, es necesario adaptar el número de golpes de la hoja de
sierra al material que se va a cortar. La velocidad correcta se puede configurar con el regulador (1).
La siguiente tabla muestra la velocidad ideal para los materiales relevantes:
En este manual y / o en la máquina, se utilizan los siguientes símbolos:
De acuerdo con las normas de seguridad esenciales aplicables de las directivas europeas
Símbolo de herramientas de Clase II
Los productos eléctricos usados no se deben tirar con la basura doméstica.
Por favor, recicle en las instalaciones correspondientes.
Consulte con su autoridad local o minorista para obtener consejos de reciclaje.
Lea este manual completamente antes de operar la sierra.
¡Este dispositivo debe ser exclusivamente para uso privado! ¡No es apto para uso comercial! Adver-
tencia: cuando se trabaja con dispositivos eléctricos, se deben observar las siguientes instruccio-
nes de prevención y seguridad para evitar incendios, descargas eléctricas y lesiones físicas!
Insertar la hoja de sierra
1. Retire el enchufe de la toma de corriente y asegúrese de que el interruptor de encendido y apaga-
do no esté bloqueado con el botón de bloqueo.
2. Empuje hacia arriba la protección ocular transparente,
3. Afloje los tornillos hexagonales en el dispositivo de fijación de la hoja de sierra con la llave de
barra hexagonal compensada suministrada, y empuje la hoja de sierra lo más posible dentro del
dispositivo de fijación. ¡Asegúrese de que los dientes de la hoja de sierra estén apuntando hacia el
frente!
4. Apriete ligeramente los tornillos hexagonales alternativamente para colocar la hoja de la sierra.
Luego gire los tornillos hasta que estén completamente apretados.
5. Empuje la protección ocular transparente hacia abajo nuevamente. La llave de tuercas se puede
empujar hacia el soporte para su custodia.
Ajuste del rodillo guía
Para una mayor precisión durante el aserrado, el dispositivo 4 está equipado con un rodillo de guía.
Este rodillo debe ajustarse de manera que toque el borde posterior de la hoja de sierra durante el
corte.
• Asegúrese de que el interruptor de encendido y apagado no esté presionado o bloqueado en su
lugar y que el enchufe de la red eléctrica no esté insertado en el tomacorriente!
• Afloje los tornillos hexagonales de la zapatilla de la sierra.
• Empuje el rodillo de guía hacia adelante hasta que toque el borde posterior de la hoja de sierra.
• Apriete los tornillos hexagonales de nuevo.
NOTA: ¡Si el eje del rodillo de guía se engrasa ocasionalmente, esto prolongará la vida útil del rodillo
de guía! Una gota de aceite libre de resina es suficiente!
Operación inicial
1. Asegúrese de que el interruptor de encendido y apagado no esté presionado o bloqueado en su
lugar con el botón de bloqueo. ¡que la hoja de sierra esté ajustada firmemente en el dispositivo de
fijación de la sierra y que los tornillos hexagonales del pie de la sierra estén apretados! Empuje
hacia abajo la protección ocular transparente.

1. INSTRUCCIONES DE SEGURIDAD Y OPERACIÓN
Por su propia seguridad y la de los demás, por favor lea estas instrucciones cuidadosamente antes
de utilizar el dispositivo. Éste lo ayudara a entender su producto más fácilmente y evitará riesgos
innecesarios.
Mantenga este manual de instrucciones en un lugar seguro para uso futuro.
Reglas generales de seguridad
ADVERTENCIA Lea toda las instrucciones. El incumplimiento de las siguientes instrucciones puede
provocar descargas eléctricas, incendios y / o lesiones graves.
Guarde todas las advertencias e instrucciones para futuras referencias. El término "herramienta
eléctrica" en las advertencias hace referencia a su máquina (con cable) o con baterías (sin cable).
GUARDE ESTAS INSTRUCCIONES
1) Área de trabajo
a) Mantenga el área de trabajo limpia y bien iluminada. Las áreas desordenadas u oscuras pueden
provocar accidentes.
b) No opere herramientas eléctricas en atmósferas explosivas, como en la presencia de líquidos
inflamables, gases o polvos. Las herramientas eléctricas producen chispas que pueden encender el
polvo o los vapores.
c) Mantenga a los niños y transeúntes alejados mientras opera la herramienta eléctrica. Las distrac-
ciones pueden hacer que pierda el control.
2) Seguridad eléctrica
a) Nunca modifique el enchufe de ninguna manera. No use enchufes adaptadores con herramientas
eléctricas conectadas a tierra. Los enchufes no modificados y las tomas correspondientes reduci-
rán el riesgo de descarga eléctrica.
b) Evite el contacto del cuerpo con superficies puestas a tierra o puestas a tierra, como tuberías,
radiadores, estufas y refrigeradores. Existe un mayor riesgo de descarga eléctrica si su cuerpo está
conectado a tierra o a tierra.
c) No exponga las herramientas eléctricas a la lluvia ni a las condiciones de humedad. El agua que
ingresa a una herramienta eléctrica aumentará el riesgo de descarga eléctrica.
d) No abuse del cable. Nunca use el cable para transportar, tirar o desenchufar la herramienta de
potencia. Mantenga el cable alejado del calor, aceite, bordes afilados o partes móviles. Los cables
dañados o enredados aumentan el riesgo de descarga eléctrica.
e) Al operar una herramienta eléctrica en exteriores, use un cable de extensión adecuado para uso
en exteriores. El uso de un cable adecuado para uso en exteriores reduce el riesgo de descarga
eléctrica.
3) Seguridad personal
a) Manténgase alerta, observe lo que está haciendo y use el sentido común cuando utilice una
herramienta eléctrica. No use una herramienta eléctrica mientras esté cansado o bajo la influencia
de drogas, alcohol o medicamentos. Un momento de falta de atención mientras usa herramientas
eléctricas puede ocasionar lesiones personales graves.
b) Usar equipo de seguridad. Siempre use protección para los ojos. El equipo de seguridad como la
máscara contra el polvo, zapatos de seguridad, antideslizantes, casco o protección auditiva utiliza-
9
dos para las condiciones adecuadas reducirá las lesiones personales.
c) Evite el arranque accidental. Asegúrese de que el interruptor esté en la posición de apagado
antes de enchufarlo. Llevar herramientas eléctricas con el dedo en el interruptor o enchufar las
herramientas eléctricas que tienen el interruptor encendido invita a accidentes.
d) Retire cualquier llave de ajuste o llave antes de encender la herramienta eléctrica. Una llave
dejada unida a una parte giratoria de la herramienta eléctrica puede ocasionar lesiones personales.
e) No se exceda. Mantenga la postura y el equilibrio en todo momento. Esto permite un mejor
control de la herramienta eléctrica en situaciones inesperadas.
f) Vístase apropiadamente. No use ropa suelta o joyas. Mantenga el cabello, la ropa y los guantes
alejados de las piezas móviles. La ropa suelta, las joyas o el pelo largo pueden quedar atrapados en
las piezas móviles.
g) Si se proporcionan dispositivos para la conexión de las instalaciones de extracción y recolección
de polvo, asegúrese de que estén conectados y se usen correctamente. El uso de estos dispositi-
vos puede reducir los riesgos relacionados con el polvo.
4) Uso y cuidado de la herramienta eléctrica
a) No fuerce la herramienta eléctrica. Use la herramienta eléctrica correcta para su aplicación. La
herramienta eléctrica correcta hará el trabajo mejor y más seguro a la velocidad para la que fue
diseñada.
b) No use la herramienta eléctrica si el interruptor no la enciende y apaga. Cualquier herramienta
eléctrica que no pueda controlarse con el interruptor es peligrosa y debe repararse.
c) Desconecte el enchufe de la fuente de alimentación antes de hacer cualquier ajuste, cambio de
accesorios o almacenamiento de herramientas eléctricas. Dichas medidas preventivas de seguri-
dad reducen el riesgo de iniciar la herramienta eléctrica accidentalmente.
d) Guarde las herramientas eléctricas inactivas fuera del alcance de los niños y no permita que las
personas que no estén familiarizadas con la herramienta eléctrica o estas instrucciones operen la
herramienta eléctrica. Las herramientas eléctricas son peligrosas en manos de usuarios no entrena-
dos.
e) Mantener herramientas eléctricas. Compruebe si hay desalineación o atascamiento de piezas
móviles, roturas de piezas y cualquier otra condición que pueda afectar el funcionamiento de las
herramientas eléctricas. Si está dañada, haga reparar la herramienta eléctrica antes de usarla.
Muchos accidentes son causados por herramientas eléctricas mal mantenidas.
f) Mantenga las herramientas de corte, afiladas y limpias. Las herramientas de corte correctamente
mantenidas con bordes de corte afilados tienen menos probabilidades de atascarse y son más
fáciles de controlar.
g) Utilice la herramienta eléctrica, los accesorios y los bits de la herramienta, etc., de acuerdo con
estas instrucciones y de la manera prevista para el tipo particular de herramienta eléctrica, tenien-
do en cuenta las condiciones de trabajo y el trabajo que se realizará. El uso de la herramienta
eléctrica para operaciones diferentes de las previstas podría dar como resultado una situación
peligrosa.
5) Servicio
a) Haga reparar su herramienta eléctrica por un técnico de reparación calificado que use solo
repuestos idénticos. Esto asegurará que se mantenga la seguridad de la herramienta eléctrica.
Sostenga la herramienta eléctrica por las superficies de agarre aisladas, cuando realice una opera-
ción donde el accesorio de corte pueda entrar en contacto con un cableado oculto o con su propio
cable. El accesorio de corte que entra en contacto con un cable "activo" puede hacer que las
partes metálicas expuestas de la herramienta "vivan" y puedan provocar una descarga eléctrica al
operador.
2. ESPECIFICACIÓN TÉCNICA
Potencia: 18 V
Velocidad sin carga: 0-2500 spm
Longitud de golpe: 25 mm.
Max. capacidad de corte:
- En madera: 50 mm.
- En metal: 8 mm.
Ajuste del péndulo: 3 + apagado
Ajuste biselado dual: 0-45 °
Nivel de sonido LpA: 82.0 dB (A)
Nivel de sonido LwA: 93.0 dB (A)
Vibración:
ah,B = 5,658 m²/s
ah,M = 5,459 m²/s
Incluye: placa base punzonadora, soplador de viruta, guía paralela y láser.
• el valor total de la vibración declarada ha sido medido de acuerdo con un
método de prueba estándar y se puede usar para comparar una herramienta con otra;
• el valor total de la vibración declarada también se puede usar en una evaluación preliminar de la
exposición.
Advertencia:
• La emisión de vibraciones durante el uso real de la herramienta eléctrica puede diferir del valor
total declarado según las formas en que se utiliza la herramienta; y la necesidad de identificar
medidas de seguridad para proteger al operador que se basen en una estimación de la exposición
en las condiciones reales de uso (teniendo en cuenta todas las partes del ciclo operativo, como los
momentos en que se apaga la herramienta y cuándo funcionando en ralentí además del tiempo de
disparo).
4. MANTENIMIENTO
• El protector ocular, las ranuras de aire y la carcasa del motor deben mantenerse libres de polvo y
suciedad.
• Frote el dispositivo con un paño limpio o use aire comprimido a baja presión para eliminar el polvo
o la suciedad. Las cantidades excesivas de polvo de metal pueden provocar que la electricidad
proveniente de los componentes internos se conduzca a las partes metálicas expuestas!
• si es necesario reemplazar el cable de suministro, esto debe hacerlo el fabricante o su agente
para evitar riesgos de seguridad.
Limpieza y cuidado
• Retire el enchufe de la toma de corriente y asegúrese de que el interruptor de encendido y apaga-
do no esté bloqueado con el botón de bloqueo. Para la limpieza, use una tela ligeramente húmeda,
¡pero no mojada! No use materiales abrasivos adicionales (gasolina, trementina, etc.) ya que
pueden dañar la carcasa de plástico. ¡Se recomienda el uso de un jabón suave! ¡Asegúrate de que
no entre humedad en la máquina! Después de limpiar, limpie el dispositivo con un paño seco!
ADVERTENCIA!
Esta máquina produce un campo electromagnético durante la operación. Este campo puede, en
algunas circunstancias, interferir con implantes médicos activos o pasivos. Para reducir el riesgo de
lesiones graves o fatales, recomendamos a las personas con implantes médicos que consulten a su
médico y al fabricante del implante médico antes de operar esta máquina.
2. Inserte el enchufe de red en una toma de corriente de 230 voltios y 50 hertzios correctamente
instalada.
3. Acerque la sierra al objeto que va a cortar.
4. Presione el interruptor de encendido y apagado para encender la máquina. Para un funciona-
miento continuo, el interruptor de encendido y apagado puede bloquearse en su lugar con el botón
de bloqueo. Para liberar esto, presione el interruptor de encendido y apagado tanto como sea
posible y luego suéltelo. El botón de bloqueo saltará automáticamente a la posición original.
5. Después del uso, el enchufe de la red eléctrica debe quitarse del enchufe.
NOTA: No corte directamente en la pieza de trabajo con la hoja de la sierra, sino primero taladre un
orificio correspondiente desde el cual comenzar a cortar!
Ajuste para el corte de bisel
El pie de la sierra se puede ajustar de la siguiente manera en ambos lados hasta un ángulo de 45°:
1. Retire el enchufe de la toma de corriente y asegúrese de que el interruptor de encendido y apaga-
do no esté bloqueado con el botón de bloqueo.
2. Afloje (pero no quite) los tornillos hexagonales del pie de la sierra con la llave hexagonal compen-
sada provista.
3. Tire ligeramente hacia atrás del pie de la sierra y ajuste el ángulo deseado de acuerdo con la
escala del mismo.
4. Si es necesario, ajuste el rodillo guía nuevamente (consulte "Ajuste del rodillo guía").
5. Apriete los tornillos hexagonales del pie de la sierra nuevamente.
6. Para la mayoría de los trabajos, la graduación de la escala en el pie de la sierra es lo suficiente-
mente precisa.
Sin embargo, en el caso de cortes de ángulos muy precisos, debe utilizar un dispositivo de medi-
ción de ángulos. La precisión del ángulo se puede probar con un corte de prueba en material de
desecho.
7. Para volver a colocar el pie de la sierra en su posición original, retire el enchufe de la toma de
corriente y asegúrese de que el interruptor de encendido y apagado no esté bloqueado con el
botón de bloqueo.
8. Suelte los tornillos hexagonales del pie de la sierra.
9. Alinee el pie de la sierra en un ángulo de aproximadamente 90 ° con respecto a la hoja de la
sierra y empújelo hacia adelante en la dirección de la hoja de la sierra. Tenga cuidado con los
tornillos hexagonales del pie de la sierra. Estos no deben ser cubiertos por el mismo. Si lo son, tire
del pie un poco hacia atrás.
10. Si es necesario, vuelva a ajustar el rodillo de guía (consulte "Ajuste del rodillo de guía") y vuelva
a apretar los tornillos hexagonales del pie de la sierra.
Establecer el número de golpes
Para garantizar un aserrado de alta calidad, es necesario adaptar el número de golpes de la hoja de
sierra al material que se va a cortar. La velocidad correcta se puede configurar con el regulador (1).
La siguiente tabla muestra la velocidad ideal para los materiales relevantes:
En este manual y / o en la máquina, se utilizan los siguientes símbolos:
De acuerdo con las normas de seguridad esenciales aplicables de las directivas europeas
Símbolo de herramientas de Clase II
Los productos eléctricos usados no se deben tirar con la basura doméstica.
Por favor, recicle en las instalaciones correspondientes.
Consulte con su autoridad local o minorista para obtener consejos de reciclaje.
Lea este manual completamente antes de operar la sierra.
¡Este dispositivo debe ser exclusivamente para uso privado! ¡No es apto para uso comercial! Adver-
tencia: cuando se trabaja con dispositivos eléctricos, se deben observar las siguientes instruccio-
nes de prevención y seguridad para evitar incendios, descargas eléctricas y lesiones físicas!
Insertar la hoja de sierra
1. Retire el enchufe de la toma de corriente y asegúrese de que el interruptor de encendido y apaga-
do no esté bloqueado con el botón de bloqueo.
2. Empuje hacia arriba la protección ocular transparente,
3. Afloje los tornillos hexagonales en el dispositivo de fijación de la hoja de sierra con la llave de
barra hexagonal compensada suministrada, y empuje la hoja de sierra lo más posible dentro del
dispositivo de fijación. ¡Asegúrese de que los dientes de la hoja de sierra estén apuntando hacia el
frente!
4. Apriete ligeramente los tornillos hexagonales alternativamente para colocar la hoja de la sierra.
Luego gire los tornillos hasta que estén completamente apretados.
5. Empuje la protección ocular transparente hacia abajo nuevamente. La llave de tuercas se puede
empujar hacia el soporte para su custodia.
Ajuste del rodillo guía
Para una mayor precisión durante el aserrado, el dispositivo 4 está equipado con un rodillo de guía.
Este rodillo debe ajustarse de manera que toque el borde posterior de la hoja de sierra durante el
corte.
• Asegúrese de que el interruptor de encendido y apagado no esté presionado o bloqueado en su
lugar y que el enchufe de la red eléctrica no esté insertado en el tomacorriente!
• Afloje los tornillos hexagonales de la zapatilla de la sierra.
• Empuje el rodillo de guía hacia adelante hasta que toque el borde posterior de la hoja de sierra.
• Apriete los tornillos hexagonales de nuevo.
NOTA: ¡Si el eje del rodillo de guía se engrasa ocasionalmente, esto prolongará la vida útil del rodillo
de guía! Una gota de aceite libre de resina es suficiente!
Operación inicial
1. Asegúrese de que el interruptor de encendido y apagado no esté presionado o bloqueado en su
lugar con el botón de bloqueo. ¡que la hoja de sierra esté ajustada firmemente en el dispositivo de
fijación de la sierra y que los tornillos hexagonales del pie de la sierra estén apretados! Empuje
hacia abajo la protección ocular transparente.
1. INSTRUCCIONES DE SEGURIDAD Y OPERACIÓN
Por su propia seguridad y la de los demás, por favor lea estas instrucciones cuidadosamente antes
de utilizar el dispositivo. Éste lo ayudara a entender su producto más fácilmente y evitará riesgos
innecesarios.
Mantenga este manual de instrucciones en un lugar seguro para uso futuro.
Reglas generales de seguridad
ADVERTENCIA Lea toda las instrucciones. El incumplimiento de las siguientes instrucciones puede
provocar descargas eléctricas, incendios y / o lesiones graves.
Guarde todas las advertencias e instrucciones para futuras referencias. El término "herramienta
eléctrica" en las advertencias hace referencia a su máquina (con cable) o con baterías (sin cable).
GUARDE ESTAS INSTRUCCIONES
1) Área de trabajo
a) Mantenga el área de trabajo limpia y bien iluminada. Las áreas desordenadas u oscuras pueden
provocar accidentes.
b) No opere herramientas eléctricas en atmósferas explosivas, como en la presencia de líquidos
inflamables, gases o polvos. Las herramientas eléctricas producen chispas que pueden encender el
polvo o los vapores.
c) Mantenga a los niños y transeúntes alejados mientras opera la herramienta eléctrica. Las distrac-
ciones pueden hacer que pierda el control.
2) Seguridad eléctrica
a) Nunca modifique el enchufe de ninguna manera. No use enchufes adaptadores con herramientas
eléctricas conectadas a tierra. Los enchufes no modificados y las tomas correspondientes reduci-
rán el riesgo de descarga eléctrica.
b) Evite el contacto del cuerpo con superficies puestas a tierra o puestas a tierra, como tuberías,
radiadores, estufas y refrigeradores. Existe un mayor riesgo de descarga eléctrica si su cuerpo está
conectado a tierra o a tierra.
c) No exponga las herramientas eléctricas a la lluvia ni a las condiciones de humedad. El agua que
ingresa a una herramienta eléctrica aumentará el riesgo de descarga eléctrica.
d) No abuse del cable. Nunca use el cable para transportar, tirar o desenchufar la herramienta de
potencia. Mantenga el cable alejado del calor, aceite, bordes afilados o partes móviles. Los cables
dañados o enredados aumentan el riesgo de descarga eléctrica.
e) Al operar una herramienta eléctrica en exteriores, use un cable de extensión adecuado para uso
en exteriores. El uso de un cable adecuado para uso en exteriores reduce el riesgo de descarga
eléctrica.
3) Seguridad personal
a) Manténgase alerta, observe lo que está haciendo y use el sentido común cuando utilice una
herramienta eléctrica. No use una herramienta eléctrica mientras esté cansado o bajo la influencia
de drogas, alcohol o medicamentos. Un momento de falta de atención mientras usa herramientas
eléctricas puede ocasionar lesiones personales graves.
b) Usar equipo de seguridad. Siempre use protección para los ojos. El equipo de seguridad como la
máscara contra el polvo, zapatos de seguridad, antideslizantes, casco o protección auditiva utiliza-
dos para las condiciones adecuadas reducirá las lesiones personales.
c) Evite el arranque accidental. Asegúrese de que el interruptor esté en la posición de apagado
antes de enchufarlo. Llevar herramientas eléctricas con el dedo en el interruptor o enchufar las
herramientas eléctricas que tienen el interruptor encendido invita a accidentes.
d) Retire cualquier llave de ajuste o llave antes de encender la herramienta eléctrica. Una llave
dejada unida a una parte giratoria de la herramienta eléctrica puede ocasionar lesiones personales.
e) No se exceda. Mantenga la postura y el equilibrio en todo momento. Esto permite un mejor
control de la herramienta eléctrica en situaciones inesperadas.
f) Vístase apropiadamente. No use ropa suelta o joyas. Mantenga el cabello, la ropa y los guantes
alejados de las piezas móviles. La ropa suelta, las joyas o el pelo largo pueden quedar atrapados en
las piezas móviles.
g) Si se proporcionan dispositivos para la conexión de las instalaciones de extracción y recolección
de polvo, asegúrese de que estén conectados y se usen correctamente. El uso de estos dispositi-
vos puede reducir los riesgos relacionados con el polvo.
4) Uso y cuidado de la herramienta eléctrica
a) No fuerce la herramienta eléctrica. Use la herramienta eléctrica correcta para su aplicación. La
herramienta eléctrica correcta hará el trabajo mejor y más seguro a la velocidad para la que fue
diseñada.
b) No use la herramienta eléctrica si el interruptor no la enciende y apaga. Cualquier herramienta
eléctrica que no pueda controlarse con el interruptor es peligrosa y debe repararse.
c) Desconecte el enchufe de la fuente de alimentación antes de hacer cualquier ajuste, cambio de
accesorios o almacenamiento de herramientas eléctricas. Dichas medidas preventivas de seguri-
dad reducen el riesgo de iniciar la herramienta eléctrica accidentalmente.
d) Guarde las herramientas eléctricas inactivas fuera del alcance de los niños y no permita que las
personas que no estén familiarizadas con la herramienta eléctrica o estas instrucciones operen la
herramienta eléctrica. Las herramientas eléctricas son peligrosas en manos de usuarios no entrena-
dos.
e) Mantener herramientas eléctricas. Compruebe si hay desalineación o atascamiento de piezas
móviles, roturas de piezas y cualquier otra condición que pueda afectar el funcionamiento de las
herramientas eléctricas. Si está dañada, haga reparar la herramienta eléctrica antes de usarla.
Muchos accidentes son causados por herramientas eléctricas mal mantenidas.
f) Mantenga las herramientas de corte, afiladas y limpias. Las herramientas de corte correctamente
mantenidas con bordes de corte afilados tienen menos probabilidades de atascarse y son más
fáciles de controlar.
g) Utilice la herramienta eléctrica, los accesorios y los bits de la herramienta, etc., de acuerdo con
estas instrucciones y de la manera prevista para el tipo particular de herramienta eléctrica, tenien-
do en cuenta las condiciones de trabajo y el trabajo que se realizará. El uso de la herramienta
eléctrica para operaciones diferentes de las previstas podría dar como resultado una situación
peligrosa.
5) Servicio
a) Haga reparar su herramienta eléctrica por un técnico de reparación calificado que use solo
repuestos idénticos. Esto asegurará que se mantenga la seguridad de la herramienta eléctrica.
Sostenga la herramienta eléctrica por las superficies de agarre aisladas, cuando realice una opera-
ción donde el accesorio de corte pueda entrar en contacto con un cableado oculto o con su propio
cable. El accesorio de corte que entra en contacto con un cable "activo" puede hacer que las
partes metálicas expuestas de la herramienta "vivan" y puedan provocar una descarga eléctrica al
operador.
10
2. ESPECIFICACIÓN TÉCNICA
Potencia: 18 V
Velocidad sin carga: 0-2500 spm
Longitud de golpe: 25 mm.
Max. capacidad de corte:
- En madera: 50 mm.
- En metal: 8 mm.
Ajuste del péndulo: 3 + apagado
Ajuste biselado dual: 0-45 °
Nivel de sonido LpA: 82.0 dB (A)
Nivel de sonido LwA: 93.0 dB (A)
Vibración:
ah,B = 5,658 m²/s
ah,M = 5,459 m²/s
Incluye: placa base punzonadora, soplador de viruta, guía paralela y láser.
• el valor total de la vibración declarada ha sido medido de acuerdo con un
método de prueba estándar y se puede usar para comparar una herramienta con otra;
• el valor total de la vibración declarada también se puede usar en una evaluación preliminar de la
exposición.
Advertencia:
• La emisión de vibraciones durante el uso real de la herramienta eléctrica puede diferir del valor
total declarado según las formas en que se utiliza la herramienta; y la necesidad de identificar
medidas de seguridad para proteger al operador que se basen en una estimación de la exposición
en las condiciones reales de uso (teniendo en cuenta todas las partes del ciclo operativo, como los
momentos en que se apaga la herramienta y cuándo funcionando en ralentí además del tiempo de
disparo).
4. MANTENIMIENTO
• El protector ocular, las ranuras de aire y la carcasa del motor deben mantenerse libres de polvo y
suciedad.
• Frote el dispositivo con un paño limpio o use aire comprimido a baja presión para eliminar el polvo
o la suciedad. Las cantidades excesivas de polvo de metal pueden provocar que la electricidad
proveniente de los componentes internos se conduzca a las partes metálicas expuestas!
• si es necesario reemplazar el cable de suministro, esto debe hacerlo el fabricante o su agente
para evitar riesgos de seguridad.
Limpieza y cuidado
• Retire el enchufe de la toma de corriente y asegúrese de que el interruptor de encendido y apaga-
do no esté bloqueado con el botón de bloqueo. Para la limpieza, use una tela ligeramente húmeda,
¡pero no mojada! No use materiales abrasivos adicionales (gasolina, trementina, etc.) ya que
pueden dañar la carcasa de plástico. ¡Se recomienda el uso de un jabón suave! ¡Asegúrate de que
no entre humedad en la máquina! Después de limpiar, limpie el dispositivo con un paño seco!
ADVERTENCIA!
Esta máquina produce un campo electromagnético durante la operación. Este campo puede, en
algunas circunstancias, interferir con implantes médicos activos o pasivos. Para reducir el riesgo de
lesiones graves o fatales, recomendamos a las personas con implantes médicos que consulten a su
médico y al fabricante del implante médico antes de operar esta máquina.
2. Inserte el enchufe de red en una toma de corriente de 230 voltios y 50 hertzios correctamente
instalada.
3. Acerque la sierra al objeto que va a cortar.
4. Presione el interruptor de encendido y apagado para encender la máquina. Para un funciona-
miento continuo, el interruptor de encendido y apagado puede bloquearse en su lugar con el botón
de bloqueo. Para liberar esto, presione el interruptor de encendido y apagado tanto como sea
posible y luego suéltelo. El botón de bloqueo saltará automáticamente a la posición original.
5. Después del uso, el enchufe de la red eléctrica debe quitarse del enchufe.
NOTA: No corte directamente en la pieza de trabajo con la hoja de la sierra, sino primero taladre un
orificio correspondiente desde el cual comenzar a cortar!
Ajuste para el corte de bisel
El pie de la sierra se puede ajustar de la siguiente manera en ambos lados hasta un ángulo de 45°:
1. Retire el enchufe de la toma de corriente y asegúrese de que el interruptor de encendido y apaga-
do no esté bloqueado con el botón de bloqueo.
2. Afloje (pero no quite) los tornillos hexagonales del pie de la sierra con la llave hexagonal compen-
sada provista.
3. Tire ligeramente hacia atrás del pie de la sierra y ajuste el ángulo deseado de acuerdo con la
escala del mismo.
4. Si es necesario, ajuste el rodillo guía nuevamente (consulte "Ajuste del rodillo guía").
5. Apriete los tornillos hexagonales del pie de la sierra nuevamente.
6. Para la mayoría de los trabajos, la graduación de la escala en el pie de la sierra es lo suficiente-
mente precisa.
Sin embargo, en el caso de cortes de ángulos muy precisos, debe utilizar un dispositivo de medi-
ción de ángulos. La precisión del ángulo se puede probar con un corte de prueba en material de
desecho.
7. Para volver a colocar el pie de la sierra en su posición original, retire el enchufe de la toma de
corriente y asegúrese de que el interruptor de encendido y apagado no esté bloqueado con el
botón de bloqueo.
8. Suelte los tornillos hexagonales del pie de la sierra.
9. Alinee el pie de la sierra en un ángulo de aproximadamente 90 ° con respecto a la hoja de la
sierra y empújelo hacia adelante en la dirección de la hoja de la sierra. Tenga cuidado con los
tornillos hexagonales del pie de la sierra. Estos no deben ser cubiertos por el mismo. Si lo son, tire
del pie un poco hacia atrás.
10. Si es necesario, vuelva a ajustar el rodillo de guía (consulte "Ajuste del rodillo de guía") y vuelva
a apretar los tornillos hexagonales del pie de la sierra.
Establecer el número de golpes
Para garantizar un aserrado de alta calidad, es necesario adaptar el número de golpes de la hoja de
sierra al material que se va a cortar. La velocidad correcta se puede configurar con el regulador (1).
La siguiente tabla muestra la velocidad ideal para los materiales relevantes:
Visión de conjunto
1. Protección ocular
2. Dispositivo de fijación de la hoja de sierra
3. Rodillo de guía
4. Pie de la sierra
5. Interruptor de encendido y apagado
6. Soporte para llave de barra hexagonal compensada
2
3
4
1
5
6
En este manual y / o en la máquina, se utilizan los siguientes símbolos:
De acuerdo con las normas de seguridad esenciales aplicables de las directivas europeas
Símbolo de herramientas de Clase II
Los productos eléctricos usados no se deben tirar con la basura doméstica.
Por favor, recicle en las instalaciones correspondientes.
Consulte con su autoridad local o minorista para obtener consejos de reciclaje.
Lea este manual completamente antes de operar la sierra.
¡Este dispositivo debe ser exclusivamente para uso privado! ¡No es apto para uso comercial! Adver-
tencia: cuando se trabaja con dispositivos eléctricos, se deben observar las siguientes instruccio-
nes de prevención y seguridad para evitar incendios, descargas eléctricas y lesiones físicas!
Insertar la hoja de sierra
1. Retire el enchufe de la toma de corriente y asegúrese de que el interruptor de encendido y apaga-
do no esté bloqueado con el botón de bloqueo.
2. Empuje hacia arriba la protección ocular transparente,
3. Afloje los tornillos hexagonales en el dispositivo de fijación de la hoja de sierra con la llave de
barra hexagonal compensada suministrada, y empuje la hoja de sierra lo más posible dentro del
dispositivo de fijación. ¡Asegúrese de que los dientes de la hoja de sierra estén apuntando hacia el
frente!
4. Apriete ligeramente los tornillos hexagonales alternativamente para colocar la hoja de la sierra.
Luego gire los tornillos hasta que estén completamente apretados.
5. Empuje la protección ocular transparente hacia abajo nuevamente. La llave de tuercas se puede
empujar hacia el soporte para su custodia.
Ajuste del rodillo guía
Para una mayor precisión durante el aserrado, el dispositivo 4 está equipado con un rodillo de guía.
Este rodillo debe ajustarse de manera que toque el borde posterior de la hoja de sierra durante el
corte.
• Asegúrese de que el interruptor de encendido y apagado no esté presionado o bloqueado en su
lugar y que el enchufe de la red eléctrica no esté insertado en el tomacorriente!
• Afloje los tornillos hexagonales de la zapatilla de la sierra.
• Empuje el rodillo de guía hacia adelante hasta que toque el borde posterior de la hoja de sierra.
• Apriete los tornillos hexagonales de nuevo.
NOTA: ¡Si el eje del rodillo de guía se engrasa ocasionalmente, esto prolongará la vida útil del rodillo
de guía! Una gota de aceite libre de resina es suficiente!
Operación inicial
1. Asegúrese de que el interruptor de encendido y apagado no esté presionado o bloqueado en su
lugar con el botón de bloqueo. ¡que la hoja de sierra esté ajustada firmemente en el dispositivo de
fijación de la sierra y que los tornillos hexagonales del pie de la sierra estén apretados! Empuje
hacia abajo la protección ocular transparente.
3. EXPLICACIÓN DE SÍMBOLOS
1. INSTRUCCIONES DE SEGURIDAD Y OPERACIÓN
Por su propia seguridad y la de los demás, por favor lea estas instrucciones cuidadosamente antes
de utilizar el dispositivo. Éste lo ayudara a entender su producto más fácilmente y evitará riesgos
innecesarios.
Mantenga este manual de instrucciones en un lugar seguro para uso futuro.
Reglas generales de seguridad
ADVERTENCIA Lea toda las instrucciones. El incumplimiento de las siguientes instrucciones puede
provocar descargas eléctricas, incendios y / o lesiones graves.
Guarde todas las advertencias e instrucciones para futuras referencias. El término "herramienta
eléctrica" en las advertencias hace referencia a su máquina (con cable) o con baterías (sin cable).
GUARDE ESTAS INSTRUCCIONES
1) Área de trabajo
a) Mantenga el área de trabajo limpia y bien iluminada. Las áreas desordenadas u oscuras pueden
provocar accidentes.
b) No opere herramientas eléctricas en atmósferas explosivas, como en la presencia de líquidos
inflamables, gases o polvos. Las herramientas eléctricas producen chispas que pueden encender el
polvo o los vapores.
c) Mantenga a los niños y transeúntes alejados mientras opera la herramienta eléctrica. Las distrac-
ciones pueden hacer que pierda el control.
2) Seguridad eléctrica
a) Nunca modifique el enchufe de ninguna manera. No use enchufes adaptadores con herramientas
eléctricas conectadas a tierra. Los enchufes no modificados y las tomas correspondientes reduci-
rán el riesgo de descarga eléctrica.
b) Evite el contacto del cuerpo con superficies puestas a tierra o puestas a tierra, como tuberías,
radiadores, estufas y refrigeradores. Existe un mayor riesgo de descarga eléctrica si su cuerpo está
conectado a tierra o a tierra.
c) No exponga las herramientas eléctricas a la lluvia ni a las condiciones de humedad. El agua que
ingresa a una herramienta eléctrica aumentará el riesgo de descarga eléctrica.
d) No abuse del cable. Nunca use el cable para transportar, tirar o desenchufar la herramienta de
potencia. Mantenga el cable alejado del calor, aceite, bordes afilados o partes móviles. Los cables
dañados o enredados aumentan el riesgo de descarga eléctrica.
e) Al operar una herramienta eléctrica en exteriores, use un cable de extensión adecuado para uso
en exteriores. El uso de un cable adecuado para uso en exteriores reduce el riesgo de descarga
eléctrica.
3) Seguridad personal
a) Manténgase alerta, observe lo que está haciendo y use el sentido común cuando utilice una
herramienta eléctrica. No use una herramienta eléctrica mientras esté cansado o bajo la influencia
de drogas, alcohol o medicamentos. Un momento de falta de atención mientras usa herramientas
eléctricas puede ocasionar lesiones personales graves.
b) Usar equipo de seguridad. Siempre use protección para los ojos. El equipo de seguridad como la
máscara contra el polvo, zapatos de seguridad, antideslizantes, casco o protección auditiva utiliza-
dos para las condiciones adecuadas reducirá las lesiones personales.
c) Evite el arranque accidental. Asegúrese de que el interruptor esté en la posición de apagado
antes de enchufarlo. Llevar herramientas eléctricas con el dedo en el interruptor o enchufar las
herramientas eléctricas que tienen el interruptor encendido invita a accidentes.
d) Retire cualquier llave de ajuste o llave antes de encender la herramienta eléctrica. Una llave
dejada unida a una parte giratoria de la herramienta eléctrica puede ocasionar lesiones personales.
e) No se exceda. Mantenga la postura y el equilibrio en todo momento. Esto permite un mejor
control de la herramienta eléctrica en situaciones inesperadas.
f) Vístase apropiadamente. No use ropa suelta o joyas. Mantenga el cabello, la ropa y los guantes
alejados de las piezas móviles. La ropa suelta, las joyas o el pelo largo pueden quedar atrapados en
las piezas móviles.
g) Si se proporcionan dispositivos para la conexión de las instalaciones de extracción y recolección
de polvo, asegúrese de que estén conectados y se usen correctamente. El uso de estos dispositi-
vos puede reducir los riesgos relacionados con el polvo.
4) Uso y cuidado de la herramienta eléctrica
a) No fuerce la herramienta eléctrica. Use la herramienta eléctrica correcta para su aplicación. La
herramienta eléctrica correcta hará el trabajo mejor y más seguro a la velocidad para la que fue
diseñada.
b) No use la herramienta eléctrica si el interruptor no la enciende y apaga. Cualquier herramienta
eléctrica que no pueda controlarse con el interruptor es peligrosa y debe repararse.
c) Desconecte el enchufe de la fuente de alimentación antes de hacer cualquier ajuste, cambio de
accesorios o almacenamiento de herramientas eléctricas. Dichas medidas preventivas de seguri-
dad reducen el riesgo de iniciar la herramienta eléctrica accidentalmente.
d) Guarde las herramientas eléctricas inactivas fuera del alcance de los niños y no permita que las
personas que no estén familiarizadas con la herramienta eléctrica o estas instrucciones operen la
herramienta eléctrica. Las herramientas eléctricas son peligrosas en manos de usuarios no entrena-
dos.
e) Mantener herramientas eléctricas. Compruebe si hay desalineación o atascamiento de piezas
móviles, roturas de piezas y cualquier otra condición que pueda afectar el funcionamiento de las
herramientas eléctricas. Si está dañada, haga reparar la herramienta eléctrica antes de usarla.
Muchos accidentes son causados por herramientas eléctricas mal mantenidas.
f) Mantenga las herramientas de corte, afiladas y limpias. Las herramientas de corte correctamente
mantenidas con bordes de corte afilados tienen menos probabilidades de atascarse y son más
fáciles de controlar.
g) Utilice la herramienta eléctrica, los accesorios y los bits de la herramienta, etc., de acuerdo con
estas instrucciones y de la manera prevista para el tipo particular de herramienta eléctrica, tenien-
do en cuenta las condiciones de trabajo y el trabajo que se realizará. El uso de la herramienta
eléctrica para operaciones diferentes de las previstas podría dar como resultado una situación
peligrosa.
5) Servicio
a) Haga reparar su herramienta eléctrica por un técnico de reparación calificado que use solo
repuestos idénticos. Esto asegurará que se mantenga la seguridad de la herramienta eléctrica.
Sostenga la herramienta eléctrica por las superficies de agarre aisladas, cuando realice una opera-
ción donde el accesorio de corte pueda entrar en contacto con un cableado oculto o con su propio
cable. El accesorio de corte que entra en contacto con un cable "activo" puede hacer que las
partes metálicas expuestas de la herramienta "vivan" y puedan provocar una descarga eléctrica al
operador.
2. ESPECIFICACIÓN TÉCNICA
Potencia: 18 V
Velocidad sin carga: 0-2500 spm
Longitud de golpe: 25 mm.
Max. capacidad de corte:
- En madera: 50 mm.
- En metal: 8 mm.
Ajuste del péndulo: 3 + apagado
Ajuste biselado dual: 0-45 °
Nivel de sonido LpA: 82.0 dB (A)
Nivel de sonido LwA: 93.0 dB (A)
Vibración:
ah,B = 5,658 m²/s
ah,M = 5,459 m²/s
Incluye: placa base punzonadora, soplador de viruta, guía paralela y láser.
• el valor total de la vibración declarada ha sido medido de acuerdo con un
método de prueba estándar y se puede usar para comparar una herramienta con otra;
• el valor total de la vibración declarada también se puede usar en una evaluación preliminar de la
exposición.
Advertencia:
• La emisión de vibraciones durante el uso real de la herramienta eléctrica puede diferir del valor
total declarado según las formas en que se utiliza la herramienta; y la necesidad de identificar
medidas de seguridad para proteger al operador que se basen en una estimación de la exposición
en las condiciones reales de uso (teniendo en cuenta todas las partes del ciclo operativo, como los
momentos en que se apaga la herramienta y cuándo funcionando en ralentí además del tiempo de
disparo).
11
4. MANTENIMIENTO
• El protector ocular, las ranuras de aire y la carcasa del motor deben mantenerse libres de polvo y
suciedad.
• Frote el dispositivo con un paño limpio o use aire comprimido a baja presión para eliminar el polvo
o la suciedad. Las cantidades excesivas de polvo de metal pueden provocar que la electricidad
proveniente de los componentes internos se conduzca a las partes metálicas expuestas!
• si es necesario reemplazar el cable de suministro, esto debe hacerlo el fabricante o su agente
para evitar riesgos de seguridad.
Limpieza y cuidado
• Retire el enchufe de la toma de corriente y asegúrese de que el interruptor de encendido y apaga-
do no esté bloqueado con el botón de bloqueo. Para la limpieza, use una tela ligeramente húmeda,
¡pero no mojada! No use materiales abrasivos adicionales (gasolina, trementina, etc.) ya que
pueden dañar la carcasa de plástico. ¡Se recomienda el uso de un jabón suave! ¡Asegúrate de que
no entre humedad en la máquina! Después de limpiar, limpie el dispositivo con un paño seco!
ADVERTENCIA!
Esta máquina produce un campo electromagnético durante la operación. Este campo puede, en
algunas circunstancias, interferir con implantes médicos activos o pasivos. Para reducir el riesgo de
lesiones graves o fatales, recomendamos a las personas con implantes médicos que consulten a su
médico y al fabricante del implante médico antes de operar esta máquina.
2. Inserte el enchufe de red en una toma de corriente de 230 voltios y 50 hertzios correctamente
instalada.
3. Acerque la sierra al objeto que va a cortar.
4. Presione el interruptor de encendido y apagado para encender la máquina. Para un funciona-
miento continuo, el interruptor de encendido y apagado puede bloquearse en su lugar con el botón
de bloqueo. Para liberar esto, presione el interruptor de encendido y apagado tanto como sea
posible y luego suéltelo. El botón de bloqueo saltará automáticamente a la posición original.
5. Después del uso, el enchufe de la red eléctrica debe quitarse del enchufe.
NOTA: No corte directamente en la pieza de trabajo con la hoja de la sierra, sino primero taladre un
orificio correspondiente desde el cual comenzar a cortar!
Ajuste para el corte de bisel
El pie de la sierra se puede ajustar de la siguiente manera en ambos lados hasta un ángulo de 45°:
1. Retire el enchufe de la toma de corriente y asegúrese de que el interruptor de encendido y apaga-
do no esté bloqueado con el botón de bloqueo.
2. Afloje (pero no quite) los tornillos hexagonales del pie de la sierra con la llave hexagonal compen-
sada provista.
3. Tire ligeramente hacia atrás del pie de la sierra y ajuste el ángulo deseado de acuerdo con la
escala del mismo.
4. Si es necesario, ajuste el rodillo guía nuevamente (consulte "Ajuste del rodillo guía").
5. Apriete los tornillos hexagonales del pie de la sierra nuevamente.
6. Para la mayoría de los trabajos, la graduación de la escala en el pie de la sierra es lo suficiente-
mente precisa.
Sin embargo, en el caso de cortes de ángulos muy precisos, debe utilizar un dispositivo de medi-
ción de ángulos. La precisión del ángulo se puede probar con un corte de prueba en material de
desecho.
7. Para volver a colocar el pie de la sierra en su posición original, retire el enchufe de la toma de
corriente y asegúrese de que el interruptor de encendido y apagado no esté bloqueado con el
botón de bloqueo.
8. Suelte los tornillos hexagonales del pie de la sierra.
9. Alinee el pie de la sierra en un ángulo de aproximadamente 90 ° con respecto a la hoja de la
sierra y empújelo hacia adelante en la dirección de la hoja de la sierra. Tenga cuidado con los
tornillos hexagonales del pie de la sierra. Estos no deben ser cubiertos por el mismo. Si lo son, tire
del pie un poco hacia atrás.
10. Si es necesario, vuelva a ajustar el rodillo de guía (consulte "Ajuste del rodillo de guía") y vuelva
a apretar los tornillos hexagonales del pie de la sierra.
Establecer el número de golpes
Para garantizar un aserrado de alta calidad, es necesario adaptar el número de golpes de la hoja de
sierra al material que se va a cortar. La velocidad correcta se puede configurar con el regulador (1).
La siguiente tabla muestra la velocidad ideal para los materiales relevantes:
En este manual y / o en la máquina, se utilizan los siguientes símbolos:
De acuerdo con las normas de seguridad esenciales aplicables de las directivas europeas
Símbolo de herramientas de Clase II
Los productos eléctricos usados no se deben tirar con la basura doméstica.
Por favor, recicle en las instalaciones correspondientes.
Consulte con su autoridad local o minorista para obtener consejos de reciclaje.
Lea este manual completamente antes de operar la sierra.
¡Este dispositivo debe ser exclusivamente para uso privado! ¡No es apto para uso comercial! Adver-
tencia: cuando se trabaja con dispositivos eléctricos, se deben observar las siguientes instruccio-
nes de prevención y seguridad para evitar incendios, descargas eléctricas y lesiones físicas!
Insertar la hoja de sierra
1. Retire el enchufe de la toma de corriente y asegúrese de que el interruptor de encendido y apaga-
do no esté bloqueado con el botón de bloqueo.
2. Empuje hacia arriba la protección ocular transparente,
3. Afloje los tornillos hexagonales en el dispositivo de fijación de la hoja de sierra con la llave de
barra hexagonal compensada suministrada, y empuje la hoja de sierra lo más posible dentro del
dispositivo de fijación. ¡Asegúrese de que los dientes de la hoja de sierra estén apuntando hacia el
frente!
4. Apriete ligeramente los tornillos hexagonales alternativamente para colocar la hoja de la sierra.
Luego gire los tornillos hasta que estén completamente apretados.
5. Empuje la protección ocular transparente hacia abajo nuevamente. La llave de tuercas se puede
empujar hacia el soporte para su custodia.
Ajuste del rodillo guía
Para una mayor precisión durante el aserrado, el dispositivo 4 está equipado con un rodillo de guía.
Este rodillo debe ajustarse de manera que toque el borde posterior de la hoja de sierra durante el
corte.
• Asegúrese de que el interruptor de encendido y apagado no esté presionado o bloqueado en su
lugar y que el enchufe de la red eléctrica no esté insertado en el tomacorriente!
• Afloje los tornillos hexagonales de la zapatilla de la sierra.
• Empuje el rodillo de guía hacia adelante hasta que toque el borde posterior de la hoja de sierra.
• Apriete los tornillos hexagonales de nuevo.
NOTA: ¡Si el eje del rodillo de guía se engrasa ocasionalmente, esto prolongará la vida útil del rodillo
de guía! Una gota de aceite libre de resina es suficiente!
Operación inicial
1. Asegúrese de que el interruptor de encendido y apagado no esté presionado o bloqueado en su
lugar con el botón de bloqueo. ¡que la hoja de sierra esté ajustada firmemente en el dispositivo de
fijación de la sierra y que los tornillos hexagonales del pie de la sierra estén apretados! Empuje
hacia abajo la protección ocular transparente.

1. INSTRUCCIONES DE SEGURIDAD Y OPERACIÓN
Por su propia seguridad y la de los demás, por favor lea estas instrucciones cuidadosamente antes
de utilizar el dispositivo. Éste lo ayudara a entender su producto más fácilmente y evitará riesgos
innecesarios.
Mantenga este manual de instrucciones en un lugar seguro para uso futuro.
Reglas generales de seguridad
ADVERTENCIA Lea toda las instrucciones. El incumplimiento de las siguientes instrucciones puede
provocar descargas eléctricas, incendios y / o lesiones graves.
Guarde todas las advertencias e instrucciones para futuras referencias. El término "herramienta
eléctrica" en las advertencias hace referencia a su máquina (con cable) o con baterías (sin cable).
GUARDE ESTAS INSTRUCCIONES
1) Área de trabajo
a) Mantenga el área de trabajo limpia y bien iluminada. Las áreas desordenadas u oscuras pueden
provocar accidentes.
b) No opere herramientas eléctricas en atmósferas explosivas, como en la presencia de líquidos
inflamables, gases o polvos. Las herramientas eléctricas producen chispas que pueden encender el
polvo o los vapores.
c) Mantenga a los niños y transeúntes alejados mientras opera la herramienta eléctrica. Las distrac-
ciones pueden hacer que pierda el control.
2) Seguridad eléctrica
a) Nunca modifique el enchufe de ninguna manera. No use enchufes adaptadores con herramientas
eléctricas conectadas a tierra. Los enchufes no modificados y las tomas correspondientes reduci-
rán el riesgo de descarga eléctrica.
b) Evite el contacto del cuerpo con superficies puestas a tierra o puestas a tierra, como tuberías,
radiadores, estufas y refrigeradores. Existe un mayor riesgo de descarga eléctrica si su cuerpo está
conectado a tierra o a tierra.
c) No exponga las herramientas eléctricas a la lluvia ni a las condiciones de humedad. El agua que
ingresa a una herramienta eléctrica aumentará el riesgo de descarga eléctrica.
d) No abuse del cable. Nunca use el cable para transportar, tirar o desenchufar la herramienta de
potencia. Mantenga el cable alejado del calor, aceite, bordes afilados o partes móviles. Los cables
dañados o enredados aumentan el riesgo de descarga eléctrica.
e) Al operar una herramienta eléctrica en exteriores, use un cable de extensión adecuado para uso
en exteriores. El uso de un cable adecuado para uso en exteriores reduce el riesgo de descarga
eléctrica.
3) Seguridad personal
a) Manténgase alerta, observe lo que está haciendo y use el sentido común cuando utilice una
herramienta eléctrica. No use una herramienta eléctrica mientras esté cansado o bajo la influencia
de drogas, alcohol o medicamentos. Un momento de falta de atención mientras usa herramientas
eléctricas puede ocasionar lesiones personales graves.
b) Usar equipo de seguridad. Siempre use protección para los ojos. El equipo de seguridad como la
máscara contra el polvo, zapatos de seguridad, antideslizantes, casco o protección auditiva utiliza-
dos para las condiciones adecuadas reducirá las lesiones personales.
c) Evite el arranque accidental. Asegúrese de que el interruptor esté en la posición de apagado
antes de enchufarlo. Llevar herramientas eléctricas con el dedo en el interruptor o enchufar las
herramientas eléctricas que tienen el interruptor encendido invita a accidentes.
d) Retire cualquier llave de ajuste o llave antes de encender la herramienta eléctrica. Una llave
dejada unida a una parte giratoria de la herramienta eléctrica puede ocasionar lesiones personales.
e) No se exceda. Mantenga la postura y el equilibrio en todo momento. Esto permite un mejor
control de la herramienta eléctrica en situaciones inesperadas.
f) Vístase apropiadamente. No use ropa suelta o joyas. Mantenga el cabello, la ropa y los guantes
alejados de las piezas móviles. La ropa suelta, las joyas o el pelo largo pueden quedar atrapados en
las piezas móviles.
g) Si se proporcionan dispositivos para la conexión de las instalaciones de extracción y recolección
de polvo, asegúrese de que estén conectados y se usen correctamente. El uso de estos dispositi-
vos puede reducir los riesgos relacionados con el polvo.
4) Uso y cuidado de la herramienta eléctrica
a) No fuerce la herramienta eléctrica. Use la herramienta eléctrica correcta para su aplicación. La
herramienta eléctrica correcta hará el trabajo mejor y más seguro a la velocidad para la que fue
diseñada.
b) No use la herramienta eléctrica si el interruptor no la enciende y apaga. Cualquier herramienta
eléctrica que no pueda controlarse con el interruptor es peligrosa y debe repararse.
c) Desconecte el enchufe de la fuente de alimentación antes de hacer cualquier ajuste, cambio de
accesorios o almacenamiento de herramientas eléctricas. Dichas medidas preventivas de seguri-
dad reducen el riesgo de iniciar la herramienta eléctrica accidentalmente.
d) Guarde las herramientas eléctricas inactivas fuera del alcance de los niños y no permita que las
personas que no estén familiarizadas con la herramienta eléctrica o estas instrucciones operen la
herramienta eléctrica. Las herramientas eléctricas son peligrosas en manos de usuarios no entrena-
dos.
e) Mantener herramientas eléctricas. Compruebe si hay desalineación o atascamiento de piezas
móviles, roturas de piezas y cualquier otra condición que pueda afectar el funcionamiento de las
herramientas eléctricas. Si está dañada, haga reparar la herramienta eléctrica antes de usarla.
Muchos accidentes son causados por herramientas eléctricas mal mantenidas.
f) Mantenga las herramientas de corte, afiladas y limpias. Las herramientas de corte correctamente
mantenidas con bordes de corte afilados tienen menos probabilidades de atascarse y son más
fáciles de controlar.
g) Utilice la herramienta eléctrica, los accesorios y los bits de la herramienta, etc., de acuerdo con
estas instrucciones y de la manera prevista para el tipo particular de herramienta eléctrica, tenien-
do en cuenta las condiciones de trabajo y el trabajo que se realizará. El uso de la herramienta
eléctrica para operaciones diferentes de las previstas podría dar como resultado una situación
peligrosa.
5) Servicio
a) Haga reparar su herramienta eléctrica por un técnico de reparación calificado que use solo
repuestos idénticos. Esto asegurará que se mantenga la seguridad de la herramienta eléctrica.
Sostenga la herramienta eléctrica por las superficies de agarre aisladas, cuando realice una opera-
ción donde el accesorio de corte pueda entrar en contacto con un cableado oculto o con su propio
cable. El accesorio de corte que entra en contacto con un cable "activo" puede hacer que las
partes metálicas expuestas de la herramienta "vivan" y puedan provocar una descarga eléctrica al
operador.
2. ESPECIFICACIÓN TÉCNICA
Potencia: 18 V
Velocidad sin carga: 0-2500 spm
Longitud de golpe: 25 mm.
Max. capacidad de corte:
- En madera: 50 mm.
- En metal: 8 mm.
Ajuste del péndulo: 3 + apagado
Ajuste biselado dual: 0-45 °
Nivel de sonido LpA: 82.0 dB (A)
Nivel de sonido LwA: 93.0 dB (A)
Vibración:
ah,B = 5,658 m²/s
ah,M = 5,459 m²/s
Incluye: placa base punzonadora, soplador de viruta, guía paralela y láser.
• el valor total de la vibración declarada ha sido medido de acuerdo con un
método de prueba estándar y se puede usar para comparar una herramienta con otra;
• el valor total de la vibración declarada también se puede usar en una evaluación preliminar de la
exposición.
Advertencia:
• La emisión de vibraciones durante el uso real de la herramienta eléctrica puede diferir del valor
total declarado según las formas en que se utiliza la herramienta; y la necesidad de identificar
medidas de seguridad para proteger al operador que se basen en una estimación de la exposición
en las condiciones reales de uso (teniendo en cuenta todas las partes del ciclo operativo, como los
momentos en que se apaga la herramienta y cuándo funcionando en ralentí además del tiempo de
disparo).
4. MANTENIMIENTO
• El protector ocular, las ranuras de aire y la carcasa del motor deben mantenerse libres de polvo y
suciedad.
• Frote el dispositivo con un paño limpio o use aire comprimido a baja presión para eliminar el polvo
o la suciedad. Las cantidades excesivas de polvo de metal pueden provocar que la electricidad
proveniente de los componentes internos se conduzca a las partes metálicas expuestas!
• si es necesario reemplazar el cable de suministro, esto debe hacerlo el fabricante o su agente
para evitar riesgos de seguridad.
Limpieza y cuidado
• Retire el enchufe de la toma de corriente y asegúrese de que el interruptor de encendido y apaga-
do no esté bloqueado con el botón de bloqueo. Para la limpieza, use una tela ligeramente húmeda,
¡pero no mojada! No use materiales abrasivos adicionales (gasolina, trementina, etc.) ya que
pueden dañar la carcasa de plástico. ¡Se recomienda el uso de un jabón suave! ¡Asegúrate de que
no entre humedad en la máquina! Después de limpiar, limpie el dispositivo con un paño seco!
ADVERTENCIA!
Esta máquina produce un campo electromagnético durante la operación. Este campo puede, en
algunas circunstancias, interferir con implantes médicos activos o pasivos. Para reducir el riesgo de
lesiones graves o fatales, recomendamos a las personas con implantes médicos que consulten a su
médico y al fabricante del implante médico antes de operar esta máquina.
12
2. Inserte el enchufe de red en una toma de corriente de 230 voltios y 50 hertzios correctamente
instalada.
3. Acerque la sierra al objeto que va a cortar.
4. Presione el interruptor de encendido y apagado para encender la máquina. Para un funciona-
miento continuo, el interruptor de encendido y apagado puede bloquearse en su lugar con el botón
de bloqueo. Para liberar esto, presione el interruptor de encendido y apagado tanto como sea
posible y luego suéltelo. El botón de bloqueo saltará automáticamente a la posición original.
5. Después del uso, el enchufe de la red eléctrica debe quitarse del enchufe.
NOTA: No corte directamente en la pieza de trabajo con la hoja de la sierra, sino primero taladre un
orificio correspondiente desde el cual comenzar a cortar!
Ajuste para el corte de bisel
El pie de la sierra se puede ajustar de la siguiente manera en ambos lados hasta un ángulo de 45°:
1. Retire el enchufe de la toma de corriente y asegúrese de que el interruptor de encendido y apaga-
do no esté bloqueado con el botón de bloqueo.
2. Afloje (pero no quite) los tornillos hexagonales del pie de la sierra con la llave hexagonal compen-
sada provista.
3. Tire ligeramente hacia atrás del pie de la sierra y ajuste el ángulo deseado de acuerdo con la
escala del mismo.
4. Si es necesario, ajuste el rodillo guía nuevamente (consulte "Ajuste del rodillo guía").
5. Apriete los tornillos hexagonales del pie de la sierra nuevamente.
6. Para la mayoría de los trabajos, la graduación de la escala en el pie de la sierra es lo suficiente-
mente precisa.
Sin embargo, en el caso de cortes de ángulos muy precisos, debe utilizar un dispositivo de medi-
ción de ángulos. La precisión del ángulo se puede probar con un corte de prueba en material de
desecho.
7. Para volver a colocar el pie de la sierra en su posición original, retire el enchufe de la toma de
corriente y asegúrese de que el interruptor de encendido y apagado no esté bloqueado con el
botón de bloqueo.
8. Suelte los tornillos hexagonales del pie de la sierra.
9. Alinee el pie de la sierra en un ángulo de aproximadamente 90 ° con respecto a la hoja de la
sierra y empújelo hacia adelante en la dirección de la hoja de la sierra. Tenga cuidado con los
tornillos hexagonales del pie de la sierra. Estos no deben ser cubiertos por el mismo. Si lo son, tire
del pie un poco hacia atrás.
10. Si es necesario, vuelva a ajustar el rodillo de guía (consulte "Ajuste del rodillo de guía") y vuelva
a apretar los tornillos hexagonales del pie de la sierra.
Establecer el número de golpes
Para garantizar un aserrado de alta calidad, es necesario adaptar el número de golpes de la hoja de
sierra al material que se va a cortar. La velocidad correcta se puede configurar con el regulador (1).
La siguiente tabla muestra la velocidad ideal para los materiales relevantes:
En este manual y / o en la máquina, se utilizan los siguientes símbolos:
De acuerdo con las normas de seguridad esenciales aplicables de las directivas europeas
Símbolo de herramientas de Clase II
Los productos eléctricos usados no se deben tirar con la basura doméstica.
Por favor, recicle en las instalaciones correspondientes.
Consulte con su autoridad local o minorista para obtener consejos de reciclaje.
Lea este manual completamente antes de operar la sierra.
¡Este dispositivo debe ser exclusivamente para uso privado! ¡No es apto para uso comercial! Adver-
tencia: cuando se trabaja con dispositivos eléctricos, se deben observar las siguientes instruccio-
nes de prevención y seguridad para evitar incendios, descargas eléctricas y lesiones físicas!
Insertar la hoja de sierra
1. Retire el enchufe de la toma de corriente y asegúrese de que el interruptor de encendido y apaga-
do no esté bloqueado con el botón de bloqueo.
2. Empuje hacia arriba la protección ocular transparente,
3. Afloje los tornillos hexagonales en el dispositivo de fijación de la hoja de sierra con la llave de
barra hexagonal compensada suministrada, y empuje la hoja de sierra lo más posible dentro del
dispositivo de fijación. ¡Asegúrese de que los dientes de la hoja de sierra estén apuntando hacia el
frente!
4. Apriete ligeramente los tornillos hexagonales alternativamente para colocar la hoja de la sierra.
Luego gire los tornillos hasta que estén completamente apretados.
5. Empuje la protección ocular transparente hacia abajo nuevamente. La llave de tuercas se puede
empujar hacia el soporte para su custodia.
Ajuste del rodillo guía
Para una mayor precisión durante el aserrado, el dispositivo 4 está equipado con un rodillo de guía.
Este rodillo debe ajustarse de manera que toque el borde posterior de la hoja de sierra durante el
corte.
• Asegúrese de que el interruptor de encendido y apagado no esté presionado o bloqueado en su
lugar y que el enchufe de la red eléctrica no esté insertado en el tomacorriente!
• Afloje los tornillos hexagonales de la zapatilla de la sierra.
• Empuje el rodillo de guía hacia adelante hasta que toque el borde posterior de la hoja de sierra.
• Apriete los tornillos hexagonales de nuevo.
NOTA: ¡Si el eje del rodillo de guía se engrasa ocasionalmente, esto prolongará la vida útil del rodillo
de guía! Una gota de aceite libre de resina es suficiente!
Operación inicial
1. Asegúrese de que el interruptor de encendido y apagado no esté presionado o bloqueado en su
lugar con el botón de bloqueo. ¡que la hoja de sierra esté ajustada firmemente en el dispositivo de
fijación de la sierra y que los tornillos hexagonales del pie de la sierra estén apretados! Empuje
hacia abajo la protección ocular transparente.
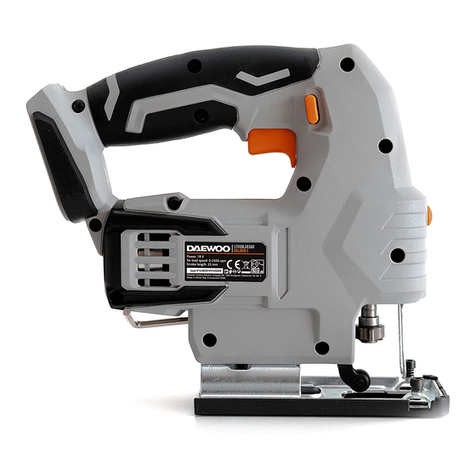
Material
Velocidad
Madera
Alta
Metal
Baja
PVC, Cerámica
Media

1. INSTRUCCIONES DE SEGURIDAD Y OPERACIÓN
Por su propia seguridad y la de los demás, por favor lea estas instrucciones cuidadosamente antes
de utilizar el dispositivo. Éste lo ayudara a entender su producto más fácilmente y evitará riesgos
innecesarios.
Mantenga este manual de instrucciones en un lugar seguro para uso futuro.
Reglas generales de seguridad
ADVERTENCIA Lea toda las instrucciones. El incumplimiento de las siguientes instrucciones puede
provocar descargas eléctricas, incendios y / o lesiones graves.
Guarde todas las advertencias e instrucciones para futuras referencias. El término "herramienta
eléctrica" en las advertencias hace referencia a su máquina (con cable) o con baterías (sin cable).
GUARDE ESTAS INSTRUCCIONES
1) Área de trabajo
a) Mantenga el área de trabajo limpia y bien iluminada. Las áreas desordenadas u oscuras pueden
provocar accidentes.
b) No opere herramientas eléctricas en atmósferas explosivas, como en la presencia de líquidos
inflamables, gases o polvos. Las herramientas eléctricas producen chispas que pueden encender el
polvo o los vapores.
c) Mantenga a los niños y transeúntes alejados mientras opera la herramienta eléctrica. Las distrac-
ciones pueden hacer que pierda el control.
2) Seguridad eléctrica
a) Nunca modifique el enchufe de ninguna manera. No use enchufes adaptadores con herramientas
eléctricas conectadas a tierra. Los enchufes no modificados y las tomas correspondientes reduci-
rán el riesgo de descarga eléctrica.
b) Evite el contacto del cuerpo con superficies puestas a tierra o puestas a tierra, como tuberías,
radiadores, estufas y refrigeradores. Existe un mayor riesgo de descarga eléctrica si su cuerpo está
conectado a tierra o a tierra.
c) No exponga las herramientas eléctricas a la lluvia ni a las condiciones de humedad. El agua que
ingresa a una herramienta eléctrica aumentará el riesgo de descarga eléctrica.
d) No abuse del cable. Nunca use el cable para transportar, tirar o desenchufar la herramienta de
potencia. Mantenga el cable alejado del calor, aceite, bordes afilados o partes móviles. Los cables
dañados o enredados aumentan el riesgo de descarga eléctrica.
e) Al operar una herramienta eléctrica en exteriores, use un cable de extensión adecuado para uso
en exteriores. El uso de un cable adecuado para uso en exteriores reduce el riesgo de descarga
eléctrica.
3) Seguridad personal
a) Manténgase alerta, observe lo que está haciendo y use el sentido común cuando utilice una
herramienta eléctrica. No use una herramienta eléctrica mientras esté cansado o bajo la influencia
de drogas, alcohol o medicamentos. Un momento de falta de atención mientras usa herramientas
eléctricas puede ocasionar lesiones personales graves.
b) Usar equipo de seguridad. Siempre use protección para los ojos. El equipo de seguridad como la
máscara contra el polvo, zapatos de seguridad, antideslizantes, casco o protección auditiva utiliza-
dos para las condiciones adecuadas reducirá las lesiones personales.
c) Evite el arranque accidental. Asegúrese de que el interruptor esté en la posición de apagado
antes de enchufarlo. Llevar herramientas eléctricas con el dedo en el interruptor o enchufar las
herramientas eléctricas que tienen el interruptor encendido invita a accidentes.
d) Retire cualquier llave de ajuste o llave antes de encender la herramienta eléctrica. Una llave
dejada unida a una parte giratoria de la herramienta eléctrica puede ocasionar lesiones personales.
e) No se exceda. Mantenga la postura y el equilibrio en todo momento. Esto permite un mejor
control de la herramienta eléctrica en situaciones inesperadas.
f) Vístase apropiadamente. No use ropa suelta o joyas. Mantenga el cabello, la ropa y los guantes
alejados de las piezas móviles. La ropa suelta, las joyas o el pelo largo pueden quedar atrapados en
las piezas móviles.
g) Si se proporcionan dispositivos para la conexión de las instalaciones de extracción y recolección
de polvo, asegúrese de que estén conectados y se usen correctamente. El uso de estos dispositi-
vos puede reducir los riesgos relacionados con el polvo.
4) Uso y cuidado de la herramienta eléctrica
a) No fuerce la herramienta eléctrica. Use la herramienta eléctrica correcta para su aplicación. La
herramienta eléctrica correcta hará el trabajo mejor y más seguro a la velocidad para la que fue
diseñada.
b) No use la herramienta eléctrica si el interruptor no la enciende y apaga. Cualquier herramienta
eléctrica que no pueda controlarse con el interruptor es peligrosa y debe repararse.
c) Desconecte el enchufe de la fuente de alimentación antes de hacer cualquier ajuste, cambio de
accesorios o almacenamiento de herramientas eléctricas. Dichas medidas preventivas de seguri-
dad reducen el riesgo de iniciar la herramienta eléctrica accidentalmente.
d) Guarde las herramientas eléctricas inactivas fuera del alcance de los niños y no permita que las
personas que no estén familiarizadas con la herramienta eléctrica o estas instrucciones operen la
herramienta eléctrica. Las herramientas eléctricas son peligrosas en manos de usuarios no entrena-
dos.
e) Mantener herramientas eléctricas. Compruebe si hay desalineación o atascamiento de piezas
móviles, roturas de piezas y cualquier otra condición que pueda afectar el funcionamiento de las
herramientas eléctricas. Si está dañada, haga reparar la herramienta eléctrica antes de usarla.
Muchos accidentes son causados por herramientas eléctricas mal mantenidas.
f) Mantenga las herramientas de corte, afiladas y limpias. Las herramientas de corte correctamente
mantenidas con bordes de corte afilados tienen menos probabilidades de atascarse y son más
fáciles de controlar.
g) Utilice la herramienta eléctrica, los accesorios y los bits de la herramienta, etc., de acuerdo con
estas instrucciones y de la manera prevista para el tipo particular de herramienta eléctrica, tenien-
do en cuenta las condiciones de trabajo y el trabajo que se realizará. El uso de la herramienta
eléctrica para operaciones diferentes de las previstas podría dar como resultado una situación
peligrosa.
5) Servicio
a) Haga reparar su herramienta eléctrica por un técnico de reparación calificado que use solo
repuestos idénticos. Esto asegurará que se mantenga la seguridad de la herramienta eléctrica.
Sostenga la herramienta eléctrica por las superficies de agarre aisladas, cuando realice una opera-
ción donde el accesorio de corte pueda entrar en contacto con un cableado oculto o con su propio
cable. El accesorio de corte que entra en contacto con un cable "activo" puede hacer que las
partes metálicas expuestas de la herramienta "vivan" y puedan provocar una descarga eléctrica al
operador.
2. ESPECIFICACIÓN TÉCNICA
Potencia: 18 V
Velocidad sin carga: 0-2500 spm
Longitud de golpe: 25 mm.
Max. capacidad de corte:
- En madera: 50 mm.
- En metal: 8 mm.
Ajuste del péndulo: 3 + apagado
Ajuste biselado dual: 0-45 °
Nivel de sonido LpA: 82.0 dB (A)
Nivel de sonido LwA: 93.0 dB (A)
Vibración:
ah,B = 5,658 m²/s
ah,M = 5,459 m²/s
Incluye: placa base punzonadora, soplador de viruta, guía paralela y láser.
• el valor total de la vibración declarada ha sido medido de acuerdo con un
método de prueba estándar y se puede usar para comparar una herramienta con otra;
• el valor total de la vibración declarada también se puede usar en una evaluación preliminar de la
exposición.
Advertencia:
• La emisión de vibraciones durante el uso real de la herramienta eléctrica puede diferir del valor
total declarado según las formas en que se utiliza la herramienta; y la necesidad de identificar
medidas de seguridad para proteger al operador que se basen en una estimación de la exposición
en las condiciones reales de uso (teniendo en cuenta todas las partes del ciclo operativo, como los
momentos en que se apaga la herramienta y cuándo funcionando en ralentí además del tiempo de
disparo).
13
4. MANTENIMIENTO
• El protector ocular, las ranuras de aire y la carcasa del motor deben mantenerse libres de polvo y
suciedad.
• Frote el dispositivo con un paño limpio o use aire comprimido a baja presión para eliminar el polvo
o la suciedad. Las cantidades excesivas de polvo de metal pueden provocar que la electricidad
proveniente de los componentes internos se conduzca a las partes metálicas expuestas!
• si es necesario reemplazar el cable de suministro, esto debe hacerlo el fabricante o su agente
para evitar riesgos de seguridad.
Limpieza y cuidado
• Retire el enchufe de la toma de corriente y asegúrese de que el interruptor de encendido y apaga-
do no esté bloqueado con el botón de bloqueo. Para la limpieza, use una tela ligeramente húmeda,
¡pero no mojada! No use materiales abrasivos adicionales (gasolina, trementina, etc.) ya que
pueden dañar la carcasa de plástico. ¡Se recomienda el uso de un jabón suave! ¡Asegúrate de que
no entre humedad en la máquina! Después de limpiar, limpie el dispositivo con un paño seco!
ADVERTENCIA!
Esta máquina produce un campo electromagnético durante la operación. Este campo puede, en
algunas circunstancias, interferir con implantes médicos activos o pasivos. Para reducir el riesgo de
lesiones graves o fatales, recomendamos a las personas con implantes médicos que consulten a su
médico y al fabricante del implante médico antes de operar esta máquina.
2. Inserte el enchufe de red en una toma de corriente de 230 voltios y 50 hertzios correctamente
instalada.
3. Acerque la sierra al objeto que va a cortar.
4. Presione el interruptor de encendido y apagado para encender la máquina. Para un funciona-
miento continuo, el interruptor de encendido y apagado puede bloquearse en su lugar con el botón
de bloqueo. Para liberar esto, presione el interruptor de encendido y apagado tanto como sea
posible y luego suéltelo. El botón de bloqueo saltará automáticamente a la posición original.
5. Después del uso, el enchufe de la red eléctrica debe quitarse del enchufe.
NOTA: No corte directamente en la pieza de trabajo con la hoja de la sierra, sino primero taladre un
orificio correspondiente desde el cual comenzar a cortar!
Ajuste para el corte de bisel
El pie de la sierra se puede ajustar de la siguiente manera en ambos lados hasta un ángulo de 45°:
1. Retire el enchufe de la toma de corriente y asegúrese de que el interruptor de encendido y apaga-
do no esté bloqueado con el botón de bloqueo.
2. Afloje (pero no quite) los tornillos hexagonales del pie de la sierra con la llave hexagonal compen-
sada provista.
3. Tire ligeramente hacia atrás del pie de la sierra y ajuste el ángulo deseado de acuerdo con la
escala del mismo.
4. Si es necesario, ajuste el rodillo guía nuevamente (consulte "Ajuste del rodillo guía").
5. Apriete los tornillos hexagonales del pie de la sierra nuevamente.
6. Para la mayoría de los trabajos, la graduación de la escala en el pie de la sierra es lo suficiente-
mente precisa.
Sin embargo, en el caso de cortes de ángulos muy precisos, debe utilizar un dispositivo de medi-
ción de ángulos. La precisión del ángulo se puede probar con un corte de prueba en material de
desecho.
7. Para volver a colocar el pie de la sierra en su posición original, retire el enchufe de la toma de
corriente y asegúrese de que el interruptor de encendido y apagado no esté bloqueado con el
botón de bloqueo.
8. Suelte los tornillos hexagonales del pie de la sierra.
9. Alinee el pie de la sierra en un ángulo de aproximadamente 90 ° con respecto a la hoja de la
sierra y empújelo hacia adelante en la dirección de la hoja de la sierra. Tenga cuidado con los
tornillos hexagonales del pie de la sierra. Estos no deben ser cubiertos por el mismo. Si lo son, tire
del pie un poco hacia atrás.
10. Si es necesario, vuelva a ajustar el rodillo de guía (consulte "Ajuste del rodillo de guía") y vuelva
a apretar los tornillos hexagonales del pie de la sierra.
Establecer el número de golpes
Para garantizar un aserrado de alta calidad, es necesario adaptar el número de golpes de la hoja de
sierra al material que se va a cortar. La velocidad correcta se puede configurar con el regulador (1).
La siguiente tabla muestra la velocidad ideal para los materiales relevantes:
En este manual y / o en la máquina, se utilizan los siguientes símbolos:
De acuerdo con las normas de seguridad esenciales aplicables de las directivas europeas
Símbolo de herramientas de Clase II
Los productos eléctricos usados no se deben tirar con la basura doméstica.
Por favor, recicle en las instalaciones correspondientes.
Consulte con su autoridad local o minorista para obtener consejos de reciclaje.
Lea este manual completamente antes de operar la sierra.
¡Este dispositivo debe ser exclusivamente para uso privado! ¡No es apto para uso comercial! Adver-
tencia: cuando se trabaja con dispositivos eléctricos, se deben observar las siguientes instruccio-
nes de prevención y seguridad para evitar incendios, descargas eléctricas y lesiones físicas!
Insertar la hoja de sierra
1. Retire el enchufe de la toma de corriente y asegúrese de que el interruptor de encendido y apaga-
do no esté bloqueado con el botón de bloqueo.
2. Empuje hacia arriba la protección ocular transparente,
3. Afloje los tornillos hexagonales en el dispositivo de fijación de la hoja de sierra con la llave de
barra hexagonal compensada suministrada, y empuje la hoja de sierra lo más posible dentro del
dispositivo de fijación. ¡Asegúrese de que los dientes de la hoja de sierra estén apuntando hacia el
frente!
4. Apriete ligeramente los tornillos hexagonales alternativamente para colocar la hoja de la sierra.
Luego gire los tornillos hasta que estén completamente apretados.
5. Empuje la protección ocular transparente hacia abajo nuevamente. La llave de tuercas se puede
empujar hacia el soporte para su custodia.
Ajuste del rodillo guía
Para una mayor precisión durante el aserrado, el dispositivo 4 está equipado con un rodillo de guía.
Este rodillo debe ajustarse de manera que toque el borde posterior de la hoja de sierra durante el
corte.
• Asegúrese de que el interruptor de encendido y apagado no esté presionado o bloqueado en su
lugar y que el enchufe de la red eléctrica no esté insertado en el tomacorriente!
• Afloje los tornillos hexagonales de la zapatilla de la sierra.
• Empuje el rodillo de guía hacia adelante hasta que toque el borde posterior de la hoja de sierra.
• Apriete los tornillos hexagonales de nuevo.
NOTA: ¡Si el eje del rodillo de guía se engrasa ocasionalmente, esto prolongará la vida útil del rodillo
de guía! Una gota de aceite libre de resina es suficiente!
Operación inicial
1. Asegúrese de que el interruptor de encendido y apagado no esté presionado o bloqueado en su
lugar con el botón de bloqueo. ¡que la hoja de sierra esté ajustada firmemente en el dispositivo de
fijación de la sierra y que los tornillos hexagonales del pie de la sierra estén apretados! Empuje
hacia abajo la protección ocular transparente.
www.daewoopowerproducts.com
Manufactured under license of Daewoo International Corporation, Korea
Fabricado bajo licencia de Daewoo International Corporation, Corea
1. INSTRUCCIONES DE SEGURIDAD Y OPERACIÓN
Por su propia seguridad y la de los demás, por favor lea estas instrucciones cuidadosamente antes
de utilizar el dispositivo. Éste lo ayudara a entender su producto más fácilmente y evitará riesgos
innecesarios.
Mantenga este manual de instrucciones en un lugar seguro para uso futuro.
Reglas generales de seguridad
ADVERTENCIA Lea toda las instrucciones. El incumplimiento de las siguientes instrucciones puede
provocar descargas eléctricas, incendios y / o lesiones graves.
Guarde todas las advertencias e instrucciones para futuras referencias. El término "herramienta
eléctrica" en las advertencias hace referencia a su máquina (con cable) o con baterías (sin cable).
GUARDE ESTAS INSTRUCCIONES
1) Área de trabajo
a) Mantenga el área de trabajo limpia y bien iluminada. Las áreas desordenadas u oscuras pueden
provocar accidentes.
b) No opere herramientas eléctricas en atmósferas explosivas, como en la presencia de líquidos
inflamables, gases o polvos. Las herramientas eléctricas producen chispas que pueden encender el
polvo o los vapores.
c) Mantenga a los niños y transeúntes alejados mientras opera la herramienta eléctrica. Las distrac-
ciones pueden hacer que pierda el control.
2) Seguridad eléctrica
a) Nunca modifique el enchufe de ninguna manera. No use enchufes adaptadores con herramientas
eléctricas conectadas a tierra. Los enchufes no modificados y las tomas correspondientes reduci-
rán el riesgo de descarga eléctrica.
b) Evite el contacto del cuerpo con superficies puestas a tierra o puestas a tierra, como tuberías,
radiadores, estufas y refrigeradores. Existe un mayor riesgo de descarga eléctrica si su cuerpo está
conectado a tierra o a tierra.
c) No exponga las herramientas eléctricas a la lluvia ni a las condiciones de humedad. El agua que
ingresa a una herramienta eléctrica aumentará el riesgo de descarga eléctrica.
d) No abuse del cable. Nunca use el cable para transportar, tirar o desenchufar la herramienta de
potencia. Mantenga el cable alejado del calor, aceite, bordes afilados o partes móviles. Los cables
dañados o enredados aumentan el riesgo de descarga eléctrica.
e) Al operar una herramienta eléctrica en exteriores, use un cable de extensión adecuado para uso
en exteriores. El uso de un cable adecuado para uso en exteriores reduce el riesgo de descarga
eléctrica.
3) Seguridad personal
a) Manténgase alerta, observe lo que está haciendo y use el sentido común cuando utilice una
herramienta eléctrica. No use una herramienta eléctrica mientras esté cansado o bajo la influencia
de drogas, alcohol o medicamentos. Un momento de falta de atención mientras usa herramientas
eléctricas puede ocasionar lesiones personales graves.
b) Usar equipo de seguridad. Siempre use protección para los ojos. El equipo de seguridad como la
máscara contra el polvo, zapatos de seguridad, antideslizantes, casco o protección auditiva utiliza-
dos para las condiciones adecuadas reducirá las lesiones personales.
c) Evite el arranque accidental. Asegúrese de que el interruptor esté en la posición de apagado
antes de enchufarlo. Llevar herramientas eléctricas con el dedo en el interruptor o enchufar las
herramientas eléctricas que tienen el interruptor encendido invita a accidentes.
d) Retire cualquier llave de ajuste o llave antes de encender la herramienta eléctrica. Una llave
dejada unida a una parte giratoria de la herramienta eléctrica puede ocasionar lesiones personales.
e) No se exceda. Mantenga la postura y el equilibrio en todo momento. Esto permite un mejor
control de la herramienta eléctrica en situaciones inesperadas.
f) Vístase apropiadamente. No use ropa suelta o joyas. Mantenga el cabello, la ropa y los guantes
alejados de las piezas móviles. La ropa suelta, las joyas o el pelo largo pueden quedar atrapados en
las piezas móviles.
g) Si se proporcionan dispositivos para la conexión de las instalaciones de extracción y recolección
de polvo, asegúrese de que estén conectados y se usen correctamente. El uso de estos dispositi-
vos puede reducir los riesgos relacionados con el polvo.
4) Uso y cuidado de la herramienta eléctrica
a) No fuerce la herramienta eléctrica. Use la herramienta eléctrica correcta para su aplicación. La
herramienta eléctrica correcta hará el trabajo mejor y más seguro a la velocidad para la que fue
diseñada.
b) No use la herramienta eléctrica si el interruptor no la enciende y apaga. Cualquier herramienta
eléctrica que no pueda controlarse con el interruptor es peligrosa y debe repararse.
c) Desconecte el enchufe de la fuente de alimentación antes de hacer cualquier ajuste, cambio de
accesorios o almacenamiento de herramientas eléctricas. Dichas medidas preventivas de seguri-
dad reducen el riesgo de iniciar la herramienta eléctrica accidentalmente.
d) Guarde las herramientas eléctricas inactivas fuera del alcance de los niños y no permita que las
personas que no estén familiarizadas con la herramienta eléctrica o estas instrucciones operen la
herramienta eléctrica. Las herramientas eléctricas son peligrosas en manos de usuarios no entrena-
dos.
e) Mantener herramientas eléctricas. Compruebe si hay desalineación o atascamiento de piezas
móviles, roturas de piezas y cualquier otra condición que pueda afectar el funcionamiento de las
herramientas eléctricas. Si está dañada, haga reparar la herramienta eléctrica antes de usarla.
Muchos accidentes son causados por herramientas eléctricas mal mantenidas.
f) Mantenga las herramientas de corte, afiladas y limpias. Las herramientas de corte correctamente
mantenidas con bordes de corte afilados tienen menos probabilidades de atascarse y son más
fáciles de controlar.
g) Utilice la herramienta eléctrica, los accesorios y los bits de la herramienta, etc., de acuerdo con
estas instrucciones y de la manera prevista para el tipo particular de herramienta eléctrica, tenien-
do en cuenta las condiciones de trabajo y el trabajo que se realizará. El uso de la herramienta
eléctrica para operaciones diferentes de las previstas podría dar como resultado una situación
peligrosa.
5) Servicio
a) Haga reparar su herramienta eléctrica por un técnico de reparación calificado que use solo
repuestos idénticos. Esto asegurará que se mantenga la seguridad de la herramienta eléctrica.
Sostenga la herramienta eléctrica por las superficies de agarre aisladas, cuando realice una opera-
ción donde el accesorio de corte pueda entrar en contacto con un cableado oculto o con su propio
cable. El accesorio de corte que entra en contacto con un cable "activo" puede hacer que las
partes metálicas expuestas de la herramienta "vivan" y puedan provocar una descarga eléctrica al
operador.
2. ESPECIFICACIÓN TÉCNICA
Potencia: 18 V
Velocidad sin carga: 0-2500 spm
Longitud de golpe: 25 mm.
Max. capacidad de corte:
- En madera: 50 mm.
- En metal: 8 mm.
Ajuste del péndulo: 3 + apagado
Ajuste biselado dual: 0-45 °
Nivel de sonido LpA: 82.0 dB (A)
Nivel de sonido LwA: 93.0 dB (A)
Vibración:
ah,B = 5,658 m²/s
ah,M = 5,459 m²/s
Incluye: placa base punzonadora, soplador de viruta, guía paralela y láser.
• el valor total de la vibración declarada ha sido medido de acuerdo con un
método de prueba estándar y se puede usar para comparar una herramienta con otra;
• el valor total de la vibración declarada también se puede usar en una evaluación preliminar de la
exposición.
Advertencia:
• La emisión de vibraciones durante el uso real de la herramienta eléctrica puede diferir del valor
total declarado según las formas en que se utiliza la herramienta; y la necesidad de identificar
medidas de seguridad para proteger al operador que se basen en una estimación de la exposición
en las condiciones reales de uso (teniendo en cuenta todas las partes del ciclo operativo, como los
momentos en que se apaga la herramienta y cuándo funcionando en ralentí además del tiempo de
disparo).
4. MANTENIMIENTO
• El protector ocular, las ranuras de aire y la carcasa del motor deben mantenerse libres de polvo y
suciedad.
• Frote el dispositivo con un paño limpio o use aire comprimido a baja presión para eliminar el polvo
o la suciedad. Las cantidades excesivas de polvo de metal pueden provocar que la electricidad
proveniente de los componentes internos se conduzca a las partes metálicas expuestas!
• si es necesario reemplazar el cable de suministro, esto debe hacerlo el fabricante o su agente
para evitar riesgos de seguridad.
Limpieza y cuidado
• Retire el enchufe de la toma de corriente y asegúrese de que el interruptor de encendido y apaga-
do no esté bloqueado con el botón de bloqueo. Para la limpieza, use una tela ligeramente húmeda,
¡pero no mojada! No use materiales abrasivos adicionales (gasolina, trementina, etc.) ya que
pueden dañar la carcasa de plástico. ¡Se recomienda el uso de un jabón suave! ¡Asegúrate de que
no entre humedad en la máquina! Después de limpiar, limpie el dispositivo con un paño seco!
ADVERTENCIA!
Esta máquina produce un campo electromagnético durante la operación. Este campo puede, en
algunas circunstancias, interferir con implantes médicos activos o pasivos. Para reducir el riesgo de
lesiones graves o fatales, recomendamos a las personas con implantes médicos que consulten a su
médico y al fabricante del implante médico antes de operar esta máquina.
2. Inserte el enchufe de red en una toma de corriente de 230 voltios y 50 hertzios correctamente
instalada.
3. Acerque la sierra al objeto que va a cortar.
4. Presione el interruptor de encendido y apagado para encender la máquina. Para un funciona-
miento continuo, el interruptor de encendido y apagado puede bloquearse en su lugar con el botón
de bloqueo. Para liberar esto, presione el interruptor de encendido y apagado tanto como sea
posible y luego suéltelo. El botón de bloqueo saltará automáticamente a la posición original.
5. Después del uso, el enchufe de la red eléctrica debe quitarse del enchufe.
NOTA: No corte directamente en la pieza de trabajo con la hoja de la sierra, sino primero taladre un
orificio correspondiente desde el cual comenzar a cortar!
Ajuste para el corte de bisel
El pie de la sierra se puede ajustar de la siguiente manera en ambos lados hasta un ángulo de 45°:
1. Retire el enchufe de la toma de corriente y asegúrese de que el interruptor de encendido y apaga-
do no esté bloqueado con el botón de bloqueo.
2. Afloje (pero no quite) los tornillos hexagonales del pie de la sierra con la llave hexagonal compen-
sada provista.
3. Tire ligeramente hacia atrás del pie de la sierra y ajuste el ángulo deseado de acuerdo con la
escala del mismo.
4. Si es necesario, ajuste el rodillo guía nuevamente (consulte "Ajuste del rodillo guía").
5. Apriete los tornillos hexagonales del pie de la sierra nuevamente.
6. Para la mayoría de los trabajos, la graduación de la escala en el pie de la sierra es lo suficiente-
mente precisa.
Sin embargo, en el caso de cortes de ángulos muy precisos, debe utilizar un dispositivo de medi-
ción de ángulos. La precisión del ángulo se puede probar con un corte de prueba en material de
desecho.
7. Para volver a colocar el pie de la sierra en su posición original, retire el enchufe de la toma de
corriente y asegúrese de que el interruptor de encendido y apagado no esté bloqueado con el
botón de bloqueo.
8. Suelte los tornillos hexagonales del pie de la sierra.
9. Alinee el pie de la sierra en un ángulo de aproximadamente 90 ° con respecto a la hoja de la
sierra y empújelo hacia adelante en la dirección de la hoja de la sierra. Tenga cuidado con los
tornillos hexagonales del pie de la sierra. Estos no deben ser cubiertos por el mismo. Si lo son, tire
del pie un poco hacia atrás.
10. Si es necesario, vuelva a ajustar el rodillo de guía (consulte "Ajuste del rodillo de guía") y vuelva
a apretar los tornillos hexagonales del pie de la sierra.
Establecer el número de golpes
Para garantizar un aserrado de alta calidad, es necesario adaptar el número de golpes de la hoja de
sierra al material que se va a cortar. La velocidad correcta se puede configurar con el regulador (1).
La siguiente tabla muestra la velocidad ideal para los materiales relevantes:
En este manual y / o en la máquina, se utilizan los siguientes símbolos:
De acuerdo con las normas de seguridad esenciales aplicables de las directivas europeas
Símbolo de herramientas de Clase II
Los productos eléctricos usados no se deben tirar con la basura doméstica.
Por favor, recicle en las instalaciones correspondientes.
Consulte con su autoridad local o minorista para obtener consejos de reciclaje.
Lea este manual completamente antes de operar la sierra.
¡Este dispositivo debe ser exclusivamente para uso privado! ¡No es apto para uso comercial! Adver-
tencia: cuando se trabaja con dispositivos eléctricos, se deben observar las siguientes instruccio-
nes de prevención y seguridad para evitar incendios, descargas eléctricas y lesiones físicas!
Insertar la hoja de sierra
1. Retire el enchufe de la toma de corriente y asegúrese de que el interruptor de encendido y apaga-
do no esté bloqueado con el botón de bloqueo.
2. Empuje hacia arriba la protección ocular transparente,
3. Afloje los tornillos hexagonales en el dispositivo de fijación de la hoja de sierra con la llave de
barra hexagonal compensada suministrada, y empuje la hoja de sierra lo más posible dentro del
dispositivo de fijación. ¡Asegúrese de que los dientes de la hoja de sierra estén apuntando hacia el
frente!
4. Apriete ligeramente los tornillos hexagonales alternativamente para colocar la hoja de la sierra.
Luego gire los tornillos hasta que estén completamente apretados.
5. Empuje la protección ocular transparente hacia abajo nuevamente. La llave de tuercas se puede
empujar hacia el soporte para su custodia.
Ajuste del rodillo guía
Para una mayor precisión durante el aserrado, el dispositivo 4 está equipado con un rodillo de guía.
Este rodillo debe ajustarse de manera que toque el borde posterior de la hoja de sierra durante el
corte.
• Asegúrese de que el interruptor de encendido y apagado no esté presionado o bloqueado en su
lugar y que el enchufe de la red eléctrica no esté insertado en el tomacorriente!
• Afloje los tornillos hexagonales de la zapatilla de la sierra.
• Empuje el rodillo de guía hacia adelante hasta que toque el borde posterior de la hoja de sierra.
• Apriete los tornillos hexagonales de nuevo.
NOTA: ¡Si el eje del rodillo de guía se engrasa ocasionalmente, esto prolongará la vida útil del rodillo
de guía! Una gota de aceite libre de resina es suficiente!
Operación inicial
1. Asegúrese de que el interruptor de encendido y apagado no esté presionado o bloqueado en su
lugar con el botón de bloqueo. ¡que la hoja de sierra esté ajustada firmemente en el dispositivo de
fijación de la sierra y que los tornillos hexagonales del pie de la sierra estén apretados! Empuje
hacia abajo la protección ocular transparente.
Other manuals for DALJS18-1
1
Table of contents
Languages:
Other Daewoo Power Tools manuals

Daewoo
Daewoo DAHG200D4 User manual

Daewoo
Daewoo DALMT18-1 User manual

Daewoo
Daewoo DALI18-1 User manual

Daewoo
Daewoo DAZJ Series User manual

Daewoo
Daewoo DAWS-025 User manual

Daewoo
Daewoo DAER1500 User manual

Daewoo
Daewoo DALGS18-1 User manual

Daewoo
Daewoo DWCSS130-220 User manual

Daewoo
Daewoo DAWS-032 User manual

Daewoo
Daewoo DADL-045 User manual