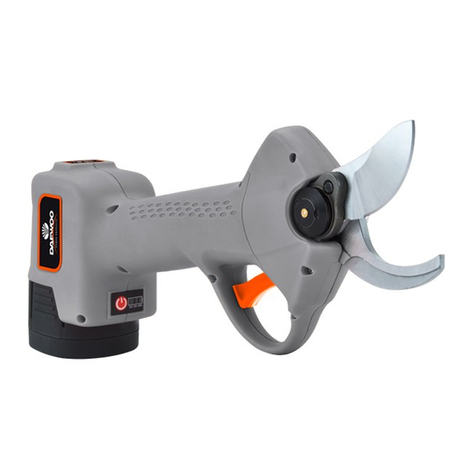
Daewoo DADL-045 User manual

Manufactured under license of Daewoo International Corporation, Korea
www.daewoopowerproducts.com
USER'S MANUAL
DADL-045 / DADL-050
Electric pruning shears

INDEX
1
.CONTENTS .............................................................................................................................................. 3
2
.INTRODUCTION TO SAFE OPERATION ................................................................................................. 3
3
.SAFETY MARK ......................................................................................................................................... 4
4
.OPERATION ............................................................................................................................................. 4
5
.USE ELECTRIC PRUNING SHEAR ......................................................................................................... 5
6
.MAINTENANCE OF BLADE ..................................................................................................................... 5
7
.TECHNICAL SPECIFICATIONS ............................................................................................................... 6
8
.EXPLODED VIEW AND SPARE PART LIST ............................................................................................. 9
EC DECLARATION OF CONFORMITY ..................................................................................................... 12
WARRANTY ............................................................................................................................................... 13
2

EN
3
materials cannot be put around the charger and the battery.
11. Keep the charger and the battery away from children, and put them in the nonflammable environ-
ment.
12. If battery level is less than 25%, and one blinking red lamp shows 10, it means the quantity of
electric charge is not enough, please charge it; if you need to store it for a long term, please charge
it fully, and the battery display shows 4 green lights, we suggest charging once for 1-2 months,
the full charging will be subject to the green light on the chargers.
13. If the appearance is abnormal, for instance: transformation, abnormal smell, smog and so on,
please do not use any articles.
14. The person who loaded with cardiac pacemaker cannot use without the medical certification.
3. SAFETY MARK
• Environment protection.
• Do not use in the rain.
• Electric pruning shears and its articles inside are fragile, please use cautiously.
• Electric pruning shears and its articles inside conform to the CE standard.
• Electric pruning shears and its articles inside belong to hazardous articles; please keep away from
the children.
4. OPERATION (please refer to the pictures)
Take the shear, battery, controller, charger, strap and so on from the box.
If used at the first time, the quantity of electric charge of the battery is not full, please charge it, the
steps show as below:
1. Connect the battery to the charger (see 13).
2. Connect the power line 12 to the charger and the power supply network (see 14).
3. The indicator light of the charger goes red, it means the charging is beginning (see 15).
4. If the indicator light of the charger goes green, it means the charging is full (see 16).
5. Break the power supply network off the charger.
6. Break the battery from the charger.
7. Put the battery into the battery bag , attention: the directions of the power faced outward. (see
18).
8. Connect the long cable 23 to the shears, connect the short cable 19 to the battery, fix the nut,
(see 20), and put the rest cable into the battery bag, then pull the zipper, (see 21-22).
9. Wear the backpack 17, use it according to the use by the left hand or the right hand, and cover the
shear holster 24 onto the left side or the right side of the belt.
10. Adjust shoulder belt and belt, (see 26-27),then close the belt.
11. Use it according to the use by the left hand or the right hand, put the controller box 25 to right or
left belt.
12. Fasten the chest strap (see 28).
13. To avoid the connecting line of the shear twines the branches, please fix the connecting line,
refer to (see 29).
5. USE ELECTRIC PRUNING SHEAR
1. Before use it every time, please oilling the blade, (see 30),note:please connect shears first,then
connect the battery.
2. Open the switch, there will be 1 sound of “Di”, and then 2 sounds of “Di”, it means the power
supply is fine, and the shear can work normally.
3. Double press on the trigger, and then the shear will open, and enter the working status.
4. The shear has 2 working modes: full open mode 31, and semi-open mode 32. Pressing the trigger
2 second 33, when you hear of 1 sound of “Di”, the shear will enter the semi-open mode, this mode
saves the valuable time for the trimming of small diameter, if you want to recover the full open mode,
just press the trigger 2 second , and then hear of 2 sound of “Di”,the loose the trigger quickly. Press
the trigger 4 second,will hear of “Di” “DiDi”, the shears will be standby mode, double click the
trigger will restart.
5. The working time and the service life of the shear depend on the correct and appropriate adjust-
ment of the top blade and the bottom blade; you shall maintain the electric pruning shear unceasin-
gly, such as: polish the blade, adjust the top and the bottom blades and other maintenance.
6. MAINTENANCE OF BLADE
1. The electric pruning shear will be checked before leaving the factory, if the cutting is not clean
and precise, please adjust the top blade and the bottom blade, till the cutting is smooth. When
adjust the blade, please don’t fix the nut tight, if not, it will cause the motor hot, then broken.
2. Periodically polish the blade, this operation is crucial, because it decides the quality of cutting,
and the service life of the blade and the service time of the battery, attention: the frequency of
polishing depends on the hardness and diameter of the branch, and the angle of polishing can be
seen in 34.
3. When the top blade no longer crosses the bottom blade throughout its length, please replace the
blade, cutdiameter 45 mm, refer to 35,36,37,38,39,40,41,42 cut diameter 30-35 mm, refer to 43,44,45,
46,47,48,49,5,51,52,53.
4. After finishing the shearing each time, please clean the blade with the cleanser and lubricant, so
as to avoid the corrosion.
5. Periodically clean the tool body with wet cloth.
6. Add the rust-preventive oil on the blade.
Guarantee and non-responsibility clause
On the precondition that you use it normally and rationally, and maintain it according to the user's
manual, if the mechatronic or the electrical apparatus is failure, Daewoo will offer the warranty for 2
years since it is delivered to the terminal customer.
The abrasion of parts and accessories due to the normal use based upon the user ’s manual, it will
not enjoy the warranty, the blade, dirt-proof cover belong to the vulnerable parts, which excluded
from the range of warranty, unless our company acknowledges the manufacturing defects clearly.
Suggest the users maintaining once in the dealer ’s yearly.
Daewoo and the dealers have no responsibilities for the following conditions:
1. The failure caused by the user ’s insufficient experience or misuse normally due to the error
maintenance.
2. The maintenance or check hasn’t been carried out according to the user’s manual.
3. Use other factories’ parts or accessories for changing the original factory’s parts or accessories,
and the purchased product has been changed or modified.
4. The products without warranty card and effective encoding.
5. The blade is not warranty parts.
6. Unauthorized alteration of the warranty card and body code.
7. The user opened the machine to repair or modify the product without authorization, but failed to
repair the product.
8. The use of bad environment or improper conditions, such as the power supply voltage does not
match, the ambient temperature, humidity and other circumstances caused damage to the product
9. Due to unavoidable factors: such as lightning strikes, fires, floods, traffic accidents and other
irresistible elements cause damage.
10. Any product that is sold at a special price or an old model that is replaced by newer ones is not
covered by the free warranty service.
11. Products that have been sold for more than one year.
7. TECHNICAL SPECIFICATION
Model: DADL-045 Model: DADL-050
Driver: Ball screw Driver: Ball screw
Cut diameter: up to 45 mm Cut diameter: up to 50 mm
Shear capacity: 25-45 mm Shear capacity: 25-50 mm
Power: 36 V DC Brushless Power: 36 V DC Brushless
Motor speed: 2500 rpm Motor speed: 2500 rpm
Lithium battery: 4.8 Ah Lithium battery: 5.2 Ah
Charger voltage: AC 110-240 V Charger voltage: AC 110-240 V
Charging time: 2-3 hours Charging time: 2-3 hours
Material of blade: Stainless alloy Material of blade: Stainless alloy
Includes: tool kit, battery, battery back bag, shear sheath, blade sheath, power indicator and grease
gun.
1. CONTENTS
1. The complete portable set of electric pruning shear If the customer doesn’t have any special
requirements, the full set will contain:
• Pruning shear 2
• User ’s manual
• Tool kit 7
• Lithium battery 3
• Controller, including the connecting line 5
• Charger 4
• A full set of backpack, including the scissor holster 6
• Blow mold case 1
• Grease gun 9 (optional)
• Up blade 8 (optional)
The above is one full set, if any particular requirements or optional configuration, the customer can
decide whether to buy or not.
2. INTRODUCTION TO SAFE OPERATION
The shears is a profession tool for the fruit tree, municipal garden, nursery garden, flower nursery,
park, forest and other places, especially for the construction and maintenance of trees, shrubs,
bushes, vines, grapes and on, which can remarkably improve the effect and quality of pruning with
high efficiency and energy saving, and reduce the alleviate the labor intensity.
Company will have no responsibility for any damage (including the damage caused by the use of
parts and accessories which are not matched by the original factory) due to misuse.
Safety measures related to the use of pruning shear
1. When maintaining or changing or other operations, please make sure that the switch wos closed.
2. Do not disassemble the shear by yourself; otherwise we will refuse any warranty.
3. During use, it is prohibited to touch the blade of the shear by your fingers, avoid cutting off your
fingers or hands.
4. Please do not put the shear and battery in the humid or corrosive circumstances, do not place the
battery in the high temperature or high voltage of environment, such as intense illumination or in
micro-wave oven.
5. After finish working,please open the cable which connect the controller and battery,and confin-
ned the tools was closed
6. Unless particular introductions, do not try to cut off the timber of major diameter or other mate-
rials.
7. The tool shall be kept away from children.
8. The shear has the power-off protection, when the power is on, the connecting line and the electric
shear contact poorly, there will 10 sounds of “Di” continuously, please reconnect connecting line ,
then restart the power supply and operate again.
9. When the shear is started, if it cannot be operated within 1 minutes, it will raise the alarm of 2
sounds of “Di” for the safety, and then the shear will be locked, please double click the switch for
launching. When you are working,then stop working forget to close the switch,after 3 minutes,will
have 2 sound “didi”, then the shear will be locked, please double click the switch for launching.
10. When the battery is charging, the charger and the battery will be heating, so any inflammable
4
materials cannot be put around the charger and the battery.
11. Keep the charger and the battery away from children, and put them in the nonflammable environ-
ment.
12. If battery level is less than 25%, and one blinking red lamp shows 10, it means the quantity of
electric charge is not enough, please charge it; if you need to store it for a long term, please charge
it fully, and the battery display shows 4 green lights, we suggest charging once for 1-2 months,
the full charging will be subject to the green light on the chargers.
13. If the appearance is abnormal, for instance: transformation, abnormal smell, smog and so on,
please do not use any articles.
14. The person who loaded with cardiac pacemaker cannot use without the medical certification.
3. SAFETY MARK
• Environment protection.
• Do not use in the rain.
• Electric pruning shears and its articles inside are fragile, please use cautiously.
• Electric pruning shears and its articles inside conform to the CE standard.
• Electric pruning shears and its articles inside belong to hazardous articles; please keep away from
the children.
4. OPERATION (please refer to the pictures)
Take the shear, battery, controller, charger, strap and so on from the box.
If used at the first time, the quantity of electric charge of the battery is not full, please charge it, the
steps show as below:
1. Connect the battery to the charger (see 13).
2. Connect the power line 12 to the charger and the power supply network (see 14).
3. The indicator light of the charger goes red, it means the charging is beginning (see 15).
4. If the indicator light of the charger goes green, it means the charging is full (see 16).
5. Break the power supply network off the charger.
6. Break the battery from the charger.
7. Put the battery into the battery bag , attention: the directions of the power faced outward. (see
18).
8. Connect the long cable 23 to the shears, connect the short cable 19 to the battery, fix the nut,
(see 20), and put the rest cable into the battery bag, then pull the zipper, (see 21-22).
9. Wear the backpack 17, use it according to the use by the left hand or the right hand, and cover the
shear holster 24 onto the left side or the right side of the belt.
10. Adjust shoulder belt and belt, (see 26-27),then close the belt.
11. Use it according to the use by the left hand or the right hand, put the controller box 25 to right or
left belt.
12. Fasten the chest strap (see 28).
13. To avoid the connecting line of the shear twines the branches, please fix the connecting line,
refer to (see 29).
5. USE ELECTRIC PRUNING SHEAR
1. Before use it every time, please oilling the blade, (see 30),note:please connect shears first,then
connect the battery.
2. Open the switch, there will be 1 sound of “Di”, and then 2 sounds of “Di”, it means the power
supply is fine, and the shear can work normally.
3. Double press on the trigger, and then the shear will open, and enter the working status.
4. The shear has 2 working modes: full open mode 31, and semi-open mode 32. Pressing the trigger
2 second 33, when you hear of 1 sound of “Di”, the shear will enter the semi-open mode, this mode
saves the valuable time for the trimming of small diameter, if you want to recover the full open mode,
just press the trigger 2 second , and then hear of 2 sound of “Di”,the loose the trigger quickly. Press
the trigger 4 second,will hear of “Di” “DiDi”, the shears will be standby mode, double click the
trigger will restart.
5. The working time and the service life of the shear depend on the correct and appropriate adjust-
ment of the top blade and the bottom blade; you shall maintain the electric pruning shear unceasin-
gly, such as: polish the blade, adjust the top and the bottom blades and other maintenance.
6. MAINTENANCE OF BLADE
1. The electric pruning shear will be checked before leaving the factory, if the cutting is not clean
and precise, please adjust the top blade and the bottom blade, till the cutting is smooth. When
adjust the blade, please don’t fix the nut tight, if not, it will cause the motor hot, then broken.
2. Periodically polish the blade, this operation is crucial, because it decides the quality of cutting,
and the service life of the blade and the service time of the battery, attention: the frequency of
polishing depends on the hardness and diameter of the branch, and the angle of polishing can be
seen in 34.
3. When the top blade no longer crosses the bottom blade throughout its length, please replace the
blade, cutdiameter 45 mm, refer to 35,36,37,38,39,40,41,42 cut diameter 30-35 mm, refer to 43,44,45,
46,47,48,49,5,51,52,53.
4. After finishing the shearing each time, please clean the blade with the cleanser and lubricant, so
as to avoid the corrosion.
5. Periodically clean the tool body with wet cloth.
6. Add the rust-preventive oil on the blade.
Guarantee and non-responsibility clause
On the precondition that you use it normally and rationally, and maintain it according to the user's
manual, if the mechatronic or the electrical apparatus is failure, Daewoo will offer the warranty for 2
years since it is delivered to the terminal customer.
The abrasion of parts and accessories due to the normal use based upon the user ’s manual, it will
not enjoy the warranty, the blade, dirt-proof cover belong to the vulnerable parts, which excluded
from the range of warranty, unless our company acknowledges the manufacturing defects clearly.
Suggest the users maintaining once in the dealer ’s yearly.
Daewoo and the dealers have no responsibilities for the following conditions:
1. The failure caused by the user ’s insufficient experience or misuse normally due to the error
maintenance.
2. The maintenance or check hasn’t been carried out according to the user’s manual.
3. Use other factories’ parts or accessories for changing the original factory’s parts or accessories,
and the purchased product has been changed or modified.
4. The products without warranty card and effective encoding.
5. The blade is not warranty parts.
6. Unauthorized alteration of the warranty card and body code.
7. The user opened the machine to repair or modify the product without authorization, but failed to
repair the product.
8. The use of bad environment or improper conditions, such as the power supply voltage does not
match, the ambient temperature, humidity and other circumstances caused damage to the product
9. Due to unavoidable factors: such as lightning strikes, fires, floods, traffic accidents and other
irresistible elements cause damage.
10. Any product that is sold at a special price or an old model that is replaced by newer ones is not
covered by the free warranty service.
11. Products that have been sold for more than one year.
7. TECHNICAL SPECIFICATION
Model: DADL-045 Model: DADL-050
Driver: Ball screw Driver: Ball screw
Cut diameter: up to 45 mm Cut diameter: up to 50 mm
Shear capacity: 25-45 mm Shear capacity: 25-50 mm
Power: 36 V DC Brushless Power: 36 V DC Brushless
Motor speed: 2500 rpm Motor speed: 2500 rpm
Lithium battery: 4.8 Ah Lithium battery: 5.2 Ah
Charger voltage: AC 110-240 V Charger voltage: AC 110-240 V
Charging time: 2-3 hours Charging time: 2-3 hours
Material of blade: Stainless alloy Material of blade: Stainless alloy
Includes: tool kit, battery, battery back bag, shear sheath, blade sheath, power indicator and grease
gun.
1. CONTENTS
1. The complete portable set of electric pruning shear If the customer doesn’t have any special
requirements, the full set will contain:
• Pruning shear 2
• User ’s manual
• Tool kit 7
• Lithium battery 3
• Controller, including the connecting line 5
• Charger 4
• A full set of backpack, including the scissor holster 6
• Blow mold case 1
• Grease gun 9 (optional)
• Up blade 8 (optional)
The above is one full set, if any particular requirements or optional configuration, the customer can
decide whether to buy or not.
2. INTRODUCTION TO SAFE OPERATION
The shears is a profession tool for the fruit tree, municipal garden, nursery garden, flower nursery,
park, forest and other places, especially for the construction and maintenance of trees, shrubs,
bushes, vines, grapes and on, which can remarkably improve the effect and quality of pruning with
high efficiency and energy saving, and reduce the alleviate the labor intensity.
Company will have no responsibility for any damage (including the damage caused by the use of
parts and accessories which are not matched by the original factory) due to misuse.
Safety measures related to the use of pruning shear
1. When maintaining or changing or other operations, please make sure that the switch wos closed.
2. Do not disassemble the shear by yourself; otherwise we will refuse any warranty.
3. During use, it is prohibited to touch the blade of the shear by your fingers, avoid cutting off your
fingers or hands.
4. Please do not put the shear and battery in the humid or corrosive circumstances, do not place the
battery in the high temperature or high voltage of environment, such as intense illumination or in
micro-wave oven.
5. After finish working,please open the cable which connect the controller and battery,and confin-
ned the tools was closed
6. Unless particular introductions, do not try to cut off the timber of major diameter or other mate-
rials.
7. The tool shall be kept away from children.
8. The shear has the power-off protection, when the power is on, the connecting line and the electric
shear contact poorly, there will 10 sounds of “Di” continuously, please reconnect connecting line ,
then restart the power supply and operate again.
9. When the shear is started, if it cannot be operated within 1 minutes, it will raise the alarm of 2
sounds of “Di” for the safety, and then the shear will be locked, please double click the switch for
launching. When you are working,then stop working forget to close the switch,after 3 minutes,will
have 2 sound “didi”, then the shear will be locked, please double click the switch for launching.
10. When the battery is charging, the charger and the battery will be heating, so any inflammable
EN
5
materials cannot be put around the charger and the battery.
11. Keep the charger and the battery away from children, and put them in the nonflammable environ-
ment.
12. If battery level is less than 25%, and one blinking red lamp shows 10, it means the quantity of
electric charge is not enough, please charge it; if you need to store it for a long term, please charge
it fully, and the battery display shows 4 green lights, we suggest charging once for 1-2 months,
the full charging will be subject to the green light on the chargers.
13. If the appearance is abnormal, for instance: transformation, abnormal smell, smog and so on,
please do not use any articles.
14. The person who loaded with cardiac pacemaker cannot use without the medical certification.
3. SAFETY MARK
• Environment protection.
• Do not use in the rain.
• Electric pruning shears and its articles inside are fragile, please use cautiously.
• Electric pruning shears and its articles inside conform to the CE standard.
• Electric pruning shears and its articles inside belong to hazardous articles; please keep away from
the children.
4. OPERATION (please refer to the pictures)
Take the shear, battery, controller, charger, strap and so on from the box.
If used at the first time, the quantity of electric charge of the battery is not full, please charge it, the
steps show as below:
1. Connect the battery to the charger (see 13).
2. Connect the power line 12 to the charger and the power supply network (see 14).
3. The indicator light of the charger goes red, it means the charging is beginning (see 15).
4. If the indicator light of the charger goes green, it means the charging is full (see 16).
5. Break the power supply network off the charger.
6. Break the battery from the charger.
7. Put the battery into the battery bag , attention: the directions of the power faced outward. (see
18).
8. Connect the long cable 23 to the shears, connect the short cable 19 to the battery, fix the nut,
(see 20), and put the rest cable into the battery bag, then pull the zipper, (see 21-22).
9. Wear the backpack 17, use it according to the use by the left hand or the right hand, and cover the
shear holster 24 onto the left side or the right side of the belt.
10. Adjust shoulder belt and belt, (see 26-27),then close the belt.
11. Use it according to the use by the left hand or the right hand, put the controller box 25 to right or
left belt.
12. Fasten the chest strap (see 28).
13. To avoid the connecting line of the shear twines the branches, please fix the connecting line,
refer to (see 29).
5. USE ELECTRIC PRUNING SHEAR
1. Before use it every time, please oilling the blade, (see 30),note:please connect shears first,then
connect the battery.
2. Open the switch, there will be 1 sound of “Di”, and then 2 sounds of “Di”, it means the power
supply is fine, and the shear can work normally.
3. Double press on the trigger, and then the shear will open, and enter the working status.
4. The shear has 2 working modes: full open mode 31, and semi-open mode 32. Pressing the trigger
2 second 33, when you hear of 1 sound of “Di”, the shear will enter the semi-open mode, this mode
saves the valuable time for the trimming of small diameter, if you want to recover the full open mode,
just press the trigger 2 second , and then hear of 2 sound of “Di”,the loose the trigger quickly. Press
the trigger 4 second,will hear of “Di” “DiDi”, the shears will be standby mode, double click the
trigger will restart.
5. The working time and the service life of the shear depend on the correct and appropriate adjust-
ment of the top blade and the bottom blade; you shall maintain the electric pruning shear unceasin-
gly, such as: polish the blade, adjust the top and the bottom blades and other maintenance.
6. MAINTENANCE OF BLADE
1. The electric pruning shear will be checked before leaving the factory, if the cutting is not clean
and precise, please adjust the top blade and the bottom blade, till the cutting is smooth. When
adjust the blade, please don’t fix the nut tight, if not, it will cause the motor hot, then broken.
2. Periodically polish the blade, this operation is crucial, because it decides the quality of cutting,
and the service life of the blade and the service time of the battery, attention: the frequency of
polishing depends on the hardness and diameter of the branch, and the angle of polishing can be
seen in 34.
3. When the top blade no longer crosses the bottom blade throughout its length, please replace the
blade, cutdiameter 45 mm, refer to 35,36,37,38,39,40,41,42 cut diameter 30-35 mm, refer to 43,44,45,
46,47,48,49,5,51,52,53.
4. After finishing the shearing each time, please clean the blade with the cleanser and lubricant, so
as to avoid the corrosion.
5. Periodically clean the tool body with wet cloth.
6. Add the rust-preventive oil on the blade.
Guarantee and non-responsibility clause
On the precondition that you use it normally and rationally, and maintain it according to the user's
manual, if the mechatronic or the electrical apparatus is failure, Daewoo will offer the warranty for 2
years since it is delivered to the terminal customer.
The abrasion of parts and accessories due to the normal use based upon the user ’s manual, it will
not enjoy the warranty, the blade, dirt-proof cover belong to the vulnerable parts, which excluded
from the range of warranty, unless our company acknowledges the manufacturing defects clearly.
Suggest the users maintaining once in the dealer ’s yearly.
Daewoo and the dealers have no responsibilities for the following conditions:
1. The failure caused by the user ’s insufficient experience or misuse normally due to the error
maintenance.
2. The maintenance or check hasn’t been carried out according to the user’s manual.
3. Use other factories’ parts or accessories for changing the original factory’s parts or accessories,
and the purchased product has been changed or modified.
4. The products without warranty card and effective encoding.
5. The blade is not warranty parts.
6. Unauthorized alteration of the warranty card and body code.
7. The user opened the machine to repair or modify the product without authorization, but failed to
repair the product.
8. The use of bad environment or improper conditions, such as the power supply voltage does not
match, the ambient temperature, humidity and other circumstances caused damage to the product
9. Due to unavoidable factors: such as lightning strikes, fires, floods, traffic accidents and other
irresistible elements cause damage.
10. Any product that is sold at a special price or an old model that is replaced by newer ones is not
covered by the free warranty service.
11. Products that have been sold for more than one year.
7. TECHNICAL SPECIFICATION
Model: DADL-045 Model: DADL-050
Driver: Ball screw Driver: Ball screw
Cut diameter: up to 45 mm Cut diameter: up to 50 mm
Shear capacity: 25-45 mm Shear capacity: 25-50 mm
Power: 36 V DC Brushless Power: 36 V DC Brushless
Motor speed: 2500 rpm Motor speed: 2500 rpm
Lithium battery: 4.8 Ah Lithium battery: 5.2 Ah
Charger voltage: AC 110-240 V Charger voltage: AC 110-240 V
Charging time: 2-3 hours Charging time: 2-3 hours
Material of blade: Stainless alloy Material of blade: Stainless alloy
Includes: tool kit, battery, battery back bag, shear sheath, blade sheath, power indicator and grease
gun.
1. CONTENTS
1. The complete portable set of electric pruning shear If the customer doesn’t have any special
requirements, the full set will contain:
• Pruning shear 2
• User ’s manual
• Tool kit 7
• Lithium battery 3
• Controller, including the connecting line 5
• Charger 4
• A full set of backpack, including the scissor holster 6
• Blow mold case 1
• Grease gun 9 (optional)
• Up blade 8 (optional)
The above is one full set, if any particular requirements or optional configuration, the customer can
decide whether to buy or not.
2. INTRODUCTION TO SAFE OPERATION
The shears is a profession tool for the fruit tree, municipal garden, nursery garden, flower nursery,
park, forest and other places, especially for the construction and maintenance of trees, shrubs,
bushes, vines, grapes and on, which can remarkably improve the effect and quality of pruning with
high efficiency and energy saving, and reduce the alleviate the labor intensity.
Company will have no responsibility for any damage (including the damage caused by the use of
parts and accessories which are not matched by the original factory) due to misuse.
Safety measures related to the use of pruning shear
1. When maintaining or changing or other operations, please make sure that the switch wos closed.
2. Do not disassemble the shear by yourself; otherwise we will refuse any warranty.
3. During use, it is prohibited to touch the blade of the shear by your fingers, avoid cutting off your
fingers or hands.
4. Please do not put the shear and battery in the humid or corrosive circumstances, do not place the
battery in the high temperature or high voltage of environment, such as intense illumination or in
micro-wave oven.
5. After finish working,please open the cable which connect the controller and battery,and confin-
ned the tools was closed
6. Unless particular introductions, do not try to cut off the timber of major diameter or other mate-
rials.
7. The tool shall be kept away from children.
8. The shear has the power-off protection, when the power is on, the connecting line and the electric
shear contact poorly, there will 10 sounds of “Di” continuously, please reconnect connecting line ,
then restart the power supply and operate again.
9. When the shear is started, if it cannot be operated within 1 minutes, it will raise the alarm of 2
sounds of “Di” for the safety, and then the shear will be locked, please double click the switch for
launching. When you are working,then stop working forget to close the switch,after 3 minutes,will
have 2 sound “didi”, then the shear will be locked, please double click the switch for launching.
10. When the battery is charging, the charger and the battery will be heating, so any inflammable
6
materials cannot be put around the charger and the battery.
11. Keep the charger and the battery away from children, and put them in the nonflammable environ-
ment.
12. If battery level is less than 25%, and one blinking red lamp shows 10, it means the quantity of
electric charge is not enough, please charge it; if you need to store it for a long term, please charge
it fully, and the battery display shows 4 green lights, we suggest charging once for 1-2 months,
the full charging will be subject to the green light on the chargers.
13. If the appearance is abnormal, for instance: transformation, abnormal smell, smog and so on,
please do not use any articles.
14. The person who loaded with cardiac pacemaker cannot use without the medical certification.
3. SAFETY MARK
• Environment protection.
• Do not use in the rain.
• Electric pruning shears and its articles inside are fragile, please use cautiously.
• Electric pruning shears and its articles inside conform to the CE standard.
• Electric pruning shears and its articles inside belong to hazardous articles; please keep away from
the children.
4. OPERATION (please refer to the pictures)
Take the shear, battery, controller, charger, strap and so on from the box.
If used at the first time, the quantity of electric charge of the battery is not full, please charge it, the
steps show as below:
1. Connect the battery to the charger (see 13).
2. Connect the power line 12 to the charger and the power supply network (see 14).
3. The indicator light of the charger goes red, it means the charging is beginning (see 15).
4. If the indicator light of the charger goes green, it means the charging is full (see 16).
5. Break the power supply network off the charger.
6. Break the battery from the charger.
7. Put the battery into the battery bag , attention: the directions of the power faced outward. (see
18).
8. Connect the long cable 23 to the shears, connect the short cable 19 to the battery, fix the nut,
(see 20), and put the rest cable into the battery bag, then pull the zipper, (see 21-22).
9. Wear the backpack 17, use it according to the use by the left hand or the right hand, and cover the
shear holster 24 onto the left side or the right side of the belt.
10. Adjust shoulder belt and belt, (see 26-27),then close the belt.
11. Use it according to the use by the left hand or the right hand, put the controller box 25 to right or
left belt.
12. Fasten the chest strap (see 28).
13. To avoid the connecting line of the shear twines the branches, please fix the connecting line,
refer to (see 29).
5. USE ELECTRIC PRUNING SHEAR
1. Before use it every time, please oilling the blade, (see 30),note:please connect shears first,then
connect the battery.
2. Open the switch, there will be 1 sound of “Di”, and then 2 sounds of “Di”, it means the power
supply is fine, and the shear can work normally.
3. Double press on the trigger, and then the shear will open, and enter the working status.
4. The shear has 2 working modes: full open mode 31, and semi-open mode 32. Pressing the trigger
2 second 33, when you hear of 1 sound of “Di”, the shear will enter the semi-open mode, this mode
saves the valuable time for the trimming of small diameter, if you want to recover the full open mode,
just press the trigger 2 second , and then hear of 2 sound of “Di”,the loose the trigger quickly. Press
the trigger 4 second,will hear of “Di” “DiDi”, the shears will be standby mode, double click the
trigger will restart.
5. The working time and the service life of the shear depend on the correct and appropriate adjust-
ment of the top blade and the bottom blade; you shall maintain the electric pruning shear unceasin-
gly, such as: polish the blade, adjust the top and the bottom blades and other maintenance.
6. MAINTENANCE OF BLADE
1. The electric pruning shear will be checked before leaving the factory, if the cutting is not clean
and precise, please adjust the top blade and the bottom blade, till the cutting is smooth. When
adjust the blade, please don’t fix the nut tight, if not, it will cause the motor hot, then broken.
2. Periodically polish the blade, this operation is crucial, because it decides the quality of cutting,
and the service life of the blade and the service time of the battery, attention: the frequency of
polishing depends on the hardness and diameter of the branch, and the angle of polishing can be
seen in 34.
3. When the top blade no longer crosses the bottom blade throughout its length, please replace the
blade, cutdiameter 45 mm, refer to 35,36,37,38,39,40,41,42 cut diameter 30-35 mm, refer to 43,44,45,
46,47,48,49,5,51,52,53.
4. After finishing the shearing each time, please clean the blade with the cleanser and lubricant, so
as to avoid the corrosion.
5. Periodically clean the tool body with wet cloth.
6. Add the rust-preventive oil on the blade.
Guarantee and non-responsibility clause
On the precondition that you use it normally and rationally, and maintain it according to the user's
manual, if the mechatronic or the electrical apparatus is failure, Daewoo will offer the warranty for 2
years since it is delivered to the terminal customer.
The abrasion of parts and accessories due to the normal use based upon the user ’s manual, it will
not enjoy the warranty, the blade, dirt-proof cover belong to the vulnerable parts, which excluded
from the range of warranty, unless our company acknowledges the manufacturing defects clearly.
Suggest the users maintaining once in the dealer ’s yearly.
Daewoo and the dealers have no responsibilities for the following conditions:
1. The failure caused by the user ’s insufficient experience or misuse normally due to the error
maintenance.
2. The maintenance or check hasn’t been carried out according to the user’s manual.
3. Use other factories’ parts or accessories for changing the original factory’s parts or accessories,
and the purchased product has been changed or modified.
4. The products without warranty card and effective encoding.
5. The blade is not warranty parts.
6. Unauthorized alteration of the warranty card and body code.
7. The user opened the machine to repair or modify the product without authorization, but failed to
repair the product.
8. The use of bad environment or improper conditions, such as the power supply voltage does not
match, the ambient temperature, humidity and other circumstances caused damage to the product
9. Due to unavoidable factors: such as lightning strikes, fires, floods, traffic accidents and other
irresistible elements cause damage.
10. Any product that is sold at a special price or an old model that is replaced by newer ones is not
covered by the free warranty service.
11. Products that have been sold for more than one year.
7. TECHNICAL SPECIFICATION
Model: DADL-045 Model: DADL-050
Driver: Ball screw Driver: Ball screw
Cut diameter: up to 45 mm Cut diameter: up to 50 mm
Shear capacity: 25-45 mm Shear capacity: 25-50 mm
Power: 36 V DC Brushless Power: 36 V DC Brushless
Motor speed: 2500 rpm Motor speed: 2500 rpm
Lithium battery: 4.8 Ah Lithium battery: 5.2 Ah
Charger voltage: AC 110-240 V Charger voltage: AC 110-240 V
Charging time: 2-3 hours Charging time: 2-3 hours
Material of blade: Stainless alloy Material of blade: Stainless alloy
Includes: tool kit, battery, battery back bag, shear sheath, blade sheath, power indicator and grease
gun.
1. CONTENTS
1. The complete portable set of electric pruning shear If the customer doesn’t have any special
requirements, the full set will contain:
• Pruning shear 2
• User ’s manual
• Tool kit 7
• Lithium battery 3
• Controller, including the connecting line 5
• Charger 4
• A full set of backpack, including the scissor holster 6
• Blow mold case 1
• Grease gun 9 (optional)
• Up blade 8 (optional)
The above is one full set, if any particular requirements or optional configuration, the customer can
decide whether to buy or not.
2. INTRODUCTION TO SAFE OPERATION
The shears is a profession tool for the fruit tree, municipal garden, nursery garden, flower nursery,
park, forest and other places, especially for the construction and maintenance of trees, shrubs,
bushes, vines, grapes and on, which can remarkably improve the effect and quality of pruning with
high efficiency and energy saving, and reduce the alleviate the labor intensity.
Company will have no responsibility for any damage (including the damage caused by the use of
parts and accessories which are not matched by the original factory) due to misuse.
Safety measures related to the use of pruning shear
1. When maintaining or changing or other operations, please make sure that the switch wos closed.
2. Do not disassemble the shear by yourself; otherwise we will refuse any warranty.
3. During use, it is prohibited to touch the blade of the shear by your fingers, avoid cutting off your
fingers or hands.
4. Please do not put the shear and battery in the humid or corrosive circumstances, do not place the
battery in the high temperature or high voltage of environment, such as intense illumination or in
micro-wave oven.
5. After finish working,please open the cable which connect the controller and battery,and confin-
ned the tools was closed
6. Unless particular introductions, do not try to cut off the timber of major diameter or other mate-
rials.
7. The tool shall be kept away from children.
8. The shear has the power-off protection, when the power is on, the connecting line and the electric
shear contact poorly, there will 10 sounds of “Di” continuously, please reconnect connecting line ,
then restart the power supply and operate again.
9. When the shear is started, if it cannot be operated within 1 minutes, it will raise the alarm of 2
sounds of “Di” for the safety, and then the shear will be locked, please double click the switch for
launching. When you are working,then stop working forget to close the switch,after 3 minutes,will
have 2 sound “didi”, then the shear will be locked, please double click the switch for launching.
10. When the battery is charging, the charger and the battery will be heating, so any inflammable
EN
7
2
1
6
10
11
13
12
14
17 18 19
15 16
7 8
9
4
5
3

8
20
23
24 27
28
25 26 29
323130
33 34
36 37 38
35
21 22

EN
9
65
58
59
60
61
10
11
12
13
14
15
16
17
18
19
20
21
22
23
24
25
26
27
28
29
30
31
32
33
34
35
36
37
38
66
67
39
40
41
42
43
44
45
46
47
48
49
50
51
52
53
54
55
56
57
68
62
58
12 3 4 56
7
8
9
8. EXPLODED VIEW AND SPARE PART LIST

10
1. Pressure matching type oiling screw cup (Not retail) - x1
2. Oil scre (Not retail) - x1
3. Pin (assembled on the down blade, Not retail) - x1
4. Cylindrical roller thrust bearing (Not retail) - x1
5. Block pin (Not retail) - x1
6. Down blade(part no. 3 together) - x1
7. Up blade - x1
8. Thrust washer - x1
9. Hexagonal screw with ten literally 5X6 - x1
10. Hex nut M8X1 - x1
11. Hexagon socket mushroom head screw M6X23 - x2
12. Double sided toothed gasket 6 - x2
13. Opening block 5 - x3
14. Eleject pin - x1
15. Slot screw M5X3 (Not retail) - x2
16. Rubber plug (Not retail) - x1
17. Cover for eleject pin (Not retail) - x1
18. Cross grooved disc head screw M3X14 - x1
19. Left shell - x1
20. Lead retainer 11.4*6*0.5 (Not retail) - x1
21. Cross grooved disc head self-tapping screw (Not retail) - x2
22. Screw cover - x2
23. Magnetic steel (Not retail) - x2
24. Plane ball bearing - x1
25. Punched outer ring ball bearings - x1
26. O-ring - x1
27. Bearing pedestal - x1
28. Cylindrical roller thrust bearing - x1
29. Output shaft - x1
30. Planetary shaft - x1
31. Cross grooved countersunk head screw - x1
32. Elastic cylindrical pin - x2
33. Gear - x3
34. Outside the ring gear - x1
35. Cross fixing screw - x1
36. Gear mat - x1
37. Small shell - x1
38. Silicone handle cover - x1
39. Sall shell screw - x2
40. Motor cover - x1
41. Taper ring - x1
42. Thrust washer - x1
43. Cross grooved disc head screw M2X10 - x4
44. Pin cover - x1
45. Bronze needle (Not retail) - x3
46. Motor - x1
47. Cross grooved disc head screw M2.5X4 - x3
48. Stainless steel tube (Not retail) - x1
49. BOX - x1

EN
11
50. Heat insulating tape (Not retail) - x1
51. Small plating (Not retail) - x2
52. Big plating (Not retail) - x1
53. Cylindrical nitrate (Not retail) - x1
54. Cross grooved disc head screw - x2
55. Type F self-tapping screw for cross - grooved disc head - x3
56. Rght shell - x1
57. Trigger board - x1
58. Switch - x1
59. Magnetic steel (Not retail) - x1
60. Button - x1
61. Spring - x1
62. Copper bush - x1
63. Feed screw nut - x1
64. Ball screw - x1
65. Switch Assy (Part no. 58.59.60.61.62 together) - x1
66. Reduction Assy(Part no. 32.33.34.35.36 together) - x1
67. Ball screw Assy(Part no. 20.21.22.23.24.25.26.27.28.29.30.31.56.57 together) - x1
68. Box Assy (Part no. 48.49.50.51.52.53 together) - x1
69. Oil screw Assy (Part no. 1.2.4.5.8.9.10 together) - x1
70. Motor cover Assy(Part no. 40.41.42 together) - x1
71. Eleject pin Assy(Part no. 14.15.16.17 together) - x1
72. Charger - x1
73. Battery - x1
74. Long Cable - x1
75. Controller board - x1
76. Controller box - x1
77. Eectric quantity display board - x1

12
EC DECLARATION OF CONFORMITY
We: GBR Corp. LTD, Room 1002, 10/F., David House, 8-20 Nanking Street, Jordan, Kowloon, Hong
Kong, China
Declare that the Product detailed below:
electric pruning shears
Model: DADL-045, DADL-050
Brand:
Satisfies the requirement of the Council Directives:
2006/42/EC (Machinery)
2014/35/EU (Low Voltage)
2014/30/EU (Electromagnetic Compatibility)
Name and address of authorized person to compile the technical file: Ente
Certificazione Macchine Srl
Via Ca’ Bella, 243 – Loc. Castello di Serravalle – 40053 Valsamoggia (BO) - ITALY
Notified body: Ente Certificazione Macchine Srl
Number of notified body: RG01_ECM rev.3
and conforms to the norms:
EN 55014-1:2017, EN IEC 61000-3-2:2019,
EN 61000-3-3:2013+A1:2019, EN 55014-2:2015,
EN 62841-1:2015, EN 62841-2-8:2016,
EN ISO 12100:2010, EN 60204-1: 2018,
EN ISO 11111-1:2016,
EN ISO 11111-7:2005+A1:2009+A2:2016,
EN ISO 9902-1:2001+A1:2009+A2:2014,
EN ISO 9902-7:2001+A1:2009+A2:2014
Position of Signatory: Director of research and development department
Date: March, 2021
Lishui , Zhejiang , CHINA

WARRANTY DOES NOT COVER
GUARANTEE
The warranty period starts from the date of sale of the products and covers 2 years for all power products.
During the warranty period, free failures caused due to the use of poor-quality materials in the production and manufacturer
workmanship admitted fault are removed. The guarantee comes into force only when warranty card and cutting coupons are
properly filled. The product is accepted for repair in its pure form and full completeness.
• Mechanical damage (cracks, chips, etc.) and damage
caused by exposure to aggressive media, foreign objects
inside the unit and air vents, as well as for damage occurred
as a result of improper storage (corrosion of metal parts);
• Failures caused by overloading or product misuse, use of
the product for other purposes. A sure sign of overload
products is melting or discoloration of parts due to the high
temperature, simultaneous failure of two or more nodes,
teaser on the surfaces of the cylinder and the piston or
destruction of piston rings. Also, the warranty does not
cover failure of the automatic voltage regulator due to
incorrect operation;
• Failure caused by clogging of the fuel and cooling
systems;
• Wearing parts (carbon brushes, belts, rubber seals, oil
seals, shock absorbers, springs, clutches, spark plugs,
mufflers, nozzles, pulleys, guide rollers, cables, recoil
starter, chucks, collets, removable batteries, filters and
safety elements, grease, removable devices, equipment,
knives, drills, etc.);
• Electrical cables with mechanical and thermal damage;
• Product opened or repaired by a non-authorized service
center.
• Prevention, care products (cleaning, washing, lubrication,
etc.), installation and configuration of the product;
• Natural wear products (production share);
• Failures caused by using the product for the needs related
to business activities;
• If the warranty card is empty or missing seal (stamp) of the
Seller;
• The absence of the holder's signature on the warranty card.
WARRANTY CARD
Product
Model
Company
Date
of sale
Product
Model
Company
Date
of sale
Product
Model
Company
Date
of sale
The product is in good conditions and fully complete. Read and agree the terms of the warranty.
Product model
Serial number
Username
Date of sale
Company
Client's signature

www.daewoopowerproducts.com
Manufactured under license of Daewoo International Corporation, Korea
This manual suits for next models
1
Table of contents
Other Daewoo Power Tools manuals

Daewoo
Daewoo DALMT18-1 User manual

Daewoo
Daewoo SDA2313GE User manual

Daewoo
Daewoo DALGS18-1 User manual

Daewoo
Daewoo DWCSS130-220 User manual

Daewoo
Daewoo DAER1500 User manual

Daewoo
Daewoo DAHG2000 User manual

Daewoo
Daewoo DAJS 400 User manual

Daewoo
Daewoo DAZJ Series User manual

Daewoo
Daewoo DALJS18-1 User manual

Daewoo
Daewoo DALI18-1 User manual