Dafra DRPB48 User manual

DRPB48 Operation Manual
Pneumatic Blind Rivet Setting Tool - DRPB48
READ THIS MANUAL CAREFULLY BEFORE USING THE TOOL !
It is IMPORTANT to follow the safety instructions for adequate protection
against injuries.
- This tool should be used ONLY to set blind rivets within the TOOL’S CAPACITY. It MUST
NOT be used for other purposes, such as hammer, etc.
- This tool should be always operated with compressed air supply within the air pressure
range 0.5Mpa ~ 0.7Mpa.
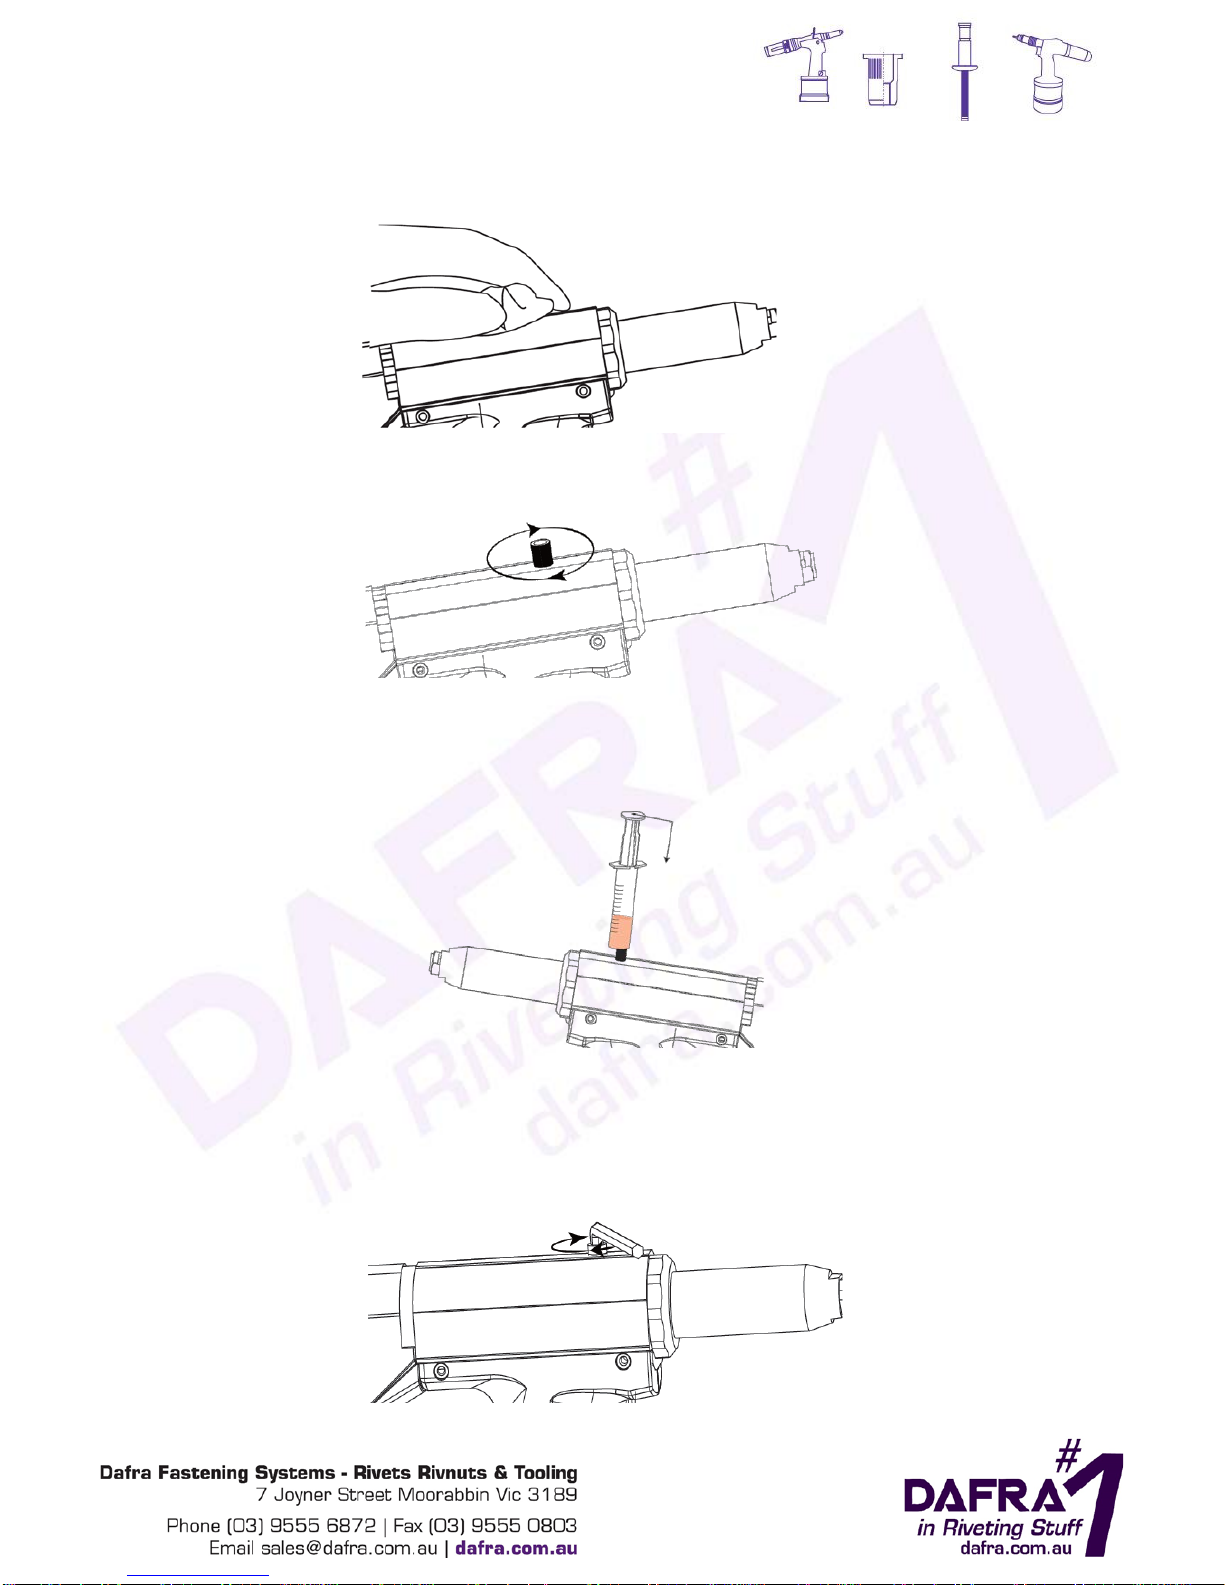
- Always DISCONNECT the air supply from the tool before changing the tool parts, such as
jaws, etc.
- DO NOT use the tool in the environment described as below:
fuel and combustion air.
temperature rapidly rising.
humidity, rain, water, storm and thunder, lightning.
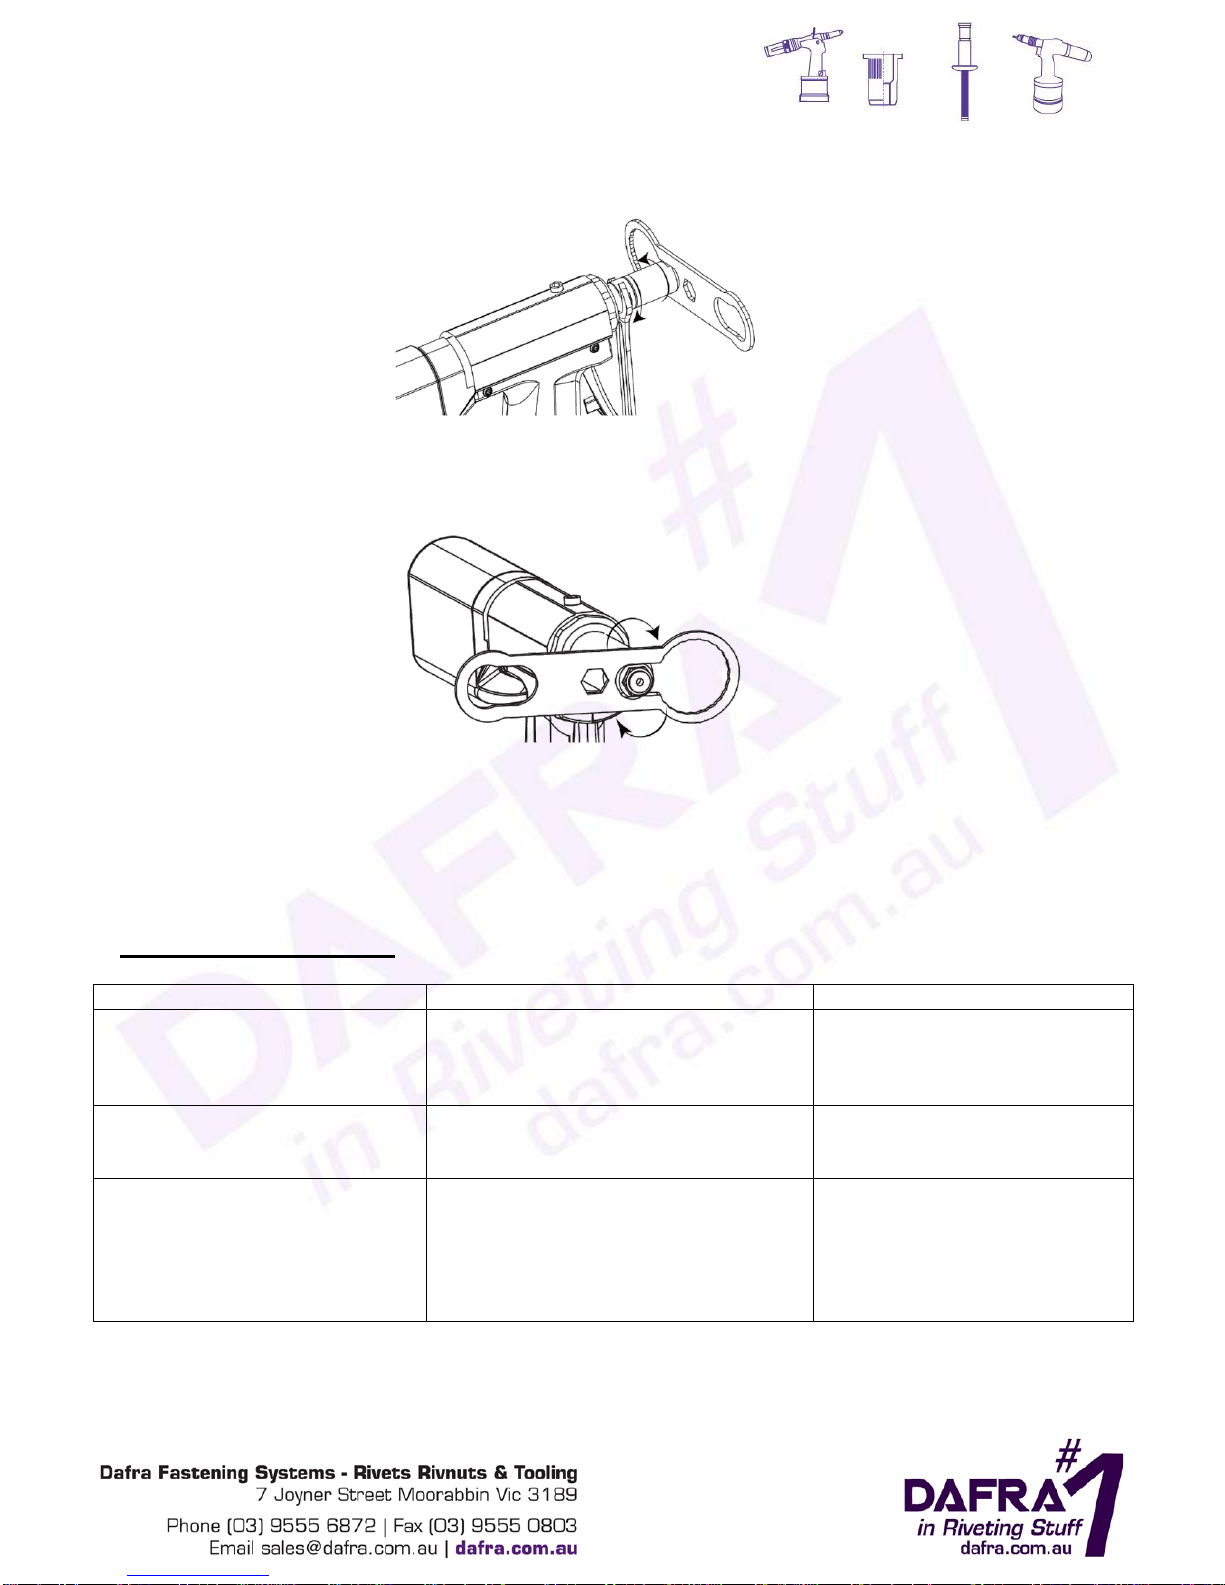
- When the tool is suspended by the operation hook during use, be sure the tool will not fall.
- When using the tool, always carry protective goggles, protective gloves, safety helmet, and
other necessary protections. It is highly recommended for safety reasons.
- Only use genuine spare parts for maintenance and repairs.
- All repair work must be carried out by skilled personnel, when in doubt, always return the
tool to the distributor.
TOOL CAPACITY
Blind rivets 3.0/3.2mm ~ 4.0mm ~ 4.8/5.0mm standard – 2.4mm optional.
TOOL SPECIFICATIONS
Air supply pressure: 0.5Mpa ~ 0.7Mpa
Output traction power: 8,400N ~ 11,760 N
Stroke: 16mm
Net weight: 1.30kgs

DRPB48 Operation Manual
GETTING STARTED
Please refer to the TOOL EXPLOSIVE ILLUSTRATION and the PARTS LIST in this manual in
order to have a good understanding of the tool parts described. The descriptions of the tool parts
appear in this manual are in italics with the parts position numbers corresponding to the tool
explosive illustration.
1) This pneumatic powered tool should be used with a compressed air supply. It is
recommended to use an air hose with a diameter bigger than 8mm.
2) Before connecting the tool to the compressed air supply, check that the compressed air
pressure is within the specified range of between 0.5Mpa ~ 0.7Mpa. Once the air pressure
has been confirmed, connect the air hose adaptor onto the tool air adaptor (#47). The air
adaptor comes in different versions in different countries. Normally the tools are equipped
with the correct version for your country as default, however, if the air adaptor you have
received does is incorrect, please contact the tool distributor(s).
3) Change and use correct nosepiece (#1) according to the size of the rivet to be set. This tool
is equipped with nosepieces 3.0/3.2mm, 4.0mm and 4.8/5.0mm (on the tool) in the kit.
Follow the steps below to change the nosepiece (#1);
a) Remove the air supply hose from air adaptor (#47).
b) Use the wrench (in accessories pack) to remove the nosepiece (#1) from the tool as
below;
c) Select the correct nosepiece in the accessories pack and screw on to the tool, using the
wrench to fix it firmly on the tool.
4) Install the mandrel release protector (in accessories pack) on the back of the tool.

DRPB48 Operation Manual
TOOL OPERATION FOR SETTING BLIND RIVETS
1) After completing the start-up preparations, place the rivet mandrel into the nosepiece, and
holding the tool to insert the rivet into the pre-drilled hole of the work piece that needs to be
fastened.
2) Pull the tool trigger (#43) to set the blind rivet in its position on work piece.
3) After setting the rivet, tilt the tool to the front in order to release the mandrel from inside the
tool or tilt back the tool and the mandrel will be released from the back of the tool into the
mandrel release protector. While using the tool, be sure always with the mandrel release
protector on the tool, in case a mandrel comes shooting out from the back and causes
injuries.
TOOL MAINTAINANCE
In order to maintain optimum performance after several weeks of regular use, add a few drops
of hydraulic oil on the inlet of the air adaptor (#47) of the tool in order to reduce the friction of
the tool parts since the oil will be blown inside the tool when tool is in operation.
After a period of use, the tool stroke may be reduced which indicated that the hydraulic oil in the
pneumatic tool needs to be refilled or changed;
1) Remove the screw (#9) with a hexagon wrench:

DRPB48 Operation Manual
2) Connect the air supply and to place a cloth over the hole where the screw (#9) was removed,
then to pull the trigger (#43) and the oil will be forced out from the tool;
3) Screw the oil inject adaptor (in oil injector set in the accessories pack) into the hole where
screw (#9) was removed;
4) Use the oil injector (in the accessories pack) to slowly inject the oil until full (approx. 15ml).
Remove the injector and its adaptor, then clean off any excess oil on the tool and tightly
screw the screw (#9) back into the tool;
5) Test the tool stroke. If the stroke is still not what it should be, some air could have entered
the oil cylinder (#11) while refilling the oil in the tool. To release this extra air from the tool,
connect the tool to the air supply, pull the tool trigger (#43) 6 or 7 times, then loosen the
screw (#9), to let the extra air leak out and then tighten the screw (#9) again.

DRPB48 Operation Manual
After extensive use, the tool may accumulate small metal chips from rivets within the nose
assembly of the tool. This will compromise the tool’s efficiency; therefore, it is recommended
that you clean or change the nose assembly parts periodically.
1) Use the wrench (in accessories pack) and a spanner provided by user;
Included in accessories kit
Provided by user
Wrench hole 1 for compressed spring pedestal (#19);
Wrench hole 2 for clamping sleeve (#3);
Wrench hole 3 for nosepieces (#1);
Wrench hole 4 for front sleeve (#2);
2) Remove the nosepiece (#1) on the tool using the wrench included in the kit;
3) Disassemble the front sleeve (#2):

DRPB48 Operation Manual
4) Disassemble clamping sleeve (#3):
5) Take out the 3-jaw set (#4) from the clamping sleeve (#3), then remove the assembly pusher
(#5) and the pusher spring (#6) from the tool. Once removed, inspect all parts for wear
before cleaning and replacing them. Any damaged parts should be replaced at this time.
6) Re-assemble the cleaned or replacement parts. Put the pusher spring (#6) onto the
assembly pusher (#5) and insert it back to the tool where assembly oil cylinder (#11) is
located;
7) Place the 3-jaw set (#4) into the clamping sleeve (#3) and be sure that all 3 jaws are seated
in the correct position;

DRPB48 Operation Manual
8) Place the clamping sleeve (#3) with the 3-jaw set (#4) inside it onto the assembly pusher
(#5) and ensure it is assembled firmly;
9) Replace the front sleeve (#2) and nosepiece (#1) on the tool;
TROUBLE SHOOTING
Problem
Possible Causes
Solutions
Rivet mandrel does not break
3-jaw set worn off or damaged.
Hydraulic oil in tool not sufficient.
Air supply with low pressure.
Change 3-jaw set.
Refill hydraulic oil.
Increase air supply pressure
within the specified range.
Jaws slippery on rivet mandrel
3-jaw set worn out.
Metal chips between jaws.
Pusher spring fatigued.
Change 3-jaw set.
Clean the jaws.
Change pusher spring.
Rivet mandrel cannot be put into
nosepiece
Incorrect nosepiece size chosen.
Jaws get stuck by mandrel not being
released.
Use correct size nosepiece
for rivet.
Remove any jammed
mandrels by disassembling
front sleeve and clamping
sleeve.

DRPB48 Operation Manual

DRPB48 Operation Manual
PARTS LIST
PART POSITION
PART CODE
DESCRIPTION
QUANTITY IN TOOL/KIT
1
P09005-00
nosepiece E/3.3 - 4,8/5,0mm
1
2
A00001-00
assembly front sleeve
1
3
P00003-00
clamping sleeve
1
4
P00053-00
3-jaw set
1
5
A00002-00
assembly pusher 5,0
1
6
P00007-00
pusher spring
1
7
F00001-00
O-ring
2
8
P00008-00
piston pin washer
1
9
P00009-00
screw
1
10
F00002-00
washer
1
11
A00020-00
assembly oil cylinder
1
12
F00003-00
U-ring
1
13
P00010-00
piston pedestal washer
1
14
F00004-00
O-ring
1
15
A00004-00
assembly piston pin
1
16
P00118-00
outer return spring
1
17
P00014-00
inner return spring
1
18
P00015-00
compressed spring seat
1
19
P00016-00
compressed spring pedestal
1
20
P00017-00
oil cylinder washer
1
21
F00029-00
U-ring
1
22
P00072-00
piston shaft washer
1
23
A00005-00
assembly air cylinder
1
24
P00073-00
assembly oil cylinder locknut
1
25
F00030-00
O-ring
1
26
F60076-00
O-ring
1
27
A00021-00
assembly air cylinder piston-shaft
1
28
P00027-00
piston pedestal
1
29
F00009-00
O-ring
1
30
P00028-00
air cylinder pedestal
1
31
P00021-00
air cylinder screw
6
32
P00029-00
air cylinder pedestal screw
1
33
P00030-00
switch lower base
1
34
F00010-00
O-ring
1
35
F00011-00
O-ring
2
36
P00031-00
switch upper base
1
37
P00032-00
switch shaft spring
1
38
F00012-00
O-ring
1
39
A00007-00
assembly trigger shaft
1
40
F00013-00
pin
3
41
P00034-00
lever
1
42
P00035-00
connecting rod
1
43
P00058-77
short trigger red
1
44
A00008-00
assembly grips
1
45
F00014-00
pin
1
46
P00039-00
screw
4
47
F00015-00
air adaptor standard
1
48
A00046-00
assembly air adaptor with hose and switch
1
49
F00016-00
O-ring
3
50
P00151-00
assembly air adaptor joint
1
51
F00048-00
A-circlip
1

DRPB48 Operation Manual
PARTS LIST CONTINUED
PART POSITION
PART CODE
DESCRIPTION
QUANTITIES IN TOOL/KIT
52
P00173-00
clamping sleeve locknut
1
53
P00150-00
swivel joint - optional supply, part of A00046-00
-
Accessories Pack
P09003-00
nosepiece C/2.7 - 4,0 mm
1
Accessories Pack
P09050-00
mandrel release protector
1
Accessories Pack
P09002-00
nosepiece B/2.3 - 3,0/3,2mm
1
Accessories Pack
A00009-00
oil injector set
1
Accessories Pack
P09051-00
hook
1
Accessories Pack
P09052-00
wrench
1
Accessories Pack
P00053-00
3-jaw set
1
Table of contents
Other Dafra Tools manuals
Popular Tools manuals by other brands

Nederman
Nederman Series 532 Service and cleaning instructions

9circle
9circle 9CL-10912 instruction manual

Stanley
Stanley 8221074STN Series Instruction manual for owner's use

Utility Solutions
Utility Solutions LOAD-RANGER USLR-XLT-1 FIELD INSPECTION PROCEDURE

Dynapac
Dynapac LT6000 Workshop manual

Elliott
Elliott ET75 Series Operating and maintenance instructions