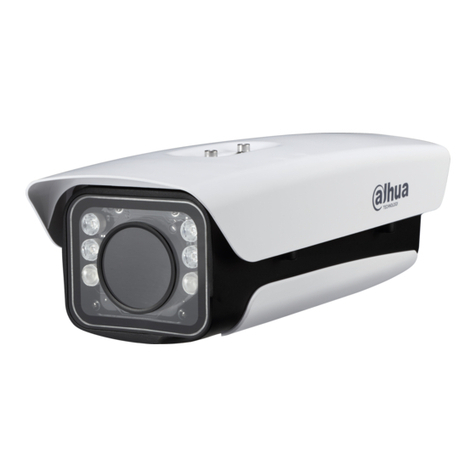
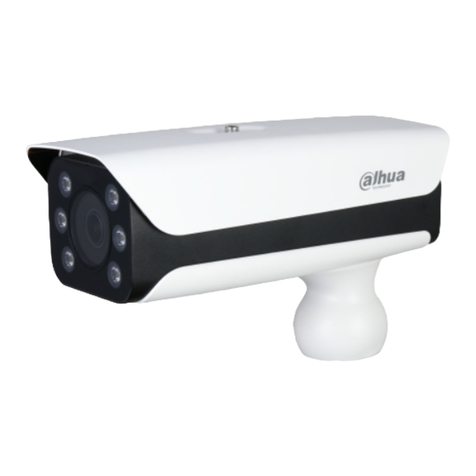
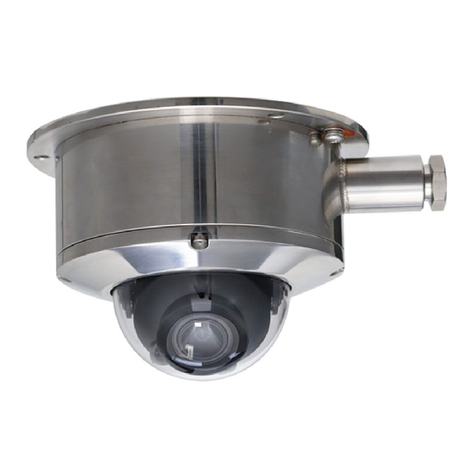
Dahua Technology 22204UENI-W User manual

22204UENI
22204UENI-W
Quick Installation Guide
V1.0.1
Dahua Technology Co., Ltd

I
Foreword
General
This manual offers reference material and general information about the basic operation,
maintenance, and troubleshooting for a Dahua Network Camera. Read, follow, and retain the
following safety instructions. Heed all warning on the unit and in the operating instructions
before operating the unit. Keep this guide for future reference.
Safety Instructions
The following categorized signal words with defined meaning might appear in the Guide.
Signal Words
Meaning
WARNING
Indicates a medium or low potential hazard which, if not avoided,
could result in slight or moderate injury.
CAUTION
Indicates a potential risk which, if not avoided, could result in
property damage, data loss, lower performance, or unpredictable
result.
NOTE Provides additional information as the emphasis and supplement
to the text.
Revision History
No.
Version
Revision Content
Release Time
1
V1.0.0
First Release.
January 2019
2
V1.0.1
Revised for North America
July 2019
Privacy Protection Notice
As the device user or data controller, you may collect personal data such as face images,
fingerprints, license plate number, email address, phone number, GPS location and other
sensitive or private information. You must ensure that your organization is in compliance with
local privacy protection laws and regulations to protect the legitimate rights and interests of
other people by implementing measures include but not limited to: providing clear and visible
identification to inform data subject the existence of surveillance area and providing related
contact

II
About the Guide
This user guide has been compiled with great care and the information it contains has
been thoroughly reviewed and verified.
The text was complete and correct at the time of printing. This guide may be periodically
updated to reflect changes to the product or to correct previous information and the
content of this guide can change without notice.
If you encounter an error or have any questions regarding the contents of this guide,
contact customer service for the latest documentation and supplementary information.
Dahua accepts no liability for damage resulting directly or indirectly from faults,
incompleteness, or discrepancies between this guide and the product described. Dahua is
not liable for any loss caused by installation, operation, or maintenance inconsistent with
the information in this guide.
All the designs and software are subject to change without prior written notice. The
product updates may cause some differences between the actual product and the Guide.
Please contact the customer service for the latest program and supplementary
documentation.
Video loss is inherent to all digital surveillance and recording devices; therefore Dahua
cannot be held liable for any damage that results from missing video information. To
minimize the occurrence of lost digital information, Dahua recommends multiple,
redundant recording systems, and adoption of backup procedure for all data.
All trademarks, registered trademarks and the company names in the Guide are the
properties of their respective owners.
Please visit our website, contact the supplier or customer service if there is any problem
occurred when using the device.
Contact the supplier or customer service if you encounter any issue while using this unit.
FCC Information
This device complies with part 15 of the FCC Rules. Operation is subject to the following two
conditions:
This device may not cause harmful interference;
This device must accept any interference received, including interference that may cause
undesired operation.
FCC compliance:
This equipment has been tested and found to comply with the limits for a digital device,
pursuant to part 15 of the FCC Rules. These limits are designed to provide reasonable
protection against harmful interference. This equipment generates uses and can radiate radio
frequency energy and, if not installed and used in accordance with the instruction manual, may
cause harmful interference to radio communication. However, there is no guarantee that
interference will not occur in a particular installation. If this equipment does cause harmful
interference to radio or television reception, which can be determined by turning the equipment
off and on, the user is encouraged to try to correct the interference by one or more of the
following measures:

III
Reorient or relocate the receiving antenna.
Increase the separation between the equipment and receiver.
Connect the equipment into an outlet on a circuit different from that to which the receiver
is connected.
Consult the dealer or an experienced radio/TV technician for help.
Legal Notices
Copyright
This user guide is ©2017, Dahua Technology Company, LTD.
This user guide is the intellectual property of Dahua Technology Company, LTD and is
protected by copyright. All rights reserved.
Trademarks
All hardware and software product names used in this document are likely to be registered
trademarks and must be treated accordingly.

IV
Important Safeguards and Warnings
This chapter describes the contents covering proper handling of the device, hazard prevention,
and prevention of property damage. Read these contents carefully before using the device,
comply with them when using, and keep it well for future reference.
Installation and Maintenance Professionals Requirements
All installation and maintenance professionals must have adequate qualifications or
experiences to install and maintain CCTV systems and electric apparatus, and to work
above the ground. The professionals must have the following knowledge and operation
skills:
Basic knowledge and installation of CCTV systems.
Basic knowledge and operation skills of low voltage wiring and low voltage electronic
circuit wire connection.
Basic knowledge and operation skills of electric apparatus installation and maintenance in
hazardous sites.
Power Requirements
Install the unit in accordance with the manufacturer’s instructions and in accordance with
applicable local codes.
All installation and operation must conform to your local electrical safety codes.
Do not overload outlets and extension cords, which may cause fire or electrical shock.
Do not place the camera near or in a place where the camera may contact overhead
power lines, power circuits, or electrical lights.
Ensure power conforms to SELV (Safety Extra Low Voltage) and that the limited power
source is rated AC 24V as specified in IEC60950-1. (Power supply requirement is subject
to the device label).
All input/output ports are SELV circuits. Ensure that SELV circuits are connected only to
other SELV circuits.
Ground the unit using the ground connection of the power supply to protect the unit from
damage, especially in damp environments.
Please install easy-to-use device for power off before installing wiring, which is for
emergent power off when necessary.
Protect the plug and power cord from foot traffic, being pinched, and its exit from the unit.
Do not attempt to service the unit. Opening or removing covers may expose you to
dangerous voltage or other hazards. Refer all servicing to qualified personnel.
If the unit is damaged and requires service, unplug the unit from the main AC power
supply and from the PoE supply and refer to qualified service personnel. Damage may
include, but is not limited to:
The power supply cord or plug is damaged.
Liquid has spilled in or on the unit.

V
An object has fallen on the unit.
The unit has been dropped and the housing is damaged.
The unit displays a marked change in performance.
The unit does not operate in the expected manner when the user correctly follows the
proper operating procedures.
Ensure a service technician uses replacement parts specified by the manufacturer, or that
have the same characteristics as the original parts. Unauthorized parts may cause fire,
electrical shock, or other hazards. Dahua is not liable for any damage or harm caused by
unauthorized modifications or repairs.
Perform safety checks after completion of service or repairs to the unit.
Use attachments and accessories only specified by the manufacturer. Any change or
modification of the equipment, not expressly approved by Dahua, could void the warranty.
Incorporate a readily accessible disconnect device in the building installation wiring for
quick power disconnect to the camera.
Dahua assumes no liability or responsibility for any fire or electrical shock caused by
improper handling or installation.
Application Environment Requirements
Please use the device within the allowed humidity (<95%RH) and altitude (<3000m).
Transport, use, and store the unit within the specified temperature and humidity range.
Do not place the unit in a wet, dusty, extremely hot or an extremely cold environment; and
avoid environments with strong electromagnetic radiation or unstable lighting.
Do not use the device in the corrosive environment such as high salt fog area (sea, beach
and coastal area), acid gas environment and chemical plants.
Do not use the device in applications with strong vibrations such as in boats and vehicles.
Never push objects of any kind into this unit through openings as they may touch
dangerous voltage points or cause a short circuit that may result in fire or electrical shock.
Take care to not spill any liquid on the unit.
If your installation environment is subjected to one of the conditions above, contact our
sales staff to purchase cameras intended for the particular environment.
Please don’t install the device near the place with heat source, such as radiator, heater,
stove or other heating equipment, which is to avoid fire.
Do not aim the lens at an intense radiation source (such as the sun, a laser, and molten
steel for example) to avoid damage to the thermal detector.
Use the factory default package or material with equal quality to pack the device when
transporting.
Operation and Maintenance Requirements
Do not touch the heat dissipation component of the unit. This part of the unit is hot and
may cause a burn.
Do not open or dismantle the device; there are no components that a user can fix or
replace. Opening the unit may cause water leakage or expose components to direct light.
Contact the manufacturer or a qualified service representative to service the camera or to
replace a component, including the desiccant.
Dahua recommends the use of a thunder-proof device in concert with the unit.
VI
Do not touch the CCD or the CMOS optic sensor. Use a blower to clean dust or dirt on the
lens surface. Use a dry cloth dampened with alcohol and gently wipe away any dust on
the lens.
Use a dry soft cloth to clean the unit’s housing. If the unit is particularly dusty, use water to
dilute a mild detergent, apply the diluted detergent to a soft cloth, then gently clean the
device. Finally, use a dry cloth to wipe the unit dry. Do not use a volatile solvent like
alcohol, benzene, or thinner; or use a strong detergent with abrasives, which may damage
the surface coating or reduce the working performance of the unit.
Do not touch or wipe a dome cover during installation, this cover is an optical device.
Refer to the following methods clean the dome cover:
Stained with dirt: Use an oil-free soft brush or blower to gently remove the dirt.
Stained with grease or fingerprints: Use a soft cloth to wipe gently the water droplet or the
oil from the dome cover. Then, use an oil-free cotton cloth or paper soaked with alcohol or
detergent to clean the lens from the center of the dome to outside. Change the cloth
several times to ensure the dome cover is clean.
WARNING
Modify the default password after login.
Use attachments and accessories only specified by the manufacturer. Any change or
modification of the equipment, not expressly approved by Dahua, could void the warranty.
Internal and external ground connection should be stable.
Do not supply power via the Ethernet connection (PoE) when power is already supplied
via the power connector.
Disconnect power before device maintenance and overhaul. It is prohibited to open the
cover with power on in an explosive environment.
Please contact the local dealer or the nearest service center if the device fails to work
normally, please don’t dismantle or modify the device.

Cybersecurity Recommendations VII
Cybersecurity Recommendations
Mandatory actions to be taken towards cybersecurity
Change Passwords and Use Strong Passwords
The number one reason systems get “hacked” is due to having weak or default
passwords. It is recommended to change default passwords immediately and choose
a strong password whenever possible. A strong password should be made up of at
least 8 characters and a combination of special characters, numbers, and upper and
lower case letters.
Update Firmware
As is standard procedure in the tech-industry, we recommend keeping NVR, DVR,
and IP camera firmware up-to-date to ensure the system is current with the latest
security patches and fixes.
Recommendations to improve your network security
Change Passwords Regularly
The length should be greater than 8 characters;
Include at least two types of characters; character types include upper and lower case
letters, numbers, and symbols;
Do not use an account name or the account name in reverse order;
Do not use sequential characters, such as 123, abc, etc.;
Do not use repeated characters, such as 111, aaa, etc.;
Change Default HTTP and TCP Ports
Change default HTTP and TCP ports for systems. These are the two ports used to
communicate and to view video feeds remotely.
These ports can be changed to any set of numbers between 1025 and 65535.
Avoiding the default ports reduces the risk of outsiders being able to guess which
ports you are using.
Update Firmware and Client Software
Keep your network-enabled equipment (such as NVRs, DVRs, IP cameras, etc.)
firmware up-to-date to ensure the system is equipped with the latest security patches
and fixes. When the equipment is connected to the public network, it is recommended
to enable the “auto-check for updates” function to obtain timely information of firmware
updates released by the manufacturer.
Download and use the latest version of client software.
Enable HTTPS/SSL
Set up an SSL Certificate and enable HTTPS to encrypt all communication between
your devices and recorder.
Enable IP Filter
Enable the IP filter to prevent unauthorized access to the system.

Cybersecurity Recommendations VIII
Change ONVIF Password
Older IP camera firmware does not automatically change the ONVIF password when
the system credentials are changed. Update the camera’s firmware to the latest
revision or manually change the ONVIF password.
Forward Only Ports You Need
Forward only the HTTP and TCP ports that are requited. Do not forward a wide range
of numbers to the device. Do not DMZ the device's IP address.
Do not forward any ports for individual cameras if they are all connected to a recorder
on site. Simply forward the NVR port.
Disable Auto-Login on SmartPSS
Disable the Auto-Login feature on SmartPSS installed on a computer that is used by
multiple people. Disabling auto-login prevents users without the appropriate
credentials from accessing the system.
Use a Different Username and Password for SmartPSS
Do not a username/password combination that you have in use for other accounts,
including social media, bank account, or email in case the account is compromised.
Use a different username and password for your security system to make it difficult for
an unauthorized user to gain access to the IP system.
Limit Features of Guest Accounts
Ensure that each user has rights to features and functions they need to perform their
job.
Disable Unnecessary Services and Choose Secure Modes
Turn off specific services, such as SNMP, SMTP, and UPnP, to reduce network
compromise from unused services.
It is recommended to use safe modes, including but not limited to the following
services:
SNMP: Choose SNMP v3 and set up strong encryption passwords and authentication
passwords.
SMTP: Choose TLS to access a mailbox server.
FTP: Choose SFTP and use strong passwords.
AP hotspot: Choose WPA2-PSK encryption mode and use strong passwords.
Multicast
Multicast is used to share video streams between two recorders. Currently there are
no known issues involving Multicast. Deactivate this feature if not in use to enhance
network security.
Check the Log
The information stored in the network log file is limited due to the equipment’s limited
storage capacity. Enable the network log function to ensure that the critical logs are
synchronized to the network log server if saving log files is required.
Check the system log if you suspect that someone has gained unauthorized access to
the system. The system log shows the IP addresses used to login to the system and
the devices accessed.
Physically Lock Down the Device
Perform physical protection to equipment, especially storage devices. For example,
place the equipment in a special computer room and cabinet, and implement access
control permission and key management to prevent unauthorized personnel from
accessing the equipment.

Cybersecurity Recommendations IX
Connect IP Cameras to the PoE Ports on the Back of an NVR
Cameras connected to the PoE ports on the back of an NVR are isolated from the
outside world and cannot be accessed directly.
Isolate NVR and IP Camera Network
Ensure that the network for the NVR and IP cameras should not be the same network
as a public computer network. Separate networks prevent unauthorized users
accessing the same network the security system.
Secure Auditing
Check online users regularly to ensure unauthorized accounts are not logged in to a
device.
Check the equipment log to access the IP addresses used to login to devices and
their key operations.

Table of Contents X
Table of Contents
Foreword .................................................................................................................................................... I
Important Safeguards and Warnings ....................................................................................................IV
Cybersecurity Recommendations........................................................................................................VII
Table of Contents .....................................................................................................................................X
1 Unpacking .............................................................................................................................................. 1
Parts List ....................................................................................................................................... 1
2 Installation and Configuration ............................................................................................................. 2
Framework and Dimension........................................................................................................... 2
Wiring ............................................................................................................................................ 3
Locally Storing Data...................................................................................................................... 3
3 Camera Installation ............................................................................................................................... 4
Preparing the Camera................................................................................................................... 4
3.1.1 Insert a Micro SD Card ....................................................................................................... 5
Mounting the Camera to a Ceiling ................................................................................................ 5
4 Network Configuration.......................................................................................................................... 8
Network Protocols......................................................................................................................... 8
Modifying the IP Address .............................................................................................................. 9
Using the ConfigTool..................................................................................................................... 9
Accessing the Web Interface ...................................................................................................... 10
Configuring Local SD Card Recording ........................................................................................11

Unpacking 1
1 Unpacking
This equipment should be unpacked and handled with care. If an item appears to have
sustained damage during shipping, notify the shipper immediately.
Verify that all the parts listed below are included. If an item is missing, contact customer
support or your local representative.
The original packing carton is the safest container to transport the unit, in the event the unit
must be returned for service. Retain the carton and all shipping material for future use.
Please refer to the enclosed CD for more details, to view the detailed User’s Manual, and for
configuration software.
Parts List
Package Item
Quantity
Network PTZ Camera
1
Screws
3
Wall Anchors
3
Weatherproof Ethernet Connector
1
Mounting Template
1
Hex Wrench
1
Installation and Regulatory Documentation
5

Installation and Configuration 2
2 Installation and Configuration
Framework and Dimension
Use this process to plan, install, and configure the security network and the IP devices.
Figure 2-1: 22204UENI Dimensions
Figure 2-2: 22204UENI-W Dimensions

Installation and Configuration 3
Wiring
Locally Storing Data
Certain cameras include a SDHC card slot for onboard storage that support a 128 GB Micro
SD card. Dahua recommends using a SanDisk Extreme Micro SD card (or an equivalent
substitute) as these cards have been fully tested without issue and the SanDisk Extreme line
is better suited for constant recording. Lower-grade SD cards meant for multimedia
applications will, at times, have questionable quality and reliability.
Recording to the SD card is first in first out (FIFO). The camera deletes the oldest (first) entry
as new storage requirements arise. The camera does not signal nor make an indication when
data is deleted. Storage time is dependent on a variety of factors such as SD card size, image
resolution and video frames per second.
SD Recording supports video only. Audio is not supported.

Camera Installation 4
3 Camera Installation
This section details installing the camera to a solid wall or to a ceiling, in an outdoor or an
indoor environment. Note that the wall or ceiling must be capable of supporting a minimum of
eight (8) times the weight of the camera and a bracket (if used).
DO NOT connect the camera to the power supply during installation.
Warning: DO NOT connect the camera to the power supply during installation.
Warning: For units intended to be installed outdoors: All wiring connecting to the unit must be
routed separately inside a different permanently earthed metal conduits (not supplied).
Warning: Install external interconnecting cables in accordance to NEC, ANSI/NFPA70 (for US
application) and Canadian Electrical Code, Part I, CSA C22.1 (for CAN application) and in
accordance to local country codes for all other countries. Branch circuit protection
incorporating a
20 A, 2-pole Listed Circuit Breaker or Branch Rated Fuses are required as part of the building
installation. A readily accessible 2-pole disconnect device with a contact separation of at least
3 mm must be incorporated.
Note: Dahua recommends attaching a “drip loop” (flex or hard conduit) during installation to
ensure condensation does not form in the mount or the conduit.
Note: 24 VAC Class 2 power supply only.
Preparing the Camera
Remove the camera, the mount accessories and any hardware packages from the boxes.
Remove the camera from the plastic wrapping and place the camera dome-end up in the
foam packaging.
Loosen the three (3) hex screws from the enclosure and remove the enclosure from the
base.

Camera Installation 5
3.1.1 Insert a Micro SD Card
The Micro SD card slot is located on the ISP board above the camera module
Figure 3-1: Micro SD Card Installation
Open the cover for the SD Card slot.
Insert the Micro SD Card into the Micro SD Card slot.
Replace the cover.
Mounting the Camera to a Ceiling

Camera Installation 6
Place the mounting template against the ceiling and mark the location of the center hole
and the three perimeter mounting holes.
Determine the route of the outgoing cables, either a center route through the ceiling
medium or a side exit to a grounded conduit. If the cables are routed through the ceiling,
then place the pedestal seal ring into the slot on the side of the camera base.
Pre-drill the three perimeter holes as marked on the wall for the expansion bolts, using a
drill bit that is no wider than the expansion bolt.
Drill a 50-mm (approximately 2 in.) center hole to route the cables, if necessary.
Insert an expansion bolt into each pre-drilled perimeter hole, if necessary.
Pull the composite cable from the dome through the ceiling.
Align the screw holes in the pedestal with the pre-drilled perimeter holes.
Secure the pedestal to the ceiling with the three screws.
Use the hex wrench to secure the three screws in external enclosure to the pedestal.
Attach the waterproof network connector if the camera is used outdoors.
a) Place the wide side of the rubber ring onto the end of the network cable extending out
from the camera.
b) Pull the waterproof cable end without the Ethernet connector through the body of the
Waterproof Connector. Thread the cable through the Fixing Rubber Ring and the
Waterproof Locking Cover.
c) Attach the male Ethernet connector to the network cable coming from the camera.
Ensure the Waterproof Connector shroud covers the Ethernet connection.
d) Connect the other end of the waterproof connector to the network port and rotate it
clockwise to lock the network port and waterproof connector firmly.
e) Slide the Waterproof Locking Cover over the main body of waterproof connector and
rotate it clockwise to seal the connection.

Camera Installation 7
Align the straight edge of the flange on the dome with the straight edge of the mount
adapter quick installation port. Slowly push the dome into the wall mount.
Insert the three (3) stainless steel set screws into the corresponding holes on the wall
mount flange and tighten to dome flange with the hex wrench.
Ensure the safety tether is attached to wall mount and to the camera.

Network Configuration 8
4 Network Configuration
Dahua IP cameras feature a built-in Web interface to control all aspects of camera operation.
This section includes details about the supported network protocols, configuring IP addresses,
and configuring alarms and local recording options. Refer to the camera’s Operations Manual
for full details.
Network Protocols
Dahua cameras support RTSP, RTP/TCP, RTP/UDP, HTTP, DHCP, TFTP, QoS, IP version 4
(IPv4) and IP version 6 (IPv6).
RTSP – Cameras communicate with video management systems over Real Time
Streaming Protocol. Do not change the RTSP port unless you are sure your VMS does
not use the default setting.
RTP/TCP – The Real-time Protocol/Transmission Control Protocol is best suited for
applications that require high reliability, and transmission time is relatively less critical.
RTP/UDP – The Real-time Protocol/User Datagram Protocol is used for live unicast video,
especially when it is important to always have an up-to-date video stream, even if some
images are dropped.
HTTP – The Hypertext Transfer Protocol is an application protocol for distributed,
collaborative, hypermedia information systems.
DHCP – The Dynamic Host Configuration Protocol allows network administrators to
centrally manage and automate the assignment of IP addresses. DHCP should only be
enabled if using dynamic IP address notification, or if the DHCP can update a DNS server.
TFTP – The Trivial File Transfer Protocol is a simple, lock-step, File Transfer Protocol
which allows a client to get from or put a file onto a remote host. TFTP lacks security and
most of the advanced features offered by more robust file transfer protocols such as File
Transfer Protocol.
QoS – Quality of Service guarantees a certain level of a specified resource to selected
traffic on a network. A QoS-aware network prioritizes network traffic and provides a
greater network reliability by controlling the amount of bandwidth an application may use.
IPv4 – The IPv4 (IP version 4) is enabled by default and obtains the IP address
automatically. The address can be used to allow or block network traffic that matches a
specified address or protocol. The IP address must be valid for the network. For more
information, contact your network administrator.
IPv6 – A typical IPv6 (IP version 6) node address consists of a prefix and an interface
identifier (total 128 bits). The prefix is the part of the address where the bits have fixed
values or are the bits that define a subnet. A typical IPv6 address may resemble the
following example: 2001:db8: :52:1:1. The IP address must be valid for the network.
Before making changes to the IPv6 address, consult with your network administrator.

Network Configuration 9
Modifying the IP Address
To operate the camera in your network you must assign it a valid network IP address. The
default IP address is 192.168.1.108, but you may have to change this address if it conflicts
with another device on the network.
To properly configure the camera for your network, you need the following information:
Camera IP address – This address is an identifier for the camera on an IP network. For
example, 140.11.2.115 is valid syntax for an IP address.
Subnet mask – A mask is used to determine the subnet an IP address belongs to.
Gateway IP address – This address is a node on a network that serves as an entrance to
another network.
Port – A port is an endpoint to a logical connection in an IP network.
Dahua supplies the ConfigTool to access and to modify the network settings of a device. Refer
to the Operation Manual, available on the CD included with the camera or on
Dahuasecurity.com, for complete information.
Notes:
Ensure that the network parameters of each camera is available before starting
configuration.
The ConfigTool supports those cameras that are part of the same network that as the
computer running the ConfigTool.
Using the ConfigTool
Install the ConfigTools.exe on a computer.
Adjust the computer’s network settings so that it is on the same network as the camera.
Launch the ConfigTool to generate a list of devices on the network.
Double click the device to be configured, the ConfigTool opens the Login dialog box for the
device.
Enter the IP address, Username, Password, and Port number of the camera, then click
OK. Note: the default Username and Password for the device is “admin” and “admin”
respectively. The default port is 37777.
This manual suits for next models
1
Table of contents
Other Dahua Technology Digital Camera manuals

Dahua Technology
Dahua Technology COP Security ITC237-PU1A-IRHL User manual

Dahua Technology
Dahua Technology DHI-ITC237-PW6M-LZF1050 User manual

Dahua Technology
Dahua Technology DH-HAC-ME1500C User manual

Dahua Technology
Dahua Technology DH-IPC-HDEW8441R-Z User manual

Dahua Technology
Dahua Technology ITC1652 Instructions for use

Dahua Technology
Dahua Technology K Series User manual

Dahua Technology
Dahua Technology DHI-ITC413-PW4D-IZ3 User manual

Dahua Technology
Dahua Technology NKB1000 User manual

Dahua Technology
Dahua Technology DHI-ITC952-RF2D User manual

Dahua Technology
Dahua Technology DHI-ITC237-PU1B-IR-PAX User manual