manuals.online logo
Brands
  1. Home
  2. •
  3. Brands
  4. •
  5. Daikin
  6. •
  7. Remote Control
  8. •
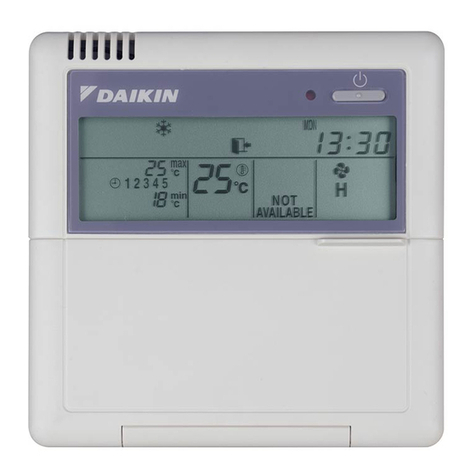
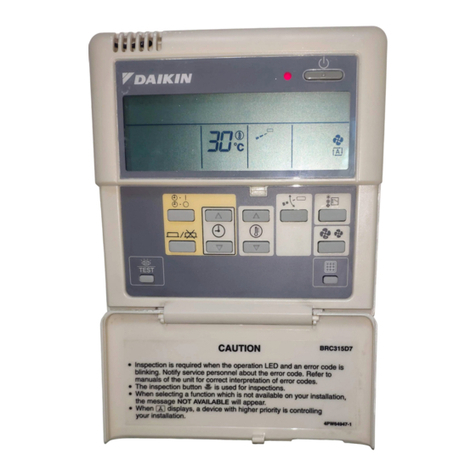
  9. Daikin BRC2A71 User manual

Daikin BRC2A71 User manual

Other Daikin Remote Control manuals

Daikin OM-GS02-02110 User manual

Daikin

Daikin OM-GS02-02110 User manual

Daikin FTXN-L9 User manual

Daikin

Daikin FTXN-L9 User manual

Daikin OM-5RTBR-0709(0)-DENV User manual

Daikin

Daikin OM-5RTBR-0709(0)-DENV User manual

Daikin OM-GS02-1011 User manual

Daikin

Daikin OM-GS02-1011 User manual

Daikin BRC7C510W User manual

Daikin

Daikin BRC7C510W User manual

Daikin BRC1D619 User manual

Daikin

Daikin BRC1D619 User manual

Daikin BRC7FA532FB User manual

Daikin

Daikin BRC7FA532FB User manual

Daikin MicroTech II User manual

Daikin

Daikin MicroTech II User manual

Daikin BRC1H63K User manual

Daikin

Daikin BRC1H63K User manual

Daikin BRC1E53 How to use

Daikin

Daikin BRC1E53 How to use

Daikin DCS302C51 User manual

Daikin

Daikin DCS302C51 User manual

Daikin BRC4C61 User manual

Daikin

Daikin BRC4C61 User manual

Daikin Siesta ARCWLA User manual

Daikin

Daikin Siesta ARCWLA User manual

Daikin BRC7EA629 User manual

Daikin

Daikin BRC7EA629 User manual

Daikin BRC1H71W User manual

Daikin

Daikin BRC1H71W User manual

Daikin BRC1E62 User manual

Daikin

Daikin BRC1E62 User manual

Daikin BRC7EA530W User manual

Daikin

Daikin BRC7EA530W User manual

Daikin ARC412A6 User manual

Daikin

Daikin ARC412A6 User manual

Daikin BRC52B61 User manual

Daikin

Daikin BRC52B61 User manual

Daikin BRC1E73 User manual

Daikin

Daikin BRC1E73 User manual

Daikin BRC2E61 User manual

Daikin

Daikin BRC2E61 User manual

Daikin BRC082A43 User manual

Daikin

Daikin BRC082A43 User manual

Daikin BRC51D64 User manual

Daikin

Daikin BRC51D64 User manual

Daikin BRC7E530W8 User manual

Daikin

Daikin BRC7E530W8 User manual

Popular Remote Control manuals by other brands

Bircher Reglomat RC Duo 2 user guide

Bircher Reglomat

Bircher Reglomat RC Duo 2 user guide

Emerson RCBT100 owner's manual

Emerson

Emerson RCBT100 owner's manual

BILDA Element-6 user manual

BILDA

BILDA Element-6 user manual

Absima CR7P manual

Absima

Absima CR7P manual

Mitsubishi Electric PAR-32MAAG Instruction book

Mitsubishi Electric

Mitsubishi Electric PAR-32MAAG Instruction book

RCA RCRTBL08BE1 quick start guide

RCA

RCA RCRTBL08BE1 quick start guide

US Electronics NOVARI user guide

US Electronics

US Electronics NOVARI user guide

Panasonic EUR7622KB0 Operation guide

Panasonic

Panasonic EUR7622KB0 Operation guide

Bang & Olufsen Beo4 user manual

Bang & Olufsen

Bang & Olufsen Beo4 user manual

Marantz RC101 user guide

Marantz

Marantz RC101 user guide

FUTABA 9ZAP - PART2 manual

FUTABA

FUTABA 9ZAP - PART2 manual

HR Matic HR MULTI 3 quick start guide

HR Matic

HR Matic HR MULTI 3 quick start guide

Anritsu MP1777A Operation manual

Anritsu

Anritsu MP1777A Operation manual

Niles WVC100 Installation & operating guide

Niles

Niles WVC100 Installation & operating guide

Bang & Olufsen BEO6 Getting started

Bang & Olufsen

Bang & Olufsen BEO6 Getting started

GE 94901 instruction manual

GE

GE 94901 instruction manual

FUTABA R7108SB Full manual

FUTABA

FUTABA R7108SB Full manual

Invacare G91S user manual

Invacare

Invacare G91S user manual

manuals.online logo
manuals.online logoBrands
  • About & Mission
  • Contact us
  • Privacy Policy
  • Terms and Conditions

Copyright 2025 Manuals.Online. All Rights Reserved.

3P146204-1
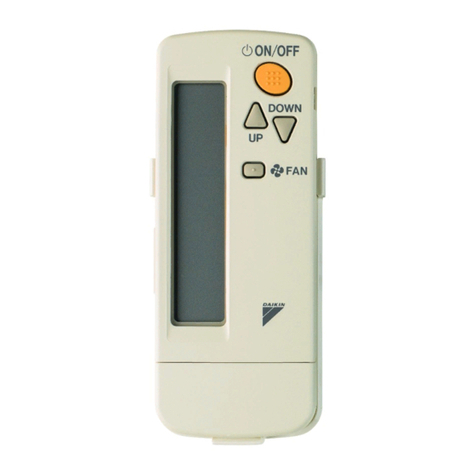
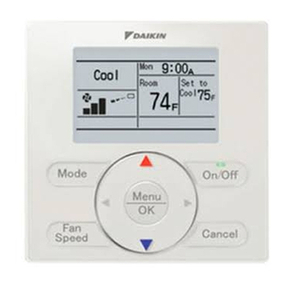
REMOTE CONTROLLER: NAME AND FUNCTION OF EACH SWITCH AND DISPLAY
ON/OFF BUTTON
Press the button and the system will start. Press the
button again and the system will stop.
OPERATION LAMP (RED)
The lamp lights up during operation. Blinks in case of stop
due to malfunction.
DISPLAY “ ” (CHANGEOVER UNDER
CONTROL)
It is impossible to changeover heating/cooling with the
remote controller when it shows this display. (As for details,
see “SETTING OF MASTER REMOTE CONTROLLER” in
the installation manual attached to the indoor unit.)
DISPLAY “ ” (UNDER CENTRALIZED
CONTROL)
When this display shows, the system is UNDER
CENTRALIZED CONTROL.
(This is not a standard specification)
DISPLAY “ ” (VENTILATION/AIR CLEANING)
This display shows that the total heat exchanger and the
air cleaning unit are in operation. (These are optional
accessories).
DISPLAY “ ” (SET TEMPERATURE)
This display shows the set temperature. Only given during
a cooling or heating operation.
DISPLAY “ ” “ ” “ ” “ ” “ ”
(OPERATION MODE)
This display shows current OPERATION MODE.
“ ” is not available with outdoor units specially designed
for cooling only.
“ ” is reserved only for outdoor units capable of heat
recovery.
DISPLAY “ ” (DEFROST / HOT START)
Indicates that defrost or hot start (during which the fan is
stopped till the temperature of air supply rises enough at
the start of a heating operation) is in progress.
TEMPERATURE SETTING BUTTON
Use this button for SETTING TEMPERATURE of the
thermostat.
; Each press raises the set temperature by 1°F.
; Each press lowers the set temperature by 1°F.
The variable temperature range is between 60°F and 90°F.
FAN SPEED CONTROL BUTTON
Press this button to select the fan speed, HIGH or LOW,
of your choice.
OPERATION MODE SELECTOR BUTTON
Press this button to select OPERATION MODE.
DISPLAY “ ” (MALFUNCTION)
Indicates malfunction and blinks if the unit stops operating
due to malfunction.
(As for details, see “TROUBLE SHOOTING” in the
operation manual attached to the outdoor unit.)
DISPLAY “ ” (FAN SPEED)
This display shows the fan speed: HIGH or LOW.
For the sake of explanation, all indications are shown in the figure above contrary to actual running situations.
63
13 5
10 12
11
98
47
12
F
H L
F
BRC2A71
H L
1
2
3
4
5
6
7
8
9
10
11
12
13
En. 英
3P146205-1
REMOTE CONTROLLER MOUNTING INSTRUCTIONS
1. Remove the upper part of remote controller.
Insert a minus screwdriver into the
slot between the upper and the
lower part of remote controller.
NOTE
1. Do not directly touch the PC 
 board with your hand.
4. Initial setting
Change the MAIN/SUB changeover switch
setting as described below.
If controlling one indoor unit with two remote
controllers, set one remote controller to
“MAIN.”and the other to “SUB.”
5. Reattach the upper part of remote controller.
NOTE
1. Do not directly touch the PC board with your hand.
NOTES
• If controlling with one remote controller, be sure to set it to “MAIN.”
• Set the remote controller before turning power supply on.
“ ” is displayed for about one minute when the power supply is
turned on, and the remote controller cannot be operated in some cases.
2. Wire the indoor unit.
Connect terminals P1 and P2 on the rear of
the lower part of remote controller to
terminals P1 and P2 on the indoor unit.
(Terminals P1 and P2 have no polarity.)
3. Fasten the remote controller.
Attach the lower part of remote controller to the electric parts box
(part to be procured in the field).
NOTE
Choose the flattest place possible for the mounting surface. Be
careful not to distort the shape of the lower part of remote controller
by over-tightening the mounting screws.
For the electric parts box to be procured in the field, use optional
accessories KJB111A.
NOTES
1. The electric parts box and wiring for connection are not included.
2. When wiring, run the wiring away the power supply wiring in order to
 avoid receiving electric noise (external noise).
3. When wiring, refer to the wiring diagram of indoor unit (attached to
 indoor unit) as well.
WIRING SPECIFICATION
Wiring type
Size
Sheathed wire (2 wire)
AWG18 or AWG16
Main Remote
Controller
(Factory Set)
Sub Remote
Controller
FIELD SETTING If optional accessories are mounted on the indoor unit,
the indoor unit setting may have to be changed. Refer
to the instruction manual for each optional accessory.
Procedure
 Remove the upper part of remote controller.
  When in the NORMAL MODE, press the BS6 BUTTON and the FIELD SET MODE is entered.
  Select the desired MODE No. with the BS2 BUTTON and the BS3 BUTTON.
  During group control, when setting by each indoor unit (MODE No. 20, 22 and 23 have been selected), push the
 BS8 BUTTON and select the INDOOR UNIT No. to be set. (This operation is unnecessary when setting
 by group.)
  Push the BS9 BUTTON and select FIRST CODE No.
  Push the BS10 BUTTON and select SECOND CODE No.
  Push the BS7 BUTTON once and the present settings are SET.
  Push the BS6 BUTTON to return to the NORMAL MODE.
(Example) If during group setting and the time to clean air filter is set to FILTER CONTAMINATION - HEAVY, set
  MODE No. to “10”, FIRST CODE No. to “0”, and SECOND CODE No. to “02”.
MODE No.
Note) 1
10(20)
Note) 6
Filter Contamination - Heavy/Light
(Setting for spacing time of display time to clean air filter)
(Setting for when filter contamination is heavy, and spacing
time of display time to clean air filter is to be halved)
Spacing Time of Display Time to Clean Air Filter Count
(Setting for when the filter sign is not to be displayed)
ON/OFF Input from Outside. (Setting for when forced ON/OFF is to be
operated from outside.)
Humidifying with thermostat OFF
Drain pump operation with humidifying
Thermostat Differential Changeover (Setting for when using the remote sensor)
  FXCQ, FXFQ, FXKQ or FXHQ only
Selection of Air Flow Direction (Setting for when a blocking pad kit has been
installed)  FXFQ only
12(22)
13(23)
15(25)
FIRST
CODE
No.
Description of Setting
SECOND CODE No. Note) 2
01
Display
Forced OFF
1.8°F
4-way flow
Not equipped
Not equipped
Do not Display
ON/OFF Operation
0.9°F
3-way flow
Equipped
Equipped
02 03
0
3
1
2
1
1
3
Long Life Filter
Standard Filter
Approx. 2,500
Hrs.
Approx.
200 Hrs.
Light
Approx. 1,250
Hrs.
Approx.
100 Hrs.
Heavy
-
-
-
2-way flow
NOTE) 1. Setting is carried out in the group 
   mode, however, if the MODE No. 
   inside the parentheses is selected, 
   indoor units can also be set  
   individually.
  2. The SECOND CODE No. is set to 
   “01” when shipped from the factory.
  3. Do not make any settings not given 
   in the table on the left.
  4. Not displayed if the indoor unit is 
   not equipped with that function.
  5. When returning to the NORMAL  
   MODE, “ ” may be displayed in 
   the LCD in order for the remote  
   controller to initialize itself.
  6. This mode is used to set the time 
   until the display time to clean air  
   filter lights up when using the  
   central remote controller.
3P146206-1
MODE No.
UNIT No.
FIRST
CODE No.
SECOND
CODE No.
En. 英
1
2
3
4
5
6
7
8