H9Q/H9QDUserManual
Rev:10/21/20 Page3of12 Author:CNR
TheAgCam®andEnduraCam®cameralinesareadurable,reliablesurveillancesystemwiththeinnovativeabilitytobequickly
movedfromoneapplicationtothenext.
II. STANDARDFEATURES
FeaturethelatestinAnalogHDtechnology
View1,2,3or4camerasatthesametime
LEDbacklit
CompatiblewithNTSCorPALcameras,notsimultaneously
AdvancedLCDtechnologyallowsyoutoclearlyseeyourimagefromanyangle
Mirrortheviewofanyofyourcamerasforuseasabackupcamera
2YearWarranty
16:9aspectratio
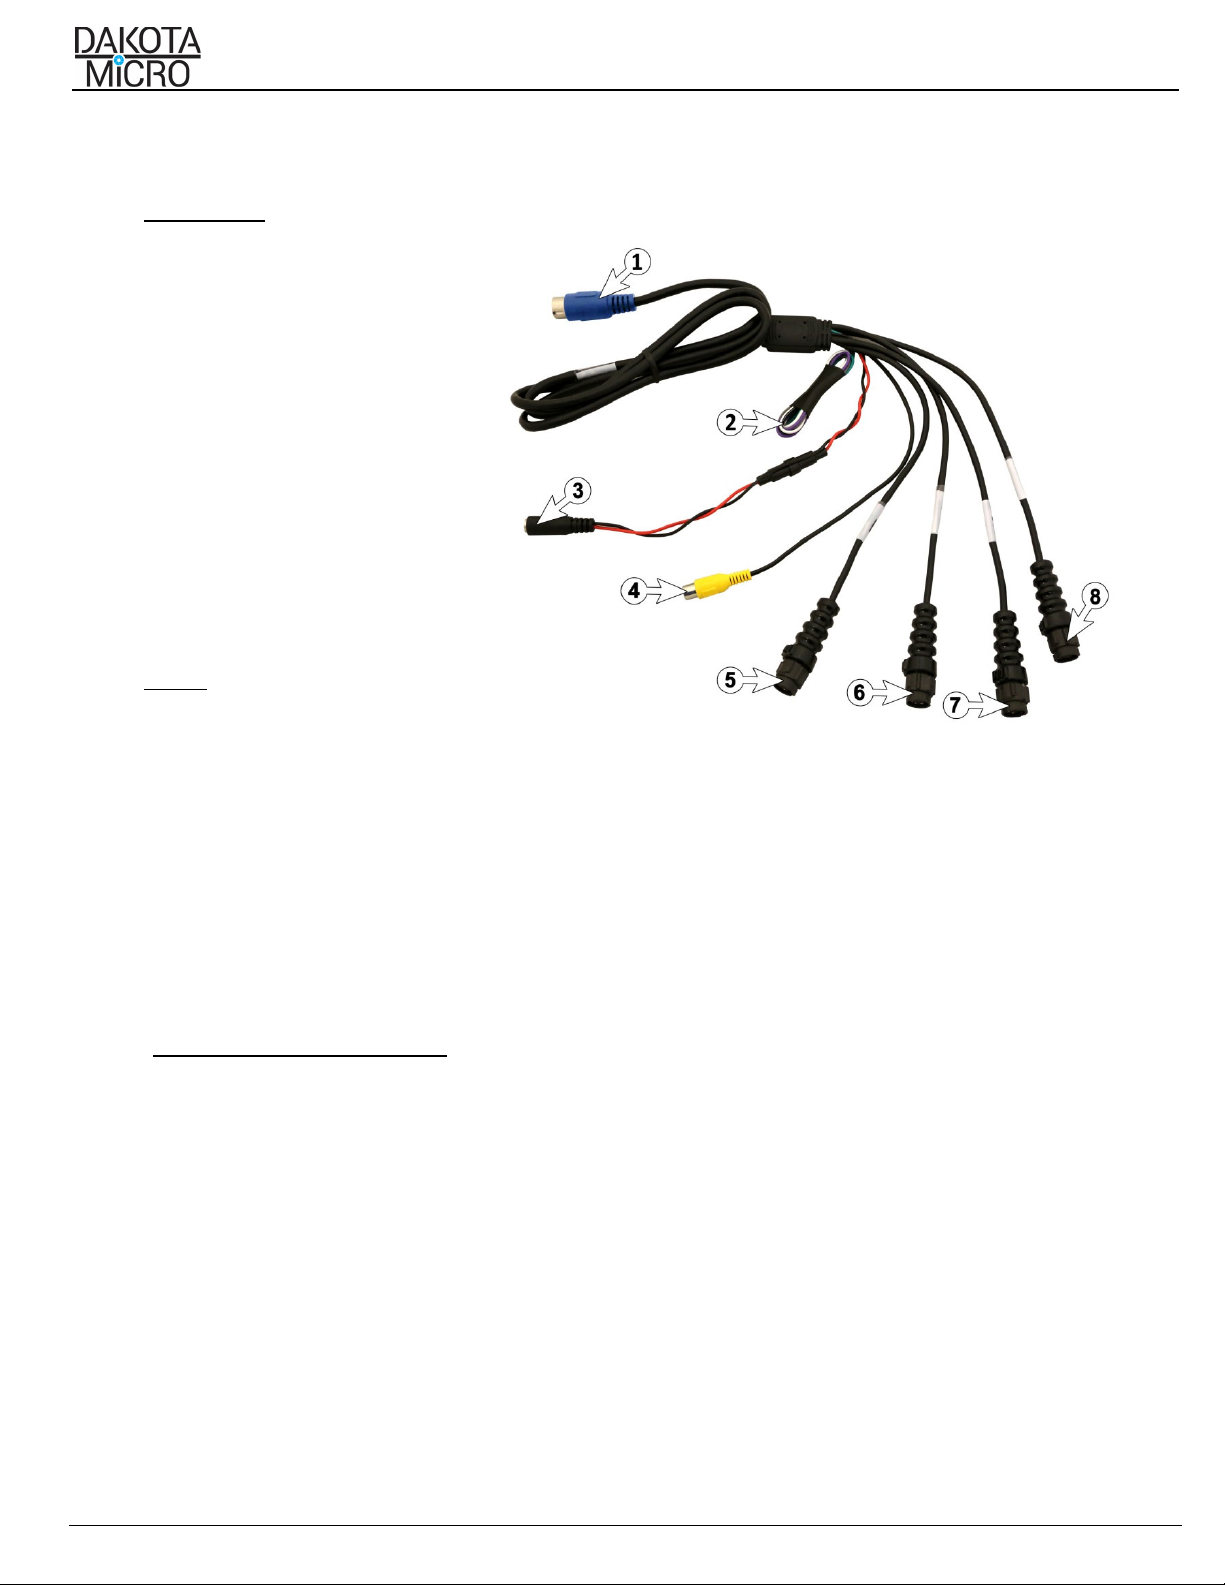
4CameraInputs
Recordsupto4camerassimultaneouslyorindependentlyontoSDcardforeasytransferoffiles
Availablein7inor9insize
Eventtriggersforeachcameraallowfortriggeredeventstobringyourcameratofullview(IE:puttingthevehiclein
reverse)
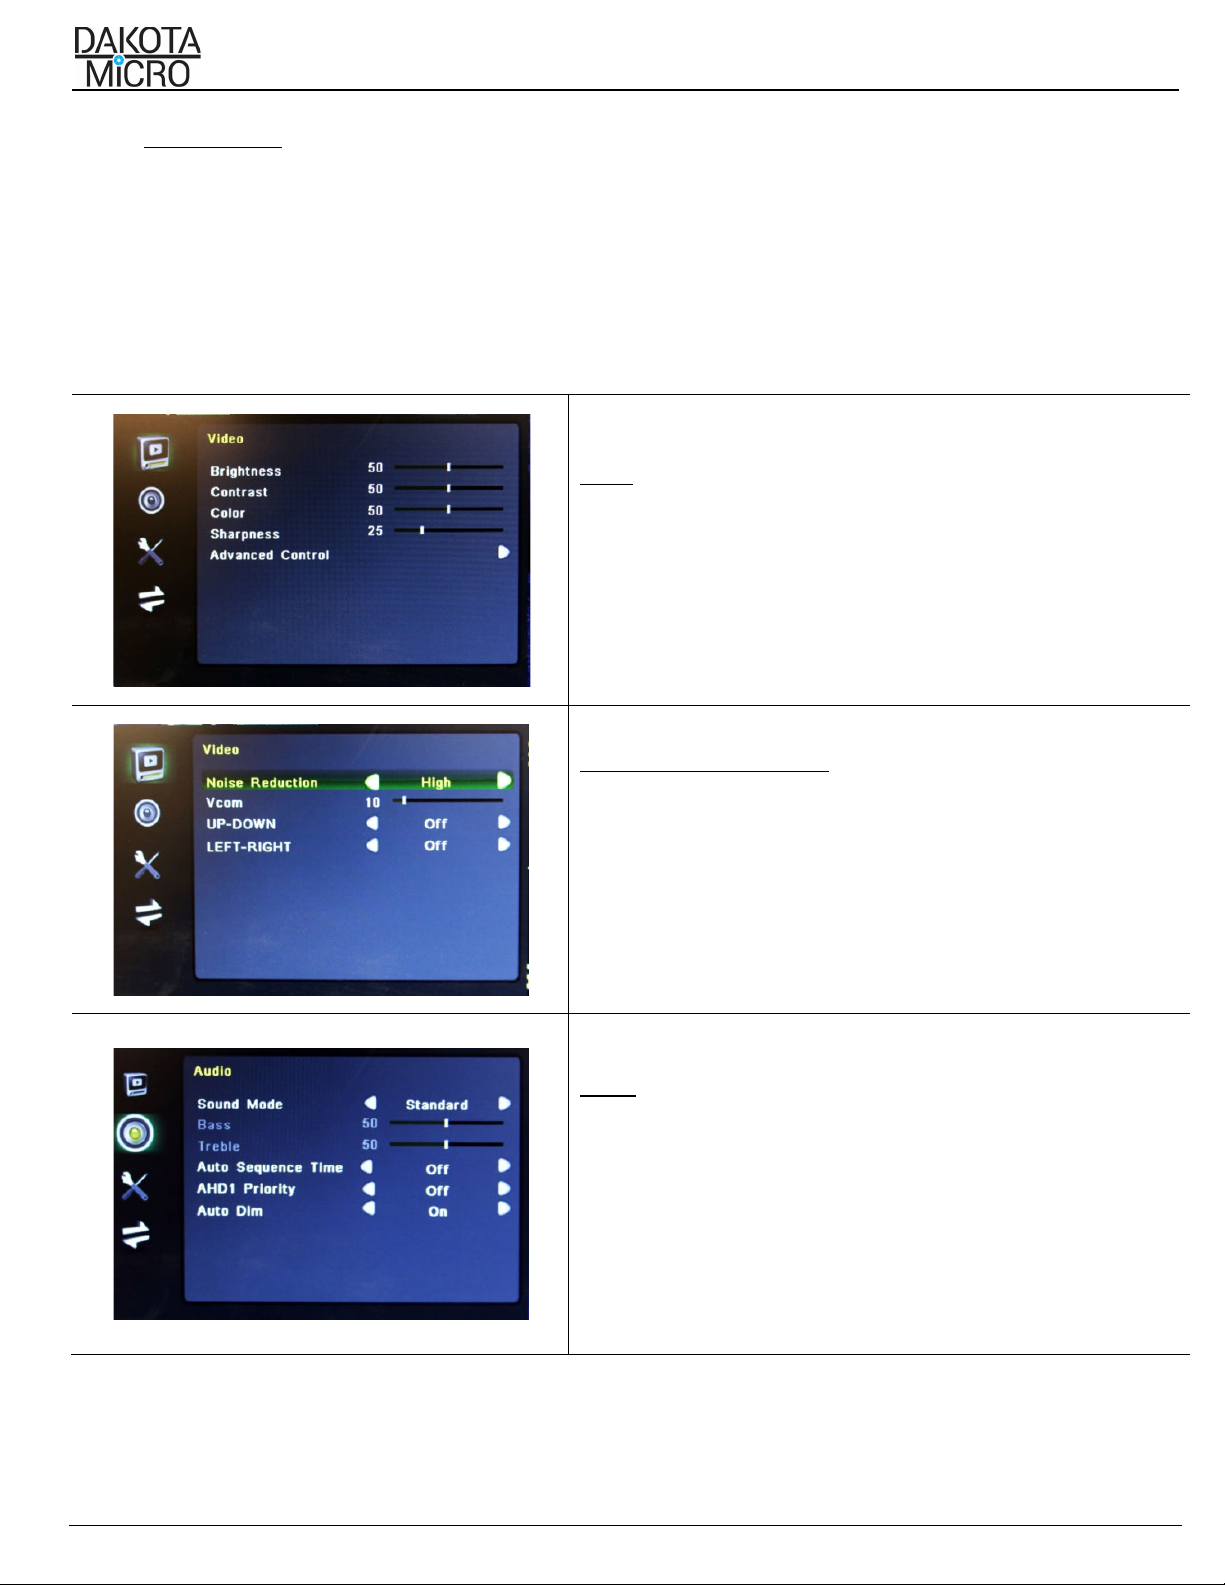
Color,brightness,contrastandvolumecontrolsthatallowcompensationforuseindifferentenvironments
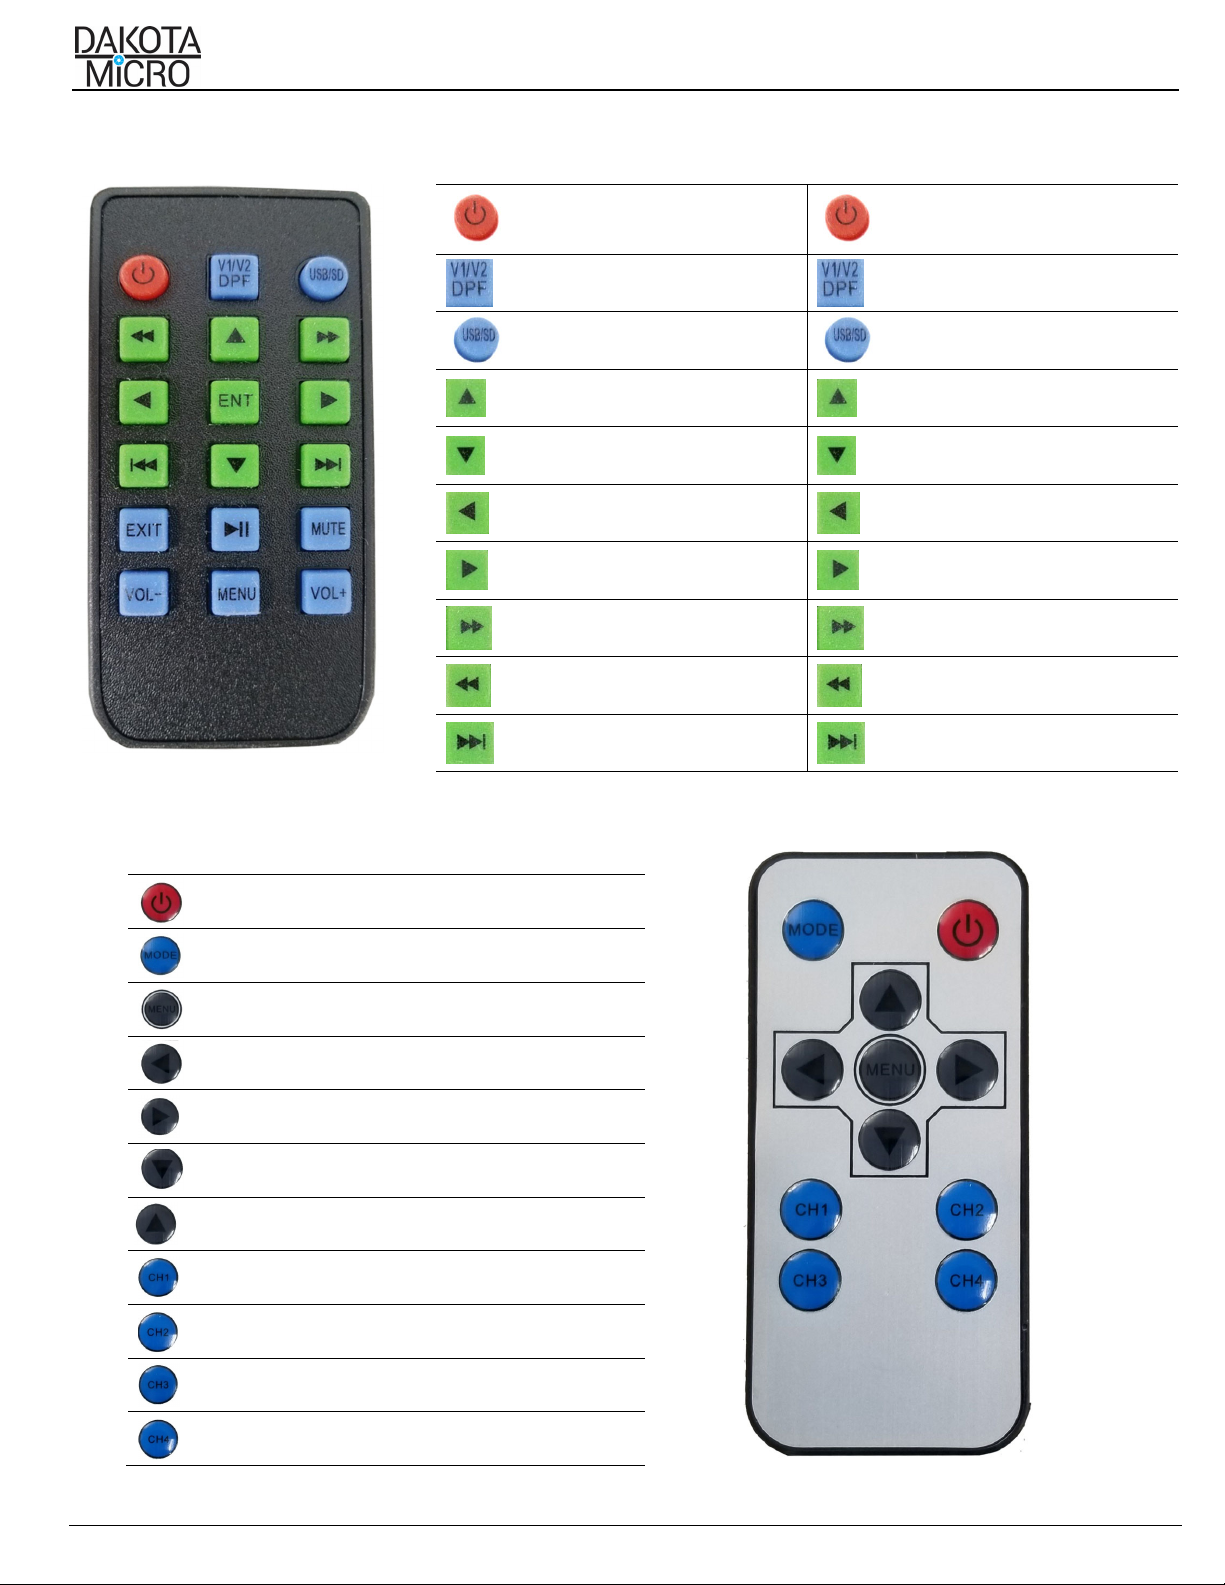
Remotecontrol,sunshield,andmetalU‐bracketmonitorstandincluded
III. IMPORTANTINFORMATIONREGARDINGANALOGANDAHDEQUIPMENT
AftertheintroductionofthecompletelineofAHDMonitors,DakotaMicrowillnolongerofferAnalogmonitors.
UtilizingtheDM‐H9Qmonitor,customercannot“mixandmatch”analogandAHDcameras.
AllAnalogDakotaMicrowirelessequipmentwillnotworkwithAHDMonitors.AHDVersionscomingsoon.
IV. MONITORINSTALLATION&MOUNTING
A.MountingPrecautions
Removeyourmonitorcarefullyfrompackagingandinspectallmountinghardware.Mountinglocationisthemost
importantpartofthemonitorinstallationasitensuresyouthemaximumvisualbenefitfromyourAgCam®system.With
thatsaid,wheninstallingyourmonitor,ensuretofollowthesethree(3)precautions:
1. Themonitorisoutofdirectsunlight.Thiswillprolongthelifeoftheunitaswellasensureoptimumvisibility.
2. Themonitordoesnotobstructview.
3. Themonitordoesnotinterferewiththenormaloperationofequipment.
WARNING:
DakotaMicro,Inc.isnotresponsibleforanydamagescausedtoyourmonitor,oryourself,duetotheimproperinstallationor
useofasuctioncupmonitormount,whetheritbeproductsoldbyDMorproductpurchasedfromanothersource.
B.UniversalBracketMounting
1.HoldmonitorsU‐bracketinplaceonmonitor.
2.Attachbracketwithincludedwingbolts.
C.FinalizingUniversalBracketInstallation
1. Withthemountandmonitorattached,findand
markthedesiredpositionforthemonitor.
2. Removethemonitorfromthemount.
3. Attachthemonitortothemountandtighten
thewingnuts.
*UseONLYthenutsincludedinthekit,boltslongerthan10mmwilldamageyourmonitor.