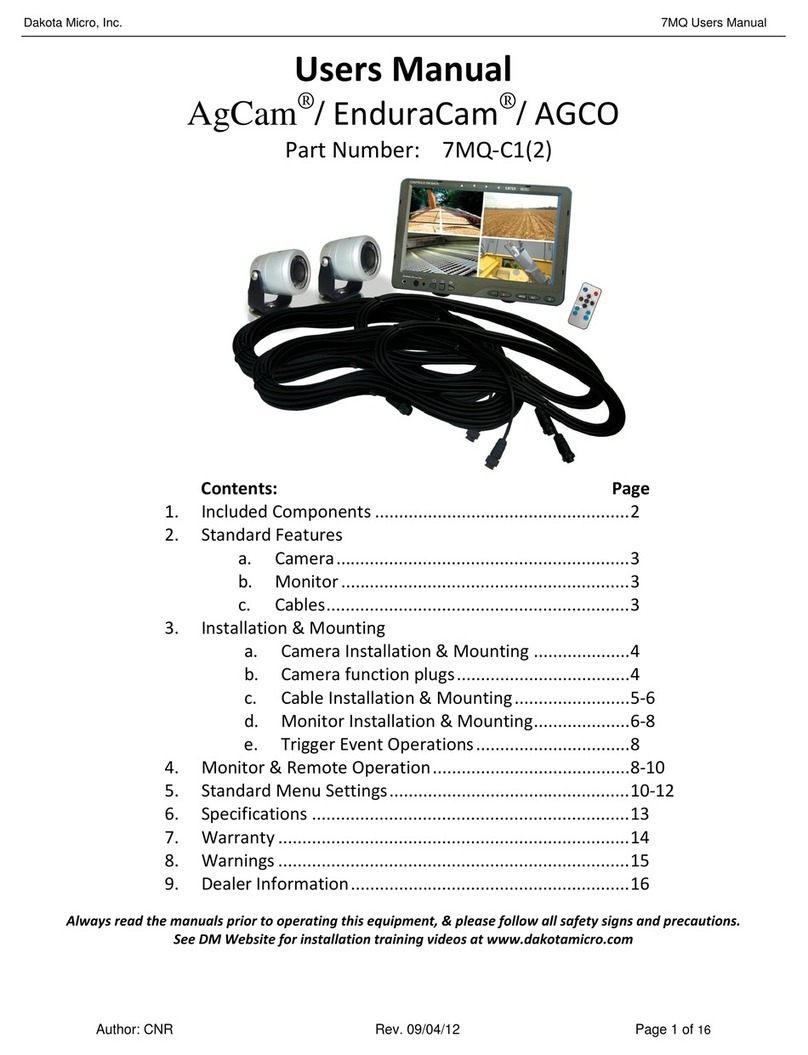
Dakota Micro AgCam User manual

Dakota Micro, Inc. Title: DMAC_DMEC 9M-7M Manual
Author: CNR Rev. 8/17/2011 Page 1 of 16
UsersManual
AgCam®/EnduraCam®
PartNumber:9(7)M‐C1(2)
Contents:Page
1. IncludedComponents.....................................................2
2. StandardFeatures
a. Camera.............................................................3
b. Monitor............................................................3
c. Cables...............................................................3
3. Installation&Mounting
a. CameraInstallation&Mounting....................4
b. Camerafunctionplugs....................................4
c. CableInstallation&Mounting........................5‐6
d. MonitorInstallation&Mounting....................6‐8
e. TriggerEventOperations................................8
4. Monitor&RemoteOperation.........................................9‐10
5. StandardMenuSettings..................................................10‐12
6. HiddenMenuSettings.....................................................12‐13
7. Specifications..................................................................14
8. Warranty.........................................................................15
9. Warnings.........................................................................15
10. DealerInformation..........................................................16
Alwaysreadthemanualspriortooperatingthisequipment,&pleasefollowallsafetysignsandprecautions.
SeeDMWebsiteforinstallationtrainingvideosatwww.dakotamicro.com

Dakota Micro, Inc. Title: 9M/7M Users Manual
Author: CNR Rev. 8/17/2011 Page 2 of 16
IncludedComponents
MonitorKitContents:
1. MonitorRemote(stylesvary)
2. ACPoweradaptor(stylesvary)
3. MonitorBase
4. Monitorsunshield(picturedw/5onmonitor)
5. 9”or7”LCDMonitorw/sunshield(9”picture)
6. 12vpoweradaptor
7. A/Vinputharness(notpictured)
CameraKitContents(percamerakit)
1. Cameraw/bracket&magneticbase
2. 60’VideoCable
3. 20’VideoCable
4. Cameracomponentbag(notpictured)includes:
Allenwrench,(x2)nylonwashers,
(x2)retainingscrews,&cameratail.

Dakota Micro, Inc. Title: 9M/7M Users Manual
Author: CNR Rev. 8/17/2011 Page 3 of 16
ThankyouforpurchasingtheAgCam®/EnduraCam®.TheAgCam®/EnduraCam®isadurable,
reliablesurveillancesystemwiththeinnovativeabilitytobequicklymovedfromoneapplication
tothenext.TrainingvideosareavailableontheDakotaMicrowebsiteat
www.dakotamicro.com
2. StandardFeatures
a. Camera
Waterproof,shockproof,suitablefornearlyanyuse.
Minimumfocaldistanceof5”.
Built‐in,highqualityCCDcamerawithhighperformanceinfrared(IR)illuminator
modules.
IRhaseffectiverangeof45’+incompletedarkness
In‐lineconditionerandsurgesuppressorpreventsover/underpoweringofunit,
preventingdamage.
Built‐inCDSlight‐sourcesensorcanautomaticallyturnon/offtheIR’sbydetecting
thelightintensityoftheenvironment.
OurexclusivePhotograycamerabodylensdarkensinbrightconditionsand
becomescompletelytransparentunderlowlightconditions.Thislensisalso
transparentofinfraredlight,allowingtheLED’stopenetrateevenwhenitis
darkened.
Standardlensfeatures92°fieldofview(3.6mm).
Optionallensesavailableinclude:4.3mm,6mm,12mm&16mm.(Acompletelens
guideisavailableonourwebsiteatwww.agcam.comorwww.enduracam.com)
FunctionplugsonEliteAgCam/EnduraCamversionsallowforIRON/OFFand
switchingofForward/Reverseimage
Removable/Replaceablecameratail.
b. Monitors
FeaturesthelatestinLCDtechnology.
Color,brightness,contrastandvolumecontrolsthatallowcompensationforusein
differentenvironments.
Selectableaudiovideoinputs.
Remotecontrol&sunshieldincluded
c. Cables
Siliconejacketenableshighflexibilityinalltemperatures
Ourdurablepower/videoextensioncablescomein20’and60’standardlengthsand
featuresturdy,watertightconnectors.
Additionalpower/videocablesavailableinlengthsof10’,40’&50’

Dakota Micro, Inc. Title: 9M/7M Users Manual
Author: CNR Rev. 8/17/2011 Page 4 of 16
3. Installation&Mounting
SeeDMWebsiteforInstallationtrainingVideos
a. CameraInstallation&Mounting
1. CameraBody
2. *IRFunctionPlug
(EliteOnly)
3. *MIRFunctionPlug
(EliteOnly)
4. RetainingScrew(x3)
5. Cameratailinput
6. Camerabracket
7. FiberWasher(x2)
8. Magnet
9. MagnetNut
b. FunctionPlugs(EliteModelsOnly)
TherearetwofunctionplugsonthebottomofeachEliteDakotaMicrocamera,near
thecameratail.Theywilllookliketwoadditionalscrewsataslightanglerecessed
intothecamerabody.Thefunctionplugsutilizeapolarizedmagnettochange
camerafunctionality.
1) IRON/OFF.ThisfunctionplugrequiresamagnettoallowfortheIRLED’sto
functioninlowlightconditions.Ifyouremovethepolarizedmagnet,theIR
LED’swillNOTcomeon.
2) MIR/FOR.Thisfunctionrequiresamagnettoactivate/deactivatethe
mirror/forwardfunctionofthecamera.Elitecamerasareshippedfromthe
factorywiththeMIRmagnetinstalled.
TemporaryMounting:
ForTemporarymountingitisrecommendedthatyouusethesupplied#65pullmagnet.If
usingmagneticmount,fastencameracablewithaziptieorotherstylefastener.Thiswill
actasa“safetywire”intheeventyourcameraisknockedlooseforsomereason.When
selectingalocation,makesurethattheequipmentsurfaceiscleanofallforeignmaterial

Dakota Micro, Inc. Title: 9M/7M Users Manual
Author: CNR Rev. 8/17/2011 Page 5 of 16
andasflataspossibletoensurethatthemagneticcamerabasewillhavegoodcontact
andnotvibrateoff.
PermanentMounting:
Forpermanentmounting,itisrecommendedthatyouremovethemagnetandattachto
anysolidsurfacewithtwo(2)screws.
Aftercameraissecurelymounted,plugPower/VideoInputintoAgCam®/EnduraCam®extension
power/videocable.Makesuretheyaresecurelyattachedandlocked(¼turnwilllockthecables
together).
SuggestionsforMountingCamera:
Whendeterminingthelocationforthecameraitisalwaysbesttouseasolidsurfaceto
minimizevibration.Laddersarenotgoodmountingchoicesduetolackofstability.
IfyouwillbeusingyourAgCam®/EnduraCam®forassistinginvisibilityfortowing,youwillwant
topositionthecamerasoyoucanseethedesiredareaandaportionofthevehicle/trailerin
tow;thiswillgiveyousomereferencetodistance.Youwillalsowanttousethemirroredsetting
inthemonitormenuorremovethemagnetintheMIRFunctionPlugonthecamerasoasto
accuratelyrepresentleftandright.Thiswillgiveyoutheeffectoflookinginarearviewmirror.
CameraWarnings
NEVERRELYONYOURAGCAM®/ENDURACAM®ASASAFETYFEATURE.Itisuptoyour
discretiontokeepyourroadtravelandotheroperationssafe.Your
AgCam®/EnduraCam®willprovideyouwithinformationonlybasedonwhatitsees.
Operationofmachinerysafetyguidelinesstillapply.
TheAgCam®/EnduraCam®isequippedwithanarrayofinfraredlightemitterswhichare
invisibletothehumaneye.Thisfeaturewillaidinlowlightconditionsbuthas
limitations.Theeffectiverangeofthenightvisionfeatureis1to45+feetandwill
produceamonochromeimageonly.Donotattempttodrivemachineryusingthis
feature
c. CableInstallation&Mounting
Thereare2lengthsofcablewithyourcamerasystem:One(1)20’andone(1)60’.Ifyouwould
liketopurchasedifferentoradditionalcablelengths,pleasecontactyourdealerwhereyou
purchasedyourAgCam®/EnduraCam®.
CableWarnings
Cableroutingisimportant.Whereyouchosetorunthecablesshouldnotinterferewith
thenormaloperationofthemachineoranysafetyequipment.
ALWAYSbeawareofany“pinchpoints”orotherpotentialhazardstothecable.

Dakota Micro, Inc. Title: 9M/7M Users Manual
Author: CNR Rev. 8/17/2011 Page 6 of 16
Secureallcablestovehicle/equipmentusingincludedcableclips,ziptiesorotherstyle
fastener.
IfyouintendtouseyourAgCam®/EnduraCam®forshortlengthPTOoperatedimplement,
avoidexcesscablelengthsifpossible.Whenyoudecideonalocationyoushouldfixthe
cameratoapermanentbracketusing¼inchbolts,andattachanyloosecablesecurelyso
thereisnochanceofentanglementinthePTOorothermovingparts.
IfyouuseyourAgCam®/EnduraCam®tomonitoracombinehopperorothercombine
operations,takecaretorememberthatcombineshavemanymovingparts.Useextreme
carewhenroutingcables,anditisstronglyrecommendedthatyouuseboltstosecurethe
camera.Whileitwouldbesufficienttousethemagneticbaseformonitoringpurposes
duringroadtravel,itisadvisedtosecurethecamerawithboltsduringoperationofthe
combine.
d. MonitorInstallation&Mounting
Mounting:
Removeyourmonitorcarefullyfrompackaging,andinspectallmountinghardware.Mounting
locationisthemostimportantpartofthemonitorinstallationtoensuremaximumvisualbenefit
fromyourAgCam®/EnduraCam®system.
Keepinmind:
Leastdirectsunlight.Keepingyourmonitoroutofdirectsunlightwillprolongthelifeof
theunitaswellasensureoptimumvisibility
Doesnotobstructyourview
Doesnotinterferewiththenormaloperationofvehicle
Examples:
Tractorw/airseederintow Tractorw/Planter
Drymountthemonitortotheincludeduniversalmountingbracketby:
1. Slidingthesquaremountingstudontopofmountingbracketintotheslotonbackofthe
monitor.

Dakota Micro, Inc. Title: 9M/7M Users Manual
Author: CNR Rev. 8/17/2011 Page 7 of 16
2. Tightennutbyturningtheknobonthebackofmountingbracketclockwise.(Optional
stylemonitorbracketsareavailable:suctioncupstyleandhardmount.Bothofthese
stylebracketshaveasquaremountingstudaswell).
Onceyouhaveattachedthemonitortothemountingbracket,followthesestepstofinalizethe
installation.
1. Withthemountandmonitorattached,findandmarkthedesiredpositionforthe
monitor.
2. Removethemonitorfromthemount.
3. Thoroughlycleantheintendedmountinglocationwithalcoholprepwipeorothernon‐oil
basedcleaner.
4. Removethepaperbackingfromthestandandpressfirmlyindesiredlocation.
5. Ifmountinginotherthanaflat,levellocation,usesmallscrewsinthefourcornersofthe
mountingbrackettopermanentlysecure.
6. DONOTexpectthattheadhesivewillholdupyourmonitor(i.e.ontheceilingorside
postofacab),itisONLYintendedtoholdthebracketdown.
7. Attachthemonitortothemountandtightenthewingnut.
Installation:
1) InputtoMonitor5)AV3‐Audio/VideoInput
2) AV1‐4Eventtriggerwires(detailspg.7)6)AV4‐VideoInput
3) AV1‐Audio/VideoInput7)RCA‐VideoOutput
4) AV2‐Audio/VideoInput8)PowerInput*

Dakota Micro, Inc. Title: 9M/7M Users Manual
Author: CNR Rev. 8/17/2011 Page 8 of 16
Power:
12vPower:
1. AttachthePowerInputconnector(8above)toyourincluded12vcigarettelighter
adaptor**
2. Plugcigarettelighteradaptorinto12vpowersource
*Thereisasmallin‐lineglassfuselocatedontheredpowerwire.Whenreplacingblown
fuses,useaMAX2ampglassfuse
**Thereisasmallglassfuselocatedinsidethetipofthe12vportionofthepoweradaptor.
Whenreplacingblownfuses,useaMAX4ampglassfuse.
HardwirePower(7.5ampmaximumcircuitcapability):
1. ContactyourlocalAgCam®/EnduraCam®dealerforavailablehardwirepoweradaptors.
e. TriggerEventOperations:
Cameraselection
Eventtriggerwiresareasfollows:
Camera1–Green
Camera2–Purple
Camera3–Gray
Camera4–White
Eventtriggerwirescanbeattachedtoany12Vpositiveevent.Thiswillcausethemonitorto
changetothatcamera,regardlessofthestateofthemonitor(i.e.ON/OFForChannel
selection).Themostrecenteventwillbetheprimarydisplay,soiftwovideochannels(AV1&
AV2)areattachedtoaneventoutput,theonethathappenslastwillchangethemonitortoits
respectivecameraview.
Thewirescanbeattachedtoanypositiveoutput10.5Vto16.9Vswitchorsupplytocausethe
monitortoautomaticallyswitchtheunittoitsrespectivechannelcamera.Forexample;ifyou
weretoattachtheAV1wiretoapositiveoutputfromanunloadingaugeronacombine,the
monitorwouldswitchfromchannel2,3,or4tochannel1whentheaugerisextended.The
eventcircuitshouldbeneutralinitsnormalstateandchangetoHIGH(+12V)whentheeventis
consideredtobeactive.
4.Monitor&RemoteOperation
Turnthemonitorononlyafterithasbeensecurelymounted,suppliedwithpower,andthe
camerasareconnected.

Dakota Micro, Inc. Title: 9M/7M Users Manual
Author: CNR Rev. 8/17/2011 Page 9 of 16
(9”Monitorshown.Actualbuttonlocationson7”monitormayvaryslightly):
1OutputjackHeadphoneJack
2‐4FORUSEONLYWITHQuadProcessor
2FullscreenWhenconnectedtoQ2willshowcameras1/2/3/4eachtimepressed
3DuplexscreenWhenconnectedtoQ2willshowCamera1/2andcamera3/4eachtime
pressed
4QuadscreenWhenconnectedtoQ2willdisplayall4camerasconnected
5‐keyTodecreaseparameter
6+keyToincreaseparameter
7MENUToswitchmenuselection,pressmultipletimes.Togotonexticon,use+
8AVKeySwitchesbetweenAV1,AV2,AV3,&AV4
9POWERTurnsmonitorON/OFF
11‐12portslocatedonsidesandbottomofmonitor
10USBPortInputforoptionalcablewhenusingacomputerconnectedtotheVGA
port
11QuadplugUSBfemaleconnectorforQuadprocessor
12VGAInputInputforVGAfromcomputerorotherconsole(seehiddenmenu,VGA
cablesoldseparately)

Dakota Micro, Inc. Title: 9M/7M Users Manual
Author: CNR Rev. 8/17/2011 Page 10 of 16
Remote:
POWERON/OFF
MuteEnable/Disablesound
FlipimageLeft/Right
FlipimageUp/Down
NavigationArrows
MENUEntersthemenu
Alsoactsas“enter”button
inmenusettings
Adjustsscreendisplay
modes
Resetyourselection
Enablestimerthatwillturn
offmonitor
Superimposeagridon
screen
AspectRatioadjustment
normal/wide
Choosesthehighlighted
selectioninMENU
GettingStarted:
1. Poweronmonitorbypushing“POWER”buttononthefaceofmonitororremote.
2. Ifyoudonotseevideofromyourcamera,pushtheAVbuttononmonitororSELbutton
onremote.RepeatedlypushingtheAVorSELbuttonwillcyclethroughthevideo
channels.
5.StandardMenuSettings
PresstheMENUkeyonthemonitororremote.Usethe–and+keysonthemonitorortheLEFT
andRIGHTarrowkeysontheremotetomovethroughtheiconsatthetopofthescreen.
1. UsetheMENUkeyonthemonitor(upanddownarrowsonremote)toselectanitem
undereachsection.Selectedmenuitemsturnred.

Dakota Micro, Inc. Title: 9M/7M Users Manual
Author: CNR Rev. 8/17/2011 Page 11 of 16
2. Use–or+onthemonitor(leftandrightarrowsonremote)tochangethevalueofthe
highlighteditem.
3. Toexit:
a. Pressthe–or+keyonthemonitor(leftorrightarrowonremote)multipletimes
tillthemenugoesaway
b. Allowmonitortotimeout(approximately5seconds).
PICTURE
BRIGHT: Adjuststhebrightnessoftheimage
CONTRAST:Adjuststhecontrastoftheimage
BACKLIGHT:Adjuststhebacklightingofthe
screen
COLOR:Adjuststhecoloroftheimage
TINT:Adjuststhetintoftheimage
VOLUME
VOLUME:Adjuststhevolumelevel
OPTION
HORIZONTAL:Mirrortheimagelefttoright
VERTICAL:Mirrortheimagetoptobottom
SYSTEM
ENGLISH:Selectyourlanguage
COLOR‐‐SYS:Adjuststhecolorsystemforyour
country(ThisfeatureislockedtoAuto)
SCALE:Superimposesascaleonyourmonitor
screen

Dakota Micro, Inc. Title: 9M/7M Users Manual
Author: CNR Rev. 8/17/2011 Page 12 of 16
PRESET
Thesesettingsallowyoutodeterminehowlong
(inseconds)aneventtriggeredcamerawill
remainonthescreen(aftertheeventends)
beforereturningtonormalview.
6. HiddenMenuSettings
Themainreasonmostpeoplewillwanttoaccessthehiddenmenuistoturnon/offtheextra
camerainputsorenable/disabletheVGAinput.
DONOTmodifyanysettingsnotclearlylaidoutinthissection.Thismanualgivesyouaccessto
allofthefactorysettingsofyourmonitor,someofwhichmustnotbemodifiedforthemonitor
tofunctionproperly.ThereareseveralmenuswhichareNOTdescribedinthissectionofthe
manual.ThosemenusMUSTbeleftasfactorydefaultsettings.
Toaccessthehiddenmenu,youMUSTusetheremotecontrolandthepowershouldbeOFF.
Thehiddenmenuwillbeeasiertoseewithnocamerasinputintothemonitor
Withthemonitorpoweroff,pressthefollowingbuttonsequenceontheremotecontrol:
1. MENU
2. LEFTarrow
3. RIGHTarrow
4. MENU
Amenushouldappearonthescreenthatsays,
“FFACTORYMODE:”atthetop.
IMPORTANT:ifyouaccidentallypressthekeyfunctionsinthereverseorder
“MENU/RIGHT/LEFT/MENU”itwilllockyououtofthehiddenmenuandyouwillneedtounplug
themonitorfor10secondstorestoremenuavailability.

Dakota Micro, Inc. Title: 9M/7M Users Manual
Author: CNR Rev. 8/17/2011 Page 13 of 16
PressMENUButtontwicetoaccesscamera&VGAinputsettings.
ThesearetheONLYsettingsinthehiddenmenuthatshouldbetamperedwith/changed.
Use&buttonsonremotetonavigatethroughmenuoptions
Use&buttonstochangesettings
MenuTitleDescriptionFactorydefault(0=OFF1=ON exceptwhere
defineddifferently)
POWERAutoPowerONOptions 0 = poweralwaysof
f
whenvehicle/power
sourceitturnedon.Mustpresspower
buttontoturnonmonitoreachtime
1=autopoweronwhenpowerisapplied
2=Returntolastpowerstatewhenyou
turnedoffthevehicle
LOGOLogodisplayonstartupON/OFF 1(displayatstartup/ON)
OFFTIMEFactorysetting,donotmodify 0(disabled/OFF)
OSDTIMEAmountoftimemenuwillbe
displayedonscreenwhenmenu
buttonispushed
8(seconds)
TVBLUEFactorysetting,donotmodify 0 (DONOTMODIFY)
AV2INPUTCamerainput2show/hide 1(display/ON)
AV4INPUTCamerainput4show/hide 1(display/ON)
ACCN/A1(notapplicableforthismonitor)
VGAINPUTWhenONallowsmonitortobe
usedasacomputermonitor.
Separatecablemustbepurchased
toaccessthisoption.
0(disabled/OFF)
AV3INPUTCamerainput3show/hide 1(display/ON)
VOL.ADJEnables/Disablesonscreen
volumeadjustment
1(display/ON)
Note:YoucannotchoosetodisableAV1.
Afteryou’vemadeyourchanges,simplyturnthemonitorpoweroffandbackontoenablethe
newsettings.

Dakota Micro, Inc. Title: 9M/7M Users Manual
Author: CNR Rev. 8/17/2011 Page 14 of 16
7.Specifications
A.Camera:
EffectivePicture
Elements510*492
ImagePick‐upDeviceSONY1/3”SuperHADCCDsensor
HorizontalResolution540Horizontallines
MinimumIllumination0LUX@F2.0
S/NRationMorethan48dB
AutoElectronicShutter1/60s~1/100,000s,ON/OFFSwitch‐able
AutoWhiteBalanceColorTemperature:2500K~9500K
AutoGainControlHigh/LowSwitch‐able
AutoIrisControlVideo‐DriveIrisControl
ScanningSystemInterlace2:1
GammaCharacteristic0.45
LensesFurnishedBoardLens3.6mm/F2.0,PhotograyBody
SynchronousSystemInternal,Negativesync.
BackLightCompensationOn/OffSwitch‐able
VideoOutput1Vp‐p/75Ohms.
OperatingTemp.‐45°F~150°F(‐42°C~66°C)
ConstructionAluminumCase
WaterproofingcriteriaIP68/69
Dimensions53x58(L)mm(BodyOnly)
B.LCDMonitor:
ScreenSize9” (16:9)digital panel/7”(16:9)digitalpanel
OverallSize235(L)X155(W)X36.5(H)mm
Weight600g
PowerinputAC10.5‐16.9V, 1,200ma(2cameras)
ColorSystemNTSC/PALautoswitch
OperatingTemp.‐30
°
F~130
°
F(‐34
°
C~+54
°
C)
TouchPanel4‐Wireresistance(optionalfunction)
Brightness400cd/m2
Resolution(HxV)800(RGB)x480
Contrast500:1
ViewingAngleL/R:70°Up:70°Down:60°

Dakota Micro, Inc. Title: 9M/7M Users Manual
Author: CNR Rev. 8/17/2011 Page 15 of 16
8.ConsumerLimitedWarranty
Subjecttothedisclaimer,limitationsandotherdirectionsstatedhereafter,DakotaMicro,Inc.(DakotaMicro)warrantsthatits
AgCam/EnduraCamProductswillbefreefromdefectsinmaterialandworkmanshipforperiodsasstatedhereafterfromthedateoforiginal
purchase.THISWARRANTYISEXPRESSLYMADEINLIEUOFANYANDALLOTHERWARRANTIES,EXPRESSORIMPLIED,INCLUDINGTHE
IMPLIEDWARRANTIESOFMERCHANTABILITYORFITNESS.THEEXCLUSIVEREMEDYOFTHEBUYERISLIMITEDTOREPAIROR
REPLACEMENTOFTHEPRODUCT.EXCEPTASSTATEDINTHISWARRANTY,DAKOTAMICROSHALLNOTBELIABLEFORANYLOSS,
INCONVENIENCE,ORDAMAGE,INCLUDINGDIRECT,SPECIAL,INCIDENTAL,ORCONSEQUENTIALDAMAGES,RESULTINGFROMTHEUSEOR
INABILITYTOUSETHEPRODUCT,WHETHERRESULTINGFROMBREACHOFWARRANTY,NEGLIGENCE,STRICTLIABILITYOFANYOTHER
LEGALTHEORY.Anyoralstatementsorrepresentationsmadebyanyonewhicharecontrarytooratvariancewiththetermsstatedinthis
LIMITEDWARRANTYarevoid.
DakotaMicrowill,atitsoption,eitherrepairthedefectorreplacethedefectiveProductorpartthereofwithaneworremanufactured
equivalentatnochargetothepurchaserforpartsorlaborfortheperiodofthree(3)yearsforcameras,two(2)yearsformonitors,quadsand
RanchHands,andone(1)yearforcablesandallotheraccessories.
TheDakotaMicrolimitedwarrantyperiodsoutlinedaboveapplythroughouttheUnitedStatesandCanadaonly.Aone(1)yearlimited
warrantyforallProductsappliestoallothergeographiclocationsunlessotherwisestatedinwritingbyDakotaMicro.
ThislimitedwarrantydoesnotapplytoanyissuesconnectedwithappearancethathavenorelationtotheperformanceoftheProductnorto
anyProducttheexteriorofwhichhasbeendamagedordefaced,whichhasbeensubjectedtoimpropervoltageorothermisuse,abnormal
serviceorhandling,orwhichhasbeenalteredormodifiedindesignorconstruction.
Inordertoenforcetherightsunderthislimitedwarranty,thepurchasershouldfollowthestepssetforthinthecompleteDM“Warranty&
RepairPolicy”listedatwww.dakotamicro.com,andprovideproofofpurchasetoDakotaMicro.
NeitherthesalespersonnelofDakotaMicronoranydealeroranyotherpersonisauthorizedtomakeanywarrantiesotherthanthose
describedherein,ortoextendthedurationofanywarrantiesbeyondthetimeperiodsdescribedherein.
ThewarrantiesdescribedhereinshallbethesoleandexclusivewarrantiesandremediesprovidedbyDakotaMicro.Correctionofdefects,in
themannerandfortheperiodoftimedescribedherein,shallconstitutecompletefulfillmentofallliabilitiesandresponsibilitiesofDakota
MicrotothepurchaserwithrespecttotheProduct,andshallconstitutefullsatisfactionofallclaims.InnoeventshallDakotaMicrobeliable
orinanywayresponsibleforanydamagesordefectsintheProductwhichwerecausedbyrepairsorattemptedrepairsperformedbyanyone
otherthanDakotaMicro.
Somestatesdonotallowthelimitationorexclusionofincidentalorconsequentialdamages,sosaidlimitationmaynotapplytoyou.
Anyactionatlaw,suitinequity,orotherjudicialproceedingfortheenforcementofanyrightprovidedforhereinorotherwise,orwith
respecttoanyclaimthatapurchasermayhaveagainstDakotaMicroshallbeinstitutedonlyintheCourtsoftheStateofNorthDakota,either
inthestatedistrictcourtlocatedinWahpeton,NorthDakotaorinFederalDistrictCourtlocationinFargo,NorthDakota.Withoutregardto
conflictsoflawprinciples,thelawsofthestateofNorthDakotashallgoverntheinterpretationandenforcementofthetermsofthisLimited
WarrantyandallaspectsoftherelationshipbetweenDakotaMicroandthepurchaser.
Thiswarrantygivesyouspecificlegalrightsandyoumayalsohaveotherrights,whichmayvaryfromstatetostate.
9.Warnings
•Donotlookdirectlyintocamera.Usecarewhentouchingthebodyofthecameraunit,itisnormalforthecameratobeheatedupto
150°F.
•Toavoidelectricalshockandmaintain,donotopentheenclosures.Highvoltageispresentandtherearenouserserviceablepartsinside.
•Wheninstallingcameraavoidpointingdirectlyatpaperorflammablematerials.
•Donotuseanychemicalsolvent,cleaningagentorcorrosivedetergenttocleanawaydirtonthesurfaceofthescreenorlens.
•Ourphoto‐graycameralenseshavebeenmadeimpact‐resistantandhavebeendrop‐balltestedaccordingtoSec.3.84,21CRFBUTARE
NOTUNBREAKABLE.Becausetheyhavebeenhardenedchemically,theyshownostresspattern.Inspectyourlensesfrequently.Chipped
orscratchedsurfaceswillreduceprotection.Suchlensesshouldbereplacedbythemanufacturer,pleasecontactyourlocaldealershipfor
moreinformation.
•Thiscamerausesaspecialcoatedopticlenswithphotochromaticproperties;ifthelensneedstobereplacedwerequirethatitbe
returnedtothefactory.
•Powertocamerasisnotinterruptedbyturningoffmonitor;12vpowersourcemustbeterminatedwhennotinusetoavoidbatterydrain.
Toavoidthisproblembesurewhenhardwiringaunit,useafusedcircuit.

Dakota Micro, Inc. Title: 9M/7M Users Manual
Author: CNR Rev. 8/17/2011 Page 16 of 16
10.DealerInformation
DateofPurchase:_____________________________________________
SerialNumber:_______________________________________________
FAQ’s
Dakota Micro, Inc.
1866462‐4226
www.agcam.com
www.enduracam.com
8659148thAve.SE
Cayuga,ND58013
DakotaMicroInc.products,specifications,pricingandprogramsaresubjecttochange
withoutpriornotice.DakotaMicroInc.reservestherighttomakedesignchangesatanytime
withoutobligationtoretroactivelyinstallthemonpreviouslysoldunits.
Other manuals for AgCam
3
This manual suits for next models
1
Table of contents
Other Dakota Micro Security System manuals