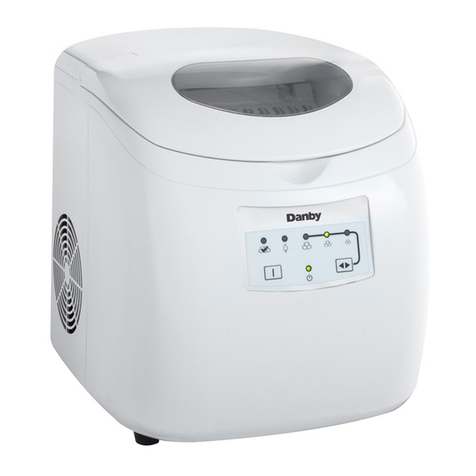
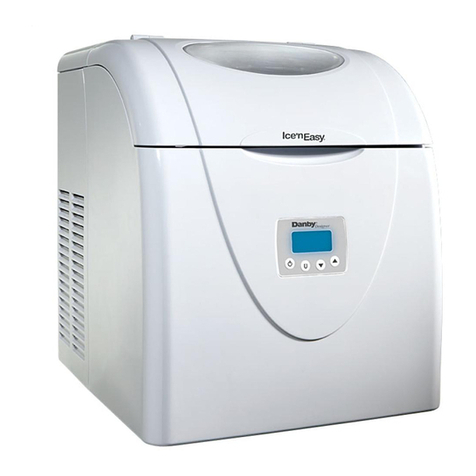
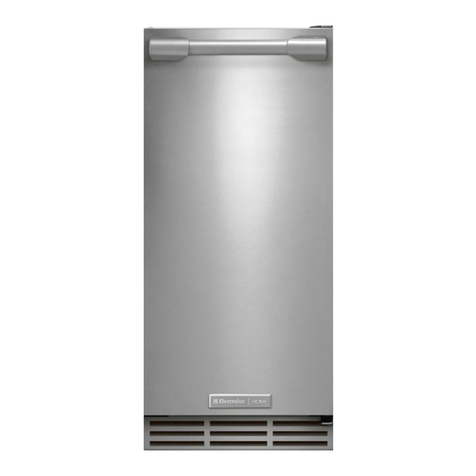
Danby Designer Ice'n Easy DIM1524W User manual

OWNER'S MANUAL
GUIDE DU PROPRll_TAIRE
MANUAL DEL USUARIO
Model. Mod61e.Modelo
DIM1524W
CAUTION:
Readand Follow All SafetyRules and
Operating Instructions Before First
Use of This Product°
ATTENTION:
Avant defaire fonctionner cette
machine,lisez et suiveztoutesles
consignes de s_curit_de ceguide en
premier lieuo
ADVERTENClA:
Lea y SigaTodaslas Indicacionesde
Seguridad y de Operaci6nANtesde
Utilizar Este Producto.
lce'nEasy
Table of Contents ..................... 1
Table des mati6res .................... 13
P
lndice ............................. 25
Danby Products Limited, Guelph, Ontario Canada NtH 6Z9
Danby Products inc., Findlay, Ohio USA 45840
Version 1 B 3/O5

Important Safety Information
Safety Precautions
Grounding Instructions 3
4
Operating instructions
Features of Your Ice Maker
The Controls of Your Ice Maker
Ice Making
ice Size Selection
Delayed Start
Self-Clean Mode
5
6
7
7
7
8
_elpful Information
Draining Your Ice Maker
Care and Cleaning 9
t0
If Something Goes wrong
Before Your Call For Service
Warranty
11
12

Welcome to the
Danby family, We're
proud of our quality
products and we
believe in dependable
service°
You'll see it in this
easy-to-use manual
and you'll hear it in the
friendly voices of our
consumer service
department°
Tel: 1-800-26-1J_lltllby _
Best of all, you'll expe-
rience these values
each time you use
your ice maker, That's
important, because
your new ice maker
will be part of your
family for a long time,
Start Herein°° Before using your Ice'N'Easy ice maker
Write down the model and serial Staple your receipt to the inside
numbers here They are on a label back cover of this manual,, You will
located on the back of the ice need it to obtain service under
maker, warranty,,
Model number
Serial number
Date purchased
Before you call for service,
there are a few things you
can do to help us serve
you better°_
Read this manual
It contains instructions to
help you use and maintain
your ice maker properly,
If you received a
damaged appliance
Immediately contact the
dealer (or builder) that sold
you the ice maker.
Save time and money
Check the section titled "If
Something Goes wrong"
before calling° This section
helps you solve common
problems that might occur,
if you do need service, you
can relax knowing help is
only aphone call away.
Tel:1-800-26-D anbyo
2

READ ALL SAFETY INFORMATION BEFORE USING
':ii_ii_i_ilh¸:_:i::L::,:iI::i:h:¸_:':::__/i ::i:/_i!:i_/_¸¸ ::::i::: :://_ h_i¸/:: i¸i¸I':IIi:::i ?:i(? Li i _:_i(:¸I:::T::II'i:L!!i:::::_i:C,i_:_¸::_iU:'_,':::¸::?::ii¸i :
%reduce tile: Hsk of fire burns electric shockl or injury to persons when using your appliance =
_:fOliowbaSic:precauti0nsl including the:following section&:: :::::::
- This appliance must be
grounded, Connect only to
a properly grounded outteL
See "Grounding Instructions"
section on page 4,
. Do not operate this appli-
ance if it has a damaged
power cord or plug. if it is
not working properly, or if the
appliance has been damaged
or dropped.
. Do not use this product near
water-for example, in a wet
basement, near a swimming
pool or near a sink.,
Use this appliance only for
its intended use as described
in this manual, Do not use
corrosive chemicals or •
vapors in this appliance,
This appliance should be
serviced only by qualified
service personnel, Contact
nearest authorized service
facility for examination, repair
or adjustment,
See door surface cleaning
instructions in the Care and
Cleaning section(s) of this
manual,
Do not cover or block any
openings on the appliance.,
Do not store this appliance
outdoors,,
Keep power cord away from
heated surfaces,
Do not immerse power cord
or plug in water
•As with any appliance, close
sup.ervision is necessary
when used by children,
WARNING: The internal holding compartment of this appliance for b0th stored ice Cubes and : :
stored water is NOT a refrigerate d
We rec0mmend changing
SAVE THESE INSTRUCTIONS
3

WARNING
Improper use of the
grounding plug can result
in a risk of electric shock.
This appliance must be
grounded. In the event of an
electrical short circuit, ground-
ing reduces the risk of electric
shock by providing an escape
wire for the electric current.
This appliance is equipped
with a power cord having a
grounding wire with a ground-
ing plug..
The plug must be plugged into
an outlet that is properly
installed and grounded.
Consult a qualified electrician
or service technician if the
grounding instructions are not
completely understood, or if
doubt exists as to whether the
appliance is properly ground-
ed.
If the outlet is a standard 2-
prong wall outlet, it is your per-
sonal responsibility and obliga-
tion to have it replaced with a
properly grounded 3-prong
wall outlet.
For best operation, plug this
appliance into its own electri-
cal outlet to prevent flickering
of lights, blowing of fuse or
tripping of circuit breaker.
Do not under any circum-
stances cut or remove the
third (ground) prong from the
power cord.
Do not use an adapter plug
with this appliance
Do not use an extension
cord with this appliance. If the
power cord is too short, have
a qualified electrician or serv-
ice technician install an outlet
near the appliance.
4

Exterior
1 Ice Maker Door with
Viewing Barrier.
2Control Panel.
(see page 6 for details)
3Adjustable Legs.
Interior
4 Evaporator Coils,
5 Water Box.
6 Ice Shovel.
7 Water Fill line,
(Located in internal reservoir,
beneath ice bucket,,)
Accessories
8 Drain Plug.
(Lower left rear of unit)
9 Ice Bucket.
I
_:"(_ F!LL LIi',_E
iJ
5

f
F]oFIH
@
1. Electronic Display - shows
timer setting, selection indicators,
and status icons
2. Power Button - used to turn
unit on or off, also used to cancel
the timer and/or currently running
program
3. Ice Size Selector - Allows
you to select between three (3)
available ice sizes
4. Increase Button - Used in
conjunction with the timer feature,
each depression adds 5 hours to
the set timer
5. Decrease Button - Used in
conjunction with the timer feature,
each depression removes 5 hours
from the set timer
• Small Cube -Denotes that "_"
U the ice maker is currently set L_J
to produces small size cubes
UoMedium Cube - Denotes
that the ice maker is currently
set to produce medium size _
o
cubes
° Large Cube - denotes that
the ice maker is currently set
to produce large size cubes
B_] RF"Timer - Displays the
.... delayed start set time
oPower -This icon flashes
when the power is off and
becomes static when the unit
has been powered on
,Bucket Full - Illuminates
to indicate that the water
bucket is full and will need to
be emptied before the ice
making process can resume
• Add Water - illuminates
when the internal reservoir
requires filling before pro-
ceeding or continuing with
the current selected program,
oFault - displayed when
the unit has entered a fault
mode and is not able to begin
or resume the current mode
Please refer to page 11for
instructions should this situa-
tion occur.,
o Pump - Illuminates when
_the unit is pumping water
from the internal reservoir to
the water bucket during the
ice making cycle and the self
clean mode,
6

1 Add water to 'fill line'. _''
13Changethe ice size if you
.don't want medium cubes.
To immediately begin the ice
making process;
. Remove ice bucket and add
water to Fill line (approx 3 5 L)
• Reinsert the ice bucket and
press the Power button
• Select the desired ice cube
size (See"Ice Size" below)
* The ice maker will automati-
cally begin approximately t5
seconds after the last button
is pressed
Please note: The length of
the ice making process is
directly proportionate to the
current ice size setting and
batch completion time range
between 9 minutes and I5
minutes per cycle, depending
upon your ice size selection
For optimal results, please
keep the ice maker door
closed during the ice making
process,
i;Selection button On the
1 Add water to !fili line'.: :[iI:
The ice size selection button
allows you to choose from
small, medium or large ice
cubes
By default your ice maker is
configured to produce medi-
um size ice cubes,, However
if you would like a different
size of cube, you need only
depress the ice size selection
button to cycle between the
three (3) available sizes
(small, medium and large,)
Ice size change is possible
during the running ice making
cycle, however it is recom-
mended to wait until the cur-
rent cycle is complete before
defining a new ice size,
NOTE: Unless there is a
power failure or power inter-
ruption to the unit, The ice
size selection you have made
will be retained as the default
ice size,
'3 Press the increase & :: _:
• Remove ice bucket and add
water to Fill line.(approx, 3,5 L)
•With the power off Press
the IncreasetDecrease but-
tons once simultaneously to
enter the timer set mode.
- Each subsequent press of
the increase button will
increase the timer in 30
minute increments up to 12
hours, Alternatively to
subtract time from the timer,
press the decrease button to
decrease the timer by 30
minute increments
• Reinsert the ice bucket and
select the ice size you
require,
• The ice maker timer wilt
automatically start I0 sec-
onds after the last button is
pressed
To cancel the timer at any
time and begin the ice making
process immediately, simply
press the power button,,
1 Add water & vinegar (1:1)
2With the power off,
simultaneously depress
the increase & decrease
arrows twice.
3Drain after program is
cornplete.
4Add fresh water to fill line.
5 Repeat Step 2
6Drain after program is
complete.
The self-clean mode should be
put into operation before you
use your ice maker for the first
time and/or if there has been a
long period without use
Stage I
* Add equal parts of water and
vinegar (1: t) to the ice maker's
reservoir,
oWith the power off, press the
increase and decrease arrows
simultaneously two times to
activate the self-clean mode
Please note, the self clean
mode with automatically initiate
approximately 10 seconds after
the last button depression°
• During the self clean mode,
the upper ice bucket is filled
and dumped multiple times and
the pump will remain in contin-
uous operation as it feeds
water to the bucket and evapo-
rator coils,, This cycle contin-
ues for approximately five-and-
a-half minutes,
Upon completion, the unit auto-
matically powers down and is
now ready for stage 2.
Stage 2
• Drain the cleaning solution
from the internal reservoir by
removing the rear drain cap
and plug (see pg 9),,
• Add fresh water to the 'Fill
line' in the internal reservoir,
oWith the power off, press the
increase and decrease arrows
simultaneously two times to
activate the self clean mode-
which will now act as a rinse
Upon completion of this final
stage of the self clean process,
the unit automatically powers
down once again_ Proceed to
drain the water from the inter-
nal reservoir and leave the lid
on the ice maker open to allow
it to air dry
8

WARNING:
The internal holding com-
partment of this appliance
for both stored ice cubes
and stored water is NOT a
refrigerated compartment.
We recommend changing
(replacing) any stored
water that has not been
used within a t2 hour time
period of the machine
being operational.
In order to maintain a hygien-
ic environment within your ice
maker and prevent the poten-
tial formation of bacteria, it is
highly recommended that you
completely drain the ice
maker after each use (daily)
or if any water has been
stored within the internal
reservoir for in excess of
twelve (12) Hours.
To drain your ice maker;
•Place a drip tray beneath
the right rear portion of the
cabinet, Depending on the
amount of water contained in
the internal reservoir, the
water may exit the drain rap-
idly, Tilt the drain pan slightly
towards the drain spout to
prevent water from projecting
away from the intended water
collection area,
• Remove the drain cap
(as shown in fig., 9 1 )
• When the exitingwater flow
decreases to a 'trickle' slightly
tilt your ice maker backwards
to ensure all the water that
may have been stored inter-
nally is thoroughly drained
Once the water has been
removed from the appliance,
wipe the internal reservoir
and ice bucket dry and leave
the ice maker lid in the open
position to expedite the drying
process,,
Fig 9,,1
9

Allow the ice maker door to
remain open for a few min-
utes after the ice making mak-
ing process is complete, run-
ning the self-clean mode or
manual cleaning, to air out and
dry the inside of the ice maker
cabinet
NOTE: Be certain the
power is off before
cleaning any part of
this appliance,
:Neve r use any commercial:
iclearters on any part of your
ice maker. :_:::: ::::_ ::i: i
Please refer to the Self-Clean
Mode Section on pg 8 for
proper system cleaning
Walls, Floor of Reservoir,
Inside Window, and Plastic
Parts
Some water deposits and dust
can be removed with a paper
towel, others may require a
damp cloth,
Ice Bucket
To prevent breakage, do not
place the ice bucket intohot
water just after ice making..
Wash it carefully in warm,
sudsy water. The ice bucket
can be broken if dropped
Remember, do not operate the
ice maker without the ice
bucket in place
Do not use abrasive cleaners
or sharp utensils on any part of
your ice maker.
Do not use cleaners con-
taining ammonia or alcohol
on the ice maker,
Ammonia or alcohol can
damage the appearance of
the appliance.
Outer Case
Clean the outside of the appli-
ance with a sudsy cloth, Rinse
and then dry, Wipe the window
clean with a damp cloth,,
Control Panel and
Door
Wipe with a damp cloth.. Dry
thoroughly Do not use clean-
ing sprays, large amounts of
soap and water, abrasive or
sharp objects on the panel-
they can damage it..Some
paper towels can also scratch
the control panel.
Door surface
It's important to keep the area
clean where the door seals
against the cabinet, Use only
mild, non-abrasive detergents
applied with a clean sponge or
soft cloth. Rinse well
10

Before You Call For Service
Problem Possible Cause What to do
Ice Maker will not start. A fuse in your home may
be blown or the circuit
breaker tripped,,
Power surge,.
Plug not fully inserted into
wall outlet
Water Shortage
Replace fuse or reset circuit breaker
Unplug the ice maker, wait a few
seconds and then plug it back in
Make sure the 3-prong plug on the
ice maker is fl_lly inserted into outlet
Ensure that there is sufficient water
in the internal reservoir,
Ice Bucket Full
Fault Mode
Empty the ice bucket,
See 'Fault Mode Icon' below.
Fault Mode Icon
illuminated in display Water bucket cannot
turn
Water line blockage.
lce cubes may be lodged in between
the water box and evaporator, Power
off the unit and manually remove any
ice cubes from the water bucket andt
or ice shovel.
This can occur when attempting to
operate the unit (or if it has been
stored) in low ambient temperature
conditions. Allow the unit to remain
in 68 F (20 C) for a few hours before
attempting to make ice or operating
the self-clean mode,,
If none of the above rectify the situation please contact our customer care department
at 1-800-26-l_llrlll_' (I-800-263-2629)
11

LINilTED PRODUCT WARRANTY
Thisqualityproductiswarrantedtobefree{reinmanufacturer'sdefectsinmaterialandworkmanship,providedthattheunitisusedunderthenormaloperating
condilionsintendedbythemanufacturer.
ThiswarrantyisavailableonlytothepersontowhomtheunitwasoriginallysoldbyDanbyorbyanauthorizeddistributorotDanby,andisnon-lransterable
TERMSOFWARRANTY
Plaslicparts(ie evaporatordoor,doorrails,coversandtraysarewarrantedforthirty(30}daysonlyfrompurchasedate,withnoexlensionsprovided.
First'fear Duringthefirstyear{t), anyeIeclr{calpartofthisproductfoundtobedefective,includinganysealedsystemunits,willberepairedor
replaced,atwarrantorsoption,atnochargetotheORIGINALpurchaserConsumablepartsfie lightbulbs)arenotwarrantedorguar-
anteedforanyiengihoftime
ToObtainService ItwillbethecustomeCsresponsibiIitytotransporttheappliancelothecloseslAuthorizedServiceDepotattheirownexpenseContacl
yourdealeriromwhomyourunitwaspurchased,orcontactyournearestauthorizedDanbyservicedepot,whereservicemuslbeper-
lormedbyaqualifiedservicetechnician.Ifserviceisperformedontheunitsbyanyoneotherthananauthorizedservicedepot,orthe
unitisusedforcommercialapplication,allobligationsofDanbyunderthiswarrantyshailbeatanend.
NothingwithinthiswarrantyshallimptythatDanbywillberesponsibleorliable{oranyspoilageordamagetofoodorothercontentsofthisappliance,whether
duetoanyde{octoftheappliance,orilsuse,whetherproperorimproper.
EXCLUSIONS
Saveashereinprovided,DanbyProductsLimiled(Canada)orDanbyProductslnc(USA), therearenootherwarranlies,conditions,representationsorguaran-
tees,expressorimplied,madeorintendedbyDanbyProductsLira{tedoritsaulhorizeddistributorsandallotherwarranlies,conditions,representationsorguar-
antees,includinganywarranlies,condilions,representationsorguaranteesunderanySaleofGoodsActorlikelegis]ationorslalueisherebyexpresslyexclud-
ed.Saveashereinprovided,DanbyProductsLimited(Canada)or DanbyProductstnc(USA),shallnotberesponsibleforanydamagestopersonsorproperty,
includingtheunititselI,howsoevercausedoranyconsequentialdamagesarisingfromfhemalfunctionoftheunitandbythepurchaseoftheunit,thepurchaser
doesherebyagreetoindemnifyandsaveharmlessDanbyProductsLimitedfromanyclaimfordamagestopersonsorpropertycausedbytheunit
GENERALPROVISIONS
Nowarrantyorinsurancehereincontainedorsetoutshallapptywhendamageorrepairiscausedbyanyel thefollowing:
1) PowerFailure,
2} Damageintransitorwhenmovingtheappliance
3) Improperpowersupplysuchaslowvoltage,defectivehousewiringorinadequatefuses
4) Accident,alteration,abuseormisuseoftheappliancesuchasinadequateaircirculationintheroomorabnormaloperatingconditions,
(extremelyhighorlowroomtemperature).
5) Useforcommercialorindustrialpurposes
6) Fire,waterdamage,theft,war,riot,hostility,actsofGodsuchashurricanes,floodsetc.
7) ServiceceilsresuHingincustomereducation
Proofofpurchasedatewillberequired{orwarrantyclaims;so,pleaseretainbillsofsale tntheeventwarrantyserviceisrequired,presentthisdocument1oour
AUTHORIZEDSERVICEDEPOT
DanbyProductsL{mited
PCBox!778,5070WhitelawRoad,
Guelph,Ontarlo,CanadaNtH5Z9
Telephone:(519)837°0920FAX:(519)837-04,19
D_nbyProductsInc.
PCBox669,101BentteyCourt,
Findlay,Ohio,U.S.A.45839*0659
Telephone:{419}425-8627FAX:(419)425-_]_29

Informations de securit6 importantes
Pr6cautions 15
Instructions de raise _ la terre 16
Instructions de fonctionnement
Caract6ristiques de votre machine & glagons 17
Commandes de votre machine & glagons 18
Fabrication de glagons 19
S_lection de la grosseur des glagons t9
D6marrage diff6r6 19
Mode d'auto nettoyage 20
Informations utiles
Vidange de votre machine & glagons
Soins et entretien 2I
22
En cas de panne
Avant de placer un appel de service
Garantie 23
24
13

Bienvenue dans la famille
Danby,,Nous sommes
tiers de nos produits de
qualit_ et croyons au bien
fond_ de fournir une
assistance tiable _ nos
clients.
Vous le d_couvrirez par
ce guide facile d'utilisation
et vous pourrez I'entendre
en provenance des voix
amicales de notre service
d'assistance _ ta client_le_
Tel.: 1-800-26-_1111by _
Mais, ce qui est encore
mieux, vous pourrez
b_n_ficier de ces valeurs
& chaque utilisation de
votre machine a glagons.
Ceci est important parce
que votre nouvelle
machine a glagons fera
partie de votre fami!le
pour Iongtemp&
Point de depart...AVAN'l" d'utiliser votre machine a glagons
"lce'N'Easy"
Enregistrez ici les numeros de modete
et de serie, Ces numeros se trouvent
sur t'etiquette au dos de ta machine
glagons
Agrafez votre regu d'achat a I'interieur
de la couverture arriere de de guide,, ii
sera requis pour faire une reclamation
de la garantie,,
Numero de modele
Numero de serie
Date d'achat
Voici quelques contributions
que vous pouvez effectuer
avant de faire un appe! de
service, pour nous aider &
mieux vous servir :
Lisez ce guide
II comprend des instructions
pour vous assister a I'utilisa-
tion et rentretien adequats de
votre machine
glagons_
Si votre appareil neuf est
avari_
Communiquez imm¢diatement
avec le revendeur (ou le man-
ufacturier),
I_pargnez temps et argents
Avant de faire un appel de
service, revisez le chapitre
intitule "En cas de panne", Ce
chapitre vous aidera & solu-
tionner des probl_mes com-
muns qui pourraient survenir..
Si une reparation est requise,
vous pouvez avoir i'esprit tran-
quille parce que de I'aide ne
sera I'affaire que d'un appel
t_l_phonique,.
Tell: 1-800-26-E_I31_V'
14

LISEZ TOUTES LES INFORMATIONS DE S F'CURITI
AVANT DE FAIRE FONCTIONNER L'APPAREIL
?_i_:ii::ii!:i(?i::i:i:?iiiiiiii::i:(:i:ii L(:I: : : ill _::(?!!i :i¸ fi:_i/:/:i?i ii :i:!::,::, I!U/%:/i: ii_ii(:i:i??
Pour minimisei le risque d'incendie, de brQluresl de Chocs €lectriques 0u de bless uresi: : ::
suivez ies Chapitres suivants en plus d'appiiquer ies precautions (Je :::
Cet appareildoitetre mis &la
terre Branchezle seulementdans
une prisecorrectementraise&la
terre Referez-vousau chapitre
intitul_"Instructionsde raisea ta
terre" _ la page 16,
Nefaitespasfonctionnercet
appareils'ii a un cordonou fiche
¢Iectriqueendommage,s'ilne
fonctionnepascorrectement,ou
siI' appareila ¢te endommag_
ou echapp&
N'utitisezpas cet appareilpres
de bassinsd'eau,par exemple
dansun sous-sold6trempe,pres
d'unepisdne ou d'un evier
N'utilisezcet appareilque pour
lesfinsauxqueltesil est congu
commeindiquedansce guide,
N'utilisezpasde produits
chimiquesou vapeurs corrosives
danslpr_sde cet appareil
Cetappareilne devrait6tre
repareque pardu personnel
qualifl&Pourtout examen,
reparationou reglage,contactez
votrecentrede servicele plus
rapproch6
Referez-vousauxinstnJctionsde
nettoyagedu fini de la porte
setrouvantau chapitrede
Soinset entretiende ce guide
• Ne recouvrezpasou n'obstruez
aucuneouverturede rappareit.,
• N'entreposezpascet appareil
l'exterieur
• Gardezle cordon¢tectrique
61oignedes sourcesde chaleur.
• N'immersezpasle cordon
ou safichedarts aucunliquide
Lorsqueoperepar un enfant,
une supervisions'av¢re
n_cessairecommec'est le cas
avec n'importequel appareil
domestique
Avertissement : Le c0mpartiment intemede ::_ang:ernentde cet :ap:pareii m_:nager _:i:le_ gl_i_ns:
et]'eau:remiseS:n'estpaslQn compartiment r:efriger& N0uS_:recommandons]e remPlacernent de
touteeaU::i:emiSeequi n a paset6 utiliSee endedans a une periode de :1!2heureS aela raise
SAUVE GARDEZ CES INSTRUCTIONS
15

AVERTISSEMENT
Une mauvaise utilisation
de la mise &la terre de la
fiche constitue un danger
d'_lectrocution.
Cet appareil dolt _tre mis _ la
terre Dans l'eventualite d'un
court-circuit, la mise a la terre
procure un chemin direct de
contournement du courant
pour prevenir I'electrocution
des manipulateurs de l'ap-
pareiL
Cet appareil est muni d'un cor-
don comprenant une fiche et
fil de mise _fila terre,,
La fiche dolt 6tre branchee
dans une prise correctement
installee et raise a la terre
Si les directives de raise & la
terre ne sont pas tout & fait
comprises ou en cas de tout
doute relatif a la raise & la
terre appropriee de I'appareil,
faites appel a un 6lectricien ou
un technicien qualifi6.
Si la prise murale est une
prise _ 2 branches, c'est votre
obligation, et la responsabilite
vous en incombe, de la faire
remplacer par une prise a trois
branches ad6quatement raise
la terre,
Pour un meilleur rendement et
pour eviter que les ampoules
d'6clairage de la residence
soient affectees d'un affaisse-
ment de tension, ou que le
fusible ou disjoncteur du circuit
ne grille ou ne se declenche,
dediez un circuit individuel
d'alimentation & la machine
glagons (prise (double) unique
sur le circuit),
Sous aucun pretexte ilest
permis de couper ou d'enlever
la troisi_me branche (raise & la
terre) de la fiche du cordon
61ectrique,,
N'utilisez pas d'adaptateur
de fiche avec cet appareiL
N'utilisez pas de cordon de
rallonge avec cet appareil, Si
le cordon electrique de I'ap-
pareil ne rejoint pas la prise
murale, faites installer une
prise plus rapprochee par un
electricien ou un technicien
qualifi&
16

Interieur
1 Porte de la machine
gla(_on avec visi_re,
2 Panneau de commande.
(pour plus de details, r6ferez-vous
& ta page 18)
3 Pattes de mise &niveau
r_glables.
/
/
/
/
/
/
/
Ext6rieur
4 Serpentins d'6vaporation,
5 Contenant d'eau.
6 Pelle &gla_ons.
7 Ligne d'indication de
niveau pour I'eau.
Accessoires
8 Bouchon de vidange,
9Seau & gla£ons.
•_ PiLL '....
17

h
@
@
U BBoB,
uU
I, Affichage _lectronique - montre
le reglagede la minuterie,lesindicateurs
defonctionss_]ectionn6esetlesicSnes
d'6tatde fonctionnernent
2. Bouton d'alimentation - pour
demarrerou arrOterI'uniteou pourretirer
la minutefieet/ouannuletle programme
en cour$.,
U
D
3. S_lecteur de grosseur de
gla(;ons - vous permetde choisirentre 17
trois(3)grosseursde cubesde glace.. V
4. Bouton d'incr_mentation - utilisO
conjointementavecla minuterie,chaque
actionnementrajoute0.5heurea la dur_e
dela rninuterie,
•Ic6ne de petit cube de glace -._,"
dndiqueque lamachine_ gIagons ED
estactuellementregl6epourpro-
duiredespetitscubesde glace
5. Bouton de d6cr6mentation - util-
is6conjointernentavectaminuterie,
chaqueaclJonnementsoustrait0,5heure
la dureede la minuterie
• Ic6ne de cube de glace
moyen -indiquequela machine
glaconsestactue!Iementr_gl_e
pourproduiredescubesdeglace
moyens
, lc6ne de gros cube de glace
- indiqueque lamachine⪥ons
estactuellementr6gleepourpro-
duiredesgroscubesde glace
r,., Minuterie - afficherheurede
": d_marragediffer&
, Ic6ne d'alimentation - cet
ic6nedignoteIorsquerintemJpteur
d'alimentationestouvertets'a!tume
en permanencelorsque!'unit6est
alimente
6
oIc6ne de plein de gla_ons -
s'eclairepourindiquerque [eseau
d'eauest pleinetdevraetrevide
pourpoursuivrelaformationde
gla_ns,
•Ajouter de I'eau - s'eclaire
Iorsquele r_servoirintemea besoin
d'etreremplipourpouvoirterminer
laformationde gla_ns selonle
programmeprCsentementselec-
tionn_
, D6faut - cetteic6nes'affiche
lorsque[unite a d_tecteunprob-
lemeetne peutentarnerouterrnin-
er le proc_d_de formationde
gla_ons,,Si cettesituationsurvient,
veuillezyourr6ferer_ la page23
pour obtenirdesinstructionsde
d6pannage
•Ic6ne h_lice - s'eclaireIorsque
I'unitepornpede i'eaudu reservoir
internef'amenantdansle seau
d'eaudurantle cyclede formation
degla£onset d'autonettoyage
18

Fabrication de gla#ons..,
jusq,,,
::!igne d'!ndication de niveau
2 Appuyez sur le bouton
:3::S!vousd#sirez unegrosseur
i: decube s de glaceautre que
:: moyen, changez la s6lection
:i::i:degrosseur. :
Pourfaire debuter le procede de fab-
ricationde gfagons
imm_diatement;
, Faitesle plein d'eau jusqu'a la ligne
d'indication de niveau ad_quat (envi-
ron3,5 i)
,Appuyezsurle boutond'alimentation
• Sele@onneztagrosseur de cubes
de gtacedesir&_(ref_rez-vousau
chapitreintitute"S61ectionde la
grosseur des cubesde glace" ci-
dessous)
• La machine &gla_ns se mettraen
marcheenviron 15secondesapr_s
que le demierboutonairet_ac_onne
Veuifleznoter: La duree du proc_d6
de fabrication de gla_:onsestdirecte-
ment proportionnelle &la selection
de la grosseurdes cubes de glaceet
I'ach_vementde lot peutprendre
entre 9 et 15minutes
Pour un rendement optimal, veuillez
garder la porte de ta machine ferm6e
durant le processus de fabricationde
gla_ns
::iii_i:_::::ii:i_i:;i!;:_::i::::i!;¸::::i::::::i::: ::......:::/_ -
2AppuYez surle bouton de
i: s61ection de grosseur de
:cubes de glace du clavier
::::i:de:commande. i:: : i
Le boutonde selec_onde grosseurde
cubes deglace vouspermetde choisir
entrepetJts,moyens,ou gros.
Vot,'emachine&gla_onsestpar
defautprogramm_epourfabfiquerdes
cubes deglace moyens Cependant,
sivous d_sirezune grosseurde cubes
deglac8 d_rente, vous n'avezqu'&
appuyersur le boutonde s_Iectionde
grosseurpourpouvoirpasserd'une
grosseur&rautreets_iectbnner une
destrois (3)grosseursdisponibles
(petits.moyens etgros),
1Iest possiblede changerlagrosseur
descubes de giacelots deIaprogres-
siond'un programme,mais ilest
n_ammoinsrecommand_delaisserle
cycleentamQsete_iner avantde
d6finirune nouvetlegrosseurde cubes
de giace
NOTE :Votre sele_on de grosseur
de cubessera gard&een m_moire
sauf s'il ya a panne de courantou
que l'alimentation de I'unit6est
autrement interrompue
•Faiteslepleind'eaujusqu'&laligne
d'indicationde niveauad6quat
(environ3,51)
::_::::ii_!_::!ii::ii::i::!ii!i::!::!::!:!i/:::i;i:i:::::ii¸¸:::;_i :i::i:i :
1: Faites!epleind eaujusqui_la
i_ lignedindicationdeniveauacl_qu_t
_:2Assurez-vous queI'alirnenta_on
.....estd_sactiv#e,'Hats".:: : :
3, Appuyez sirnultan_mentsur les
,Sans actionerle bouton d'alimentation,
appuyez une seulelois simultan_ment
sur les boutons d'iincr_mentationet de
d_cr_mentationpouraccederau mode
de r_glagede la minuterie
,Chaqueactionnementsubsequentdu
boutond'incr_menfationferaaug-
:: boL,tonsf!_ch_sd'incr_mentation
....... . :;; ; .... ... menter la dur_e de taminuterie par
::: et ae eecrementauon : .........
:4 R_'glezia dur_ede la minutede. : increment:oe ,_um_nutesjusqua un
5::s_lecti0nnez ia grosseur:de cube maximum de t2 heures,
Reciproquement, pour soustraire du
::i ::i::::::i i: ::: ::: : : temps de la minuterie,appuyez sur le
19
bouton de dec,_mentation pour dimin-
uer la pefiode par tranches de 30 min-
utes
•S61ectionnezla grosseur de cubes de
glace desir6e
• La minuteriedela machine&gla_ons
semettraautomatiquementen marche
apr_sledemieractionnementdesbou-
tonsf]_ches
Pourannuletled61aietdemarrerle
proc_e defabricationdegia_ns sur
le champ,appuyezsimplementsurle
boutond'alimentation&n'impor_equet
moment
Other manuals for Designer Ice'n Easy DIM1524W
2
Table of contents
Languages:
Other Danby Ice Maker manuals

Danby
Danby DIM2500SSDB User manual

Danby
Danby DIM2500WDB Assembly instructions

Danby
Danby Silhouette DIM32D1BSSPR Assembly instructions

Danby
Danby DIM2500WDB Assembly instructions

Danby
Danby DIM2500SSDB User manual

Danby
Danby DIM2500RDB Assembly instructions

Danby
Danby Designer Ice'n Easy DIM1524W User manual

Danby
Danby Silhouette Select DIM3225BLSST Assembly instructions

Danby
Danby Silhouette Select DIM3225BLSST Assembly instructions

Danby
Danby DIM2607WDB Assembly instructions