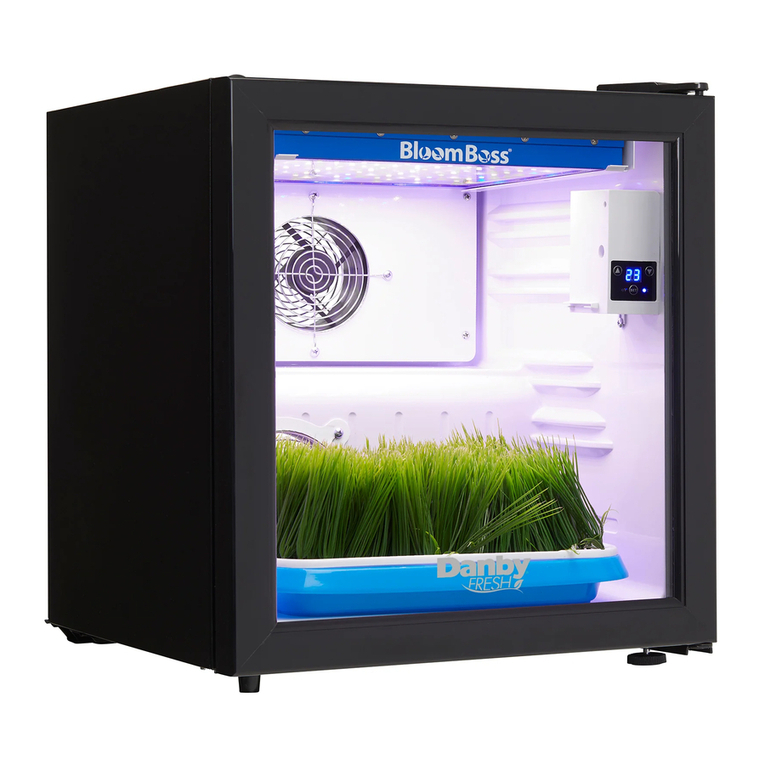
Danby Fresh DFG58D1BSS User manual

HOME HERB GROWER
Owner’s Manual.............................1 - 10
CULTIVATEUR À HERBE À LA MAISON
Manuel du propriétaire.................11 - 20
CULTIVADOR DE HIERBAS PARA EL HOGAR
Manual del propietario.................21 - 30
MODEL •MODÈLE •MODELO
DFG58D1BSS
2018.01.02

1
Welcome
Welcome to the Danby family. We are proud of our quality products and we believe in
dependable service. We suggest that you read this owner’s manual before plugging in your new
appliance as it contains important operation information, safety information, troubleshooting and
maintenance tips to ensure the reliability and longevity of your appliance.
Visit www.Danby.com to access self service tools, FAQs and much more. For additional assistance
call 1-800-263-2629.
Note the information below; you will need this information to obtain service under warranty.
You must provide the original purchase receipt to validate your warranty and receive service.
Model Number: _________________________________________________
Serial Number: _________________________________________________
Date of Purchase: _______________________________________________
Need Help?
Before you call for service, here are a few things you can do to help us serve you better.
Read this owner’s manual:
It contains instructions to help you use and maintain your appliance properly.
If you receive a damaged appliance:
Immediately contact the retailer or builder that sold you the appliance.
Save time and money:
Check the troubleshooting section at the end of this manual before calling. This section
will help you solve common problems that may occur.
1-800-26- Danby
(1-800-263-2629)

2
SAFETY REQUIREMENTS
This appliance is not intended for use by persons
(including children) whose physical, sensory or
mental capabilities may be different or reduced,
or who lack experience or knowledge, unless such
persons receive supervision or training to operate
the appliance by a person responsible for their
safety.
Children should be supervised to ensure that they
do not play with the appliance.
To avoid risk of electric shock, do not operate this
appliance in an area that is likely to accumulate
standing water. If this condition develops, disconnect
the power supply before stepping into the water.
Do not store or use combustible materials such as
gasoline or other flammable vapors or liquids in the
vicinity of this or any other appliance.
Do not cover or block the intake and exhaust
openings.
This appliance is intended for indoor, residential
applications only. Do not use this appliance
outdoors. Do not use this appliance for commercial
or industrial applications.
DANGER: Risk of child entrapment. Before throwing
away an old appliance:
• Remove the door or lid.
• Leave shelves in place so that children may not
easily climb inside.
GROUNDING INSTRUCTIONS
This appliance must be grounded. Grounding
reduces the risk of electrical shock by providing an
escape wire for the electrical current.
This appliance has a cord that has a grounding
wire with a 3-prong plug. The power cord must be
plugged into an outlet that is properly grounded.
If the outlet is a 2-prong wall outlet, it must be
replaced with a properly grounded 3-prong wall
outlet. The serial rating plate indicates the voltage
and frequency the appliance is designed for.
WARNING - Improper use of the grounding
plug can result in a risk of electric shock.
Consult a qualified electrician or service agent
if the grounding instructions are not completely
understood, or if doubt exists as to whether the
appliance is properly grounded.
Do not connect the appliance to extension cords,
adapters or together with another appliance in the
same wall outlet.
Do not splice the power cord. Do not under any
circumstances cut or remove the third ground prong
from the power cord.
If the power supply cord is damaged, it must be
replaced by the manufacturer, its service agent or
similar qualified person in order to avoid hazard.
For lighting equipment with cords please ensure that
the cords:
1. Are not concealed or extended through a wall,
floor, ceiling, or other parts of the building
structure,
2. Are not located above a suspended ceiling or
dropped ceiling,
3. Are not permanently affixed to the building
structure,
4. Are routed so that they are not subject to strain
and are protected from physical damage,
5. Are visible over their entire length, and
6. Are used within their rated capacity as
determined for the maximum temperature
of the installed environment specified in the
instructions.
Important Safety Information
READ AND FOLLOW ALL SAFETY INSTRUCTIONS
SAVE THESE INSTRUCTIONS!

3
INSTALLATION INSTRUCTIONS
FRONT VENT
This appliance is front breathing. Do not block the
front air vent as this will result in high operating
temperatures, higher energy usage and possible
system overheating and failure.
LEVELING INSTRUCTIONS
There is an adjustable foot on the bottom of the
appliance that can be turned up or down to ensure
that the appliance is level. To level the appliance:
1. Turn the leveling foot counter-clockwise until
the top of the foot is touching the bottom of the
chassis.
2. Slowly turn the leveling leg clockwise until the
appliance is level.
LOCATION
Two people should be used when moving the
appliance.
Select a location with a strong level floor that can
support the weight of the appliance and the plants
grown inside.
Avoid direct sunlight and heat. Direct sunlight may
affect the acrylic coating of the appliance or the
growing cycle of the plants. Nearby heat sources
can overheat the unit and cause high internal
temperatures that may harm the plants.
Ensure that the appliance is turned off and
unplugged before any changes are made to the
light system.
The LED light panel is not water proof. Do not spray
water on the surface, sides or back of the light
panel.
Do not look directly at the LED light with the naked
eye as this can cause retinal damage.
The LED panel cannot be exposed to corrosive
materials.
The LED panel is for indoor growing only. This
appliance is intended for household use only. It
is not designed for outside installation including
anywhere that is not temperature controlled.
Do not touch the surface of the light system while the
power is connected as it can get hot.
Do not use the LED panel during a thunderstorm to
avoid a surge that could damage the light system.
Keep the door closed during operation.
Only use genuine spare parts from Danby or those
that have been CSA, UL or CE approved.
Recommended ambient operating temperature is
between 13°C - 23°C (55°F - 73°F).
Recommended operating humidity is below 80%.
This appliance is 60.5 cm (23.8 inches) wide by
87.5 cm (34.4 inches) high by 65 cm (25.6 inches)
deep.

INSTALLATION INSTRUCTIONS
4
SHELF INSTRUCTIONS
Do not cover the shelves with aluminum foil or
other material as this will impede air flow inside
the cabinet and can adversely affect internal
temperature.
Before removing a shelf, make sure that the light
system is unplugged.
To remove the shelves:
1. Fully extend the shelf.
2. Lift the front of the shelf.
3. Hold the shelf track, push the shelf in and then
up to release it from the rear dampers.
To change the position of the shelf glides:
1. Remove the shelf as per the above instructions.
2. Extend the shelf glide fully.
3. Remove the rear screw first, then remove the
front screw.
4. Install the shelf glide in a new position by
installing the screws in the pre-drilled holes. Do
the same for the glide on the other side of the
appliance.
5. Reinstall the shelf and plug in the light system.
1 2
Table of contents
Other Danby Lawn And Garden Equipment manuals
Popular Lawn And Garden Equipment manuals by other brands

Sunforce
Sunforce SOLAR user manual

GARDEN OF EDEN
GARDEN OF EDEN 55627 user manual

Goizper Group
Goizper Group MATABI POLMINOR instruction manual

Rain Bird
Rain Bird 11000 Series Operation & maintenance manual

Cub Cadet
Cub Cadet BB 230 brochure

EXTOL PREMIUM
EXTOL PREMIUM 8891590 Translation of the original user manual

Vertex
Vertex 1/3 HP Maintenance instructions

GHE
GHE AeroFlo 80 manual

Land Pride
Land Pride Post Hole Diggers HD25 Operator's manual

Yazoo/Kees
Yazoo/Kees Z9 Commercial Collection System Z9A Operator's & parts manual

Premier designs
Premier designs WindGarden 26829 Assembly instructions

Snapper
Snapper 1691351 installation instructions