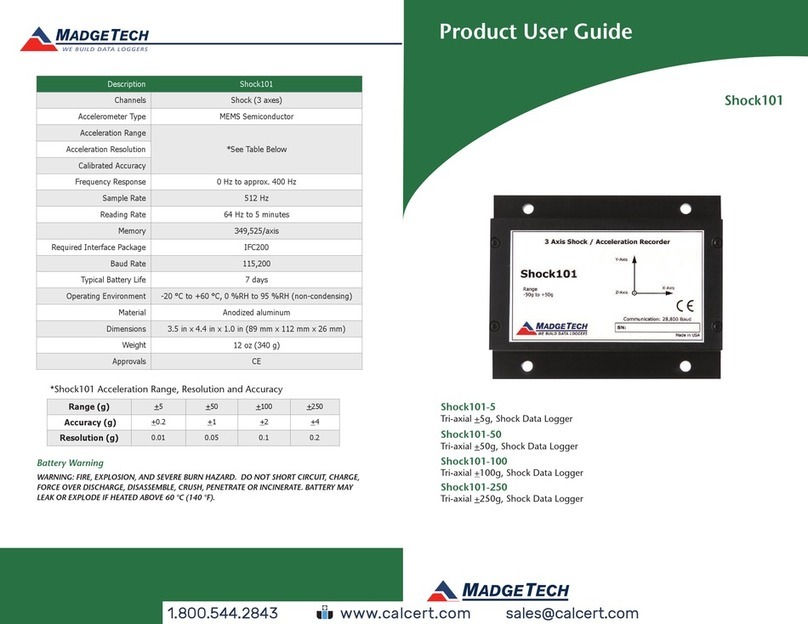
Data Harvest EASYSENSE V-Log User manual

EASYSENSE V-Log
User Guide

EASYSENSE V-Log User Guide DS133 (5)
Data Harvest Group Ltd, 2014
2
CONTENTS
Copyright: all rights reserved.
This manual may be copied for use within the premises of the Licensee on condition that it is not
loaned, sold or used outside the Licensee's premises.
Data Harvest's policy is to continually improve products and services, so we reserve the right to make
changes without notice. It is acknowledged that there may be errors or omissions in this publication for
which responsibility cannot be assumed. No liability will be accepted for loss or damage resulting from
use of information contained in this manual or from uses as described.
What’s supplied?
What’s supplied? ...............................................................................................................2
Getting to know your V-Log data logger............................................................................3
The V-Log data logger.......................................................................................................3
V-Log buttons ....................................................................................................................3
Sensors .............................................................................................................................4
The plug-in sensors.......................................................................................................4
V-Log 8’s built-in sensors..............................................................................................4
Changing a sensors range and turning a sensor on or off............................................4
Ways to capture data with V-Log ......................................................................................5
Using V-Log standalone (without a computer)..................................................................5
Meter.............................................................................................................................5
Pictogram......................................................................................................................6
EasyLog ........................................................................................................................6
Snapshot.......................................................................................................................7
Timing............................................................................................................................7
Counting........................................................................................................................8
Review...........................................................................................................................8
System ..........................................................................................................................9
Using V-Log connected via USB to Windows PC for the first time ................................ 10
V-Log in WiFi mode........................................................................................................ 12
WiFi Specifications..................................................................................................... 15
V-Log in Bluetooth mode................................................................................................ 15
When connecting to a Windows computer................................................................. 16
When connecting to a iPad or Android device........................................................... 16
Hard Reset ..................................................................................................................... 17
Limited warranty ............................................................................................................. 17
The EASYSENSE V-Log data logger
Plastic storage case
Sensor leads 2 x long (3005)
and 2 short (3004)
1 x mini USB lead
(standard A to mini B)
(3021)
DS133 (5)

EASYSENSE V-Log User Guide DS133 (5)
Data Harvest Group Ltd, 2014
3
Getting to know your V-Log data logger
Charge EASYSENSE V-Log fully before first use
Connect V-Log directly to a USB port on your computer*, or a powered USB hub, or a USB mains charger
that outputs 5 V at 1 A or more, using the USB cable supplied. A full charge can take up to 8 hours.
A battery charging symbol will be displayed on V-Log’s screen while the logger is charging.
*Your computer must be turned on and not in sleep or standby mode; otherwise the battery may drain
instead of charge.
The V-Log data logger
V-Log buttons
The ENTER button is used to start data collection, progress to the next screen, confirm a choice or
take a sample.
The square STOP button is used to stop data being recorded or return to the previous screen.
The SCROLL buttons are used to scroll through menus on the LCD screen or to browse
measurements during data logging.
V-Log8 Light sensor (visible)
Battery power
level indicator
Built-in rechargeable battery
LCD display
USB input
SCROLL up button
STOP or BACK
button
ENTER or SELECT button
SCROLL down button
Plug-in sensors inputs
V-Log8 Sound sensor
V-Log8 Air Pressure & Humidity sensor

EASYSENSE V-Log User Guide DS133 (5)
Data Harvest Group Ltd, 2014
4
Sensors
The plug-in sensors
Plug the sensors into the sockets on the top of the V-Log logger.
When a sensor is connected it will automatically be detected and displayed on the LCD display.
V-Log 8’s built-in sensors
The V-Log 8 has 4 built-in sensors –Sound, Light, Humidity and Air Pressure.
Changing a sensors range and turning a sensor on or off
Use & to scroll the list until the pointer is pointing at Meter
and select .
Select again.
Use & to scroll until the pointer is pointing at the appropriate
sensor and select .
Use & to scroll until the pointer is pointing at the appropriate
option i.e. Set range or Turn Off, and select .
Note: If a sensor only has one range then only Turn Off will be available.
Set range
The pointer will indicate the current range selected.
Use & to scroll until the pointer is pointing at the required range.
Select to choose that range.
Select to exit the sensor option window, then again to return to the Meters window.
Built-in Sensor
Ranges
Sound
40 to 110 dBA
±2000 mV
Light level
Indoor (Slow) 1 k lx (0 to 1,000 lx)
Indoor (Fast) 1 k lx (0 to 1,000 lx)
In/Out 10 k lx (0 to 10,000 lx)
Outdoor 100 k lx (0 to 100,000 lx)
Humidity
0 to 100% RH
Air Pressure
85 to 110 kPa
850 to 1100 mbar
23 to 33 inHg
-200 to 1,000 m
-500 to 5,000 m
-500 to 10,000 m
▼
5)
Sound
►
6) Light
7) Pressure
▲
▼
Light
►
10k lx
100k lx
▲
▼
Light
►
Set range
Turn Off
▼
►
Meter
Pictogram
EasyLog

EASYSENSE V-Log User Guide DS133 (5)
Data Harvest Group Ltd, 2014
5
Turning a sensor ON or OFF the display
The built-in sensors can be switched On or Off the display.
With the pointer pointing at Turn Off / On press to alter from Off
to On or vice versa.
Select to return to the Meters window.
Ways to capture data with V-Log
There are different ways that V-Log can be used to collect data.
1. As a stand-alone instrument: V-Log is used to display, collect and store data while disconnected
from the computer i.e.
a. Display readings on its LCD screen (but not stored) using Meter mode.
b. Display, collect and store data using V-Log’s logging menu options e.g. Pictogram,
EasyLog, Snapshot, Timing and Counting.
The data collected is stored in V-Log’s memory to either be reviewed on V-Log’s screen or
retrieved to the EasySense software on a computer.
Up to 255 sets of data can be stored in V-Log’s memory.
2. As an interface connected to a computer: V-Log is entirely driven by the software on the host
computer. The data from the sensors is transmitted immediately to the computer and displayed on the
computers screen using the options in the EasySense software. This method of collection is useful for
many classroom-based experiments.
Using V-Log standalone (without a computer)
To switch V-Log on, press any button on the panel.
Notes:
If V-Log is operating on battery power and is idle, it will automatically
switch itself off after 2 minutes. Press any button to resume operation.
V-Log does not auto switch off while powered from a USB port.
V-Log has a menu of different options available, which are displayed on
the built-in LCD screen. There are six working modes, which can be
used to collect data without being connected to the computer. These
are Meter, Pictogram, Easy Log,Snapshot, Timing and Counting
modes.
A menu option is selected by using & to move the pointer up or
down until it is pointing at the required option then press to select.
If using plug-in sensors they should be connected before entering a logging mode (except for Meters
when they will automatically be detected and then display readings).
Meter
In Meter mode V-Log will display measurements from the sensors (plug-in or built-in sensors) on the LCD
screen but will not store any data.
While in Meter mode is used to check or change the sensors range or to switch a sensor off.
is used to temporarily halt updates to the sensors readings. Two lines ▌▌ (bottom right) indicate that the
display is paused.
Light
Set range
►
Turn Off
▲
Meter
Pictogram
EasyLog
Snapshot
Timing
Counting
Review
System

EASYSENSE V-Log User Guide DS133 (5)
Data Harvest Group Ltd, 2014
6
The size of the text in Meter mode can be altered. From the System menu select Meter Text then
either Single Height or Double Height.
With double height selected data from up to 4 sensors is visible
on the screen (scroll to see more).
If single height is selected then the data from up to 8 sensors is
visible.
Pictogram
Pictogram uses an image, block or bar to represent the data. Each segment represents a 10th of a total
range (or span) of the sensor and displays the number proportional to the reading.
Sensor readings are captured every time is pressed, rather than at regular time intervals. Up to 10
samples can be stored in each set of data.
EasyLog
Select EasyLog to begin logging continuously until stopped. The bottom line of the LCD display is a visual
indicator of logging as it takes place, each time the line completes the logged samples are compressed
and the sample rate alters.
1) 23.9˚C
2) 20.5˚C
3) 24.1˚C
4) 15.6˚C
5) 50.9 dBA
6) 150 lx
7) 100.88 kPa
8) 35.9 %RH
Press the enter button to view a
logging summary, press enter again to
return to the EasyLog screen
EasyLog
Press stop to exit, then either enter to confirm
your choice or stop to continue logging
▼
5) 48.8 dBA
6) 356 lx
7) 24.0 ˚C
Press stop to exit, then either enter to confirm
your choice or stop to continue logging
Pictogram
▼
►
Icon
Block
Bar
Press the
enter button
to collect up
to 10 samples
▼
1
3
5
4
Samples taken 3
Press the enter button to switch
a sensor off or change its range
Meter
5) 50.9
dBA
6) 150
lx
7) 100.88
kPa
8) 35.9 %RH
Press stop to pause the display, then
either stop again to exit Meter mode or
enter to continue taking measurements

EASYSENSE V-Log User Guide DS133 (5)
Data Harvest Group Ltd, 2014
7
Snapshot
Snapshot mode enables you to capture sensor readings every time is pressed, rather than at regular
time intervals.
Timing
Timing is used to set up and store simple time and speed measurements using digital switch type sensors.
Connect either one sensor to Input 1:A or two to Input 1:A and 2:B before selecting Timing. The options
available will depend on whether one or two sensors are connected.
For V-Log to be able to calculate speed or acceleration you will need to enter a measurement of the
apparatus used in the experiment e.g.
For Speed A to B this is the distance between the sensor connected to input A and the sensor
connected to input B (0.10 m to 6.00 m in steps of 0.10 m).
For Speed at A, using a single interrupt card, select the width of the card that will pass through the
Light gate (30 mm to 120 mm).
Upon completion of a timing event the measurement will be displayed on the LCD display.
Timing options are:
Time menu
Time at A
Time at A or B
Time from A to B
Period at A
Stopwatch A to A
Speed menu
Speed at A using:
Double Interrupt card
Picket fence
Spoked pulley
Speed at A or B using:
Single Interrupt card
3 Speeds at A or B using:
Single Interrupt card
Speed from A to B using
Distance A to B
Speed at A then B using:
Single Interrupt card
Acceleration menu
Acceleration at A using:
Double Interrupt card
Picket fence
Spoked pulley
Acceleration A to B using:
Single Interrupt card
Press the enter button to
take a sample
Snapshot
Press stop to exit, then either enter to confirm
your choice or stop to continue logging
▼
5) 48.8
dBA
6) 356
lx
7) 24.0
˚C
Samples taken 8

EASYSENSE V-Log User Guide DS133 (5)
Data Harvest Group Ltd, 2014
8
Counting
Counting is used to count events by using digital switch type sensors connected to either Input A, or both
A and B or the buttons on V-Log.
Press to cycle through simple mathematical functions on the A and B data (A + B, A –B, B –A,
Difference).
Review
You can use Review to view the readings stored in a data set. The most recently stored data is shown
first.
Review
Use the scroll buttons to go up
or down the list of data sets until
you find the right one, press
to select.
Use the scroll buttons to
view the readings taken in
this set of data.
Snapshot
08/04/14
14:44:09
▲ Data set 1 /42
▼
1) 21.53
˚C
2) 21.48
˚C
▲Sample 4 /10
Use the enter button to toggle to a
second screen if more than 3
sensors were logged.
Press the enter button to cycle
through mathematical functions
on the collected data.
A scroll button can be used instead
of a plug-in sensor to count.
Counting
Press stop to exit, then either enter to confirm
your choice or stop to continue logging
0-------- 10
A5
B3
A + B = 8
▼
Time
►
Speed
Acceleration
▲
Timing
▼
►
Speed at A
Speed
at Aor B
3
Speeds at Aor B
Speed
at A
=
0.61369 ms-1
#2
v=
0.51353 ms-1
n=2
Reading
number
▼
►
1Interrupt
card
2Interrupt
card
Picket Fence
▼
30mm
►
40mm
50mm
▲
Average measurement over this number of readings

EASYSENSE V-Log User Guide DS133 (5)
Data Harvest Group Ltd, 2014
9
System
Switch Off
Used to send V-Log directly into low power (sleep mode), even when connected to a USB port.
Note: V-Log automatically goes to sleep after a period of inactivity.
Sensor
Use to change the range of a sensor or switch the built-in sensors On or Off the display. This option is
also available by pressing whilst in Meter mode.
Delete Data
Select whether to ‘Delete all’data sets or to choose individual sets (use the scroll buttons to find a data
set and then to delete).
Full Reset
Use to reset V-Log back to its factory default conditions. Please note this will erase all data. Any WiFi
settings will not be altered (see page 14 for resetting WiFi).
Language
Use to alter the selected language choice.
Date Style
Use to alter the format of the date display i.e. from a European to USA date format.
Note: The actual time and date is set automatically when the logger is connected to the EasySense software.
Decimals
Use to switch decimals off and on, or to change the decimal format from a full stop to a comma.
Meter Text
Use to choose whether the text height should be double or single height whilst in Meter mode.
System
▼
►
Switch Off
Sensor
Delete Data
Full Reset
Language
Date Style
Decimals
Meter Text
Use the scroll buttons to go
up or down the list of options
Use enter to select an option

EASYSENSE V-Log User Guide DS133 (5)
Data Harvest Group Ltd, 2014
10
V-Log
data logger
PC Windows
computer
USB
Using V-Log connected via USB to Windows PC for the first time
Step 1:
Install the EasySense software, if it is not already on your computer. For details of how to install and
operate this program, please refer to the instructions provided with the EasySense software.
V-Log requires version 3.5 or above of the EasySense PC Windows software. (The version number can
be verified in About from the Help menu).
Step 2:
Connect V-Log to the computer’s USB port using the USB cable supplied. Windows will automatically
detect a new device and install the drivers.
Step 3:
Check that the LCD display on V-Log is displaying the main menu (EasyLog, Snapshot, Timing,
Counting, Review, and System).
Note: In most circumstances V-log will not communicate with the PC if it is taking samples. If the LCD screen
shows samples being taken, press the stop button to finish recording.
Open the EasySense software program.
Step 4:
The first time the EasySense program is opened a ‘Select Program Level’ window will automatically open.
Select a suitable user’s level.
Level 1 is aimed at ‘start’ level (e.g. up to 9 years old).
Level 2 is aimed at ‘mid’ level (e.g. 9 - 15 years old)
Level 3 is aimed at ‘exam’ level (e.g.15 years plus).
Step 5:
An Interface option window will open.
1) If connecting an interface direct to
a PC Windows computer select:
(a) Local Interface
(b) Interface: EasySense Range
(c) Select USB port as the connection.
(d) If these settings will stay the same leave
the ‘Show at startup’ box unticked.
If the box is ticked (enabled) the ‘Select
Interface’ window will automatically open when
you next start EasySense, so you can check
the selected method of connection is correct
(e) Click on OK. The program will save the selection.
The text at the top right of
the EasySense window will
indicate that a Local
Interface connection has
been established.
(b)
(a)
(c)
(d)
(e)

EASYSENSE V-Log User Guide DS133 (5)
Data Harvest Group Ltd, 2014
11
2) If simultaneously sharing data with other network users.
On the Windows computer acting as the Controller (interface connected to the computer) select
(a) Local Interface
(b) EasySense Range as the interface.
(c) USB Port as the connection.
(d) Share Local Interface to allow others network
user’s to connect as Viewers.
Note: Type in a more appropiate name for the
controller computer if preferred.
(e) If the settings will always stay the same
leave the ‘Show at startup’ box unticked.
If the box is ticked (enabled) the ‘Select Interface’
window will automatically open when you next
start EasySense, so you can check that the
selected method of connection is correct.
(f) Click on OK. The program will save the
current selection.
The text top right of the
EasySense window will indicate
that connection as the Controlling
system has been established.
On a Windows computer that will be acting as a Viewer select
(a) Network
(b) If the ‘Show at startup’ box is ticked (enabled) this
window will automatically open when you next start
EasySense, so you can check the selected method of
connection is correct
(c) Click on OK. The program will save the current selection.
(d) Click on the Not connected text
in the top right of the EasySense
window.
(b)
(a)
(c)
(e)
(d)
(f)
(b)
(a)
(c)
Data is captured in real-time by
the Controller and instantly
relayed to any Viewers that
have made the connection to
the Controller via the local
network
Ethernet or WiFi
USB
V-Log data
logger
PC Windows
computer
CONTROLLER
VIEWER
Windows PC
VIEWER
iOS (e.g. iPad)
VIEWER
Android
Ethernet or WiFi
WiFi
WiFi
Local Network

EASYSENSE V-Log User Guide DS133 (5)
Data Harvest Group Ltd, 2014
12
Select the computer acting as the Controller
from the list of available devices, OK.
The text on the top right of the
EasySense window will
indicate that connection as a
Viewer has been established.
On an iPad that will be acting as a Viewer:
(a) From Settings set Wi-Fi to the same network that the ‘Controller’ PC is connected to.
(b) Open the EasySense iPad software, select the ‘Not Connected’ text at the bottom right of the
screen and select the ‘name’ of the computer acting as the Controller from the list of devices.
(c) The text will change to indicate that connection as a Viewer is established
On an Android that will be acting as a Viewer:
(a) From Settings set WiFi to the same network that the ‘Controller’PC is connected to.
(b) Open the EasySense Android software, select the Connect icon (top right of screen) and select
the ‘name’ of the computer acting as the Controller from the list of devices.
(c) The text bottom right of screen will change to indicate that connection as a Viewer has been
established
Step 6:
The Home screen will open. Select one of the experiment modes e.g. EasyLog, Pictogram, Meters,
Snapshot, Counting or Timing.
V-Log in WiFi mode
If V-Log has a WiFi board fitted it can be used in WiFi mode. It is recommended that V-Log is
connected to USB power when used in this mode as the power requirements are high, and will drain
the battery quickly.
Connecting V-Log WiFi to a network
V-Log WiFi can operate in two different modes:
1. Connected to its own local network (Access Point)
V-Log WiFi is set to Access Point by default. In this mode the iPad connects to a network created by V-
Log. This connection is typically used when not in range or able to access the school’s network (perhaps
on a field trip). While connected to V-Log in Access Point mode, the iPad will NOT be connected to any
other school network resources, and therefore unable to access other items such as web pages, email,
cloud storage, etc.
It is possible to have multiple V-Log WiFi loggers each creating their own separate network.
2. Connecting to an existing school’s network (Infrastructure)
In this mode V-Log WiFi and the iPad connect to the same existing network. It has the advantage of
allowing the iPad to remain connected to other resources delivered by the school network, such as web
access, email, printing and cloud storage facilities, etc.
Note:
V-Log WiFi loggers produced prior to April 2016 use 802.11b, ensure the WiFi
network is bmode compatible.
If a b mode module is fitted the logger’s WiFi label will just show WiFi and
when you reset the logger it will flash ‘with WiFi’

EASYSENSE V-Log User Guide DS133 (5)
Data Harvest Group Ltd, 2014
13
V-Log WiFi loggers produced after April 2016 use 802.11n, ensure the WiFi
network is n mode compatible.
If an nmode module is fitted the logger’s WiFi label will show WiFin and when you
reset the logger it will flash up ‘with WiFi-n’
V-Log Access Point connection using the default settings
1. Select WiFi.
2. Select Start WiFi.
3. Connect the iPad or Android to the V-Log’s Access Point network:
Select Settings.
Select the Wi-Fi link. Ensure Wi-Fi is ON.
Choose the V-Log AP network from the list of available networks. Wait for confirmation that the
network has been joined e.g. a tick or it shows as Connected.
4. Start the EasySense App.
5. On an iPad tap on the status button ‘Not Connected’ (bottom right of the screen), on an Android tap
on the connection icon (top right of the screen). Select the V-Log’s name from the list.
6. The status will change to show that it is ‘Controlling V-Log xx or Viewing V-Log xx’.
To exit V-Log from WiFi mode select and then to confirm.
Connecting V-Log to a school’s network (Infrastructure)
1. Select WiFi.
2. Select Setup WiFi.
3. Select Scan for Networks.
4. Once the scan has finished select the school’s network from
the list that appears and .
5. If required enter the Key (the school network’s password), scroll to (bottom row right) then V-
Log will show as connected to the school’s network.
6. Connect the iPad to the school’s network. Start the EasySense App.
7. On an iPad tap on the status button ‘Not Connected’ (bottom right of the screen), on an Android tap on
the connection icon (top right of the screen). Select the V-Log’s name from the list.
▼
►
Start WiFi
Setup WiFi
WiFi
Select Start WiFi to connect to the
network last accessed
Select Setup WiFi to make changes
e.g. access a different network
▼
►Scan for Networks
Create a Network
Advanced Setup
The name of the access point (AP) network
The name of the V-Log logger
NEWTON 69
is ready on
NEWTON 69 AP
The name of the school’s network
The name of the V-Log logger
▼
Newton 69
is
on network
BTHub-704
Scroll down to view the
IP and MAC address

EASYSENSE V-Log User Guide DS133 (5)
Data Harvest Group Ltd, 2014
14
To exit V-Log from WiFi mode select and then to confirm.
When you next V-Log in WiFi mode it will be set to connect to the school’s network so just select WiFi
then Start WiFi.
It is possible to connect a number of V-Log WiFi loggers to the school network simultaneously, each with
its own unique name. From the iPad select the required V-Log by choosing it from the list in the
EasySense iPad software.
To connect back to an Access Point network
Select WiFi, then Setup WiFi.
Select Create a Network.
To create/connect the Access Point network without
making any changes select Start a Network.
Open the EasySense App. On an iPad tap on the status button ‘Not Connected’ (bottom right of the
screen), on an Android tap on the connection icon (top right of the screen). Select the V-Log’s name from
the list.
To change the name of the Access Point network
Select WiFi, Setup WiFi.
Select Create a Network.
Select Network Name.
Use to delete any characters from the existing name and
enter the characters for the new name. Scroll to (bottom row
right) then enter.
To encrypt the Access Point network
Select WiFi, Setup WiFi.
Select Create a Network.
Select Set Password.
Enter a suitable password. Scroll to (bottom row right) then enter.
To make V-Log forget a known WiFi network
Select WiFi, Setup WiFi.
Select Advanced Setup and enter DHG2020 as the password.
Select Forget a Network.
Select the network from the list, enter and confirm your choice.
To change V-Log’s name
Select WiFi, Setup WiFi.
Select Advanced Setup and enter DHG2020 as the password.
Select Logger Name.
Use to delete any characters from the existing name and enter the characters for the new
name. Scroll to (bottom row right) then enter.
To reset WiFi to its default settings
Select WiFi, Setup WiFi.
Select Advanced Setup and enter DHG2020 as the password.
Select Reset WiFi, enter and confirm your choice.
▼
Forget a Network
►Logger Name
Reset WiFi
▲
▼
►Start a Network
Network Name
Set Password
▼
Start a Network
►Network Name
Set Password
▲
Start a Network
Network Name
►Set Password
▲
Forget a Network
Logger Name
►Reset WiFi
▲
▼
►Forget a Network
Logger Name
Reset WiFi

EASYSENSE V-Log User Guide DS133 (5)
Data Harvest Group Ltd, 2014
15
Using the on-screen keypad
Use & buttons to go forward or back through the alphabet /
numbers / symbols on the keyboard.
Use to select / accept the symbol under the dark cursor.
Use to delete a character.
Move the cursor to the ‘tick’ symbol and press to accept the
entered password.
Move the cursor to the ‘cross’ symbol and press to leave this
screen with any characters entered to be rejected and ignored.
Connecting a group of iPads/Androids to a V-Log
It is possible for a group of devices to connect to one V-Log WiFi simultaneously to allow students to work
collaboratively on a single experiment.
Note: Performance maybe impacted if lots of devices are connected to the same logger.
When connecting to V-Log, the first iPad/Android/Windows PC to connect is given ‘control’ of the logger
and will therefore be able to setup, start and stop the experiment. All subsequent devices that connect to
the logger are given ‘Viewer’ status, they will see the set up changes made by the controller, and as data
is captured it will appear in real time.
When recording stops, all iPads/Androids automatically save the captured data into their internal memory.
One iPad/Android cannot change or delete the data held on another iPad/Android.
To leave a group, simply tap on the connection status button to disconnect (iPad users this is bottom right
of the screen, Android users top right of the screen).
When the controlling iPad/Android disconnects this will disconnect all the others. A new controlling
iPad/Android is chosen by ensuring that it is the first to re-connect.
WiFi Specifications
V-Log WiFi is a wireless enabled data logger. It is classed as a mobile device and has a usable
transmission range of 0.2 m to 10 m in open air.
V-Log WiFi loggers produced prior to April 2016 are compatible with IEEE 802.11b.
V-Log WiFi loggers produced after April 2016 are compatible with IEEE 802.11n.
Supports WPA-Personal (TKIP) and WPA2-Personal (AES) Security (802.11i)*
Frequency Range: 2412-2462 MHz
Channels supported: 1 to 11
*V-Log WiFi will automatically detect and use the required security protocol.
Hereby, Data Harvest Group Ltd., declares that V-Log WiFi is in compliance with the essential
requirements and other relevant provisions of Directive 2014/53/EU.
A full copy of the Declaration of Conformity can be obtained by writing to the following address:
Data Harvest Group Ltd., 1 Eden Court, Leighton Buzzard, Bedfordshire, LU7 4FY, UK.
V-Log in Bluetooth mode
If V-Log has a Bluetooth board fitted it can be used in Bluetooth mode. If using V-Log battery powered in
this mode, fully charge the battery before use e.g. leave to charge overnight for use in lessons the next
day. When the battery is in good condition and fully charged it will power a Bluetooth connected V-Log for
about 8 hours.
Note: V-Log stays awake while Bluetooth is turned on. Disconnect after use as the battery will continue to drain if V-
Log is stored with Bluetooth still selected.
Ensure the firmware of V-Log is at least V1.9 or higher.
Do NOT pair the devices (when paired V-Log will not be made available to the EasySense software).
Enter Password:
DHG2020
abcdefghijklmnopqrstu
vwxyzABCDEFGHIJKLMNOP
QRSTUVWXYZ0123456789
+-^%$@!_:\/?<=>.[]

EASYSENSE V-Log User Guide DS133 (5)
Data Harvest Group Ltd, 2014
16
When connecting to a Windows computer
V3.10 or later of the EasySense Windows software must be installed on the computer. An operating
system of Windows 7 or above is required.
Connect a 2070 or 2071 Bluetooth Smart USB adaptor to the USB port on the
Windows computer. The adaptor is a plug and play device whose drivers should
install automatically*.
On V-Log scroll until the cursor points to Bluetooth then to select.
The screen will show the name of the logger.
Open the EasySense software on the PC.
From File, Interface select Bluetooth and Network. OK.
Note: When first selected you may need to change Windows firewall
settings to allow network access for this app.
Select the connection status text top
right of the EasySense window.
Select the V-Log’s name (as
displayed on its screen) from the
list.
The connection status will change
to show that it is ‘Controlling xx
or Viewing xx the logger.
A link symbol on V-Log’s screen
will indicate connection to a computer.
When you’ve finished select the connection status icon in the EasySense software to disconnect then
press then to confirm on V-Log.
* If auto install fails, download and unzip the drivers for the Bluetooth USB adaptor (Product 2070 or 2071) from the
Data Harvest website. Open Device Manager, right click on the entry for the dongle (typically listed under Other
devices) and select Update drivers. Select to ‘Browse my computer’ (install manually), locate and select the
BLED112 directory. When installed the adaptor will be listed under the Ports (COM & LPT) section.
When connecting to a iPad or Android device
An iPad will need to support Bluetooth Low Energy (BLE) also known as Smart or 4 (iPad 3 or later or
any iPad Mini). V1.15 or later of the EasySense iPad software must be installed.
An Android will need to support Bluetooth Low Energy (BLE) / Smart –OS 4.4 or later. V1.09 or later of
the EasySense Android software must be installed.
Do NOT pair the devices (when paired V-Log will not be made available to the EasySense software).
Check in Settings on the device that Bluetooth is On.
Select Bluetooth on V-Log.
Start the EasySense software.
On an iPad tap on the ‘Not Connected’ text bottom right of the screen.
On the Android select the connect icon , top right of the screen
Select the V-Log’s name from the list.
The status will change to show that it is ‘Controlling xx or Viewing xx’.
When you’ve finished select the connection status icon in the EasySense software to disconnect, then
press then to confirm on V-Log.

EASYSENSE V-Log User Guide DS133 (5)
Data Harvest Group Ltd, 2014
17
Bluetooth specifications
Bluetooth 4.2 low energy radio, single mode compliant
Transmit (TX) power: 0 dBm
Receiver (RX) sensitivity: - 90 dBm
Usable transmission range: up to 10 m in open air
Frequency Range: 2.402 to 2.480 GHz operation
Hard Reset
If V-Log fails to respond to the computer or a button press, carry out a hard reset.
1. If necessary attach V-Log to USB power.
2. Press + + at the same time for a second and then release.
If the hard reset has been done correctly, the LCD will display EASYSENSE V-Log and the version
number of its operating system before returning to the main menu. If V-Log still fails to respond, please
contact Data Harvest.
Note: A Hard Reset does not erase any stored data sets but if a recording is interrupted by a reset, then the data
being captured will not be stored.
Limited warranty
For information about the terms of the product warranty, see the Data Harvest website at: https://data-
harvest.co.uk/warranty.
FCC Details
This device complies with Part 15 of the FCC Rules. Operation is subject to the following two conditions:
(1) this device may not cause harmful interference, and (2) this device must accept any interference
received, including interference that may cause undesired operation.
Note: Data Harvest products are designed for educational use and are not intended for use in
industrial, medical or commercial applications.
WEEE (Waste Electrical and Electronic Equipment) Legislation
Data Harvest Group Ltd is fully compliant with WEEE legislation and is pleased to
provide a disposal service for any of our products when their life expires. Simply
return them to us clearly identified as ‘life expired’ and we will dispose of them for you.
Data Harvest Group Ltd.,
1 Eden Court,
Leighton Buzzard,
Bedfordshire LU7 4FY
Fax: +44 (0)1525 851638 support@data-harvest.co.uk
Other manuals for EASYSENSE V-Log
1
Table of contents
Other Data Harvest Data Logger manuals
Data Harvest
Data Harvest EasySense Q 3 User manual
Data Harvest
Data Harvest EASYSENSE V-Hub User manual
Data Harvest
Data Harvest DS186 User manual
Data Harvest
Data Harvest EASYSENSE Vu+ User manual
Data Harvest
Data Harvest EASYSENSE Q Advanced User manual
Data Harvest
Data Harvest EASYSENSE V-Log User manual
Data Harvest
Data Harvest EASYSENSE Q3+ User manual
