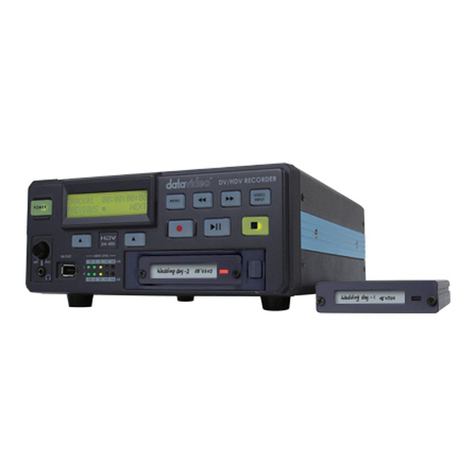
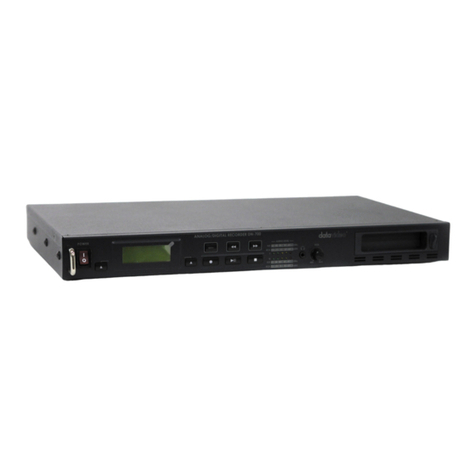
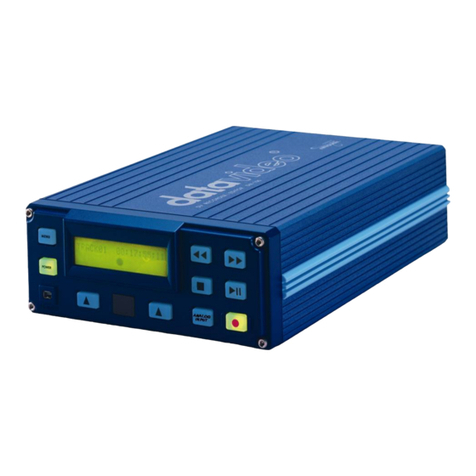
Data Video DN-300 User manual

DN-300 HDV / DV Hard Disk Recorder
Instruction Manual
www.datavideo-tek.com
Rev 040909

2
Contents
Warnings and Precautions................................................................................................................................. 3
Warranty ............................................................................................................................................................ 4
Disposal ............................................................................................................................................................. 4
Packing List ....................................................................................................................................................... 5
Introduction ........................................................................................................................................................ 5
Features ......................................................................................................................................................... 5
Connections & Controls ..................................................................................................................................... 6
Front Panel..................................................................................................................................................... 6
Rear Panel ..................................................................................................................................................... 7
Powering On ...................................................................................................................................................... 8
Menu Options .................................................................................................................................................... 8
HDD Mode Menu ........................................................................................................................................... 9
Record Formats Menu ................................................................................................................................. 10
Input Video Standard Menu.......................................................................................................................... 10
NTSC Setup Level Menu ..............................................................................................................................11
Video Input Source Menu............................................................................................................................. 12
GPI Mode & Functions Menu....................................................................................................................... 12
Set Date & Time Menu................................................................................................................................. 13
Set Full Syt Menu......................................................................................................................................... 14
Format Hard Disk Menu............................................................................................................................... 15
Erase Track Menu ........................................................................................................................................ 15
Convert DV to AVI Menu .............................................................................................................................. 16
Set Output Channel Menu ........................................................................................................................... 17
Scan HDD Surface Menu............................................................................................................................. 17
Operation with a DV Camcorder / Deck / Vision Mixer.................................................................................... 18
Recording a DV track ................................................................................................................................... 18
Playing back a DV Track.............................................................................................................................. 19
Operation with a HDV Camcorder / Deck........................................................................................................ 20
Recording a HDV (.M2T) track..................................................................................................................... 20
Playing back an M2T (HDV) Track............................................................................................................... 21
Operation with an Analogue Video Source...................................................................................................... 21
Recording a (.DV) track from an Analogue input ......................................................................................... 21
Connecting to a Computer............................................................................................................................... 22
Connecting to a PC ...................................................................................................................................... 23
Connecting to a MAC ................................................................................................................................... 25
DV File Converter Software............................................................................................................................. 26
Installation .................................................................................................................................................... 26
Registration .................................................................................................................................................. 27
Operation ..................................................................................................................................................... 28
RS 422 Command Set / Protocol .................................................................................................................... 31
Interface Overview ....................................................................................................................................... 31
Command Block Format .............................................................................................................................. 31
Connector Pin Assignment........................................................................................................................... 32
Communication Protocol.............................................................................................................................. 32
Command Table (without Checksum byte) .................................................................................................. 33
Detailed Description of Commands (without Checksum byte)..................................................................... 33
Return Data (without Checksum byte) ......................................................................................................... 34
Status Return Data....................................................................................................................................... 34
RS 422 Version History................................................................................................................................ 34
DN-300 Firmware Version............................................................................................................................ 34
Specifications................................................................................................................................................... 35
Supported Video Formats:........................................................................................................................ 35
Supported File Formats:........................................................................................................................... 35
Service and Support ........................................................................................................................................ 36

3
Warnings and Precautions
1. Read all of these warnings and save them for later reference.
2. Follow all warnings and instructions marked on this unit.
3. Unplug this unit from the wall outlet before cleaning. Do not use liquid or aerosol cleaners. Use a
damp cloth for cleaning.
4. Do not use this unit in or near water.
5. Do not place this unit on an unstable cart, stand, or table. The unit may fall, causing serious damage.
6. Slots and openings on the cabinet top, back, and bottom are provided for ventilation. To ensure safe
and reliable operation of this unit, and to protect it from overheating, do not block or cover these
openings. Do not place this unit on a bed, sofa, rug, or similar surface, as the ventilation openings on
the bottom of the cabinet will be blocked. This unit should never be placed near or over a heat
register or radiator. This unit should not be placed in a built-in installation unless proper ventilation is
provided.
7. This product should only be operated from the type of power source indicated on the marking label
of the AC adapter. If you are not sure of the type of power available, consult your Datavideo dealer or
your local power company.
8. Do not allow anything to rest on the power cord. Do not locate this unit where the power cord will be
walked on, rolled over, or otherwise stressed.
9. If an extension cord must be used with this unit, make sure that the total of the ampere ratings on the
products plugged into the extension cord do not exceed the extension cord’s rating.
10. Make sure that the total amperes of all the units that are plugged into a single wall outlet do not
exceed 15 amperes.
11. Never push objects of any kind into this unit through the cabinet ventilation slots, as they may touch
dangerous voltage points or short out parts that could result in risk of fire or electric shock. Never
spill liquid of any kind onto or into this unit.
12. Except as specifically explained elsewhere in this manual, do not attempt to service this product
yourself. Opening or removing covers that are marked “Do Not Remove” may expose you to
dangerous voltage points or other risks, and will void your warranty. Refer all service issues to
qualified service personnel.
13. Unplug this product from the wall outlet and refer to qualified service personnel under the following
conditions:
a. When the power cord is damaged or frayed;
b. When liquid has spilled into the unit;
c. When the product has been exposed to rain or water;
d. When the product does not operate normally under normal operating conditions. Adjust only
those controls that are covered by the operating instructions in this manual; improper
adjustment of other controls may result in damage to the unit and may often require
extensive work by a qualified technician to restore the unit to normal operation;
e. When the product has been dropped or the cabinet has been damaged;
f. When the product exhibits a distinct change in performance, indicating a need for service.
To avoid any possible static damage to your equipment please ensure your camcorder / deck is switched off
when connecting or disconnecting the IEEE-1394 cable.

4
Warranty
Datavideo warrants that the equipment it manufactures shall be free from defects in material and
workmanship for a period of 12 months from the date of product purchased. If equipment fails due to such
defects, Datavideo will, at its option, repair or provide a replacement for the defective part or product.
Equipment that fails after the warranty period, has been operated or installed in a manner other than that
specified by Datavideo, or has been subjected to abuse or modification, will be repaired for time and material
charges at the Buyer’s expense.
This warranty does not affect your statutory rights within the Country of purchase.
Disposal
For EU Customers only - WEEE Marking.
This symbol on the product indicates that it will not be treated as household waste. It must be handed over to
the applicable take-back scheme for the recycling of electrical and electronic equipment. For more detailed
information about the recycling of this product, please contact your local Datavideo office.

5
Packing List
The following items should be included in the box. If any items are missing please contact your supplier.
1 x DN-300 HDV / DV Hard Disk Recorder
1 x File Converter Software CD
1 x 6 Pin to 6 Pin DV Cable 2m
1 x 6 Pin to 4 Pin DV Cable 2m
1 x YUV Component I/O Cable Sub D 15 Pin Socket to 7 x BNC Socket 30cm
2 x BNC to BNC Cable 1.2m
1 x 2 Phono Plug to 2 Phono Plug Audio Cable 1.2m
1 x S-Video Plug to Plug Cable 1.2m
1 x Mains Cable
1 x Power Supply (12V 4.2A)
1 x Instruction Manual
Introduction
The Datavideo DN-300 is a HDV / DV Hard Drive Recorder. It can record HDV via the IEEE-1394 (iLink,
FireWire) output from HDV Camcorders (.m2t), or DV25 from DV or Analogue video sources (.dv). The DN-
300 can be used as an external firewire drive from which files can be dragged and dropped to a PC or MAC.
The DN-300 has a built in utility to convert .dv files to .avi files, and is also supplied with DV file converter
software to create other file formats such Quicktime.
Features
Stand Alone DV / HDV Hard Drive Recorder / Player.
Records DV from Digital or Analogue Video Inputs (DV25 via IEEE-1394 (iLink FireWire) or Component
(YPbPr) / S-Video (Y/C) / Composite (CVBS) analogue video inputs).
Records HDV (.m2t) via IEEE-1394 (iLink, FireWire).
Full VTR playback functionality, including loop playback.
RS-422 control
GPI input
Drag and Drop file transfer to PC or MAC via IEEE-1394.
N.B. The DN-300 cannot be operated as a DV Device from a PC - The AVC Command set is not
supported.

6
Connections & Controls
Front Panel
Power On / Off Button. This is a soft power on / off button which
powers the unit on from a state of standby; the main power on / off
switch is on the rear panel
Menu Button. This calls up the menu display which is navigated using
the Fwd / Rew Buttons and Previous / Next Buttons
Display Panel. Displays the status of the DN-300. The display will
show Track Number, Timecode, or if the Menu Button is pressed the
Menu Display
Fwd / Rew Buttons. In playback mode these buttons will operate as
Fast Forward and Rewind Buttons. If the Menu Button is pressed these
buttons will navigate backwards and forwards between the various
menu options
Stop Button. Stops playback or record.
Play / Pause Button. Starts playback of a track, or pauses playback of
a track- status will be displayed on the Display Panel. Also Starts /
Pauses a recording when unit is in Record mode
Analog Input Button. Switches the DN-300 to Analog Input
(Component YUV / S-Video Y/C / Composite CVBS) - Analog Inputs
can only be recorded in DV formats. See Operation with an analogue
video source for more details
Record Button. Puts the DN-300 into Record Mode. To start recording
press the Record Button and Play Button simultaneously.
N.B. Unit will not record if no video signal is present.
Previous / Next Buttons. These buttons navigate up and down
between recorded tracks and menu options.
4 Pin DV In/Out Port. This is a convenient front mounted DV / IEEE-
1394 Port for connection to a DV / HDV camcorder, or to a PC for file
transfer.

7
Rear Panel
6 Pin DV In/Out Ports. Ports for connecting to a DV / HDV camcorder, or
to a PC for file transfer.
YUV In/Out Port. If you intend to run a YUV Component signal in or out
of the DN-300 connect the special YUV breakout cable to this port. See
Video Input Source Menu for more details.
N.B. YUV In/Out is only suitable for RAW DV (DV) operation - It is
not possible to record or playback M2T (HDV) files via the YUV
In/Out
RS-422 Port. The DN-300 can be controlled via RS-422 from external
devices. The DN-300 uses standard Sony protocol. Connect the RS-422
control cable to this port.
S-Video / Composite Video and Stereo Audio In / Out. These are the
standard connections for analogue video and audio signals. You can
connect standard analogue video signals to the inputs and record them
in DV format. A standard analogue video monitor could be connected to
the output for simple record / playback monitoring of DV recordings.
See Video Input Source Menu for more details.
N.B. Analogue Inputs & Outputs are only suitable for RAW DV (DV)
operation - It is not possible to record or playback M2T (HDV) files
via the Analogue Inputs / Outputs
The GPI socket can be used for simple external control. The DN-300 can
accept pulse or level trigger inputs, which can trigger record or playback
and pause commands See GPI Mode & Function Menus for more
details.
RS-232 Socket. May be used for some firmware updates, or other future
uses.
DC In Socket. Connect the supplied 12V 4.2A PSU to this socket. The
connection can be secured by screwing the outer fastening ring of the
DC In plug to the socket
Power On/Off Switch. Switches the power On / Off
Grounding Terminal. When connecting this unit to any other component,
make sure that it is properly grounded by connecting this terminal to an
appropriate point. When connecting, use the socket and be sure to use
wire with a cross-sectional area of at least 1.0 mm2.

8
Powering On
Connect the DN-300 power supply to the DC In socket. Ensure the power cable is connected to a suitable
mains socket.
Switch the power On/Off
switch to the ON position Press the Power Button until it lights up
The LCD display panel should show DN-300 and after a few seconds the track display should appear and
the DN-300 is ready to go
Menu Options
The DN-300 is a menu driven unit; there are 18 menus which are used to initially set up the unit. The menu
settings are non-volatile (they are stored even when the unit is switched off), so many of the settings, such
as date and time, you will only need to set once. We will look at each individual menu in more detail, but here
is a quick overview of them. N.B. Not all menus appear when the Analog Input Button is illuminated.
The 18 Menus are:
HDD MODE - This sets the DN-300 to HDD mode for drag and drop
file transfers to a PC or MAC. See HDD Mode Menu for more details.
SETUP LOOP PLAY - Sets the DN-300 to loop play a track, the track
will continuously loop until stopped.
RECORD FORMATS - Sets the DN-300 record format to .dv file for
DV25 and Analogue input recordings or .m2t for HDV recording. See
Record Formats Menu for more details.
FREE SPACE - Displays how much HDD space is available on the
DN-300.
TOTAL SPACE - Displays the total available HDD storage on the DN-
300.
INPUT VIDEO STANDARD - Sets the DN-300 video input to NTSC to
PAL. See Input Video Standard Menu for more details.
NTSC SETUP LEVEL - Sets the ire to 0 or 7.5 for NTSC. 7.5 ire is
most commonly used in the U.S.A. and Canada and 0 ire in far eastern
countries such as Japan. See NTSC Setup Level Menu for more
details.
VIDEO INPUT SOURCE - The DN-300 has three types of Analogue
Input - select between CVBS (Composite), Component (YPbPr) or S-
Video (Y/C). See Video Input Source Menu for more details.
SET GPI TRIGGER MODE - The DN-300 has two GPI trigger modes,
Pulse or Level trigger can be set. See GPI Mode & Function Menus
for more details.
SELECT GPI FUNCTION - The GPI function can be set to either Play /
Play Pause or Record / Record Pause. See GPI Mode & Function
Menus for more details.

9
SET DATE & TIME -Sets the date and time on the DN-300; the
setting is non-volatile so it is stored when the unit is powered off. See
Set Date & Time Menu for more details.
SET FULL SYT - Occasionally DV devices can suffer from conflicts. In
the event of the DN-300 conflicting with another device Set Full Syt is
enabled to overcome the conflict.
FORMAT HARD DISK - Formats the HDD and removes all files and
tracks from the DN-300. See Format Hard Disk Menu for more
details.
ERASE TRACK - Erases individual tracks from the DN-300.
See Erase Track Menu for more details.
CONVERT DV TO AVI - Converts DV files to .AVI files for greater NLE
compatibility.
See Convert DV to AVI Menu for more details.
SET OUTPUT CHANNEL - Allows the output channel of the DN-300 to
be switched to a different I.D. number. This is important if there are
any conflicts between DV Devices. See Set Output Channel Menu
for more details.
HDD SURFACE SCAN - Checks the HDD for errors / bad sectors.
This is only necessary if your DN-300 is not performing correctly, or
you install a new HDD. A result.txt file is created in the root directory of
the HDD, this can be viewed from a PC.
FIRMWARE VERSION - Display the Rev No. and Firmware Version of
the DN-300
HDD Mode Menu
NB: Although your PC / MAC may see the DN-300 as an AVC compliant DV Device it is not intended
to be operated as such.
Connect the DN-300 IEEE-1394 output to a PC or MAC.
To set the DN-300 into HDD Mode firstly press the Menu button so that it is illuminated.
You will see the display change to the HDD Mode Menu
Press the Next (▲) Button to select ENTER and the display will show the HDD Enable Confirmation Screen
Press the Next (▲) Button again to confirm, after a few seconds HDD Mode will be enabled
The PC / MAC should recognise that an external IEEE-1394 (Firewire)HDD has been connected.
The DN-300 can then be used just like any external drive.
See Connecting to a PC / Connecting to a MAC for more details.
To return the DN-300 to Deck Mode either use “Safely Remove Hardware” with a PC, or with a MAC use
“Eject” or Drag the DN-300 Drive to “Trash”. Once un-mounted the DN-300 display will return to Track
Display.

10
Record Formats Menu
The Record Formats Menu sets the file format for any DN-300 recordings. You can choose to record
Standard Definition inputs to RAW DV (.DV) files and HDV recordings to M2T files.
Raw DV files can be recorded from a DV deck, camcorder, vision mixer with IEEE-1394 (iLink, FireWire,
DV25) output, or from an analogue video source using the DN-300 Composite (CVBS), S-Video (Y/C) or
Component (YUV) inputs.
M2T (HDV) files can only be recorded from a HDV camcorder or HDV deck which has an .m2t output on
IEEE-1394 (iLink, FireWire, HDV out).
NB: It is not possible to record/play HDV M2T from the Standard Definition (SD) connections on the
DN-300. To view DN-300 recorded M2T files set your HDV Camcorder / Deck to Recorder Mode then
the DN-300 files can then be played back to the HDV Camcorder viewfinder / monitor via an IEEE-
1394 connection.
To select the Record Format:
Press the Menu Button, to enter menu mode
Press the FWD (►►) Button to navigate the menus until RECORD FORMATS is displayed
Press the Next (▲) Button to enter the RECORD FORMAT set up menu
Press the FWD (►►) Button to select either RAW DV (DV) or M2T (HDV)
To confirm your selection and exit the menu press the Next (▲) button.
Then press the Menu Button to leave menu mode
Input Video Standard Menu
The Input Video Standard Menu sets the DN-300 to receive either NTSC or PAL video signals.
To select the Input Video Standard:
Press the Menu Button, to enter menu mode
Press the FWD (►►) Button to navigate the menus until INPUT VIDEO STANDARD is displayed
Press the Next (▲) Button to enter the INPUT VIDEO STANARD set up menu

11
Press the FWD (►►) Button to select either PAL or NTSC
To confirm your selection and exit the menu press the Next (▲) button.
Then press the Menu Button to leave menu mode
NTSC Setup Level Menu
The NTSC Setup Level Menu sets the DN-300 either 0 ire or 7.5 ire - This is not required for PAL inputs.
7.5 ire is most commonly used in the U.S.A. and Canada and 0 ire in far eastern countries such as Japan. If
you are unsure which to set, please consult your dealer.
To select the NTSC Level:
Press the Menu Button, to enter menu mode
Press the FWD (►►) Button to navigate the menus until NTSC SETUP LEVEL is displayed
Press the Next (▲) Button to enter the NTSC level set up menu
Press the FWD (►►) Button to select either 0 IRE or 7.5 IRE
To confirm your selection and exit the menu press the Next (▲) button.
Then press the Menu Button to leave menu mode

12
Video Input Source Menu
The Video Input Source Menu sets the analogue input mode of the DN-300.
The DN-300 has Composite (CVBS), S-Video (Y/C) and Component (YPbPr) analogue inputs.
N.B. It is only possible to record/play Standard Definition RAW DV (.DV) files with these analogue
connections. HDV (.M2T) files/tracks cannot be created from the DN-300’s analogue connections.
To select the Video Input Source:
Press the Menu Button, to enter menu mode
Press the FWD (►►) Button to navigate the menus until VIDEO INPUT SOURCE is displayed
Press the Next (▲) Button to enter the VIDEO INPUT SOURCE set up menu
Press the FWD (►►) Button to select either Composite, Component or S-Video
To confirm your selection and exit the menu press the Next (▲) button.
Then press the Menu Button to leave menu mode
GPI Mode & Functions Menus
The DN-300 can be set to receive either pulse or level GPI triggers, which can be set to activate Play /
Pause or Rec / Pause.
To select the GPI Mode:
Press the Menu Button, to enter menu mode
Press the FWD (►►) Button to navigate the menus until SET GPI TRIGGER MODE is displayed
Press the Next (▲) Button to enter the SET GPI TRIGGER MODE menu
Press the FWD (►►) Button to select either Pulse Trigger or Level Trigger

13
To confirm your selection and exit the menu press the Next (▲) button.
Then press the Menu Button to leave menu mode
To select the GPI Function:
Press the Menu Button, to enter the menu mode
Press the FWD (►►) Button to navigate the menus until SET GPI FUNCTION is displayed
Press the Next (▲) Button to enter the SET GPI FUNCTION menu
Press the FWD (►►) Button to select either Pulse Trigger or Level Trigger
To confirm your selection and exit the menu press the Next (▲) button.
Then press the Menu Button to leave menu mode
Set Date & Time Menu
To set the Date & Time on the DN-300
Press the Menu Button, to enter menu mode
Press the REW (◄◄) Button to navigate the menus until SET DATE & TIME is displayed
Press the Next (▲) Button to enter the SET Date & Time menu
You will see a flashing cursor on the date value.
To set the date use the Play/Pause Button to increase the value or the Stop Button to decrease the value
Increases Value Decreases Value

14
Use the FWD (►►) Button to move the cursor to the next column to the right i.e. Month / Year / Hours /
Minutes or the REW (◄◄) Button to move the cursor back to the left.
Moves the cursor to the right Moves the cursor to the left
Once you have set the date & time press the Next (▲) Button to exit the menu
Then press the Menu Button to leave menu mode
Set Full Syt Menu
DV25 devices can sometimes conflict with one another, it is not a common occurrence but it can happen.
When conflicts occur one DV device may not recognize the other, or the output from one is switched off by
the other. “Set Full Syt” will overcome conflicts of this type, so if you do have a conflict with another DV
device switch Set Full Syt to Enable.
Press the Menu Button, and use the REW (◄◄) Button to navigate to SET FULL SYT
Press the Next (▲) Button to select Enable and then press it again to exit the menu.
Then press the Menu Button to leave menu mode

15
Format Hard Disk Menu
Format Hard Disk will remove all tracks from the hard drive.
Press the Menu Button, to enter menu mode
Press the REW (◄◄) Button to navigate the menus until FORMAT HARD DISK is displayed
Press the Next (▲) Button to enter the FORMAT HARD DISK menu
You will see ARE YOU SURE? displayed
Press the Next (▲) Button again to confirm that you want to format the hard disk.
After a few seconds the DN-300 will reboot and the display will return to normal
Erase Track Menu
Erase Track is used for deleting individual tracks from the DN-300.
Press the Menu Button, to enter menu mode
Press the REW (◄◄) Button to navigate the menus until ERASE TRACK is displayed
Press the Next (▲) Button to enter the ERASE TRACK menu
Use the FWD (►►) or REW (◄◄) Button to select the track that you want to erase - (Track 01 in this case)
Press the Next (▲) Button to erase the selected track - The track duration will return to 00:00:00:00
Then press the Menu Button to leave menu mode

16
Convert DV to AVI Menu
The DN-300 has a built in file conversion utility which can convert recorded .dv files to .avi files (type 1 or
type 2). You can choose the format which best suits your NLE platform.
N.B. The DN-300 requires sufficient free drive space to create an .avi file. A 1GB .dv file will require at
least 1GB of free space on the DN-300 drive for the .avi file to be created.
Tracks that have been recorded as .M2T (HDV) files cannot be converted to .avi
Any converted AVI file will not be displayed on the track list, but it will be available for drag and drop
to a PC in HDD Mode.
The DV to AVI conversion takes about 60% real time. i.e. A 1 hour DV track will take around 36 minutes to
convert to an AVI file.
N.B. You can convert .DV files from the DN-300 faster using the DV File Converter program that is
supplied on a CD with the DN-300, see page 27 for more details.
Press the Menu Button, to enter menu mode
Press the REW (◄◄) Button to navigate the menus until CONVERT DV TO AVI is displayed
Press the Next (▲) Button to enter the CONVERT DV TO AVI menu
Use FWD (►►) or REW (◄◄) to select the track that you want to convert - (Track 01 in this case) - Then
press the Next (▲) Button to confirm the selection.
Use FWD (►►) or REW (◄◄) to select AVI Type-1 or Type-2 and then press the Next (▲) Button to
confirm the selection.
The conversion process will start - once complete CONVERSION DONE will be displayed
Press the Next (▲) Button to select OK - and then press the Menu Button to exit.

17
Set Output Channel Menu
Occasionally DV device outputs will conflict. It is not a frequent occurrence but when it happens it is possible
to change the Output Channel I.D of the DN-300 to overcome the conflict. For example if another DV device
has the same output channel I.D. as the DN-300 this will result in a conflict, this may mean that the DN-300
output is blocked. Please try changing the output channel I.D. of the DN-300 to solve the problem.
The default output channel of the DN-300 is channel 1, this is fine for recording from a DV Device and
monitoring / playing back to an analogue monitor. If you want to output DV from the DN-300 to another DV
Device you may need to select channel 63.
N.B. When the DN-300 is set to channel 63 you cannot playback a track through the DN-300’s
analogue outputs until the connected external DV device is switched off or disconnected.
Press the Menu Button, to enter menu mode
Press the REW (◄◄) Button to navigate the menus until SET OUTPUT CHANNEL is displayed
Press the Next (▲) Button to enter the SET OUTPUT CHANNEL menu
Use FWD (►►) or REW (◄◄) to change the output channel number - in this case we have selected 1
Press the Next (▲) Button to confirm the setting
Then press the Menu Button to leave menu mode
Scan HDD Surface Menu
Surface scan is a utility which checks the disc surface for errors and bad sectors. It is not generally
necessary to use Surface Scan unless your DN-300 is not performing correctly, or you have changed the
HDD.
To run Surface Scan press the Menu Button to enter menu mode.
Press the REW (◄◄) Button to navigate the menus until SCAN HDD SURFACE is displayed
Press the Next (▲) Button twice to start the HDD Surface Scan.

18
The progress of the scan will appear in the LCD display. Once complete the Surface Scan Done message
will appear. Press the Next (▲) Button to exit the surface scan.
A txt file called Result will have been created in the root directory of the DN-300 HDD, this can be accessed
via a PC, by connecting the DN-300 as a HDD.
Operation with a DV Camcorder / Deck / Vision Mixer
Recording a DV track
To record from a DV Camcorder / Deck / Vision Mixer connect the DV device to the DN-300 via an IEEE-
1394 (iLink, FireWire) cable. You can connect to either of the rear 6 Pin ports, or to the front mounted 4 Pin
port, but only connect one DV device to the DN-300 at a time.
N.B. To avoid any possible static damage please ensure your camcorder is switched off when
connecting / disconnecting the IEEE-1394 cable.
Rear Mounted DV 6 Pin Ports Front mounted DV 4 Pin Port
Use the Next / Previous Buttons to select an empty track from the DN-300 track list, one that shows a
duration of 00:00:00:00 in the LCD display.
Not suitable - Track
has been recorded
Suitable - Track is
empty
Press both the Record and Play/Pause Buttons simultaneously and the DN-300 should start recording.
+
The counter should start counting and the REC
symbol should appear
If it does not start recording check the following:
There is a DV signal coming from the DV device.
The Analogue Input Button on the DN-300 is not illuminated
The DN-300 Record Format is set to RAW DV (DV), and not set to M2T (HDV) see Record Formats Menu.
The track you have selected on the DN-300 is empty. The counter next to the Track Number on the LCD
display should be showing 00:00:00:00.
Go to the FREE SPACE Menu and check that the DN-300 drive is not full.
The IEEE-1394 cable is not too long, disconnected or damaged.

19
During record you can Pause the DN-300 by pressing the Play/Pause button, the counter on the LCD display
will stop.
The counter should stop counting and the REC PAUSE symbol
should appear
To continue recording to the same track release Pause by pressing the Play/Pause button again.
The counter should start counting again and the REC symbol
should return
N.B. It is not possible to stop a recording and then restart on the same track, once a track has been
stopped you must select a new empty track from the DN-300 to start recording again.
Playing back a DV Track
Tracks that have been recorded in RAW DV (.DV) mode can be played back to DV25 devices via one of the
IEEE-1394 ports, or to analogue monitors or recorders via the Composite, S-Video (Y/C) or Component
(YUV) video outputs.
To play a track back to a camcorder you will need to switch the camcorder to recorder / edit mode, so that it
receives a signal via the DV port. - Please consult your camcorder instruction manual for more details.
N.B. To play a track from the DN-300 to a DV Device the output channel must be set to 63 (see pg17).
Use the Previous (▲) / Next (▲) Buttons to select the track you want to play, and then press the Play (►II)
Button.
It is also possible to set the DN-300 to loop play. In loop play the track will seamlessly looped until stopped.
To set up loop play press the Menu Button to enter menu mode and then the FWD (►►) Button until
SETUP LOOP PLAY is displayed.
+
Press the Next (▲) Button to enter the setup loop play menu, and then press the FWD (►►) Button to
select ENABLE
Press the Next (▲) Button to select SET and then press the Menu Button to return to track display.
When you press play the selected track will start playing, and will loop until the Stop (■) Button is pressed.
To cancel loop playback, follow the above procedure but select disable instead of enable.
N.B. To play a track from the DN-300 to a DV Device the output channel must be set to 63 (see pg17).

20
Operation with a HDV Camcorder / Deck
Recording a HDV (.M2T) track
To record from a HDV Camcorder / Deck connect the HDV device to the DN-300 via an IEEE-1394 (iLink,
FireWire) cable. You can connect to either of the rear 6 Pin ports, or to the front mounted 4 Pin port, but only
connect one HDV device to the DN-300 at a time.
N.B. To avoid any possible static damage please ensure your camcorder is switched off when
connecting / disconnecting the IEEE-1394 cable.
Rear Mounted DV 6 Pin Ports Front mounted DV 4 Pin Port
Make sure that the DN-300 Record Format is set to M2T (HDV). See Record Formats Menu.
Use the Next / Previous Buttons to select an empty track from the DN-300 track list, one that shows a
duration of 00:00:00:00 in the LCD display.
Not suitable - Track
has been recorded
Suitable - Track is
empty
Press both the Record and Play/Pause Buttons simultaneously and the DN-300 should start recording.
+
The counter should start counting and the REC
symbol should appear
If it does not start recording check the following:
There is a HDV signal from the HDV device. Some camcorders have options to put out DV or HDV via their
IEEE-1394 (iLink) ports, make sure the output is set to HDV.
The Analogue Input Button on the DN-300 is not illuminated.
The DN-300 Record Format is set to M2T (HDV) See Record Formats Menu.
The track you have selected on the DN-300 is empty. The counter next to the Track Number on the LCD
display should be 00:00:00:00.
Go to the FREE SPACE Menu and check that the DN-300 drive is not full.
The IEEE-1394 cable is not too long, disconnected or damaged.
During record you can Pause the DN-300 by pressing the Play/Pause button, the counter on the LCD display
will stop.
The counter should stop counting and the REC PAUSE symbol
should appear
To continue recording to the same track release Pause by pressing the Play/Pause button again.
The counter should start counting again and the REC symbol
should return
N.B. It is not possible to stop recording and then restart on the same track, once a track has been
stopped you must select a new empty track from the DN-300 to start recording again.
Other manuals for DN-300
1
Table of contents
Other Data Video DVR manuals

Data Video
Data Video DN-500 User manual

Data Video
Data Video DN-500 User manual

Data Video
Data Video DN-400 User manual

Data Video
Data Video HDR-10 User manual

Data Video
Data Video DN-300 User manual

Data Video
Data Video MP-4100 Manual

Data Video
Data Video HDR-100 Guide

Data Video
Data Video DN-60 User manual

Data Video
Data Video DV Bank User manual

Data Video
Data Video DN-700 User manual