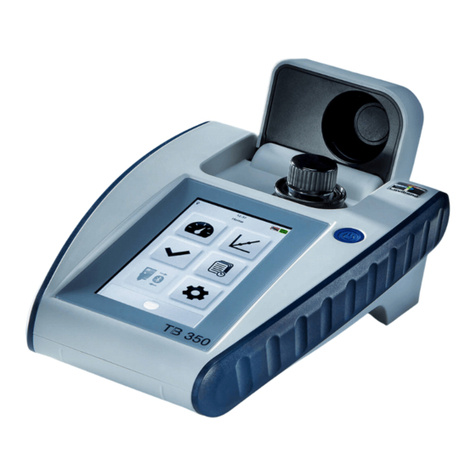
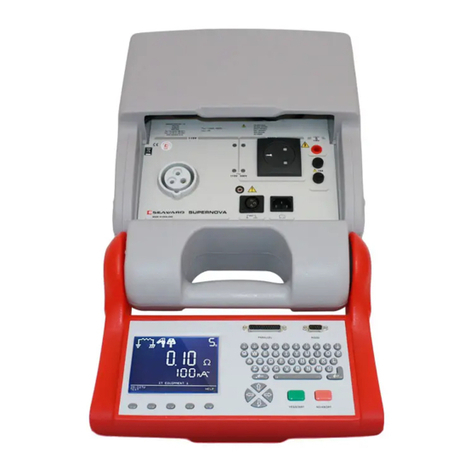
Datasensing ST 400AD User manual

ST 400AD
SENSOR TESTER
ANALOGUE + DIGITAL
OPERATING INSTRUCTIONS
Follow the procedure below to operate the tester:
SUPPLIED MATERIAL
• Sensor Tester
• User’s manual
• Power adapter
• USB cable
USER’S MANUAL
Please read the manual carefully before using this product. This product should be applied
by someone with a certain level of electrical knowledge. Please read and make sure that
you understand how to operate the product before using it. Please keep this manual
readilly accesible for future references when needed.
WARNING
Please comply with the warnings indicated below:
Please do not exceed maximum rated voltage during usage in order to prevent
tester malfunction or fire.
Please do not apply AC power supply to avoid breakage.
Please do not subject the product to high temperature to avoid scalding
The product contains a non removable Li-ion battery. For the delivery of the product,
follow National and IATA regulations.
PRECAUTIONS
Comply with the warnings indicated below for they are important:
• Please do not use it in flammable or explosive environments.
• Please do not use it in environments with water, oil, chemicals or steams.
• Please do not disassemble, repair or alter this product.
• Please do not exceed the rated voltage and current.
• Please do not exceed the rated environment.
• Please observe electrical polarity when making connections.
• Please connect load correctly.
• Please avoid short-circuiting the load.
• Please do not operate it ,if the housing is broken.
• When disposing of the tester, please treat it as an industrial waste.
• Please do not use it directly connected to a working machine
WARRANTY
Our products have been tested prior to shipping, however if malfunction occurs, please
contact our offices near you and present the failure in details so that we can provide the
best solution to you.
Warranty Period
The warranty period is 1 year starting from the shipment date.
Scope of warranty
If malfunction is caused by the product within the warranty period, free service of repairing
shall be offered. The cases listed below do not fall into the scope of warranty:
• Failure to comply with these operating instructions or breech of contracts with our
company.
• Any malfunction that is caused by buyer’s own device or soware, instead of our
product’s defect
• Malfunction that is caused by modification, part replacement, repair or any other
operation not previously authorized in writing by Datasensing S.r.l.
• Malfunction that is caused by unpredictable factors (such as change of science and
technology) aer the product is delivered from our company.
• Malfunction that is caused by natural disasters such as fire, earthquake and flood; or
abnormally shiing voltage during charging.
FUNCTIONS
Mode switching - Press the MODE button shortly to switch the tester in three modes: current
(I), voltage (V), and switch (D). The result will be displayed on the screen.
Power display - When the tester is working normally, the power will be displayed in the upper
right, and the grid number indicates the remaining power. When it flashes, it indicates that the
battery is low and needs to be charged. When charging, the number of flashes indicates the
progress of charging. When fully charged, the full battery symbol will flash.
Sleep mode - If the tester does not operate for more than 10 minutes, it automatically enters
the sleep state, the 24V power supply and the screen will be turned off; press the MODE button
or the TEACH-IN button, and the tester returns to the operable state.
Mute mode - Press and hold the TEACH-IN button for more than 6s, the buzzer will sound
once, and the tester enters silent mode. Repeating this operation, the buzzer will sound twice
to indicate that the Mute mode has been exited, and the tester will store the state, and will
remain in the last state when it is turned on again.
Teach-In function - Press the TEACH-IN button, the TEACH-IN (red) terminal will output a high
level voltage, and the voltage logic will match the brown terminal voltage. When the button is
released, the TEACH-IN (red) terminal will output a low level voltage, and the LCD will display
the current Teach-In logic state.
Flashlight function - Press and hold the MODE button for more than 2s, the light will light up,
and the same operation can turn off the light.
Short circuit protection - Short circuit protection is entered when the tester output current
is too high. When a short circuit is detected, the LCD will display “SCP”. Aer the short circuit
condition is removed, the tester needs to be restarted to return to the normal state.
Note:
• Please make sure the power is off before connecting the cable.
• Please make sure the voltage fluctuations are within maximum rated range.
• When the power is on, please do not apply the device In the first 0.5 s.
• Please do not subject the device to dust, dirt or vapor.
• Please do not subject the device to water, oil or organic solvent such 1s diluents
• Do not use the device while charging.
!
SPECIFICATIONS
Current Mode 0 … 20 mA
Measurement accuracy: ≤ 0,04mA
Voltage mode 0 … 10 V
Measurement accuracy: ≤ 0,4V
Sensor ouput type
detection NPN / PNP (automatic detect)
Output voltage 19 … 24V
Output current for
sensors ≤ 160mA
Battery capacity 4000 mAh(1)
Operating time ≥ 10h (sensor @50mA)
Charging time ≤ 9h
Operating temperature -10°C … +45°C
Weight 200g
Dimension 150x67x26 mm
Functions Short circuit protection; Sleeping mode; Positive pulse
Other functions Flashlight
(1) the product contains a non removable Li-ion battery. For the delivery of the product, follow the National and
IATA regulations.
!
• All rights reserved • Without limiting the rights under copyright, no part of this
documentation may be reproduced, stored in or introduced into a retrieval system,
or transmitted in any form or by any means, or for any purpose, without the express
written permission of Datasensing S.r.l. • Datasensing and the Datasensing logo are
trademarks of Datasensing S.r.l.
©2022 Datasensing S.r.l.
821012270 REV. A ENG ED 03/2022
CONNECTIONS
1. Connect the sensor wires to the corresponding tester terminals and turn on the
tester.
2. Select the corresponding measurement mode (voltage, current, digital).
3. Press the Teach-in button according to the teaching logic of the product.
4. The measurement results are displayed on the screen.
DIMENSIONS
TEACH-IN Button
USB OUT Connector
MODE Button LED light
TEACH-IN Terminal
USB IN Connector INPUT Terminal
POWER Terminal
GND Terminal
ON/OFF Button
brown
black
blue
sensor
other colors
Teach In
mm
67.67
26.64
149.83
132.45
Datasensing S.r.l.
Strada S. Caterina 235 - 41122 Modena - Italy
Tel. +39 059 420411 - Fax +39 059 253973
mm
67.
67
26.
64
1
49.
83
13
2.4
5

821012270 REV. A ITA ED 03/2022
ST 400AD
TESTER DI SENSORI
ANALOGICO + DIGITALE
ISTRUZIONI OPERATIVE
Seguire la procedura per utilizzare il prodotto
CONTENUTO DELLA CONFEZIONE
• Tester per sensori
• Manuale utente
• Alimentatore
• Cavo USB
MANUALE UTENTE
Leggere attentamente il manuale prima di utilizzare il prodotto. Il prodotto deve essere
utilizzato da un utente esperto. Prima dell’utilizzo, accertarsi di avere capito come il pro-
dotto deve essere utilizzato. Mantenere il manuale facilmente accessibile nel caso siano
necessarie consultazioni in futuro.
AVVERTENZE
Seguire scrupolosamente le avvertenze sotto indicate:
non eccedere la massima tensione di alimentazione indicata per prevenire riscalda-
menti o incendi
non applicare una tensione AC per prevenire rotture della batteria
non sottoporre il prodotto ad alte temperature per evitare riscaldamenti
il prodotto contiene una batteria Li-ion non removibile. Per la spedizione del prodot-
to fare rifermimento alle normative Nazionali e IATA.
PRECAUZIONI DI SICUREZZA
Per la vostra sicurezza, seguire le istruzioni sotto indicate:
• Non utilizzare in ambienti con atmosfere infiammabili o esplosive
• Non utilizzare in ambienti con acqua, oli, prodotti chimici o vapori
• Non aprire, riparare o alterare il prodotto
• Non superare la massima tensione e corrente indicata
• Non utilizzare il prodotto al di fuori delle condizioni ambientali previste
• Rispettare le polarità elettriche nelle connessioni
• Collegari correttamente eventuali carichi
• Evitare corto circuiti
• Non utilizzare il prodotto se il corpo è danneggiato
• Eliminare il prodotto come rifiuto industriale
• Non utilizzare il prodotto direttamente connesso a una macchina in lavoro
GARANZIE
Il prodotto è testato prima della spedizione. Nel caso di malfunzionamenti, contattare i
nostri uffici.
Periodo di garanzia
Il periodo di garanzia è di 1 anno a partire dalla data di spedizione
Scopo della garanzia
Nel caso di malfunzionamento dovuto al prodotto durante il periodo di validità della
garanzia, il prodotto verrà riparato o sostituito. Sono esclusi dalla garanzia malfunziona-
menti dovuti a :
• un non corretto uso, come previsto dal presente manuale
• dispositivi non corretti o collegati impropriamente al tester
• modifiche, sostituzioni di componenti o ogni altro intervento non precedentemente
autorizzato per iscritto da Datasensing S.r.l. sul prodotto
• cause non prevedibili come eventi naturali (incendi, alluvioni, …) o sbalzi di tensione
durante la ricarica
• fattori (come cambiamenti tecnologici) verificatesi dopo la spedizione del dispositivo
FUNZIONI
Modalità di funzionamento - Selezionare tramite il pulsante MODE la modalità di funzion-
amento prescelta: Corrente (I), Tensione (V) e Digitale (D). Il risultato della selezione sarà
indicato sul display.
Alimentazione - In modalità di funzionamento normale, la carica della batteria è mostra-
ta nella parte superiore destra del display e il numero di tacche indica la riserva di energia
disponibile. Quando l’indicatore lampeggia la batteria necessita di essere ricaricata. Quando
completamente ricaricata, il simbolo di batteria carica lampeggia.
Sleep Mode - Se il tester non opera per un tempo maggiore di 10min, il tester entra in modal-
ità “sleep”: alimentazione e display si spengono. Per riattivare il tester è necessario premere i
pulsanti MODE o TEACH-IN.
MUTE Mode - Premere il pulsante di TEACH-IN per t>6sec, il buzzer suonerà una volta e il tes-
ter entrerà in modalità silenziosa. Premendo nuovamente il pulsante di TEACH-IN per t>6sec, il
buzzer suonerà due volte e il tester rientrerà nella modalità normale.
Funzione di TEACH-IN - Quando si preme il pulsante di TEACH-IN il terminale di teach-in
viene portato a +24V. Quando il pulsante non è premuto il terminale di teach-in rimane a 0V.
Sul display l’attivazione della funzione è indicata dalla segnalazione Tch ON / OFF.
Attivazione LED - Premere il pulsante MODE per t<2sec per attivare il led di illuminazione.
Premendo nuovamente il pulsante MODE per t>2sec, il led si spegnerà
Protezione al corto circuito - Il tester è protetto al corto circuito. Quando un corto circuito è
rilevato il display mostrerà l’indicazione “SCP”. Una volta rimosso il corto circuito è necessario
spegnere e riaccender il tester per rientrare in modalità normale.
Note
• Assicurarsi che il pulsante di accensione sia in posizione OFF quando sono connessi i cavi
• Assicurarsi che i ripple di tensione siano entro i limiti consentiti
• Non connettere un sensore nei primi 0,5s dall’accensione
• Non sottoporre il prodotto a polveri, sporco o vapori
• Non sottoporre il prodotto a acqua, oli, solventi organici, diluenti
• Non utilizzare il prodotto durante la ricarica.
marrone
nero
blu
sensore
1. Connettere i terminali al sensore (alimentazione, uscita – Teach-in se il sensore lo richie-
de) e accendere il tester
2. Selezionare la modalità di funzionamento (digitale, in corrente, in tensione)
3. A seconda del sensore, premere il pulsante di teach-in (se richiesto)
4. Il risultato della misura è mostrato sullo schermo
!
(1) il prodotto contiene una batteria Li-ion non removibile. Per la spedizione del prodotto, fare riferimento alle
normative nazionali e IATA.
altri colori
Teach in
!
©2022 Datasensing S.r.l.
• Tutti i diritti riservati • Senza con ciò limitare i diritti coperti dal copyright, nessuna
parte della presente documentazione può essere riprodotta, memorizzata o introdotta
in un sistema di recupero o trasmessa in qualsiasi forma o con qualsiasi mezzo, o per
qualsiasi scopo, senza l’espresso consenso scritto di Datasensing S.r.l. • Datasensing e
il logo Datasensing sono marchi di Datasensing S.r.l.
SPECIFICHE
Modalità in
corrente
0 … 20 mA
Accuratezza misura: ≤ 0,04mA
Modalità in
tensione
0 … 10 V
Accuratezza misura: ≤ 0,4V
Rilevazione logica
sensori NPN / PNP (rilevamento automatico)
Tensione di uscita 19 … 24V
Corrente uscita per
sensori ≤ 160mA
Capacità batteria 4000 mAh(1)
Autonomia ≥ 10h (sensori @50mA)
Tempo di ricarica ≤ 9h
Temperatura operativa -10°C … +45°C
Peso 200g
Dimensioni 150x67x26 mm
Funzioni Protezione corto circuito; Sleeping mode; Impulso positivo
Funzioni aggiuntive Lampada LED
CONNECTIONS
1. Connettere i terminali al sensore (alimentazione, uscita – Teach-in se il sensore lo
richiede) e accendere il tester
2. Selezionare la modalità di funzionamento (digitale, in corrente, in tensione)
3. A seconda del sensore, premere il pulsante di teach-in (se richiesto)
4. Il risultato della misura è mostrato sullo schermo
marrone
nero
blu
sensore
altri colori
Teach In
DIMENSIONI
pulsante TEACH-IN
connettore USB OUT
pulsante MODE lampada LED
terminale TEACH-IN
connettore USB IN terminale INPUT
terminale POWER
terminale GND
pulsante ON/OFF
mm
67,67
26,64
132,45
149,83
Datasensing S.r.l.
Strada S. Caterina 235 - 41122 Modena - Italy
Tel. +39 059 420411 - Fax +39 059 253973
mm
67,
6
7
2
6
,
64
132
,45
1
49
,83
Table of contents
Languages:


