manuals.online logo
Brands
  1. Home
  2. •
  3. Brands
  4. •
  5. DaVinci
  6. •
  7. Indoor Furnishing
  8. •
  9. DaVinci Homestead 16126 User manual

DaVinci Homestead 16126 User manual

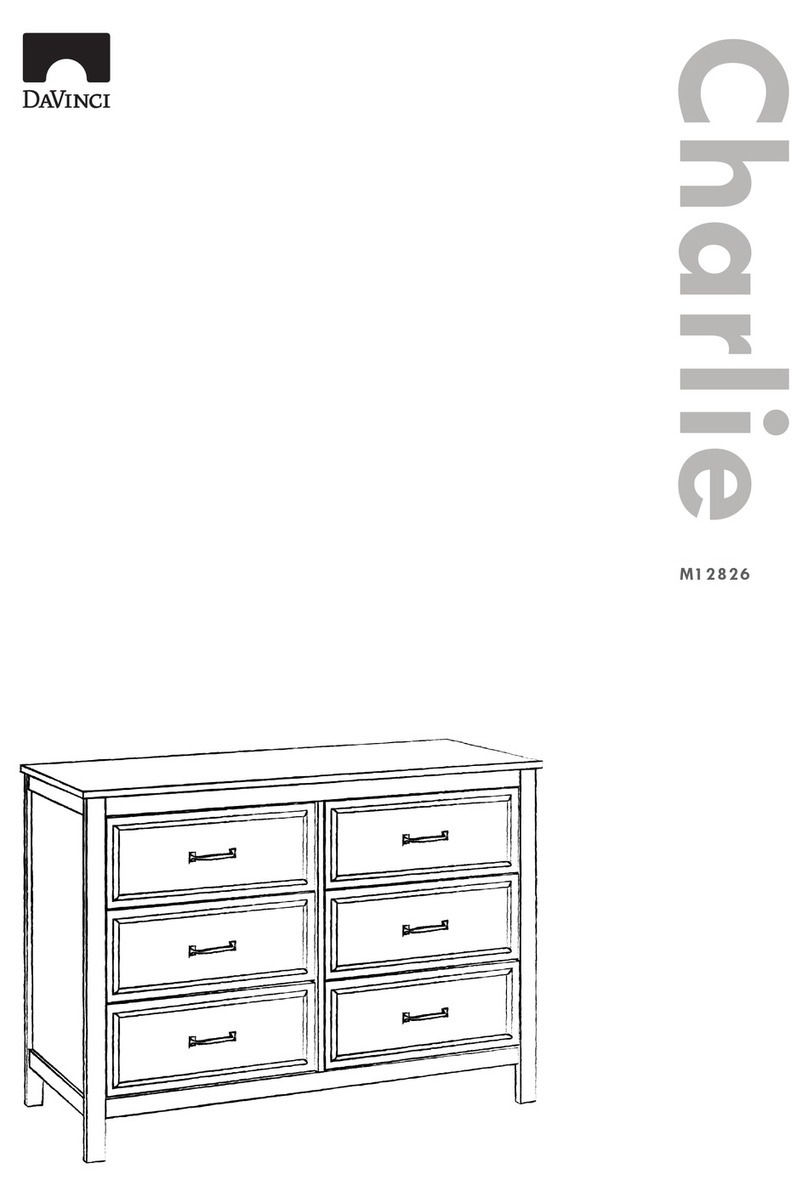
Homestead 6 Drawer Double Dresser Assembly Instructions
Cómoda doble de 6 cajones Homestead Manual de Ensamblaje
Artículo# 16126
revisado 24ENE2018 1
* You will need two people to
assemble this 6 drawer double
wide dresser.
* Necesitará dos personas para
armar esta cómoda de 6 cajones
de doble ancho.
Thank you for purchasing a DaVinci nursery product! To ensure safe use of your product, please
follow these assembly instructions closely. If you are missing parts or have any questions, please
visit our website at www.themdbfamily.com/support.
For assembly, use the Allen wrench if it is included in the hardware box. We also recommend
using a Phillips head screwdriver (not included) to complete assembly. Please do not substitute
parts or use power screwdrivers. Our pieces are made from natural woods. Due to the nature of
wood, some variation in color, grain, or texture is to be expected.
We hope you and your growing family enjoy our product.
With thanks,
DaVinci
¡Gracias por comprar un producto de guardería DaVinci! Para garantizar un uso seguro de su
producto, por favor siga estas instrucciones de montaje de cerca. Si le faltan piezas o tiene alguna
pregunta, por favor Visite nuestro sitio web en www.themdbfamily.com/support.
Para el montaje, use la llave Allen si está incluida en la caja de herramientas. También recomenda-
mos usar un destornillador Phillips (no incluido) para completar el ensamblaje. No sustituya las
piezas ni utilice destornilladores eléctricos. Nuestras piezas están hechas de maderas naturales.
Debido a la naturaleza de la madera, es de esperar cierta variación en el color, el grano o la
textura.
Esperamos que usted y su creciente familia disfruten de nuestro producto.
Muchas gracias,
DaVinci
2
* Tools Needed (not included)
* Herramientas necesarias (no incluidas)
Phillips screwdriver
Destornillador Phillips
PARTS • PIEZAS
C. Middle Panel
C. Panel Central
D. Top Panel
D. Panel Superior
A. Left Side Panel
A. Panel izquierdo
B. Right Side Panel
B. Panel derecho
E. Top Panel Support Rail
E. Riel de soporte del panel superior
F. Back Top Rail
F. Riel Superior Posterior
H. Front Cross Bar (2)
H. Barra cruzada delantera (2)
G. Back Bottom Panel
G. Panel Posterior Inferior
J. Back panel
J. Panel Posterior
K. Drawer front (6)
K. Frente de cajón (6)
I. Front Bottom Panel
I. Panel frontal inferior
Not to Scale/No está a escala
3
HARDWARE • ACCESORIOS DE MONTAJE
Bolts in Actual Size/Tornillos en tamaño real
O. Drawer bottom (6)
O. Fondo de Cajón (6)
M. Right drawer side (6)
M. Lado derecho de cajón (6)
L. Left drawer side (6)
L. Lado izquierdo de cajón (6)
N. Drawer back (6)
N. Posterior de Cajón (6)
H3. 1” Phillips headscrew (48)
H3. Tornillo de cabeza Phillips
de 1 ”(48)
H6. 2/3” Phillips headscrew (14)
H6. Tornillo Phillips de 2/3 "(14)
H1. 1-3/4” Allen Head Bolt (14)
H1. Perno de cabeza Allen
de 1-3 / 4 "(14)
H2. 1” Allen Head Bolt (14)
H2. Perno de cabeza Allen
de 1 "(14)
H5. 0.8 x 3 cm Wood Dowel (23)
H5. Pasador de madera
de 0,8 x 3 cm (23)
H7. Curve Washer (10)
H7. Arandela curva
H4. 1/2” Knob Bolt (12)
H4. Perno de perilla
de 1/2 "(12)
H8. Knob (6)
H8. Perilla (6)
H9. Allen wrench
H9. Llave Allen 4
1
ASSEMBLY INSTRUCTIONS • INSTRUCCIONES DE MONTAJE
5
H2
(Front)
(Frente)
(Back)
(Posterior)
F
G
H5
C
2
6
F
C
G
E
H
H
I
H2
(Front)
(Frente)
(Back)
(Posterior)
H5
3
(Front)
(Frente)
(Back)
(Posterior)
H5
H1
H7
H9
C
B
A
7
E
H
H
I
F
G
H5
H5
H9 H1 H7
H2
H9
4
8
H2
(Front)
(Frente)
(Back)
(Posterior)
B
A
D
C
F
E
H9
H1
H5
H9
H2
H9
5
9
(Front)
(Frente)
(Back)
(Posterior)
B
A
D
J
H6
G
6DRAWER ASSEMBLY INSTRUCTIONS
INSTRUCCIONES DE MONTAJE DE CAJONES
6a
H3
H3
K
L
M
6b
O
K
L
M
10
6d
H4
6c
L
M
N
K
O
H3
H3
H8
H4
K
11
7
(Front)
(Frente) K
K
K
K
K
K
12
13
Serious or fatal crushing can occur when furniture tips over on children. To help prevent tip-over,
follow the steps below to install this anti-tipping strap.
El aplastamiento grave o fatal puede ocurrir cuando los muebles se vuelcan sobre los niños. Para ayudar a
evitar que se vuelque, siga los pasos a continuación para instalar esta correa antivuelco.
FURNITURE ANTI-TIPPING KIT INSTALLATION
INSTALACIÓN DEL DISPOSITIVO ANTI-VUELCO
8(REQUIRED)
(NECESARIO)
Phillips
screwdriver
Destornillador
Phillips
Tools Needed (not included)
Herramientas Necesarias (no incluidas)
Pencil
Lápiz
Stubby
Screwdriver
Destornillador
Corto
X 2X 2
X 1
HARDWARE
ACCESORIOS DE MONTAJE
WARNING
Serious or fatal crushing injuries
can occur from furniture tip-over.
To help prevent tip-over:
Use of tip-over restraints may
only reduce, but not eliminate,
the risk of tip-over.
This is a permanent label.
Do not remove!
Install tipover restraint provided.
Place heaviest items in the lowest
drawers.
Do not set TVs or other heavy
objects on top of this product,
unless the product is specifically
designed to accommodate them.
Never allow children to climb or
hang on drawers, doors, or
shelves.
Never open more than one
drawer at a time.
(OR)
Do not defeat or remove the
drawer interlock system.
ADVERTENCIA
Se pueden producir lesiones por
aplastamiento graves o fatales a
causa de la caída de los muebles.
Para ayudar a prevenir el vuelco:
Esta es una etiqueta permanente.
¡No quitar!
Instale la restricción de vueltas
provista.
Coloque los artículos más pesa-
dos en los cajones más bajos.
No coloque televisores u otros
objetos pesados encima de este
producto, a menos que el produc-
to esté diseñado específicamente
para acomodarlos.
Nunca permita que los niños se
suban o cuelguen de cajones,
puertas o estantes.
Nunca abra más de un cajón a la
vez.
(O)
No anule ni retire el sistema de
enclavamiento del cajón.
El uso de restricciones de vuelco
solo puede reducir, pero no
eliminar, el riesgo de vuelco.
ASSEMBLY INSTRUCTIONS • INSTRUCCIONES DE MONTAJE
8a
8b
8c
Locate a 2” x 4” stud
behind the wall, and make
a mark.
Ubique un perno de 2 ”x 4”
detrás de la pared y haga
una marca.
Install the strap on the
wall with the screw and
washer.
Instale la correa en la pared
con el tornillo y la arandela.
Install the other end of
strap on the back of
dresser with the screw and
washer into the wood
framing of the dresser.
Instale el otro extremo de la
correa en la parte posterior
de la cómoda con el tornillo
y la arandela en el marco
de madera de la cómoda.
14
2” x 4” wall stud
Perno de pared de 2" x 4"
CHANGER TRAY IS NOT INCLUDED, SOLD
SEPARATELY. CHANGER TRAY M0219 OR M0619
MADE BY THE MDB FAMILY IS RECOMMENDED.
LA BANDEJA DEL CAMBIADOR NO ESTÁ INCLUI-
DA, SE VENDE POR SEPARADO. SE RECOMIENDA
LA BANDEJA DEL CAMBIADOR M0219 O M0619
HECHA POR MDB FAMILY.
READ ALL INSTRUCTIONS BEFORE USING
THE PRODUCT. KEEP THE INSTRUCTIONS
FOR FUTURE USE. Recheck all screws and
bolts to be sure they are fastened securely.
Do not overtighten.
LEA TODAS LAS INSTRUCCIONES ANTES DE USAR EL
PRODUCTO. GUARDE LAS INSTRUCCIONES PARA USO
FUTURO. Vuelva a revisar todos los tornillos y pernos
para asegurarse de que estén bien sujetos. No apriete
demasiado. KEEP THIS MANUAL IN A SAFE PLACE FOR
FUTURE REFERENCE.
MANTENGA ESTE MANUAL EN UN LUGAR
SEGURO PARA FUTURAS REFERENCIAS.
15
Finish
Terminado
IMPORTANTE:
Al igual que con todos los muebles para niños y bebés, es importante revisar los sujetadores,
tornillos y pernos periódicamente para verificar que estén apretados. Los padres deben garan-
tizar un entorno seguro para sus hijos revisando los muebles con regularidad antes de colocar
a un niño en el producto.
IMPORTANT:
As with all infant and baby furniture, it is important to check fasteners, screws, and bolts
periodically for tightness. Parents should ensure a safe environment for their children by
checking the furniture regularly before placing a child in the product.
Registering your product is even easier than
before. You can register your product on our
website at :
www.themdbfamily.com/registrations
Registrar su producto es incluso más fácil que antes.
Puede registrar su producto en nuestro sitio web en:
www.themdbfamily.com/registrations
Storage:
Pine woods exchange moisture with the air adjust-
ing to major changes in room temperature and
humidity. Therefore, it is best to place your furniture
away from heating or air-conditioning vents.
Sunlight is not friendly to solid wood furniture and
prolonged direct exposure to harsh sunlight can
discolor the finish. Be careful not to place your furni-
ture in direct sunlight for extended periods of time. As
with all your fine furniture, blot up spills immediately.
•
•
Care and Cleaning:
•
Do not scratch or chip the finish. Do not use
abrasive chemicals for cleaning. Clean with mild
soap on a damp, soft rag. Rinse and dry thoroughly.
If you ever refinish this furniture, be sure to use only
a non-toxic finish specified for children’s products. If
you choose to refinish this furniture, the warranty will
be voided.
Cuidado y Limpieza:
• No raye ni astille el acabado. No utilice productos
químicos abrasivos para la limpieza. Limpie con un
jabón suave sobre un trapo suave y húmedo. Enjuague
y seque bien. Si alguna vez renueva este mueble,
asegúrese de usar solo un acabado no tóxico específico
para los productos para niños. Si decide renovar estos
muebles, se anulará la garantía.
• Las maderas de pino cambian la humedad con el aire
ajustándose a cambios importantes en la temperatura y
la humedad de la habitación. Por lo tanto, lo mejor es
colocar los muebles lejos de las salidas de calefacción o
aire acondicionado.
• La luz solar no es amigable con los muebles de
madera maciza y la exposición directa prolongada a la
luz solar intensa puede decolorar el acabado. Tenga
cuidado de no colocar sus muebles a la luz solar directa
durante largos períodos de tiempo. Al igual que con
todos sus muebles finos, elimine los derrames
inmediatamente.
Almacenamiento:
THE MDB FAMILY
855 WASHINGTON BLVD.
MONTEBELLO, CA 90640
SI DESEA PEDIR EL REEMPLAZO O
PIEZAS QUE FALTAN, POR FAVOR
VISÍTENOS EN:
WWW.THEMDBFAMILY.COM/SUPPORT
O PUEDE CONTACTARNOS POR CORREO:
O ORDER
T US BY MAIL:
IF YOU WOULD LIKE T
REPLACEMENT OR MISSING PARTS,
PLEASE VISIT US AT:
WWW.THEMDBFAMILY.COM/SUPPORT
OR YOU CAN CONTAC
THE MDB FAMILY
855 WASHINGTON BLVD.
MONTEBELLO, CA 90640
T US BY MAIL:
A
OR YOU CAN CONTAC
855 WASHINGTON BLVD.
MONTEBELLO, CA 90640
•
•
16

Other DaVinci Indoor Furnishing manuals
DaVinci Sawyer Farmhouse M24726 User manual

DaVinci

DaVinci Sawyer Farmhouse M24726 User manual

DaVinci JennyLind Changer Installation and operating instructions

DaVinci

DaVinci JennyLind Changer Installation and operating instructions

DaVinci Jenny Lind 7323 User manual

DaVinci

DaVinci Jenny Lind 7323 User manual

DaVinci Olive Glider and Ottoman Maintenance manual

DaVinci

DaVinci Olive Glider and Ottoman Maintenance manual

DaVinci Otto M22526 User manual

DaVinci

DaVinci Otto M22526 User manual

DaVinci 13823 Installation and operating instructions

DaVinci

DaVinci 13823 Installation and operating instructions

DaVinci 4355 User manual

DaVinci

DaVinci 4355 User manual

DaVinci 4798 Installation and operating instructions

DaVinci

DaVinci 4798 Installation and operating instructions

DaVinci 5926 User manual

DaVinci

DaVinci 5926 User manual
DaVinci 1991 Installation and operating instructions

DaVinci

DaVinci 1991 Installation and operating instructions

DaVinci 0934 User manual

DaVinci

DaVinci 0934 User manual

DaVinci Morgan 3 User manual

DaVinci

DaVinci Morgan 3 User manual

DaVinci MADDOX RECLINER AND SWIVEL GLIDER User manual

DaVinci

DaVinci MADDOX RECLINER AND SWIVEL GLIDER User manual

DaVinci 7323 User manual

DaVinci

DaVinci 7323 User manual

DaVinci 5998 Installation and operating instructions

DaVinci

DaVinci 5998 Installation and operating instructions

DaVinci Ryder M23511 User manual

DaVinci

DaVinci Ryder M23511 User manual

DaVinci 4398 User manual

DaVinci

DaVinci 4398 User manual

DaVinci Jenny Lind Twin Bed User manual

DaVinci

DaVinci Jenny Lind Twin Bed User manual

DaVinci Parker 2 Door Changer Installation and operating instructions

DaVinci

DaVinci Parker 2 Door Changer Installation and operating instructions

DaVinci Carter's 0273 User manual

DaVinci

DaVinci Carter's 0273 User manual

DaVinci Kalani M5523 User manual

DaVinci

DaVinci Kalani M5523 User manual
DaVinci Asher 13801 User manual

DaVinci

DaVinci Asher 13801 User manual

DaVinci Marley W4923 User manual

DaVinci

DaVinci Marley W4923 User manual

DaVinci Margot M24926 User manual

DaVinci

DaVinci Margot M24926 User manual

Popular Indoor Furnishing manuals by other brands

Argos 473/8639 Assembly instructions

Argos

Argos 473/8639 Assembly instructions

Hülsta now! no.14 Coffee Table 3612 Assembly instruction

Hülsta

Hülsta now! no.14 Coffee Table 3612 Assembly instruction

Glorious Smart Series installation instructions

Glorious

Glorious Smart Series installation instructions

Costway JV10998 manual

Costway

Costway JV10998 manual

Atlantic Furniture NEWPORT CAPTAIN'S BOOKCASE HEADBOARD Assembly instructions

Atlantic Furniture

Atlantic Furniture NEWPORT CAPTAIN'S BOOKCASE HEADBOARD Assembly instructions

Gami 155 Assembly instructions

Gami

Gami 155 Assembly instructions

Furinno 22271 Assembly instruction

Furinno

Furinno 22271 Assembly instruction

bbf EX17512 instruction manual

bbf

bbf EX17512 instruction manual

LUE BONA GAWAINE Series user manual

LUE BONA

LUE BONA GAWAINE Series user manual

Avante ERGOADJUST DELUX manual

Avante

Avante ERGOADJUST DELUX manual

BDI COSMO CONSOLE 5729 Assembly instructions

BDI

BDI COSMO CONSOLE 5729 Assembly instructions

Dorel Home Products DA3729 Assembly instructions

Dorel Home Products

Dorel Home Products DA3729 Assembly instructions

Ergolux RX8M user guide

Ergolux

Ergolux RX8M user guide

Next ISABELLA 855836 Assembly instructions

Next

Next ISABELLA 855836 Assembly instructions

OSP furniture ASCEND II ACT3120 quick start guide

OSP furniture

OSP furniture ASCEND II ACT3120 quick start guide

GoodHome wilsona 3663602428718 manual

GoodHome

GoodHome wilsona 3663602428718 manual

Hay PIER SYSTEM instruction manual

Hay

Hay PIER SYSTEM instruction manual

Bentley Designs 403X-43 manual

Bentley Designs

Bentley Designs 403X-43 manual

manuals.online logo
manuals.online logoBrands
  • About & Mission
  • Contact us
  • Privacy Policy
  • Terms and Conditions

Copyright 2025 Manuals.Online. All Rights Reserved.