DISPLAY SELECT
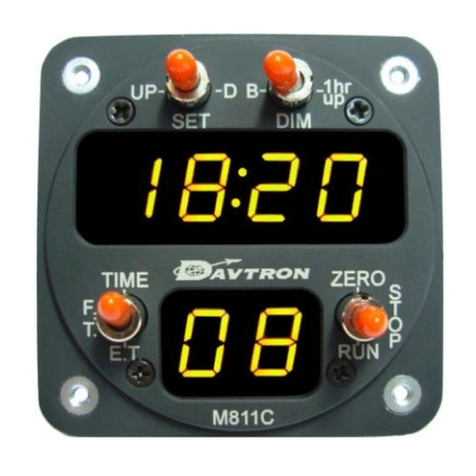
The switch marked Time/F.T./E.T. is a three
position switch that selects the function to be
displayed.
TIME
When the time function is selected, the proper
time will read in hours, minutes, and seconds. The
time channel may be set to local time or G.M.T.
SETTING TO ACCURATE TIME
Davtron sets the clock to the correct GMT time
when it leaves the factory. To change hour, push
Dim/Bright switch to 1hr up position. Each press
or just holding it in the 1hr up position will
increase time by one hour. This setting does not
effect the minutes or seconds. The switch
marked Set is for changing minutes or seconds.
When you hold set switch in UP mode, minutes
will count one per second until 5 seconds elapse,
then minutes speed up to 5 minutes per second.
When you hold set swtich in the D, down postion,
the seconds reset to zero. During the time the
clock is being set, the Elapsed Time and Flight
Time still continue to operate normally. The
Set switch is a momentary switch and automati-
cally returns to the center position.
FLIGHT TIME RECORDER
When the Flight Time channel is selected, the
actual time in flight will be displayed in hours,
minutes, and seconds. The Flight Time channel is
controlled by either applying a voltage to the blue
control lead or ground to the orange control lead.
Anytime during flight the pilot may check total
time in flight. When the aircraft has landed, the
pilot can record total Flight Time. The pilot can
have total Flight Time on a trip with a number of
stops if he avoids returning the Flight Time
recorder to zero. The Flight Time recorder will
total time up to 99 hours. Normally it is
recommended that the Flight Time recorder be
zeroed on the pre start up check list of the
aircraft. The Flight Time can be zeroed by holding
switch to ZERO for 3 seconds.
ELAPSED TIME METER
When the Elapsed Time channel is selected the
Elapsed Time meter will read in hours, minutes,
and seconds. This recorder is fully controlled by
the pilot from the front panel. It may be started,
stopped and returned to zero for elasped time,
approach, time, etc. Total time up to 99 hours.
ELAPSED TIME COUNT DOWN
When the Elapsed Time channel is selected and
the toggle that controls the ET channel is at stop
your ready to set time for the count down time.
Entering the time is identical to setting time.
Once time is updated for ET, push toggle to run
and time will begin to count down. When the
count reaches zero the displays will flash. Toggle
to the Stop position to stop the counting and
flashing but then you can toggle back to RUN to
coninue counting. Toggle to zero to reset to zero
or you can set back to the previous set time by
holding switch to ZERO for 3 seconds.
DIM POSITION FOR DISPLAY
For night operation a Dim position is provided.
Normal position is B or bright.
CHANGING CLOCK FROM
24 to 12HR:
With unit off, hold Bright/Dim switch
in 1hr up position, turn on unit. Unit is now 12HR.
Repeat steps to switch back.
Battery Removal: Recommend to remove &
replace CR2032 battery every 5 years.
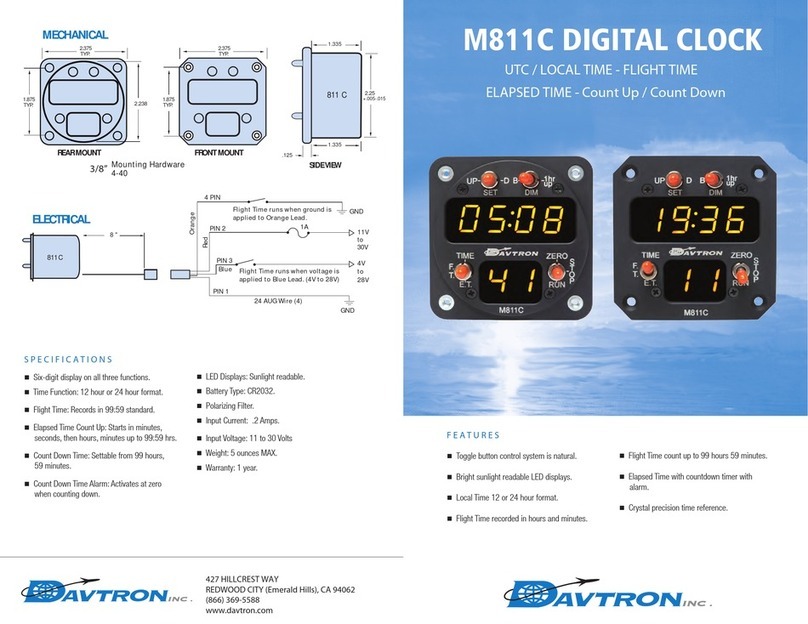
Davtron Model 811C has an internal lithium battery berfore it leaves
the factory. All three functions of the clock are activated and working.
At this time, Davtron sets the clock function to accurate time of GMT.
The Time, Flight Time and Elaspe Time will hold approximately 5 years
without any addtional power. No aircraft keep-alive necessary.
Aircraft power is required to light the display only.
This switch makes minor time
corrections
Position # 1 (up) is a momentary postion
and sets the clock one minute forward for
every second held in the up position. After 5
seconds, mintues speed up to 5 per second.
Position # 2 is the normal position.
Position # 3 (D) is a momentary position
and resets seconds to zero when selected or
held.
This switch sets Bright/Dim, and
makes one hour changes
Position # 1 (B) is the Bright position of the
display for daytime use.
Position # 2 (Dim) is for night time use.
Position # 3 (1 hr. up) is a momentary
position and sets the clock 1 hour ahead for
every time the switch is moved to this
position and released.
This switch selects which chan-
nel is to be displayed
Position # 1 (Time) selects real time. This
channel may be set to G.M.T. time or local
time. Reads in hours, minutes and seconds.
Position # 2 (F.T.) selects Flight Time, reads
in hours, minutes and seconds of actual
flight.
Position # 3 (E.T.) selects Elapsed Time,
reads in hours, minutes and seconds.
This switch control the Elapsed
Time meter
Position # 1 (Zero) is a momentary position
and resets the Elasped Time meter to zero.
The switch returns to position #2 when
released.
Position # 2 (Stop) will stop the Elasped
Time meter.
Position # 3 (Run) starts the Elapsed
Time meter or Count Down Timer.
TENS OF
MINUTES
MINUTES
SECONDS
TENS OF
HOURS
HOURS
TENS OF
SECONDS
1
2
3
1
2
3
123123
MODEL 811C OPERATION
Download installation manual www.davtron.com product page M811C
