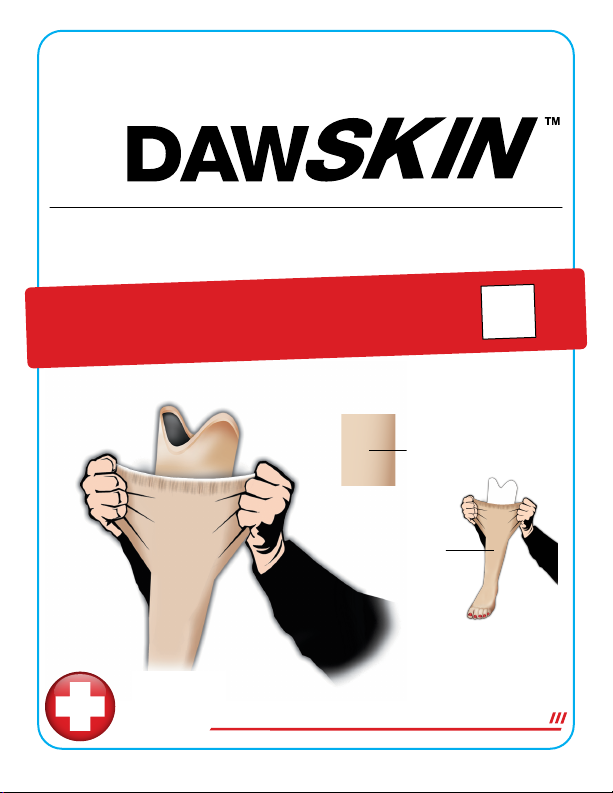
DAW Industries EZ-Access DAWSKIN User manual
DAW®
Industries
DAW
T
echnical Support (800) 242-8669
•
Orders (800) 252-2828
www.daw-usa.com
© Copyright 2021, DAW Industries, San Diego, CA - All Rights Reserved 08272021
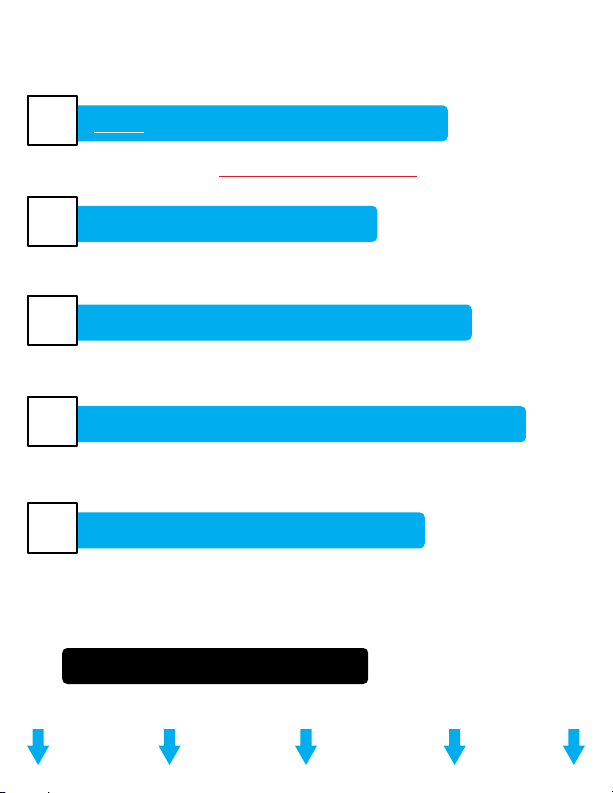
Please Review STEP 1
EZ-Access
FINISHING PROCEDURE
These 2 Pieces Included
EZ-Access
DAWSKIN
EZ-Wrap
1
4
2
3
5
STEP
STEP
STEP
STEP
STEP
Pg. 2. . . . . . . .
. . . . .
. . . . . . . . . .
. . . . . . . . . . . . . .
. . . . . . . . . . . . . . .
Pg. 3
Pg. 5
Pg. 6
Pg. 7
Pg. 4
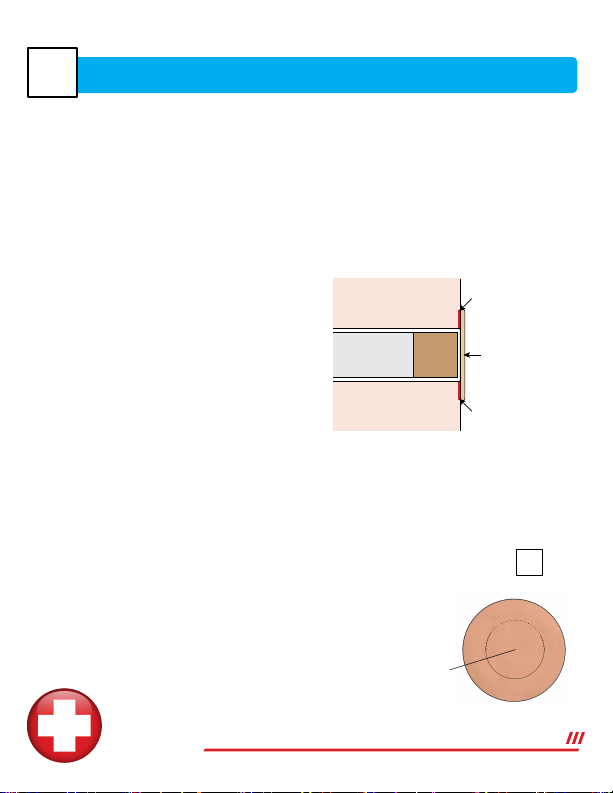
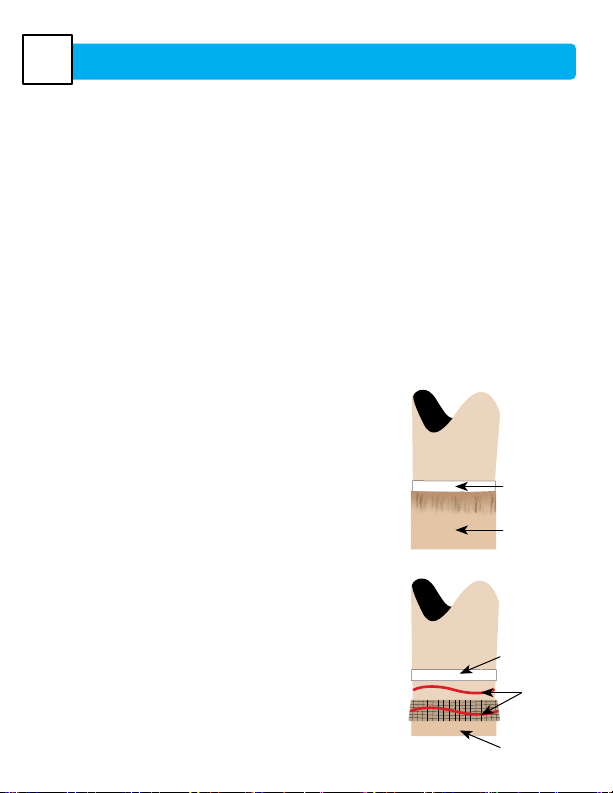
GLUE FOAM COVER TO FOOT SHELL
TABLE OF CONTENTS
WARM, THEN DON THE EZ-ACCESS DAWSKIN
USE WITH A SHUTTLE LOCK?
GLUE EZ-WRAP TO THE SOCKET BRIM
USE WITH AN EXPULSION VALVE?
Experience shows that this DAWSKIN WILL TEAR at the Heel if the
Foam Cover is not securely & permanently glued onto the Foot Shell.
Warming the DAWSKIN makes it much easier
to pull over the heel and onto the leg.
Preserve The DAWSKIN’s Appearance By Using
A Color-Matched Valve Patch (DSK-VP).
Loose Around The Ankle?
Preserve the DAWSKIN’s appearance by adjusting the shuttle lock
button length & prepping it’s hole in the foam cover.
CLEANING INSTRUCTIONS

1
For active patients, or those with hydraulic ankles, ensure a lasting bond remains
between the Foam Cover & the Foot Shell by tapering the top of the Foot Shell and
the inside of the distal end of the Foam Cover.
Follow These Recommended Steps:
1. Be sure to cut Foam Cover longer. Add 1/2” to 3/4” (1.5 cm to 2 cm)
additional length so that it will overlap to top edge of the Foot Shell.
2. Taper inside of distal end of Foam Cover at a 45° angle.
3. Grind square edge of top portion of foot at 45° angle.
4. Glue foam completely to angled top edge of Foot Shell
with barge/poly-adhesive glue.
5. Grind foam for a smooth transition of foot to ankle.
GLUE FOAM COVER TO FOOT SHELL
Experience shows that this DAWSKIN WILL TEAR
at the Heel if the Foam Cover is not securely &
permanently glued onto the Foot Shell.
DAW®
Industries
DAW
© Copyright 2021, DAW Industries, San Diego, CA, All Rights Reserved 07162021
Technical Support (800) 242-8669 •www.daw-usa.com
STEP Pg. 2
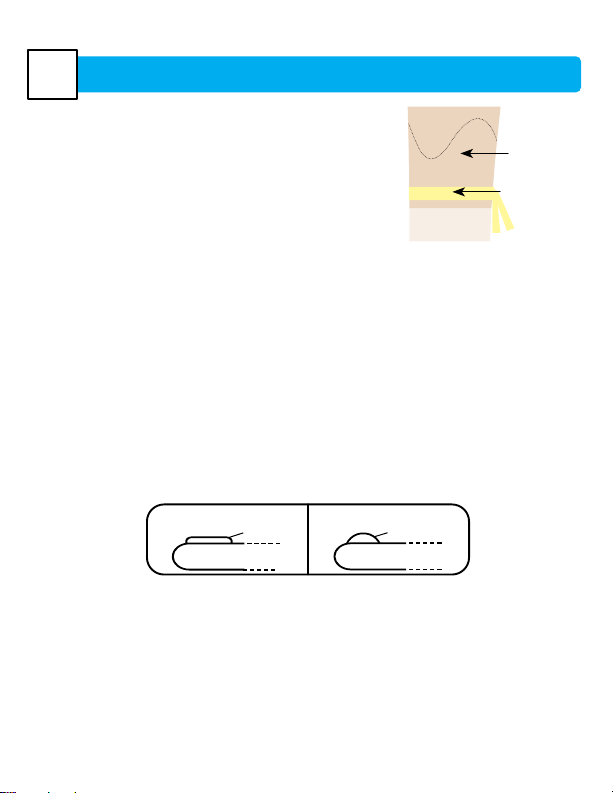
1. Adjust or build-up the length of the shuttle lock button so it rests flush with the
outer surface of the foam cover. With the proper length, your patient can press the
button with the “pad” of their finger, rather than their fingertip, which after repeated
pushes, may cause their fingernail to wear holes in their DAWSKIN.
2. Protect the inside surface of the
DAWSKIN from sharp edges of the
shuttle lock button. Using a scrap
piece of DAWSKIN, make a circular
patch large enough to cover the hole
in the foam cover made for the lock
release button. Glue the patch to the
foam cover with S-Glue.
3. DAW Recommends your patient be trained to press their shuttle lock button
with their finger “pad”, not their finger tip, because it may wear holes in their
DAWSKIN allowing liquid to soak into their foam cover.
Preserve the DAWSKIN’s appearance by adjusting the shuttle
lock button length & prepping it’s hole in the foam cover.
2USING A SHUTTLE LOCK?
Foam Cover
Shuttle Lock
Button
Build
Up
Circular
DAWSKIN
Patch
S-Glue
Foam Cover
S-Glue
DAW®
Industries
DAW
© Copyright 2021, DAW Industries, San Diego, CA, All Rights Reserved 07162021
Technical Support (800) 242-8669 •www.daw-usa.com
5
USING AN EXPULSION VALVE? SEE STEP
Preserve The DAWSKIN’s Appearance By Using
A Color-Matched Valve Patch (DSK-VP).
DAWSKIN Color-Matched
Valve Patch (DSK-VP).
STEP Pg. 3
1. Pull the tubular EZ-Wrap over socket brim far enough
down so that the DAWSkin, when pulled up, will overlap
the bottom edge of the EZ-Wrap by at least 1in (3cm).
2. To keep the EZ-Wrap up in position while gluing,
tie the included latex strap over the EZ-Wrap
approximately 11/2in (4cm) below posterior socket brim.
3. Fold the EZ-Wrap down over the latex strap to expose the socket brim.
4. Glue EZ-Wrap to Socket Brim using Only DAW S-GLUE Regular Formula (DSK-SG):
WARNING: Fasten ONLY with DAW S-Glue. All other fast-setting glues produce
too much heat and will damage the DAWSKIN.
Starting from the posterior brim, apply a thin layer of S-Glue, 1/8” wide, to the
socket brim (see illustration below). S-Glue working time = 6 seconds.
Work in 2 inch sections at a time.
CAUTION: S-Glue must be applied sparingly. Excess application will generate
heat, which can damage the DAWSKIN. Maintain even,
sparing application using applicator nozzle.
5. Without stretching, press the EZ-Wrap over the glue-coated surface. Rub your finger
over the area quickly to smooth the glue between the socket and the DAWSKIN.
6. Hold with pressure for 20 seconds, allowing the S-Glue to cure.
7. Using the same procedure as in Steps 4, 5, & 6 glue anterior brim. Then glue medial
and lateral portions.
8. Once the glue has cured, trim the edge with a sharp blade. The edge can be perfected
using a fine sanding cone on a rotary sander. For the most professional finish, use the
matching color of DAWTRIM to finish the socket brim.
3GLUE EZ-WRAP TO THE SOCKET BRIM
4Do ✘Do Not
S-Glue S-Glue
EZ-Wrap
Latex Strap
STEP Pg. 4
4WARM, THEN DON THE EZ-ACCESS DAWSKIN
1. Warm Using Oven Or Hair Dryer (DO NOT OVERHEAT)
Warming in Oven (Recommended)
Heat oven to 120-Degrees. Place DAWSKIN on edge of oven with door open.
Warm for 90 seconds, then flip. Warm other side for 90 seconds.
Warming with Hair Dryer (NOT A HEAT GUN)
Thoroughly warm the DAWSKIN with a hair dryer to 120º F (5º C).
Use of a heat gun will damage the DAWSKIN (cracking will occur,
though it will not be immediately apparent).
2. Don the EZ-Access DAWSKIN as you would a stocking. While still warm,
carefully stretch DAWSKIN over the heel. Then pull fully up the leg all the way above
the socket brim.
NOTE: For continuous AK covers, check proper
tension by bending knee and straightening, wrinkles
should disappear in seconds
3. Apply 3/4in (2cm) masking tape on EZ-Wrap all the way
around at the top edge of the DAWSKIN. (Img. A)
4. Fold over top 1in (2.5cm) of EZ-Access DAWSKIN. (Img. B)
5. Apply S-Glue “Release Formula” on both the exposed
EZ-wrap below the tape and the folded over portion
of the DAWSKIN. (Img. B)
6. Let glued on surfaces reach a stage of dry-tacky.
(approximately 2 minutes).
7. Unfold the top of the DAWSKIN back over The
EZ-Wrap and apply slight pressure.
8. Remove masking tape.
9. Prosthesis can be dispensed immediately.
Warming the DAWSKIN makes it much easier
to pull over the heel and onto the leg.
Masking Tape
EZ-Access
DAWSKIN
Masking Tape
EZ-Access
DAWSKIN
S-Glue
Release
Formula
Img. A
Img. B
STEP Pg. 5

CAUTION: S-Glue must be applied sparingly. Excess application will generate heat, which
can damage the DAWSKIN. Maintain even, sparing application using applicator nozzle.
4Do ✘Do Not
S-Glue S-Glue
DAW®
Industries
DAW
© Copyright 2021, DAW Industries, San Diego, CA, All Rights Reserved 07162021
Technical Support (800) 242-8669 •www.daw-usa.com
5USING A EXPULSION VALVE?
Preserve The DAWSKIN’s Appearance By Using A Color-Matched Valve Patch (DSK-VP).
1. Make a circular hole in your DAWSKIN and Foam
Cover no larger than 1 5/8 inches in diameter.
2. Apply a thin layer of DAW S-Glue (DSK-SG) onto
the underside of your Valve Patch around the
flap portion. The thinner, the better, as any glue
spreading out beyond the patch will be visible on
the surface of the DAWSKIN.
3. Center the Valve Patch over the foam cover’s
expulsion valve hole. Hold for 20 seconds as the
S-Glue cures.
Air can now exit the prosthesis without damaging your DAWSKIN’s integrity or appearance!
1 5⁄8in
(41mm)
3in
(76mm)
S-Glue
Underside
STEP Pg. 6
DO NOT HEAT SHRINK DAWSKIN. Unlike heat-shrink skins,
DAWSKIN remains elastic to accommodate long-term ankle flexion.
Need a smaller ankle? Use DAWSKIN “Petite Size”.
Loose Around The Ankle?
Stretching the DAWSKIN up the leg more will narrow the ankle.
Refasten the latex strap. Remember that pulling up to narrow
the ankle slightly reduces available stretch for ankle articulation.
1. For general cleaning, the DAWSKIN can be cleaned with soap & water using
a clean soft cloth. Do not use chlorine, acetone or abrasive detergents.
2. In case of marks or stains, use DAWSKIN Cleaner™(DSK-CLEANER).
CLEANING INSTRUCTIONS
DAW®
Industries
DAW
© Copyright 2021, DAW Industries, San Diego, CA, All Rights Reserved 07162021
Technical Support (800) 242-8669 •www.daw-usa.com
CE Authorized Representative
OKO Solution SAS
ROUSSET PARC II,
157 Avenue Gaston Imbert,
13790 Rousset, France
Pg. 7
Table of contents
Other DAW Industries Medical Equipment manuals


