Medtrum S9 User manual
www.medtrum.com
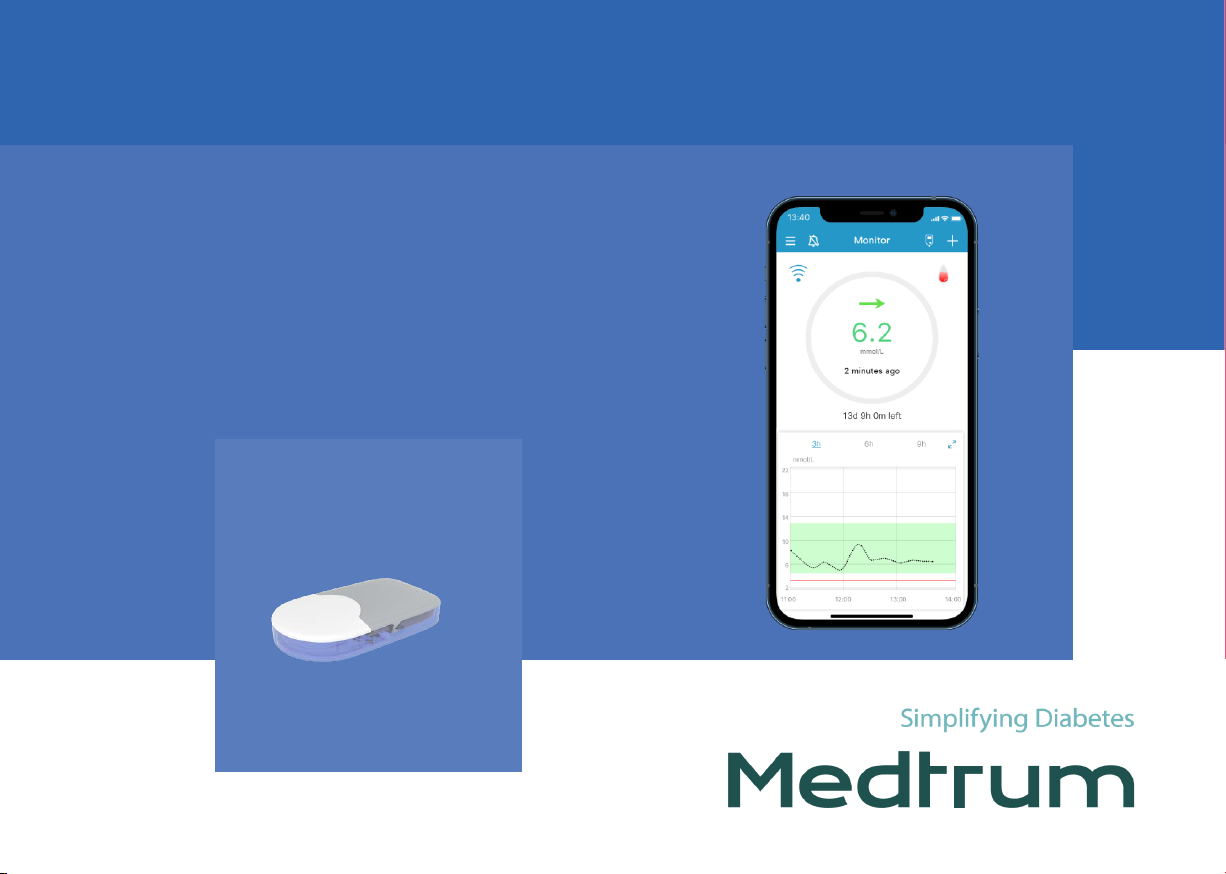
S9 CGM System
Quick Start Guide (mmol/L)

Medtrum Simplifying Diabetes
www.medtrum.com
Overview 1
Mobile Settings 2
Register and Login 3
EasySense Settings 4
Glucose Alerts Settings 5
Apply Sensor 6
Start Sensor 8
Read CGM 9
CGM Alerts 11
Stop Sensor 12
Your Personal Settings 13
Contents
Medtrum Simplifying Diabetes
www.medtrum.com
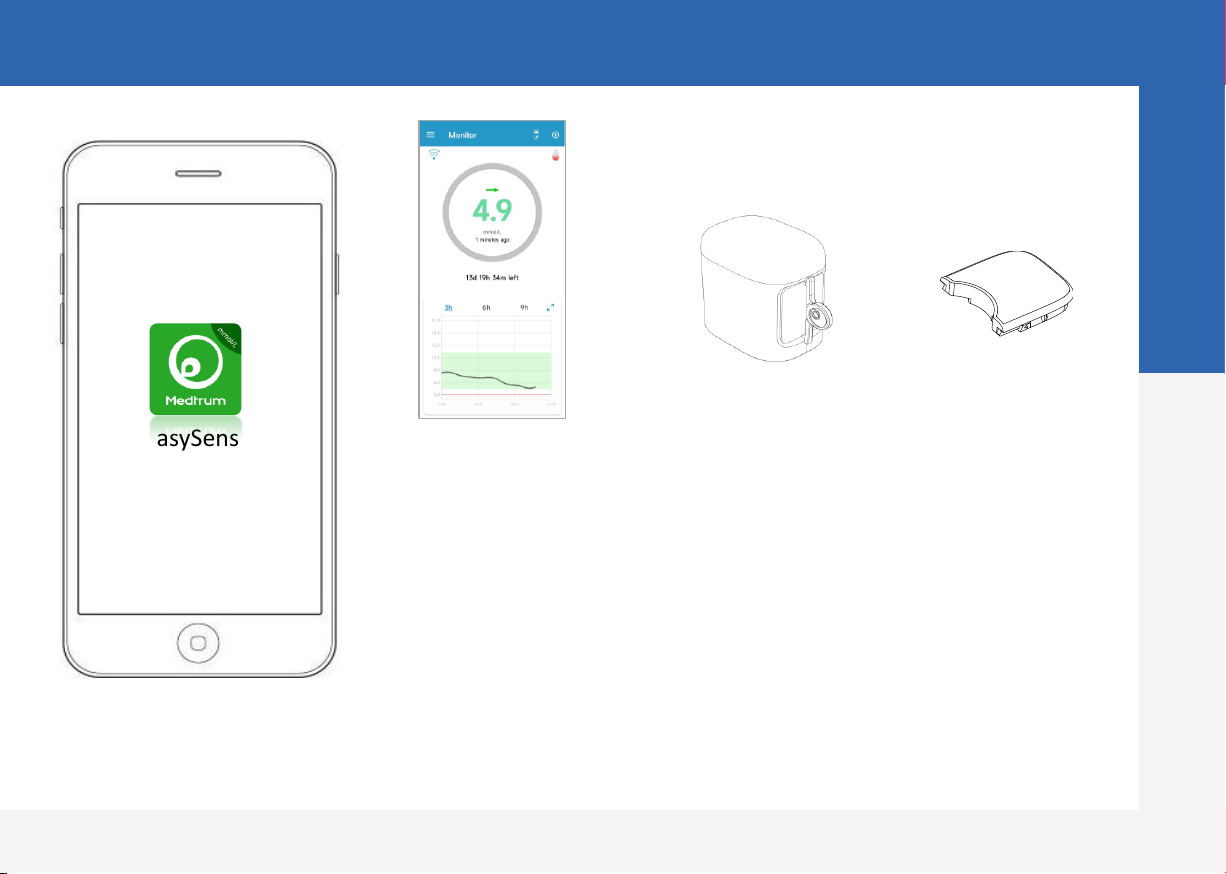
EasySense App
•The Glucose Sensor (MD3660 for 14 days) is inserted under the skin to
measure your glucose level in interstitial fluid.
•The Transmitter (MD1160) records Sensor data and sends data to your smart
device via Bluetooth Low Energy.
•The Sensor (with Transmitter snapped in) is waterproof at 8 feet (2.5 meters)
for 60 minutes (IP28).
•Store the Sensor at temperatures between 2°C (36°F) and 30°C (86°F).
•Store the Transmitter at temperatures between -10°C (14°F) and 55°C (131°F).
Glucose Sensor Transmitter
CGM System Overview
1
EasySense

Medtrum Simplifying Diabetes
www.medtrum.com
2
Mobile Settings
Smart Device Requirements
•IOS device: IOS 11.0 system or later
•Android device: Android 8.0 system or later
Set the following for your EasySense App:
•Bluetooth: Available and turn on
•Silent and Do Not Disturb: Turn off
•Volume: Loud enough for you to hear alerts and
reminders.
•Internet: Make sure your smart device settings allow
EasySense App to use WLAN and mobile data.
•Camera: Grant EasySense access to camera.
•Notifications: Turn on notifications for the EasySense
App.
•Time: Do not change your smart device’s time because
it can make the time on the monitor screen wrong.
•Battery saving mode: Do not activate low battery usage
mode. Otherwise, the app will stop uploading data in
the background.
•EasySense App is open and running in the background.
•Restart the EasySense App after your smart device is
restarted.
If you installed the App on an IOS device:
•Make sure the background refresh for
EasySense App is turned on.
If you installed the App on an Android
device:
•For Android system 8.0 to 11.0, make sure you
allow the App to access device's location so
that the App can use the Bluetooth feature.
•For Android 12.0 system or later, make sure
you turn on Nearby Devices so that the App
can use the Bluetooth feature to connect other
device.
•Make sure the EasySense App is locked in the
background.
•Open auto run in the smart manage
(Samsung).
Recommended Smart Device Settings
See your smart device instructions to learn
how to change its settings.

Medtrum Simplifying Diabetes
www.medtrum.com
1. Install the app
•IOS - Download EasySense App from Apple App Store.
•Android - Download EasySense App from Google Play.
3. Login
Tap the national flag on the top right corner and select the country you chose upon registration, and then log in with
your account and password.
2. Register
•Tap Register to enter the register screen.
•Tap the flag icon and select your Country / Region.
•Enter your email address, tap Get code, then check the Verification Code from
the email you received.
•Enter the verification code, your full name and password.
•Read and agree to the privacy policy and terms of use, tick the small boxes and
tap Create Account to register your Medtrum Account.
Register and Login
3

Medtrum Simplifying Diabetes
www.medtrum.com
3. Find Transmitter SN
You can find the Transmitter SN on the
product box or on the back of the Transmitter.
4. Add Transmitter SN
Tap Add Transmitter and add Transmitter SN by
entering SN manually or scanning QR code.
1. Set audio options
Main Menu ➔Settings ➔General Settings
➔Audio Options
We recommend that you turn Audio and
Vibrate on. If you turn them both off, your
might miss an alert. The snooze time can be
set between 10 minutes and 3 hours.
EasySense Settings
4
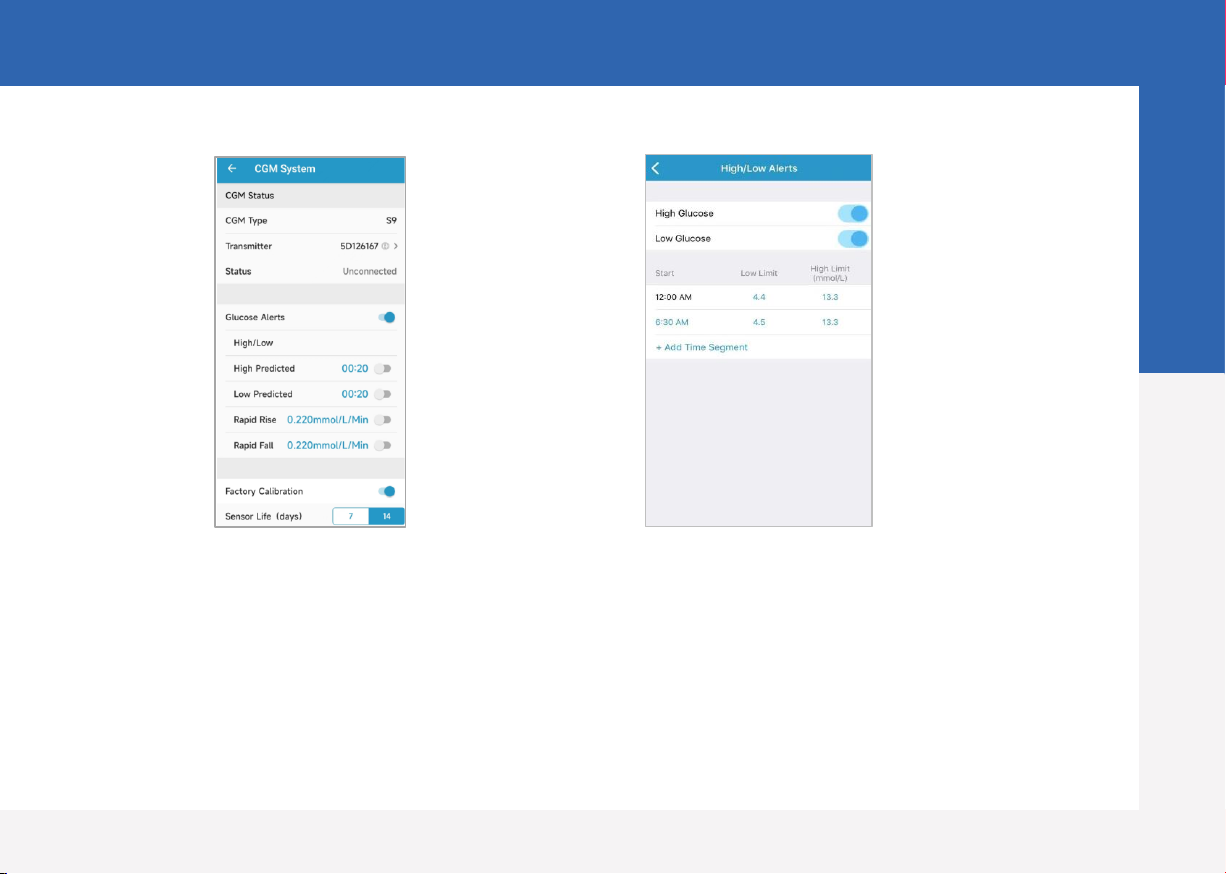
2. Set the CGM Type
Main Menu ➔Settings
➔CGM System ➔CGM Type
Ensure that S9 is selected.
Medtrum Simplifying Diabetes
www.medtrum.com
Rate Alerts
You will be reminded of a glucose rise or fall
faster than the set rate limits.
Main Menu ➔CGM System ➔Glucose Alerts
High/Low Alerts
•You will be reminded when your glucose is
above the set High Limit / below the set Low
Limit
•Up to 8 segments for each day
Predictive Alerts
You will be reminded of a predicted high or
low glucose value some time (the predictive
alert time) in advance.
Glucose Alerts Settings
5
Medtrum Simplifying Diabetes
www.medtrum.com
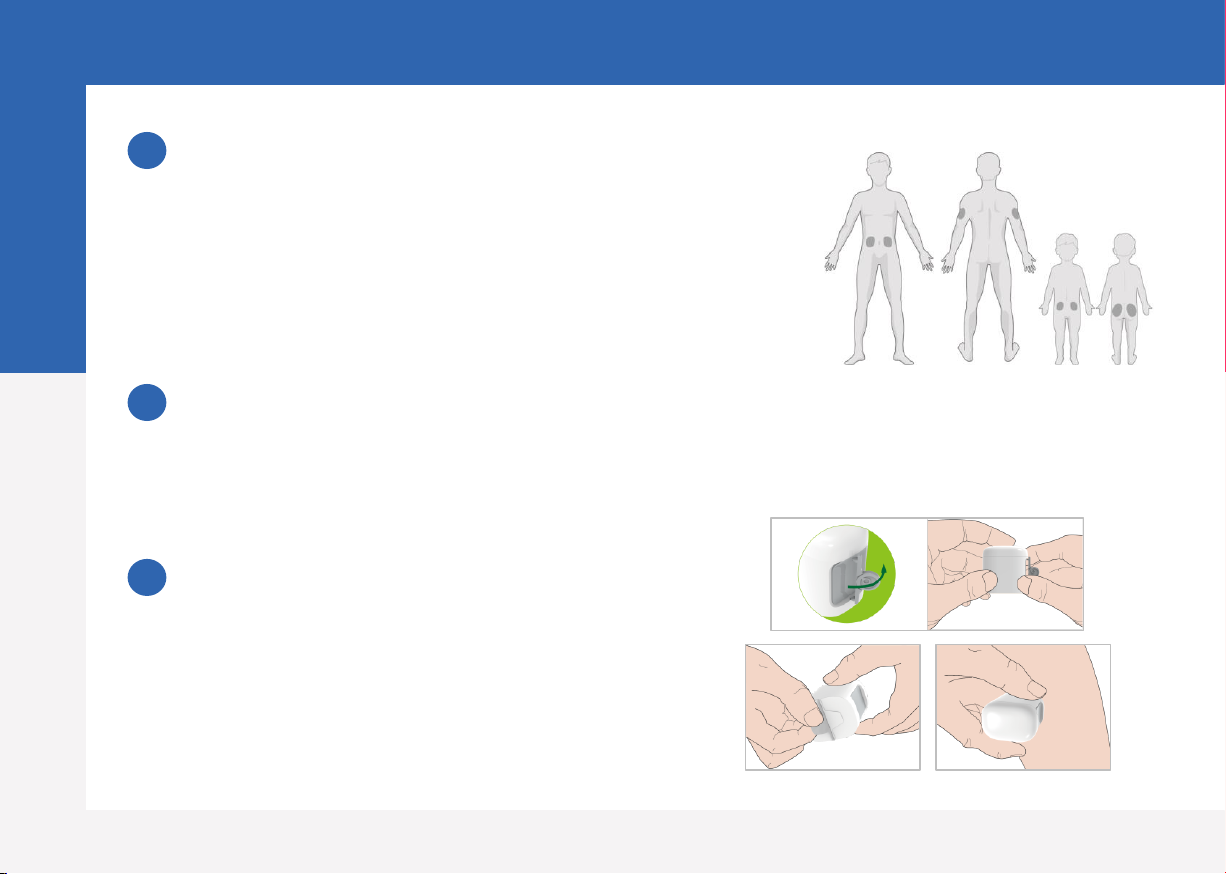
Select an insertion site
•Clean, less hair, no sweat, uncovered, enough fat (at least
5mm thick), away from insulin infusion site.
•Choose an insertion site on the upper arm, apply the
Sensor vertically.
•Choose an insertion site on your abdomen (buttock for
children), apply the Sensor horizontally.
Prepare the insertion site
•Wipe the selected insertion area with rubbing alcohol and
wait for the area to dry up.
•The Sensor adhesive stays more firmly on dry skin.
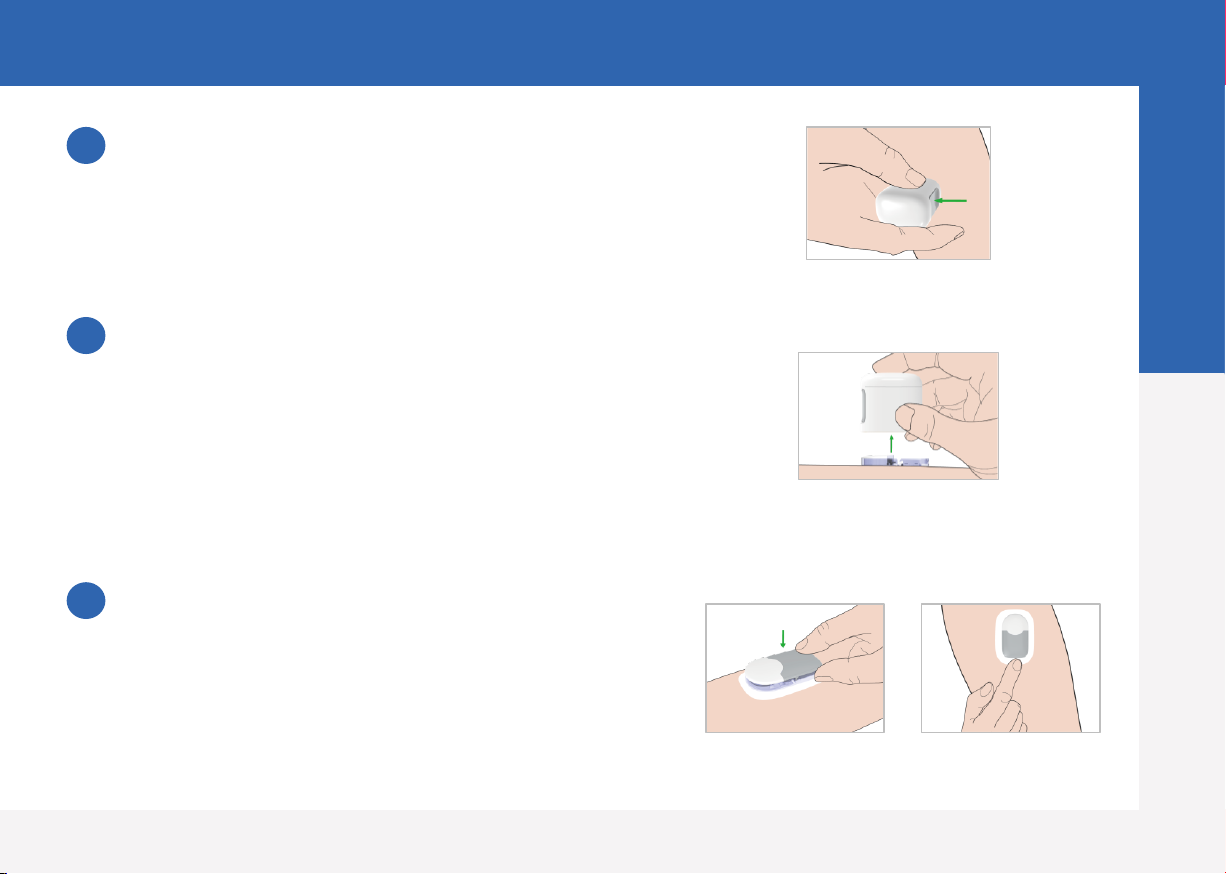
Place the Sensor
•Use your thumb and finger to bend off the
safe lock by pushing it to the left or right.
•Remove the Protective Liner from the Sensor
Support Mount
•Place the Sensor vertically on the upper arm.
1
2
3
Apply Sensor
6
Medtrum Simplifying Diabetes
www.medtrum.com
Insert Sensor needle
•Hold the inserter as shown on the right and press swiftly the
inserter.
Remove the Inserter
•Lift the inserter vertically away from the mount.
•Only the Sensor support mount will be left on your body.
•Discard the sensor inserter into a sharp's container or a
puncture-proof container with a tight lid.
Connect Transmitter
•Snap the Transmitter into the Sensor support mount
•The indicator light will flash green 3 times first then
another 6 times within one minute
4
5
6
Apply Sensor
7

Medtrum Simplifying Diabetes
www.medtrum.com
4. Calibrate the Sensor
•Tap the calibration icon on Monitor Screen,
enter BG and confirm the value.
3. Sensor Warm-up
•When connected, the Sensor will go through a
warm-up period for 30 minutes.
1. Connect the Sensor
•Connect the sensor on Monitor Screen or CGM
menu.
Start Sensor
8
2. Enter the Sensor code
•If the Factory Calibration is turned on, you can enter
the sensor code by scanning the QR code or
manually entering the 4-digit code on the back of
the sensor, then the calibrations aren't required.
•If the sensor code is not entered, the sensor need
to be calibrated twice on the first day.

Medtrum Simplifying Diabetes
www.medtrum.com
Home Screen Sensor Status
Sensor Condition
•Warm-Up - Sensor is warming up.
•ERR - Sensor shall be recalibrated after 15 minutes.
•BG - Sensor shall be recalibrated now.
•??? - No readings.
•LOST - Sensor signal is lost.
•HIGH - Sensor glucose is above 22.2 mmol/L (400mg/dL).
•LOW - Sensor glucose is below 2.2 mmol/L (40mg/dL).
•Underlined reading (Only appears when no sensor code is entered) -
Calibration overdue. A new meter BG is needed for calibration.
•Connecting - If this message remains for long time, it indicates
Bluetooth communication issue or incorrect SN.
•Connecting Sensor - If this message remains for long time, it
indicates sensor insertion failure.
•
Read CGM
9
1. CGM Signal
2. Main Menu
3. Calibration
4. Add Event
5. Sensor Status
6. Sensor Trend Graph
4
5
6
2
1
3
Medtrum Simplifying Diabetes
www.medtrum.com
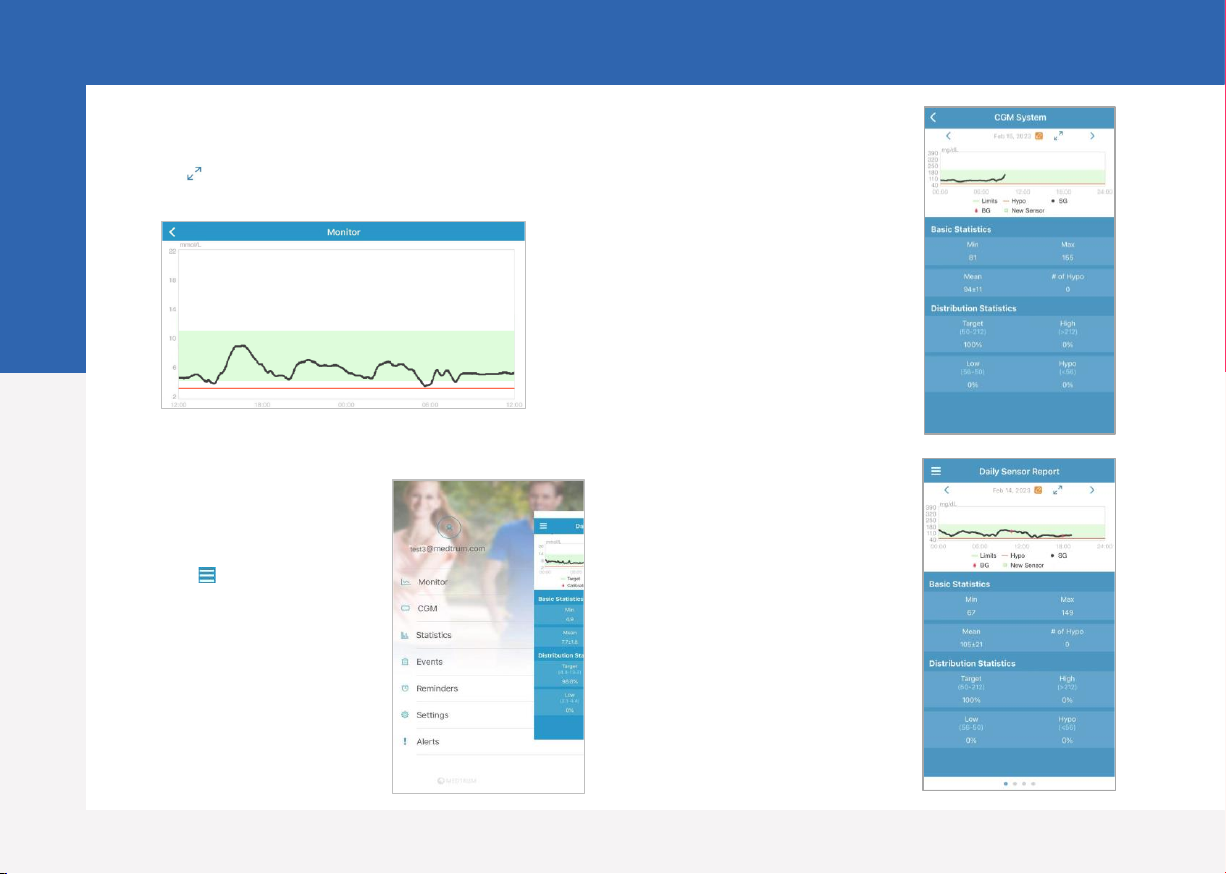
Detailed Glucose
Information
Tap the Sensor Status
area to go to Detailed
Glucose screen
Landscape View
Tap to view a graph in landscape mode
Statistics
Main Menu ➔
Statistics
Slide the screen to view
four types of Statistics:
Daily Sensor Report,
Sensor Overlay, Trend
Analysis and Event
Summary.
Main Menu
Tap at the top-left
corner to open the
Main Menu
Read CGM
10

Medtrum Simplifying Diabetes
www.medtrum.com
App Messages Actions to Take
LOST SENSOR Move your smart device close to
the Transmitter.
METER BG NOW Enter a new meter BG for
calibration.
SENSOR CALIBRATION
ERROR
Enter meter BG after 15 minutes.
SENSOR END IN 6 HOURS,
SENSOR END IN 2 HOURS,
SENSOR END IN 30 MINUTES
Change sensor in time
SENSOR EXPIRED, SENSOR
FAILURE, Change Sensor
Change Sensor now.
SENSOR BATTERY LOW Change Sensor in time.
NO READINGS Check if the sensor gets bumped
or dislodged. If not . If the sensor is
dislodged, change sensor.
TRANSMITTER ERROR Call customer support.
HIGH GLUCOSE, Low
GLUCOSE, HIGH PREDICTED,
LOW PREDICTED, RAPID RISE,
RAPID FALL, BELOW 3.1
mmol/L (BELOW 56 mg/dL)
Check blood glucose and treat as
necessary. Continue to monitor
blood glucose.
Alerts Examples
Alerts:
Alerts are trigged by conditions that may require
your attention. Do not ignore the Alerts.
Clear an alert:
•Read the alert message on the App.
•Tap OK on the App to acknowledge the alert.
•Follow the instructions in the alert message.
App running in the background
App running in the foreground
CGM Alerts
11
Medtrum Simplifying Diabetes
www.medtrum.com
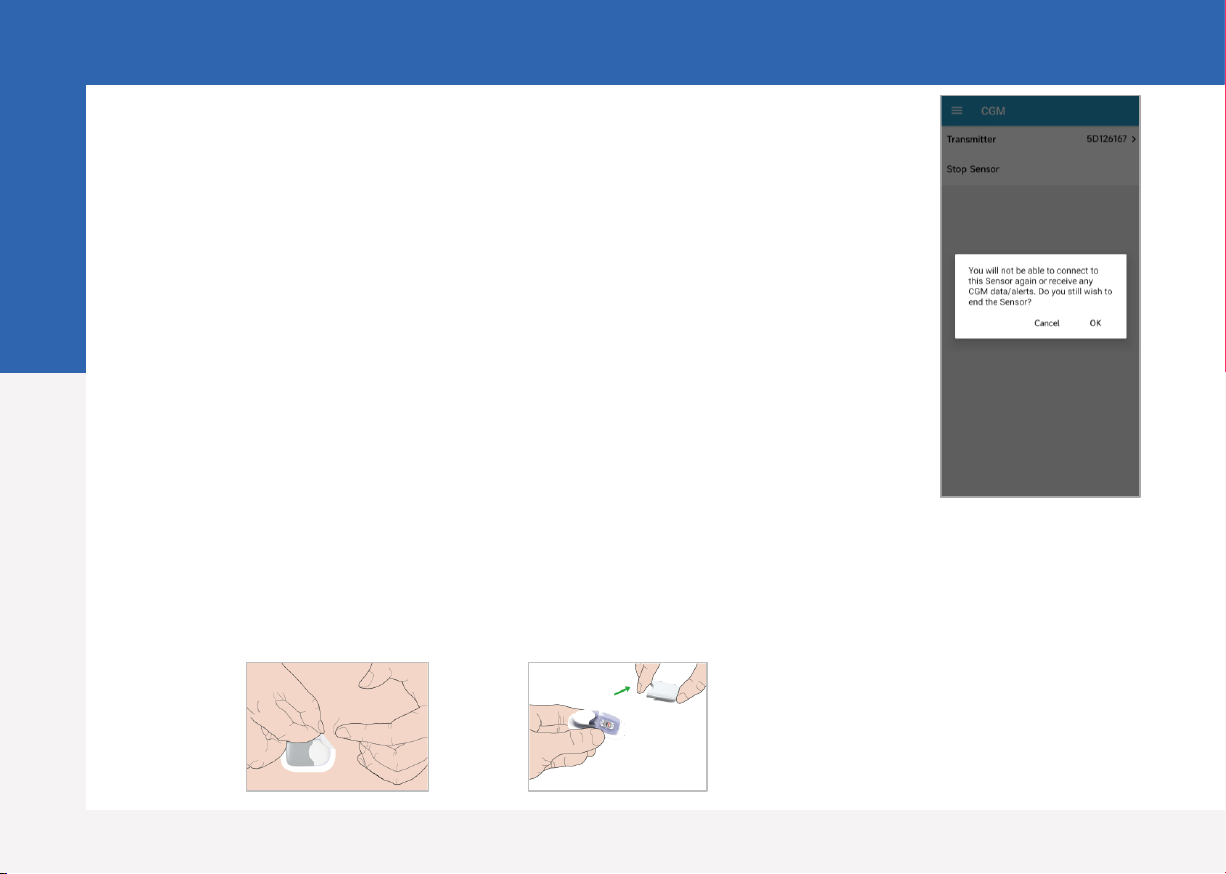
Stop Sensor
•If the Sensor Expiration alerts are on, each Sensor session will end
automatically 14 days. After that, you can remove the Sensor from body.
•If you want to remove a Sensor before its expiration, you must stop it
from your EasySense App first.
Main Menu ➔CGM ➔Stop Sensor
Remove the Sensor
•Gently peel the adhesive pad off your skin in one continuous movement to remove
the Sensor and Transmitter.
•Fold and break the sensor support mount, and gently pull the Transmitter away from
the sensor support mount.
•Discard the Sensor support mount and reuse the Transmitter.
•Make sure the Transmitter was disconnected from the old Sensor for at least 90
seconds before it is connected to a new one.
Stop Sensor
12

Medtrum Simplifying Diabetes
www.medtrum.com
Glucose Alerts
ON OFF
Glucose Limits (mmol/L)
Start Time Low Limit High Limit
:
:
:
:
:
:
:
:
Predictive Alerts
Type Status / Time
High ON OFF
Low ON OFF
Rate Alerts (mmol/L/min)
Type Status / Rate
Rise ON OFF
Fall ON OFF
Repeat/Snooze
High /
Low /
Others /
Your Personal CGM Settings
13
www.medtrum.com
Medtrum Technologies Inc.
Building 3 and Building 8, No. 200, Niudun Road
Shanghai 201203, China
Tel: +86-21-50274781
Fax: +86-21-50274779
This product complies with Directive
93/42/EEC (MDD) and Directive
2014/53/EU (RED).
MD1160
IM883260WW-001
348733
Version: 1.05
Medtrum B.V.
Nijverheidsweg 17
5683 CJ Best
The Netherlands
Tel: +31 (0) 499745037
Other manuals for S9
1
Table of contents
Other Medtrum Medical Equipment manuals


Popular Medical Equipment manuals by other brands


Pro Orthic
Pro Orthic NIGHT SPLINT Product information

Otto Bock
Otto Bock 12K41 Instructions for use

Neuroelectrics
Neuroelectrics Enobio 8 Getting started

Karl Storz
Karl Storz VITOM TH 200 instruction manual

Innovative Neurotronics
Innovative Neurotronics The WalkAide System Clinical manual

medi
medi protect.Maternity belt Instructions for use