Days 841 User manual
841 & 842 SHOWER CHAIRS
PTO
Introduction
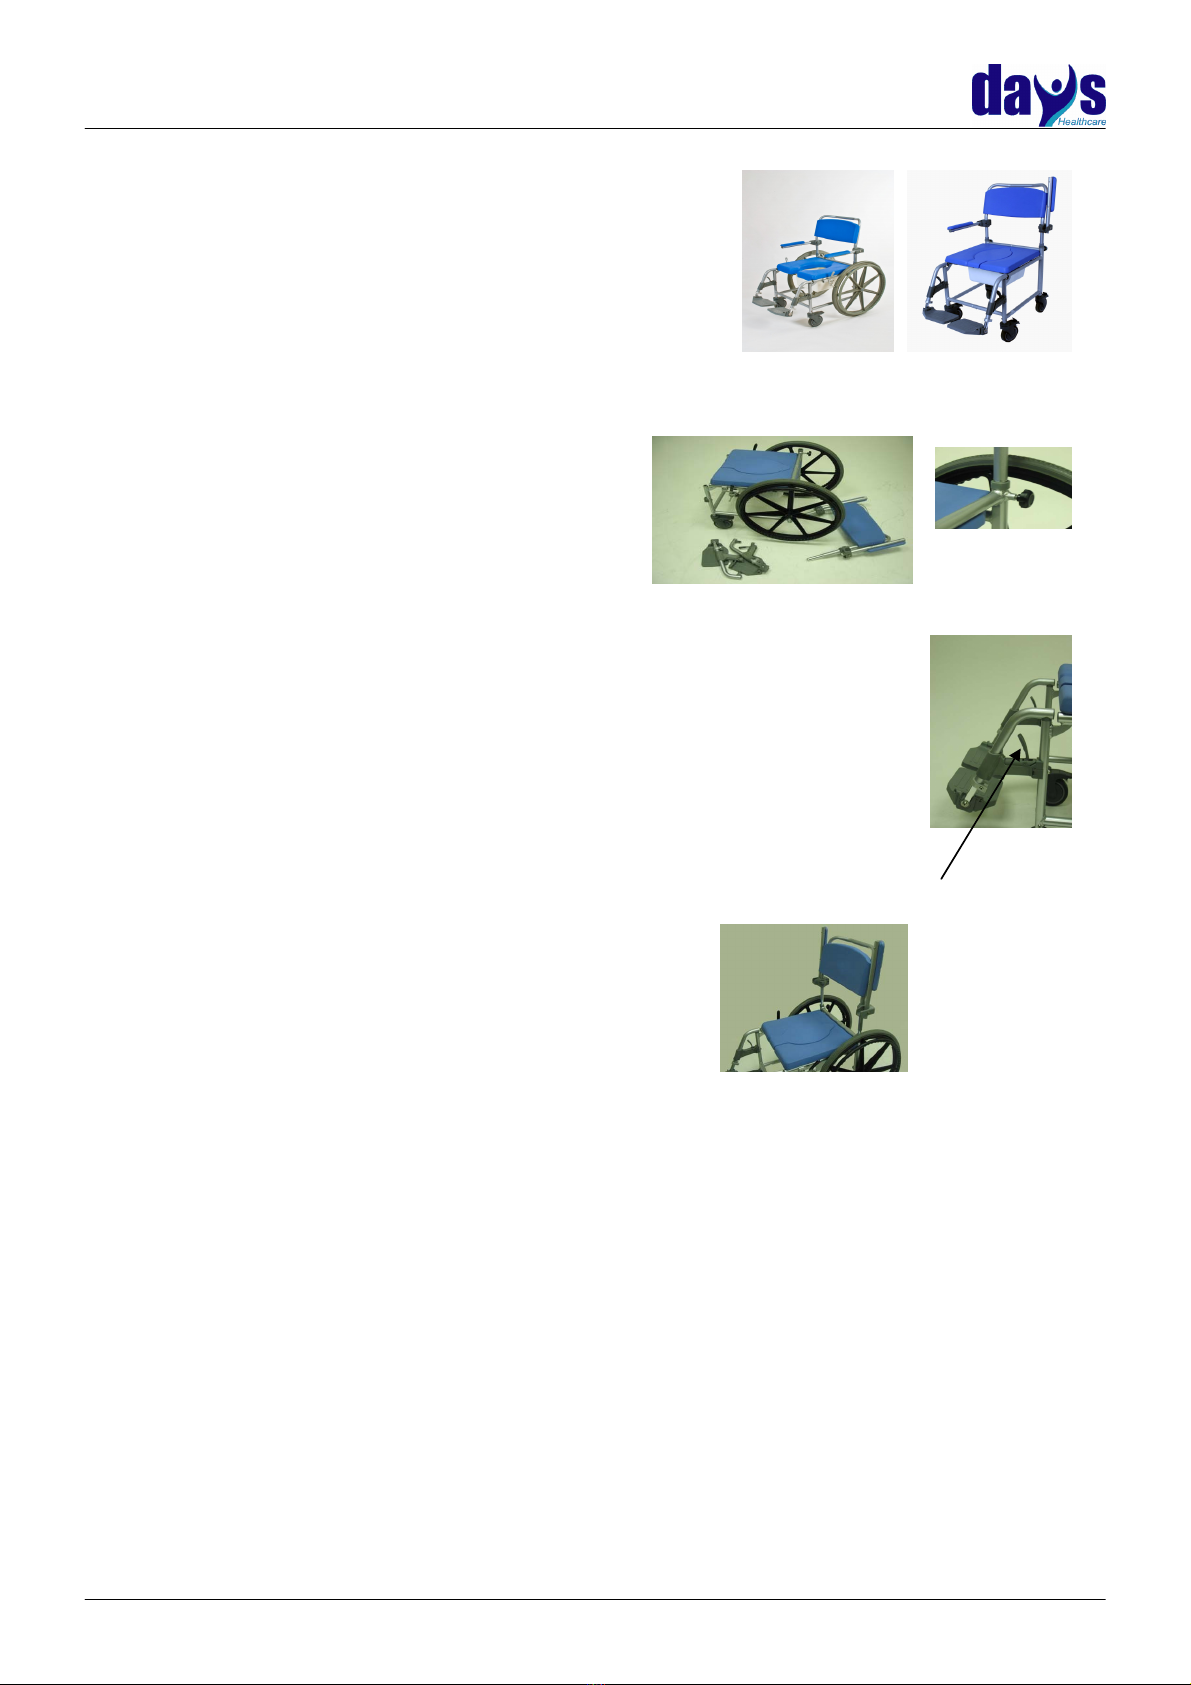
The Days Healthcare 841 and 842 range of Shower Chairs
are manufactured from powder coated aluminium tu ing
with swing-away detacha le footrests and lift up arms.
The ack support incorporates a pushing handle for atten-
dant use when required . A gap fronted seat allows the
chairs to e used as a commode or over a toilet pedestal.
Assembly
The product is shipped from Days Healthcare Ltd
with the ack assem ly and footrests detached,
see (fig 1). The ackrest is easily fitted into the
ase tu e and is secured in place y tightening
up the hand kno s (fig 2)
Swing-away footrests
The footrests can e rotated away from the front of the chair or removed
completely to aid access to the chair.
Depress the plastic locking lever to release holding mechanism (fig 3) , lift to
remove or rotate footrests to the rear.
The footrest will click to lock when returned to the front of the chair.
To adjust the footplate height , remove the height adjustment screw with the
hexagon key provided , adjust the footplate to the required position and refit
screw into the nearest hole and tighten to secure.
Armrests
The armrests can e lift upright for side transfer (Fig 4).
Operating Instructions
The 842 Mo ile Shower Chair is fitted with four 125mm castors and is designed for the user
to e positioned y an attendant . When in use the chair can e secured y locking the
rakes on the castors with your foot y pressing down on the castor levers .To release , pull
up on the lever .
The 841 model is fitted with 24” rear wheels thus allowing the user to self propel themselves
into position. When in use the chair can e secured y pushing the rake levers fully forward
to lock the rear wheels . To release , pull the levers ack .
The tension of the rake may e adjusted y loosening the rake support racket and sliding
it along the frame . Re-tighten the two clamp olts after adjustment.
Both models are supplied with toileting owls which can e removed from the rear of the
chair when showering or using a pedestal toilet . When refitting the owl , ensure the owl is
seated in oth slides underneath the seat and centrally positioned .
841 842
Fig 2
Fig 1
Fig 3
Locking Lever
Fig 4

D/N: B2-018-03
Safety Precautions
Do not stand on the footrests when getting in or out of the chair as this will tip the chair
forwards. Always apply the rakes when using the chair for showering or toileting to
avoid unnecessary chair movement. Remem er in a shower environment the floors are
wet and slippery. Be aware that if the user leans too far forward in the chair and takes the
weight off the rear wheels the chair could slide ackwards even with the rakes applied.
Do not sit on the front edge of the seat as this will also tend to tip the chair forward.
Maintain an upright posture and lean against the ackrest.
WARNING! - Always take extra care when getting in or
out of the shower chair
Cleaning
To clean, wipe over with a soft damp cloth. Use general purpose neutral detergent and
warm soapy water. The shower chair may e placed under running water at low pressure
or showered down to assist cleaning. Do not use harsh a rasives or leach ased cleaners
to avoid surface damage and discolouration. To disinfect clean as a ove and wipe over
with solution of one thousand parts per million availa le chlorine disinfectant (hazta s/
precept), rinse and dry.
Maintenance
Daily, efore use, check the effective operation of the rakes and castors.
Make sure the castors rotate freely .
Check the seat is properly secured in place y the front clips .
Both armrests are securely locked in height .
Footrests and footplates are secure in position .
Specification
Spare Parts
Warranty Information
The Days Healthcare Shower Chairs are warranted for one year from the date of purchase
against faulty workmanship or materials. Please contact your supplier/dealer should a
fault occur.
The warranty does not extend to the consequential costs resulting from fault clearance, in
particular freight and travel costs, loss of earnings, expenses, etc.
The manufacturer will not accept responsi ility for any damage or injury caused y misuse
or non-o servance of the instructions set out a ove.
email: info@dayshealthcare.co.uk
Model No.
Seat Width Seat Height Overall Width Overall Height Max. User Weight
841 & 842 445 mm 540 mm 700 mm 990 mm 125 Kg
Spare Parts No. Description
CM517605L Left footrest
CM517605R Right footrest
HH124 Hand knob
This manual suits for next models
1
Table of contents
Other Days Wheelchair manuals

Days
Days ANI-RC440 User manual

Days
Days Link TR User manual

Days
Days 338 Escape LITE User manual

Days
Days 388 Escape SE User manual

Days
Days Escape Lite User manual

Days
Days 338 Escape LITE User manual

Days
Days 09 146 3090 User manual

Days
Days VERB User manual

Days
Days Whirl TR User manual

Days
Days HP-3DX Escape User manual


Popular Wheelchair manuals by other brands


FoiCare
FoiCare FC-P2 user manual

Decon wheel
Decon wheel R82 Kudu Assembly instructions

Sunrise
Sunrise BREEZY P10 user guide

Drive DeVilbiss
Drive DeVilbiss Ecotec 2G operating instructions

Nuprodx
Nuprodx MULTICHAIR BIG WHEEL Series ASSEMBLY & PACKING INSTRUCTIONS

Permobil
Permobil ROHO AGILITY CARBON Operation manual


