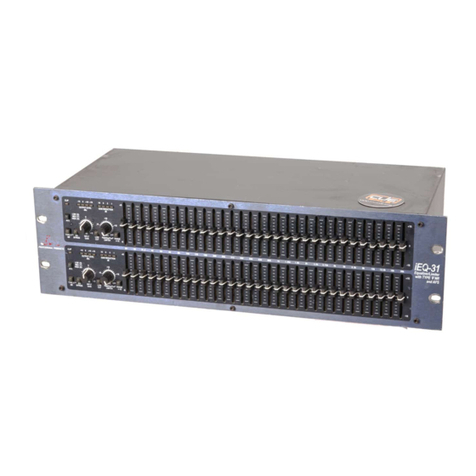
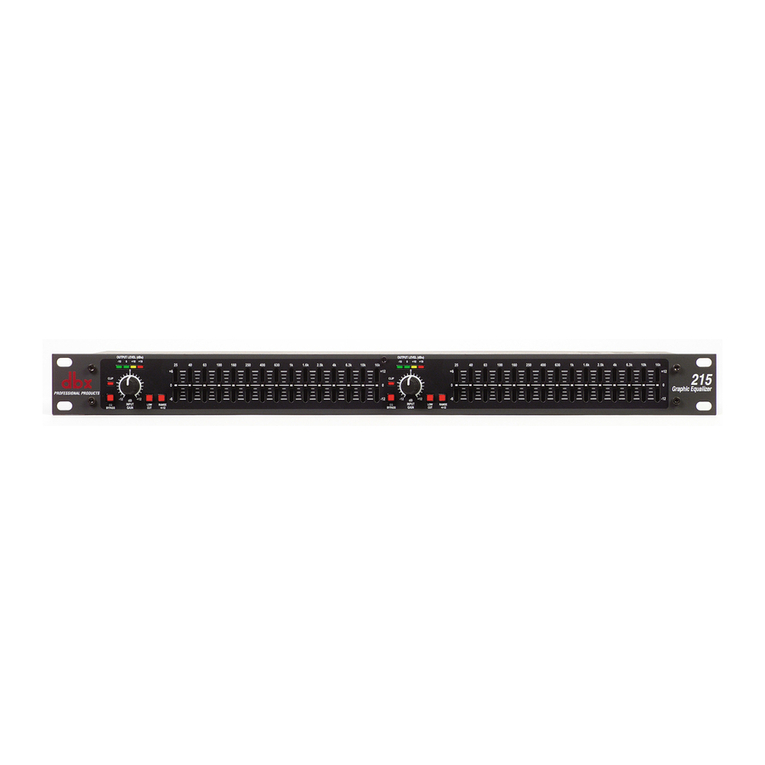
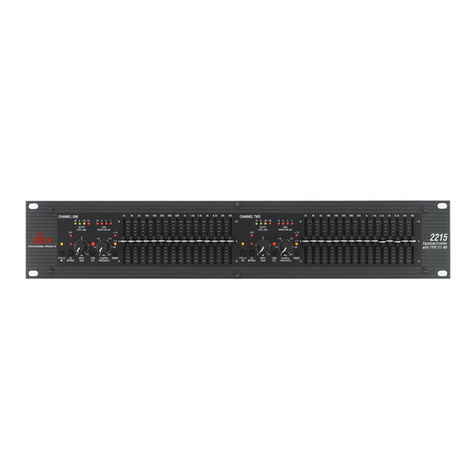
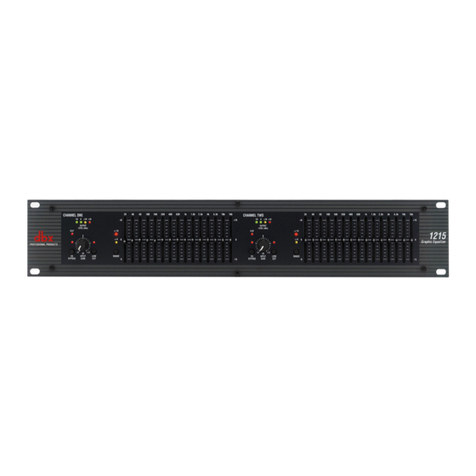
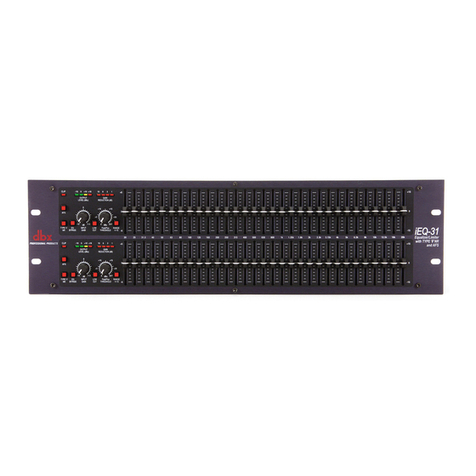
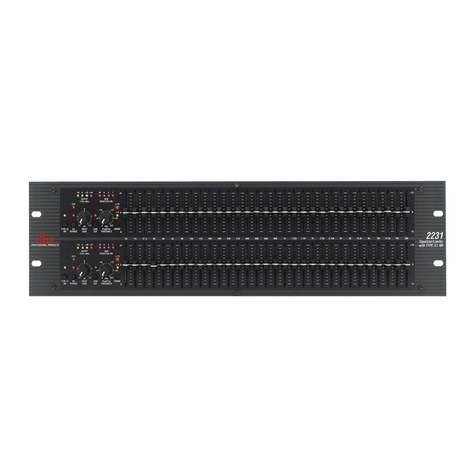
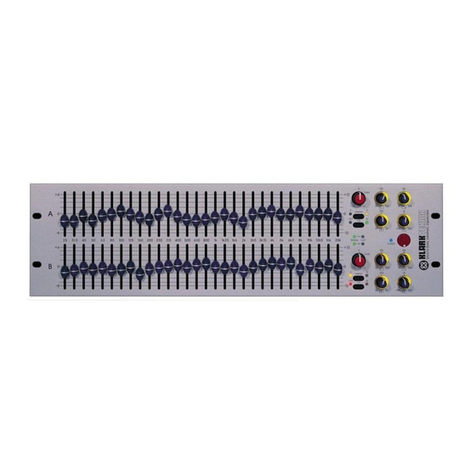
dbx 12 Series User manual

OPERATION MANUAL
MODE D’EMPLOI
BEDIENUNGSANLEITUNG
MODO DE EMPLEO
12 SERIES
EQUALIZER

IMPORTANT SAFETY INFORMATION
The symbols shown above are internationally accepted symbols that warn of
potential hazards with electrical products. The lightning flash with arrowpoint in
an equilateral triangle means that there are dangerous voltages present within
the unit. The exclamation point in an equilateral triangle indicates that it is nec-
essary for the user to refer to the owner’s manual.
These symbols warn that there are no user serviceable parts inside the unit. Do
not open the unit. Do not attempt to service the unit yourself. Refer all servic-
ing to qualified personnel. Opening the chassis for any reason will void the
manufacturer’s warranty. Do not get the unit wet. If liquid is spilled on the unit,
shut it off immediately and take it to a dealer for service. Disconnect the unit
during storms to prevent damage.
CAUTION
ATTENTION:
RISQUE DE CHOC ELECTRIQUE - NE PAS OUVRIR
WARNING:
TO REDUCE THE RISK OF FIRE OR ELECTRIC
SHOCK DO NOT EXPOSE THIS EQUIPMENT TO RAIN OR MOISTURE
RISK OF ELECTRIC SHOCK
DO NOT OPEN
WARNING FOR YOUR PROTECTION
READ THE FOLLOWING:
KEEP THESE INSTRUCTIONS
HEED ALL WARNINGS
FOLLOW ALL INSTRUCTIONS
THE APPARATUS SHALL NOT BE EXPOSED TO DRIPPING OR SPLASHING
LIQUID AND NO OBJECT FILLED WITH LIQUID, SUCH ASVASES, SHALL BE
PLACED ON THE APPARATUS.
CLEAN ONLY WITH A DRY CLOTH.
DO NOT BLOCK ANY OF THE VENTILATION OPENINGS. INSTALL IN AC-
CORDANCE WITH THE MANUFACTURER’S INSTRUCTIONS.
DO NOT INSTALL NEAR ANY HEAT SOURCES SUCH AS RADIATORS,
HEAT REGISTERS, STOVES, OR OTHER APPARATUS (INCLUDING AMPLI-
FIERS) THAT PRODUCE HEAT.
ONLY USE ATTACHMENTS/ACCESSORIES SPECIFIED BY THE MANUFAC-
TURER.
UNPLUG THIS APPARATUS DURING LIGHTNING STORMS OR WHEN
UNUSED FOR LONG PERIODS OF TIME.
Do not defeat the safety purpose of the polarized or grounding-type plug. A
polarized plug has two blades with one wider than the other. A grounding
type plug has two blades and a third grounding prong. The wide blade or third
prong are provided for your safety. If the provided plug does not fit your outlet,
consult an electrician for replacement of the obsolete outlet.
Protect the power cord from being walked on or pinched particularly at plugs,
convenience receptacles, and the point where they exit from the apparatus.
Use only with the cart stand, tripod bracket, or table specified by the manufac-
ture, or sold with the apparatus. When a cart is used, use caution when moving
the cart/apparatus combination to avoid injury from tip-over.
Refer all servicing to qualified service personnel. Servicing is required when
the apparatus has been damaged in any way, such as power-supply cord or plug
is damaged, liquid has been spilled or objects have fallen into the apparatus, the
apparatus has been exposed to rain or moisture, does not operate normally, or
has been dropped.
POWER ON/OFF SWITCH: If the equipment has a Power switch, the Power
switch used in this piece of equipment DOES NOT break the connection from
the mains.
MAINS DISCONNECT: The plug shall remain readily operable. For rack-mount
or installation where plug is not accessible, an all-pole mains switch with a
contact separation of at least 3 mm in each pole shall be incorporated into the
electrical installation of the rack or building.
FOR UNITS EQUIPPED WITH EXTERNALLY ACCESSIBLE FUSE RECEPTA-
CLE: Replace fuse with same type and rating only.
MULTIPLE-INPUTVOLTAGE:This equipment may require the use of a different
line cord, attachment plug, or both, depending on the available power source at
installation. Connect this equipment only to the power source indicated on the
equipment rear panel.To reduce the risk of fire or electric shock, refer servicing
to qualified service personnel or equivalent.
If connected to 240V supply, a suitable CSA/UL certified power cord shall be
used for this supply.
SAFETY INSTRUCTIONS
NOTICE FOR CUSTOMERS IF YOUR UNIT IS EQUIPPED WITH A POWER CORD.
WARNING: THIS APPLIANCE SHALL BE CONNECTED TO A MAINS SOCKET OUTLET WITH A
PROTECTIVE EARTHING CONNECTION.
The cores in the mains lead are coloured in accordance with the following code:
GREEN and YELLOW - Earth BLUE - Neutral BROWN - Live
As colours of the cores in the mains lead of this appliance may not correspond with the coloured
markings identifying the terminals in your plug, proceed as follows:
UThe core which is coloured green and yellow must be connected to the terminal in the plug
marked with the letter E, or with the earth symbol, or coloured green, or green and yellow.
UThe core which is coloured blue must be connected to the terminal marked N or coloured
black.
UThe core which is coloured brown must be connected to the terminal marked L or coloured
red.
This equipment may require the use of a different line cord, attachment plug, or both, depending
on the available power source at installation. If the attachment plug needs to be changed, refer
servicing to qualified service personnel who should refer to the table below. The green/yellow
wire shall be connected directly to the units chassis.
CONDUCTOR WIRE COLOR
Normal Alt
L LIVE BROWN BLACK
N NEUTRAL BLUE WHITE
E EARTH GND GREEN/
YEL GREEN
WARNING: If the ground is defeated, certain fault conditions in the unit or in the system to
which it is connected can result in full line voltage between chassis and earth ground. Severe
injury or death can then result if the chassis and earth ground are touched simultaneously.
WARNING FOR YOUR PROTECTION
READ THE FOLLOWING:
KEEP THESE INSTRUCTIONS
HEED ALL WARNINGS
FOLLOW ALL INSTRUCTIONS
THE APPARATUS SHALL NOT BE EXPOSED TO DRIPPING OR SPLASHING
LIQUID AND NO OBJECT FILLED WITH LIQUID, SUCH AS VASES, SHALL BE
PLACED ON THE APPARATUS.
CLEAN ONLY WITH A DRY CLOTH.
DO NOT BLOCK ANY OF THE VENTILATION OPENINGS. INSTALL IN AC-
CORDANCE WITH THE MANUFACTURER’S INSTRUCTIONS.
DO NOT INSTALL NEAR ANY HEAT SOURCES SUCH AS RADIATORS,
HEAT REGISTERS, STOVES, OR OTHER APPARATUS (INCLUDING AMPLI-
FIERS) THAT PRODUCE HEAT.
ONLY USE ATTACHMENTS/ACCESSORIES SPECIFIED BY THE MANUFAC-
TURER.
UNPLUG THIS APPARATUS DURING LIGHTNING STORMS OR WHEN
UNUSED FOR LONG PERIODS OF TIME.
Do not defeat the safety purpose of the polarized or grounding-type plug. A
polarized plug has two blades with one wider than the other. A grounding
type plug has two blades and a third grounding prong. The wide blade or third
prong are provided for your safety. If the provided plug does not fit your outlet,
consult an electrician for replacement of the obsolete outlet.
Protect the power cord from being walked on or pinched particularly at plugs,
convenience receptacles, and the point where they exit from the apparatus.
Use only with the cart stand, tripod bracket, or table specified by the manufac-
ture, or sold with the apparatus. When a cart is used, use caution when moving
the cart/apparatus combination to avoid injury from tip-over.
Refer all servicing to qualified service personnel. Servicing is required when
the apparatus has been damaged in any way, such as power-supply cord or plug
is damaged, liquid has been spilled or objects have fallen into the apparatus, the
apparatus has been exposed to rain or moisture, does not operate normally, or
has been dropped.
POWER ON/OFF SWITCH: If the equipment has a Power switch, the Power
switch used in this piece of equipment DOES NOT break the connection from
the mains.
MAINS DISCONNECT: The plug shall remain readily operable. For rack-mount
or installation where plug is not accessible, an all-pole mains switch with a
contact separation of at least 3 mm in each pole shall be incorporated into the
electrical installation of the rack or building.
FOR UNITS EQUIPPED WITH EXTERNALLY ACCESSIBLE FUSE RECEPTA-
CLE: Replace fuse with same type and rating only.
MULTIPLE-INPUTVOLTAGE:This equipment may require the use of a different
line cord, attachment plug, or both, depending on the available power source at
installation. Connect this equipment only to the power source indicated on the
equipment rear panel.To reduce the risk of fire or electric shock, refer servicing
to qualified service personnel or equivalent.
If connected to 240V supply, a suitable CSA/UL certified power cord shall be
used for this supply.
This Equipment Is Intended For Rack Mount Use Only.
SAFETY INSTRUCTIONS
NOTICE FOR CUSTOMERS IF YOUR UNIT IS EQUIPPED WITH A POWER CORD.
WARNING: THIS APPLIANCE SHALL BE CONNECTED TO A MAINS SOCKET OUTLET WITH A
PROTECTIVE EARTHING CONNECTION.
The cores in the mains lead are coloured in accordance with the following code:
GREEN and YELLOW - Earth BLUE - Neutral BROWN - Live
As colours of the cores in the mains lead of this appliance may not correspond with the coloured
markings identifying the terminals in your plug, proceed as follows:
UThe core which is coloured green and yellow must be connected to the terminal in the plug
marked with the letter E, or with the earth symbol, or coloured green, or green and yellow.
UThe core which is coloured blue must be connected to the terminal marked N or coloured
black.
UThe core which is coloured brown must be connected to the terminal marked L or coloured
red.
This equipment may require the use of a different line cord, attachment plug, or both, depending
on the available power source at installation. If the attachment plug needs to be changed, refer
servicing to qualified service personnel who should refer to the table below. The green/yellow
wire shall be connected directly to the units chassis.
CONDUCTOR WIRE COLOR
Normal Alt
L LIVE BROWN BLACK
N NEUTRAL BLUE WHITE
E EARTH GND GREEN/
YEL GREEN
WARNING: If the ground is defeated, certain fault conditions in the unit or in the system to
which it is connected can result in full line voltage between chassis and earth ground. Severe
injury or death can then result if the chassis and earth ground are touched simultaneously.

LITHIUM BATTERY
WARNING
CAUTION!
This product may contain a lithium battery.There is danger of
explosion if the battery is incorrectly replaced. Replace only with
an Eveready CR 2032 or equivalent. Make sure the battery is
installed with the correct polarity. Discard used batteries according
to manufacturer’s instructions.
ADVARSEL!
Lithiumbatteri - Eksplosjonsfare.Ved utskifting benyttes kun batteri
som anbefalt av apparatfabrikanten. Brukt batteri returneres appa-
ratleverandøren.
ADVARSEL!
Lithiumbatteri - Eksplosionsfare ved fejlagtig håndtering.
Udskiftning må kun ske med batteri av samme fabrikat og type.
Levér det brugte batteri tilbage til leverandøren.
VAROITUS!
Paristo voi räjähtää, jos se on virheellisesti asennettu.Vaihda paristo
ainoastaan laitevalmistajan suosittelemaan tyyppin. Hävitä käytetty
paristo valmistajan ohjeiden mukaisesti.
VARNING!
Explosionsfara vid felaktigt batteribyte.Använd samma batterityp
eller en ekvivalent typ som rekommenderas av apparattillverkaren.
Kassera använt batteri enligt fabrikantens instruktion.
IMPORTANT SAFETY INFORMATION
U.K. MAINS PLUG WARNING
A molded mains plug that has been cut off from the cord is unsafe.
Discard the mains plug at a suitable disposal facility. NEVER
UNDER ANY CIRCUMSTANCES SHOULDYOU INSERT A
DAMAGED OR CUT MAINS PLUG INTO A 13 AMP
POWER SOCKET. Do not use the mains plug without the fuse
cover in place. Replacement fuse covers can be obtained from your
local retailer. Replacement fuses are 13 amps and MUST be ASTA
approved to BS1362.
ELECTROMAGNETIC COMPATIBILITY
This unit conforms to the Product Specifications noted
on the Declaration of Conformity. Operation is sub-
ject to the following two conditions:
Ê UÊÊÌÃÊ`iÛViÊ>ÞÊÌÊV>ÕÃiÊ>ÀvÕÊÌiÀviÀiVi]Ê>`Ê
Ê UÊÊÌÃÊ `iÛViÊ ÕÃÌÊ >VVi«ÌÊ >ÞÊ ÌiÀviÀiViÊ ÀiViÛi`]Ê
including interference that may cause undesired
operation.
Operation of this unit within significant electromagnetic
fields should be avoided.
Ê UÊÕÃiÊÞÊÃi`i`ÊÌiÀViVÌ}ÊV>Lið
WARRANTY
This warranty is valid only for the original purchaser and only in the United States.
1. The warranty registration card that accompanies this product must be mailed within 30
days after purchase date to validate this warranty. You can also register online at
www.dbxpro.com. Proof-of-purchase is considered to be the responsibility of the consumer.
A copy of the original purchase receipt must be provided for any warranty service.
2. dbx warrants this product, when bought and used solely within the U.S., to be free from
defects in materials and workmanship under normal use and service.
3. dbx liability under this warranty is limited to repairing or, at our discretion, replacing
defective materials that show evidence of defect, provided the product is returned to dbx
WITH RETURN AUTHORIZATION from the factory, where all parts and labor will be covered up
to a period of two years. A Return Authorization number must first be obtained from dbx. The
company shall not be liable for any consequential damage as a result of the product’s use in
any circuit or assembly.
4. dbx reserves the right to make changes in design or make additions to or improvements
upon this product without incurring any obligation to install the same additions or improve-
ments on products previously manufactured.
5. The foregoing is in lieu of all other warranties, expressed or implied, and dbx neither
assumes nor authorizes any person to assume on its behalf any obligation or liability in con-
nection with the sale of this product. In no event shall dbx or its dealers be liable for special
or consequential damages or from any delay in the performance of this warranty due to
causes beyond their control.
Manufacturer’s Name: dbx Professional Products
Manufacturer’s Address: 8760 S. Sandy Parkway
Sandy, Utah 84070, USA
declares that the product:
Product name: dbx 1215 and dbx1231
Note: Product name may be suffixed by the letters-EU.
Product option: None
conforms to the following Product Specifications:
Safety: IEC 60065 -01+Amd 1
EMC: EN 55022:2006 (N/A; Analog Product)
IEC61000-4-2
IEC61000-4-3
IEC61000-4-4
IEC61000-4-5
IEC61000-4-6
IEC61000-4-8
IEC61000-4-11
Supplementary Information:
The product herewith complies with the requirements of the:
Low Voltage Directive 2006/95/EC
EMC Directive 2004/108/EC.
RoHS Directive 2002/95/EC
WEEE Directive 2002/96/EC
With regard to Directive 2005/32/EC and EC Regulation
1275/2008 of 17 December 2008, this product is designed,
produced, and classified as Professional Audio Equipment and
thus is exempt from this Directive.
Roger Johnsen
Director, Engineering
Signal Processing
8760 S. Sandy Parkway
Sandy, Utah 84070, USA
Date: November 19, 2010
European Contact: Your local dbx Sales and Service Office or
Harman Music Group
8760 South Sandy Parkway
Sandy, Utah 84070 USA
Ph: (801) 566-8800
Fax: (801) 568-7583
DECLARATION OF CONFORMITY
If you want to dispose this product, do not mix it with general household waste. There is a
separate collection system for used electronic products in accordance with legislation that
requires proper treatment, recovery and recycling.
Private household in the 25 member states of the EU, in Switzerland and Norway may return their used
electronic products free of charge to designated collection facilities or to a retailer (if you purchase a similar
new one).
For Countries not mentioned above, please contact your local authorities for a correct method of disposal.
By doing so you will ensure that your disposed product undergoes the necessary treatment, recovery and
recycling and thus prevent potential negative effects on the environment and human health.

1
MANUAL CONTENTS
INTRODUCTION.................................................. 2
INSPECTION .................................................... 2
OPERATING CONTROLS ........................................... 2
CONNECTING THE EQ TO YOUR SYSTEM .............................. 3
REAR PANEL DESCRIPTIONS........................................ 4
INSTALLATION CONSIDERATIONS .................................... 5
OPERATION AND APPLICATIONS NOTES............................... 5
TECHNICAL SUPPORT / FACTORY SERVICE ............................. 6
FRANÇAIS ..................................................... 7
DEUTSCH ..................................................... 17
ESPAÑOL ..................................................... 27
SPECIFICATIONS ................................................. 37
BLOCK DIAGRAM................................................ 39
MANUAL CONTENTS
12 SERIES GRAPHIC EQUALIZERS

INTRODUCTION
Congratulations on your purchase of a dbx graphic equalizer. All dbx graphic equalizers are high performance
multi-functional units designed to deliver all the flexibility and power that professional users demand. We recom-
mend that you take a moment to read through this operation manual. It provides information that will assist you
from system set-up to EQ applications. The 12 Series Equalizers include the following features:
Hl^iX]VWaZ7ddhi$8jigVc\ZWZilZZc£+Y7VcY£&*Y7
7VaVcXZY^cejihVcYdjiejih
MAG!7Vgg^ZgHig^e!VcY&$)IGHXdccZXidgh
"&'Y7$ &'Y7^ceji\V^cgVc\Z
&-Y7$dXiVkZ)%=o7ZhhZaAdl"8ji[^aiZg
8]Vhh^h$h^\cVa\gdjcYa^[iXVeVW^a^in
>ciZgcVaedlZghjeeanigVch[dgbZg
EdlZg"d[[]VgY"l^gZgZaVnWneVhhl^i]'"hZXdcYedlZg"jeYZaVn
INSPECTION
Verify that the equalizer’s package contains the following:
:fjVa^oZgjc^ibViX]^c\hZg^VacjbWZgbVg`ZYdceVX`V\Z
68edlZgXdgY
DeZgVi^dcBVcjVa
GZ\^higVi^dc8VgY
;djggVX`bdjcihXgZlhVcYlVh]Zgh
If any of these items are missing please contact dbx customer service at the number provided on the back cover of
this manual.
OPERATING CONTROLS
Front Panels
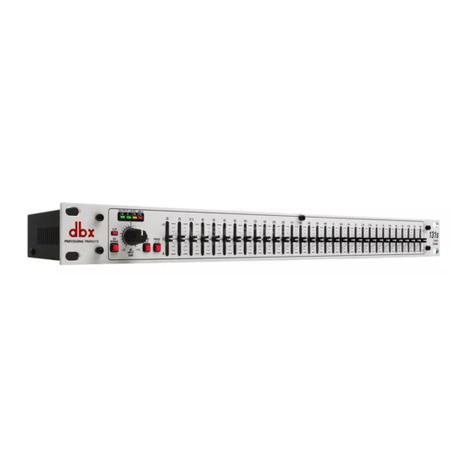
1231 - dual channel 31 band graphic equalizer
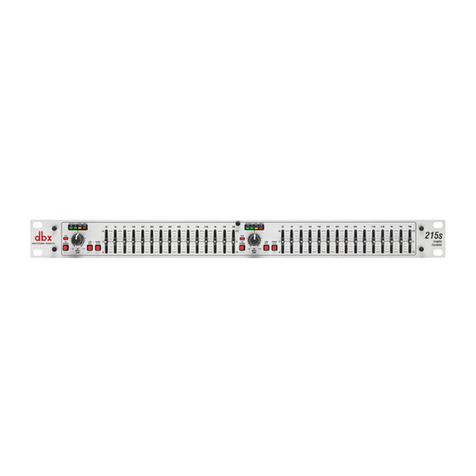
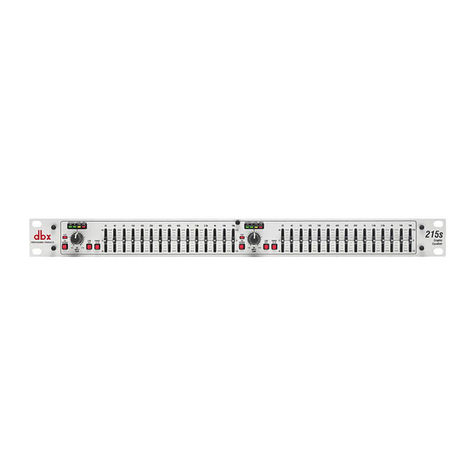
&'&*"YjVaX]VccZa&*WVcY\gVe]^XZfjVa^oZg
2
OPERATION MANUAL
1231
Graphic Equalizer
20 25 31.5 40 50 63 80 500400315250 1.6k1.25k1k800 5k4k3.15k2.5k 16k12.5k10k8k6.3k 20k2k630100 125 160 200
RANGE
OUTPUT
LEVEL (dBu)
LOW
CUT
EQ
BYPASS
INPUT
GAIN
dB
-12
0
+12
+/-6
+/-15
CLIP
+18+100-10
RANGE
OUTPUT
LEVEL (dBu)
LOW
CUT
EQ
BYPASS
INPUT
GAIN
dB
-12
0
+12
+/-6
+/-15
CLIP
+18+100-10
0
-15
+15
0
-15
+15
0
-6
+6
0
-6
+6
RANGE
OUTPUT
LEVEL (dBu)
LOW
CUT
EQ
BYPASS
INPUT
GAIN
dB
-12
0
+12
+/-6
+/-15
CLIP
0
-6
+6
25 40 63 100 160 250 400 16k10k6.3k4k630 1k 1.6k 2.5k
+18+100-10
1215
Graphic Equalizer
0
-15
+15
RANGE
OUTPUT
LEVEL (dBu)
LOW
CUT
EQ
BYPASS
INPUT
GAIN
dB
-12
0
+12
+/-6
+/-15
CLIP
0
-6
+6
25 40 63 100 160 250 400 16k10k6.3k4k630 1k 1.6k 2.5k
+18+100-10
0
-15
+15

3
Input Gain Control: I]^hXdcigdahZihi]Zh^\cVaaZkZaidi]ZZfjVa^oZg#>i^hXVeVWaZd["&'Y7id &'Y7d[\V^c#>ih
Z[[ZXi^hVeeVgZciWnk^Zl^c\i]ZDJIEJIA:K:A76G<G6E=#
EQ Bypass: I]^hhl^iX]gZbdkZhi]Z\gVe]^XZfjVa^oZghZXi^dc[gdbi]Zh^\cVaeVi]#HZZ7adX`Y^V\gVbdcEV\Z
-#I]Z7NE6HHhl^iX]YdZhcdi!]dlZkZg!V[[ZXii]Z>CEJI<6>C!dgADL8JI[^aiZgh#
EQ Bypass LED:I]^hgZYA:9a^\]ihl]Zci]Z:F^h^cWneVhhbdYZ#CdiZi]ViWneVhhbdYZdcanZ[[ZXihi]Z
graphic equalizer section of the 12 Series EQs. The>CEJI<6>C and and ADL8JI controls remain unaffected
when the EQ is bypassed.
Boost/Cut Range Selection Switch and LEDs: I]^hhl^iX]hZaZXihl]^X]d[i]ZildWddhi$XjigVc\Zhi]ZZfjVa^oZg
l^aajhZ!Z^i]Zg£+Y7dg£&*Y7#I]ZgZYA:9a^\]ihl]Zci]Z£&*Y7gVc\Z^hhZaZXiZY!VcYi]ZnZaadlA:9a^\]ih
l]Zci]Z£+Y7gVc\Z^hhZaZXiZY#CdiZi]Vii]Z7DDHI$8JIhl^iX]^hha^\]iangZXZhhZY#I]^h^hidegZkZciVXX^YZc-
iVaVXi^kVi^dcd[i]Zhl^iX]!edhh^WanXVjh^c\YVbV\Ziddi]ZghdjcYhnhiZbXdbedcZcih#
Output Level Bar Graph: I]ZhZ[djgA:9h^cY^XViZdjiejiaZkZad[i]ZZfjVa^oZg#I]ZgZYA:9^h(Y7WZadlXa^e-
e^c\VcY^hbVg`ZYVh &-Y7j#>ibdc^idghi]ZaZkZaVii]Zdjiejid[i]ZZfjVa^oZgV[iZgVaadi]ZgegdXZhh^c\#
Clip LED: I]^hA:9a^\]ihl]ZcZkZgVcn^ciZgcVah^\cVaaZkZagZVX]Zh(Y7WZadlXa^ee^c\l]^X]bVndXXjgl]Zc
Vcnd[i]Z[daadl^c\]VeeZc/&i]Z^cejih^\cVa^h¸]diiZg¹i]Vc ''Y7j!'ZmXZhh^kZ\V^c^hVeea^ZYWni]Z^ceji
\V^cXdcigda!dg(ZmXZhh^kZWddhi^hVeea^ZYjh^c\i]Z[gZfjZcXnha^YZgh#
Frequency Band Slider Controls: Each one of these slider potentiometers will boost or cut at its noted frequency
Wn£+Y7dg£&*Y7!YZeZcY^c\jedci]Zedh^i^dcd[i]Z7DDHI$8JIG6C<:hl^iX]#L]ZcVaai]Zha^YZghVgZ^c
the center detented position the output of the equalizer is flat. The frequency band centers of the 1231 are marked at
&$(gYd[VcdXiVkZ^ciZgkVahdc>HDhiVcYVgYheVX^c\h!l]^aZi]Z[gZfjZcXnWVcYXZciZghd[i]Z&'&*VgZbVg`ZYVi
'$(gYhd[VcdXiVkZ^ciZgkVahdc>HDhiVcYVgYheVX^c\h#
Low Cut Enable Switch: I]ZADL"8JIhl^iX]^chZgihdggZbdkZhi]Z&-Y7$dXiVkZ)%=o7ZhhZaadl"Xji[^aiZg
[gdbi]Zh^\cVaeVi]#L]Zci]ZADL"8JIhl^iX]^hejh]ZY^c!i]ZADL"8JI[^aiZg^h>Ci]ZVjY^deVi]#
CONNECTING T HE EQTOY OUR SYSTEM
The 12 Series Equalizers have balanced inputs and outputs that can be used with any balanced or unbalanced line-
aZkZaYZk^XZ#;dgbdgZheZX^[^X^c[dgbVi^dcVWdjiXVWa^c\edhh^W^a^i^Zh!eaZVhZgZ[Zgidi]ZhZXi^dcZci^iaZY
Installation Considerations, Page 5.
To connect the equalizer to your sound system refer to the following steps:
7XUQRIIDOOHTXLSPHQWEHIRUHPDNLQJFRQQHFWLRQV
0RXQWHTXDOL]HULQDVWDQGDUGZLGWKUDFN
Install the EQs in a rack with the rack screws provided. It can be mounted above or below anything that does
cdi\ZcZgViZZmXZhh^kZ]ZVi#6bW^ZciiZbeZgVijgZhh]djaYcdiZmXZZY&&(;)*8l]ZcZfj^ebZci^h^cjhZ#
6ai]dj\]i]Zjc^i»hX]Vhh^h^hh]^ZaYZYV\V^chigVY^d[gZfjZcXnVcYZaZXigdbV\cZi^X^ciZg[ZgZcXZ!ZmigZbZan
]^\][^ZaYhd[G;VcY:B>h]djaYWZVkd^YZY#
0DNHDXGLRFRQQHFWLRQVYLD;/5EDUULHUVWULSRU756MDFNVDFFRUGLQJWRDSSOLFDWLRQQHHGV
All three types of connectors for the inputs and outputs can be used for balanced or unbalanced connections.
I]ZjhZd[bdgZi]VcdcZXdccZXidgViVi^bZ[dgi]Z^cejihXdjaYjcWVaVcXZWVaVcXZYa^cZh!XVjhZe]VhZXVcXZa-
aVi^dc!h]dgiVXdcYjXidgid\gdjcY!dgXVjhZYVbV\Ziddi]ZgZfj^ebZciXdccZXiZYidi]ZZfjVa^oZg#BdgZi]Vc
dcZdjiejibVnWZjhZYh^bjaiVcZdjhanVhadc\Vhi]ZXdbW^cZYeVgVaaZaadVY^h\gZViZgi]Vc+%%Ω.
6HOHFWWKHRSHUDWLQJUDQJHZLWKWKH%2267&875$1*(6(/(&7,21switch
Note: Be sure to reduce audio levels at the power amplifiers when changing the setting of this switch as it may generate an audible transient.
$SSO\SRZHUWRWKHHTXDOL]HU
8dccZXii]Z68edlZgXdgYidi]Z68edlZggZXZeiVXaZdci]ZWVX`d[i]ZZfjVa^oZg#GdjiZi]Z68edlZgXdgY
to a convenient power outlet away from audio lines. The unit may be turned on and off from the rear panel
OPERATION MANUAL
12 SERIES GRAPHIC EQUALIZERS

power switch or a master equipment power switch. Since the 12 Series Equalizers consume a relatively small
Vbdjcid[edlZg!i]Zjc^ihbVnWZaZ[idcXdci^cjdjhan#
REAR PANEL DESCRIPTIONS
Rear Panels
1231 - dual channel 31 band graphic equalizer
&'&*"YjVaX]VccZa&*WVcY\gVe]^XZfjVa^oZg
Power Switch: Switches the power on and off. Always make audio connections with the power switch in the D;;
position.
Power Cord Receptacle: Connects AC power to the equalizer.
Output Connectors:I]gZZineZhd[djiejiXdccZXidghVgZegdk^YZY[dgdjiejiXdccZXi^dch/bVaZMAGineZXdc-
cZXidgh!&$)i^e"g^c\"haZZkZe]dcZ_VX`XdccZXidghVcYVWVgg^Zghig^e#
Input Connectors: I]gZZineZhd[^cejiXdccZXidghVgZegdk^YZY[dg^cejiXdccZXi^dch/[ZbVaZadX`^c\MAGineZ
XdccZXidgh!&$)i^e"g^c\"haZZkZe]dcZ_VX`XdccZXidgh!VcYVWVgg^Zghig^e#I]ZbVm^bjb^cejiaZkZai]Vii]ZZfjVa-
^oZgXVcVXXZei^h ''Y7jgZ[/%#,,*Kgbh#
&KDVVLV*URXQG/LIW6WUDS7ngZbdk^c\i]Z_jbeZgXdccZXi^c\i]ZildhXgZlhdci]ZWVgg^Zghig^e!i]ZX]Vhh^h
\gdjcY^hhZeVgViZY[gdbi]ZX^gXj^i\gdjcYd[i]ZZfjVa^oZg#I]^h^hhdbZi^bZhcZXZhhVgnidegZkZci¸\gdjcYaddeh¹
^cVhdjcYhnhiZb#L]Zca^[i^c\i]Z\gdjcYhigVe!ndjbjhibV`ZVXdccZXi^dc[gdbi]ZX^gXj^i\gdjcY iZgb^cVa
to some other ground point in your audio system in order for the equalizer to function properly.
4
OPERATION MANUAL

5
Wiring Connections With Ground
INSTALLATION CONSIDERATIONS
+RRNXSVDQG&DEOLQJI]Z&'HZg^Zh:fjVa^oZghVgZYZh^\cZY[dgcdb^cVa )Y7jaZkZah#I]ZZfjVa^oZghXVcWZ
jhZYl^i]Z^i]ZgWVaVcXZYdgjcWVaVcXZYhdjgXZh!VcYi]ZdjiejihXVcWZjhZYl^i]Z^i]ZgWVaVcXZYdgjcWVaVcXZY
adVYh!egdk^YZYi]ZegdeZgXVWa^c\^hjhZY#
A balanced line is defined as two-conductor shielded cable with the two center conductors carrying the same signal
but of opposite polarity when referenced to ground. An unbalanced line is generally a single-conductor shielded
cable with the center conductor carrying the signal and the shield at ground potential.
,QSXW&DEOH&RQILJXUDWLRQVI]ZZfjVa^oZg]VhVc^ceji^beZYVcXZd[)%`ΩWVaVcXZYVcY'%`Ωunbalanced. This
makes the 12 Series Equalizers’ audio inputs suitable for use with virtually any low source impedance (under 2kΩ#
2XWSXW&DEOH&RQILJXUDWLRQVI]ZZfjVa^oZg»hdjieji^hXVeVWaZd[Yg^k^c\V+%%ΩadVYid &-Y7j#;dgbVm^bjb
]jbgZ_ZXi^dcl^i]VWVaVcXZYhdjgXZ!Vkd^YXdbbdc\gdjcY^c\Vii]ZZfjVa^oZg»h^cejihVcYdjiejih#BdhiWVa-
VcXZY("XdcYjXidgXVWaZh]VkZi]Zh]^ZaYXdccZXiZYViWdi]ZcYh#I]^hXVcgZhjai^c\gdjcYaddehl]^X]XVjhZ
]jb#>[]jbeZgh^hihignY^hXdccZXi^c\i]Zh]^ZaYdcdcZdgbdgZd[i]ZXVWaZh^ci]ZhnhiZb!egZ[ZgVWanVii]Z^ceji
d[VYZk^XZ!cdiVii]Zdjieji#
OPERATION AND APPLICATION NOTES
I]ZYWm&'HZg^Zh<gVe]^X:fjVa^oZghVgZjhZ[jaVjY^dh^\cVaegdXZhh^c\iddah^ch^ijVi^dchl]ZgZegZX^hZ[gZfjZcXn
control is required across the audible frequency spectrum.
When used with an audio spectrum analyzer the EQs can tune any acoustical environment -- from the studio to the
XdcXZgi]Vaa""idhideg^c\^c\!^cXgZVhZXaVg^in!VcY[aViiZci]ZdkZgVaa[gZfjZcXngZhedchZd[i]ZZck^gdcbZci#6
real-time spectrum analyzer or other types of audio environment analyzers are very useful in determining the
amount of equalization needed.
>chZgii]Z\gVe]^XZfjVa^oZgWZilZZci]Zh^\cVahdjgXZjhjVaanVb^mZgVcYi]ZedlZgVbea^[^Zghdgi]ZXgdhhdkZg^[
i]ZgZ^hdcZ#6Y_jhii]ZaZkZaVcYZfjVa^oVi^dcVhgZfj^gZYidn^ZaYi]ZYZh^gZYhnhiZbgZhedchZ#I]Zadc\i]gdl[VY-
ers of the EQs allow very precise settings of the equalization for accurate equalization curves.
;dgdei^bjbh^\cVa"id"cd^hZgZhedchZ!i]Z\V^chigjXijgZd[i]ZhdjcYhnhiZbbjhiWZegdeZganhZije#:VX]Xdbed-
cZcid[i]ZhdjcYhnhiZbh]djaYWZhZiVi^ihcdb^cVadeZgVi^c\aZkZa!hiVgi^c\l^i]i]Z[^ghiZaZbZci^ci]ZhnhiZb!
usually a mixing console. Each element should be run at its nominal operating level in order to take advantage of
i]ZbVm^bjbh^\cVa"id"cd^hZegdeZgi^Zhd[i]ViZaZbZci#AdjYheZV`ZgVbea^[^Zgh!Vhi]ZaVhiZaZbZci^ci]ZX]V^c!
h]djaYWZhZidcanVhadjYVhcZXZhhVgn!^cdgYZgidVkd^Y^cYjX^c\jccZXZhhVgncd^hZ^cidi]ZhnhiZb#
++
+
++ +
++
Without Jumper in Place With Jumper in Place
jumper
optional
circuit
ground
chassis
ground
circuit
ground
chassis
ground
to system
ground
optional Input
Cable
Output
Cable
Input
Cable
Output
Cable
OPERATION MANUAL
12 SERIES GRAPHIC EQUALIZERS

TECHNICAL SUPPORT / FACTORY SERVICE
The dbx 12 Series EQs are all solid-state products with components chosen for high performance and excellent reli-
VW^a^in#:VX]jc^i]VhWZZciZhiZYVcYWjgcZY"^cVii]Z[VXidgn#CdVY_jhibZcid[VcnineZh]djaYWZgZfj^gZY
throughout the life of the unit.
>[X^gXjbhiVcXZhVg^hZl]^X]cZXZhh^iViZgZeV^g!lZgZXdbbZcYi]Vindjg:FWZgZijgcZYidi]Z[VXidgn#I]^hXVc
dcanWZYdcZWngZXZ^k^c\VG:IJGC6JI=DG>O6I>DCcjbWZg[gdbYWmXjhidbZghZgk^XZ#
>[ndjgZfj^gZiZX]c^XVahjeedgiXdciVXi8jhidbZgHZgk^XZ#7ZegZeVgZYidVXXjgViZanYZhXg^WZi]ZegdWaZb#@cdl
i]ZhZg^VacjbWZgd[ndjgjc^ieg^ciZYdcVhi^X`ZgViiVX]ZYidi]ZX]Vhh^hd[i]Zjc^i#
Contact information is printed on the back cover of this manual.
6
OPERATION MANUAL

MODE D’EMPLOI
7
CORRECTEURS GRAPHIQUES SÉRIES 12
FRANÇAIS

ATTENTION
VEUILLEZ LIRE CE QUI SUIT :
CONSERVEZ CES INSTRUCTIONS
RESPECTEZ TOUTES LES CONSIGNES
SUIVEZ TOUTES LES INSTRUCTIONS
NETTOYEZ L’APPAREIL UNIQUEMENT AVEC UN LINGE HUMIDE.
NE BLOQUEZ PAS LES OUÎES DE VENTILATION. RESPECTEZ LES
CONSIGNES D’INSTALLATION DU FABRICANT.
N’INSTALLEZ PAS L’APPAREIL À PROXIMITÉ DE SOURCES DE
CHALEUR COMME DES RADIATEURS OU D D’AUTRES APPAREILS
SUSCEPTIBLES DE PRODUIRE DE LA CHALEUR (Y COMPRIS LES
AMPLIFICATEURS).
UTILISEZ UNIQUEMENT LES APPAREILS OPTIONNELS/
ACCESSOIRES RECOMMANDÉS PAR LE FABRICANT.
DÉBRANCHEZ CET APPAREIL DURANT LES ORAGES OU LORSQUE
VOUS NE L’UTILISEZ PAS PENDANT DE LONGUES PÉRIODES.
EAU ET HUMIDITÉ : L’appareil ne doit pas être utilisé à proximité de
liquides ou dans un endroit humide (salle de bain, sous-sol humide,
près d’une piscine, etc.). Veillez à ce qu’aucun objet ou liquide ne
pénètre dans l’appareil.
ALIMENTATION : L’appareil doit impérativement être connecté à un
réseau secteur de la tension correspondant à celle inscrite dans le
mode d’emploi ou sur l’appareil.
MISE À LA TERRE OU POLARISATION : Véillez à ne pas modifier la
mise à la terre ou la polarisation de l’appareil.
PROTECTION DU CORDON SECTEUR : Les cordons d’alimentation
doivent être placés de sorte qu’il soit impossible de marcher dessus.
Vérifiez que les cordons ne sont pas pincés ou écrasés par des
objets placés dessus ou à côté. Veillez au bon dégagement du cor-
don sur la prise secteur murale (ou multiprise) et sur l’appareil.
MAINTENANCE : Pour réduire les risques d’incendie et
d’électrocution, l’utilisateur doit uniquement effectuer sur l’appareil
les opérations indiquées dans le mode d’emploi. Les opérations de
maintenance doivent être confiées à des personnes qualifiées.
POUR LES APPAREILS ÉQUIPÉS D’UN FUSIBLE ACCESSIBLE :
Remplacez le fusible uniquement par un fusible du même type et du
même calibre.
TENSION D’ENTRÉE MULTIPLE : Cet appareil peut nécessiter un
cordon et/ou une prise différents, selon l’alimentation disponible à
l’installation. Connectez uniquement cet appareil au type
d’laimentation indiqué en face arrière de l’appareil. Pour réduire le
risque d’électrocution, confiez la maintenance à des personnes
qualifiées.
CONSIGNES DE SÉCURITÉ
APPAREILS POURVUS D’UN CORDON SECTEUR.
ATTENTION : CET APPAREIL DOIT ÊTRE RELIÉ À LA TERRE.
Les câbles du cordon secteur sont repérés par couleurs :
VERT et JAUNE - Terre BLEU - Neutre MARRON - Phase
Les couleurs utilisées par le cordon secteur de cet appareil peuvent être différen-
tes de celles utilisées par votre embase secteur :
s,ECÊBLECOULEURVERTEETJAUNEDOITÐTRECONNECTÏAUPLOTVERTETJAUNEOU
repéré par la lettre E (ou le symbole de la Terre).
s,ECÊBLEBLEUDOITÐTRERACCORDÏAUPLOT.OUNOIRDELEMBASE
s,E CÊBLE MARRON DOIT ÐTRE CONNECTÏ AU PLOT AU PLOT , OU ROUGE DE
l’embase secteur.
Cet appareil peut nécessiter l’utilisation d’un type différent de cordon secteur,
d’une liaison différente, voire les deux, selon la source utilisée lors de
l’installation. Si vous devez modifier la fiche, consultez un personnel qualifié
(code des couleurs indiqué dans le tableau ci-dessous). Le câble jaune/vert doit
être directement relié au châssis de l’appareil.
LIVE
E
NEUTRAL
EARTH GND
CONDUCTOR
L
N
BROWN
BLUE
GREEN/YEL
BLACK
Normal Alt
WIRE COLOR
WHITE
GREEN
ATTENTION : En cas de découplage de la terre, l’apparel peut présenter ou caus-
er des dysfonctionnements pouvant entraîner des accidents graves ou mortels
lors de contacts entre le châssis et la terre.
CAUTION
ATTENTION: RISQUE DE CHOC ELECTRIQUE - NE PAS OUVRIR
WARNING: TO REDUCE THE RISK OF FIRE OR ELECTRIC
SHOCK DO NOT EXPOSE THIS EQUIPMENT TO RAIN OR MOISTURE
RISK OF ELECTRIC SHOCK
DO NOT OPEN
Les symboles internationaux illustrés ci-dessus signalent un danger élec-
trique potentiel. L’éclair indique la présence de tensions dangereuses dans
l’appareil. Le point d’exclamation indique à l’utilisateur la nécessité de con-
sulter le mode d’emploi.
Ces symboles vous indiquent que l’appareil ne contient aucune pièce sus-
ceptible d’être remplacée par l’utilisateur. Ne pas ouvrir l’appareil. N’essayez
pas de réparer l’appareil vous-mêmes. Consultez des personnes qualifiées.
L’ouverture du boîtier de l’appareil pour quelque raison que ce soit entraîne
instantanément la garantie constructeur. Ne mettez jamais l’appareil en con-
tact avec des liquides. Si du liquide est renversé sur l’appareil, mettez-le
immédiatement hors tension et confiez-le à un service de maintenance
compétent ou à votre revendeur. En cas d’orage, déconnectez l’appareil du
secteur.
CONSIGNES DE SÉCURITÉ IMPORTANTES

U.K. MAINS PLUG WARNING
A molded mains plug that has been cut off from the cord is unsafe. Discard the mains plug at a suitable disposal
facility. NEVER UNDER ANY CIRCUMSTANCES SHOULD YOU INSERT A DAMAGED OR CUT MAINS PLUG INTO A 13
AMP POWER SOCKET. Do not use the mains plug without the fuse cover in place. Replacement fuse covers can be
obtained from your local retailer. Replacement fuses are 13 amps and MUST be ASTA approved to BS1362.
CONSIGNES DE SÉCURITÉ IMPORTANTES
COMPATIBILITÉ
ÉLECTROMAGNÉTIQUE
Cet appareil est conforme aux caracté-
ristiques portée sur la déclaration de
conformité (ci-contre). L’utilisation
est soumise aux conditions suivantes :
s#ET APPAREIL NE DOIT CAUSER
aucune interférence dangereuse.
s#ET APPAREIL DOIT ACCEPTER TOUTES
les interférences reçues, y com-
pris celles susceptibles
d’engendrer un dysfonc-
tionnement.
Évitez d’utiliser cet appareil dans une
zone soumise à d’importants champs
électromagnétiques.
s 5TILISEZ UNIQUEMENT DES CÊBLES
blindés.
Nom du fabricant: dbx Professional Products
Adresse du fabricant: 8760 S. Sandy Parkway
Sandy, Utah 84070, USA
Déclare que le produit:
Nom du produit: dbx 1231, dbx 1215
Option du produit: Non communiquée
est conforme aux caractéristiques suivantes :
Sécurité: IEC 60065 -01+Amd 1
EMC: EN 55022:2006 (N/A; Analog Product)
IEC61000-4-2
IEC61000-4-3
IEC61000-4-4
IEC61000-4-5
IEC61000-4-6
IEC61000-4-8
IEC61000-4-11
Informations supplémentaires:
Ce produit est conforme aux exigences de:
Low Voltage Directive 2006/95/EC
EMC Directive 2004/108/EC.
RoHS Directive 2002/95/EC
WEEE Directive 2002/96/EC
En ce qui concerne la Directive 2005/32/EC et Règlement de
CE 1275/2008 du 17 décembre 2008, ce produit est conçu, est
produit, et est classifié comme Equipement Audio
Professionnel et est ainsi exempt de cette Directive.
Roger Johnsen
Director, Engineering
Signal Processing
8760 S. Sandy Parkway
Sandy, Utah 84070, USA
Date: November 19, 2010
Contact européen: Votre revendeur local dbx ou
Harman Music Group
8760 South Sandy Parkway
Sandy, Utah
84070 USA
(801) 566-8800
(801) 568-7583
DÉCLARATION DE CONFORMITÉ


TABLE DES MATIÈRES
INTRODUCTION.................................................. 12
INSPECTION .................................................... 12
GÉGLAGES ..................................................... 12
CONNEXION DU CORRECTEUR ÀVOTRE SYSTÈME ........................ 13
DESCRIPTION DES FACES ARRIÈRES................................... 14
INSTALLATION ................................................. 15
NOTES SUR L’UTILISATION ET LES APPLICATIONS ........................ 15
ASSISTANCE TECHNIQUE / SERVICE .................................. 16
TAB:E DES MATIERES
11
CORRECTEURS GRAPHIQUES SÉRIES 12

INTRODUCTION
CdjhkdjhgZbZgX^dchYZaVXdc[^VcXZfjZkdjhcdjhibd^\cZoZcX]d^h^hhVcijcXdggZXiZjg\gVe]^fjZYWm#Idjh
aZhXdggZXiZjgh\gVe]^fjZhYWmhdciYZhVeeVgZ^ahbjai^[dcXi^dccZahYZ]VjiZfjVa^i!XdcjhedjgYa^kgZgidjiZaV
hdjeaZhhZZiaVej^hhVcXZcXZhhV^gZh|jcZji^a^hVi^dcegd[Zhh^dccZaaZ#CdjhkdjhgZXdbbVcYdchYZegZcYgZaZ
iZbehYZa^gZXZbdYZY»Zbead^#>akdjh[djgc^iidjiZhaZh^c[dgbVi^dchcXZhhV^gZh!YZa»^chiVaaVi^dcYjhnhibZVjm
Veea^XVi^dchY»\Va^hVi^dc#AZhXdggZXiZjghhg^Z&'d[[gZciaZh[dcXi^dchhj^kVciZh/
EaV\ZY»ViicjVi^dc$VXXZcijVi^dcXdbbjiVWaZZcigZ£+Y7Zi£&*Y7
:cigZhZihdgi^Zhhnbig^fjZh
8dccZXiZjghMAG!hjgWdgc^ZgZi?VX`higd+!(*bb
EaV\ZYZ\V^cY»ZcigZ"&'Y7$ &'Y7
;^aigZeVhhZ"]Vji&-Y7$dXiVkZ)%=oYZineZ7ZhhZa
;dcXi^dcYZYXdjeaV\ZYZbVhhZ
IgVch[dgbViZjg^ciZgcZY»Va^bZciVi^dc
;dcXi^dcYZ7neVhheVggZaV^b^hZ]dghiZch^dcVkZXYaV^YZ'hZXdcYZh|aVb^hZhdjhiZch^dc#
INSPECTION
Kg^[^ZofjZaZeVX`YjXdggZXiZjgXdci^ZciaZhabZcihhj^kVcih/
6eeVgZ^aYdciaZcjbgdYZhg^ZXdggZhedcY|XZaj^^cY^fjhjga»ZbWVaaV\Z
8dgYdcY»Va^bZciVi^dc
BdYZY»Zbead^
8VgiZY»ZcgZ\^higZbZci
FjVigZk^hZigdcYZaaZhYZbdciV\ZZcgVX`
H^a»jcYZXZhabZcihbVcfjZ!kZj^aaZoXdciVXiZgaZhZgk^XZXa^ZciaZYWmVjcjbgd^cY^fjVjYdhYZXZbdYZ
d’emploi.
RÉGLAGES
Faces avant
1231 - Correcteur graphique 31 bandes deux canaux
&'&*"8dggZXiZjg\gVe]^fjZ&*WVcYZhYZjmXVcVjm
12
MODE D’EMPLOI
1231
Graphic Equalizer
20 25 31.5 40 50 63 80 500400315250 1.6k1.25k1k800 5k4k3.15k2.5k 16k12.5k10k8k6.3k 20k2k630100 125 160 200
RANGE
OUTPUT
LEVEL (dBu)
LOW
CUT
EQ
BYPASS
INPUT
GAIN
dB
-12
0
+12
+/-6
+/-15
CLIP
+18+100-10
RANGE
OUTPUT
LEVEL (dBu)
LOW
CUT
EQ
BYPASS
INPUT
GAIN
dB
-12
0
+12
+/-6
+/-15
CLIP
+18+100-10
0
-15
+15
0
-15
+15
0
-6
+6
0
-6
+6
RANGE
OUTPUT
LEVEL (dBu)
LOW
CUT
EQ
BYPASS
INPUT
GAIN
dB
-12
0
+12
+/-6
+/-15
CLIP
0
-6
+6
25 40 63 100 160 250 400 16k10k6.3k4k630 1k 1.6k 2.5k
+18+100-10
1215
Graphic Equalizer
0
-15
+15
RANGE
OUTPUT
LEVEL (dBu)
LOW
CUT
EQ
BYPASS
INPUT
GAIN
dB
-12
0
+12
+/-6
+/-15
CLIP
0
-6
+6
25 40 63 100 160 250 400 16k10k6.3k4k630 1k 1.6k 2.5k
+18+100-10
0
-15
+15

MODE D’EMPLOI
13
CORRECTEURS GRAPHIQUES SÉRIES 12
3RWHQWLRPqWUH,QSXW*DLQ 8Zg\aV\ZYiZgb^cZaZc^kZVjYjh^\cVaZcZcigZYjXdggZXiZjg#HVeaV\ZYZg\aV\Z
ZhiYZ"&'Y7| &'Y7#KdjhedjkZok^hjVa^hZghdcZ[[ZihjgaZ7Vg\gVe]DJIEJIA:K:A#
7RXFKH(4%\SDVV 8ZiiZidjX]ZeZgbZiYZXdjeZgaVhZXi^dcYZXdggZXi^dcYjigV_ZiYjh^\cVakd^gHncdei^fjZZc
eV\Z-#AVidjX]Z7NE6HHc»V[[ZXiZVjXjcZbZciaZg\aV\Z>CEJI<6>CdjaZh[^aigZheVhhZ"]VjiADL8JI#
Led EQ Bypass :8ZiiZA:9gdj\Zh»VaajbZadghfjZaZXdggZXiZjgZhiZcbdYZ7neVhh#CdiZofjZaZbdYZ7neVhh
V[[ZXiZjc^fjZbZciaVhZXi^dcYZXdggZXi^dcYZhXdggZXiZjghhg^Zh&'#AZhg\aV\Zh>CEJI<6>C et ADL8JI ne
hdcieVhbdY^[^hadghfjZaZXdggZXiZjgZhiWneVhh#
7RXFKHVHW/HGVGHVpOHFWLRQGHODSODJHG·DFFHQWXDWLRQDWWpQXDWLRQ5$1*(8ZiiZidjX]ZeZgbZiYZhaZX-
i^dccZgaVeaV\ZY»VXXZcijVi^dc$ViicjVi^dcji^a^hZeVgaZXdggZXiZjg/£+Y7dj£&*Y7#AVAZYgdj\Zh»VaajbZ
adghfjZaVeaV\ZYZ£&*Y7ZhihaZXi^dccZ#AVAZY_VjcZh»VaajbZadghfjZaVeaV\ZYZ£+Y7ZhihaZXi^dccZ#
CdiZofjZaVidjX]ZY»VXXZcijVi^dc$ViicjVi^dcZhia\gZbZciZc[dcXZV[^cY»k^iZgidjiZVXi^kVi^dcVXX^YZciZaaZ
hjhXZei^WaZY»ZcYdbbV\ZgaZhVjigZhabZcihYjhnhibZ#
Bargraph Output Level : 8ZhfjVigZhAZYh^cY^fjZciaZc^kZVjYZhdgi^ZYjXdggZXiZjg#AVAZYgdj\ZZhi|(Y7
VkVcia»XgiV\ZZiedgiZaVkVaZjg &-Y7j#:aaZeZgbZiYZXdcigaZgaZc^kZVjZchdgi^ZYjXdggZXiZjg!VeghidjhaZh
autres traitements.
Led Clip : 8ZiiZAZYh»VaajbZadghfj»jch^\cVa^ciZgcZViiZ^cijcc^kZVjYZ(Y7VkVciXgiV\Z!XZfj^hZegdYj^i
adghfjZ/&aZc^kZVjYjh^\cVaY»ZcigZZhieajhaZkfjZ ''Y7j!'jcc^kZVjZmXZhh^[ZhiVeea^fjVjg\aV\ZYj
\V^cY»ZcigZ!dj(jcZVXXZcijVi^dcZmXZhh^kZZhiVeea^fjZ|a»V^YZYZhXjghZjghYZ[gfjZcXZh#
&XUVHXUVGHVEDQGHVGHIUpTXHQFHV 8]VXjcYZXZhXjghZjghVXXZcijZdjViicjZaV[gfjZcXZfj^aj^ZhiV[[ZXiZ
YVchjcZeaV\ZYZ£+Y7dj£&*Y7!hZadcaVedh^i^dcYZaVidjX]ZG6C<:Y»VXXZcijVi^dc$ViicjVi^dc#AdghfjZ
idjhaZhXjghZjghhdciZcedh^i^dcXgVciZXZcigVaZ!aVhdgi^ZYjXdggZXiZjgZhieaViZ#AZhXZcigZhYZhWVcYZhYZ
[gfjZcXZhYj&'(&hdciZheVXZheVgYZh^ciZgkVaaZhhiVcYVgYhY»jci^ZghY»dXiVkZcdgbZ>HD!VadghfjZaZhXZc-
igZhYZhWVcYZhYZ[gfjZcXZYj&'&*hdciZheVXheVgYZh^ciZgkVaaZhYZYZjmi^ZghY»dXiVkZhiVcYVgYhcdgbZ>HD#
7RXFKH/RZ&XW AVidjX]ZADL"8JI^chgZdjgZi^gZYjigV_ZiYjh^\cVaaZ[^aigZeVhhZ"]VjiYZ
&-Y7$dXiVkZ)%=oYZineZ7ZhhZa#FjVcYZaaZZhiZc[dcXZ!aZ[^aigZeVhhZ"]VjiZhi^chgYVchaZigV_ZiYjh^\cVa#
CONNEXION DU CORRECTEUR ÀVOTRE SYSTÈME
AZhXdggZXiZjghhg^Zh&'hdcifj^ehY»ZcigZhZiYZhdgi^Zhhnbig^fjZhedjkVciigZji^a^hZhVkZXidjiVeeVgZ^a|
c^kZVja^\cZhnbig^fjZdjVhnbig^fjZ#EdjgdWiZc^gYZh^c[dgbVi^dcheajhheX^[^fjZhhjgaZhedhh^W^a^ihYZ
X}WaV\Z!kZj^aaZokdjhgZedgiZg|aVhZXi^dc^ci^ijaZInstallation, en page 5.
EdjgXdccZXiZgaZXdggZXiZjg|kdigZhnhibZ!XdchjaiZoaZh^chigjXi^dch/
3ODFH]WRXVOHVDSSDUHLOVKRUVWHQVLRQDYDQWG·HIIHFWXHUOHVFRQQH[LRQV
0RQWH]OHFRUUHFWHXUGDQVXQUDFNGHODUJHXUVWDQGDUG
>chiVaaZoaZXdggZXiZjgYVchjcgVX`|a»V^YZYZhk^hheX^VaZh[djgc^Zh#>acZYd^ieVhigZbdcihjgdjhdjhjc
VeeVgZ^a\cgVcijcZX]VaZjgZmXZhh^kZ#AViZbegVijgZVbW^VciZcZYd^ieVhZmXYZg)*8adghfjZkdjhji^a^-
hZoa»VeeVgZ^a#7^ZcfjZaZX]}hh^hYZa»VeeVgZ^ahd^iWa^cYXdcigZaZh=;ZiaZh^ciZg[gZcXZhbV\ci^fjZh!kdjh
YZkZok^iZgaZhX]Vbehigde^bedgiVcihYZ=;djY»^ciZg[gZcXZhaZXigdbV\ci^fjZh#
3RXUOHVFRQQH[LRQVDXGLRXWLOLVH]OHVFRQQHFWHXUV;/5VXUERUQLHURX-DFNVWpUpRVHORQDSSOLFDWLRQV
AZh(ineZhYZXdccZXiZjghYZhZcigZh$hdgi^ZheZgbZiiZciYZhXdccZm^dchhnbig^fjZhdjVhnbig^fjZh#
A»ji^a^hVi^dcYZeajhY»jcXdccZXiZjg|aV[d^hedjgaZhZcigZheZjiVhnbig^hZgaZha^\cZhhnbig^fjZh!XVjhZg
YZhVccjaVi^dchYZe]VhZ!YZhXdjgi"X^gXj^ih!djZcYdbbV\ZgaZhVeeVgZ^ahgZa^hVjXdggZXiZjg#KdjhedjkZoji^-
a^hZgeajh^Zjghhdgi^Zhh^bjaiVcbZciiVcifjZaVX]Vg\ZidiVaZ|hjeg^ZjgZ|+%%Ω.
6pOHFWLRQQH]ODSODJHG·DFFHQWXDWLRQDWWpQXDWLRQjO·DLGHGHODWRXFKH5$1*(
Note: Réduisez les niveaux audio des amplis de puissance pour modifier le réglage de cette touche afin d’éviter de générer des transitoires audi-
bles.
$FWLYH]OHFRUUHFWHXU
8dccZXiZoaZXdgYdcY»Va^bZciVi^dc|a»ZbWVhZhZXiZjgZc[VXZVgg^gZYjXdggZXiZjg#7gVcX]ZoaZXdgYdc
Y»Va^bZciVi^dc|jcZeg^hZVYfjViZ!ad^\cZYZha^\cZhVjY^d#A»VeeVgZ^aeZjiigZVXi^k$YhVXi^k|a»V^YZYZ

a»^ciZggjeiZjghZXiZjgYZaV[VXZVgg^gZdjYZa^ciZggjeiZjgYZaVeg^hZhZXiZjg#8dbbZaZhXdggZXiZjghYZhhg^Zh
&'XdchdbbZcigZaVi^kZbZcieZj!kdjhedjkZoaZhaV^hhZgXdci^cjZaaZbZcihdjhiZch^dc#
DESCRIPTION DES FACES ARRIÈRES
Faces arrières
1231 - Correcteur graphique 31 bandes deux canaux
&'&*"8dggZXiZjg\gVe]^fjZ&*WVcYZhYZjmXVcVjm
Interrupteur Power : EZgbZiYZbZiigZa»VeeVgZ^ahdjhiZch^dcdj]dghiZch^dc#:[[ZXijZoidj_djghaZhXdccZm^dch
lorsque l’appareil est hors tension (position D;;.
(PEDVHVHFWHXUEZgbZiYZgZa^Zga»VeeVgZ^aVjhZXiZjg#
Connecteurs Output :A»VeeVgZ^aZhifj^eYZigd^hineZhYZXdccZXiZjghYZhdgi^Z0ineZMAGb}aZ!?VX`higd
+!(*bbZihjgWdgc^Zg#
Connecteurs Input : A»VeeVgZ^aZhifj^eYZigd^hineZhYZXdccZXiZjghY»ZcigZ/ineZMAG[ZbZaaZ|kZggdj^a-
aV\Z!?VX`higd+!(*bbZihjgWdgc^Zg#AZc^kZVjY»ZcigZbVm^bjbfjZeZjiVXXZeiZgaZXdggZXiZjgZhiYZ ''
Y7jg[#/%!,,*KZ[[##
'pFRXSODJHGHPDVVH:cgZi^gVciaZ[^aXVkVa^Zgfj^gZa^ZaZhYZjmk^hYjWdgc^Zg!aVbVhhZbXVc^fjZZhiYXdj-
eaZYZaVbVhhZaZXig^fjZYjXdggZXiZjg#8ZaVh»VkgZeVg[d^hcXZhhV^gZedjgk^iZgaZhWdjXaZhYZbVhhZYVchjc
hnhibZhdcdgZ#AdghfjZkdjhgZi^gZoaZ[^aYZbVhhZ!kdjhYZkZoXdccZXiZgaVWdgcZYZbVhhZaZXig^fjZ
(|jcVjigZed^ciYZbVhhZYZkdigZhnhibZVjY^dedjgfjZaZXdggZXiZjg[dcXi^dccZXdggZXiZbZci#
14
MODE D’EMPLOI

Connexions à la masse
INSTALLATION
&kEODJHVHWFRQQH[LRQVAZhXdggZXiZjghhg^Zh&'hdciXdcjhedjgYZhc^kZVjmcdb^cVjm )Y7j#AZhXdg-
gZXiZjgheZjkZciigZji^a^hhVkZXYZhhdjgXZhhnbig^fjZhdjVhnbig^fjZhZiaZhhdgi^ZheZjkZciigZji^a^hZhVkZX
YZhX]Vg\Zhhnbig^fjZhdjVhnbig^fjZhVkZXjcX}WaV\ZVYfjVi#
JcZa^\cZhnbig^fjZZhik]^XjaZeVgXdbbZjcX}WaZWa^cYYZjmXdcYjXiZjghYdciaZhYZjmXdcYjXiZjghXZc-
igVjmigVchedgiZciaZbbZh^\cVabV^hYZedaVg^ideedhZadghfj»^ahhdcig[gZcXh|aVbVhhZ#JcZa^\cZVhnb-
ig^fjZZhi\cgVaZbZcik]^XjaZeVgjcX}WaZWa^cYh^beaZXdcYjXiZjg!YdciaZXdcYjXiZjgXZcigVaigVchedgiZaZ
signal et le blindage at ground potential.
&RQILJXUDWLRQVGHVFkEOHVG·HQWUpHAZXdggZXiZjgeghZciZjcZ^beYVcXZY»ZcigZYZ)%`Ωhnbig^fjZZi
'%`ΩVhnbig^fjZ#AZhZcigZhVjY^dYZhXdggZXiZjghhg^Zh&'hdciYdcXVYVeiZh|egVi^fjZbZciidjiZhaZhhdjgXZh
WVhhZ^beYVcXZhdjh'`Ω#
&RQILJXUDWLRQVGHVFkEOHVGHVRUWLHAVhdgi^ZYjXdggZXiZjgZhiXVeVWaZYZ\gZgjcZX]Vg\ZYZ+%%Ω| &-Y7j#
EdjgjcgZ_ZibVm^bjbYjgdc[aZbZciVkZXjcZhdjgXZhnbig^fjZ!k^iZoYZg[gZcXZgaZhZcigZhZiaZhhdgi^ZhYj
XdggZXiZjg|aVbbZbVhhZ#AZWa^cYV\ZYZaVeajeVgiYZhX}WaZhhnbig^fjZh(XdcYjXiZjghZhiXdccZXiVjmYZjm
Zmigb^ih#8ZaVeZjiZcigVcZgYZhWdjXaZhYZbVhhZZiYdcXYjgdc[aZbZci#H^aZgdc[aZbZcieZgh^hiZ!ZhhVnZoYZ
YXdccZXiZgaZWa^cYV\ZY»jcdjYZeajh^ZjghX}WaZh!YZeg[gZcXZ|a»ZcigZY»jcVeeVgZ^acdc|aVhdgi^Z#
NOTES SUR L’UTILISATION ET LES APPLICATIONS
AZhXdggZXiZjgh\gVe]^fjZYZhhg^Zh&'hdciYZhdji^ahighegVi^fjZhYVchaZigV^iZbZciYZhh^\cVjmVjY^d/^aheZg-
bZiiZcijcXdcigaZegX^hYZh[gfjZcXZhhjgaZheZXigZVjY^WaZ#
Adghfj»^ahhdciji^a^hhVkZXjcVcVanhZjgYZheZXigZVjY^d!aZhXdggZXiZjghhdcihjhXZei^WaZhY»VXXdgYZgc»^bedgiZ
fjZaZck^gdccZbZciVXdjhi^fjZYjhijY^d|aVhVaaZYZXdcXZgi"^aheZjkZciViicjZgaVghdcVcXZ!Vj\bZciZgaV
XaVgiZi]dbd\c^hZgaVWVcYZeVhhVciZ\adWVaZYZa»Zck^gdccZbZci#A»ji^a^hVi^dcY»jcVcVanhZjgYZheZXigZZc
iZbehgZadjY»VjigZhineZhY»VcVanhZjghY»Zck^dccZbZciVjY^dZhiighegVi^fjZedjgYiZgb^cZgaVfjVci^iYZXdg-
gZXi^dccXZhhV^gZ#
>chgZoaZXdggZXiZjg\gVe]^fjZZcigZaVhdjgXZhdcdgZ\cgVaZbZcijcZXdchdaZYZb^mV\ZZiaZhVbea^hYZej^h-
hVcXZdjaZ[^aigZVXi^[!h»^anZcVjc#9iZgb^cZoaZc^kZVjZiaVXdggZXi^dccXZhhV^gZh|aVgedchZhdj]V^iZ#AZh
;VYZgh|adc\jZXdjghZYZhXdggZXiZjgheZgbZiiZciYZhg\aV\ZhighZ[[^XVXZhedjgYZhXdjgWZhY»\Va^hVi^dcegX^h-
es.
EdjgdWiZc^gjcgVeedgih^\cVa$Wgj^idei^bjb!aVhigjXijgZYZ\V^cYjhnhibZYd^iigZXdggZXiZbZciXdc[^\jgZ#
8]VfjZabZciYjhnhibZhdcdgZYd^iigZg\a|hdcc^kZVjY»ji^a^hVi^dccdb^cVaYhaZegZb^ZgabZciYjhnh-
ibZ!fj^Zhi\cgVaZbZcijcZXdchdaZYZb^mV\Z#8]VfjZabZciYd^iigZji^a^h|hdcc^kZVjYZ[dcXi^dccZbZci
cdb^cVaV[^cY»dWiZc^ghdcbZ^aaZjggVeedgih^\cVa$Wgj^i#AZhVbea^[^XViZjgh!YZgc^ZghabZcihYZaVX]VcZYd^kZci
igZg\ah|jcc^kZVjdei^bVa!edjgcZeVh^cYj^gZYZWgj^i^cYh^gVWaZ#
MODE D’EMPLOI
15
CORRECTEURS GRAPHIQUES SÉRIES 12
++
+
++ +
++
Without Jumper in Place With Jumper in Place
jumper
optional
circuit
ground
chassis
ground
circuit
ground
chassis
ground
to system
ground
optional Input
Cable
Output
Cable
Input
Cable
Output
Cable

ASSISTANCE TECHNIQUE / SERVICE
AZhXdggZXiZjghhg^Zh&'YWmhdciidjhYZhVeeVgZ^ah|igVch^hidghVkZXYZhXdbedhVcihheX^VaZbZcihaZXi^dcch
edjgaZjgZmXZaaZciZfjVa^iZiaZjg[^VW^a^i#8]VfjZVeeVgZ^aVib^hhdjhiZch^dc!iZhiZig\aZcjh^cZ!ZicZ
YZkgV^iYdcXcXZhh^iZgVjXjcg\aV\Z^ciZgcZYjgVciidjiZhVYjgZYZk^Z#
H^jcZgeVgVi^dch»VkgV^icXZhhV^gZ!cdjhkdjhgZXdbbVcYdchYZgZckdnZga»VeeVgZ^a|a»jh^cZ#KdjhYZkZoegVa-
VWaZbZciVkd^gYZbVcYkdigZcjbgdY»Vjidg^hVi^dcYZgZidjgG:IJGC6JI=DG>O6I>DCVjhZgk^XZXa^ZciaZ
de dbx.
AdghfjZkdjhXdciVXiZoaZhhZgk^XZhYZbV^ciZcVcXZ!egeVgZo"kdjh|YXg^gZaZegdWabZYZbVc^gZegX^hZZi|
YdccZgaZcjbgdYZhg^ZYZkdigZVeeVgZ^a^beg^bhjgjcVjidXdaaVcieaVXhdjha»VeeVgZ^a#
AZh^c[dgbVi^dchXdcXZgcVciaZhhZgk^XZhhdci^beg^bZhVjYdhYZXZbdYZY»Zbead^#
16
MODE D’EMPLOI

BEDIENUNGSANLEITUNG
17
GRAPHISCHE EQUALIZER SERIEN 12
DEUTSCH
Other manuals for 12 Series
2
This manual suits for next models
2
Table of contents
Languages:
Other dbx Stereo Equalizer manuals
Popular Stereo Equalizer manuals by other brands

AudioSource
AudioSource EQ TEN owner's manual

Accuphase
Accuphase AD-2810 instruction manual

Nady Audio
Nady Audio GEQ 231 owner's manual

Audio Control
Audio Control Richter Scale Series III Owner's enjoyment manual

Apex N.V.
Apex N.V. GX 230 user manual

Lanzar
Lanzar Vibe 440PSU Owner's manual and installation guide