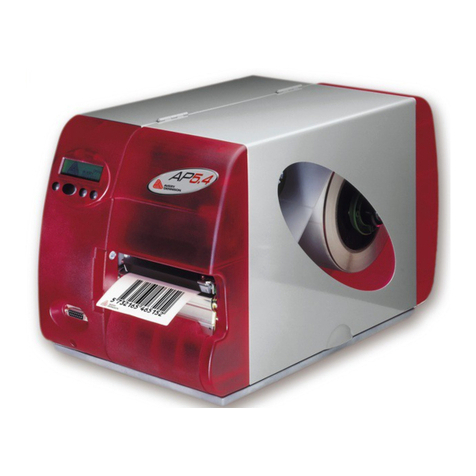
DEC 3500 User manual

. . . . . . . . . . . . . . . . . . . . . . . . . . . . . . . .
DEClaser 3500 Printer
Quick Setup Guide
EK-D350P-RG.A01
Digital Equipment Corporation
Maynard, Massachusetts

. . . . . . . . . . . . . . . . . . . . . . . . . . . . . . . .
First Printing, June 1994
Digital Equipment Corporation makes no representations that the use of its products in the manner described in
this publication will not infringe on existing or future patent rights, nor do the descriptions contained in this
publication imply the granting of licenses to make, use, or sell equipment or software in accordance with the
description.
Possession, use, or copying of the software described in this publication is authorized only pursuant to a valid
written license from Digital or an authorized sublicensor.
Digital Equipment Corporation 1994. All Rights Reserved.
Printed in the U.S.A.
The following are trademarks of Digital Equipment Corporation: DECimage Plus, DEClaser, DECnet,
DECprint, DECserver, DECstation, LATprint, OpenDECconnect, OpenVMS, PrintServer, ULTRIX, VAX,
VAXstation, Digital, and the DIGITAL logo.
All other trademarks and registered trademarks are the property of their respective holders.
The software described in this guide is furnished under a license agreement or nondisclosure agreement. The
software may be used or copied only in accordance with the terms of the agreement.
2

. . . . . . . . . . . . . . . . . . . . . . . . . . . . . . . .
INTRODUCTION
This guide explains how to:
n
Unpack the printer
n
Setup the printer
n
Use the control panel
n
Print a basic job
n
Find additional product information
2
1
6
4
3
5
7
1 - On/off Switch
2 - Output Tray
3 - Control Panel
4 - Lift Handle
5 - Universal Paper Tray
6 - Front Cover Release Latch
7 - Multipurpose Feeder Slot
4
12
3
5
1- Parallel port
2- Slot for optional:
Fax Modem; AppleTalk interface;
Serial interface
3- Slot for optional:
Ethernet interface; Fax Modem;
AppleTalk interface; Serial interface
4- Air Vent
5- AC Power Plug
3

. . . . . . . . . . . . . . . . . . . . . . . . . . . . . . . .
BEFORE YOU BEGIN
Be sure you have the following items:
n
Digital Print Cartridge
n
Cable to connect the printer to your
computer (sold separately).
If you are using the printer in a serial or
network environment, refer to the option
documentation for cable requirements.
If you are directly connecting the printer
to your computer, you need a Centronics-
compatible parallel cable. The
illustration shows the printer cable
connection. Refer to your computer
documentation for the connection to the
computer.
Cables can be purchased from your
Authorized Dealer. Use high quality
cables to prevent possible print errors.
123
4567891011
12 13 14 15 16 17 18
19 20 21 22 23 24 25 26 27 28 29 30 31 32 33 34 35 36
4

. . . . . . . . . . . . . . . . . . . . . . . . . . . . . . . .
CONFIGURING AND PLACING THE PRINTER
1. Remove the printer from the packing
box.
2. Install any optional boards or memory
before proceeding. Installation
instructions are included with each
option.
3. Position the printer in your work area,
being sure to adhere to the clearances
shown.
5

. . . . . . . . . . . . . . . . . . . . . . . . . . . . . . . .
4. Open the printer front cover by
applying downward pressure inside
the thumbholes and pulling forward.
6

. . . . . . . . . . . . . . . . . . . . . . . . . . . . . . . .
5. Install the print cartridge, following
the instructions on the print cartridge
label.
a. Gently rock the print cartridge to
loosen and distribute the toner.
b. Remove the toner seal. Pull the
the orange tab straight out to avoid
breaking the tape.
c. Line up the orange side bars on the
print cartridge with the orange
arrows inside the printer and slide
the cartridge into the cavity.
CAUTION: Do not leave the unwrapped print cartridge sitting in direct
sunlight. Prolonged exposure to direct light damages the print drum.
7

. . . . . . . . . . . . . . . . . . . . . . . . . . . . . . . .
6. Close the front cover.
7. Remove the paper tray.
8

. . . . . . . . . . . . . . . . . . . . . . . . . . . . . . . .
8. Fill the paper tray with paper, print
side up.
NOTE: If necessary, adjust the paper
guides.
9

. . . . . . . . . . . . . . . . . . . . . . . . . . . . . . . .
9. Reinstall the paper tray.
10. For optional Multipurpose Feeder
installation, open the feeder door.
10

. . . . . . . . . . . . . . . . . . . . . . . . . . . . . . . .
11. Attach the Multipurpose Feeder.
a. Insert the left pin.
b. Slide the latch on the right side of
the feeder tray to the left.
c. Insert the right pin and release the
latch.
d. Extend the feeder tray.
11

. . . . . . . . . . . . . . . . . . . . . . . . . . . . . . . .
WARNING: Make sure the printer on/off switch is in the off (0) position before
attaching any cables.
12. Connect the parallel, serial, or
network cable to the printer and
computer or host.
A parallel connection is shown here.
13. Attach any additional cables to the
appropriate connector on the back.
Additional cables may be needed
for option connections. Refer to
the option documentation for cable
requirements.
1- Option slot for:
Fax Modem; AppleTalk interface;
Serial interface
2- Option slot for:
Ethernet interface; Fax Modem;
AppleTalk interface; Serial interface
12

. . . . . . . . . . . . . . . . . . . . . . . . . . . . . . . .
14. Plug the AC power cord into the back
of the printer.
WARNING: This printer is designed to be properly grounded. To ensure proper
operation, plug the power cord into a properly grounded AC outlet only.
15. Plug the AC power cord into a
properly grounded AC outlet.
13

. . . . . . . . . . . . . . . . . . . . . . . . . . . . . . . .
16. Turn on the printer by pressing the
power switch to the on (I)position.
The following control panel message
displays, indicating the printer is
performing an initial diagnostic test:
Self-test
When the test completes, the printer
is ready to print. The following
message displays:
ONLINE
Idle
17. Extend the rear output tray. The tray
can be extended to various lengths to
accommodate Letter, Legal, and A4
size papers.
14

. . . . . . . . . . . . . . . . . . . . . . . . . . . . . . . .
VERIFY PRINTER CONNECTION
To ensure your computer is
directing output to your printer,
print a page. At the root directory
(C:\) on your computer, type:
DIR>PRN
A directory page should print. If it
does not, ensure the LPT1 port is
directed to the local port. Refer to
your operating system
documentation for information.
15

. . . . . . . . . . . . . . . . . . . . . . . . . . . . . . . .
CONTROL PANEL
The control panel is located on the
front of the printer, and consists of
a two-line display and a keypad
with eight keys. The display
shows the status of the printer.
Keys have different functions
when the printer is online, offline,
or if a menu has been entered. The
following chart provides a brief
description of the function of each
control panel key.
16

. . . . . . . . . . . . . . . . . . . . . . . . . . . . . . . .
Key During Printer and
Network Operations During Fax Operations
During Menu Operations
Online Toggles the printer online
and offline.
In online mode, the printer
receives data or com-
mands from the host
computer. When the
printer is taken offline,
pages that are currently
printing are completed.
If the current job is not
complete, data and/or
new jobs continue to be
received until the buffer
is full.
When the Online key is
pressed again, the printer
returns to online mode and
waiting print jobs print or
printing continues where
it left off.
If the printer is taken offline
while receiving a fax, the
page that is currently
printing is completed. The
remaining portion of the job
is sent to the buffer until it
is full. No new jobs are
accepted. If the buffer is
full, the fax modem
disconnects, but the current
job remains in the buffer.
Printing completes when
the Online key is pressed
and the printer is toggled
back to online mode.
If the printer is taken offline
while you are sending a fax,
the current fax job
continues to send, but no
new fax jobs are started.
Returns the printer to online
mode and printing
continues where it left off.
Help This key is active only
when the printer is in
offline mode and outside of
the menu operations.
During printer idle -
Prints the menu map, and
remains offline until
Online is pressed.
During print operations -
The printer beeps once and
returns to the online mode.
The current job completes,
then the menu map prints.
This key is active only when
the printer is in offline
mode and outside of the
menu operations.
The printer beeps once and
returns to the online mode.
The current fax job, either
sending or receiving,
completes, then the menu
map prints.
No effect.
17

. . . . . . . . . . . . . . . . . . . . . . . . . . . . . . . .
Key During Printer and
Network Operations During Fax Operations
During Menu
Operations
Reset Flushes all current and
pending print jobs. This key
is active only when the
printer is in offline mode
and outside of the menu
operations. Resetting...
then Flushing Job... appears
on the display. Once the
printer is reset, it returns to
the offline state.
Disconnects fax line and
flushes all faxes. This key
is active only when the
printer is in offline mode
and outside of the menu
operations. Resetting...
then Flushing Job... appears
on the display. Once the
printer is reset, it returns to
the offline state.
No effect.
Form
Feed Ejects the last page of a PCL
job. This key is only active
when the printer is in offline
mode and outside of the
menu operations. Form
Feed... appears on the
display. Once the printer
completes the form feed
operation, it returns to the
offline state.
No effect.
No effect.
18

. . . . . . . . . . . . . . . . . . . . . . . . . . . . . . . .
Menu Takes the printer offline and
enables menu mode, thus
activating the following
keys:
Select, Esc, Item, Value.
Also displays the highest
level in the currently
selected menu.
Pages that are currently
printing are completed. If
the current job is not
complete, data is received
and processed until the
buffer is full. New jobs are
received until the buffer is
full, but they are not
processed.
If the printer is taken offline
while receiving a fax, the
page that is currently
printing is finished. The
remaining job is buffered to
memory until resources are
full. No new jobs are
accepted. When the Online
key is pressed, printing
continues.
If the printer is taken offline
while you are sending a fax,
the current fax job continues
to send, but no new fax jobs
are started.
No effect.
19

. . . . . . . . . . . . . . . . . . . . . . . . . . . . . . . .
Key During Print and
Network Operations During Fax Operations
During Menu Operations
Select
From Level 1: Moves you
to the next level.
From Level 2: Selects a new
default.
Esc
From Level 1: Exits menu
mode and returns the
printer to its previous state.
From Level 2: Moves you
back to Level 1.
Item
s
Moves you backward
through the menu items at
the current level. This is a
repetitive key.
Item
t
Moves you forward through
the menu items at the
current level. This is a
repetitive key.
Value
s
From Level 1: No effect.
From Level 2: Moves you
backward through the
options for the current item.
Value
t
From Level 1: No effect.
From Level 2: Moves you
forward through the options
for the current item.
Restore factory default settings by pressing Online and Menu while turning the printer on (
I
).
NOTE: For detailed information on the control panel keys and their functions,
navigating menus, and making printer configuration changes, refer to the printer
User's Guide.
20
Table of contents
Other DEC Printer manuals
