DediProg NuProg-F8 User manual

NuProg-F8
eMMC and UFS
Gang Programmer and Duplicator
User Manual
Version 2.0
DediProg User Manual 09/2019
©DediProg Technology Co., Ltd. 2019 All rights reserved.

NuProg-F8 User Manual
www.dediprog.com 2
Table of Content
I. Introduction......................................................................................................... 3
II. Product Information............................................................................................. 3
III. System Requirement............................................................................................ 4
IV. Product Descriptions ............................................................................................ 5
4.1 Exterior .......................................................................................................... 5
4.2 Socket Adaptor Installation............................................................................. 8
V. Dediware Quick Installation ................................................................................. 9
5.1 Software Installation ...................................................................................... 9
5.2 Install NuProg-F8 Programmer.......................................................................12
5.3 NuProg Installation Guide..............................................................................12
5.4 Stand Alone Mode.........................................................................................15
VI. Trouble Shooting and Other Questions................................................................22
VII. Revision ..............................................................................................................24
Important notice:
This document is provided as a guideline and must not be disclosed without consent of DediProg.
However, no responsibility is assumed for errors that might appear.
DediProg reserves the rights to make any changes to the product and/or the specification at any time
without notice. No part of this document may be copied or reproduced in any form or by any means
without prior written consent of DediProg.

NuProg-F8 User Manual
www.dediprog.com 3
I. Introduction
This NuProg-F8 user manual illustrates its hardware specifications, instructions, and
quick software installation guide. NuProg-F8 is a combination of programmer and
duplicator, which is dedicated to support high capacity memory, like UFS and eMMC. For
UFS, it provides the basic LUN/RPMB read and write, Descriptors, Attributes, and the
Flag settings. As for eMMC, it supports User Area, Boot1/2 and RPMB read and write,
also provides ExtCsd settings, as well as GPP1~4 divisions and Enhance setting. With
USB3.0 high speed transmission, Nuprog-F8 is the finest programmer and duplicator for
research and development.
For more information, please visit our website. www.dediprog.com/download
II.Product Information
High Speed Programming
With high speed processor, programming speed will greatly increase.
UFS Write speeds: 80~95MB/s; Read speeds: 130~150MB/s (Depends on the computer
and IC performance).
Time reference: It will only take 14 seconds to write a 1GB file into a Toshiba UFS IC.
Support UFS and eMMC/eMCP Settings and Programs
UFS
1. Support Descriptors, Attributes, and Flags settings
2. Support LUN configured and advance settings
3. RPMB
eMMC
1. Support User Area, Boot1/2 Partition, and Extend CSD
2. Support RPMB, GPP1~4 and Enhanced mode
Support all IC package
Support standard package of UFS and EMMC (BGA153 (11.5x13mm)) or special package of
UMCP and eMCP.
Regular Software Update
Support USB 2.0 and USB 3.0 (Use Power adapter)

NuProg-F8 User Manual
www.dediprog.com 4
III.System Requirement
CPU:
Intel i5 or Above
OS:
Windows 7/Windows 8/Windows 8.1/
Windows 10
USB Port:
USB 2.0 and USB 3.0
Free Dish Space:
At least double of the programming
memory.
CD ROM:
It is necessary for installing the software.
*Since UFS and eMMC have mass volumes, please reserve enough space for buffering.
*Computer performance will affect the read and write of UFS, please choose a computer that
has higher CPU and better performance.

NuProg-F8 User Manual
www.dediprog.com 5
IV. Product Descriptions
4.1 Exterior
A. LCD Keypad Panel
E. Slave Socket Sites
Fig. 4-1
C. Master Site Operation LED
B. Master Socket Site
F. Slave Operation LED
G. Power LED
D. Duplication
Start Button

NuProg-F8 User Manual
www.dediprog.com 6
I. USB3.0 Port
J. Power Connector
Fig. 4-2
H. SATA Output
Fig. 4-3
K. Power Button

NuProg-F8 User Manual
www.dediprog.com 7
A. LCD Keypad Panel
For search and manipulate in standalone mode.
B. Master Socket Site
It is the socket site for the master IC chip, which allows programming the master
chip directly.
C. Master Site Operation LED
Red (Error): Error message; programming failed.
Yellow (Busy): In the progress of programming.
Green (Pass): Program succeeds.
D. Duplication Start Button (For Stand Alone only)
Start Button for duplication.
E. Slave Socket Sites
For duplicate the slave IC chips.
F. Slave Operation LED
The status operation lights for duplication.
G. Power LED
LED will turn on when NuProg-F8 is powered on.
H. SATA Output
For daisy chain NuProg-F8 (Please contact DediProg for further information).
I. USB3.0 Port
For connect the programmer with the computer.
J. Power Button
K. Power Connector
Please use the 15V/4A power supply that DediProg provided.

NuProg-F8 User Manual
www.dediprog.com 8
4.2 Socket Adaptor Installation
Insert an IC into a socket adaptor, and then attach to the socket site.
Fig. 4-4

NuProg-F8 User Manual
www.dediprog.com 10
5.1.2 When it is the first time to install NuProg-F8 software, please install the USB Driver.
Otherwise, the computer will not be able to recognize the programmer.
Fig. 5-3
Fig. 5-2

NuProg-F8 User Manual
www.dediprog.com 11
5.1.3 After installation, Dediware and NuProg icons will appear on the desktop. The
Dediware icon is for StarProg and ProgMaster series programmer; NuProg is for
NuProg-E programmer.
There is another icon called DediWare_CLI; it is the Command Line software for StarProg
Series programmers, and it does not support NuProg series.
StarProg/ProgMaster
Fig. 5-5
NuProg-E
Fig. 5-4

NuProg-F8 User Manual
www.dediprog.com 12
5.2 Install NuProg-F8 Programmer
5.2.1 Place an IC into a socket adaptor and attach it to the socket site.
5.2.2 Connect NuProg-F8 to the computer (USB 3.0 is recommended).
5.2.3 Once start running the Dediware, it will detect programmer automatically and
available for programming.
5.3 NuProg Installation Guide
This section will only illustrate the Copy Function. More information about the
Engineering mode, please refer to the “NuProg-E User Manual”.
5.3.1 Double click NuProg to start Dediware.
Fig. 5-6

NuProg-F8 User Manual
www.dediprog.com 13
5.3.2 Software Introduction
Engineering mode and Functions: Menu includes general functions, like languages
selection, buffer settings, and firmware updates…etc. And, the function icons are
for the Engineering mode to create the master IC chip.
Programmer Information: It shows whether the programmer and the Dediware are
connected. NuProg-F8 has master device and slave devices, but when the
NuProg-F8 is connected to the PC (USB mode), it can only operate the Master Chip,
since the Copy function only works in Standalone mode. As shown as Fig 5-8, the
Firmware version of the master is 1.7.4; FPGA version is 151. The Firmware version
of the slave is 2.2.26; FPGA version is 153.
Log
Window
Batch Config
Setting
CheckSum
data
IC
Information
Engineering
mode and
Functions
Fig. 5-7
Programmer
Information

NuProg-F8 User Manual
www.dediprog.com 14
IC Information: Shows the IC manufacturer, model name, memory size, and the number
of the corresponding socket adaptor
Batch Config Setting: It shows the settings of the copy function
CheckSum Data: It shows the project data that were loaded in the Engineering mode.
Log Window: It displays and records all the actions and the results.
Fig. 5-8

NuProg-F8 User Manual
www.dediprog.com 15
5.4 Stand Alone Mode
NuProg-F8 uses standalone mode to achieve Copy functions; standalone mode means it
can be used without connecting to a computer. Please follow the below steps:
Step 1. After turn on NuProg-F8, the main screen will show the Firmware version and
the FPGA version of the master device. When the NuProg Software is not connected to
the programmer, user can use the LCD keypad to enter the standalone mode on
NuProg-F8.
Step 2. Choose UFS or eMMC according to user’s need.

NuProg-F8 User Manual
www.dediprog.com 16
In the Print Programmer Info, the LCD will display Programmer FW/FPGA/SN…etc.
In the Check socket counter, the LCD will display each connected socket counter.
Step 3. After select Copy UFS or Copy eMMC, please set up the Batch Setting according
to user’s need, press enter to continue, and NuProg-F8 will detect the master IC.

NuProg-F8 User Manual
www.dediprog.com 17
Step 4. Set ID check enable or not. Usually it is recommended to Enable ID check. This
is designed for different chips copying, however, please note that it still has some
limitations.
Master chip size need to be smaller than the Copied chips.
Do not mix the chip types, EX: eMMC chips copy to UFS chips.
eMMC extCSD / UFS attributes, and flags have some OTP values, if the copied chips
has already been written those bit (byte), but the master IC has not, then it might
occur copy failure.
Step 5. Click enter to the next page, NuProg-F8 will initialize the master chip, after
finishing the process, the result will appear on the LCD. It shows details information of
the master IC; including the part number, the LUNs, and the partition size.

NuProg-F8 User Manual
www.dediprog.com 18
Step 6. Press enter and it will give the choices of loading the Config file (N) or
re-scanning the master IC (Y).
Step 6-1. If choosing No at Step 6, it will show Image Config, which will be saved
automatically after scanning the master IC. This selection usually will be used in the
below situations:
The users have a large count of IC devices need to copy, and need to shut down the
programmer every day.
The users want to Verify operation.
If users do not want to re-scan the master IC, they can select [No] to reduce scanning
time, but please note that NuProg-F8 only saves one default config, so if re-scan the
master IC, F8 will create another new config file and also cover the old one.

NuProg-F8 User Manual
www.dediprog.com 19
After reviewing the master IC info, press Enter to start initializing and the copy process.
Step 6-2-1. If choosing Yes at Step 6, then it will ask for the size range for scan limit
setting.

NuProg-F8 User Manual
www.dediprog.com 20
Step 6-2-2. Start scanning the master IC and it will display its result.
Step 6-2-3. Next, after reviewing the master IC info, press Enter to start initializing and
the copy process. Please also remember that F8 has already saved a new config.
Therefore, users can load it next time when they want to copy the same master IC.
Step 7. Start copying.
There are a lot of information on this page, please see the following desciptions.
Table of contents
Other DediProg Motherboard manuals
DediProg
DediProg SF600 Instruction Manual
DediProg
DediProg StarProg-A User manual
DediProg
DediProg SF600 User manual
DediProg
DediProg NuProg-E User manual
DediProg
DediProg NuProg-E User manual
DediProg
DediProg NuProg-E2 User manual
DediProg
DediProg StarProg-ATE User manual
DediProg
DediProg StarProg Series User manual

DediProg
DediProg StarProg-ATE User manual
DediProg
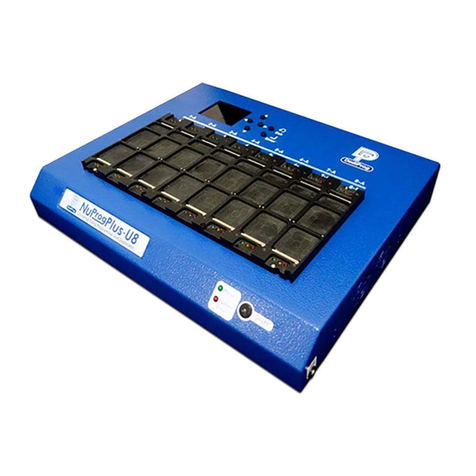
DediProg NuProgPlus-U8 User manual


