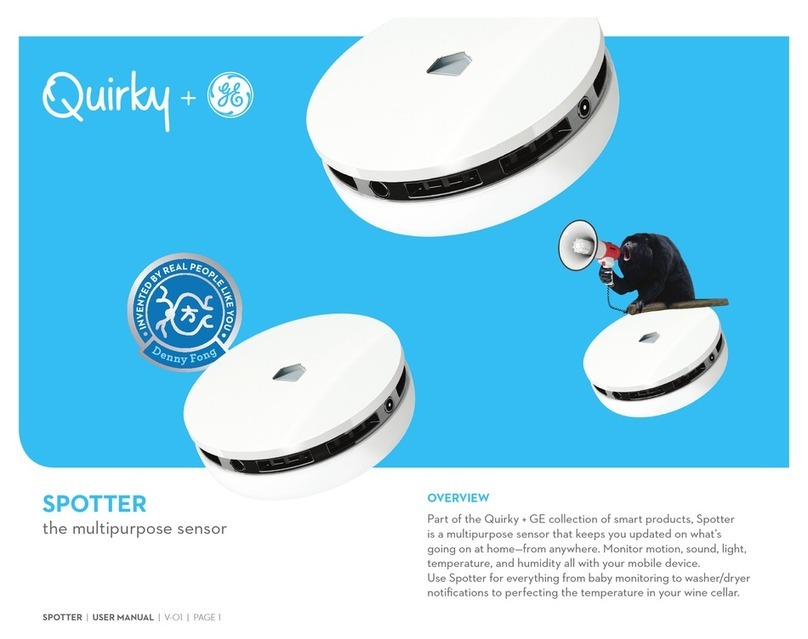
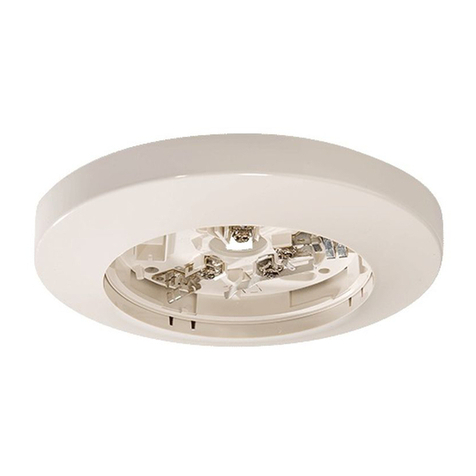
Deep Blue BlueFox Basic User manual

Installation and
Operating Instructions
Pool Safety System
Private Version
EN

2
1 Explanation of Symbols and Safety Notes ............. 5
1.1 Explanation of symbols .......................................................................... 5
1.2 Safety notes ........................................................................................... 5
2 Overview ........................................................................................... 6
2.1 Notes on the installation and operating instructions .............................. 6
2.2 Operating principle ................................................................................ 6
2.3 Intended use .......................................................................................... 7
2.4 Package contents ................................................................................... 8
3 Using the System for the First Time ............................... 10
4 Installing the BlueFox System ........................................... 11
4.1 Installing and connecting the alarm box ................................................. 11
4.1.1 Selecting a location for installation ............................................ 11
4.1.2 Installing the alarm box .............................................................. 12
4.1.3 Electrical connections to the alarm box ....................................... 12
4.2 Fitting the pool sensor ........................................................................... 13
5 Using the System ......................................................................... 16
5.1 Preparations ........................................................................................... 16
5.2 Alarm ..................................................................................................... 16
5.3 After use ................................................................................................ 16
6 Testing the System ..................................................................... 17
7 Wrist Computer ............................................................................ 18
7.1 Preparation ............................................................................................ 18
7.2 Charging the wrist computer’s battery ................................................... 18

3
7.3 Programming the alarm depth and time ................................................. 20
7.4 Calling the status / Clearing the alarm / Resetting ................................... 22
8 BlueFox Control Software ..................................................... 23
8.1 Hardware requirements .......................................................................... 23
8.2 PC operating system requirements ......................................................... 23
8.3 Installing the BlueFox Control software .................................................. 23
8.4 Using the BlueFox control software ........................................................ 26
8.5 Uninstalling the BlueFox control software ............................................... 26
8.6 Updates ................................................................................................. 26
9 Meaning of the LED Display .................................................. 27
9.1 The wrist computer in use ...................................................................... 27
9.2 The wrist computer connected to a PC or charging station ..................... 27
10 Maintenance / Service ............................................................. 28
11 Troubleshooting ........................................................................... 28
12 Technical Specifications ......................................................... 30
12.1 General .................................................................................................. 30
12.2 Operational, transport and storage conditions ........................................ 30
12.3 Power failure ......................................................................................... 31
12.4 Wrist computer battery capacity ............................................................. 31
13 Disclaimer ........................................................................................ 31
14 Warranty ........................................................................................... 32
15 Disposal ............................................................................................. 33

4
16 Optional Accessories ................................................................ 33
17 Configuration table .................................................................... 34
Copyright Deep Blue Marine AG, 2010
Patent pending 102008050558.7

5
1 Explanation of Symbols and Safety Notes
1.1 Explanation of symbols
Safety notes
In the text, safety notes are marked with a warning triangle.
Signal words denote the level of danger that would occur if the measures for mini-
mising the risk were not followed.
Caution means that minor material damage could occur.
Warning means that minor personal injury or serious material damage could occur.
Danger means that serious personal injury could occur. In particularly serious cir-
cumstances there is a risk of death.
yA point appears before instructions.
1.2 Safety notes
Safety notes
yBefore tting and commissioning the BlueFox System or before in-
stalling and using the BlueFox Control Software you must have read
and understood these installation and operating instructions.
yFollowing the instructions contained in these installation and operat-
ing instructions will not completely protect you or third parties from
danger.
yObserve local regulations pertaining to "electrical installations in
damp environments".
yNo modications may be made to the BlueFox System.
yThe alarm box, pool sensor and all other BlueFox components may
not be opened.

6
Safety notes
yObserve the safety notes contained in these installation and operat-
ing instructions.
yThe BlueFox system does not provide complete protection from
drowning. Monitoring the swimming pool remains your personal
responsibility. See Disclaimer, P. 31.
yThe BlueFox system may only be used for the intended purpose and
in the intended eld of application. See Intended use, P. 7.
yOnly use the plug-in mains adapter supplied and original BlueFox
accessories.
yA short tone sequence will sound if there is a power failure. The
BlueFox system will then no longer provide support for monitoring
the swimming pool. Have the plug-in mains adapter checked by a
specialist.
2 Overview
2.1 Notes on the installation and operating instructions
These installation and operating instructions describe the installation and use of the
BlueFox system, the installation and use of the BlueFox Control software and the
conguration of the wrist computer.
You will nd “step-by-step” instructions in the section Using the System for the First
Time, P. 10.
You can download these installation and operating instructions from http://www.
deepbluemarine.ch/ as a PDF le. The hyperlinks, bookmarks and search function of
the PDF version allow you to quickly nd topics.
The BlueFox system is under continuous development. Pictorial and graphical exam-
ples in these installation and operating instructions may deviate from the equipment
supplied.
2.2 Operating principle
For each swimming pool user, a wrist computer is pre-programmed with a personal
alarm depth and alarm time – according to the user’s swimming ability. Program-
ming is carried out using the PC program BlueFox Control.
When the user enters the water the wrist computer automatically switches on (wa-
ter contacts).
At depths greater than the alarm depth and when the programmed alarm time ex-

7
pires, the wrist computer activates the Alarm 2. The pool sensor receives the alarm
signal and routes it to the alarm box. The siren and warning lights are activated.
Swimming pool
Alarm depth
Case A
Case B
Depth profile
Wrist computer
Time
Depth
2
4
5
1
Programmed
alarm time
Warning lights
Warning lights
Siren
6.5 min
3
Siren
Wrist computer transmits
alarm (6 min.)
Alarm sequence
1 Wrist computer is deeper than the alarm depth
2 Once the pre-programmed alarm time has expired the alarm is acti-
vated: The warning lights and siren are activated.
Case A (switch is pressed):
3 The siren on the alarm box can be deactivated by pressing the switch
. The warning lights continue to illuminate until the wrist computer is
taken out of the water 4.
Case B (switch is not pressed):
The warning lights and siren are deactivated after 6.5 minutes.
2.3 Intended use
The BlueFox system has been designed for use in private and public swimming pools
(indoor and outdoor swimming pools). The alarm box is protected against light wa-
ter jets (IP65). For outdoor installations the alarm box must be protected from direct
sunlight.

8
2.4 Package contents
S
E
N
S
O
R
S
E
N
S
O
R
S
E
N
S
O
R
Alarm box
1 Warning lights with siren
2 12 V connection
3 Switch (on/off/ siren
off)
4 Pool sensor connection
Alarm box installation com-
ponents
5 4 brackets
6 4 screws
(self tapping)
7 4 screws
8 4 plugs
Plug-in mains adapter
Pool sensor
9 pool sensor with cable
mounting ring
4 screws
5 m/16 ft
10 m/33 ft
2
3
1
4
5
7
8
6
9
Fig. 1 Alarm box pool sensor
Adhesive (solvent-free)
Allan wrench 3 mm
Fig. 2 Adhesive and tools

9
USB cable
Magnetic adapter
(connects wrist computer / USB
cable)
USB plug-in mains adapter
Wrist computer (2 pcs.)
1 Red and green LEDs
2 Water contacts
(gold-plated)
2
1
Fig. 3 Wrist computer accessories
For further BlueFox system components, see Optional Accessories, P. 33.

10
3 Using the System for the First Time
yRead the installation and operating instructions.
yCharge the wrist computer battery, see Charging the wrist computer’s battery,
P. 18.
yInstall the BlueFox Control software, see Installing the BlueFox Control software,
P. 23.
yCongure the wrist computer for system test (alarm depth 5 cm, alarm time
5 sec.), see Programming the alarm depth and time, P. 20.
yInstall and connect the alarm box, see Installing and connecting the alarm box,
P. 11.
yDetermine the location for installing the pool sensor, see Fitting the pool sensor,
P. 13.
yCheck the pool sensor position, see Testing the System, P. 17.
yFix the pool sensor cable.
yCongure a wrist computer for each person using the swimming pool, see Pro-
gramming the alarm depth and time, P. 20.
yStart using the BlueFox system, see Using the System, P. 16.

11
4 Installing the BlueFox System
yDispose of packaging materials in an environmentally acceptable manner
yRead the Installation and operating instructions
4.1 Installing and connecting the alarm box
Only an approved specialist may connect the electricity supply, connect the unit to
the mains and commission the alarm box.
4.1.1 Selecting a location for installation
When selecting a location for installation take into consideration:
– The pool sensor must be installed at the deepest end of the swimming pool. See
Fitting the pool sensor, P. 13.
– The minimum distance between the alarm box and the swimming pool is 2 m /
7 feet.
– The alarm box must be installed out of the reach of children.
– The on the alarm box must be within reach of the operator.
– Observe any country-specic regulations pertaining to the installation location.
– Observe the local building regulations.
– Observe the requirements of the local electricity supply utility.
– In outdoor locations the alarm box must be protected from direct sunlight.
Option: Pool sensor cable extension (see Optional Accessories, P. 33)

12
4.1.2 Installing the alarm box
1
2
3
4x
4x
4x
yAfx the brackets to the alarm box using the self-tapping screws 1.
yHold the alarm box to the wall and mark the drilling positions.
Danger! Electric shock risk!
Connect the drill to a residual current circuit breaker.
yDrill the holes for the plugs (drill diameter 6 mm) and insert the plugs 2.
yFit the alarm box to the wall 3.
4.1.3 Electrical connections to the alarm box
Requirements for the plug-in mains adapter
– The mains socket may not be located in a wet area (swimming pool, shower,
etc.).
– The mains socket must be installed by an approved expert.
– AC 100-240 V, 50 Hz
– Residual current circuit breaker and earth terminal
yConnect the 12 V cable to the alarm box and screw tight.
yFix the 12 V cable.

13
Danger! Electric shock risk!
Do not use extension cables between the plug-in mains adapter and the
mains socket.
yInsert the plug-in mains adapter into a mains socket (with earth terminal) located
away from the wet area. Use a residual current circuit breaker. (See above, Re-
quirements for the plug-in mains adapter, P. 12).
yIf the cable is too short, have an additional mains socket (with residual current
circuit breaker and earth terminal) tted outside the wet area by an approved
electrician.
4.2 Fitting the pool sensor
The pool sensor must be tted to the pool wall at the deepest end of the swim-
ming pool. The pool sensor must be “visible” from all points in the swimming pool.
It is not necessary to reduce the water depth in order to t the sensor. The supplied
adhesive can be used underwater.
3/3
2/3
1
2
Swimming pool
Fig. 4 Positioning the pool sensor
yDetermine the deepest area of the swimming pool 1.
yLower the pool sensor on its cable to 2/3 of the maximum depth 2 (soft side of
the pool sensor must face the water).
yFor test purposes, afx the pool sensor cable to the edge of the swimming pool
temporarily.
yEnsure that the plug on the pool sensor cable is dry.

14
yConnect the pool sensor cable to the alarm box and screw tight 3.
S
E
N
S
O
R
S
E
N
S
O
R
S
E
N
S
O
R
3
Fig. 5 Connecting the pool sensor to the alarm box
yIf the pool sensor cable is too short: use an extension cable (see Optional Acces-
sories, P. 33).
y Check the position of the pool sensor, see Testing the System, P. 17.
y If test fails: Check the position of the pool sensor and test again.
Following successful test:
yMark the position of the pool sensor in the swimming pool.
yTake the pool sensor out of the water.
S
E
N
S
O
R
S
E
N
S
O
R
S
E
N
S
O
R
4
5
6
4x
A
yLoosen the screws 4.
yRemove the mounting ring 5.
Fig. 6 Removing the mounting ring
yRead the instructions for use and the safety datasheet for the adhesive.
yApply a thin layer of the supplied adhesive to the hollow on the rear of the
mounting ring (surface A).
yWithin 6 minutes, afx surface A of the mounting ring to the marked position in
the swimming pool. The cable slot 6 should be at the top.
yDo not apply any loads to the mounting ring for 24 hours.

15
Caution!
Incorrect tting of the pool sensor will prevent proper monitoring of
the swimming pool. The side of the pool sensor marked "Sensor"
must face into the swimming pool.
S
E
N
S
O
R
S
E
N
S
O
R
S
E
N
S
O
R
8
7
4x
"Sensor"
6 yAfter a minimum of 24 hours
ypush the pool sensor into the
mounting ring 7 (route the pool
sensor cable through the slot in the
mounting ring 6).
yTighten the screws using only slight
force 8.
Fig. 7 Fitting the pool sensor into the mounting ring
yAfx the pool sensor cable.
yTest the system, see Testing the System, P. 17.

16
5 Using the System
5.1 Preparations
y Press the switch on the alarm box (the alarm box activates, the switch
illuminates green and a short tone sounds).
y Test the system (see Testing the System, P. 17).
y Check the wrist computer (see Wrist Computer, P. 18).
y Ensure that all persons in the swimming pool area are wearing a wrist computer.
5.2 Alarm
If an alarm is triggered the siren will sound and the warning light will ash. The red
LED on the wrist computer ashes.
y Find the person in distress and recover that person immediately. If there are no
longer any wrist computers with triggered alarms in the swimming pool the
alarm lights and sirens will be automatically deactivated.
y Commence lifesaving actions.
y Call for medical assistance.
Turn siren off
yBriey press the switch on the alarm box: The siren turns off.
Resetting the wrist computer
yOnce the rescue is completed: Reset the wrist computer’s alarm using the Blue-
Fox Control software (see Calling the status / Clearing the alarm / Resetting, P. 22)
yCharge the wrist computer’s battery (see page 18).
5.3 After use
yTurn off the alarm box: Hold the switch down for approx. 5 seconds (a short
tone sequence sounds and the green LED extinguishes).
yDry the wrist computer using a cloth.
yCharge the battery if the red LED on the wrist computer ashes at one-second
intervals (when the unit is out of the water). See Charging the wrist computer’s
battery, P. 18.

17
6 Testing the System
yCongure the wrist computer for system test, see Programming the alarm depth
and time, P. 20):
Alarm depth: 5 cm
Alarm time: 5 sec.
Caution!
The siren will sound during the system test.
Immediately remove the test wrist computer from the water once the
alarm has activated. Use ear protection, keep children away from the
siren.
y Turn on the alarm box (see Using the System, P. 16).
y Hold the test wrist computer in the swimming pool long enough for the siren to
sound and the warning light to ash.
y Remove the test wrist computer from the water. The warning lights and siren
will be deactivated automatically.
y Repeat the test at various locations in the swimming pool (recesses, corners).
y If the test is only partially successful or if the test fails: See Troubleshooting, P. 28

18
7 Wrist Computer
Wrist computer
1 Red LED
2 Green LED
3 Water contacts (gold-plated)
Rear
5 Connection for magnetic adapter (charging
and communication with a PC)
Serial number
1 2
3
5
Fig. 8 Wrist computer
7.1 Preparation
yLightly shaking the wrist computer will cause it to leave energy saving mode.
yWhen the green LED is ashing the wrist computer is ready for use.
yCharge the battery if the red LED on the wrist computer ashes at one-second
intervals (when the unit is out of the water). See Charging the wrist computer’s
battery, P. 18.
yBefore rst use or if the LEDs do not ash: Charge the battery, See Charging the
wrist computer’s battery, P. 18.
ySet the alarm depth and alarm time, see Programming the alarm depth and
time, P. 20.
yEnsure that all persons in the swimming pool area are wearing a wrist computer.
yBegin using the alarm box, see Using the System, P. 16.
7.2 Charging the wrist computer’s battery
yCharge the battery before rst use.
yCharge the battery if the red LED on the wrist computer ashes at one-second
intervals (when the unit is out of the water).

19
Note: If the red LED on the wrist computer begins to ash, the wrist computer can
still be used until the end of the day.
Danger! Electric shock risk!
Only use the USB plug-in mains adapter, USB cable and magnetic
adapter in dry rooms.
Caution!
Humidity may damage USB plug-in mains adapter, USB cable and mag-
netic adapter.
Only charge the wrist computer in dry rooms. Before connecting the
wrist computer dry it using a dry cloth.
Magnetic adapter
Wrist computer
USB plug-in mains
adapter
1
5
3
2
4
USB cable
y Connect the USB cable (small plug)
to the magnetic adapter 1.
y Connect the magnetic adapter to
the wrist computer 2 (note correct
alignment).
y Charging using the USB mains
adapter:
Connect the USB cable (large plug)
to the USB plug-in mains adapter 3
and connect the USB plug-in mains
adapter to the electricity supply 4.
y Charging via a PC USB connec-
tion:
Connect the USB cable (large plug)
to the PC 5 and power-up the PC.
Charging in progress: Red LED ashes every 5 seconds
Charging complete: Green LED ashes every 5 seconds
Time required for a full charge: Approx. 2-3 hours
y After charging:
Disconnect the wrist computer from the magnetic adapter.
Remove the USB plug-in mains adapter from the electricity supply.

20
7.3 Programming the alarm depth and time
The alarm depth and alarm time are programmed using the BlueFox control soft-
ware. Installation of the software is described in the section Installing the BlueFox
Control software, P. 23.
Caution!
Humidity may damage USB plug-in mains adapter, USB cable and mag-
netic adapter.
Only connect wrist computers to the PC in dry rooms.
Before connecting wrist computers, dry them using a dry cloth.
y Connecting a wrist computer to a PC:
Magnetic adapter
Wrist computer
1
3
2
USB cable
y Connect the USB cable (small
plug) to the magnetic adapter
1.
y Connect the magnetic adapter
to the wrist computer 2 (note
correct alignment).
y Connect the USB cable (large
plug) to the PC 3.
yAllocate each person or group of people an individual alarm depth and alarm
time together with a wrist computer colour.
yEnter the alarm depth and alarm time together with the associated wrist compu-
ter colour into the Conguration table, P. 34, .
yOpen the BlueFox Control software:
Double-click the symbol on the desktop or navigate via
Start > Program > BlueFox Control.
Other manuals for BlueFox Basic
1
Table of contents
