DeerValley DV-1S0029 Installation instructions

www.deervalleybath.com |(+1) 312-626-9466 | service@ deervalleybath.com
Smart Toilet
(DV-1S0029)
NOTE: Drawings may not exactly define contour of the product.
Installation and
Owner’s Manual

service@deervalleybath.com
(+1) 312-626-9466

Important Safe Guards 02
18
20
04
WARNING & Attention
Install the Remote Control
Install the Remote Control
03
Explanation of Terms and Symbols
11
12Test before Use
10
10
10
Product Installation
Tools needed
Parts included
11
12
13
Smart Toilet overall view
Remote Control
Precautions before Installation
11
Parts Diagram
14
Installation The Smart Toilet
Remote Control Operation
24Knob and Other Operation
26Battery Backup Installation
26Specifications

1.
Important Safe Guards
(+1) 312-626-9466
www.deervalleybath.com
NOTE: Specialized tools may be necessary to install DeerValley Smart Toilet, plumbing not included.
Installation and
Owner’s Manual
IMPORTANT SAFEGUARDS
When using electrical products, especially when children are present, basic safety precautions
should always be followed, including the following:
GROUNDING INSTRUCTIONS
This product must be grounded. In the event of an electrical short circuit, a grounded product
reduces the risk of electric shock.This product is equipped with a cord having a grounded wire
with a grounded plug. The plug must be plugged into an GCFI outlet that is properly installed
and grounded.
DANGER – Improper use of the plug can result in a risk of electric shock.
Check with a licensed electrician or serviceman if the grounding instructions are not completely
understood. Or if there is any doubt the product is properly grounded. This product is for use
on a nominal 110 V circuit, and has a grounded plug that looks like the electrical plug
illustrated below.
Grounding Methods
Grounded
outlet
Grounding pin
Grounded
outlet bo
x
AA200
*WARNING: Risk of electric shock Connect only to a circuit
that is protected by a ground-fault circuit-interrupter (GFCI).

-3- (+1) 312-626-9466
www.deervalleybath.com
2. Explanation of Terms and Symbols
NOTE: Drawings may not exactly define contour of the product.
Installation and
Owner’s Manual
Thank you for purchasing our product. Please read this User Manual before installation
and use and save it for future reference. The hazards and warnings listed herein are
important to our users' safety. Significant consequences may result from failure to
heed warnings.
Keep product away from any wet environments, including, but is not
limited to, humid environments, close proximities to baths, showers
or sinks.
Indicates possible injury or death resulting from improper usage due to
disregarding this message.
Indicates human injury or property loss that may result from improper
usage due to disregarding this message.
When used with the above "Warning" and "Attention" signs, indicates a
strict request to follow noted precautions.
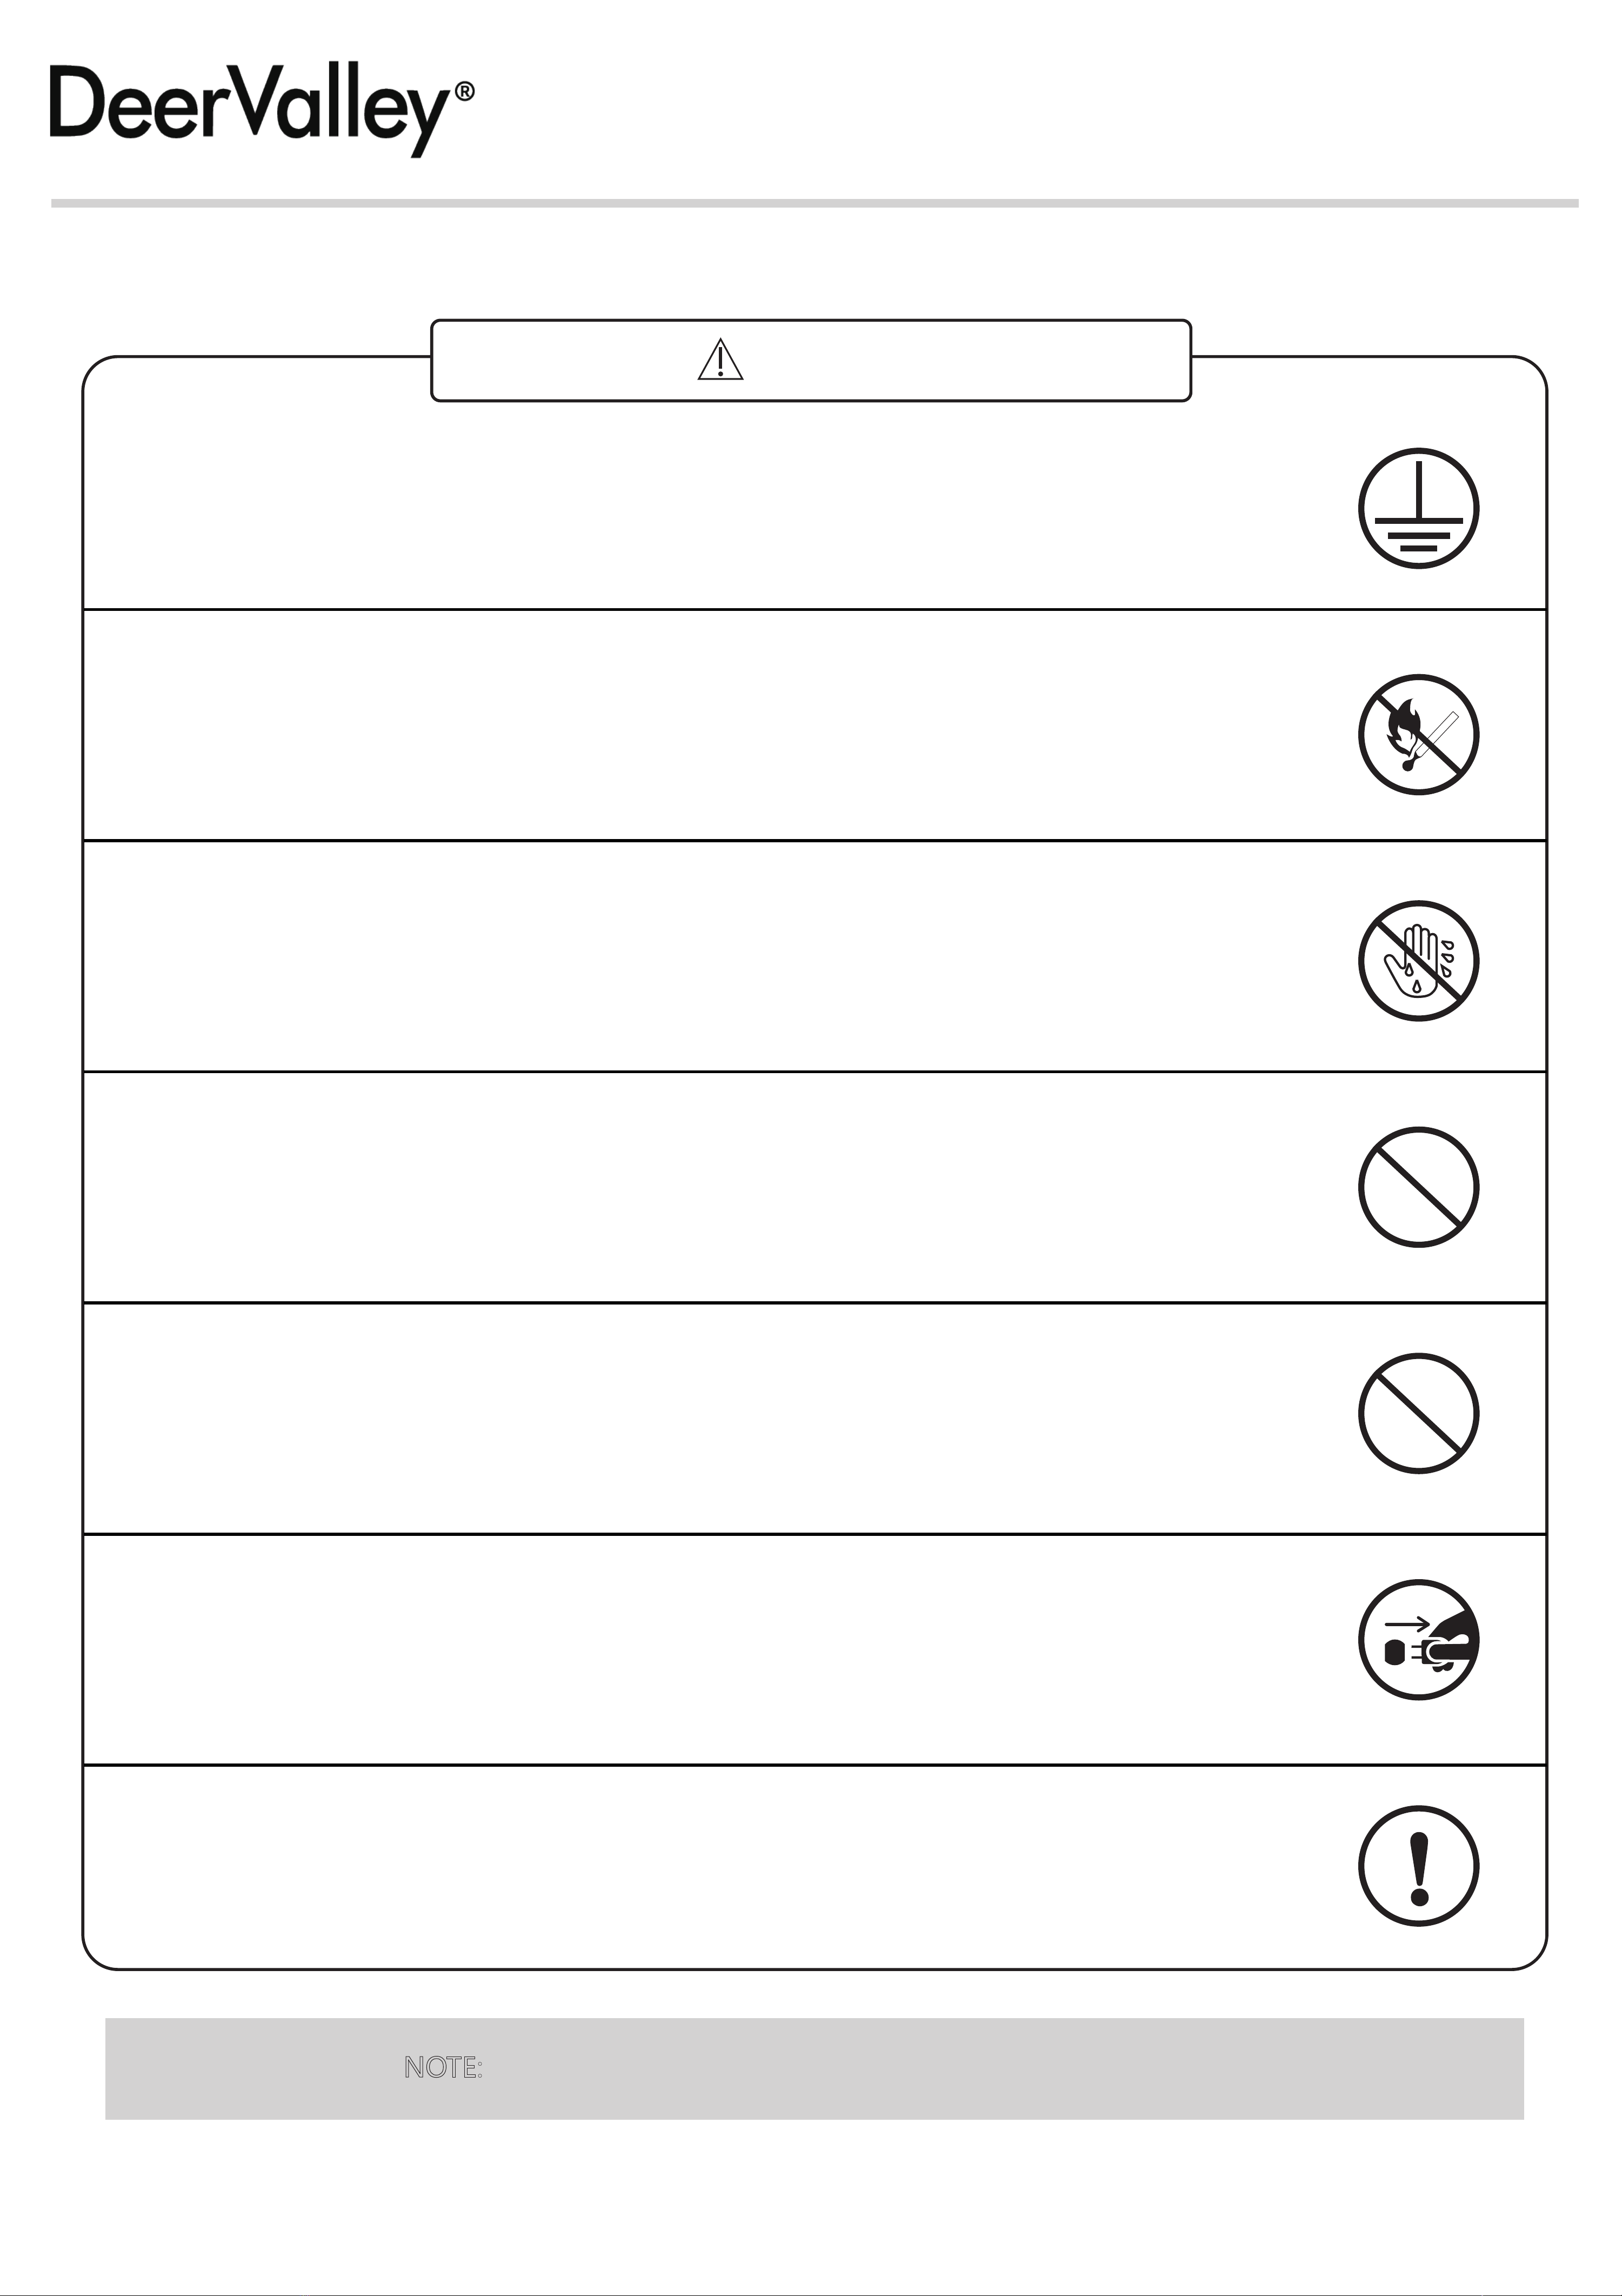
Prohibits any individual from performing any action with this symbol.
Prohibits any individual from disassembling the product.
Do not touch.
Do not touch with a wet hand.
Keep away from any extreme heat or fire.
Operate only as instructed.
Unplug the unit from power.
Protective grounding.
Explanation of Terms and Symbols
WARNING
ATTENTION
(+1) 312-626-9466
www.deervalleybath.com
-4-
NOTE: Drawings may not exactly define contour of the product.
3. WARNING & Attention
Installation and
Owner’s Manual
WARNING
This product needs to be properly grounded.
Risk of electric shock. If unsure, contact an electrician.
Do not place a lit cigarette along with other burning objects into the unit.
Risk of fire.
Do not touch, insert or pull out the power plug with a wet hand.
Risk of electric shock.
Do not use during thunderstorms (pull out the power plug during storms).
Failure in doing so may lead to injury or malfunction.
Do not use a power socket in poor condition or a damaged power plug.
Risk of fire and/or electric shock.
When the seat or lid is damaged, to avoid any harm, be sure to unplug
the unit from power, shut off the water supply and contact your local
distributor for replacement.
Risk of fire and/or electric shock.
The power socket in use should be within the specified range
(AC 110 V ± 10%, Max current > 10A).
Risk of fire and/or electric shock.

-5- (+1) 312-626-9466
www.deervalleybath.com
NOTE: Drawings may not exactly define contour of the product.
Installation and
Owner’s Manual
WARNING
Do not pull, damage, bend, twist, stretch, roll, bundle, clamp or squeeze
the power cable. Do not place anything on power cable.
Risk of fire and/or electric shock.
This product is not a toy. Advise children not to play with product.
Risk of injury.
Regularly unplug the unit from power and wipe off any dust on the plug
using a dry cloth.
Risk of fire.
Young children, the aged and the physically disabled should be given
supervision by a person responsible for their safety while using the unit.
Otherwise, prolonged use may cause low temperature burns.
If the power cord is damaged, to prevent any injuries or accidents,
it should be replaced by a professional.
Risk of fire and/or electric shock.
For cleaning or maintenance of plastic parts, do not use any harsh
cleaning agents. (These include but not limited to concentrated sulfuric
acid, concentrated nitric acid, glacial acetic acid, carbon tetrachloride,
chloroform, acetone, butanone, benzene, methylbenzene, phenol,
methylphenol, dimethylformamide, methyl ether, soybean oil, acetate,
40% nitric acid, thick salt acid, 95% alcohol, kerosene,gasoline, or brake oil, etc.)
Otherwise, the plastic part may crack and cause personal injury;
Risk of fire and / or electric shock.
(+1) 312-626-9466
www.deervalleybath.com
-6-
NOTE: Drawings may not exactly define contour of the product.
Installation and
Owner’s Manual
WARNING
Do not disassemble, repair or alter this product on your own. Call in a
professional or contact HuiDa for future advise.
Risk of fire, electric shock, and/or other accident that may lead to injury.
Do not use industrial or polluted water.
Risk of cystitis, dermatitis and electric shock and fire due to internal
corrosion of the unit.
Do not apply any force to the unit's seat and lid. Do not stand on the lid
or open or close the lid and the seat forcefully.
Risk of product damage and user injury.
Do not add water or detergent into the unit or onto the remote
control. Do not splash water or cleaner on the product and power plug.
Risk of fire and electric shock.
Do not place your hand or any other object into the dryer outlet,
and do not cover the dryer and dryer outlet when product is.
Risk of fire, electric shock, and/or other accident that may lead to injury.
Do not install or use the unit in a damp and easily immersed bathroom.
Do not spray water on this product or rinse it with water to prevent damage.
Risk of fire and electric shock.
Do not spray urine at the dryer.
Risk of electric shock.
ATTENTION
Do not use the heated seat or dryer for a long time with high or middle
temperature.
Risk of burns.
Avoid direct sunlight or heat.
Risk of product discoloration.
While using the unit, make sure that the skin is in contact with the seat
sensor area. Otherwise, product may not operate correctly.
Children may have difficulty staying in contact with sensor area.
(+1) 312-626-9466
www.deervalleybath.com
-7-
NOTE: Drawings may not exactly define contour of the product.
Installation and
Owner’s Manual
BATTERY WARNING
Read the following for proper battery usage:
●Properly install the battery according to its correct polarity.
●Remove the battery during long periods without use.
●Replace the battery before it reaches the end of its usage. Failure to do
so may result in interrupted signals.
●Cover the battery with tape before disposal. This will prevent battery fluid
leakage that may cause fire and / or other damages.
●Place the battery out of children and infant reach.
If battery is swallowed, contact a doctor immediately.
●If battery fluid leaks onto user, quickly rinse off with clean water.
Do not do the following with the batteries:
●Do not hold or store with metal objects (such as a necklace or a watch).
●Do not mix new and old batteries.
●Do not pull apart battery or throw it into water and/or fire.
Battery fluids may cause a fire.
(+1) 312-626-9466
www.deervalleybath.com
-8-
NOTE: Drawings may not exactly define contour of the product.
Installation and
Owner’s Manual
To avoid danger from false reset of the thermal breaker, do not supply
power through an external switching device, such as a timer, or connect
to a circuit that is periodically turned on and off by a general-purpose
component.
Do not hit the ceramic with gravity to prevent damage and
water leakage.
Do not spray urine on the nozzle.
Dirt may cause clogging.
Please do not bury cementitious materials (cement mortar, etc.)
in the toilet base to prevent the toilet from being cracked due
to expansion.
Do not flush newspaper, diaper pads, sanitary napkins and other items
that are easily blocked into the toilet.
When replacing the filter, be sure to turn off the angle valve.
When the filter is being installed, be sure to fasten it with force.
Risk of leakage.
Do not use the unit in an environment below 0°C.
ATTENTION
(+1) 312-626-9466
www.deervalleybath.com
-9-
NOTE: Drawings may not exactly define contour of the product.
Installation and
Owner’s Manual
Unplug the unit when the product is in disuse for a long time. Make
sure to shut off the water supply and drain the water inside the product.
Risk of fire, leakage and product damage.
Do not use old hose to connect to unit. Use the one provided with your
product. Anything else connected to the older hose may need replaced.
Risk of water leakage and property loss.
When storing or transporting in cold climate, make sure to drain the
water from the unit. Product may crack and other damages may occur
due to freezing water.
Risk of fire, leakage, and product damage.
In case of sudden power failure, unplug the power plug and turn off
the angle valve to prevent water leakage.
Risk of water leakage or property loss.
ATTENTION
WARNING– To reduce the risk of burns, electrocution, fire, or injury;
1. Close supervision is necessary when this product is used by, on, or near children.
2. Use this product only for its intended use as described in this manual. Do not use
attachments not recommended by the manufacturer.
3. Never operate this product if it has a damaged cord or plug, if it is not working properly, if it
has been dropped or damaged, or dropped into water.
Return the product to a service center for examination and repair.
1. Keep the power cord away from heated surfaces.
2. Never block the air openings of the product or place it on a soft surface, such as a bed or
couch, where the air openings may be blocked. Keep the air openings free of lint, hair, and
the like.
3. Never use while sleeping or drowsy.
4. Never drop or insert any object into any opening or hose.
5. Do not use outdoors or operate where aerosol (spray) products are being used or where
oxygen is being administered.
6. Connect this product to a properly grounded outlet only. See Grounding Instructions.

4. Product Installation
(1)
Tools needed
(2)
Parts included
Smart Toilet T-Valve Wax Ring
Remote Control assembly
Floor Bolts
Operating instruction
and other prints
Connector
(+1) 312-626-9466
www.deervalleybath.com
NOTE: Drawings may not exactly define contour of the product.
Please confirm that all articles in the package are complete. If any of parts
are missing, please contact our customer service department at(Customer
fill in the after-sales phone number). The picture is for reference only,
please refer to the actual product.
-10-
Installation and
Owner’s Manual
Utility Knife
Tape Measure
Drill(with 6mm Bit)
23-26mm(Adjustable Wrench)
Raw Tape
Screwdriver
Marker
Measuring Cup

3. Parts Diagram
(1)
Smart toilet overall view
-11- (+1) 312-626-9466
www.deervalleybath.com
NOTE: Drawings may not exactly define contour of the product.
Installation and
Owner’s Manual
The appearance and functions of the real product shall prevail.
knob
Knob
Power Plug
Dryer
Nozzle
(Rear Wash and Front Wash)
Toilet
Heated Seat
Seat Sensor
Cover
Safety Instruction
Foot Touch
Tee valve
Toilet Water
Supply Hose
Intelligent Toilet Water
Supply Hose
Feminine
Water Supply
Angle Valve
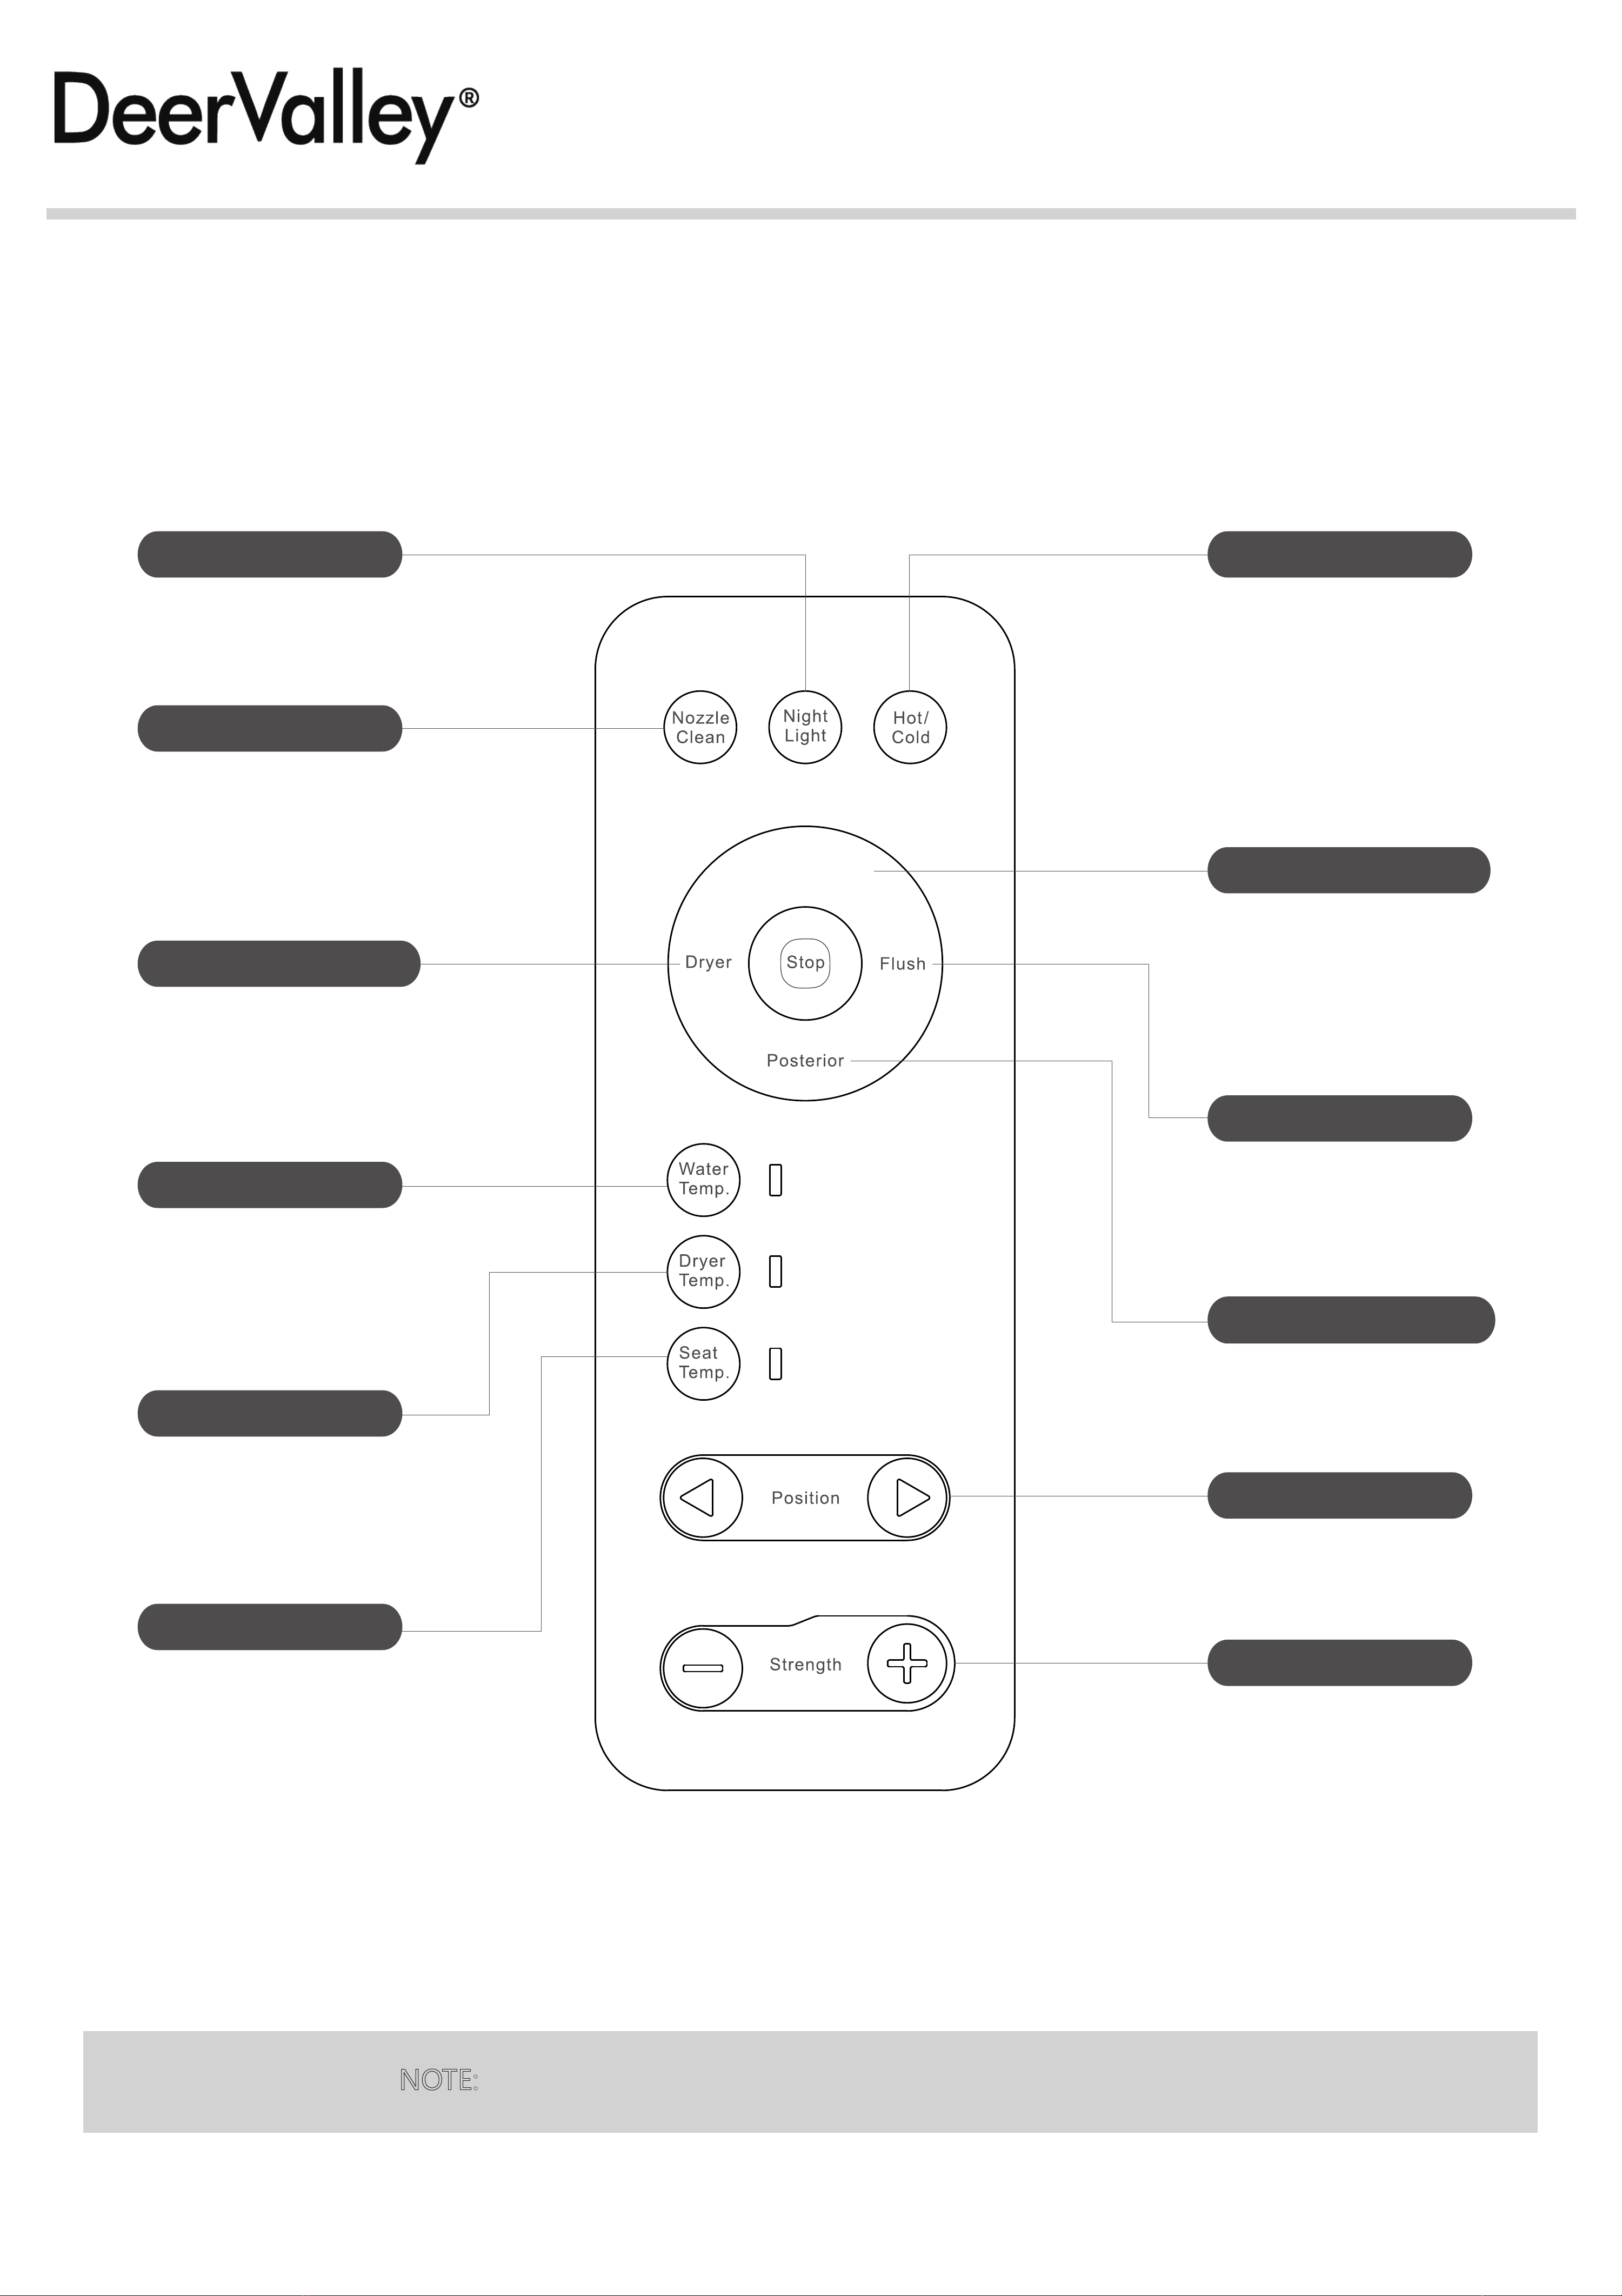
(2) Remote Control
-12- (+1) 312-626-9466
www.deervalleybath.com
NOTE: Drawings may not exactly define contour of the product.
Installation and
Owner’s Manual
Posterior
Used for posterior
wash
Flush
Flush after use
Hot/Cold
Alternate wash with
hot and cold water
Feminine
Used for wash of
female's
Position
Adjustment of 5 levels
can be realized at
nozzle's position
Strength
Adjust strength of
posterior and
feminine wash
Night Light
On/off of night light
Nozzle Clean
Key for nozzle clean
Dryer
Dry washed part
with warm air
Seat Temp.
Temperature of seat
ring is adjustable
Dryer Temp.
Water Temp.
Water temperature
can be adjusted at
wash
Temperature of warm
air can be adjusted
Feminine

-13-
(3) Precautions before Installation
(+1) 312-626-9466
www.deervalleybath.com
NOTE: Drawings may not exactly define contour of the product.
Installation and
Owner’s Manual
Water Pressure Requirements
The minimum dynamic operating water pressure is 25 Psi, and the maximum static water
pressure is 80 Psi.
18.54 26.88
15.78
(+1) 312-626-9466
www.deervalleybath.com
-14-
NOTE: Drawings may not exactly define contour of the product.
Installation and
Owner’s Manual
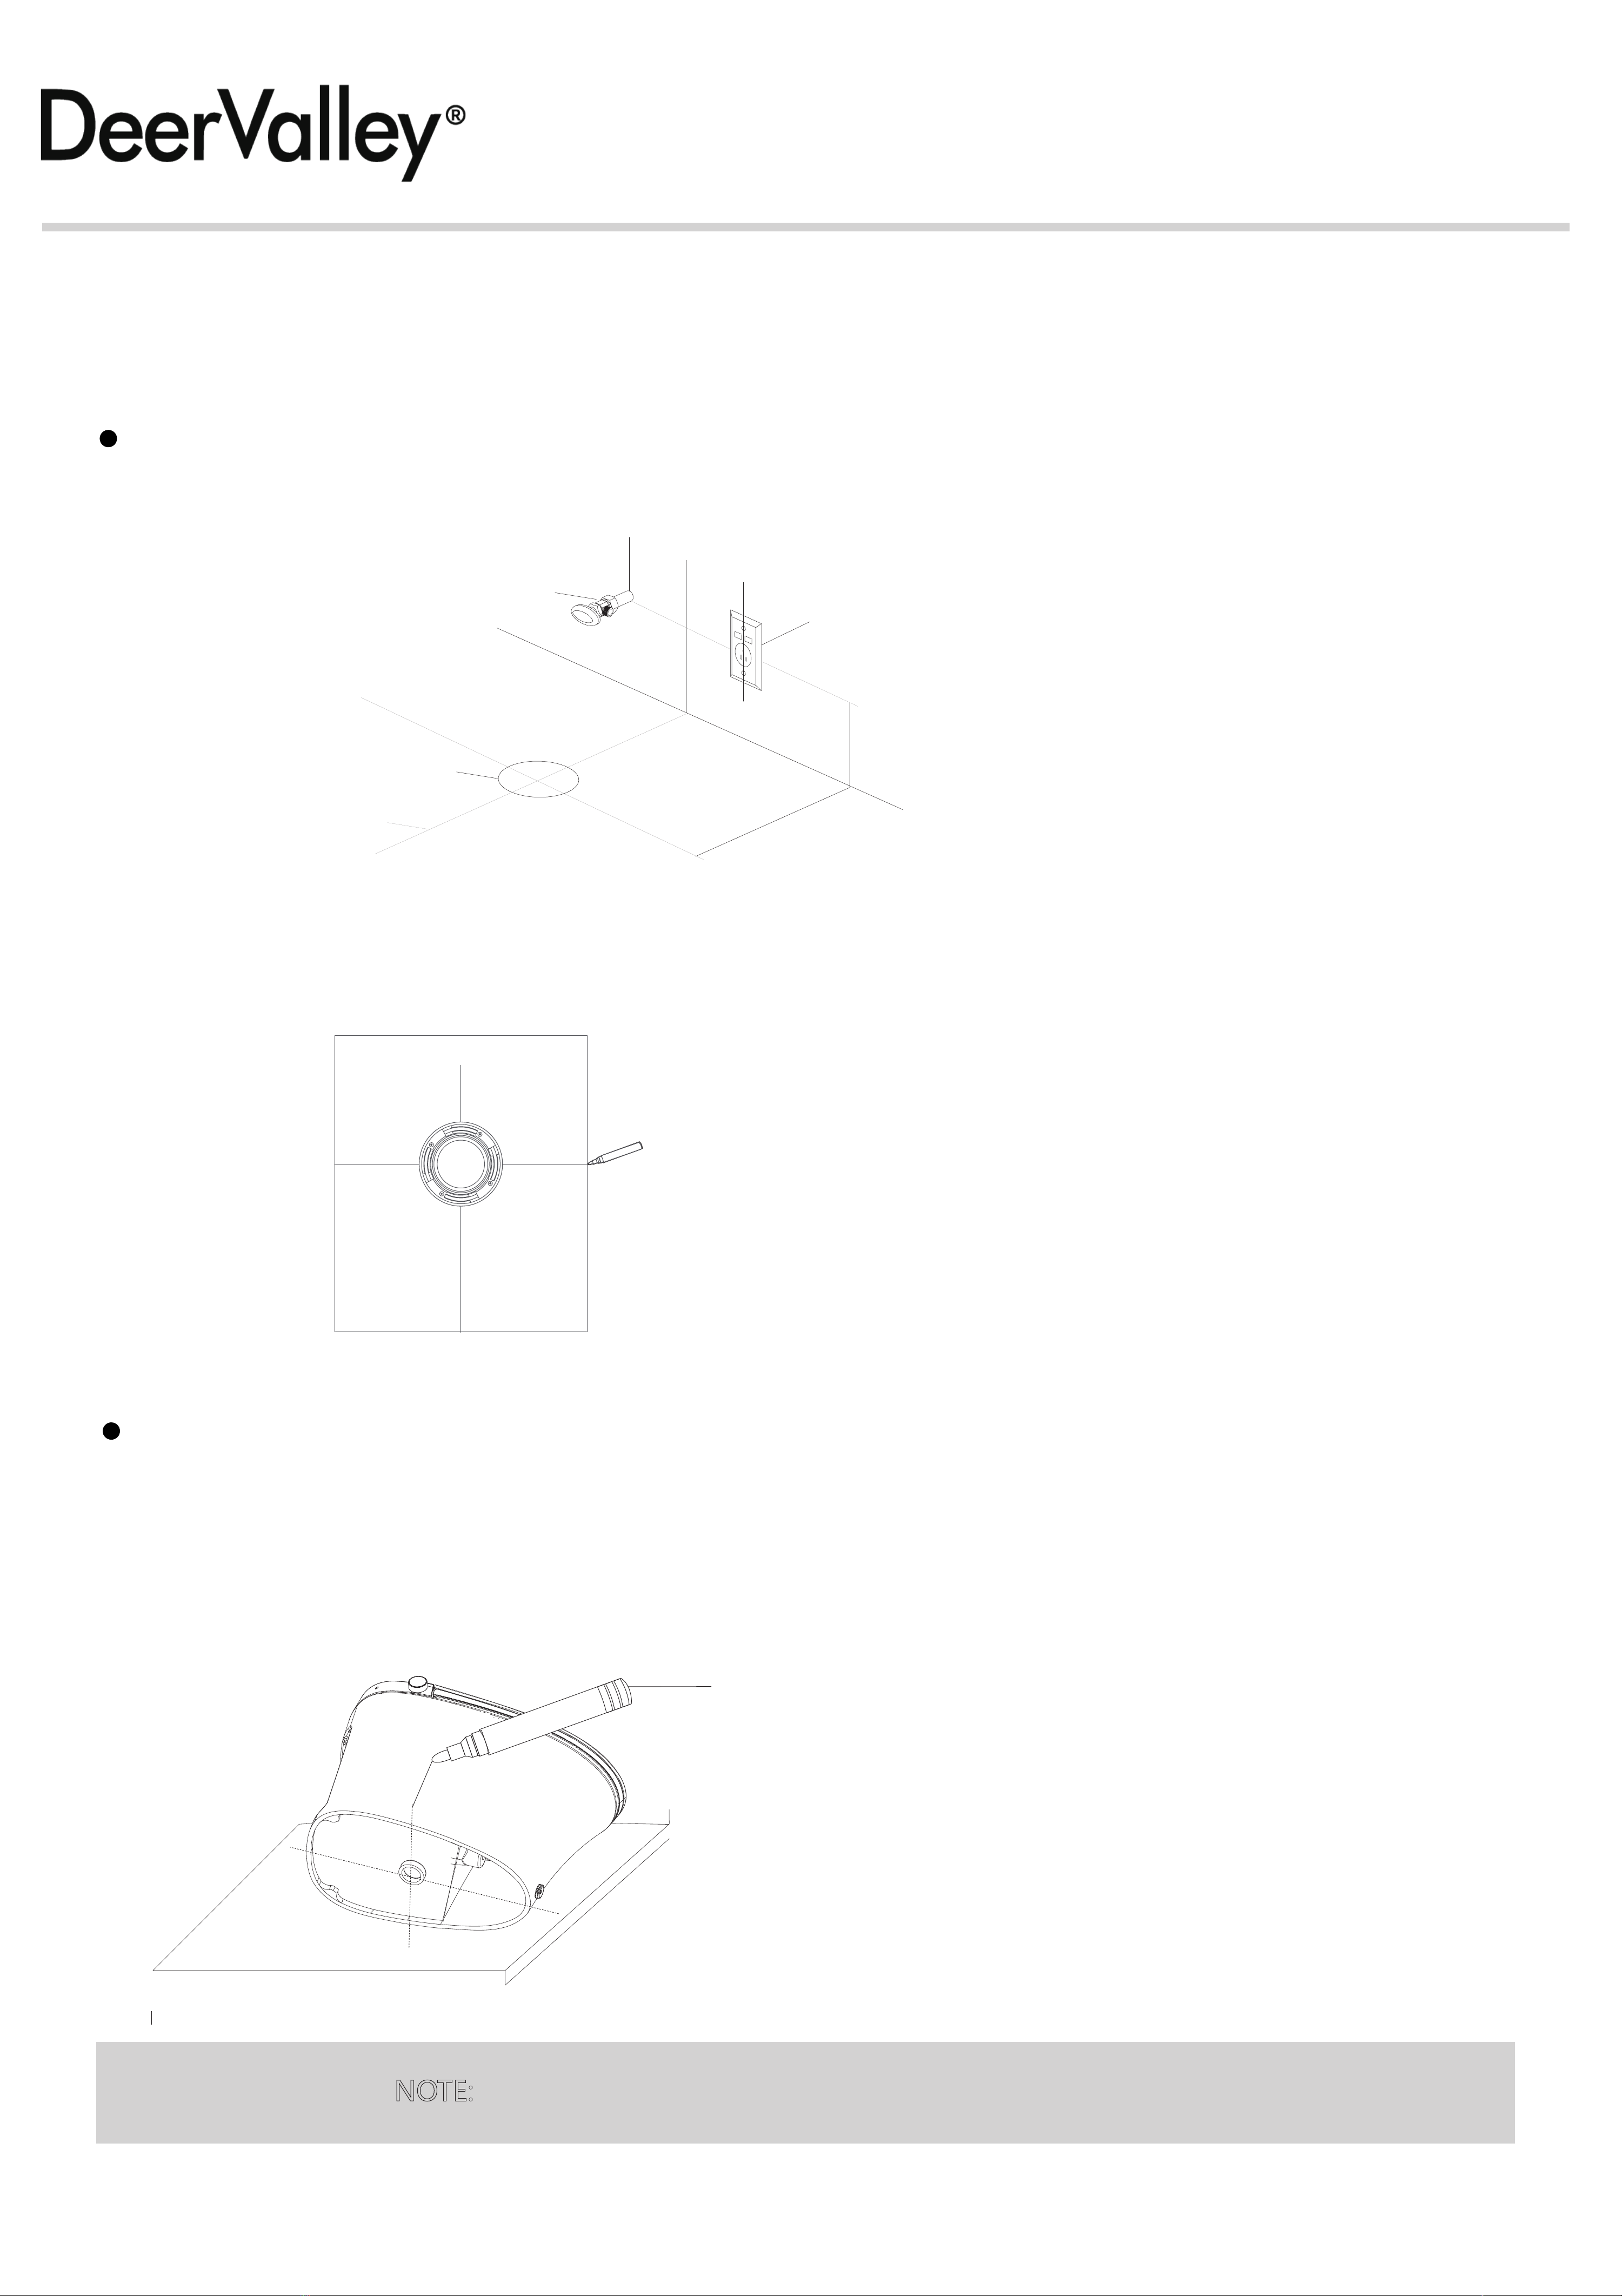
4. Installation The Smart Toilet
(1) Draw a cross marker on the drain outlet on the ground.
Clean the floor and wipe off any excess dust or dirt . Failure to install on an cleaned surface
will affect the quality of installation.
Turn the ceramic body over laterally and place on a prepared foam surface. By visual
measurement, draw a line on one lateral side of the ceramic body point of the drain
outlet perpendicular to the plane against the central of ceramic bottom, and the same
for the other lateral side, and draw a line perpendicular to the floor from the front central
point of ceramic body.
(3) Install smart toilet bottom flange anchor screw.
(2) Installation of floor flange.
12" (305mm)
8" (200mm)
Grounded waterproof and splash-
proof electrical outlet.
Existing water supply
angle valve
Drain outlet
Cross marker
Ground Flange
Marking Pen

(4) Install the wax ring and brass floor bolts onto floor flange.
Center and press the wax ring on the floor flange. Insert the 2 brass floor bolts flat head thru the
appropriate slot in the floor flange. Use the provided plastic floor bolt washer to secure the floor
bolts on the floor flange. Brass bolts should remain verticle FIGURE 5A. Install the wax ring at the
sewage outlet of the product FIGURE 5B.
FIGURE 5A
Floor Bolts
Flange
Wax Ring Wax Ring
FIGURE 5B
(+1) 312-626-9466
www.deervalleybath.com
-15-
NOTE: Drawings may not exactly define contour of the product.
Installation and
Owner’s Manual
(5) Preparing the toilet seat for toilet bowl installation.
Hold both seat and cover vertical, pull upward to detach them from ceramic bowl.
Movethe seat forward as shown.
Two people to lift the toilet bowl, slowly lower the bowl onto the floor flange use the guide
marking as the toilet reference. Making sure the floor bolts on the floor flange completely
come through bolt opening on the bottom of toielt bowl by viewing from the back of the
seat.
Next, press down the toilet bowl firmly onto the floor so the wax ring can create the
full seal.
Lastly, screw down the nuts on the floor bolts by hand to secure the toilet bowl
on the floor from the opening behind the back of the seat.
Caution: Do not move the toilet bowl around once the toilet bowl is in position.
It can damage the wax ring seal and result in water leakage.
(6) Installing the toilet bowl onto floor flange
FIGURE 7A FIGURE 7B FIGURE 7C FIGURE 7D

(7) Conncting the tee valve to shut off valve and connecting braided water supply hoses.
With the 3/8" male connection facing to the right, apply Telflon tape and screw on
adapter (supplied).
(+1) 312-626-9466
www.deervalleybath.com
-16-
NOTE: Drawings may not exactly define contour of the product.
Installation and
Owner’s Manual
Connect tee valve to male thread on adapter (apply Telflon tape to male threads).
Connect braided supply tubes to tee valve male connections.
- 1/2" seat water supply hose to bottom of tee valve
- 1/2" toilet water supply hose to right side of tee valve
Note: Use Telflon Tape on all threaded connections to insure a water tight seal.
FIGURE 9A FIGURE 9B
FIGURE 9C FIGURE 9D
(8) Confirm the water supply.
Open the water supply angle valve to the greatest extent as shown in the drawing.
Make sure there is no water leakage in each connection part. If there is water leakage, please
re-tighten the nut for re-installation.
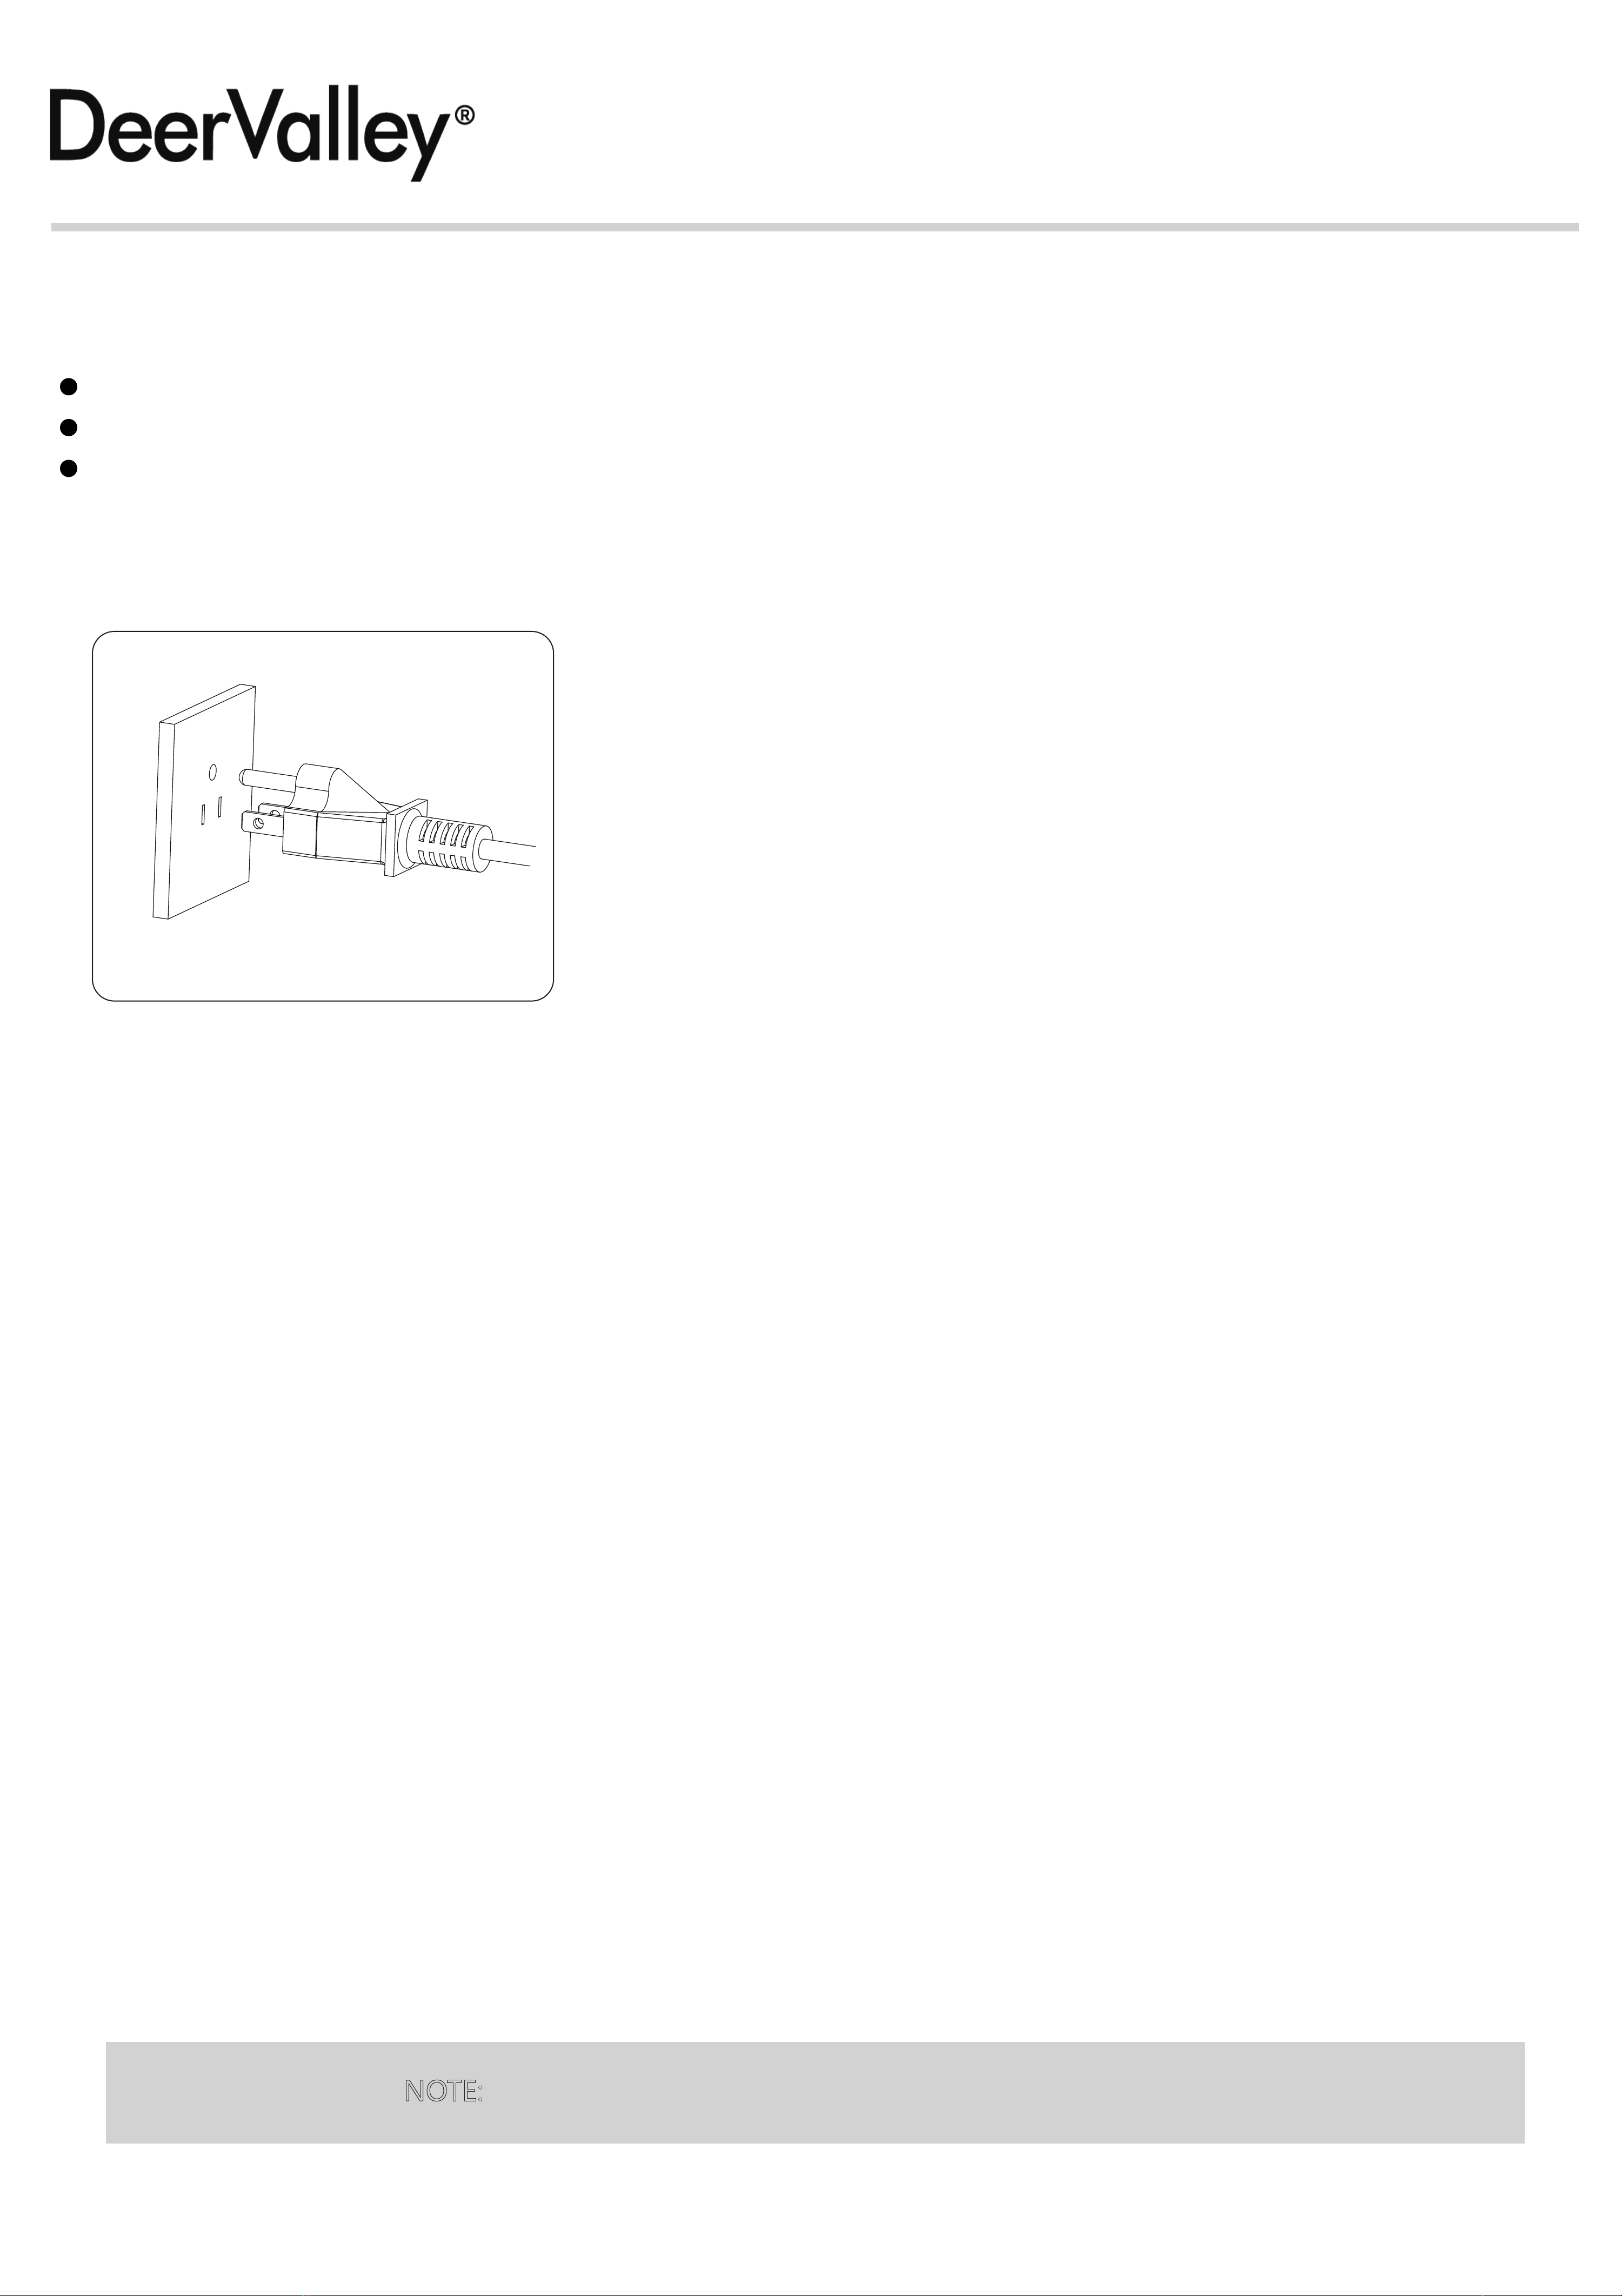
(9) Connect the power supply.
Connect the ground wire.
Power plug into the AC 120V socket.
Confirm whether the power is connected.
Confirm indicator light on the power plug. A lit-up power indicator light will confirm that the smart toilet is powered-on.
When powered on, press and hold the knob for 3 seconds to enter standby mode.
Note:
(+1) 312-626-9466
www.deervalleybath.com
-17-
NOTE: Drawings may not exactly define contour of the product.
Installation and
Owner’s Manual

5. Install the Remote Control
(+1) 312-626-9466
www.deervalleybath.com
-18-
NOTE: Drawings may not exactly define contour of the product.
Installation and
Owner’s Manual
(1) Install the Remote Control
1. According to the location of the screw holes of the remote control holder, drill two
holes with a 6mm-diameter drill.bit on the wall with a depth greater than 45mm.
2. Install the expansion tube into the holes.
3. Place the remote control holder onto the fixing hole.
4. Fix the remote control holder with the configured expansion screws.
5. Open the battery area of the remote control and install new batteries.
6. Place the remote control on its holder.The specific steps are shown in the drawings below.
If the wall for installation is of a specific material (such as wood panel, MDF), please use a
suitable fixing method.
The remote control should be installed in a place that is not easily exposed to water.
Installation steps:
45mm
6mm
Anchor
Bracket
of remote
controller Screws
Completion
of bracket
installation
Placement
of remote
control
Table of contents
Popular Toilet manuals by other brands

Axent
Axent PRIMUS W331 Installation instruction

Axent
Axent PRIMUS Installation instructions & user manual

IFO
IFO Spira 6275 Operating and maintenance instructions

enware
enware 6861 Series Installation and maintenance instructions

GALA
GALA Innova Inspira manual

Geberit
Geberit IDO PORSGRUND GLOW 91570 Operating and maintenance instruction


