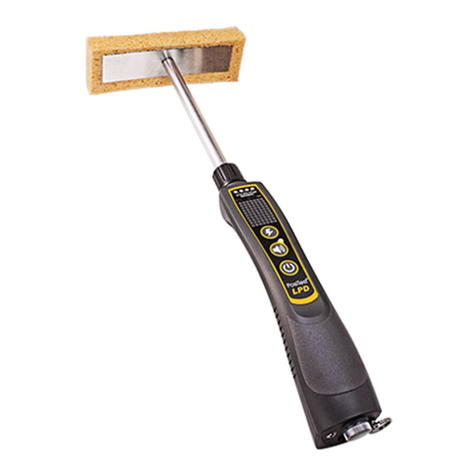
DeFelsko PosiTest HHD C User manual

High voltage Holiday Detector
Instruction Manual

Introduction
The Posi est HHD C High voltage Holiday Detector is a
Continuous DC oliday Detector designed to locate defects and
discontinuities (called “pinholes” or “holidays”) in a coating system
applied to a conductive substrate. igh voltage holiday detectors are
commonly used to inspect non-conductive coatings thicker than 500
µm (20 mils).
Designed for maximum utility, the powerful Li-on batteries of the
Posi est HHD C fit neatly within the wand handle eliminating the
need for a separate battery box—reducing weight and eliminating
operator fatigue.
1
This equipment generates high voltages up
to 30,000V (30kV). Accidental contact with the electrode may result
in an electric shock. Always keep the working end of the electrode
away from your body and never touch it when activated. The
Posi est HHD C operator should exercise care to minimize their risk
of electric shock and be aware of all relevant safety guidelines
before using this equipment.
The ribbed end of the instrument is designed to maximize the
distance between the electrode collar and the operator. The
electrode and ribbed end of the instrument should not be touched
when the Posi est HHD C is in Detection Mode.
When in Detection Mode (pg. 4) generating high voltage or if an arc
is being produced, the Posi est HHD C will generate broadband
Radio Frequency emissions. Care must be observed in the vicinity of
sensitive electronics or radio equipment.
Operational Safety
DeFelsko recommends that the operator read and
fully understand this manual prior to using the Posi est HHD C.
IMPORTANT:
WARNING:
!
The
Posi est HHD C
includes a built-in bleeder resistor,
which will discharge the surface when the electrode is in contact
with the part AND the tester is not generating high voltage.
NOTE:

2
For safe Posi est HHD C operation:
DO NO —
wUse in wet or rainy conditions.
wUse if you are fitted with a pacemaker.
wUse without first connecting the ground (earth) cable.
wTouch or allow anyone else to touch the object being tested.
wUse in any environment where an arc or spark could result in
explosion.
DO —
wEnsure that all connections are secure and tight.
wWear appropriate gloves and footwear.
wUse flagging tape and signage to keep other personnel away
from the testing area.
wCommunicate the hazards associated with holiday testing with
all personnel on-site via tailgate meetings or Field Level azard
Assessments.
wPower OFF the detector before touching the spring or brush.
wConfirm the testing voltage requirements and ensure this is
communicated to all personnel involved or working in the area.

a Fan brush
bThumb screw
c
Battery compartment
d
Battery cover
e
Ground cable socket with nut
f
Trigger
g
Speaker
h
Electrode collar
iGround cable
3
Posi est HHD C Overview
Display
Strobe alert
Control panel
Not shown
ard shell case
Batteries
The Posi est HHD C Kit contains the following materials.
A Posi est HHD C
BStainless Steel Fan Brush
C7.6 m (25’) Ground (earth) cable with Ground Clip
D4 Li-ion 18650 Cell Batteries
ESmart Battery charger with universal AC voltage input
ard shell case (not shown)
A variety of optional and replacement accessories are available to
help you get the most out of your Posi est HHD C.
See www.defelsko.com/hhd to learn more.
Accessories
C
D
B
E
A
abd
e
hf
g
c
i

4
Quick Start
The Posi est HHD C powers-up when the power button is
pressed. To preserve battery life, it powers down after approximate-
ly 5 minutes of no activity. Alternatively, hold the power button
for 5 seconds for immediate power down. All settings are retained.
1. Review Operational Safety (pg. 1).
2. Assemble the detector for the application to be tested –
“Assembly Instructions” (pg. 5).
3. Properly ground the instrument – “Grounding” (pg. 5).
4. Confirm that the detector is in proper working condition –
“Operational Check” (pg. 5).
5. Verify and Set the test voltage and sensitivity – “Adjusting the
est Voltage and Sensitivity” (pg. 6).
6. Perform the test – “Instrument Operation” (pg. 7).
The Posi est HHD C has two primary operating modes:
1. Standby Mode: The detector is powered up but not generating
a high voltage. The detector continuously monitors the electrode
voltage, and will display the voltage and lightning bolt icon if
voltages over 500 Volts are present on the electrode. DO NOT
touch the electrode or surface if the lightning bolt icon is shown
on the display.
2. Detection Mode: The detector is generating a high voltage and
analyzing electrode voltage and current to determine if holidays
are present. olidays can be detected when the charged
electrode is passed over a coated substrate. When a holiday is
encountered, current flows from the electrode into the substrate.
The current returns to the detector through the ground (earth)
wire, completing the circuit and triggering audible and visible
alarms. An integrated voltmeter measures and displays the
electrode voltage on the display while in use.
After the trigger is released the detector returns to Standby
Mode. The electrode voltage and lightning bolt icon will continue
to be displayed until the electrode and surface have discharged.
DO NOT touch the electrode or surface if the lightning bolt is
shown on the display.

5
Assembly Instructions
S EP 1. Attach the Electrode: Loosen the thumb screw on the
electrode collar, or if using an electrode rod, loosen the thumb screw
on the free end of the electrode rod. Attach the required electrode
and re-tighten the thumb screw.
S EP 2. Attach the Ground Cable: Insert the included ground cable
into the ground socket and finger tighten the nut by turning
clockwise.
S EP 3. Install the Batteries: Loosen the screw on the battery
cover door, and remove the cover. Install the batteries in the correct
orientation, as indicated on the inside of the battery cover. Replace
the cover and secure with the thumb screw.
Grounding
Ensure the ground (earth) cable is uncoiled and fully extended.
Connect the ground clip to an exposed (uncoated) area of the part.
A direct conductive path must be established between the Posi est
HHD C and the conductive substrate of the part being tested.
Never touch the ground cable while the detector is in use.
WARNING:
Operational Check
Prior to each use, the Posi est HHD C should be checked to ensure
it is operating correctly. This operational check ensures that the
audible and visual alerts are operating properly and the instrument is
generating a voltage. For Calibration and Verification see pg. 9.
Performing an Operational Check
1. Ensure the instrument and all components are assembled.
2. Visually inspect each cable and connection.
3. Press and release the power button on the top of the
Posi est HHD C
.
4. The
Posi est HHD C
should power on and display the test
voltage.
5. Press and hold the trigger on the Posi est HHD C to turn on
the high voltage and activate Detection Mode.

6
A spark may or may not be seen and heard. When using
a lower test voltage or in bright conditions, the spark may not be
visible.
NOTE:
8. Release the trigger to turn high voltage OFF and return the
Posi est HHD C to Standby Mode, then remove the
electrode from the part being tested. Steps 5 – 8 can be
repeated several times.
Always release the trigger before removing the
electrode from the part under test. This ensures that the built-in
bleeder resistor will discharge the part being tested.
The Posi est HHD C is now ready to use.
WARNING:
6. Touch the electrode to the bare ground wire or grounded
substrate of the part being inspected.
7. The Posi est HHD C audible and strobe alerts should
activate.
With the detector powered ON and in Standby Mode, the current
test voltage will be displayed. Press to toggle between the
following adjustment modes:
Adjust est Voltage Use the or buttons to adjust
the test voltage. The voltage can be adjusted in 10V increments
between 500V and 1,000V, and in 100V increments between 1kV
and 30kV. Press to accept and exit.
Adjust to coating thickness (mils) Use the or
buttons to set your expected coating thickness in mils. Press to
accept and exit. The test voltage will be calculated according to the
equation below.
Adjust to coating thickness (microns) Use the or
buttons to set your expected coating thickness in microns. Press
to accept and exit. The test voltage will be calculated according to
the equation below.
Adjusting the est Voltage and Sensitivity
-
+
-
+
-
+
V = 1,500 + 1.5[170 + 2.48d + 58√d] (microns)
V = 1,500 + 1.5[170 + 63d + 293√d] (mils)
where V = Voltage in volts d = Thickness of coating
mils
μm
kV

7
Sensitivity Adjustment By default, the Sensitivity of the
detector is factory-set to ensure that the instrument alarms when
holidays are detected, while ignoring ‘false positives’ due to surface
moisture, electrode movement, etc. For most applications, the
default sensitivity setting is ideal.
To verify that the Sensitivity is set correctly, attach the electrode to be
used for the desired application, and find a known holiday in the
coating or place a shim with the same thickness as the coating over
the bare substrate with a 1mm diameter hole drilled in the center.
Ensure that the Posi est HHD C detects the holiday or hole in the
shim, and that it does not alarm over areas without defects or
holidays.
Test Voltage and Sensitivity adjustments are retained
during power cycles.
NOTE:
If a sensitivity adjustment is required press the or buttons to
adjust the sensitivity. Press to accept and exit.
-
+
Instrument Operation
To reduce the possibility of building static charge
on the object under test, the following steps should always be
followed when using the Posi est HHD C:
IMPORTANT:
1. Perform all steps listed in the “Quick Start” (pg. 4).
2. Enable Detection Mode by holding the trigger of the
instrument. The Posi est HHD C will output high voltage at
the selected test voltage. The lightning bolt icon will appear at
the bottom of the display, and the instrument will emit a tick
sound while Detection Mode is enabled.
The voltage output of the Posi est HHD C is regulated and
maintains the test voltage under normal electrode loading.
When in Detection Mode, the voltage at the electrode is
displayed on the Posi est HHD C. Minor fluctuations on the
display are normal during inspection as the Posi est HHD C is
regulating the test voltage. When the electrode is connected to
ground, the display will show “---" indicating that the electrode
voltage is less than the minimum of 500V.
μA

8
3. Place the electrode on the surface of the part you will be
testing.
4. Move the electrode over the coated surface at a travel speed
not to exceed 0.3m/second (1ft/second) to locate defects. If a
holiday is detected, the Posi est HHD C will activate the
strobe and audio alarm.
5. Release the trigger to deactivate the high voltage output and
return the Posi est HHD C to Standby Mode. The electrode
voltage and lightning bolt icon will continue to be displayed
until the electrode and surface have discharged. DO NOT
touch the electrode or surface if the lightning bolt is shown
on the display.
6. Remove the electrode from the surface.
The Posi est HHD C includes a built-in bleeder resistor,
which will discharge the surface when the electrode is in contact with
the part and the detector is not generating high voltage.
NOTE:
Removing the electrode from the surface while in
Detection Mode could leave the surface charged. Touching a
charged surface could result in electrical shock.
WARNING:
Calibration and Verification
Calibration
The Posi est HHD C is shipped with a Certificate of Calibration
showing traceability to a national standard. DeFelsko recommends
customers establish calibration intervals based upon their own
experience and work environment. A detector used frequently,
roughly, or in harsh operating conditions may require a shorter
calibration interval than if used less frequently and handled with
care. Based on our product knowledge, data and customer
feedback, a one-year certification interval from either the date of
calibration, date of purchase, or date of receipt is a typical starting
point.
Verification
The Posi est HHD C includes an integrated voltmeter which
measures and displays the output voltage of the detector on the
display. This provides the ability to monitor the generated voltage

9
of the Posi est HHD C to a voltage within the 500V – 1,000V range
in 10V steps, and 1kV – 30kV range in 100V steps. The Posi est
HHD C integrated voltmeter is accurate to ± 5% of the generated
test voltage.
The Posi est HHD C Verifier is available for verifying the accuracy
of the Posi est HHD C and other continuous DC high voltage
holiday detectors and is an important component in fulfilling both
ISO and in-house quality control requirements.
Learn more at: https://defelsko.com/hhdc/verifier
Battery Status, Charging, and Installation
The Posi est HHD C Kit includes four removable, rechargeable
18650 Lithium-ion cell batteries. It is recommended that the batteries
be charged after each use.
The battery icon on the display will turn red
with one bar remaining when the batteries are
low. This indicates that the batteries require
charging.
To charge the batteries, insert them into the
supplied charger. Each time the charger is
connected to a power supply, and no buttons
are pressed, the charger will enter the default
charging mode, appropriate for the supplied
batteries.
Protected 18650 Lithium-ion cell batteries are recommended for use
with the Posi est HHD C. Only batteries supplied by DeFelsko
should be used.
Keep all electrical contacts clean.
IMPORTANT:
Storing the Posi est HHD C
When not in use, the Posi est HHD C should be stored in the
supplied hard shell case. Keep the instrument clean and dry. After
use, clean the instrument with a soft, damp cloth, and then wipe dry.
Do not use solvents such as lacquer thinner, methyl ethyl ketone
(MEK), etc.

10
Posi est HHD C roubleshooting
Posi est HHD C will not detect holidays
w
Check Electrode Connections: With the detector powered OFF,
check all connections. Ensure the electrode is fully engaged
within the electrode collar of the Posi est HHD C and the thumb
screw is secured.
w
Check Ground Connections: With the detector powered OFF,
remove the ground cable and then fully reinsert it into the ground
socket. Finger tighten the nut by turning clockwise. Ensure the
opposite end is clean and well connected to the substrate of the
coating system being inspected.
w
Check est Voltage: If the test voltage is too low, the Posi est
HHD C will not find holidays.
w
Reduce ravel Speed: Recommended travel speed of the
Posi est HHD C is a maximum of 0.3m/second (1ft/second).
Posi est HHD C turns OFF while in use
w
Check Batteries: Low or defective batteries will not be able to
sustain the power required to operate the Posi est HHD C.
Charge or replace the batteries.
When generating high voltage, the Posi est HHD C display is
lower than the test voltage.
w
The Posi est HHD C integrated voltmeter ALWAYS displays the
actual voltage being generated (± 5%). Although the Posi est
HHD C will regulate the output voltage to match the test voltage,
there are circumstances when it is not possible to generate the
test voltage. For example, overloading of the electrode by setting
the voltage higher than recommended for the coating system
under inspection may result in a generated voltage lower than the
test voltage. Reducing the brush or electrode size will also reduce
loading.
The Posi est HHD C meets the Electromagnetic
Compatibility Directive and Low Voltage Directive
when operated in Standby Mode.

Limited Warranty, Sole Remedy
and Limited Liability
www.defelsko.com
© 2023 DeFelsko Corporation USA
All Rights Reserved
This manual is copyrighted with all rights reserved and may not be reproduced or transmitted,
in whole or part, by any means, without written permission from DeFelsko Corporation.
DeFelsko, PosiTest, PosiTector, and PosiSoft are trademarks of DeFelsko Corporation
registered in the U.S. and in other countries. Other brand or product names are trademarks
or registered trademarks of their respective holders.
Every effort has been made to ensure that the information in this manual is accurate.
DeFelsko is not responsible for printing or clerical errors.
Before returning the Posi est HHD C for service –
1. Install fully charged batteries in the correct orientation.
2. Inspect all wires, plugs, and connectors for damage.
3. Power up Posi est HHD C by pressing the power button .
4. Press and hold the trigger.
5. Touch the electrode to ground (earth) to simulate a holiday.
6. If the Posi est HHD C does not activate the Audio and Strobe
alarms or create an arc, remove the batteries and return the
Posi est HHD C without the batteries for service.
IMPOR AN :
If you must return the Posi est HHD C for service,
please follow the instructions provided at
https://www.defelsko.com/service-support#Service
DeFelsko's sole warranty, remedy, and liability are the express
limited warranty, remedy, and limited liability that are set forth on
its website: www.defelsko.com/terms
Returning for Service


Manual de Instrucciones
High voltage Holiday Detector

Introducción
El PosiTest HHD C High voltage Holiday Detector es un detector
de corriente continua diseñado para localizar defectos y
discontinuidades (llamados picaduras o porosidades) en sistemas
de recubrimiento aplicado a sustratos conductores. Los detectores
de poros de alta tensión se utilizan de manera habitual en
inspecciones de recubrimientos no conductores de espesor menor
a 500 µm (20 mils).
Diseñadas para ofrecer la máxima utilidad, las potentes baterías de
iones de litio del PosiTest HHD C se ubican en la empuñadura, lo
que elimina la necesidad de una caja de batería externa, reduciendo
peso y ahorrando esfuerzo al operador.
1
Este equipo genera alta tensión, de hasta
30 000 V (30kV). El contacto accidental con el electrodo puede
generar una descarga eléctrica. Mantenga siempre el extremo del
electrodo alejado de su cuerpo y no lo toque cuando esté activado.
El operador del PosiTest HHD C deberá actuar con cuidado para
evitar riesgos de descarga eléctrica y estar al tanto de todas las
pautas de seguridad antes de utilizar este equipo.
El extremo anillado del instrumento está diseñado para incrementar
todo lo posible la distancia entre la abrazadera del electrodo y el
operador. El electrodo y el extremo anillado del instrumento no
deben tocarse cuando el PosiTest HHD C esté en modo de
detección.
Cuando esté en modo de detección (pág. 4) generando alto voltaje
o cuando se produce un arco, el PosiTest HHD C generará
emisiones de radiofrecuencia de banda ancha. Evite la cercanía a
elementos electrónicos sensibles o equipos de radio.
Segurid d oper tiv
DeFelsko recomienda que el operador lea
detenidamente todo el manual antes de utilizar el PosiTest HHD C.
IMPORTANTE:
ATENCIÓN:
!
El
PosiTest HHD C
cuenta con una resistencia de purga
la cuál descarga la superficie cuando el electrodo está en contacto
con la pieza Y el detector no está generando alta tensión.
NOTA:

Para operar de manera segura con el PosiTest HHD C:
NO —
wUtilizar en entornos húmedos o mojados.
wUtilizar si lleva marcapasos.
wUtilizar sin conectar primero el cable de aterrizado (tierra).
wToque o permita que alguien toque el objeto que está
comprobando.
wUtilizar en aquellos entornos en los que un arco o una chispa
puedan provocar una explosión.
SÍ —
wComprobar que todas las conexiones son seguras y están
apretadas.
wUtilizar guantes y calzado adecuados.
wUtilizar cinta de señalización y letreros para mantener al resto
del personal alejado de la zona de pruebas.
wComunicar los peligros asociados con la detección de
porosidades a todo el personal en el sitio de trabajo mediante
reuniones o evaluaciones de riesgos en campo.
wApagar el detector antes de tocar el resorte o la escobilla.
wConfirmar los requisitos de tensión de comprobación y
asegúrese de que se comunica a todo el personal que participa
o que trabaja en la zona.
2

3
Gener lid des del PosiTest HHD C
Pantalla
Indicador de alerta
Teclado
Escobilla
b
Tornillo de mariposa
c
Compartimento de la batería
d
Tapa de la batería
e
Puerto conector del cable de tierra
f
Gatillo
g
Altavoz
h
Abrazadera de electrodo
i
Cable de tierra
El Equipo del PosiTest HHD C contiene los siguientes
materiales.
A PosiTest HHD C
BEscobilla de acero inoxidable
CCable de tierra (ground) con pinza de 7,6 m (25’)
D4 baterías tipo ceda de ion Litio 18650
ECargador de batería inteligente con entrada CA universal en
estuche rígido (no se muestra)
Existe gran variedad de opciones de accesorios disponibles para
ayudarle a sacar el máximo provecho de su PosiTest HHD C.
Si desea más información, consulte www.defelsko.com/hhd.
Accesorios
No mostr d
Estuche rigido
Baterías
C
D
B
E
A
abd
e
hf
g
c
i

4
Inicio rápido
El PosiTest HHD C se enciende al pulsar el botón . Para conser-
var la vida de la batería, el detector se apagará transcurridos unos
5 minutos de inactividad. Si desea apagarlo manualmente, pulse el
botón de encendido durante 5 segundos. Se conservarán todas
las configuraciones.
1. Revisión de instrucciones de segurid d oper tiv (pág. 1).
2. Ensamble el detector para realizar una prueba –Instrucciones
de Ens mble (pág. 5).
3. Conecte a tierra el instrumento - Aterriz do (pág. 5).
4. Confirme que el detector está en buenas condiciones para
funcionar - Prueb de Funcion miento (pág. 5).
5. Verifique y ajuste el voltaje y la sensibilidad de prueba –
“Ajuste del volt je de prueb y l sensibilid d” (pág. 6).
6. Realice la prueba-"Oper ción del instrumento" (pág. 7).
El PosiTest HHD C tiene dos modos de funcionamiento principales:
1. Modo de esper : El detector está encendido pero no genera
alta tensión. El detector evalua constantemente el voltaje en el
electrodo y despliega en pantalla un ícono de relampago .
cuando el voltaje en el electrode es superior a 500 Volts. NO
TOQUE el electrodo ni la superficie bajo evaluación si el ícono
de relampago esta encencido.
2. Modo de detección: El detector está generando una corriente
de alta tensión y analizando la tensión y la corriente del electrodo
para determinar si existen poros. Los poros se detectan al paso
del electrodo cargado sobre un sustrato con recubrimiento.
Cuando se encuentra un poro, la corriente fluye desde el
electrodo hacia el sustrato. La corriente volverá al detector a
través del cable de masa (ground), completando el circuito y
activando las alarmas sonoras y visuales. Un voltímetro
integrado mide y muestra la tensión del electrodo en la pantalla.
El detector continuamente monitorea el voltaje del electrodo y
mostrará un ícono de relámpago si el voltaje presente en el
electrodo excede 500 Volts. EVITE TOCAR el electrodo o la
superficie cuando el ícono de relámpago aparece en la
pantalla.

5
Instrucciones de Ens mble
PASO 1. Conecte el electrodo: Afloje el tornillo de mariposa de la
abrazadera del electrodo o, si utiliza una varilla de electrodo, afloje
la mariposa del extremo libre de la varilla. Conecte el electrodo y
vuelva a apretar la mariposa.
PASO 2. Conecte el c ble de tierr : Inserte el cable de puesta a
tierra suministrado en el puerto del conector de tierra y ajuste el
perno de solo con la fuerza de sus dedos girándola hacia la derecha.
PASO 3. P r inst l r l b terí : Afloje el tornillo de la tapa de la
batería y retírela. Coloque las baterías. La orientación correcta se
indica en el interior de la tapa. Vuelva a colocar la tapa y apriete la
mariposa.
Tierr
Compruebe que el cable de tierra (ground) está totalmente
desenrollado y extendido. Conecte la pinza a una zona expuesta
(sin recubrir) en el área de la pieza. Debe existir una trayectoria
conductora directa entre el PosiTest HHD C y el sustrato conductor
de la pieza que se está probando.
Nunca toque el cable de tierra cuando el detector esté en uso.
ATENCIÓN:
Prueb de funcion miento
Antes de cada uso, el PosiTest HHD C deberá comprobarse para
garantizar su correcto funcionamiento. Esta prueba de
funcionamiento garantiza que las alarmas sonoras y visuales
funcionan correctamente y el instrumento genera tensión. Para la
C libr ción y comprob ción, consulte pág. 9.
Prueb de funcion miento
1. Compruebe que el instrumento y todos sus componentes
están ensamblados.
2. Inspeccione visualmente cada cable y conexión.
3. Pulse el botón de encendido en la parte superior del
PosiTest HHD C
.
4. El PosiTest HHD C se encenderá e indicará el voltaje de
prueba configurado.

6
5. Mantenga pulsado el gatillo para generar corriente de alta
tensión e iniciar el modo de detección.
6. aga contacto con el electrodo sobre el cable de tierra sin
asilamiento o directamente en el sustrato conectado a tierra
de la pieza que desea comprobar.
7. Las alertas sonoras y visuales de PosiTest HHD C se
activarán.
Es posible que una chispa sea no visible e inaudible.
Cuando se utilicen voltajes de prueba bajos o con demasiada luz,
la chispa puede ser no visible.
NOTA:
8. Libere el gatillo para DESACTIVAR la tensión alta y vuelva a
poner el PosiTest HHD C en modo de esper . A
continuación, retire el electrodo de la pieza que está
comprobando. Los pasos del 5 al 8 se pueden repetir tantas
veces como sea necesario.
Libere siempre el gatillo antes de retirar el electrodo
de la pieza que está comprobando. Esto garantiza que la resistencia
de purga del aparato descargará la pieza. El PosiTest HHD C
estará listo para su empleo.
ATENCIÓN:
Con el detector encendido (ON) y en modo de esper , se
mostrará la el voltaje de prueba configurado. Pulse para
alternar entre los siguientes modos de ajuste:
Configur ción del Volt je de Prueb Utilice los botones
o para ajustar. El voltaje se puede ajustar en incrementos de
10 V entre 500 V y 1000 V; entre 1 kV y 30 kV los incrementos
serán de 100 V. Pulse para aceptar y salir.
Ajuste del Volt je de Prueb y l Sensibilid d
-
+
kV
Ajuste l espesor del recubrimiento (mils) Utilice los
botones o para ingresar el valor del espesor de recubri-
miento en mils. Pulse para aceptar y salir. El valor de voltaje de
prueba se calculará de acuerdo con la siguiente ecuación.
-
+
mils
Table of contents
Languages:
Other DeFelsko Security Sensor manuals