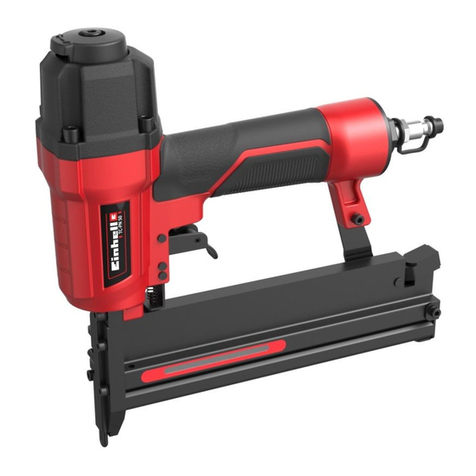
Delfast NNK-P400 User manual

4.00mm PNUEMATIC
POST STAPLER
OWNERS MANUAL
| delfast.com
@DelfastNZ #Delfast
Improper and unsafe use of this tool will result in death or serious injury. It is very
important that the intended operator of this tool reads and understands this manual
before operating this tool. Keep this manual available for others before they use the tool.

Table of Contents
Product Overview 1
Correct air plant and correct installation of the tool 2
Your tool - safety aspects 3
Operation Instructions 4
Loading and Unloading the Fastener 4
Depth of Drive Adjustment 4
Jam Clearing 4
Technical Characteristics 5
Maintenance Instructions 6
General Maintenance 6
Cleaning 6
Storage 6
Troubleshooting Guide 7
Notes & Service History 8
Freephone. 0508 782 753
|

Product Overview
1
2
4
5
6
3
1. Belt Hook
2. Air Supply
3. Magazine
4. Pusher
5. Depth of Drive Adjustment
6. Trigger
1
delfast.com

2Freephone. 0508 782 753
|
CORRECT AIR PLANT AND
CORRECT INSTALLATION OF THE TOOL
It is very important for the proper functioning of the tool that the air plant be correctly positioned and produces
clean, dry, filtered compressed air in the right quantity and at the right pressure.
Never attempt to use oxygen, combustible gases or any bottled gas under pressure as an energy source for the
tool. It will explode, causing serious injury and/or death.
Never exceed the maximum recommended working pressure of 8.9 bar (130 psi).
Never connect the tool to an air line whose pressure may potentially exceed 9.3 bar (135 psi) should the in-line
pressure regulator fail.
BEFORE STARTING TO USE THIS TOOL OR BEFORE CARRYING
OUT MAINTENANCE, PLEASE READ CAREFULLY ALL THE
INFORMATION CONTAINED IN THIS MANUAL AND THE
ENCLOSED PARTS DIAGRAM WHICH IS AN INTEGRAL PART OF
IT, AND CONSERVE THESE FOR FUTURE REFERENCE.
Thank you for buying this Delfast Fastenings tool. It has been designed, built
and tested according to all current norms and laws. These include European
Directive 89/392 and subsequent amendments, EN 292, EN 792-13 and
ANSI ISANTA SNT-101-1993.

3
delfast.com
YOUR TOOL - SAFETY ASPECTS
When the tool is in use, the user and all others in the area must wear eye protection which conforms to the
laws in force in your country. It is the responsibility of the employer to ensure that approved eye protection is
available and is being used by the operator and all others in the work area.
Other forms of personal protection equipment such as hard hats, steel toecaps and mail gloves, etc. Must be
used where required.
This 4.00mm Post Stapler fires genuine Delfast 4.00mm post staples in Plain, Barbed or Ribbed.
The work contacting elements used in the Delfast 4.00mm post stapler is sequential action. Read carefully
the parts diagram which accompanies this manual or try the tool without fasteners in order to understand the
system used on this model.
Sequential action—Once the nose of the tool has been pushed against the work piece, it can be actuated once
until the nose is lifted away from the workpiece. At this point the tool will stop working and will not work again
until the nose is again pushed firmly against the workpiece.
The tools and fasteners must always be considered as one system from the point of view of safety. Mistreating
the tool can result in a fastener being fired causing injury or death.
Any attempt to modify the tool in any way, without the written approval from Delfast, will void the warranty.
Do not remove or render inoperable any of the operating controls. Never tamper with, block or remove the work
contacting element.
Remove the tool from the air supply if left unattended, when moving to a new workplace or when climbing or
descending ladders.
Always remove the finger from the trigger when not driving fasteners.
Inspect the tool thoroughly before connecting it to the airline. Do not attempt to use a tool which appears
to have been damaged, modified or to have pieces missing. When using the tool for the first time, or when
returning to the tool after a period of time, always check that the magazine is empty before connecting the
tool to the air supply and try it a few times without fasteners before loading. Try the tool a few more times on a
waste workpiece before starting work.

4Freephone. 0508 782 753
|
OPERATION INSTRUCTIONS
This tool is a piece of working equipment, not a toy. Always respect it as such. Never point it at yourself or
anyone else. Always assume that the tool is loaded. Always use the tool in safe way. Check that the tool is in
good condition before starting to use it. In case of doubt contact Delfast.
Use only genuine Delfast 4.00mm staples.
Use the tool to drive fasteners only when the nose is pressed firmly against the workpiece. Do not keep a finger
on the trigger when not driving fasteners. Remove the finger from the trigger when changing positions or when
moving to a new work area.
Loading and Unloading Fasteners
• Connect hose from compressor before you load fasteners because if you load the fasteners before you
connect the hose, the fastener may be fired accidentally.
• Point the nozzle away from any personnel and keep your fingers away from the trigger when loading
fasteners.
• To load the staples slide the pusher until it clicks into the lockout position (Image A)
• Load the staples into the magazine (Image B) and release the lockout button for the pusher to follow
behind the staples. (Image C)
• To unload the staples from the magazine slide the pusher until it clicks into the lockout position.
(Image A) (Image C)
(Image B)

5
delfast.com
CP400 Depth of Drive Adjustment
• Unscrew Hex bolt on the very front of the nozzle with 4mm allen key. (Image D)
• Pull tip out to your desired depth and tighten hex bolt with 4mm allen key.
Clearing
• In the off chance there is a staple jam, disconnect the hose from the compressor before you perform any
action.
• Unscrew both hex bolts on the nozzle off the gun with a 5mm allen key drive (Image E)
• Unscrew hex bolt connecting the handle to the magazine with a 5mm allen key drive (Image F)
• Seperate magazine from gun
• Remove staple using needle nose pliers (Image G). Assemble magazine to gun back together before
further use
(Image D)
(Image G)
(Image E)
(Image F)

6Freephone. 0508 782 753
|
MAINTENANCE INSTRUCTIONS
General Maintenance
Should the tool break down or start working in any way which is not normal, stop work immediately and remove
the tool from the air supply.
The tool must only be repaired or maintained by people who have been trained in the subject. Whoever repairs
the tool must know of and be capable of evaluating risks and safety aspects involved in improper maintenance
or incorrect repair.
Remove the tool from the air supply before carrying out repairs or maintenance. Take out any fasteners in the
magazine before starting repairs or maintenance.
Use only genuine Delfast replacement parts. These are produced to the same standards as the original parts of
the tool. The use of parts which are not made by Delfast could reduce the life of the tool to become unsafe.
Cleaning
Remove the tool from the air supply and check the internal components regularly. O-rings should be checked for
wear and replace before they become worn out.
It is good practice to change the head gasket each time the tool is opened. O-ring and gasket kits are available
for your use.
Grease all O-rings, and the surfaces of the cylinder and valve piston regularly.
Oil tool 2-6 times daily depending on usage. Oil to be dropped into fitting where hose connects to the tool.
DO NOT use CRC®or similar as these swell the O-rings, a light air tool oil is the most suitable.
Clean build-ups of dirt, glue or foreign material from the nose area and the magazine on a regular basis. Failure
to do so will result in the tool becoming unsafe.
See delfast.com/videos for our clean & care video.
Storage
When not in use for an extended period, oil the tool before storing and again when it is in use.
The tool should be stored in a warm and dry environment. Keep out of reach of children.

7
delfast.com
Fault Probable cause Remedy
1. Tool does not fire when trigger
is pulled. No noise heard:
1. No air. 1a. Check tool connected to air.
1b. Check valve from compressor
is open.
2. Tool leaks air from the cap: 2a. O-ring in cap or on valve
piston damaged.
2b. Buffer in head worn.
2a. Fit new O-ring kit.
2b. Fit new buffer.
3. Tool makes a noise but does
not drive fastener:
3a. Servovalve O-ring worn or
damaged.
3b. Tool jammed.
3a. Fit new O-ring kit.
3b. Remove from air and unjam.
4. Air leak from nose with tool
held fired.
4. Bumper damaged or badly
worn.
4. Fit new bumper.
5. Tool does not always drive
fasteners.
5a. Air pressure too low.
5b. Piston O-ring worn.
5c. Bumper worn or damaged.
5d. Feeder spring worn or
damaged.
5a. Increase air pressure.
5b. Fit new O-ring kit.
5c. Replace bumper.
5d. Replace feeder spring.
6. Fastener driven too deep. 6a. Air pressure too high
6b. Depth set regulator
(if present) badly adjusted.
6c. Bumper badly worn or
damaged.
6a. Reduce air pressure
6b. Adjust depth set regulator.
6c. Replace bumper.
7. Fastener not driven deep
enough.
7a. Air pressure too low
7b. Depth set regulator (if
present) badly adjusted.
7c. Driver tip broken or worn.
7a. Increase air pressure.
7b. Adjust depth set regulator.
7c. Replace driver.
This tool has been designed for driving fasteners. All other uses are improper and could be dangerous and
irresponsible. Delfast declines any responsibility for any accidents caused by improper use.
TROUBLESHOOTING GUIDE
• Disconnect the tool from the air supply before proceeding.
• Remove all fasteners from the tool before commencing work.
• Test fire the tool two or three times without fasteners before loading.
• If the repair cannot be carried out by following the guidelines below, please contact Delfast.

9
delfast.com
WATCH OUR VIDEOS ONLINE AT:
delfast.com/videos
PNEUMATIC
HOW TO

4.00mm PNUEMATIC
POST STAPLER
OWNERS MANUAL
Improper and unsafe use of this tool will result in death or serious injury. It is very
important that the intended operator of this tool reads and understands this manual
before operating this tool. Keep this manual available for others before they use the tool.
| delfast.com
@DelfastNZ #Delfast
Table of contents
Other Delfast Tools manuals
Popular Tools manuals by other brands

American Lubrication Equipment
American Lubrication Equipment TIM-3600 Series manual
Powerfix Profi
Powerfix Profi 283350 Operation and safety notes
Elliott
Elliott RECON 1500 Operating and maintenance instructions

Eiko
Eiko SEN5A-ACT Operation instructions

Eastwood
Eastwood Elite 65500 Set up and operating instructions

Westfalia
Westfalia 98 16 70 Original instructions

