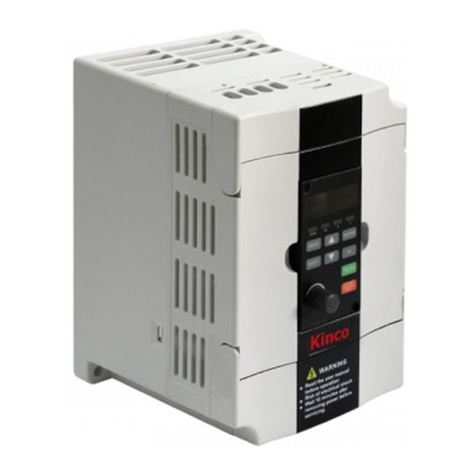
Delixi CDI-SPD Series User manual

Foreword
I
Foreword
Thank you for choosing CDI-SPD series photovoltaic water pump driver
produced by Delixi (Hangzhou) Inverter Co., Ltd.
Before using CDI-SPD series photovoltaic water pump driver (hereinafter
referred to as “the Product”), please read the manual carefully in order to ensure the
proper use. Improper use may result in the equipment’s abnormal operation,
malfunction, decrease of service life and even personal injury accident. Therefore,
please do read the manual carefully before use and use the Product strictly according
to the manual. The manual is a standard file which must be kept properly after
reading for further repairing and maintenance of the Product in the future.
Besides the operating instructions, the manual also provides wiring diagram for
your reference. If having difficulties or special requirements for usage of the
Product, please feel free to contact our local offices or dealers or call our customer
service center of the headquarters directly. We will offer dedicated service to you.
We may change the contents of this Manual without a prior notice.
Please confirm the followings seriously when unpacking the Product:
1. Check if the Product is damaged, components and parts are damaged and
drop and the body is collided in the transportation process.
2. Check if the rated value labeled on the nameplate of the Product accords with
your order requirements and if the packaging box contains the machine that you
order, product certificate, operation manual and warranty card.
We are strict in the manufacture, packaging and delivery. For any inspection
omissions, please contact us or your supplier to solve the problem.

Table of Contents
II
Table of Contents
Foreword……………………………………………………………………………...I
Chapter I Safety Operation and Attentions.................................................................1
1.1 Acceptance ................................................................................................. 1
1.2 Safety Operation Attentions ....................................................................... 2
Chapter II Product Information ..................................................................................3
2.1 Nameplate Data and Naming Rule............................................................. 3
2.2 Product Specification ................................................................................. 4
2.3 Product List................................................................................................ 4
2.4 Appearance and Installation Dimension ..................................................... 5
2.5 Daily Maintenance and Repairing.............................................................. 9
Chapter III Installation and Wiring...........................................................................11
3.1 Installation Site and Space.........................................................................11
3.2 Standard Wiring........................................................................................ 13
3.2.1 Description of the terminals of frequency inverter.......................... 14
3.2.2 Wiring reference for the main circuit and control circuit is as shown
in the table below..................................................................................................... 16
3.3 Earthing.................................................................................................... 17
Chapter IV Keyboard Operation and Running .........................................................14
4.1 Selection of Operation Mode.................................................................... 18
4.2 Test Run and Inspection ........................................................................... 18
4.2.1 Precautions and inspection prior to test run .................................... 18
4.2.2 Test Run.......................................................................................... 18
4.3 Keyboard Operation Method.................................................................... 19
4.3.1 Keys and functions of keyboard...................................................... 19
4.3.2 Methods to view/give parameters (with digital keyboard).............. 21
4.3.3 Keyboard monitoring data .............................................................. 22
Chapter V Functional Parameters Table ...................................................................23
5.1 Basic Functions of F28 Group........................................................... 24
Chapter VI Troubleshooting .................................................................................... 27
Appendix 1 Recommended Configuration of Solar Cell Modules...........................29


Chapter I Safety Operation and Attentions
Page 1
Chapter I Safety Operation and Attentions
Please read this manual carefully before installation, operation, maintenance
and inspection of the Product.
Please read this chapter before using the Product in order to ensure personal,
equipment and property safety. Attentions related to safety operation in the manual
are classified into “warning” and “cautions”.
1.1Acceptance
The items in the table below must be inspected:
Items Inspected
Note
1. Is the model of frequency inverter
consistent with order?
Check the Model indicated on the
nameplate on one side of the frequency
inverter.
2. Is there any damage to the components?
Survey the external appearance of the
frequency inverter and make sure that no
damage has occurred during
transportation
3. Are the components properly fastened?
Take off front cover of frequency inverter
and use proper tools to inspect all visible
components.
4. Is the user’s manual received?
User’s manual of frequency inverter
Please contact us or our agent if any of the items above fails to pass the
acceptance.
Warning
Cautions
: Potentially dangerous condition, which maybe cause severe body
injuries or dead ifrelevant requirement is ignored.
: Potentially dangerous condition, which maybe cause middle,
light injuries or devicedamage if relevant requirement is ignored,
it also applies to unsafe operation.

Chapter I Safety Operation and Attentions
Page 2
1.2 Safety OperationAttentions
1. Installation and maintenance should be performed by professional only.
2. Verify that rated voltage of the frequency inverter should conform with voltage
level of AC power supply. Otherwise it shall cause hurt to human body or fire
accident.
3. Don’t connect main circuit power with output terminals U, V and W. The
connection will damage equipment, thus warranty cardwill be invalid.
4. Don’t connect input power until panel is well installed. Do not remove the
cover when it is powered; otherwise, electric shock may occur.
5. Don’t touch high voltage terminal within frequency inverter under power-on status;
otherwise, electric shock may occur.
6. Maintain the frequency inverter after powering off it for at least 15 minutes
because it has plenty of capacitance energies. At the moment, charging indicator light
will be off or confirm the positive and negative Bus line voltages are under 36V;
otherwise, electric shock can occur.
7. Don’t turn on or off line and connector when the circuit is powered on Otherwise,
personal injury may occur.
8. Electronic components can be easily damaged by static electricity so please avoid
touching them.
9. This frequency inverter should not undergo voltage withstand test, which might
result indamages to the semiconductor devices in it.
10. Cover plate must be covered up before power on; otherwise, electric shock and
explosion can occur.
11. Never confuse the input and output terminals. Otherwise, explosion or damage to
the property mightoccur.
12. For frequency inverter of which storage period exceeds half year, please increase
the input voltage gradually by using regulator, to prevent from electric shock and
explosion.
13. Don’t operate the frequency inverter with wet hands; otherwise, electric shock
may occur.
14. All parts should be replaced by professional only. It is strictly prohibitive to
remain stub ormetal object in machine, to prevent from fire.
15. After replaced control board, please perform relevant parameter setting before
operation toprevent from damage of materials.
Cautions
1. If the motor is used for the first time or has been in leisure for a long time,
remember tocheck its insulation first. It is advisable to use a 500V megger. Make sure
the insulationresistance should not be less than 5 MΩ.
2. Please consider the tolerance of mechanical device if it needs running above 50 Hz.
3. In the regions with an altitude above 1,000 m, the heat dissipation effect of
frequency inverter will be reduced due to thin air so it must be used with a reduced
capacity. Reduce capacity by 1% for every 100 m after the altitude exceeds 1,000 m.
4. Do not start or stop the frequency inverter with contactors. Otherwise, damage
might occurto the equipment.
5. Do not modify factory set value of frequency inverter without authorization, or
damagemight be caused.
Warning
Anti-static

Chapter II Product Information
Page 3
Chapter II Product Information
2.1 Nameplate Data and Naming Rule
Nameplate data: Take CDI-SPDG1R5S2 as an example:
IP20
Input:DC 200~400V
AC 1PH 220V±15% 50/60Hz
Model:CDI-SPDG1R5S2
Output:AC 3PH 0V~Uinput 0~400Hz
7.0A 1.5kW
Hardware Version:1.1.00
Software Version:1.01.31
SPDG1R5S219K000001
CDI SPD G 1R5 S2
DELIXI inverter
Product series no.
Product type
Power of the adapting motor
G:General Type
SS2:1 PH AC 220V(Input/Output),50/60Hz
DC:200~400V
SPD Series
T4:3 PH AC 380V,50/60Hz,DC:300~750V
S2:1 PH AC 220V,50/60Hz,DC:200~400V
Voltage Level (Rated Voltage)
T2:3 PH AC 220V,50/60Hz,DC:200~400V

Chapter II Product Information
Page 4
2.2 Product Specification
Machine Type
-SS2
Product
-S2
Product
-T2 Product
-T4 Product
AC input voltage (V)
220(±15%)
(1PH)
220(±15%)
(3PH)
380(±15%)
(3PH)
Max. DC voltage (V)
440
440
440
800
Starting voltage (V)
200
200
200
300
Min. working voltage (V)
150
150
150
250
Range of DC input
voltage recommended
(V)
200~400
200~400
200~400
300~750
Recommended MPP
voltage (V)
330
330
330
550
2.3 Product List
Model of Frequency Inverter
Rated Input Current
(A)
Rated Output
Current (A)
Adaptive Motor
(kW)
CDI-SPDG0R4SS2
6.5
5.0
0.4
CDI-SPDG0R7SS2
9.5
7.0
0.7
CDI-SPDG1R5SS2
15.7
10.0
1.5
CDI-SPDG2R2SS2
27.0
14.0
2.2
CDI-SPDG4R0SS2
32.8
17.0
4.0
CDI-SPDG0R4S2
6.5
3.0
0.4
CDI-SPDG0R7S2
9.5
5.0
0.7
CDI-SPDG1R5S2
15.7
7.0
1.5
CDI-SPDG2R2S2
27.0
10.0
2.2
CDI-SPDG4R0S2
32.8
17.0
4.0
CDI-SPDG4R0T2
18.5
17.0
4.0
CDI-SPDG0R7T4
3.4
3.0
0.7
CDI-SPDG1R5T4
5.0
4.5
1.5
CDI-SPDG2R2T4
6.8
6.0
2.2
CDI-SPDG4R0T4
10.5
9.5
4.0
CDI-SPDG5R5T4
15.5
13.0
5.5
CDI-SPDG7R5T4
20.5
17.0
7.5
CDI-SPDG011T4
26
25.0
11
CDI-SPDG015T4
35
32.0
15
CDI-SPDG018.5T4
38.5
37.0
18.5
CDI-SPDG022T4
46.5
45.0
22
CDI-SPDG030T4
62
60.0
30
CDI-SPDG037T4
76
75.0
37
CDI-SPDG045T4
92
90.0
45
CDI-SPDG055T4
113
110.0
55
CDI-SPDG075T4
157
152.0
75
CDI-SPDG090T4
180
176.0
90
CDI-SPDG110T4
214
210.0
110
Ordering instruction:

Chapter II Product Information
Page 5
Please specify the corresponding model and specification of the products
when placing an order. For any special requirements, please contact us for
negotiation.
2.4Appearance and Installation Dimension

Chapter II Product Information
Page 6

Chapter II Product Information
Page 7

Chapter II Product Information
Page 8

Chapter II Product Information
Page 9
2.5 Daily Maintenance and Repairing
(1) Daily maintenance
The influence such as environmental temperature, humidity, dust and vibration
may result in aging of the internal components of frequency inverter,which should
cause potential fault of frequency inverter or reduction of its service life. Therefore,
it is necessary to perform dailymaintenance andregular inspection with the
frequency inverter.
Daily inspection item:
A Check if the sound of motor running has any abnormal change.
B Check if there is any vibration in motor running.
C Check if the installation environment of frequency inverter is changed.
D Check if the cooling fan of frequency inverter works normally.
Daily cleaning:
A Keep frequency inverter always clean and tidy.
B Clean surface dust on the frequency inverter effectively in order to prevent
dust from entering the frequency inverter, especially metal dust.
CClean oil dirt of frequency inverter’s cooling fan effectively.
(2) Regular inspection
Please inspect places that can be hardly inspected regularly.
Regular inspection item:
A Inspect and clean air flue regularly.
B Inspect if the screw is loose.
C Inspect of the frequency inverter is corroded.
D Inspect if there is arc on surface connecting terminal.
(3) Replacement of vulnerable parts
The vulnerable parts of the frequency inverter include cooling fan and filter
electrolytic capacitor, the service life of which closely depend onoperating
environment and maintenance condition.
Users can confirm replacement period according to running time.
A Cooling fan
Possible damage reasons: Bearing abrasion and blade aging.
Judgment standard: Confirm if the fan blade has cracks and abnormal vibration
sound when starting.
B Filter electrolytic capacitor
Possible damage reasons: Input power with low quality, high environment
temperature, frequent load modulation and electrolyte aging.
Judgment standard: Confirm if the liquid leaks and safety valve has protruded;
measurement of electrostatic capacity and insulation resistance.
(4) Storage of frequency inverter
After purchased the device, please pay attention to following points while

Chapter II Product Information
Page 10
storing it:
A Please store it in original package as much as possible.
B Long term storage should cause aging of electrolytic capacitor. Make sure to
electrifyit once every half a year for at least 5 hours and to raise voltage to rated
value slowly via voltage regulator.
(5) Warranty of frequency inverter
Maintenance free is limited to the frequency inverter only.
We provide life-long paid service for our products, whenever and wherever
they are used.
We bear the responsibilities of repair, replacement and return at most for the
product once quality or product accident happens. If users need more responsibility
compensation warranties, please place insurance at the property insurance company
in advance.
Warranty service should be effective in 18 months after bar code date.
For fault caused in following reasons, a pay-needed maintenanceservice only
is available even warranty term iseffective:
A Faults caused by incorrect operation (subject to user’s manual) or
unauthorized repair and refitting.
B Problems caused by using the frequency inverter beyond requirements of
standard and specification.
C Damage caused by accidental drop and improper handling after purchase.
D Aging or fault caused by severe environment.
E Damage caused by natural disasters such as earthquake, fire disaster, wind,
lightning stroke, abnormal voltage or reasons happening together with disasters.
F Damage in the transportation process (Notes: Transportation mode is
designated by user of themselves. We could assist agent to conduct transfer of
goods).
G When brand, trademark, serial number and nameplate marked by
manufacturers are damaged or can’t be recognized.
H Failure to pay off fund according to purchase contract.
I Failure to describe actual conditions relating to installation, wiring,
operation, maintenance, or othercondition to the Company.
For the repair, replacement and return services, customers need to send the product
back to us. We will provide the corresponding service after confirming the
responsible party.
We still have the ownership of the product for which the buyer doesn’t pay off
the price or pay the residual fund in time. In such case, we do not undertake the
above responsibilities and the buyer cannot propose any disagreement.
All relevant service fees shall be calculated in accordance with the identical
standards of the factory. In the eventthat an agreement or a contract exists, its
priority shall be performed.

Chapter ⅢInstallation and Wiring
Page 11
Chapter III Installation and Wiring
3.1 Installation Site and Space
Installation site:
Warning
1. Avoid direct sunlight and outdoor direct use.
2. Don’t use it under corrosive gas and liquid environment.
3. Don’t use it under oil fog and splashing water environment.
4. Don’t use it under salt fog environment.
5. Don’t use it under raining and moist environment.
6. Please equip the unit with filters device if metal dust or fiber
wadding existing in air.
7. Avoid power noise, such as electric welding machine and
high-power electrical equipment, which can impact operation of
the equipment.
8. Radioactive materials can influence use of the Product.
9. Avoid flammable materials, thinner and solvent.
Environment
Environment temperature: -10℃~+40℃
Storage temperature: -20℃~+65℃
Environment humidity: 90% RH at maximum (noncondensing)
Height: Under 1,000 m. Reduce capacity by 1% for every 100
m after the altitude exceeds 1,000 m.
Vibration: No greater than 5.9 m/s2(0.6 g) at maximum.
Installation direction: Please install the product vertically in
order not to affect the heat dissipation effect of frequency
inverter.
For sound performance and long service life, the frequency inverter shall be
installed according to the above installation environment suggestions to prevent
damages.
警
告

Chapter ⅢInstallation and Wiring
Page 12
Installation space:
When frequency inverters are installed vertically, enough heat dissipation space
shall be reserved in order to ensure effective cooling.
Installation Space of Frequency Inverter
1. Necessary clearance for open-frame type (IP00) and
enclosed wall-mounted type (IP20) is the same at the
top/bottom and both sides.
2. Air temperature at the permitted inlet of frequency inverter:
-10℃~+40℃.
3. Enough heat dissipation space shall be reserved in the upper
and lower areas in order to ensure smooth air intake and
emission of frequency inverter.
4. Don’t let foreign objects fall inside air duct during
installation lest fan damage.
5. Add filtering device at air intake when silk fibers fly or it is
very dusty.
Cautions
Air outlet
Air inlet
Air outlet
Larger than
150 mm
Larger than
150 mm
Air
outlet
Air
inlet

Chapter ⅢInstallation and Wiring
Page 13
3.2 Standard Wiring
See the standard wiring diagram of the main circuit and control circuit of the
Product in the figure below:
(DC-)
(DC+)
DI2
DI3
COM
Low-level switch
High-level switch
Water
pump
PV input
CDI-SPD frequency inverter
(S)
(R)
(T)
AC input
Gravity circuit breaker Q1
AC circuit breaker Q2
DI4
DI1
Forward rotation
Common Terminal
Reverse rotation
COM
Water tower Water well
U
V
W
(L1)
(L2)
Common Terminal
1. DC circuit breaker Q1 must be installed as the protection switch of PV DC
input.
2. Frequency inverter must not be in AC and DC connection at the same time.
If it requires AC/DC connection at the same time, switching control circuit
shall be configured externally.
3. Special PV combiner boxes shall be used for the parallel connection of
components.
4. When PV cell module is more than 10 m from frequency inverter, Type II
lightning arrester shall be configured at DC input end.
5. When water pump is more than 50 m from frequency inverter, it is
suggested to select output reactor.
6. Self-running upon power-up is defaulted for frequency inverter. If it needs
to configure parameters, please set in strict accordance with the instruction
steps of Chapter IV.
7. Tighten terminal screws according to the specified tightening torque.
8. Make sure the earthing terminals have been earthed before connecting the
main circuit.
9. Terminal arrangement sequence shall be subject to physical objects.
Cautions

Chapter ⅢInstallation and Wiring
Page 14
3.2.1 Description of the terminals of frequency inverter
Description of the Main Circuit Terminals of Frequency Inverter:
Identification
Name
Function Description
R, S, T
(L1, L2)
AC input
3-phase (single-phase) AC input terminal,
connected to power grid
DC+, DC-
PV DC input
Input terminal of PV cell panel
U, V, W
Output of
frequency
Inverter
3-phase (single-phase) AC output terminal,
generally connected to the motor of water pump
Safe protection
earthing
Safe protection earthing terminal; each machine
must be earthed reliably
Description for -SS2 single-phase output models
1) Generally, the output terminals U and W of the inverter connect to the phase
cables of the single-phase motor.
2) If the single-phase pump cannot be started, the two-phase control method
must be used, and the start-up and running capacitors (if any) of the motor must be
removed. The figure below shows the internal wiring of the common single-phase
motor. In the figure, L1, L2, C1, and C2 indicate the running winding, start-up
winding, running capacitor, and start-up capacitor. When the motor speed exceeds
75% of the rated speed, the start-up capacitor is switched off.
U2
U1
L1
V2
V1
L2
C1
C2
L
N
Internal wiring of the single-phase motor winding after removing the starting
and running capacitor:

Chapter ⅢInstallation and Wiring
Page 15
U2
U1
L1
V2
V1
L2
C1
C2 U2
U1
L1
V2
V1
L2
U
W
V
U1 and V1 are the common terminals of the windings. Connect them to the
output terminal W of the solar pumping inverter. Connect U2 to the output terminal
U of the inverter. Connect V2 to the output terminal V of the inverter. (Note: Use the
screws equipped with the inverter.) Now F28.39=1.
Description of the Control Circuit Terminals of Frequency Inverter:
Classifica
tion
Terminal
Name
Function Description
Digital
quantity
input
DI1
Forward running
DI1: Forward running of frequency
Inverter
DI2: level switch (low-level switch)
connected to the normally on
contact by default
DI3: level switch (high-level switch)
connected to the normally on
contact by default
DI4: Reverse running of frequency
Inverter
DI2
Low-level switch
DI3
High-level switch
DI4
Reverse running
T1 relay
T1A
Failure output
TA-TB is normally on
TTA-TC is normally off
Driving capability:
AC 250 V below 3 A
DC 30 V below 3 A
T1B
T1C
+24 V
power
supply
COM
24 V power output
Provide DC 24 V power voltage to
the external.
Driving capability: Maximum
output current 300 mA
+24V

Chapter ⅢInstallation and Wiring
Page 16
3.2.2 Wiring reference for the main circuit and control circuit is as
shown in the table below
Model of Frequency
Inverter
Wire Gauge of Main Circuit (mm2)
Wire Gauge of Main
Circuit (mm2)
DC+/DC-, R/S/T, U/V/W
PE
CDI-SPDG0R4SS2
2.5
2.5
1.0
CDI-SPDG0R7SS2
2.5
2.5
1.0
CDI-SPDG1R5SS2
4
4
1.0
CDI-SPDG2R2SS2
4
4
1.0
CDI-SPDG4R0SS2
6
6
1.0
CDI-SPDG0R4S2
2.5
2.5
1.0
CDI-SPDG0R7S2
2.5
2.5
1.0
CDI-SPDG1R5S2
2.5
2.5
1.0
CDI-SPDG2R2S2
4
4
1.0
CDI-SPDG4R0S2
6
6
1.0
CDI-SPDG4R0T2
6
6
1.0.
CDI-SPDG0R7T4
2.5
2.5
1.0
CDI-SPDG1R5T4
2.5
2.5
1.0
CDI-SPDG2R2T4
2.5
2.5
1.0
CDI-SPDG4R0T4
4
4
1.0
CDI-SPDG5R5T4
4
4
1.0
CDI-SPDG7R5T4
6
6
1.0
CDI-SPDG011T4
6
6
1.0
CDI-SPDG015T4
10
10
1.0
CDI-SPDG018.5T4
16
16
1.0
CDI-SPDG022T4
16
16
1.0
CDI-SPDG030T4
25
16
1.5
CDI-SPDG037T4
25
16
1.5
CDI-SPDG045T4
35
16
1.5
CDI-SPDG055T4
35
16
1.5
CDI-SPDG075T4
50
25
1.5
CDI-SPDG090T4
70
35
1.5
CDI-SPDG110T4
120
60
1.5

Chapter ⅢInstallation and Wiring
Page 17
3.3 Earthing
1. Earthing resistance:
200 V level: 100 Ω or below
400 V level: 10 Ω or below
2. Don’t earth frequency Inverter, electric welder, motor or other large-current
electrical equipment commonly. Make sure all earth wires inside conduit are laid
separately from the leads of large-current electrical equipment.
3. Use earth wires up to the specified standard and shorten their length as much
as possible.
4. When several frequency Inverters are used in a row, please earth the device
as shown in Fig. (a) and Don’t make earth wires form a circuit as shown in Fig. (c).
5. Frequency Inverters and motors shall be earthed according to the connections
given in Fig. (d).
(a) Correct (b) Incorrect (c) Not recommended
(d) Correct (e) Not recommended
6. Wiring inspection:
Inspect the following items after installation and wiring are completed.
A. Check if the wiring is correct.
B Check if there is broken wire residues or screws left inside the device.
C Check if the screws are tightened firmly.
D Check if the naked leads on terminal contact with other terminals.
This manual suits for next models
28
Table of contents
Popular DC Drive manuals by other brands

Control Techniques
Control Techniques Emerson Focus 1 user guide
Eaton
Eaton PowerXL DH1 manual
Franklin Electric
Franklin Electric SubDrive Connect Plus SDCP-SUB2043 quick start guide
Kruger
Kruger Ecowatt K320 Series Operation manual
Nidec
Nidec COMMANDER S100 user guide
SEW-Eurodrive
SEW-Eurodrive MGF-DSM Series Addendum to the operating instructions
Digital Equipment
Digital Equipment DSP2022-S installation guide

Lenze
Lenze L-force EWS Series Mounting instructions
Danfoss
Danfoss VLT HVAC Drive FC 102 operating instructions
TB-Electronics
TB-Electronics F-SCAN MOBILE NT instruction manual
Danfoss
Danfoss VLT Design guide
Coelbo
Coelbo SPEEDMATIC SET 2010 Installation and operating instructions
