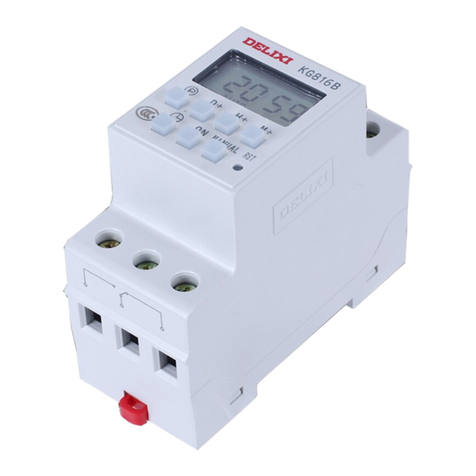
Delixi KG316T User manual

KG316T Time Switch
User Manual
□Please carefully read this User Manual before installing and
operating the product. and keep this manual properly for future
reference

-1 -
1. Overview
1.1 Scope of Application
It is suitable for AC 50/60Hz control circuit with the voltage of 380V and below as a delay timing element to
turn on or off the power of various control circuits at a predetermined time, suitable for street lights, neon lights,
advertising sign lights, radio and television equipment and various household appliances.
Standard: GB/T14048.5
1.2 Model Definition
Rated control power supply voltage Us: refer to 3.5
Time control
Design No.
Switch
1.3 Normal Working Conditions and Installation Conditions
1.3.1 Working environment: the altitude does not exceed 2000 meters; the ambient temperature is not higher than
+40°C and not below -5°C; the rated control power supply voltage variation range of the rated control power
supply is 85%-110% of the rated voltage; Installed in places where there is no medium without harsh vibration or
explosive hazard or the medium does not contain gas or conductive dust that causes metal corrosion or damage to
the insulation free from the rain or snow erosion.
the ra
2. Structural Features
This time switch has an eight-bit microprocessor chip that is directly packaged on the PCB board; the chip
components are used peripherally, featuring with surface mounting, LCD display, and high-power relay output; its
battery is replaceable.
3. Technical Features
3.1 Rated insulation voltage Ui: AC380V:
3.2 Rated impulse withstand voltage Uimp: AC1.5kV;
3.3 Each rated operating voltage Ue/rated operating current Ie under the usage category:
AC - 15 Ue / Ie : AC240V / 3A; Ue / Ie: AC380V / 1.9A ;
3.4 Resistive current Ith: 10A;

-2 -
3.5 Rated control power supply voltage Us: AC50/60Hz: 220V, 380V;
3.6 Pollution level: 3;
3.7 Enclosure protection grade: IP50;
3.8 Contact capacity: 30A AC220V (resistive)
3.9 The time error a day (24 hours) is not greater than ±2 seconds;
3.10 16 on and 16 off actions can be set every day;
3.11 The switching time can be cycled by days or week;
3.12 The maximum control time is 168 hours, and the minimum control time is 1 minute;
3.13 Mechanical life: Greater than or equal to 1 million times;
5.14 Electrical life: Greater than or equal to 100,000 times;
3.15 Cooperation with the short circuit protective device (SCPD): The RT16-00, 10A fuse with “1” type basic
protection is recommended as SCPD; that is, the relay shall not cause danger to the persons or equipment in case
of short circuit, and it is not allowed to work continuously before the repair or replacement of parts. If the fuse
protective device of the different model is selected, the original cooperation may fail.
4. Outline and Installation Dimensions, Wiring Diagram Unit: (mm)
Outline and Installation Hole Dimensions
((or use 35mm standard guide rail))

-3 -
Input
Output
Power
Load
Direct control load wiring diagram Connect AC contactor control load wiring
diagram
5 Installation and Operation
5.1 The keyboard will be locked automatically if not operated within 15 seconds, and the mark " " is displayed in
the lower left corner.
5.2 Unlock: Press the "Cancel/Restore" key 4 times to unlock the keyboard automatically, and the mark " " will
disappear.
5.3 Press the "Week calibration", "Hour calibration", and "Minute calibration" respectively to adjust the Beijing
time.
5.4 Set the ON/OFF time
Step Key Setting contents
1Press "Timing" key Enter the timing ON setting, with 1ON dispalyed
2Press "Week
calibration" key To set the ON time for several days or one day or eavey day of a week.
3Press the "Hour
calibration" and "Minute
calibration" respectively
To set the ON time
4Press "Timing" key To enter the timing OFF setting, with 1OFF displayed
5Press "Week
calibration" key To set the ON time for several days or one day or eavey day of a week.
6Press the "Hour
calibration" and "Minute
calibration" respectively
To set the OFF time
7Repeat 1-6 Set the ON/OFF time for 2-16 times. If no timing is required, the "-- :
--" will be displayed
8Press "Clock" key To end the timing setting and return back to the clock run state
9Press "Auto/Manual"
key The lower part of LCD screen first display the "OFF" switch state, and
then it is turned to the "Auto" state.
Power
Load
Output
Input
Chinese-English Comparison Table
English Mo Tu We Th FRSA Su
Chinese Monday Tuesday Wednesday Thursday Friday Saturday Sunday
Automatic Clock Calibration Function
In the unlocked state, first press and hold the "Cancel/Resume" key, and press the "Clock" key to display "7d=00"
to enter the automatic clock timing function, meaning the time to be adjusted in a week; "7d=-xx" means
automatic decreasing, and 7d=xx means automatic increasing; the maximum adjustment range is 28 seconds.
Press the "Week Calibration" key to adjust the time to be adjusted a week, and press the "Clock" key to return.
After setting, the time will be automatically increased or decreased at 00:31:30 every Saturday.

-4 -
6. Operation Precautions
6.1 In order to prevent the contact from heating under strong current, please tighten the screws of the wiring
terminal when connection.
6.2 It is strictly forbidden to install and disassemble the energized product.
6.3 Please replace the battery regularly to avoid insufficient battery power, resulting in unclear display or no
display. (5# battery is used in the time switch)
6.4 The equipment that may cause major economic losses or personal safety is designed to make the technical
characteristics and performance values have sufficient allowance, and safety measures such as double circuit
protection should be adopted.
7 Часто встречающиеся неисправности и методы их устранения
7.1 Check whether the battery voltage is not too low or there is no power, please replace the battery.
7.2 The time switch works abnormally after power-on
Check whether the time switch time limit setting meets the required requirements, and whether the week is set
in the "Auto" position.
7.3 The output indicator is on when the time switch reaches the set time, but the relay does not convert.
Check whether the power supply voltage is too low
7.4 Product burnt
Check whether the power supply exceeds the rated power supply voltage of the product and whether the power
cord is connected correctly.
7.5 Troubleshooting
In case of failure of product, first cut off the power, and then connect the wire properly according to the wiring
diagram; operate the product according to the Installation and Operation Instructions after checking that the line
works normally. If the product has the poor quality problem, please contact the local dealer or our company.
8. Transport and Storage
The product shall be free from the rain or snow erosion or squeezing during storage and transportation. and shall
be stored in well ventilated places where the relative humidity (25℃±5℃) does not exceed 90%. the lower limit
of the temperature is -25℃. and the upper limit of the temperature is +55℃.

-5 -
9. Unpacking and Inspection
Open the outer carton and check that there is the Operation Instruction in the packing box.
10. Ordering Notice
Please specify the model and specification of the product when ordering. For Any special requirement. please
contact the manufacturer.
11. Company Commitment
Under the condition that users follow the use and storage conditions and the product are well sealed. within 24
months from the production date. our company will provide repair and replacement service free of charge for any
damage or abnormal operation due to poor manufacture quality. A paid repair will be provided if the warranty
period expires. For any damage due to one of the following situations. a paid repair will be given even if within
the warranty period:
(1) Improper operation. maintenance. or storage;
(2) Modified without permission or improper repair;
(3) Damage due to falling off or caused during installation after purchase;
(4) Force majeure such as earthquakes. fires. lightning strikes. abnormal voltages. and secondary disasters;
(5) The electrical life of the product exceeds 100.000 times; The mechanical life is more than one million times.
If you have any question. please contact the dealer or our company’s customer service department.
Table of contents
Other Delixi Switch manuals

