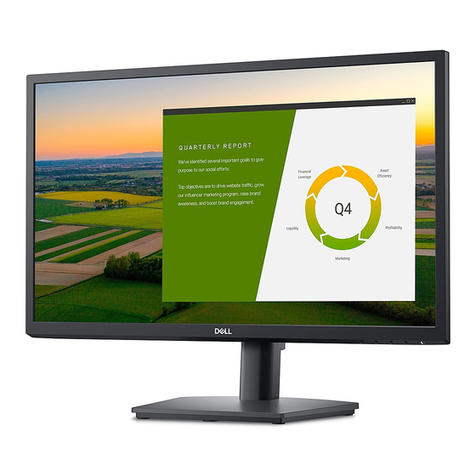
Dell UltraSharp 1800FP User manual

APPENDIX G :
FCC ID : BEJLD803H
USER’S MANUAL

Dell™ 1800FP Color Display User's Guide
Information in this document is subject to change without notice.
© 2001 Dell Computer Corporation. All rights reserved.
Reproduction in any manner whatsoever without the written permission of Dell Computer Corporation is strictly forbidden.
Trademarks used in this text: Dell and the DELL logo are trademarks of Dell Computer Corporation; Microsoft, Windows, and
Windows NT are registered trademarks of Microsoft Corporation; VESA is a registered trademark of Video Electronics
Standards Association; IBM is a registered trademark of International Business Machines Corporation; Adobe is a trademark
of Adobe Systems Incorporated, which may be registered in certain jurisdictions. As an ENERGY STAR Partner, Dell
Computer Corporation has determined that this product meets the ENERGY STAR guidelines for energy efficiency.
Other trademarks and trade names may be used in this document to refer to either the entitles claiming the marks and names
or their products. Dell Computer Corporation disclaims any proprietary interest in trademarks and trade names other than its
own.
Initial release:04/05/2002
Preface
Safety Instructions
Introduction
Setup
Using the Display
Troubleshooting
Specifications
Regulatory Notices
Warranty
Documentation

Back to Contents Page
Preface: Dell™ 1800FP Color Display User's Guide
About This Guide • Notational Conventions
About This Guide
This guide is intended for anyone who uses the Dell 1800FP Color Display. It describes the display's features, setup, and
operation.
The sections are as follows:
Safety Instructions lists safety information.
Introduction gives an overview of the display’s features and provides an orientation to the display.
Setup describes the initial setup process.
Using the Display gives an overview of how to use the display.
Troubleshooting provides tips and solutions for common problems.
Specifications lists the technical specifications of the display.
Regulatory lists regulatory certifications and notices.
Warranty describes the warranty information for this product.
Documentation provides additional documentation that supports this product.
Notational Conventions
The following subsections describe notational conventions used in this document.
Notes, Cautions, and Warnings
Throughout this guide, blocks of text may be accompanied by an icon and printed in bold type or in italic type. These blocks
are notes, cautions, and warnings, and they are used as follows:
Some warnings may appear in alternate formats and may be unaccompanied by an icon. In such cases, the specific
presentation of the warning is mandated by regulatory authority.
Back to Contents Page
NOTE: A NOTE indicates important information that helps you make better use of your computer system.
CAUTION: A CAUTION indicates either potential damage to hardware or loss of data and tells you how to
avoid the problem.
WARNING: A WARNING indicates the potential for bodily harm and tells you how to avoid the

Back to Contents Page
Safety Instructions: Dell™ 1800FP Color Display User's Guide
Read and follow these instructions when connecting and using your computer display:
To help avoid damaging your computer, be sure that the voltage selection switch on the power supply is set to match
the alternating current (AC) power available at your location:
115 volts (V)/60 hertz (Hz) in most of North and South America and some Far Eastern countries such as Japan,
South Korea, and Taiwan.
230 V/50 Hz in most of Europe, the Middle East, and the Far East
Also be sure that your display is electrically rated to operate with the AC power available in your location.
Never insert anything metallic into the display openings. Doing so may create the danger of electric shock.
To avoid electric shock, never touch the inside of the display. Only a qualified technician should open the display's
case.
Never use your display if the power cable has been damaged. Do not allow anything to rest on the power cable, and
keep the cable away from where people could trip over it.
Be sure to hold the plug, not the cable, when disconnecting the display from an electric socket.
Openings in the display cabinet are provided for ventilation. To prevent overheating, these openings should not be
blocked or covered. Also, avoid using the display on a bed, sofa, rug, or other soft surface. Doing so may block the
ventilation openings in the bottom of the cabinet. If you put the display in a bookcase or some other enclosed space, be
sure to provide adequate ventilation.
Put your display in a location with low humidity and a minimum of dust. Avoid places like damp basement or dusty
hallways.
Do not expose the display to rain or use it near water (in kitchens, next to swimming pools, etc.). If the display
accidentally gets wet, unplug it and contact an authorized dealer immediately. You can clean the display with a damp
cloth when necessary, but be sure to unplug the display first.
Place the display on a solid surface and treat it carefully. The screen is made of glass and can be damaged if dropped
or sharply hit.
Locate your display near an easily accessible electric outlet.
If your display does not operate normally - in particular, if there are any unusual sounds or smells coming from it -
unplug it immediately and contact an authorized dealer or service center.
Do not attempt to remove the back cover, as you will be exposed to a shock hazard. The back cover should only be
removed by qualified service personnel.
High temperatures can cause problems. Don't use your display in direct sunlight, and keep it away from heaters,
stoves, fireplaces, and other sources of heat.
Unplug the display when it is going to be left unused for an extended period of time.
Unplug your display from the electric outlet before any service.
Back to Contents Page
WARNING: Use of controls, adjustments, or procedures other than those specified in this documentation
may result in exposure to shock, electrical hazards, and/or mechanical hazards.
Back to Contents Page
Introduction: Dell™ 1800FP Color Display User's Guide
Overview • Graphics
Overview
Congratulations on purchasing the Dell 1800FP Flat Panel Color Display. The 1800FP utilizes a 18.1-inch (45.97cm) Active
Matrix TFT LCD that displays sharp and brilliant images of text and graphics with a maximum resolution up to 1280 x 1024
pixels. This display is optimal for Microsoft® Windows®, CAD/CAM/CAE, desktop publishing, spreadsheets, multimedia, and
any other application that demands large screen size and high resolutions. The Dell 1800FP was designed for a wide variety
of users ranging from the home, small office, or corporate environment. Those who require exceptional quality and reliability at
an affordable price will appreciate the value that the Dell 1800FP provides.
For more details see Specifications Section.
Graphics
The following links show various views of the display and its components.
Front View
Back View
Bottom View
Side View
Back to Contents Page

Back to Contents Page
Front View: Dell™ 1800FP Color Display User's Guide
A. Input selection button
Use this button to make Dsub or DVI connector active.
This feature is used when two computers are connected
to the display. The default setting is Dsub.
B. Menu buttons
Use this button to enter or exit the On Screen Display.
C. Up/down arrow buttons
Select between OSD items and activates "Hot key"
function for brightness adjustment.
D. Left/Right arrow buttons
Use these buttons to choose or adjust items in the On
Screen Display and activates Hot Key function for
contrast adjustment.

Back to Contents Page
E. Select/Auto button
-!Use this button to enter a selection in the On Screen
Display.
- Automatically adjust vertical position, horizontal
position, pixel clock and phase.
F. Power button and LED indicator
Turn the display on/off and indicate the status of power
management.

Back to Contents Page
Back View: Dell™ 1800FP Color Display User's Guide
1.Power connector
2.15-pin D-sub input
3.DVI-D digital input
4. Kensington lock
Back to Contents Page

Back to Contents Page
Bottom View: Dell™ 1800FP Color Display User's Guide
The base is attached when the display is shipped and can be removed.
Back to Contents Page

Back to Contents Page
Side View: Dell™ 1800FP Color Display User's Guide
Back to Contents Page

Back to Contents Page
Setup: Dell™ 1800FP Color Display User's Guide
Tilt/Swivel Base
Attaching the Cables
Positioning the Display
Maintenance
Back to Contents Page

Back to Contents Page
Tilt/Swivel Base: Dell™ 1800FP Color Display User's Guide
Tilt/Swivel Base
With the Tilt/ Swivel base, you can tilt and/or swivel the display for the most comfortable viewing angle.
CAUTION: The base is attached when the display is shipped and can be removed.
Back to Contents Page

Back to Contents Page
Attaching the Cables: Dell™ 1800FP Color Display User's Guide
Cable Connections On Back of Display and Computer
1. Turn off your computer and unplug its power cable.
2. Connect either the white (digital DVI-D) or the blue (analog D-SUB) display connector cable to the corresponding
video port on the back of your computer. Do not use both cables on the same PC. The only case in which both
cables can be used is if they are connected to two different PCs with appropriate video systems. (The graphics are
for illustration only. System appearance may vary).
3. Connect the power cable for your display to the power port on the back of the display.
4. Plug the power cables of your computer and your display into a nearby outlet.
5. Turn on your display and computer.
If your display displays an image, installation is complete. If it does not display an image, see Troubleshooting.
Back to Contents Page

Back to Contents Page
Positioning the Display: Dell™ 1800FP Color Display User's
Guide
Consider the following environmental factors when you are deciding how to position the display:
If there are any woofer speakers near the display, unplug and relocate the woofer to another room.
Remove all electronic devices such as radios, fans, clocks, and telephones that are within 3 feet away of the display.
If there were electronic devices removed, perform degauss again.
Back to Contents Page

Back to Contents Page
Maintenance: Dell™ 1800FP Color Display User's Guide
To clean your antistatic screen, lightly dampen a soft, clean cloth with water. If possible, use a special screen-cleaning
tissue or solution suitable for the antistatic coating.
To clean your Midnight Gray display cabinet, avoid using detergent of any kind. Detergent leaves a milky film on
plastics; particularly the darker colored ones. It is best to use a lightly dampened warm cloth to clean the cabinet.
White powder substance, due to shipping, may appear on the plastic or near bezel edge. If you observe this, simply
wipe it off.
Darker color plastics may scratch and shows white scuff marks more than lighter-colored display. Handle your Midnight
Gray display with care.
Back to Contents Page
WARNING: To avoid risk of electric shock, do not disassemble the display cabinet. Users cannot service the
display. User maintenance is restricted to cleaning.
NOTE: Before cleaning the display, unplug it from the electrical outlet.

Back to Contents Page
Using the Display: Dell™ 1800FP Color Display User's Guide
Setting the Optimal Resolution
Controls and Indicators
Back to Contents Page

Back to Contents Page
Setting the Optimal Resolution: Dell™ 1800FP Color Display
User's Guide
For optimal display performance while using the Microsoft®Windows® operating systems, set the display resolution to 1280 x
1024 pixels by performing the following steps:
1. Click the Start button, point to Settings, and click Control Panel.
2. Double-click the Display icon in the Control Panel window, and then click the Settings tab.
3. In the Desktop area, move the slidebar to 1280 by 1024 pixels. Then click OK.
Back to Contents Page

Back to Contents Page
Controls and Indicators: Dell™ 1800FP Color Display User's
Guide
Overview • On Screen Display (OSD) Menu System • Automatic Save • OSD_Warning_Messages • LED_Indicators
Overview
Use the control buttons on the front of the display to adjust the characteristics of the image being displayed. As you use these
buttons to adjust the controls, an on-screen display (OSD) shows their numeric values as they change.
A. Input selection button
Use this button to make Dsub or DVI connector active. This feature is used when
two computers are connected to the display. The default setting is Dsub.
B. Menu button
Use this button to enter or exit the On Screen Display. See access the Menu
system.
C. Up/down arrow buttons
Select between OSD items and activates "Hot key" function for brightness
adjustment.
D. Left/Right arrow buttons
Use these buttons to choose or adjust items in the On Screen Display and activates
Hot Key function for contrast adjustment.

On Screen Display (OSD) Menu System
Direct-Access Functions
E. Select/Auto button
Automatically adjust vertical position, horizontal position, pixel clock and phase. For
best results, use this button when there is a full screen of detailed information, such
as fine text, or the shutdown window (without shutting down the system). The
following dialog will appear on a black screen as the display self-adjusts to the
current input:
See Auto adjustment.
Note: Auto Adjust will not occur if you press the button while there are no
active video input signals, or attached cables.
F. Power button and LED indicator
Turn the display on/off and indicate the status of power management. The power
indicator lights steady green while the display function normally. The LED is steady
amber for DPMS. See Power management mode.
Function Adjustment Method
Auto adjustment:
Even though your computer system can recognize your new flat panel display
on startup, the 'Auto Adjustment' function will optimize the display settings for
use with your particular setup. Auto Adjustment can be accessed through the
OSD via the Image Settings submenu pictured at left or, you may use the direct
access instructions below:
1.Turn on your computer and display.
2.Push the 'Select/Auto' button (E) to activate the Auto adjustment function.
3.When finished, the pixel clock and phase should be adjusted to their optimal
settings.

Accessing the Menu System
1. With the menu off, push the MENU button to open the OSD system and display the main features menu.
2. OSD main menu has 5 sub-menus including “Brightness/Contrast”, “Color”, “Position”, “Tracking” and “Setup”. Push
the up and down arrow buttons to move between the function icons. As you move from one icon to another, the
Brightness:
The Brightness function adjusts the luminance of the flat panel.
With the menu off, push the up(or down) arrow button to display the Brightness
adjustment menu.
Adjust Brightness first, then adjust Contrast only if further adjustment is
necessary.
increase luminance
decrease luminance
Contrast:
The Contrast function adjusts the degree of difference between darkness and
lightness on the display screen.
With the menu off, push the left(or right) arrow button to display the Contrast
adjustment menu.
increase the contrast
decrease the contrast
Controls Locked/Unlocked :
Menu and :
This function allows you to secure the current control settings, so that they
cannot be inadvertently changed. Press and hold the MENU button and
!button for 3 seconds: the message “CONTROLS LOCKED” appears.
You can unlock the OSD controls at any time by pushing the MENU button and
!button for 3 seconds:
the message “CONTROLS UNLOCKED” will appear.
ASub-menu icon BSub-menu name
Other manuals for UltraSharp 1800FP
3
Table of contents
Other Dell Monitor manuals

Dell
Dell S2421HSX User manual

Dell
Dell UltraSharp U2417HA User manual

Dell
Dell S2721HGFA User manual

Dell
Dell P2722HB Instructions for use

Dell
Dell E1715SE User manual

Dell
Dell S2319H User manual

Dell
Dell C8621QT User manual

Dell
Dell S2317HWI User manual

Dell
Dell W2600 User manual

Dell
Dell P2423DE User manual

Dell
Dell E2014T User manual

Dell
Dell G3223Q User manual

Dell
Dell E248WFP - 24" LCD Monitor User manual

Dell
Dell 1909Wb User manual

Dell
Dell P2418HT Instructions for use

Dell
Dell D1626HT - UltraScan 1600HS - 21" CRT Display User manual

Dell
Dell 1707FPc User manual

Dell
Dell UltraSharp UP2516D User manual

Dell
Dell E2209Wc User manual

Dell
Dell E2011H User manual