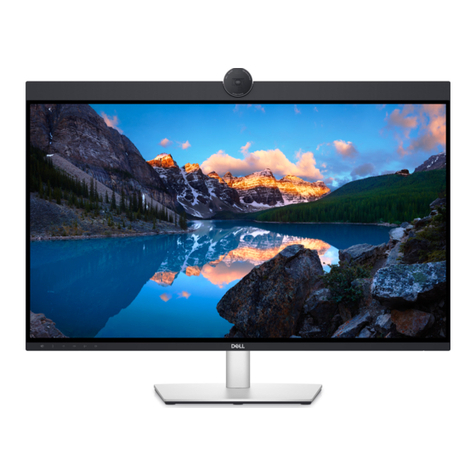
Dell UltraSharp U2424H User manual

Dell UltraSharp 24 Monitor -
U2424H/U2424H WOST/U2424HE
User’s Guide
Model: U2424H/U2424H WOST/U2424HE
Regulatory model: U2424Hb/U2424Ht/U2424HEb

NOTE: A NOTE indicates important information that helps you make
better use of your computer.
CAUTION: A CAUTION indicates potential damage to hardware or loss
of data if instructions are not followed.
WARNING: A WARNING indicates a potential for property damage,
personal injury, or death.
Copyright © 2023 Dell Inc. or its subsidiaries. All rights reserved. Dell, EMC, and other trademarks
are trademarks of Dell Inc. or its subsidiaries. Other trademarks may be trademarks of their respective
owners.
2023 - 09
Rev. A00

│ 3
Contents
Safety instructions . . . . . . . . . . . . . . . . . . . . . . . . . . 7
About your monitor. . . . . . . . . . . . . . . . . . . . . . . . . . 8
Package contents. . . . . . . . . . . . . . . . . . . . . . . . . . . . . . . . 8
Product features . . . . . . . . . . . . . . . . . . . . . . . . . . . . . . . 10
Identifying parts and controls . . . . . . . . . . . . . . . . . . . . . 12
Front view . . . . . . . . . . . . . . . . . . . . . . . . . . . . . . . . . . . . . . . . . . . 12
Top view . . . . . . . . . . . . . . . . . . . . . . . . . . . . . . . . . . . . . . . . . . . . . 13
Back view . . . . . . . . . . . . . . . . . . . . . . . . . . . . . . . . . . . . . . . . . . . . 14
Rear and bottom view. . . . . . . . . . . . . . . . . . . . . . . . . . . . . . . . . . .15
Monitor specifications . . . . . . . . . . . . . . . . . . . . . . . . . . . 20
Resolution specifications . . . . . . . . . . . . . . . . . . . . . . . . . . . . . . . 22
Supported video modes . . . . . . . . . . . . . . . . . . . . . . . . . . . . . . . . 22
Preset display modes . . . . . . . . . . . . . . . . . . . . . . . . . . . . . . . . . . 23
Multi-Stream Transport (MST) modes. . . . . . . . . . . . . . . . . . . . . 24
Electrical specifications . . . . . . . . . . . . . . . . . . . . . . . . . . . . . . . . 24
Physical characteristics . . . . . . . . . . . . . . . . . . . . . . . . . . . . . . . . 26
Environmental characteristics . . . . . . . . . . . . . . . . . . . . . . . . . . . 28
Pin assignments . . . . . . . . . . . . . . . . . . . . . . . . . . . . . . . . . . . . . . 29
Universal Serial Bus (USB) interface . . . . . . . . . . . . . . . . 31
SuperSpeed USB 10 Gbps (USB 3.2 Gen2). . . . . . . . . . . . . . . . . . .31
USB Type-C . . . . . . . . . . . . . . . . . . . . . . . . . . . . . . . . . . . . . . . . . . 31
USB 3.2 downstream connector . . . . . . . . . . . . . . . . . . . . . . . . . . 32
USB Type-C connector . . . . . . . . . . . . . . . . . . . . . . . . . . . . . . . . . 32
USB ports . . . . . . . . . . . . . . . . . . . . . . . . . . . . . . . . . . . . . . . . . . . 33
RJ45 connector (applicable for U2424HE only). . . . . . . . 34
Driver installation . . . . . . . . . . . . . . . . . . . . . . . . . . . . . . . . . . . . . 35
RJ45 connector LED status . . . . . . . . . . . . . . . . . . . . . . . . . . . . . 36

4 │
Video Bandwidth . . . . . . . . . . . . . . . . . . . . . . . . . . . . . . . . . . . . . . 37
USB Speed Bandwidth. . . . . . . . . . . . . . . . . . . . . . . . . . . . . . . . . . 37
Plug and play capability . . . . . . . . . . . . . . . . . . . . . . . . . . 38
LCD monitor quality and pixel policy . . . . . . . . . . . . . . . . 38
Ergonomics. . . . . . . . . . . . . . . . . . . . . . . . . . . . . . . . . . . . 38
Handling and moving your display . . . . . . . . . . . . . . . . . . 40
Maintenance guidelines . . . . . . . . . . . . . . . . . . . . . . . . . . 41
Cleaning your monitor . . . . . . . . . . . . . . . . . . . . . . . . . . . . . . . . . . 41
Setting up the monitor . . . . . . . . . . . . . . . . . . . . . . 43
Attaching the stand . . . . . . . . . . . . . . . . . . . . . . . . . . . . . 43
Organizing your cables. . . . . . . . . . . . . . . . . . . . . . . . . . . 46
Using the tilt, swivel, and vertical extension . . . . . . . . . . 47
Tilt, swivel . . . . . . . . . . . . . . . . . . . . . . . . . . . . . . . . . . . . . . . . . . . 47
Vertical extension . . . . . . . . . . . . . . . . . . . . . . . . . . . . . . . . . . . . . 48
Rotating the monitor . . . . . . . . . . . . . . . . . . . . . . . . . . . . 48
Rotate clockwise . . . . . . . . . . . . . . . . . . . . . . . . . . . . . . . . . . . . . . 49
Rotate counterclockwise . . . . . . . . . . . . . . . . . . . . . . . . . . . . . . . . 49
Adjusting the rotation display settings of your system . . 50
Connecting your monitor . . . . . . . . . . . . . . . . . . . . . . . . . 51
Connecting the DisplayPort (DisplayPort to DisplayPort) cable. . 51
Connecting the USB Type-C cable
(applicable for U2424HE only). . . . . . . . . . . . . . . . . . . . . . . . . . . . 52
Connecting the monitor for DP Multi-Stream Transport (MST)
function . . . . . . . . . . . . . . . . . . . . . . . . . . . . . . . . . . . . . . . . . . . . . 52
Connecting the Monitor for USB Type-C Multi-Stream Transport
(MST) Function (applicable for U2424HE only) . . . . . . . . . . . . . . 53
Connecting the monitor for RJ45 cable (optional) (applicable for
U2424HE only). . . . . . . . . . . . . . . . . . . . . . . . . . . . . . . . . . . . . . . . 53
Connecting the USB A-C cable . . . . . . . . . . . . . . . . . . . . . . . . . . . 54
Dell Power Button Sync (DPBS) (applicable for
U2424HE only) . . . . . . . . . . . . . . . . . . . . . . . . . . . . . . . . . 56
Connecting the monitor for DPBS for the first time . . . . . . . . . . . 59
Using DPBS function . . . . . . . . . . . . . . . . . . . . . . . . . . . . . . . . . . . 60

│ 5
Connecting the monitor for USB-C Multi-Stream Transport
(MST) function . . . . . . . . . . . . . . . . . . . . . . . . . . . . . . . . . . . . . . . 62
Connecting the monitor for USB-C . . . . . . . . . . . . . . . . . . . . . . . 63
Securing your monitor using Kensington lock (optional). 65
Removing the monitor stand . . . . . . . . . . . . . . . . . . . . . . 65
VESA wall mounting (optional) . . . . . . . . . . . . . . . . . . . . 66
Operating the monitor . . . . . . . . . . . . . . . . . . . . . . 67
Turn on the monitor . . . . . . . . . . . . . . . . . . . . . . . . . . . . . 67
Using the joystick control . . . . . . . . . . . . . . . . . . . . . . . . 67
Joystick functions. . . . . . . . . . . . . . . . . . . . . . . . . . . . . . . . . . . . . 68
Using the Main Menu . . . . . . . . . . . . . . . . . . . . . . . . . . . . 68
Accessing the Menu Launcher . . . . . . . . . . . . . . . . . . . . . . . . . . . 68
Menu Launcher details . . . . . . . . . . . . . . . . . . . . . . . . . . . . . . . . . 69
Using the navigation keys . . . . . . . . . . . . . . . . . . . . . . . . . . . . . . . 70
Using the On-Screen Display (OSD) menu . . . . . . . . . . . 70
Accessing the menu system . . . . . . . . . . . . . . . . . . . . . . . . . . . . . 70
OSD messages . . . . . . . . . . . . . . . . . . . . . . . . . . . . . . . . . 88
Initial setup . . . . . . . . . . . . . . . . . . . . . . . . . . . . . . . . . . . . . . . . . . 88
OSD warning messages . . . . . . . . . . . . . . . . . . . . . . . . . . . . . . . . 90
Setting the KVM switch (applicable for U2424HE only) . 95
Setting the Auto KVM (applicable for U2424HE only) . . . 97
Setting the maximum resolution . . . . . . . . . . . . . . . . . . . 98
Setting the maximum refresh rate . . . . . . . . . . . . . . . . . . 99
Multi-Monitor Sync (MMS) . . . . . . . . . . . . . . . . . . . . . . 100
Setting Multi-Monitor Sync (MMS) . . . . . . . . . . . . . . . . . . . . . . . 101
Troubleshooting . . . . . . . . . . . . . . . . . . . . . . . . . . 103
Self-test. . . . . . . . . . . . . . . . . . . . . . . . . . . . . . . . . . . . . 103
Using the joystick to lock/unlock buttons . . . . . . . . . . . 104
Locking the power and joystick buttons . . . . . . . . . . . . . . . . . . . .104

6 │
Always On USB-C Charging (applicable for U2424HE
only) . . . . . . . . . . . . . . . . . . . . . . . . . . . . . . . . . . . . . . . . 105
Updating monitor firmware . . . . . . . . . . . . . . . . . . . . . . 105
Common problems . . . . . . . . . . . . . . . . . . . . . . . . . . . . . 106
Product specific problems . . . . . . . . . . . . . . . . . . . . . . . 109
Universal Serial Bus (USB) specific problems . . . . . . . . . 111
Regulatory information . . . . . . . . . . . . . . . . . . . . . 113
FCC notices (U.S. only) and other regulatory
information. . . . . . . . . . . . . . . . . . . . . . . . . . . . . . . . . . . .113
EU product database for energy label and product
information sheet . . . . . . . . . . . . . . . . . . . . . . . . . . . . . . .113
Contacting Dell . . . . . . . . . . . . . . . . . . . . . . . . . . . 114

Safety instructions │ 7
Safety instructions
Use the following safety guidelines to protect your monitor from potential damage
and to ensure your personal safety. Unless otherwise noted, each procedure
included in this document assumes that you have read the safety information that
shipped with your monitor.
NOTE: Before using the monitor, read the safety instruction that is
shipped with your monitor and printed on the product. Keep the
documentation at a secure location for future reference.
WARNING: Use of controls, adjustments, or procedures other than
those specified in this documentation may result in exposure to shock,
electrical hazards, and/or mechanical hazards.
WARNING: The possible long-term effect of listening to audio at high
volume through the headphones (on monitor that support it) may cause
damage to your hearing ability.
• Place the monitor on a solid surface and handle it carefully. The screen is
fragile and can be damaged if dropped or hit with a sharp object.
• Ensure that your monitor is electrically rated to operate with the AC power
available in your location.
• Keep the monitor in room temperature. Excessive cold or hot conditions can
have an adverse effect on the liquid crystals of the display.
• Connect the power cable from the monitor to a wall outlet that is near and
accessible. See Connecting your monitor.
• Do not place and use the monitor on a wet surface or near water.
• Do not subject the monitor to severe vibration or high impact conditions. For
example, do not place the monitor inside a car trunk.
• Unplug the monitor when it is going to be left unused for an extended period.
• To avoid electric shock, do not attempt to remove any cover or touch the
inside of the monitor.
• Read these instructions carefully. Keep this document for future reference.
Follow all warnings and instructions marked on the product.
• Certain monitors can be wall mounted using the VESA mount that is sold
separately. Ensure to use the correct VESA specifications as mentioned in the
wall mounting section of the User’s Guide.
For information on safety instructions, see the Safety, Environmental, and
Regulatory Information (SERI) document that is shipped with your monitor.
8 │ About your monitor
About your monitor
Package contents
The following table provides the list of components that are shipped with your
monitor. If any component is missing, contact Dell. For more information, see
Contacting Dell.
NOTE: Some items may be optional and may not ship with your monitor.
Some features may not be available in certain countries.
Display
Stand riser
Stand base
Power cable (varies by
country)

About your monitor │ 9
USB Type-C Gen2 cable
(applicable for U2424HE
only)
Cable length: 1.00 M
DisplayPort 1.4 cable (DP to
DP) Cable length: 1.80 M
USB-A to USB-C Gen2 cable
Cable length: 1.00 M
• Quick Setup Guide
• Safety, Environmental,
and Regulatory
Information
• Factory Calibration Report

10 │ About your monitor
Product features
The Dell U2424H/U2424H WOST/U2424HE monitor has an active matrix, Thin-
Film Transistor (TFT), Liquid Crystal Display (LCD) and LED backlight. The monitor
features include:
• 60.47 cm (23.80 in.) viewable area (measured diagonally). 1920 x 1080 (16:9)
resolution, plus full-screen support for lower resolutions.
• Wide viewing angle to allow viewing from a sitting or standing position.
• Color gamut of sRGB 100% and BT.709 100% with an average Delta E < 2;
also supports DCI-P3 85%.
• Digital connectivity with DisplayPort, HDMI, and USB Type-C (with DP
Alternate Mode; applicable for U2424HE only).
• Single USB Type-C to supply power (PD 90 W) to a compatible notebook
while receiving video and data signal (applicable for U2424HE only).
• Tilt, swivel, height, and rotate adjustment capabilities.
• Ultra-thin bezel minimizes the bezel gap in multi-monitor usage, enabling
easier setup with an elegant viewing experience.
• Removable stand and Video Electronics Standards Association (VESA™)
100 mm mounting holes for flexible mounting solutions.
• Auto Brightness sensor detects the surrounding light and adjusts monitor
brightness and color temperature accordingly; multiple Dell monitors equipped
with Auto Brightness sensor could synchronize their brightness and color
temperature level through MST connection.
• U2424H/U2424H WOST is equipped with:
-One USB Type-C upstream port (data only, USB 3.2 Gen2, 10 Gbps)
-Two SuperSpeed USB 10 Gbps (USB 3.2 Gen2) Type-A downstream ports
-One SuperSpeed USB 10 Gbps (USB 3.2 Gen2) Type-A downstream with
BC1.2 charging port
-One SuperSpeed USB 10 Gbps (USB 3.2 Gen2) Type-C downstream port
• U2424HE is equipped with:
-One USB Type-C upstream port (video and data; DisplayPort 1.4 with
Alternate mode, PD up to 90 W)
-One USB Type-C upstream port (data only, USB 3.2 Gen2, 10 Gbps)
-Three SuperSpeed USB 10 Gbps (USB 3.2 Gen2) Type-A downstream ports
-One SuperSpeed USB 10 Gbps (USB 3.2 Gen2) Type-A downstream with
BC1.2 charging port
-One SuperSpeed USB 10 Gbps (USB 3.2 Gen2) Type-C downstream port

About your monitor │ 11
• USB Type-C and RJ45 ports enable a single-cable, network-connected
experience (applicable for U2424HE only).
• Plug-and-play capability if supported by your computer.
• On-Screen Display (OSD) adjustments for ease of set-up and screen
optimization.
• Power and OSD buttons lock.
• Security-lock slot.
• Stand lock.
•<0.5 W in Standby Mode.
• The monitor supports DRR (Dynamic refresh rate) function. DRR works with
all Windows 11 tasks, allowing you to automatically increase the refresh rate
(for smoother experience) while using the PC or NB to writing or scrolling, and
lower the refresh rate when you don’t need it, which saves more power.
• This monitor uses a low blue light panel. When the monitor is reset to factory
settings or default setting, it is in compliance with TÜV Rheinland’s hardware
low blue light certification.*
Blue light ratio:
The ratio of light in the range from 415nm-455nm compared to 400nm-500nm
shall be less than 50%.
Category Blue light ratio
1<20%
220% < R <35%
335% < R <50%
• Decreases the level of hazard blue light emitted from the screen to make
viewing more comfortable for your eyes without distortion of color accuracy.
• The monitor adopts Flicker-Free technology, which clears the eye visible
flicker, brings comfort viewing experience and preventing users suffer from
eye strain and fatigue.
* This monitor is in compliance with TÜV Rheinland hardware low blue light
certification under Category 2.
WARNING: The possible long-term effects of blue light emission from
the monitor may cause damage to the eyes, which includes but is not
limited to eye fatigue and digital eye strain. ComfortView Plus feature is
designed to reduce the amount of blue light emitted from the monitor

12 │ About your monitor
to optimize eye comfort. The monitor uses low blue light panel and is in
compliance with TÜV Rheinland at factory reset/default setting mode
(Brightness: 75%, Contrast: 75%, CCT: Standard)
Identifying parts and controls
Front view
Front view with monitor stand
No. Description Use
1Power LED indicator Solid white light indicates that the
monitor is turned on and functioning
normally. Blinking white light indicates
that the monitor is in Standby Mode.

About your monitor │ 13
Top view
No. Description Use
1Auto Brightness sensor Adjusts the brightness and the color
temperature of the display according to
the surrounding light. For more
information, see Auto Brightness and
Auto Color Temp..
NOTE: If the brightness level becomes
abnormally low, see Trou b l es hoo tin g.

14 │ About your monitor
Back view
Back view with monitor stand
No. Description Use
1VESA mounting holes (100 mm
x 100 mm - behind the attached
VESA Cover)
Wall mount monitor using VESA-
compatible wall mount kit (100 mm x
100 mm).
2Regulatory label Lists the regulatory approvals.
3Stand release button Releases stand from the monitor.
4Barcode, serial number, and
Service Tag label
See this label if you need to contact
Dell for technical support. The
Service Tag is a unique alphanumeric
identifier that enables Dell service
technicians to identify the hardware
components in your monitor and
access warranty information.
5Power button To turn the monitor on or off.
6Joystick Use to control the OSD menu. For
more Information, see Operating the
monitor.
7Cable-management slot Use to organize cables by routing
them through the slot.

About your monitor │ 15
Rear and bottom view
U2424H/U2424H WOST
Rear and bottom view without monitor stand
No. Description Use
1Security-lock slot
(based on Kensington
Security Slot)
Secure your monitor using a security lock
(purchased separately) to prevent
unauthorized movement of your monitor.
2Power connector Connect the power cable (shipped with your
monitor).
3HDMI port Connect your computer with the HDMI
cable.
4DisplayPort Connect your computer with the DisplayPort
cable (shipped with your monitor).
5Stand lock To lock the stand to the monitor using a M3 x
6 mm screw (the screw is not included).
6DisplayPort (out) DisplayPort output for MST (multi-stream
transport) capable monitor. To enable MST,
see Connecting the monitor for DP Multi-
Stream Transport (MST) function.
NOTE: Remove the rubber plug when using
DisplayPort out connector.

16 │ About your monitor
7SuperSpeed USB 10
Gbps (USB 3.2 Gen2)
Type-C upstream port
(data only)
Connect the USB A-C cable (shipped with
your monitor) from the monitor to the
computer. This port supports USB data
transfer at 10 Gbps (USB 3.2 Gen2). Once
this cable is connected, you can use the USB
connectors on the monitor.
NOTE: USB Type-C is not supported on
versions of Windows prior to Windows 10 and
Windows 11.
8SuperSpeed USB 10
Gbps (USB 3.2 Gen2)
Type-A downstream
ports
Connect your USB device.**
NOTE: To use these ports, you must connect
the USB A-C cable (shipped with your
monitor) to the USB Type-C upstream port
(data only) on the monitor and to your
computer.
9Audio line-out port Connect external speakers.*
10 SuperSpeed USB 10
Gbps (USB 3.2 Gen2)
Type-A downstream
ports
Connect your USB device.**
NOTE: To use these ports, you must connect
the USB A-C cable (shipped with your
monitor) to the USB Type-C upstream port
(data only) on the monitor and to your
computer.
11 SuperSpeed USB 10
Gbps (USB 3.2 Gen2)
Type-A downstream
with BC1.2 charging
port
Connect your USB device** or charge your
device.
NOTE: To use this port, you must connect
the USB A-C cable (shipped with your
monitor) to the USB Type-C upstream port
(data only) on the monitor and to your
computer.
12 SuperSpeed USB 10
Gbps (USB 3.2 Gen2)
Type- C down stream
port (10 Gbps, 15 W)
Connect your USB device.**
NOTE: To use this port, you must connect
the USB A-C cable (shipped with your
monitor) to the USB Type-C upstream port
(data only) on the monitor and to your
computer.

About your monitor │ 17
*Headphone usage is not supported for the audio line out connector.
**To avoid signal interference, when a wireless USB device has been connected to
a USB downstream port, it is not recommended to connect any other USB devices
to the adjacent port(s).
Rear and bottom view without monitor stand
U2424HE
13 Soundbar slots Attach your external Soundbar (sold
separately) to the monitor by aligning the
magnetic tabs on the soundbar with the slots
on the monitor.
No. Description Use
1Security-lock slot
(based on Kensington
Security Slot)
Secure your monitor using a security lock
(purchased separately) to prevent
unauthorized movement of your monitor.
2Power connector Connect the power cable (shipped with your
monitor).
3HDMI port Connect your computer with the HDMI
cable.
4DisplayPort Connect your computer with the DisplayPort
cable (shipped with your monitor).
5Stand lock To lock the stand to the monitor using a M3 x
6 mm screw (the screw is not included).

18 │ About your monitor
6SuperSpeed USB 10
Gbps (USB 3.2 Gen2)
Type-C upstream port
(video and data)
Connect the USB Type-C cable (shipped
with your monitor) from the monitor to the
computer or notebook. This port supports
USB Power Delivery, Data, and DisplayPort
video signal.
The SuperSpeed USB 10 Gbps (USB 3.2
Gen2) Type-C port offers the fastest transfer
rate and the alternate mode with DP 1.4
supports a maximum resolution of
1920 x 1080 at 120 Hz, PD 20 V/4.5 A,
15 V/3 A, 9 V/3 A, 5 V/3 A.
NOTE: USB Type-C is not supported on
versions of Windows prior to Windows 10 and
Windows 11.
7DisplayPort (out) DisplayPort output for MST (multi-stream
transport) capable monitor. To enable MST,
see Connecting the monitor for DP Multi-
Stream Transport (MST) function.
NOTE: Remove the rubber plug when using
DisplayPort out connector.
8SuperSpeed USB 10
Gbps (USB 3.2 Gen2)
Type-C upstream port
(data only)
Connect the USB A-C cable (shipped with
your monitor) from the monitor to the
computer. This port supports USB data
transfer at 10 Gbps (USB 3.2 Gen2). Once
this cable is connected, you can use the USB
connectors on the monitor.
NOTE: USB Type-C is not supported on
versions of Windows prior to Windows 10 and
Windows 11.
NOTE: Remove the rubber plug when using
USB Type-C upstream port (data only)
connector.

About your monitor │ 19
*Headphone usage is not supported for the audio line out connector.
9SuperSpeed USB 10
Gbps (USB 3.2 Gen2)
Type-A downstream
ports (3)
Connect your USB device.**
NOTE: To use these ports, you must connect
the USB Type-C cable (shipped with your
monitor) to the USB Type-C upstream port
(video and data) (#6) or connect the USB A-
C cable (shipped with your monitor) to the
USB Type-C upstream port (data only) (#8)
on the monitor and to your computer.
10 Audio line-out port Connect external speakers.*
11 RJ45 port Support Ethernet connection 10/100/1000/
2500 Mbps. Connect this port to Ethernet
with RJ45 cable. You can use either the USB
Type-C cable or the USB A-C cable that are
shipped with your monitor to make USB
connection and complete the setup.
12 SuperSpeed USB 10
Gbps (USB 3.2 Gen2)
Type-A downstream
port with Type-A
downstream with BC1.2
charging port
Connect your USB device** or charge your
device.
NOTE: To use these ports, you must connect
the USB Type-C cable (shipped with your
monitor) to the USB Type-C upstream port
(video and data) (#6) or connect the USB A-
C cable (shipped with your monitor) to the
USB Type-C upstream port (data only) (#8)
on the monitor and to your computer.
13 SuperSpeed USB 10
Gbps (USB 3.2 Gen2)
Type-C downstream
port (10 Gbps, 15 W)
Connect your USB device.**
NOTE: To use these ports, you must connect
the USB Type-C cable (shipped with your
monitor) to the USB Type-C upstream port
(video and data) (#6) or connect the USB A-
C cable (shipped with your monitor) to the
USB Type-C upstream port (data only) (#8)
on the monitor and to your computer.
14 Soundbar slots Attach your external Soundbar (sold
separately) to the monitor by aligning the
magnetic tabs on the soundbar with the slots
on the monitor.

20│ About your monitor
**To avoid signal interference, when a wireless USB device has been connected to
a USB downstream port, it is not recommended to connect any other USB devices
to the adjacent port(s).
Monitor specifications
Model U2424H/U2424H WOST/U2424HE
Screen type Active matrix - TFT LCD
Panel technology In-Plane Switching Technology
Aspect ratio 16:9
Viewable Image
Diagonal
Width (active area)
Height (active area)
Tot a l are a
604.70 mm (23.80 in.)
527.04 mm (20.75 in.)
296.46 mm (11.67 in.)
156246.28 mm2(242.18 in.2)
Pixel pitch 0.2745 mm x 0.2745 mm
Pixel per inch (PPI) 92.53
Viewing angle
Vertical
Horizontal
178° (typical)
178° (typical)
Luminance output 250 cd/m² (typical)
Contrast ratio 1000 to 1 (typical)
Faceplate coating Anti-Glare with 3H hardness
Backlight White LED edgelight system
Response time 8 ms (Normal OD)
5 ms (Fast OD)
Color depth 16.7 million colors
Color gamut • sRGB 100%
• BT.709 100%
•DCI-P385%
Calibration accuracy sRGB and BT.709: Delta E < 2 (average)
This manual suits for next models
2
Table of contents
Other Dell Monitor manuals

Dell
Dell P2211H User manual

Dell
Dell UltraSharp 1800FP User manual

Dell
Dell P2720D User manual

Dell
Dell UltraSharp 1800FP User manual

Dell
Dell P2415Q User manual

Dell
Dell P2018H User manual

Dell
Dell P992 User manual

Dell
Dell UltraSharp U2515H User manual

Dell
Dell P2210H User manual

Dell
Dell UltraSharp U2419HC User manual

Dell
Dell E157FP - 15" LCD Monitor User manual

Dell
Dell U2410 - UltraSharp - 24" LCD Monitor User manual

Dell
Dell D7523QT User manual

Dell
Dell 2000FP User manual

Dell
Dell P1911 User instructions

Dell
Dell S1709WFP User manual

Dell
Dell S2422HG User manual

Dell
Dell E1913S User manual

Dell
Dell D2015H User manual

Dell
Dell IN2010NWFP User manual