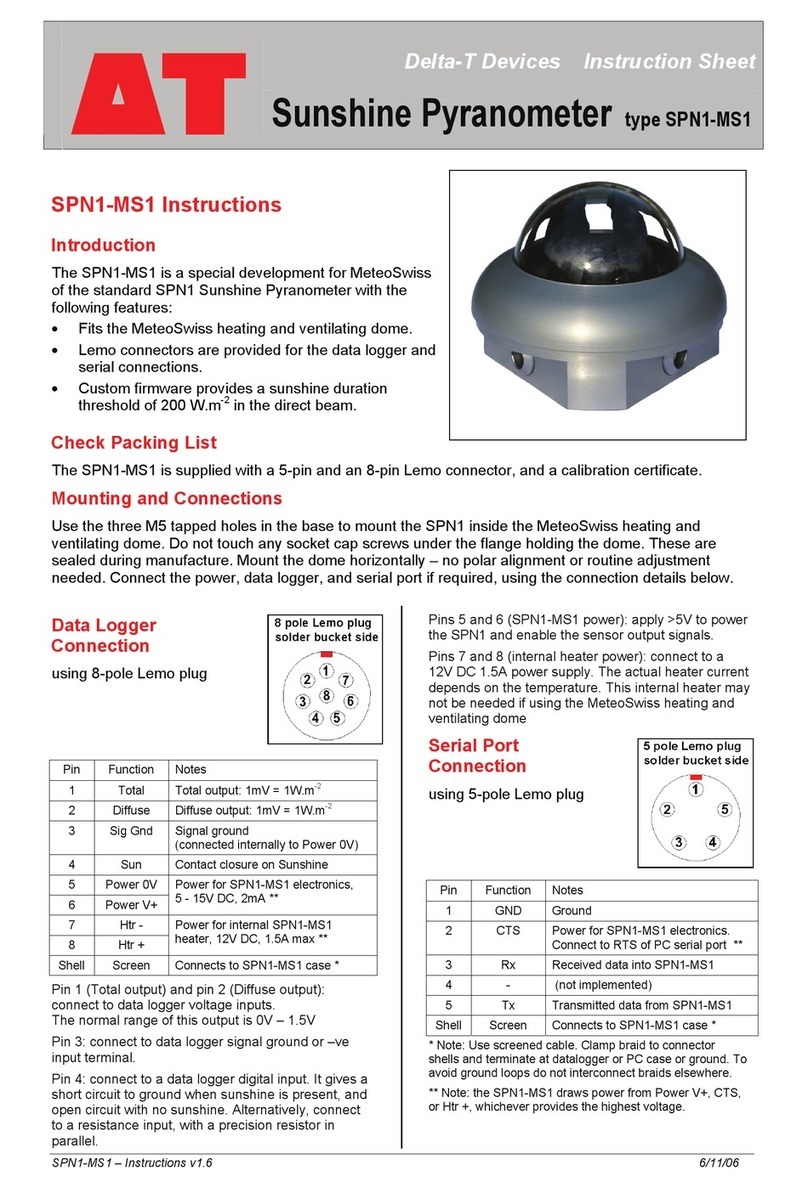
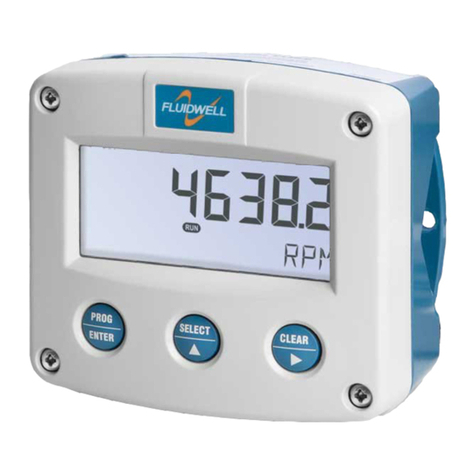
Delta-T HH2 User manual

User Manual for the
Moisture Meter
type HH2
Delta-T Devices Ltd
Version 4.0.1

Notices
Copyright
All rights reserved. Under the copyright laws, this manual may not be copied, in
whole or in part, without the written consent of Delta-T Devices Ltd. Under the law,
copying includes translation into another language.
Copyright © 2013, Delta-T Devices Ltd.
CE conformity
The Moisture Meter has been assessed for compatibility under the European Union
EMC Directive 89/336/EEC and conforms to the appropriate standards. When used
in conjunction with a Delta-T soil moisture sensor (such as the Theta or Profile
Probes), then the EMC guidelines stipulated in the respective manuals for these
sensors should be followed to ensure the combined system remains compliant.
See EMC certificate copy on page 85
Design changes
Delta-T Devices Ltd reserves the right to change the designs and specifications of
its products at any time without prior notice.
User Manual Version: 4.0.1
SM150 sensor added - see Addendum, inserted at front
SM300 sensor added - see Addendum, inserted at front
ML3 sensor added - see Addendum, inserted at front
May 2013
__________________________________________________________
Delta-T Devices Ltd.
Tel: +44 1638 742922
128, Low Road
Fax: +44 1638 743155
Burwell e-mail: sales@delta-t.co.uk
CAMBRIDGE CB5 0EJ WWW: http://www.delta-t.co.uk
UK
___________________________________________________________

Addendum to HH2 User Manual Version 4.0 for ML3
Addendum to HH2 User Manual
Version 4.0 for ML3
Please keep this document with your HH2 User Manual.
ML3 Sensor readings
Support for ML3 requires HH2 Firmware version 2.7 and HH2Read version 2.7 or
later.
To select the ML3 for the next reading:
Press Set at the start-up or readings screen to display the Options menu.
Scroll down to Device using the up ▲and down ▼ keys and press Set.
Scroll down to ML3 using the up and down keys and press Set.
Press Read to take a reading.
Temperature readings are not supported
Please note:
The HH2 does not read ML3 temperature readings
The HH2 hand held meter is intended for taking readings quickly and then moving on
to another location. But the temperature sensor in the ML3 takes about 30 minutes*
to thermally equilibrate with the surrounding soil, and should ideally be buried in the
soil. So for these two reasons it is not appropriate to use the HH2 for soil temperature
readings with this sensor.
* Note: This is defined as the time to equilibrate with and read within 1 degree C of
the soil temperature when burying an ML3 which is itself initially 10 degree C

Addendum to HH2 User Manual Version 4.0 for ML3
2
different from the soil temperature, and which has at least 20 cm of cable buried in
the soil too.
Support for the ML3 is the same the support for the ML2, ML2x and SM300 -
described in the HH2 User Manual.
Trouble Shooting
My ML2x and ML3 don’t agree
Cause
The ML2x conversion table is optimised for water at 0 mS.m-1
The ML3 table is optimised to be most accurate at a salinity of 150 mS.m-1.
This is the typical value in real soils, and helps extend the range of salinity over which
soil moisture readings may be taken.
Solution
When using an ML2x as well as an ML3 select the ML2 Special look-up table for the
ML2.
This is optimised for use at 150 mS.m-1 and so should give the best agreement with
the ML3.
This solution requires HH2 Firmware version 2.7 and HH2Read version 2.7 or later.
How to upgrade your HH2
Support for ML3 is provided in version 2.7 of the HH2 firmware and version 2.7 of
the PC software HH2Read.
Older versions of the HH2 Moisture Meter can be upgraded to work with the ML3 –
see HH2 upgrades section in our price list for details. This requires the HH2 to be
sent back to Delta-T or our distributor.
Which version do I have?
To check which version of HH2Read that you currently have, run HH2Read on your
PC and select Help. About.
To check which version of firmware in the HH2 connect it to your PC via e.g. COM1
and select the Version button in HH2Read
Upgrade Options
1) Complete upgrade. This upgrades both HH2 firmware and PC software
and is the best option.
Either return your HH2 to Delta-T for an HH2 factory upgrade or ask you
local distributor to do it. Contact us for prices and shipping instructions.
2) Partial upgrade for HH2Read only: Download HH2Read version 2.7 or
later from the Delta-T website or the Delta-T Software and Manuals DVD

Addendum to HH2 User Manual Version 4.0 for ML3
This option helps you to install the ML3 linearisation table into the HH2
meter using the HH2Read PC software.
It is not that difficult (see the link below for instructions).
The downside is - each time your HH2 battery goes flat for more than 30
seconds you will have to reinstall the ML3 linearisation table.
For details see the document Support for the ML3 Soil Moisture Sensor
with an HH2, available on our website and on the Delta-t Software and
Manuals DVD
3) No upgrade: It is possible use an ML3 with earlier versions of the HH2
meter. It takes some effort. You need to create a linearization table called
ML3.lin in the correct format and load it into the HH2 using HH2Read.
The disadvantages are is the same as item 2 above, plus you also have to
remember to select the Device PR1 Special. (which is provided as a place
holder for additional tables).
Support for the ML3 Soil Moisture Sensor with an HH2, available on our
website and on the Delta-t Software and Manuals DVD.
Linearisation Tables Format on page 76 of HH2 User Manual version 4.0

Addendum to HH2 User Manual Version 4.0 for SM300
Addendum to HH2 User Manual
Version 4.0 for SM300
Please keep this document with your HH2 User Manual.
SM300 Sensor readings
Support for SM300 requires HH2 Firmware version 2.5 and HH2Read version 2.5 or
later.
Please note:
The HH2 does not read SM300 temperature readings
This is because SM300 temperature sensor has a slow response time and is
unsuitable for instantaneous temperature measurements’
Support for the SM300 is exactly the same the support for the ML2, ML2x and
SM200 - described in the HH2 User Manual.
To select the SM300 for the next reading:
Press Set at the start-up or readings screen to display the Options menu.
Scroll down to Device using the up ▲and down ▼ keys and press Set.
Scroll down to SM300 using the up and down keys and press Set.
Press Read to take a reading.
How to upgrade your HH2
Support for SM300 is provided in version 2.5 of the HH2 firmware and version 2.5 of
the PC software HH2Read.
Older versions of the HH2 Moisture Meter can be upgraded to work with the SM300 –

Addendum to HH2 User Manual Version 4.0 for SM300 2
see HH2 upgrades section in our price list for details. This requires the HH2 to be
sent back to Delta-T or our distributor.
Which version do I have?
To check which version of HH2Read that you currently have, run HH2Read on your
PC and select Help, About.
To check which version of firmware in the HH2 connect it to your PC via e.g. COM1
and select the Version button in HH2Read
Upgrade Options
1) Complete upgrade. This upgrades both HH2 firmware and PC software
and is the best option.
Either return your HH2 to Delta-T for an HH2 factory upgrade or ask you
local distributor to do it. Contact us for prices and shipping instructions.
2) Partial upgrade for HH2Read only: Download HH2Read version 2.5 or
later from the Delta-T website or the Delta-T Software and Manuals CD
Issue 3 or later.
This option provides a SM300 linearisation table SM300.lin which you install
into the HH2 meter using the HH2Read PC software.
It is not difficult. Disadvantages are:
a. the SM300 table displaces an existing table in the HH2, so the HH2
doesn’t offer the SM300 in the Device menu: you have to select ML1
instead.
b. each time your HH2 battery goes flat for more than 30 seconds you will
have to reinstall the SM300 linearisation table.
3) No upgrade: It is possible to use an SM300 with earlier versions of the
HH2Read: create your own linearization table file and load it into the HH2
using HH2Read.
The disadvantages are the same as Partial upgrade (above), plus you also
have to create your own linearization table file.
See also:
Support for the SM300 Soil Moisture Sensor with an HH2, available on our
website and on the Delta-t Software and Manuals CD Issue 3.
Linearisation Tables Format on page 76 of HH2 User Manual version 4.0

Addendum to HH2 User Manual Version 4.0 for SM150
Addendum to HH2 User Manual
Version 4.0 for SM150
Please keep this document with your HH2 User Manual.
SM150 Sensor readings
Support for SM150 requires HH2 Firmware version 2.6 and HH2Read version 2.6 or
later.
To select the SM150 for the next reading:
Press Set at the start-up or readings screen to display the Options menu.
Scroll down to Device using the up ▲and down ▼ keys and press Set.
Scroll down to SM150 using the up and down keys and press Set.
Press Read to take a reading.
How to upgrade your HH2
Support for SM150 is provided in version 2.6 of the HH2 firmware and version 2.6 of
the PC software HH2Read.
Older versions of the HH2 Moisture Meter can be upgraded to work with the SM150 –
see HH2 upgrades section in our price list for details. This requires the HH2 to be
sent back to Delta-T or our distributor.

Addendum to HH2 User Manual Version 4.0 for SM150 2
Which version do I have?
To check which version of HH2Read that you currently have, run HH2Read on your
PC and select Help, About.
To check which version of firmware in the HH2 connect it to your PC via e.g. COM1
and select the Version button in HH2Read
Upgrade Options
1) Complete upgrade. This upgrades both HH2 firmware and PC software
and is the best option.
Either return your HH2 to Delta-T for an HH2 factory upgrade or ask you
local distributor to do it. Contact us for prices and shipping instructions.
2) Partial upgrade for HH2Read only: Download HH2Read version 2.6 or
later from the Delta-T website or the Delta-T Software and Manuals CD
Issue 5 or later.
This option provides a SM300 linearisation table SM150.lin which you install
into the HH2 meter using the HH2Read PC software.
It is not difficult. Disadvantages are:
a. the SM150 table displaces an existing table in the HH2, so the HH2
doesn’t offer the SM150in the Device menu: you have to select ML1
instead.
b. each time your HH2 battery goes flat for more than 30 seconds you will
have to reinstall the SM150 linearisation table.
3) No upgrade: It is possible to use an SM150 with earlier versions of the
HH2Read: create your own linearization table file and load it into the HH2
using HH2Read.
The disadvantages are the same as Partial upgrade (above), plus you also
have to create your own linearization table file.
See also:
Linearisation Tables Format on page 76 of HH2 User Manual version 4.0

3
Contents
Quick Start! 4
Introduction to the Moisture Meter 5
Navigating Options and Readings 9
SM200 and ThetaProbes 17
Profile Probes 27
WET Sensor 39
Equitensiometers 51
Memory use 58
PC Software - HH2Read 60
Dataset Import Wizard 68
CSV Data File Layout 70
About Soil Parameters a0 & a1 74
Linearisation Tables Format 76
Changing the Battery 78
Care and Maintenance 81
Technical Reference 82
Warranty and Service 96
Accessories 98
Water Deficit Explained 103
Field Water Capacity Values 106
Glossary 112
Index 115

4
Quick Start! Moisture Meter User Manual 4.0
Quick Start!
1. Unpack - see page 6.
2. Connect the battery or press Esc to wake the Moisture Meter if it is asleep.
3. Connect the sensor. The HH2 will assume it is an ML2 ThetaProbe in
mineral soil unless you tell it otherwise. Ignore that for now!
4. Put the sensor in soil and press Read to read and display a result.
5. Press Store to save it.
6. Repeat 4 & 5.
To explore menu options see page 9
To retrieve readings to your PC (This will take a little longer):
•Install and Run HH2Read (see page 60)
•Press Retrieve, enter a file name and press OK
About this Manual
Introduction, Unpacking, Parts page 5
Navigating Options and Readings page 9
Turn to the separate chapters for
SM200 & ThetaProbes page 17
Profile Probes page 27
WET Sensors page 39
Equitensiometers page 51
The rest of the manual has sections on
Memory management page 58
HH2Read page 60
Dataset Import Wizard page 68
Data File Layout page 70
About soil parameters a0 & a1 page 74
Linearisation Tables page 76
Changing the Battery page 78
Maintenance page 81
There is a Technical Reference with
Specifications page 82
Troubleshooting page 86
Accessories page 98
Water Deficit Explained page 103
Field Water Capacity page 106
Glossary & Index page 112
Note the various
warnings about
changing batteries

Introduction to the Moisture Meter
5
Introduction to the Moisture Meter
Description
The Moisture Meter reads and stores measurements taken with the following Delta-T
soil moisture sensors:
ThetaProbe, types ML2, ML2x & ML1
SM200 soil moisture sensors
Profile Probe, types PR2 and PR1
Equitensiometer, type EQ2
WET sensors
The meter can display and store, where appropriate, the following values for the
measured readings:
•raw data as milliVolt reading (mV)
•soil wetness
•soil water deficit (mm)
•pore and bulk conductivity
•bulk permittivity
•temperature
Equitensiometers can only be read in mV.
Readings include the time and date for later collection from a PC.
Readings may be averaged.
Note: averages cannot be stored for later collection from a PC.
The meter is easy to carry and operate with one hand.
Connectors
Equitensiometers, ThetaProbes, SM200s and Profile Probes supplied for use with the
HH2 come fitted with a 25-pin connector that plugs in directly.
PR2 Profile Probes have their own separate HH2 connector cable
Adapters are available for Equitensiometers or probes fitted with 4-pin DIN plugs or 5-
pin Tajimi plugs.
Sensors sold with bare wires for connection to loggers need to be fitted with a 25-pin
D connector. Either solder it directly, using the type DSK1 adapter kit, or via a
junction box type JNC2 connected to a DSK1 via extra cable.
See also: Accessories on page 98.

6
Introduction to the Moisture Meter Moisture Meter User Manual 4.0
Unpacking
Your consignment will have the following parts:
Part:
Sales code
Description
Moisture Meter
HH2
Moisture Meter with:
battery,
connector cap,
this User Manual &
Data Collection software
HH2Read on CD
RS232 cable with
9-way to 25-way
converter
HHRS2 Cable has 9-way D-
connectors at both ends.
Use 9 to 25 way
converter to connect to
the Moisture Meter
and may also contain some or all of the following:
PR2-HH2 cable
PRC/d-
HH2
1.5m cable connects PR2
to HH2
SM200 - HH2
cable
SM2C/d-
HH2
1.5 m cable connects
SM200 to HH2
Spare battery set
HH2BAT
2 x PP3 Alkaline
DIN to 25-way D
socket converter
C-HH2-
DIN
Din plug connected to 25-
pin female D connector
via a short lead.
Tajimi to 25-way
D socket
converter
C-HH2-T 25-way female D
connector fitted with
Tajimi socket.
25-way D socket
kit
DSK1 25 way D Socket Kit for
user to solder onto
sensors with bare wires to
connect to HH2.
Spares Kit
HH2-SPK
Set of Spares for HH2

Introduction to the Moisture Meter
7
Moisture Meter Parts
Battery compartment - takes one
PP3 battery
LCD with 2 rows of 16 characters -
used to display menus and
readings
Splash proof case
25-pin D Connector for sensor
connection or PC connection
Keypad
Read take readings
Store save reading
Set select menu or
select option
Esc wake meter or
reject option & go back
▲▼ scroll
# #average

8
Introduction to the Moisture Meter Moisture Meter User Manual 4.0
How the Moisture Meter takes readings
Analogue sensors (SM200, ML1, ML2, ML2x, EQ2, PR2, PR1)
The Moisture Meter applies power to the sensor and measures the output signal
voltage returned.
It displays this directly, in mV, and/or converts into other units, depending on the type
of sensor and information available. (Equitensiometer results can only be displayed in
mV.)
The meter converts the mV reading into soil moisture units using a linearisation table
and soil-specific parameters.
Linearisation tables are pre-installed for sensors, and for Organic and Mineral soil
parameters.
For greatest accuracy you can enter your own soil type parameters - but these have
to be determined experimentally. This is outside the scope of this manual.
For mm Deficit you need to supply Field Capacity and Root Depth for each soil type
and crop.
The date and time is saved with each reading. Before saving readings you may enter
a unique Plot, Sample or Device identity (ID) label.
Digital Sensor (WET)
The Moisture Meter applies power to the sensor, receives readings as serial data,
processes these (as described in the WET sensor Application Note available from
Delta-T), and calculates bulk and pore conductivity, bulk permittivity and temperature
as required. Using installed soil calibrations the HH2 calculates water content. Given
the root depth and field capacity it can also calculate mm Deficit.
Sleep and Waking the Meter
To conserve the battery, the meter will “go to sleep” when it is not used for 1 minute.
The display will go blank and the meter will power down to reduce its power
consumption.
To make the HH2 sleep, press Esc once to return to the banner "Delta-T Devices
Moisture Meter" then press Esc one more time to make it sleep.
The meter will “wake up” when Esc is pressed or when RS232 messages are
received from the PC or when the battery is reconnected.
Averaging
Press # to shows the previous average – and press # twice to update it with the
current reading. Averages are not stored – sorry. Write it down if you need it.
For details see Averaging on page 14.

Navigating Options and Readings
9
Navigating Options and Readings
Press Esc to wake the HH2 and examine the Navigation Map overleaf. There are
two main routes - round the Read Cycle, and down (and up) the Options Menus.
Individual options or values are set at the bottom level of each menu path.
See also the Options Summary at the back of each sensor chapter.
Not all options are available with all devices. A table of permitted options, ranges
and default values are shown in each sensor chapter.
To display the main Options menu press the Set key when the readings are visible
on the display, or when the start-up screen is visible.
Options:
Data
Press Set to select an option - this may be another, lower menu.
Press Esc to reject an option and backtrack up to the previous menu.
When the and symbols are displayed, press the up and down keys to
scroll through the options in any given menu.
To save Readings - press Store.
To save Options - press Set.
Press Read and Store to take and save readings.
Options Menu
The symbol indicates that other options are available.
Data: Add label for Plot ID, Sample, Device ID, Root Depth, Sensor Depth or delete
all data.
Device: Select the sensor e.g. PR1 for a Profile Probe.
Soil Type: Choose one for each sensor if you want results in engineering units. The
default is Mineral.
Soil Set-Up: Define parameters associated with each soil type.
Units: Select which engineering units are used - e.g. %vol or m3.m-3.
Display: Select readings to be taken and displayed -e.g. mV and %Vol.
Date and Time: The clock can be set via the keypad or from the PC
Status: Displays: % memory used, % battery life remaining & number of readings in
memory. Also version numbers of firmware and any installed tables.
Remote: Select this when connecting to a PC.

10 Navigating Options and Readings Moisture Meter User Manual 4.0

Navigating Options and Readings
11
Using the Options Menu
Select your Device option first - the other options depend on which device has been
selected.
Note: before you can select a WET sensor device you must install the WET sensor
calibration file using HH2Read ( see Install WET Sensor Calibration on page 41).
You may specify any Plot ID (A - Z), Device ID (0 - 255) and Sample ID (1 - 2000) for
any reading. These are just labels.
You may choose which engineering units to display result.
For soil moisture you must select a soil type unless you only want mV readings.
(Equitensiometers readings are only available in mV.)
The default soil type is Mineral.
Advanced users, able to calibrate their own soils, may install their own soil specific
calibration coefficients called a0 & a1 under Soil Set-Up. (b0 & b1 for WET sensors).
Other users should use the Mineral and Organic soils already defined in the Moisture
Meter.
WET users have a choice of standard soil types and, if purchased pre-installed in the
HH2, custom calibrations for specific commercial artificial soils such as stone wool.
If you want mm deficit you MUST define the Field Capacity and Root Depth for
each soil type. We provide a table in the back of this manual for mineral soils. Organic
soils are so variable you have to determine the field capacity experimentally, before it
makes any sense to take mm Deficit readings.
The default for Field Capacity is pre-set to the 38% corresponding to a silty clay loam.
The default Root Depth, set to zero, forces the calculated default value for mm Deficit
to be zero. See Calculating Field Capacity on page 108.
Some crop consultants recommend 700 mm as the default Root Depth.
For ease of graphing data it is good to always measure your sensors in the same
order each visit.
Some experts recommending having three sensors, or access tubes, at each
location, and taking three readings from each, to average out random sampling errors
later on your PC.

12
Navigating Options and Readings Moisture Meter User Manual 4.0
Example: Change the Plot Label
The Plot Label is an optional label in the Data sub menu and can take any value from
A to Z.
Press Esc to wake the meter.
Press Set to display the main Options menu.
Scroll down to Data and Press Set.
Scroll down to Plot ID and Press Set.
Plot Label:
C
In this example, "C" is offered because it was saved with the previous reading.
Press up or down to change the value.
Press Set to select the new value.
To reject an option or value press the Esc.
In practice you will most probably visit the Data sub menu each time you change your
location - to change one or more labels - in order to better identify each reading later.
Setting the Clock
You can set the clock from the PC or from the keypad of the Moisture Meter.
To set the time in the HH2 to that of your PC use the Settings, Clock command in
the HH2Read application, (see page 64). Alternatively you can set the clock from the
keypad.
Note: The date - month - year order will be set to reflect that on your PC the first time
you use the Settings, Clock option in the HH2Read.
To set the clock from the keypad
Press Set at the start-up screen to display the Options menu.
Scroll down to Date and Time using the up and down keys and press Set.
Date and Time:
Set Date
Press Set to display the Date menu:
Date:
01/01/2000

Navigating Options and Readings
13
Note that the date - month - year order will be set to reflect that on your PC the first
time you use the Settings, Clock option in the Data Collection software HH2Read on
your PC.
Use the up and down keys to change the first field and press Set to accept it.
The indicator jumps to the next field.
Repeat for the second and third fields in the Date display.
This will return you to the Date and Time menu.
Scroll down to the Set Time option with the key and repeat the above instructions
to set the hours, minutes and seconds fields, shown below:
Time:
22/56/42
Options are device specific
Options are only displayed if relevant to the device selected.
For instance, if under device you select Equitensiometer, then you will not be given a
choice of Soil Type or Soil Set-Up, or Units.
The default settings in the Moisture Meter are for an ML2 ThetaProbe.
The next section is organised by sensing device. Each has its own menu navigation
tree and a table indicating the default settings, available menu options and permitted
ranges for settings.
Upload Data to PC
From the main Options menu select Remote and press Set.
The rest of the work is done from your PC keyboard.
If not yet installed, install HH2Read on your PC, as described on page 60.
Connect the PC to your Moisture Meter as explained on page 61.
Run HH2Read and select its Retrieve command as described on page 65.
The end result is that your data is saved to file in a comma separated (.CSV) format
as shown on page 70.
See also Dataset Import Wizard on page 68.
Note: you can’t store or upload averages to the PC
Table of contents
Other Delta-T Measuring Instrument manuals
Popular Measuring Instrument manuals by other brands
IKA
IKA IC control operating instructions

Hitachi
Hitachi UG 50Y Handling instructions

Campbell
Campbell EC150 instruction manual
PROGRESSIVE RC
PROGRESSIVE RC UNIVERSAL LIPO ESR METER instructions
Load Cell Central
Load Cell Central WDESK-G Installation and user manual
Diehl Metering
Diehl Metering HYDRUS 171A installation guide
