DeLUX MAVERICK SOFT WASH SYSTEM User manual

DELUX® MAVERICK
SOFT WASH SYSTEM

INTRODUCTION
Congratulations on your choice of a Delux® Maverick Soft Wash System. We are
certain you will be pleased with your purchase. This manual was created to help you
get the best results from your new Delux® Maverick Soft Wash System. Please read
it carefully and thoroughly to ensure that you learn to use your soft wash system
safely.
Keep this manual nearby so you can refer to it as needed. If you should decide to
sell your Delux® Maverick Soft Wash System, please be sure to include this manual.
We strongly encourage you to read the warranty policy for the Delux® Maverick Soft
Wash System so you understand its coverage and your responsibilities of
ownership. The information and specifications herein were correct at the time of
publication. Delux® Cleaning Supply Inc. reserves the right to alter any design or
specifications at any time without notice. If you have questions about your Delux®
Maverick Soft Wash System that are not covered in this manual, please call us toll
free at 1-888-42-DELUX
Thank you for your purchase.

Introduction..................................................................................................................................... 1
What’s In The Box ............................................................................................................................ 4
What You Need to Get Started......................................................................................................... 5
Getting Started ................................................................................................................................ 5
Tips and Tricks ................................................................................................................................. 5
CleanUp ........................................................................................................................................... 6
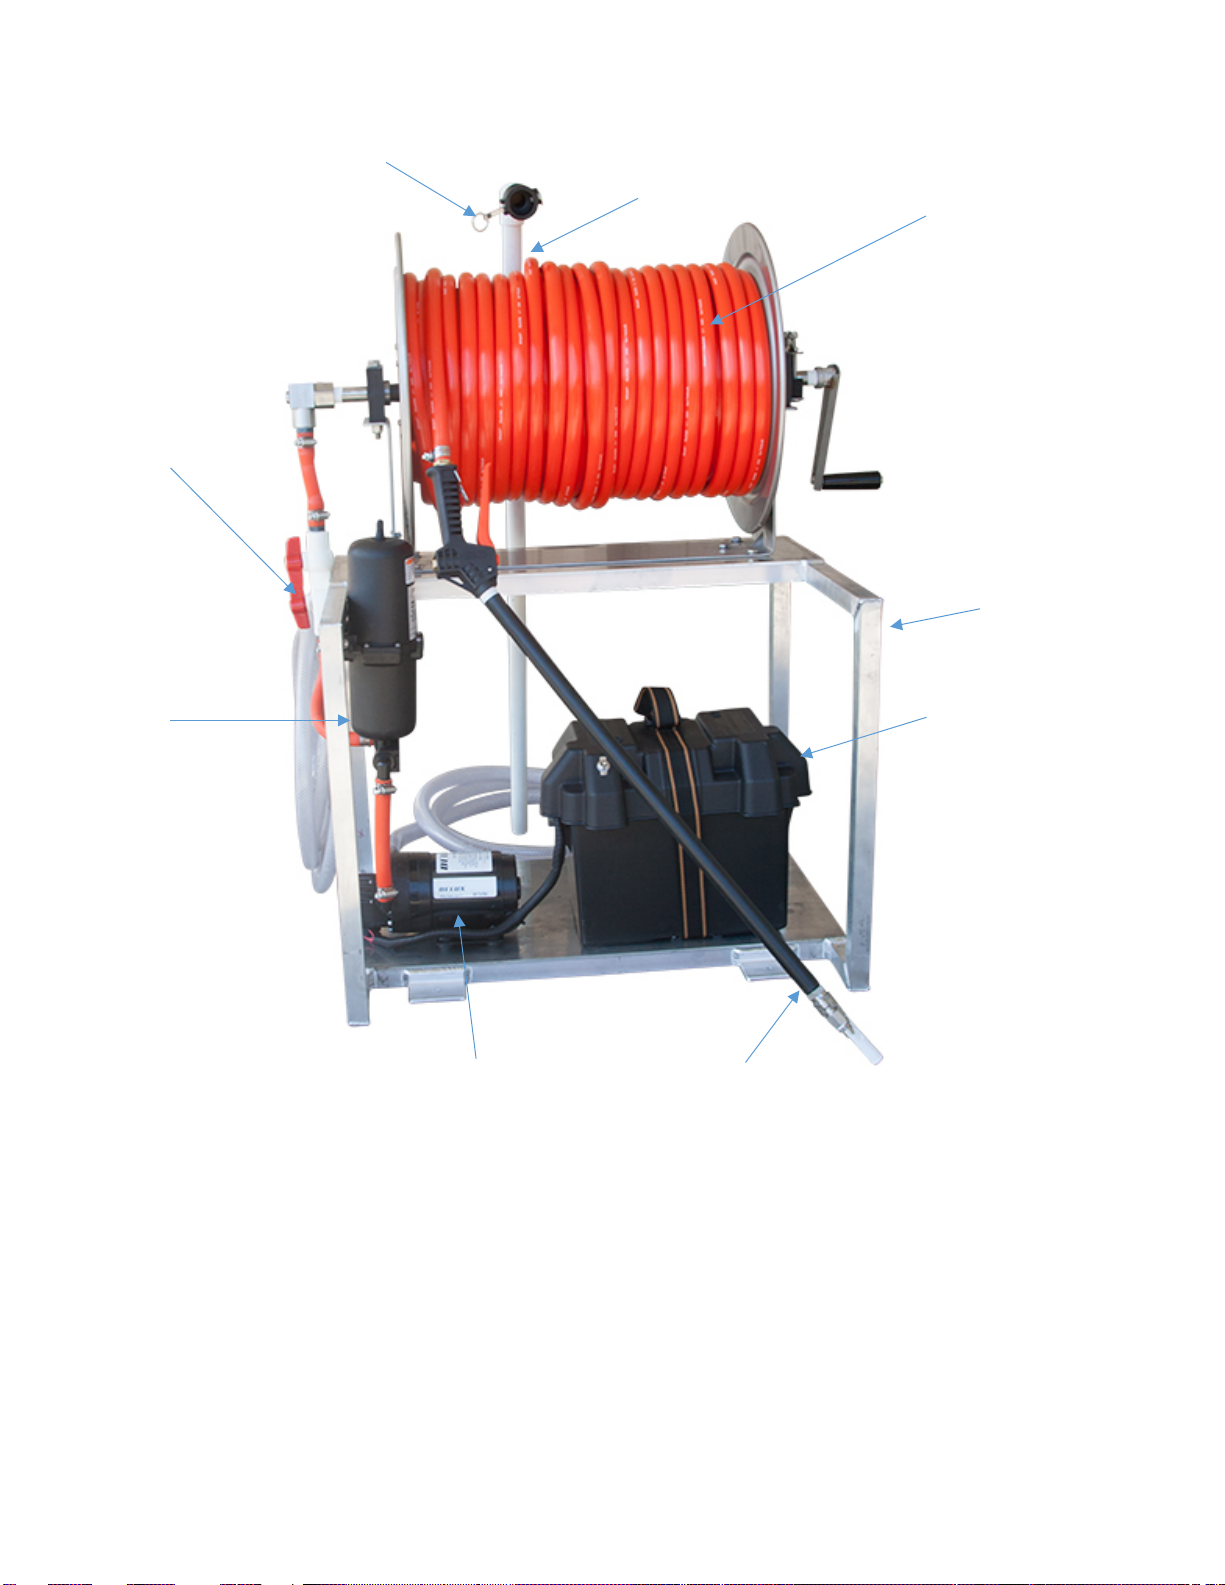
The Maverick Soft Wash System is a professional grade soft wash machine for low
pressure roof cleaning and house washing. The high strength aluminum tube frame
protects a Delux D7150 12v diaphragm pump, a Floject Accumulator, and a water tight
battery box. A hose reel sits on top of the frame with 200 feet of Ag chemical resistant
hose. The Maverick Soft Wash System is strong, efficient, and ready for work.
200 feet of ½
Inch Rubber
Hose
Cam Lock
Fitting
Aluminum
Frame
Water Tight
Battery Box
Delux® 12v
Diaphragm
Pump
Accumulator
Tank
24 Inch PVC
Soft Wash
Wand
Purge Valve
Pickup tube

WHAT’S IN THE BOX
DELUX® 12 VOLT DIAPHRAGM PUMP
7 GPM, 100 PSI, Delux® diaphragm pump with a maximum temperature of 160 F.
FLOJET ACCUMULATOR TANK
The FLOJET Accumulator Tank when used with a diaphragm pump gives you the best
of both worlds! High flow when you need it and the ability to restrict the flow for sensitive
situations. When the pump starts, liquid enters the reservoir compressing the bladder
until the maximum pressure for the pressure switch is reached then the pump shuts off.
When water is demanded, pressure in the air chamber forces liquid into the system.
Pump stays off until the minimum pressure is reached on the switch. Then pump turns
on, reducing cycling leading to longer switch and pump life.
CAM LOCKS
Cam locks make it easy to connect hoses quickly. No need to screw anything together.
PICKUP TUBE
This rigid pickup tube ensures that the pump will always draw chemical, even when the
tank is low.
½” X 24” PVC WAND
This chemical resistant wand allows the user to extend their reach.
½” X 200’ RUBBER HOSE
This chemical resistant hose transports the bleach solution from the Bronco to the gun,
wand, and nozzle.
WATER TIGHT BATTERY BOX
The water tight battery box will protect electrical components while the Bronco is in
operation.
PURGE VALVE
A PVC purge valve is fixed to the line between the accumulator and the hose reel to
relieve the pressure that can build up when the tank runs dry. Turn the valve to release
the pressure from the system and drain the fluid back into the mix tank.
The second valve allows the flow to be cut off to the hose reel and redirected to a mix
tank. This makes it easy and fast to create chemical blends right at the jobsite.
Table of contents
Other DeLUX Industrial Equipment manuals


