Den-Mat Portable Diode Laser User manual

Sapphire®Portable Diode Laser
Instructions for Use
PORTABLE DIODE LA SER

2
Table of Contents
1. INTRODUCTION.............................................................................................................................................................4
2. WARNINGS AND CAUTIONS....................................................................................................................................5
Emergency Termination of Laser Emissions...............................................................................................................6
3. SAPPHIRE®PORTABLE DIODE LASER INDICATIONS FOR USE................................................................6
4.
SAPPHIRE PORTABLE DIODE LASER FACILITY AND ENVIRONMENTAL CONSIDERATIONS
............7
Heating and Ventilation...................................................................................................................................................7
Lighting...............................................................................................................................................................................7
Combustible Chemicals and Gases............................................................................................................................7
Plume evacuation .............................................................................................................................................................7
Operatory Access during Sapphire Portable Diode Laser use.............................................................................7
5. GENERAL SAFETY WITH THE SAPPHIRE PORTABLE DIODE LASER ......................................................8
General Safety Considerations.....................................................................................................................................8
Conformance to Medical Device Regulations...........................................................................................................8
Eye and Skin Protection .................................................................................................................................................9
Emergency Shutdown Options.....................................................................................................................................9
6. SAPPHIRE PORTABLE DIODE LASER INSTALLATION AND SETUP ...........................................................9
Instructions on Unpacking & Customer Service Assistance..................................................................................9
Shipping Container Information................................................................................................................................. 10
Contents of Sapphire Portable Diode Laser Shipping Container ..................................................................... 10
Installing the Sapphire Portable Diode Laser......................................................................................................... 10
7. SAPPHIRE PORTABLE DIODE LASER CONTROLS AND DISPLAYS.................................................... 12
Sapphire Portable Diode Laser Handpiece............................................................................................................ 12
Sapphire Portable Diode Laser Control Panel....................................................................................................... 13
Sapphire Portable Diode Laser Power Level Adjustment ................................................................................... 14
Continuous Wave and Pulse Mode ................................................................................................ 14
READY Activation of Sapphire Portable Diode Laser Unit ................................................................................. 14
Laser Activation and Laser “ON” Indication ........................................................................................................... 14
EMERGENCY DEACTIVATION of LASER............................................................................................................ 15
Remote Door Interlock................................................................................................................................................. 15
Portablility of the Sapphire Portable Diode Laser ................................................................................................. 16
Battery Power Level Indicator .................................................................................................................................... 16
Error Codes.................................................................................................................................................................... 16
Sapphire Portable Diode Laser Power Level Adjustment
Sapphire Portable Diode Laser Power Level AdjustmentSapphire Portable Diode Laser Power Level Adjustment
Continuous Wave and Pulse Mode
Continuous Wave and Pulse ModeContinuous Wave and Pulse Mode
Sapphire Portable Diode Laser Power Level Adjustment
Sapphire Portable Diode Laser Power Level AdjustmentSapphire Portable Diode Laser Power Level Adjustment
Continuous Wave and Pulse Mode
Continuous Wave and Pulse ModeContinuous Wave and Pulse Mode

3
8. SAPPHIRE PORTABLE DIODE LASER OPERATION AND USE.................................................................. 16
Operating Modes .......................................................................................................................................................... 16
Continuous Wave (CW) Mode .................................................................................................................................. 16
Pulsed Energy Mode .....................................................................................................................................................17
Tissue Responses to Laser Energy............................................................................................................................17
Installing and Replacing Single-Use Fiberoptic Tips .............................................................................................17
Initiating the Fiber.......................................................................................................................................................... 19
Setting Parameters ....................................................................................................................................................... 19
Hard Tissue Procedures.............................................................................................................................................. 19
Cleaning Instructions.................................................................................................................................................... 19
Calibration....................................................................................................................................................................... 19
9. PROCEDURAL RECOMMENDATIONS FOR USING THE SAPPHIRE PORTABLE DIODE LASER...... 21
Contraindications .......................................................................................................................................................... 21
Test Firing the Sapphire Portable Diode Laser ...................................................................................................... 21
Tip Initiation (when indicated) .................................................................................................................................... 21
Sapphire Portable Diode Laser Use......................................................................................................................... 21
Gingival Contouring with the Sapphire Portable Diode Laser System ............................................................ 22
Gingivectomy, Gingivoplasty and Papillectomy with the Sapphire Portable Diode Laser........................... 23
Gingival Troughing & Tissue Retraction for Impressions with Sapphire Portable Diode Laser.................. 24
Sulcular Debridement with the Sapphire Portable Diode Laser System ......................................................... 25
Labial Frenectomy with the Sapphire Portable Diode Laser System................................................................ 26
Abcess Excision with the Sapphire Portable Diode Laser .................................................................................. 27
Hemostasis with the Sapphire Portable Diode Laser........................................................................................... 28
10. SAPPHIRE PORTABLE DIODE LASER SPECIFICATIONS........................................................................... 29
11. SERVICING THE SAPPHIRE PORTABLE DIODE LASER............................................................................. 30
12. SYSTEM WARRANTY................................................................................................................................................. 30
MANUFACTURER INFORMATION
Den-Mat®Holdings, LLC
2727 Skyway Drive
Santa Maria, CA 93455 USA
Tel.: 805-922-8491

4
1. INTRODUCTION
The Sapphire®Portable Diode Laser unit is a dental soft-tissue laser surgical/debridement device. The
Sapphire Portable Diode Laser may be used for a variety of soft-tissue, gingival modification, and sulcular
therapy procedures.
Dental professionals and staff who will use the Sapphire Portable Diode Laser should receive proper laser use
training prior to patient treatment with these devices. Applicable training programs for dental Laser use are
available through the Academy of Laser Dentistry, dental schools, and many dental continuums. Your authorized
Den-Mat Holdings, LLC Representative can also provide the names of local dentists who have a Sapphire
Portable Diode Laser and may be able to provide additional guidance for new Sapphire Portable Diode
Laser users.
Safety is paramount when using any energy-based surgical instrument and your office should implement a safety
program for the Sapphire Portable Diode Laser. If your office does not already have a safety officer, one should
be appointed to be responsible for understanding proper use, safe operation, and maintenance of the Sapphire
Portable Diode Laser system. Their duties should include training office personnel in all aspects of system safety
and management of the Sapphire Portable Diode Laser and all accessories.
Manufacturer’s Laser Identification, output and standards label
The Sapphire Portable Diode Laser carries the Manufacturer’s identification label affixed to the bottom panel of
the Control Module.
MODEL: Sapphire®Portable Diode Laser
MODEL NO.: 033981000-0
MANUFACTURED BY: DEN-MAT HOLDINGS, LLC. SANTA MARIA, CA 93455 USA
LASER CLASSIFICATION: (PER IEC 60825-1): Class 4
MAXIMUM LASER OUTPUT: 3W Continuous Wave, 5W Pulsed
FREQUENCY IN PLUSED MODE: Fixed, 10 Hz
PULSE DURATION: 0.05 seconds
WORKING BEAM WAVELENGTH: 808 nm (±5nm)
POWER INPUT: 15W, 5 VDC supplied from 110 - 120 VAC
@ 60 Hz, or 220 - 240 VAC @ 50 Hz
COMPLIES WITH IEC 60601-1, 60601-2-22; IEC 60825-1; IEC 60601-1-2,
CLASS B PER IEC 60601-1-2.

5
2. WARNINGS AND CAUTIONS
Warning: Visible and Invisible Laser Radiation – Avoid eye or skin
exposure to direct or scattered radiation
CLASS 4 Laser Product
Warning: Do not use in the presence of combustible or combustion
supporting gases
Warning: Do not use in the presence of supplemental therapeutic
oxygen supplies
Warning: Always test activate the device outside the mouth before
using on a patient.
Caution: Use of controls or adjustments, or performance of procedures other than
those specified herein may result in hazardous radiation exposure.
Warning: Laser Safety Eye Protection MUST BE WORN by the
Operator, Patient, Assistant, and anyone present when the laser is
activated. Eye Protection must conform to Specification DIN EN207
Annex II of the Directive 89/686/EEC with optical density in 800nm-
818nm of OD 4+ such as NoIR Laser Company filter model DII
Above Warning is affixed to the front panel of the Sapphire Portable Diode Laser Control Module.
LASER APERTURE
at the end of handpiece
Above Warning is affixed to the cover overhanging the power/communications cord receptacle.

6
Emergency Termination of Laser Emissions:
The Sapphire®Portable Diode Laser has been designed with several methods to terminate emission of Laser
energy if the operator wishes to deactivate the system in an emergency situation. These include an emergency
shutoff switch, a key switch, a power switch, and pressing the READY button on the control pad. Any of these
may be used to terminate laser emissions from the Sapphire Portable Diode Laser System.
3. SAPPHIRE PORTABLE DIODE LASER INDICATIONS FOR USE
The Sapphire Portable Diode Laser is indicated for use in dental intraoral soft tissue general, oral maxilla-facial
and cosmetic surgery including ablating, incising, excising, vaporizing and coagulation of soft tissues using a fiber
optic delivery system. Indications include:
Excision and incision biopsies
Hemostatic assistance
Treatment of apthous ulcers
Gingival incision and excision
Gingivectomy
Gingivoplasty
Gingival troughing
Gingival recontouring
Tissue retraction for impressions
Oral papillectomy
Sulcular debridement
Sulcular tissue removal
Removal of granulation tissue
Frenectomy
Frenotomy
Abcess incision and draining and excision
Operculectomy
Removal of fibromas
Soft tissue crown lengthening
Vestibuloplasty
General guidelines for some of these procedures may be found in section 9 of this user instruction manual. In
addition to receiving proper training in the use of dental Lasers, users should be familiar and experienced with
these procedures using electrosurgical devices or traditional instruments before performing them on patients with
the Sapphire Portable Diode Laser. Non-experienced users should seek appropriate training or guidance before
attempting clinical treatments with the Sapphire Portable Diode Laser system.
7
4. SAPPHIRE PORTABLE DIODE LASER FACILITY
AND ENVIRONMENTAL CONSIDERATIONS
In order to insure the safe use of the Sapphire Portable Diode Laser in your facility, please check to make sure
that the proposed location is compatible with the specifications listed below.
Power requirements for the Sapphire Portable Diode Laser follows:
Input Power - 110 – 120 V AC @ 60 Hz, 3A; 220-240 V AC @ 50 Hz, 1.5A (switchable)
Output Power - 24W, +5 V DC at 6A maximum
Heating and Ventilation:
The room where the Sapphire Portable Diode Laser is used should have an appropriate cooling and heating
system so that the lasers can be operated within the optimal temperature range of 20º - 30ºC (68º - 86º F).
Avoid storing or transporting the lasers in temperatures below 0º Celsius (32º F).
Lighting:
Overhead lighting and/or dental unit light should provide enough illumination to allow proper operator
visibility of the surgical site when activating the Sapphire Portable Diode Laser intra-orally.
Combustible Chemicals and Gases:
All gases that are combustible or support combustion and are used in the operatory area where the Sapphire
Portable Diode Laser is being operated must be turned off during the procedure. Cleaning supplies or other
flammable chemical compounds should be stored in an area away from the surgical site in order to avoid possible
combustion. Do not use in the presence of supplemental therapeutic oxygen supplies for patients with respiratory
or related diseases.
Plume evacuation:
Plume evacuation should be addressed when vaporizing tissues. A high volume vacuum system should be used
and 0.1 micron or less high filtration masks that are suitable for virus and bacterial control should be worn by
Clinicians, operators and auxiliary staff in the vicinity of procedures being performed with the Sapphire Portable
Diode Laser system.
Operatory Access during Sapphire Portable Diode Laser Use:
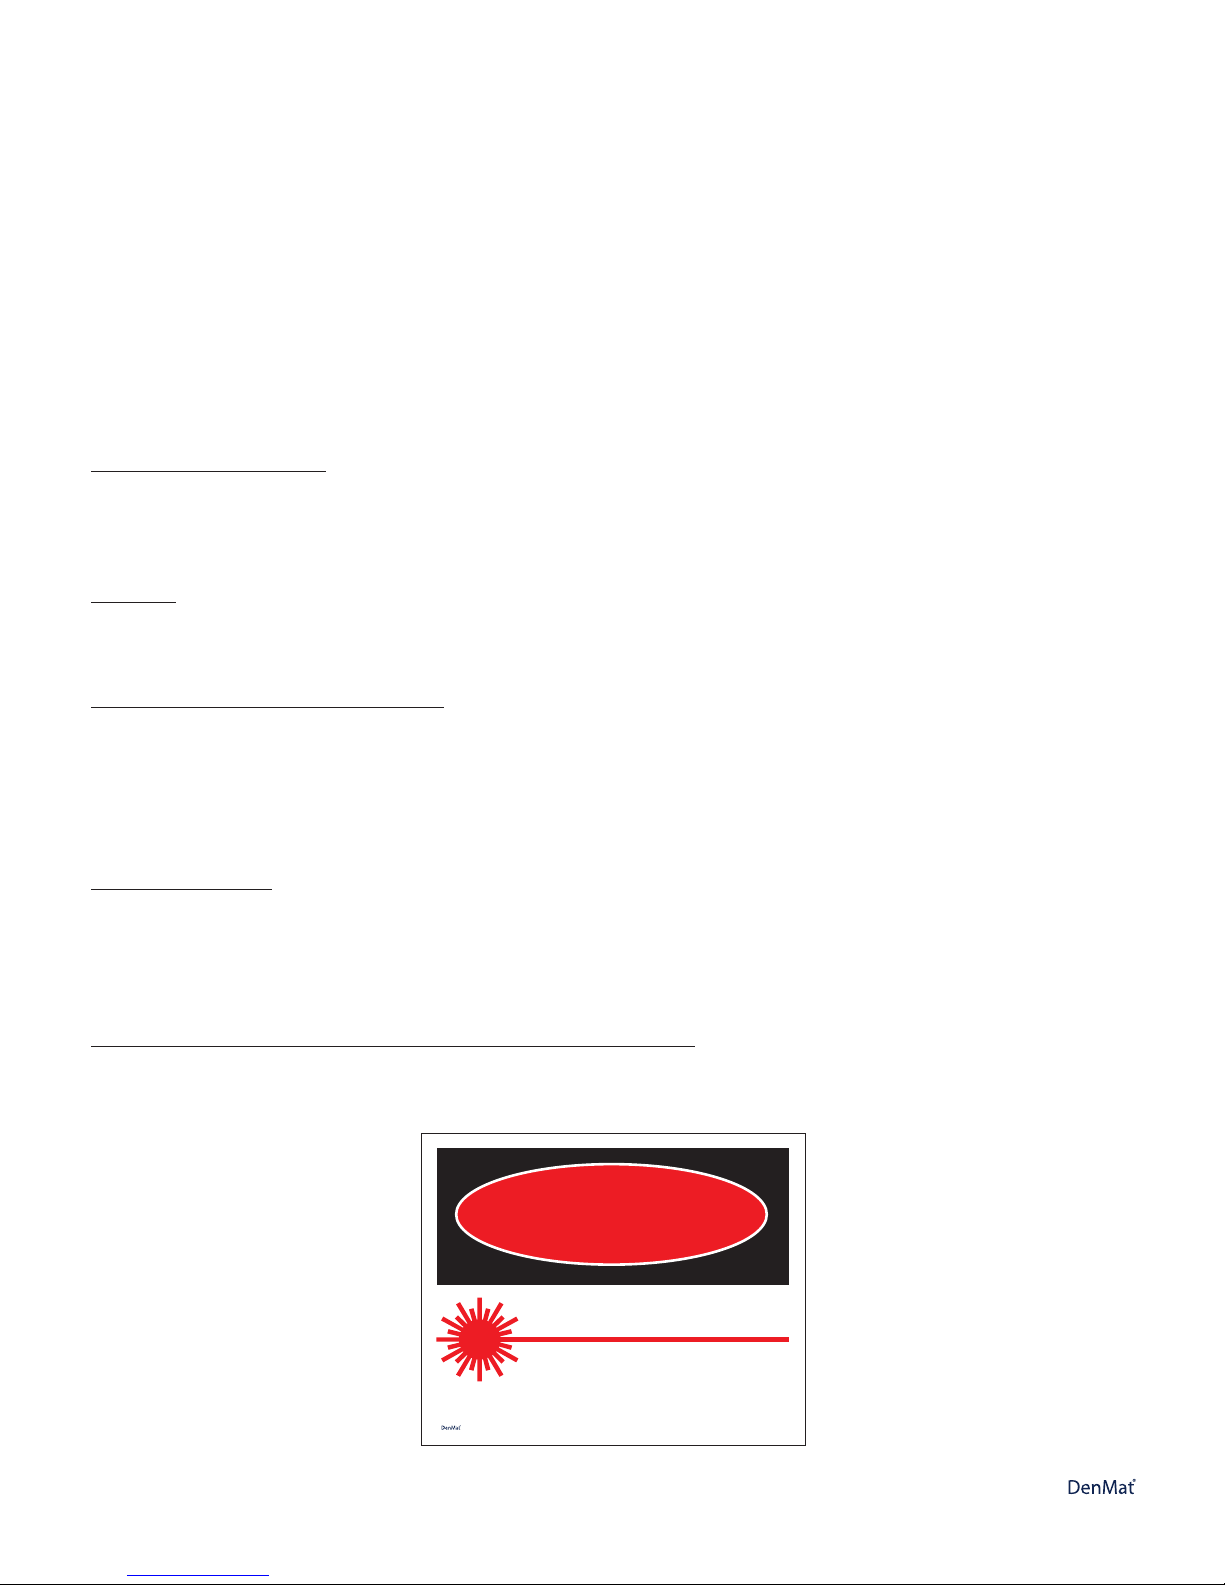
Access to the treatment area should be restricted while the lasers are in use. A sign indicating “LASER IN USE”
should be placed in a designated area adjacent to the treatment area entry location.
DANGER
LASER RADIATION. A V OID EYE OR SKIN
EXPOSURE TO DIRECT OR SCA T TERED
RADIATION.
Wavelength: 808nm
Max output power: 5W
Pulse duration: 0.05 seconds
LASER PROTECTIVE EYEWEAR REQUIRED
CLASS IV LASER PRODUCT
©2010 Den-Mat® Holdings, LLC.Santa Maria, CA 93455 USA. World Right Reserved. 818441100 08/10DO

8
5. GENERAL SAFETY WITH THE SAPPHIRE®PORTABLE DIODE LASER
General Safety Considerations:
Safe use of the Sapphire Portable Diode Laser is the responsibility of the entire dental team including the
doctor, any system operators and the dental office safety officer. Protocols for the safe use of Lasers have
been developed by medical and dental professionals, scientists and laser manufacturers. These protocols
should be followed when using the Sapphire Portable Diode Laser system. Dental professionals have also
developed protocols and guidelines for Laser use on oral soft tissues which should be employed when using
the Sapphire Portable Diode Laser system. Den-Mat®Holdings, LLC recommends implementation of a safety
program for the safety of your patients and office staff in connection with the use of the Sapphire Portable
Diode Laser. Den-Mat Holdings, LLC also recommends checking and complying with applicable local safety
and health organization requirements.
Conformance to Medical Device Regulations
The Den-Mat Holdings, LLC Sapphire Portable Diode Laser is in conformity with the Essential Requirements
spelled out in the Medical Device Directive (MDD), 93/42/EEC, dated 14 June 1993 as amended by
Directive 2007/47/EC.
The device follows the conformity assessment procedure for CE marking described in Annex II, point 3 (Full
Quality Assurance) of the MDD.
Den-Mat Holdings, LLC’s Notified Body is LNE/G-MED, number 0459.
The Company’s Authorized Representative to the European Community is:
GLS GLOBAL LEGAL
16, boulevard Saint-Germain
75005 PARIS, FRANCE
9
Eye and Skin Protection:
While the Sapphire Portable Diode Laser is in use, doctors, system operators, auxiliary staff, patients, and anyone
attending them in the operatory must wear the appropriate safety eyewear that has been designed for use with
the 700-plus nm wavelengths associated with Lasers. Eye Protection must conform to Specification DIN EN207
Annex II of the Directive 89/686/EEC with optical density in 800nm-818nm of OD 4+ such as NoIR Laser
Company filter model DI1.
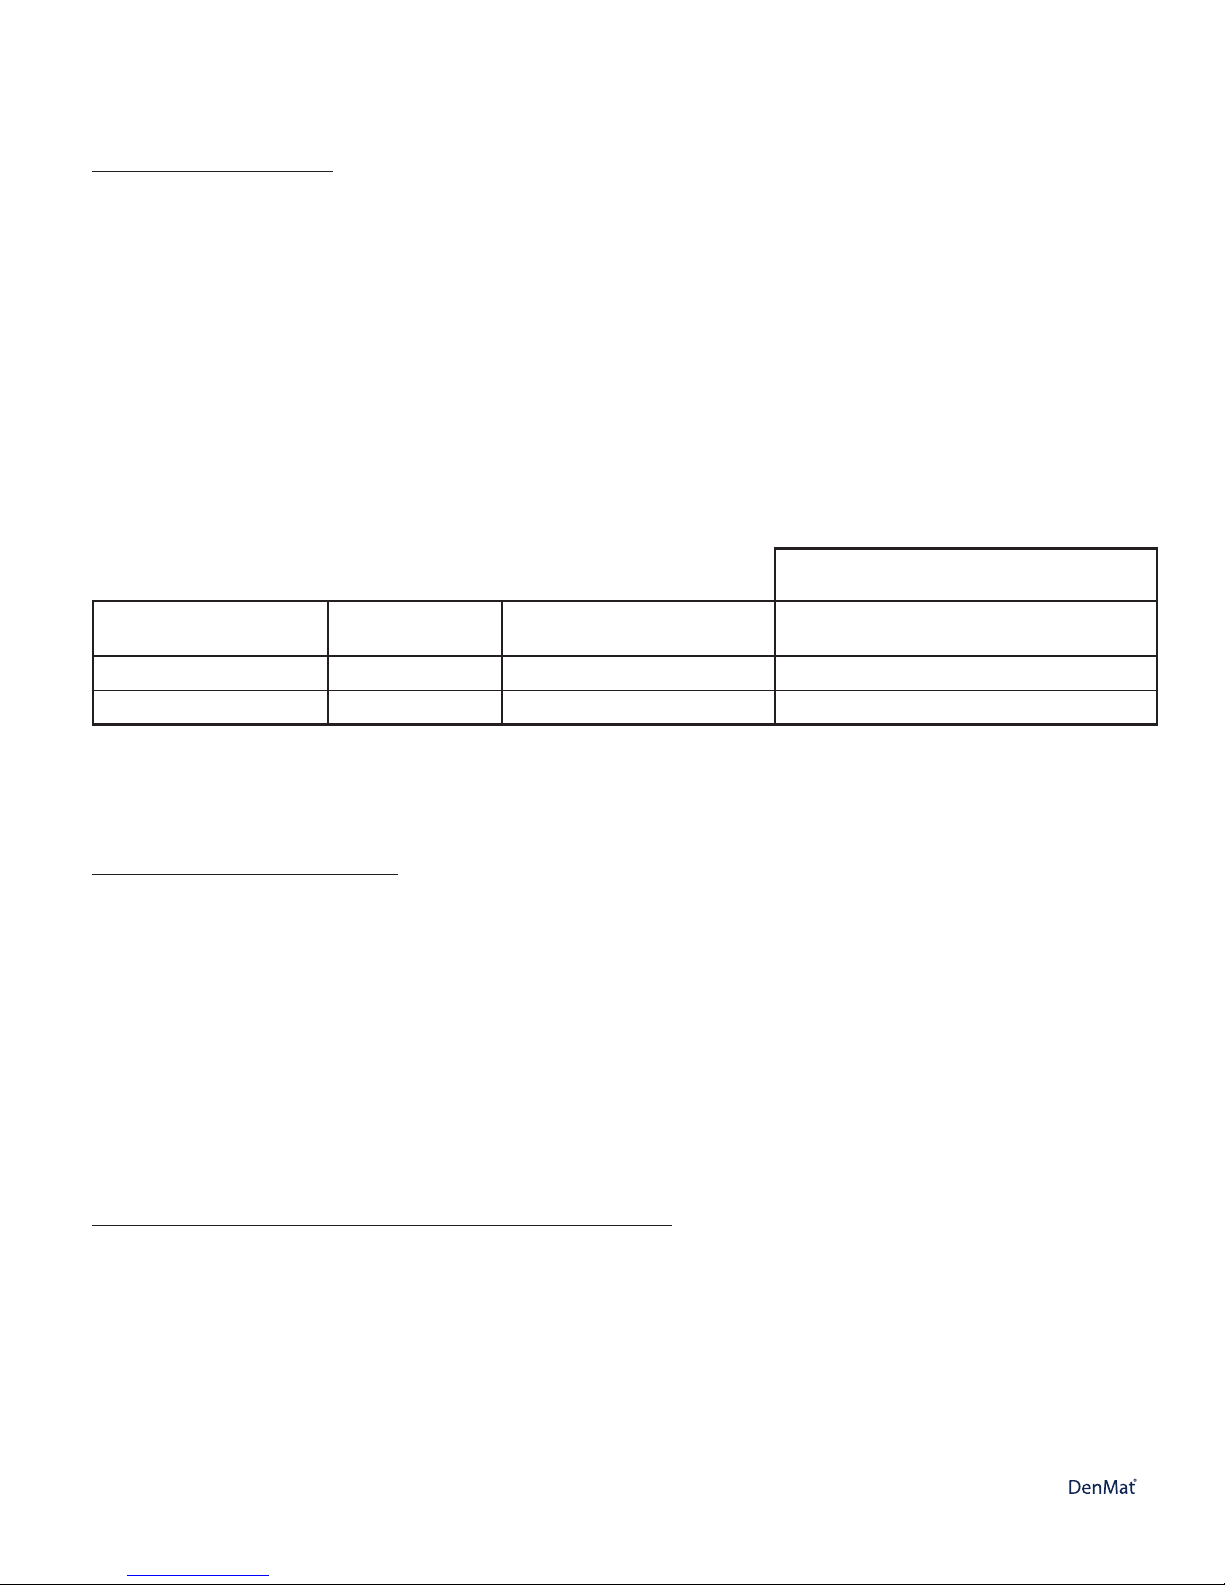
Nominal Ocular Hazard Distance (NOHD) is the distance from the source of laser emission to the point
where it no longer exceeds its Maximum Permissible Exposure (MPE – highest level of laser radiation to
which a person may be exposed without hazardous effects or adverse biological changes in the eyes or
skin). The Nominal Hazard Zone (NHZ) is the space within which the level of direct, reflected, or scattered
radiation during normal operation exceeds the appropriate MPEs. The outer limit of the NHZ is equal to the
NOHD. The NOHD for persons wearing recommended safety glasses is shown in Table 1 below.
Never point the Sapphire Portable Diode Laser tip directly at the face, eyes or skin of anyone while
emitting energy.
Emergency Shutdown Options:
Perform any of these actions to terminate laser emissions in the event of a real or perceived emergency:
1. Release the handpiece activation button.
2. Depress the emergency “STOP” button.
3. Remove your foot from the foot switch.
4. Turn the key counterclockwise to the “OFF” position.
5. Switch the power switch to the “OFF” (O) position.
6. Press the READY button to go to Standby mode.
6. SAPPHIRE PORTABLE DIODE LASER INSTALLATION AND SETUP
Instructions on Unpacking & Customer Service Assistance:
A Den-Mat Holdings, LLC Authorized Distributor can provide assistance when you are ready to remove the
Sapphire Portable Diode Laser from its shipping container. Please do not attempt to unpack the Sapphire
Portable Diode Laser and install or setup the unit without reading this section first. If you are unsure about any
aspect of the assembly, call your Den-Mat Holdings, LLC Authorized Distributor for assistance.
NOHD (inches/cm)
MPE
mW/cm2
Without eye With Recommended
protection Eye Protection
Fiber Optic Tip (direct) 1.66 9° (± 1°) 155/393.7 1.55/3.94
Reflected from tissue 1.66 n/a 0.25/0.63 0.0025/0.0063
Radiation Source Divergence Angle
Table 1 NOHD

10
Shipping Container Information:
The shipping container you received with your Sapphire®Portable Diode Laser was specially designed to safely
transport the Laser. In the unlikely event that you need to return the Laser for service or repair, please retain the
original shipping container.
Please check to insure that all items are accounted for.
Installing the Sapphire Portable Diode Laser:
Each of the items listed below should be inspected and the instructions followed. Use of any cables or
accessories other than those provided by Den-Mat Holdings, LLC may damage the device and may result in
increased RF emissions or decreased immunity of the equipment.
Sapphire Portable Diode Laser control module – Plug the AC/DC Power Converter into the wall outlet and
attach the small, low-voltage plug to the jack on the rear of the Control Module.
Power Switch – The power switch for the Sapphire Portable Diode Laser is located on the rear panel of the
Control Module. This switch must be in the “ON” position when the Sapphire Portable Diode Laser unit is to
be used.
Sapphire Portable Diode Laser Handpiece – When the operating key is turned on, the Sapphire Portable Diode
Laser unit will default to STANDBY status, indicated by 0.8 showing in the LASER POWER display and the
CW icon glowing green.
Operating Key Switch – In order to operate the Sapphire Portable Diode Laser unit, the Laser Operating Key
must be inserted into the key switch in the Sapphire Portable Diode Laser Control Module and turned clockwise
to the “ON” position to place the unit in STANDBY status. Prior to leaving the office, your safety officer should
check to see that the key switch has been turned off, removed and stored in a safe place.
Footswitch (optional) – A footswitch may be purchased, if desired. To use, insert the plug into the jack on the side
of the Control Module. When the footswitch is attached, the Handpiece ON/OFF button will not function and the
footswitch controls the working beam’s emission.
Contents of Sapphire Portable Diode Laser Shipping Container:
The contents of the shipping container should include the following:
•SapphirePortableDiodeLaserControlModulewithLaserHandpiece
•AC/DCPowerConverter
•LaserOperatingKey
•FiberOpticTips,400μm/5pc
•Single-useBarrierSleevesforHandpiece25pc
•ProtectiveGlasses3pc
•SafetySign
•SapphirePortableDiodeLaserInstructions
•WarrantyInformation
CW icon glowing green.
CW icon glowing green.CW icon glowing green.

11
Sapphire Portable Diode Laser Assembly Instructions Summary:
1. Plug the Power Converter into the wall outlet and the low voltage plug into the jack on the rear of the
Control Module.
2. Switch the Power Switch on the Control Module to “ON.”
3. Insert the Operating Key into the key switch on the Control Module and turn the switch to the
“ON” position.
4. Attach the foot switch (optional)
5. The display on the Sapphire Portable Diode Laser unit will show the default output 0.8 W in the
CW Mode. The CW icon will glow green.
6. If the battery power level for the Sapphire Portable Diode Laser unit is low (identified by a blank
“LASER POWER” display and a red Battery Indicator), the unit will need to charge its batteries
before use. Wait until the Battery Indicator has turned to green, indicating that the batteries are
fully charged.
CW Mode. The CW icon will glow green.
CWMode. The CW iconwill glow green.CW Mode. The CW icon will glow green.

12
7. SAPPHIRE®PORTABLE DIODE LASER CONTROLS AND DISPLAYS
Sapphire Portable Diode Laser Handpiece:
The Sapphire Portable Diode Laser Handpiece includes the components and functions as shown below:
Sapphire Portable Diode Laser Handpiece Components
1. Removable, Disposable single-use Tip
2. ON/OFF Actuator Switch
3. Main Handle Barrel of Handpiece
4. Collar for Removable Tip
5. Sanitary, disposable single-use Barrier Sleeve (not shown).
Avoid Exposure-Laser Radiation is emitted from this aperture
1
2
3
4

13
Sapphire Portable Laser Control Panel:
The Sapphire Portable Laser Control Panel has the following features and control functions:
10
2
1
8
3
4
5
6
7
9
Figure 1
1. “READY” Button
2. “READY” Indicator Light
•Greenin“READY”status
•Unlitin“STANDBY”status
3. “UP” adjustment for Laser Power
4. “DOWN” adjustment for Laser Power
5. “PULSE” mode indicator
6. “CW” (CONTINUOUS WAVE) mode indicator (glowing RED, indicating working beam firing)
7. “CW/P” (CONTINUOUS WAVE/ PULSE) Mode Toggle Button
8. Laser Power Level Indicator
9. “STOP” (LASER EMERGENCY STOP) Button
10. Battery power level indicator
5. “PULSE” mode indicator
5. “PULSE” mode indicator5. “PULSE” mode indicator
6. “CW” (CONTINUOUS WAVE) mode indicator (glowing RED, indicating working beam firing)
6. “CW” (CONTIN UOUS WAVE) mode indicator (glowing RE D, indicating working beam firing)6. “CW” (CONTIN UOUS WAVE) mode indicator (glowing RE D, indicating working beam firing)

14
Sapphire®Portable Diode Laser Power Level Adjustment:
Power can be adjusted by using the UP and DOWN arrow keys to increase (UP) or decrease (DOWN) the
power setting. The power level setting will be displayed by the Laser Power Level Indicator. Upon initial power-
up, the unit defaults to the CW mode and the CW icon on the control panel glows green. The power
setting will default to 0.8 Watts and will be displayed in the LASER POWER window.
Continuous Wave and Pulse Mode:
Continuous Wave (CW) or 10 Hz Pulse modes for Laser power delivery may be selected by pressing the
“CW/P” toggle key. The icon for the selected mode will glow green.
READY Activation of Sapphire Portable Diode Laser Unit:
Press the READY button in either CW or PULSE to change from STANDBY to READY status and prepare the
unit for Laser activation. The LED embedded on the READY button will glow green indicating that the Laser is
in “READY” status. Changing the mode or power level releases the unit from “READY” status requiring the user
to select the new setting by pressing the READY button again. Settings may not be changed when the laser is
activated. Pressing the READY button without changing the Laser power level or mode toggles the system back
to STANDBY status.
When the unit is placed into READY mode, the LED in the READY button glows green, offering a visual
indication that the unit is READY to fire the working beam.
Target-Indicating Device
The disposable Fiberoptic Tips point to where the Laser working beam will perform its surgical or theraputic
purpose and, therefore, functions as the Sapphire Portable Diode Laser’s target-indicating device.
Laser Activation and Laser “ON” Indication:
The Sapphire Portable Diode Laser working beam can be activated using either the handpiece ON/OFF actuator
or the (optional) footswitch, but not both at the same time. If the footswitch is installed, it overrides the handpiece
ON/OFF switch. Unplug the footswitch from the Sapphire Portable Diode Laser Control Module if it will not
be used.
Continuous Wave and Pulse Mode:
Continuous Wave and Pulse Mode:Continuous Wave and Pulse Mode:
Continuous Wave and Pulse Mode:
Continuous Wave and Pulse Mode:Continuous Wave and Pulse Mode:
power setting. The power level setting will be displayed by the Laser Power Level Indicator. Upon initial power-
power setting. The power level setting will be displayed by the Laser PowerLevel Indicator. Upon initial power-power setting. The power level setting will be displayed by the Laser PowerLevel Indicator. Upon initial power-
up, the unit defaults to the CW mode and the CW icon on the control panel glows green. The power
up, the unit defaults to the CW mode and the CW icon onthe control panel glows green. The powerup, the unit defaults to the CW mode and the CW icon onthe control panel glows green. The power

15
When the Sapphire Portable Diode Laser is in READY and the ON/OFF button on the Handpiece is held
down, or the footswitch is depressed and held down, the active mode icon will turn from GREEN to RED and
an audible “chirp” will be heard, indicating that the laser working beam has been activated. After a 100 micro-
second delay, the Handpiece will begin delivering laser working beam emissions to the target tissue by means
of the disposable 400 micrometer fiberoptic delivery tip. Releasing the Handpiece ON/OFF button or the
footswitch will immediately terminate the working beam’s emission.
EMERGENCY DEACTIVATION OF LASER:
The Sapphire Portable Diode Laser may be deactivated at any time by pressing the Emergency “STOP” button
(Page 13, #9, Figure 1). This action deactivates the unit function in any mode, at any power setting, and whether
or not Laser power is activated.
Other means of terminating laser working beam emissions:
1. Release the handpiece activation button
2. Depress the emergency “STOP” button
3. Remove your foot from the Foot Switch
4. Turn the key counterclockwise to the “OFF” position
5. Switch the Power switch to the “OFF” (O) position
6. Press the READY button to go to Standby mode.
To reset the unit for use, depress and hold down the “STOP” button for 5 seconds.
Remote Door Interlock Jack (Door Interlock Switch not included)
The Sapphire Portable Diode Laser footswitch jack doubles as a remote interlock jack when the ‘Y’-shaped
bifurcated door interlock cord (not provided) is installed. This feature enables a clinician to establish a separate
laser treatment room with an entrance door that is electronically wired to the Sapphire Portable Diode
Laser. When the remote interlock is installed, the laser will turn off anytime the door to the room is opened,
hypothetically to protect the eyes of the person entering the room. Without the remote interlock installed, the
Sapphire Portable Diode Laser will operate normally.
To use the remote interlock feature, an interlock loop will need to be purchased from a local electronics store.
Call your Den-Mat Holdings, LLC Authorized Distributor for a list of parts needed to install the remote door
interlock switch. Install the switch on the door and plug the jack into the end of the bifurcated cord marked
‘Remote Door Interlock.’ Plug the male end of the Y-shaped cord into the Sapphire Portable Diode Laser
footswitch jack.
If you intend to use the optional footswitch to control the Sapphire Portable Diode Laser, plug the footswitch
cord into the end of the door interlock cord marked ‘Footswitch.’
If you don’t require this feature in your operatory and you wish to control laser emissions with the optional
footswitch, the footswitch jack can be inserted directly into the footswitch jack without use of the ‘Y’-shaped
bifurcated door interlock cord. Call your Den-Mat Holdings, LLC Authorized Distributor if you’d like to receive this
connector to use the door interlock feature.

16
Portability of the Sapphire®Portable Diode Laser:
The Sapphire Portable Diode Laser does not need to be attached to the wall outlet to function. A rechargeable
lithium-ion battery powers the Sapphire Portable Diode Laser. When fully charged, the Sapphire Portable Diode
Laser can be operated for up to 40 minutes, for most procedures, before needing to be recharged. So, the
Sapphire Portable Diode Laser can be taken from operatory to operatory as needed. (Be certain that all safety
considerations are followed wherever the Laser is operated, including protective glasses for operator, assistants,
and patients as well as signs warning others that laser procedures are taking place.)
Battery Power Level Indicator:
If the battery charge drops below 3.4V, the Battery Power Indicator will change from green to amber. This is
usually not cause for concern unless the unit is intended to be used for an especially extended procedure
(greater than 40 minutes), particularly if the procedure requires for the laser to be operated in the continuous
wave mode at outputs greater than 2.0W. If the battery is discharged below 2.5V, the Battery Power Level
Indicator changes from amber to red. This indicates that very limited power remains and that the Laser should be
reconnected to the Power Converter and recharged before using. If the battery continues to discharge, “E 4” will
appear in the Laser Power display window and the READY LED will flash red, indicating that there is not enough
power to initiate lasing. The unit will need to be plugged into the wall outlet and allowed to recharge before it can
be used.
Error Codes:
E 1 – Output power Not in Calibration: Exceeds ± 20% of indicated output
E 2 – Over temp; Diode base temperature >50 °C
E 3 – Low battery; Recharge or replace battery (Battery indicator RED)
E 4 – No power; No output or drive current (READY LED blinks RED, too)
E 5 – Handpiece communication error
8. SAPPHIRE PORTABLE DIODE LASER OPERATION AND USE
Operating Modes:
The Sapphire Portable Diode Laser will deliver energy in either continuous wave (CW) or Pulsed (P), “temporal
emission mode” (time related mode). Selection of the appropriate mode will allow the operator to optimize control
of target tissue temperatures and the efficiency of energy delivered. The pulse duration (0.05 seconds) and the
number of pulses per second (10) have been fixed by the manufacturer. Therefore, the operator will need to
adjust only the laser power and mode.
Continuous Wave (CW) Mode :
The CW mode is generally the fastest way to ablate tissues but heat can build up and cause collateral damage
to adjacent tissues. Cool the tissues being treated by using periodic blasts of air from a triplex syringe and high
speed suction. You may also use water to cool in areas where there is prolonged exposure to the Sapphire
Portable Diode Laser beam. Avoid using the air syringe when you have an opening in soft tissue adjacent to
or within the surgery site, as an air embolism may occur resulting from air captured within the tissue during the
cooling process.
Continuous Wave (CW) Mode :
Continuous Wave(CW) Mode :Continuous Wave(CW) Mode :

17
Pulsed Energy Mode :
Pulsing the Sapphire Portable Diode Laser energy will allow some cooling of the tissue between emissions of
energy. The “duty cycle” is the percentage of the time that the system is emitting energy. The pulses per second,
the duty cycle and the energy intensity per pulse determine the average power.
In the pulsed mode, the Sapphire Portable Diode Laser is programmed to deliver 10 pulses per second with a
duty cycle of 50%. It produces 1 energy pulse with 1 period of rest with no energy between each pulse. The
result is an average power per second that will be 50% of the laser’s setting. Therefore, when using pulsed
energy, you will have to adjust your power upward in order to achieve the same rate of work at the same power
set in CW.
Tissue Responses to Laser Energy:
Maximum results will be achieved by regulating the power and the speed that the operator moves the Fiber Optic
Tip. Tissue charring is an undesirable after-effect of too much power, or of the tip moving too slowly. Always use
the least amount of power that is required to complete your procedure. The ideal tissue response will show little
or no discoloration after treatment and will result in less residual damage and faster healing. Avoid penetrating
or damaging the periosteum, and do not attempt to use the laser on alveolar bone. Because the 808 nm laser
energy is attracted to melanin and hemoglobin, power must be reduced when treating patients with darker soft
tissue. Always begin with the lowest power you can use to remove or modify target tissue.
Installing and Replacing Single-Use Fiber Optic Tips
The Fiber Optic Tips conduct laser energy from the laser diodes to the tissues. These fibers are made of silica
with a polymer cladding.
Note that there are potential hazards when inserting, steeply bending, or improperly securing the Fiber Optics to
the handpiece. Failure to follow these recommendations may lead to damage to the fiber or delivery system and/
or harm to the patient, staff, or laser operator.
Pulsed Energy Mode :
Pulsed Energy Mode :Pulsed Energy Mode :
Installing the Fiber Optic Tip
Disposable
Fiber Optic Tip assembly
Handpiece

18
The fiber is relatively flexible, but can be broken if bent at an angle that is too sharp or a radius that is too small.
Protein debris from gingival tissue accumulates on the fiber during surgery and the extreme heat that develops
will deteriorate the Tip. Fibers can fracture if a blackened area greater than 3 - 4 mm develops. This is especially
important when using the Sapphire®Portable Diode Laser for periodontal pocket debridement. Stop lasing and
regularly wipe off the tip with a 2 x 2 gauze sponge that has been wet with water to avoid the accumulation of
protein debris. Do not use flammable solvents such as alcohol when cleaning a hot tip. The Sapphire Portable
Diode Laser disposable Fiber Optic Tips are designed so that they typically won’t need to be stripped or cleaved.
Replace the disposable, single-use Tip as necessary and for each new patient.
The disposable, single-use Fiber Optic Tips are provided in a sealed package. Each Fiber Optic Tip contains a
pre-cleaved, pre-stripped piece of fiber. They are designed for single-use only and must be discarded after use.
Confirm the integrity of the package before use; if damaged, do not use the Tips. Special care should be taken
not to break or snap the fiber when removing Tips from packaging. Do not touch the ends of the fiber.
Re-using Fiber Optic Tips will greatly increase the chance of patient-to-patient infection. Dispose used Fiber
Optic Tips in a Sharps Container.
Confirm that the unit’s Operating Key is turned to ‘OFF’ when changing Fiber Optic Tips.
To install a new Tip, hold the collar of the Tip between your thumb and forefinger, align the polished end of the
fiber with the Handpiece receptacle and firmly press the Tip onto the Handpiece. We recommend that you set
the Sapphire Portable Diode Laser to READY with the aiming beam at default (0.4 mW) after installing a new
Fiber Optic Tip to evaluate the shape and the intensity of the beam to ensure the integrity of the fiber Optic
system: the aiming beam spot should be round and the beam should be focused and not diffuse. If the beam is
not round or is diffuse, try another Fiber Optic Tip and if the problem persists, the unit’s Fiber Optic system will
need to be evaluated by the manufacturer. Reset the aiming beam to desired output (page 14) following this
evaluation.
To remove a worn Fiber Optic Tip, gently grip the Sapphire Portable Diode Laser Fiber Optic Tip between
forefinger and thumb and pull it directly away from the Handpiece.

19
Initiating the Fiber
Some procedures call for the Fiber Tip to be ‘initiated.’ ‘Initiation’ prepares the tip of the fiber to retain heat by
fusing a thin layer of pigment on the end. The easiest way to initiate a tip is by lightly moving the end of the fiber
across a piece of articulating paper with the unit set to 1W CW (see below). The tip will retain pigment from the
paper and will glow. Do not exceed contact time of 1 second.
Setting Parameters:
Review your power and mode requirements and then depress the mode toggle button to select either
Continuous (CW) or Pulsed (P) mode operation. The mode you have selected will be identified by the
corresponding icon glowing green.
Select power output by pressing the up or down arrow buttons until you have reached the desired level. The
default power setting is 0.8 Watts and will be displayed in the LASER POWER window when the unit is
powered-up.
Hard Tissue Procedures:
The Sapphire Portable Diode Laser is not indicated for hard tissue procedures. The Sapphire Portable Diode
Laser is attracted to melanin, hemoglobin and to some extent to water and oxygenated hemoglobin. Avoid
prolonged exposure of the energy when working in and around the cervical areas of the tooth. Due to the thin
layer of enamel in this area, energy may be absorbed by the hemoglobin in the pulp and pulpal hyperemia
may occur. Extended exposure to such energy could cause patient discomfort and even lead to possible
pulpal necrosis.
Cleaning Instructions:
The Sapphire Portable Diode Laser Handpiece and power/communication cord should be cleaned using a
liquid disinfectant similar to BIREX or CIDEX. Do not spray disinfectant directly onto the Handpiece as this may
damage the ON/OFF switch or penetrate into the microprocessor or laser optics. Apply with a gauze sponge or
wipe. Please wear gloves.
Calibration:
The Sapphire Portable Diode Laser uses solid-state circuitry to continuously monitor power output and adjusts
the power supplied to the laser diode to maintain the output at the user defined setting. If the output levels are
more than ± 20% of the set value, the unit will shut off power to the laser diode. If this happens, the unit should
be turned off and allowed to sit for about five (5) minutes, then turned on again. If the laser performs when
retried, the microprocessor has been able to make adjustments and the unit will function. If the unit fails to fire
when retried, the device will need to be sent for re-calibration by Den-Mat®Holdings, LLC Service Department.
Tip Being Initiated

20
We suggest that your practice establish an internal calibration program for your laser. Recalibration is
recommended at least once per year based on typical usage.
Recalibration may be performed by Den-Mat®Holdings, LLC by returning the unit. As an alternative, you may
purchase a calibrated hand-held power meter approved for use with 808 nm devices to check power output.
The laser should be set at 1, 2, and 3W in CW with output checked at each level. Similarly, the output should be
set 1, 3, and 5W in P with output checked at each level. The output display on the hand-held meter should be
within 20% of each setting. If not, replace the Fiber Optic Tip and recheck power outputs. If output displays are
still outside the ±20% tolerance, return the unit to Den-Mat Holdings, LLC for recalibration. There are no methods
available for the user to adjust the calibration of the unit and the Handpiece must not be opened by the user for
any reason.
This manual suits for next models
1
Table of contents
Other Den-Mat Medical Equipment manuals


