DENGEN MULTIPLE HRC-15010 User manual
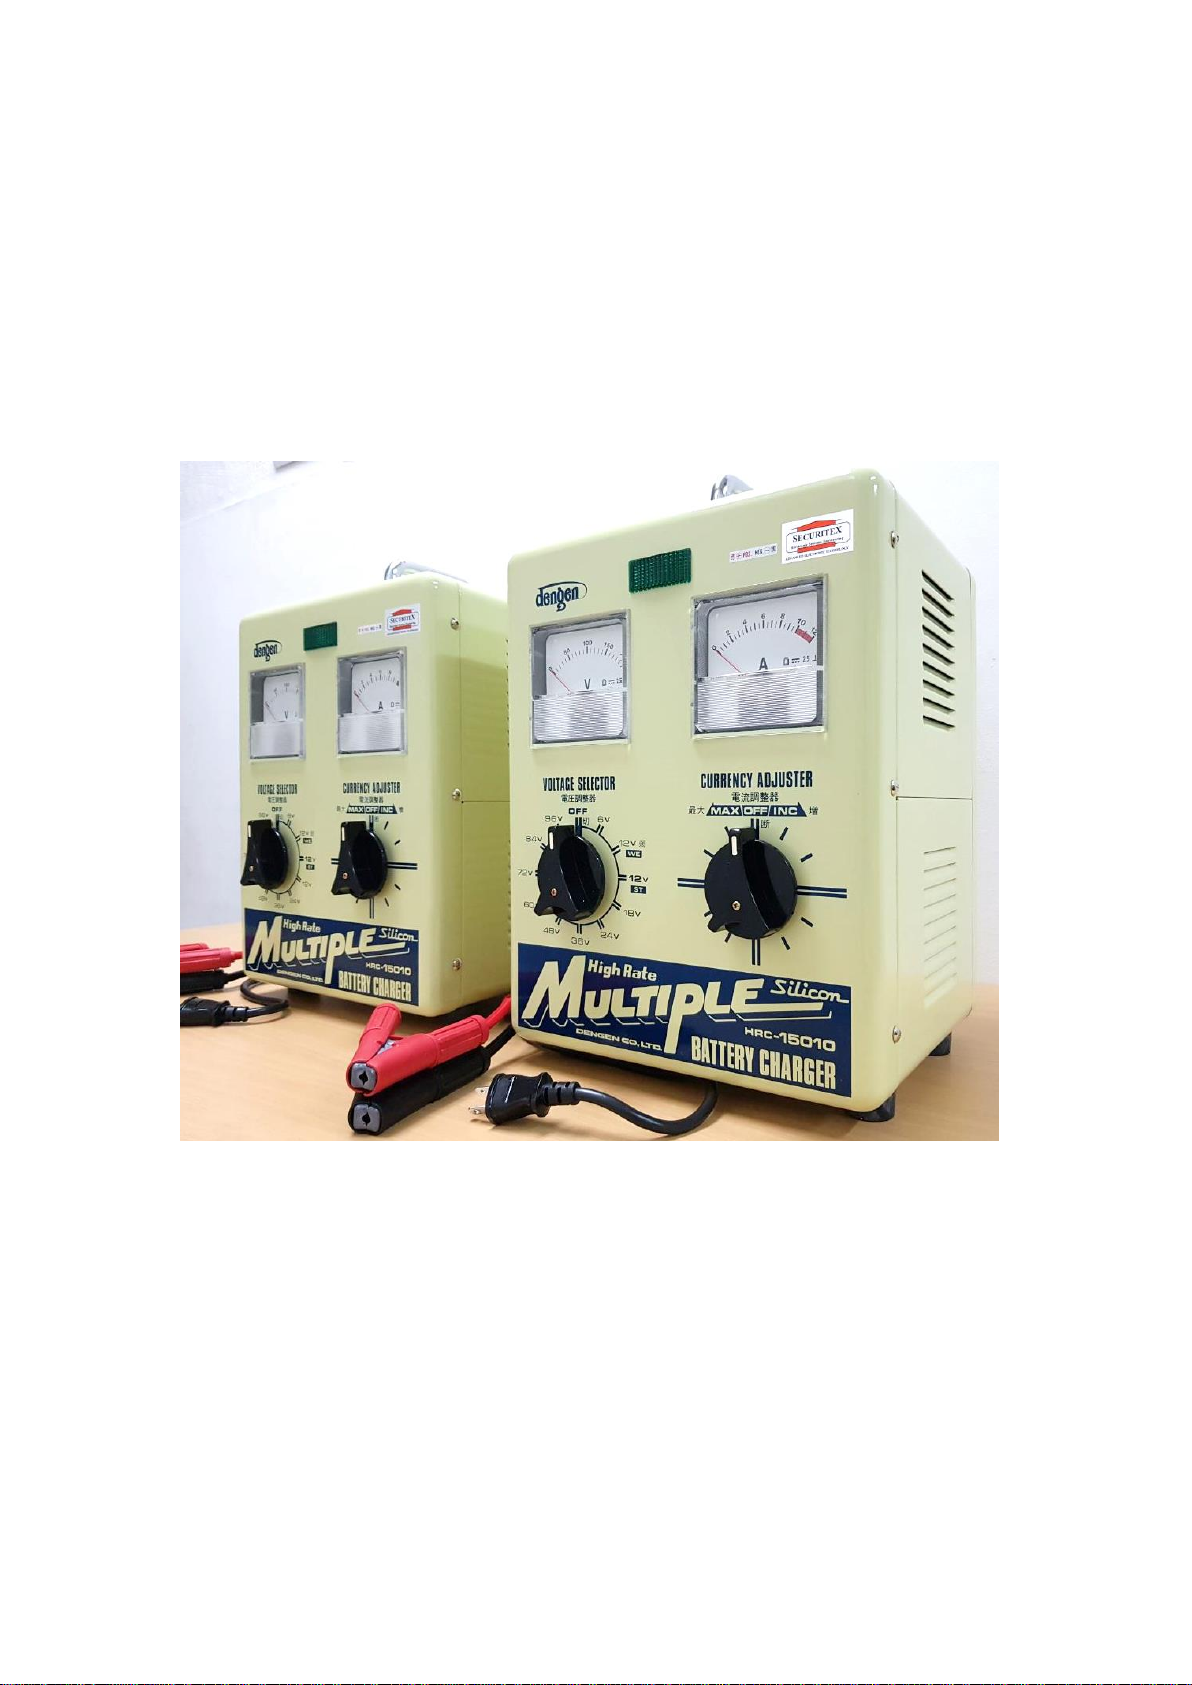
High Rate
MULTIPLE Battery Charger
OPERATING INSTRUCTION
HRC-15010
DENGEN CO, LTD. Osaka Japan
Page 1

NOTE:
Please read this manual carefully before starting to use this DENGEN battery charger. If in doubt
please do not continued to use and seek professional advice.
Battery Electrolyte contained diluted sulfuric acid and is highly corrosive. Wash with plenty of
water if come into contact with skin or any surface.
Always use goggle and rubber glove with plastic apron when handling battery and charging.
Always ensure that battery is / are charge in a well ventilated place and there must be no flame
or spark around.
For prolong charging without supervision or monitoring, it is good to connect the charger to a
timer control.
FEATURES
1. Chargeable from 6V to 96V (Normal and Fast charging)
2. Easy to charge and simplified operation.
3. Meter with built-in illumination for use during night charging or where the area is not well
illuminated.
4. There will be no electric shock and leakage due to the system is double insulated type.
5. When reverse connection or wrong connection the in-built over current circuit breaker & fuse will
activate in second and trip the system.
SPECIFICATIONS
Model : HRC15010
Applicable Battery : 6VDC 2ah - 12Vdc 100ah (10 hrs)
Input AC. : 110Vac 117Vac 125Vac 200Vac
210Vac 220Vac 230Vac 140Vac
250Vac Single Phase 50-60Hz
Power / P. FAC’R : 1.4KVA/97%
Output D.C : 6Vdc -96Vdc Battery 10A
Attach Cord : Electric Cord 2.1meters
Battery Cord 1.2meters (c/w crocodile clip (Red+/Black-)
Spare fuse : Glass Tube 3 pieces
DIFFERENCE BETWEEN 6Vdc & 12Vdc
Apart from the size of battery, if there are 3 entrances of distilled water it is 6Vdc. If its 6 entrances it is
12Vdc.
HOW TO CHARGE
1. Connect the electric cord on the back of the charger into the main electric source base one the
charger specification (input voltage).
2. Connect the RED clip to the Positive battery terminal (+) and BLACK clip to the Negative battery
terminal (-)
3. Ensure the battery voltage to be charge is correct. Set the function switch to the VOLT position,
6V. 12V. 18V. 24V. 36V. 48V. 60V. 72V. 84V. 96V.
4. Check the battery fluid (Water / electrolyte) and top up if necessary (do not over top up).
5. Turn the current adjustment knob and set the regular charging current.
6. Do not run over 10A for the meter indication 6V-96V
7. Turn ON the Charging.
Page 2
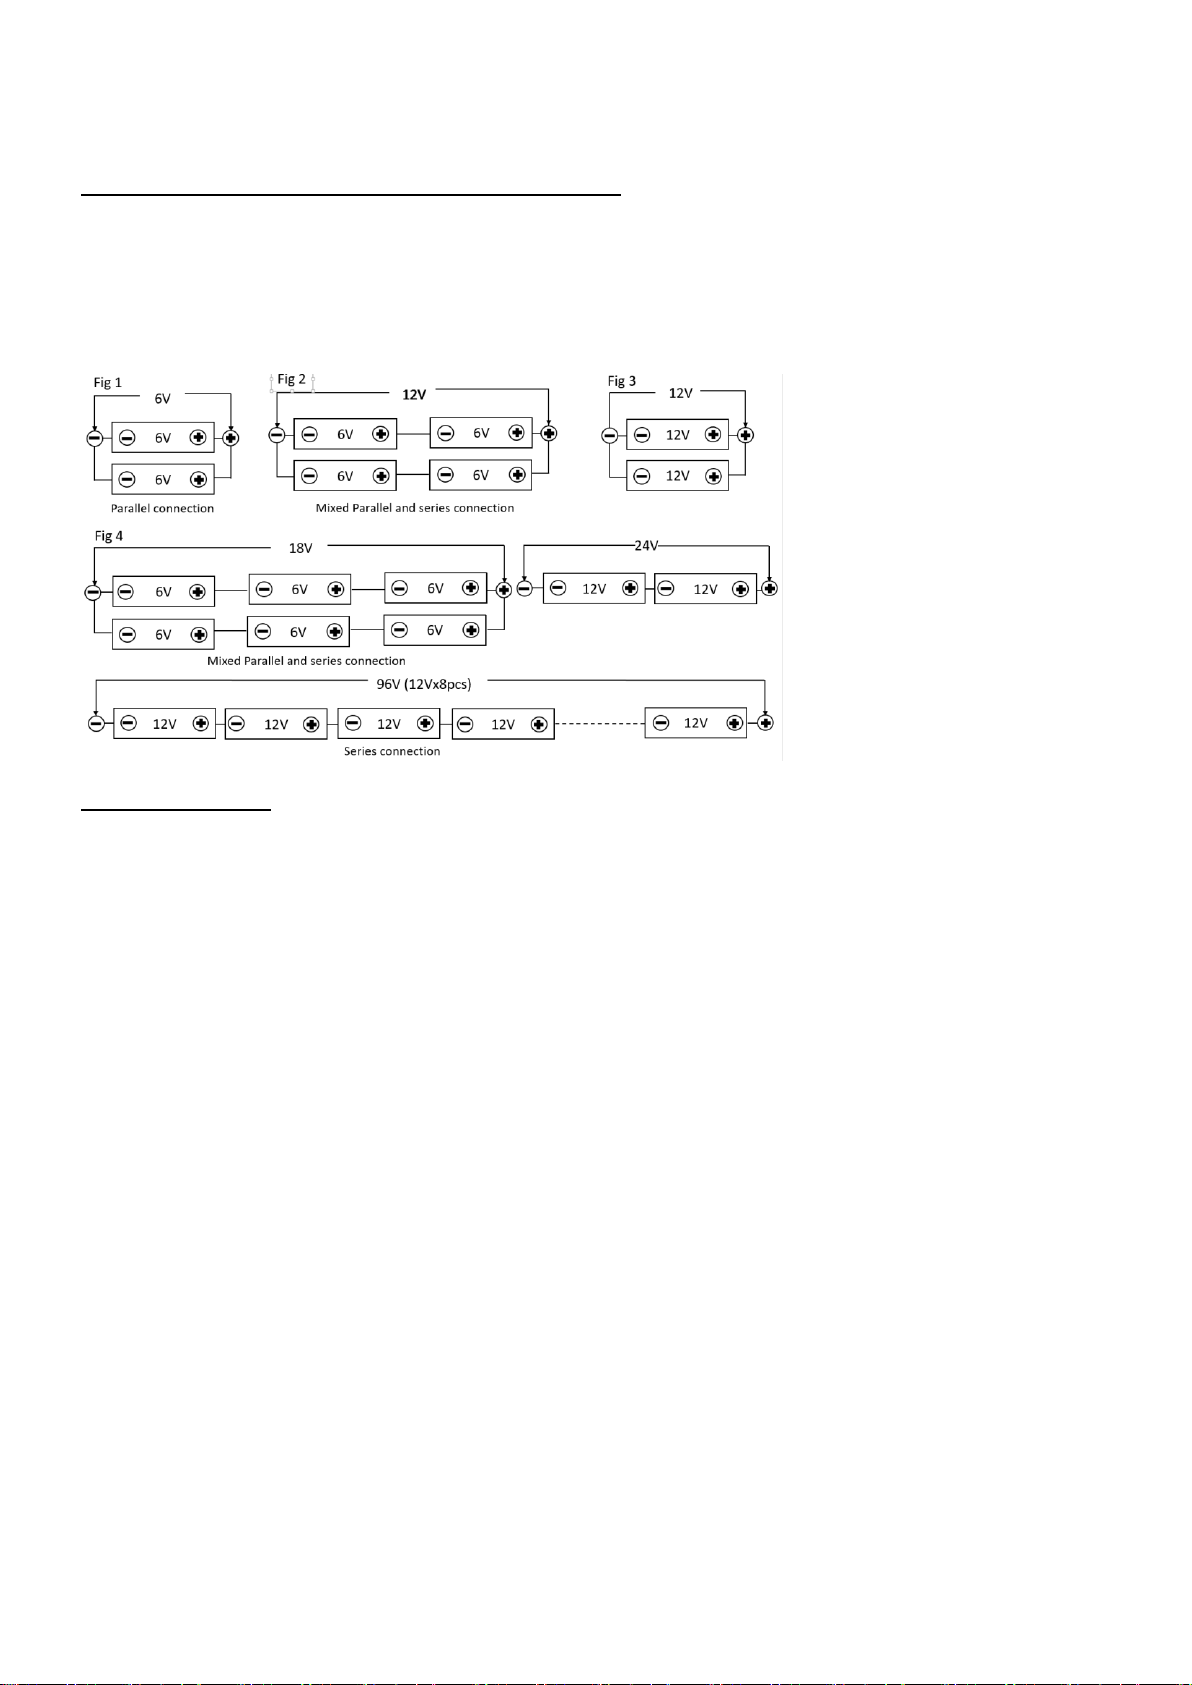
HOW TO CHARGE 2 PIECES OR MORE BATTERIES
Charge at the parallel connection for the different size battery. In case similar size battery charge at the
series connection.
Warning: Before starting to charge the battery, ensure all the positive and negative terminal is 100%
connected correctly. Any reverse connection will cause the charger and battery to be damage. NEVER
REVERSE CHARGE.
FIRST CHARGING
1. There are two kinds of batteries having no fluid (battery water / electrolyte).
Pre-charge (Existing or have been charge once before) and Non pre-charge battery (Totally new).
2. Instil electrolyte (diluted sulphuric acid of 1.26 specific gravity)
3. Keep it for 2 hours at least after instillation (Do not fill up into the battery first)
4. Start to charge at normal charging (set the charging to the lowest capacity of normal charging)
5. Charging Time set (CT) : Charge Battery about 6 hrs
Non-charge battery about 60 hrs.
6. Specific Gravity (SG) : Before charging is 1.26SG After charging is 1.28-1.29SG.
Page 3.

CAUTION (WARNING)
1. Keep distance between charger and battery (1 meter apart) during charging.
2. Drop current when temperature of battery during charging rises to about 40 degrees centigrade.
3. Reduce current adjustment when pointer of the Ampere meter indicate 10A over area (RED zone)
4. Prevent over filling the electrolyte in the battery as it may over flow.
5. Before end of normal charging small bubbles may appear from each terminal that is normal.
6. Additional charging is needed if the battery sulfuric acid specific gravity is under 1.25SG.
7. Charge once every 2 months if there is no trouble for engine starting.
8. V is Voltmeter and A is Ampere meter.
9. Voltmeter indicates charging voltage. Charge 12V battery to be about 15V in normal charging.
PROHIBITION
1. Use spare fuse when the installed fuse in blown. Never use wire or other non-standard rated fuse.
2. Do not charge with battery cap ON (CLOSE)
3. Do not touch the charging clip + & - together.
4. Do not invert the Positive and Negative charging on the battery terminal. (Doing so will activate the
circuit breaker and may damage the battery).
5. If the connection is set conversely, D.C breaker on the back of the charger will automatically cut off.
6. Do not take off (Disconnect) the clip +/- or operate the switches during charging.
7. Do not allow fire or sparks to come near the battery as it can catch fired and explosion occurred due to
emission of hydrogen when the battery is in charging.
THINGS TO CHECK IF METER DO NOT SWING OR LAMP IS NOT LIGHTED
1. Completely discharged battery cannot be charge instantly (see No. 3).
2. Check whether capacity for the fluid (Electrolyte) of each terminal of the battery is full or not.
3. If Ampere meter do not swing (move), this indicate the Specific Gravity (SG) of the battery electrolyte is
dropping due to the battery is totally discharged. (In this case set current Ampere meter to No. 2 for 6V
and to No. 7 for 12V than charge the battery for about 15 hrs)
4. If after charging for 3hrs at the above and the Ampere meter swing (move), than charge at normal
charging continuously.
5. If lamp does not light up, check the fuse in the back of the charger.
6. When meter does not swing in spite of lamp is ON or Battery is normal, check again the connection of the
clips and terminals.
This manual contain 4 pages.
Page 4 is the last page.
Edited by Securitex Electronic Systems Engineering
Table of contents
Popular Batteries Charger manuals by other brands

Free2Move eSolutions
Free2Move eSolutions eProfessional user manual

Conceptronic
Conceptronic OZUL04BE Quick installation guide

Lamarche
Lamarche ESCR Series Installation and operation manual

Natek
Natek ML314B User instruction

LRP electronic
LRP electronic Quadra Pro 41280 user guide

RichardSolo
RichardSolo VT900 instruction manual


Deutronic
Deutronic DBLW Series operating instructions

Schumacher Electric
Schumacher Electric SC1389 owner's manual

Moshi
Moshi Otto Q quick start guide

Bitron
Bitron AC Wall SOCKET Installer manual

MOB
MOB MO6349 user manual

Paxton Automotive
Paxton Automotive Novi 2000 Supercharger Owner's installation guide