PROakcess PROenerg 450 User manual

Chargeur de batterie et démarreur booster 12V – 24V
PROenerg 450
est le produit idéal pour recharger vos batteries de voitures, camping car,
bateau, camion, et toute batterie au plomb rechargeable en 12V ou 24V. Il peut aussi être
utilisé comme booster pour démarrer un moteur, si la batterie de celui-ci était hors-service.
! Lire la notice avant toute utilisation !
Spécifications
Courant entrée : 230V – 50Hz
Courant sortie : DC 12V / 24V
Courant de charge max 70A
Capacité des batteries à charger : 30 à 300 AH
Courant de démarrage ‘booster’ max : 300A
Équipement Classe 1: IP20
Précautions de sécurité
-
Cet appareil n’est pas conçu pour être utilisé par de jeunes enfants ou par des personnes ne
pouvant pas lire ou comprendre le manuel, sauf sous surveillance d’une personne responsable
qui assure qu’ils peuvent utiliser le chargeur de batterie sans risque. Stockez et utilisez ce
chargeur hors de portée des enfants et vérifiez qu’ils ne peuvent pas jouer avec.
-
Vérifiez que la batterie à charger soit bien rechargeable, que son voltage soit de 12V ou 24V,
que la batterie ne soit pas endommagée. Les bornes doivent être propres et sèches avant la
connexion. Ne convient pas pour la recharge de batterie au Lithium.
-
Durant la charge, la batterie produit des gaz explosifs. A tenir éloigné de toute source de
flamme ou d’étincelles durant l’usage. Toujours utiliser dans un endroit frais et ventilé. Ne pas
fumer à proximité !
-
Ne pas utiliser à l’intérieur de la voiture ou sous le capot, ne pas couvrir, ne pas utiliser sous
la pluie, la neige, ou exposé aux rayons du soleil.
-
Toujours mettre des gants (si possible en caoutchouc) et lunettes de protection appropriés
pour travailler sur la batterie qui contient un acide corrosif. Ne pas être en contact avec l’acide
de batterie.
-
N’utilisez pas votre appareil si les pinces, les câbles, ou les gaines de câbles sont
endommagés. SI le produit est défaillant, il ne pourra être réparé que par un technicien
spécialisé.
-
Ne jamais mettre en contact les pinces entre elles, ni les brancher sur un même objet
métallique (risque de court circuit).
Fonction chargeur de batterie 12V – 24V
PROenerg 450
est équipé d’une protection (un fusible de remplacement est livré avec
l’appareil) en cas de : surcharge, court-circuit, inversion de polarité.
Le fusible se trouve à l’arrière du bouton ‘fusible’ du panneau de contrôle.
1-
vérifier la batterie à charger.
Elle doit être propre, sèche, non endommagée.
450
Pour les batteries avec entretien, ouvrir les bouchons, vérifier le niveau d’électrolyte dans
chaque compartiment et compléter si nécessaire avec de l’eau distillée (le haut des plaques
ne doit pas être à l’air libre).
Laisser ouverts les bouchons pendant la charge !
2-
l’appareil doit être débranché, interrupteur principal en position OFF.
3- L’interrupteur doit être en position ‘charge’.
4-
brancher le câble rouge (+) de l’appareil sur la borne 12V ou 24V de l’appareil en fonction
du voltage de la batterie à charger.
5-
Connecter la pince/câble rouge (+) sur le pôle (+) de la batterie.
6-
Connecter la pince/câble noir (-) sur le châssis du véhicule, à distance de la batterie et du
circuit de carburant, ou sur la borne (-) de la batterie si la batterie est hors véhicule.
7-
Sélectionner le niveau de charge.
Interrupteur ½ :
Si charge 12V : position 1 : 9,5V / 50A – position 2 : 10,5V / 55A
Si charge 24V : position 1 : 18,8V / 60A – position 2 : 20,8V / 66A
Interrupteur logo ‘tortue’ / logo ‘lapin’
‘logo tortue’: programme charge lente
‘logo lapin’ : programme charge rapide
8-
brancher l’appareil sur le réseau, et l’interrupteur général en position ‘ON’ la charge
commence.
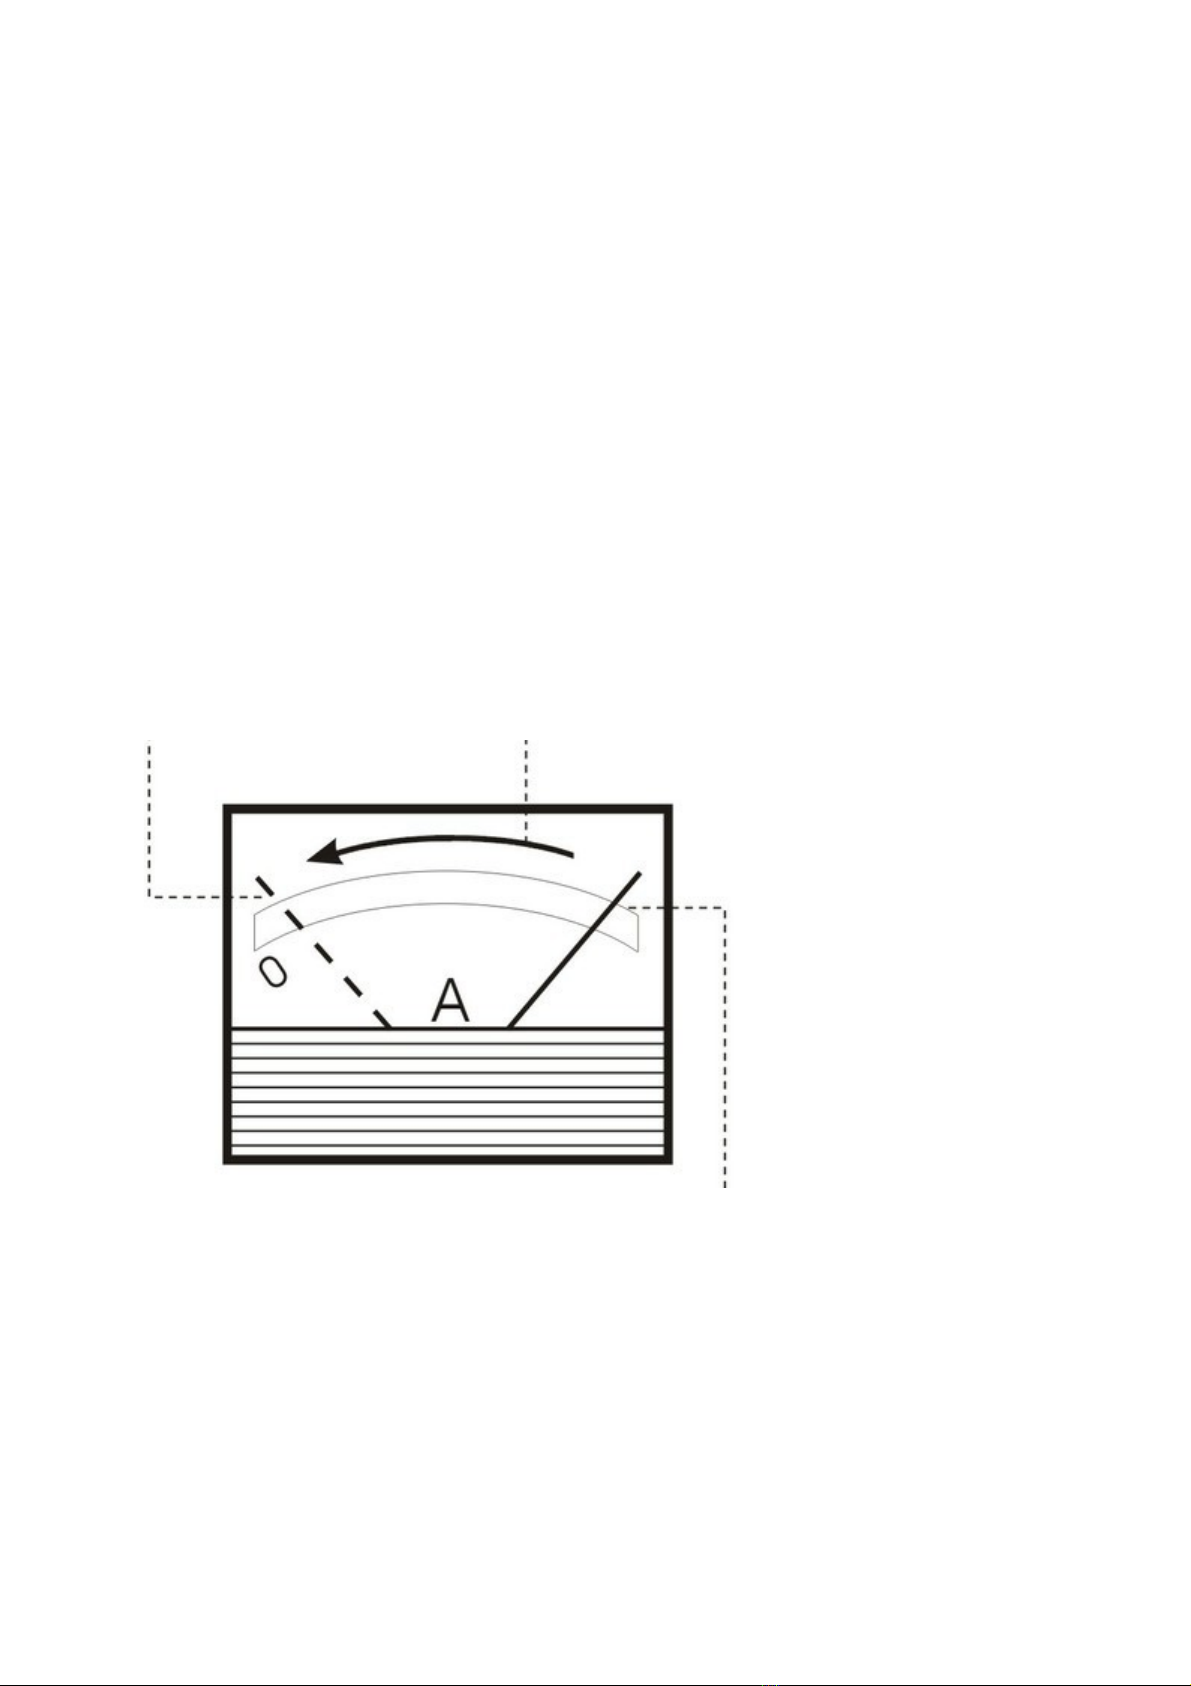
Vous pouvez suivre la charge à l’aide de l’ampèremètre.
FIN DE CHARGE PENDANT LA CHARGE
INITIALEMENT
Batterie déchargée, l’aiguille se trouve à droite sur l’ampèremètre, et va ensuite diminuer
au fur et à mesure de la charge.
La fin de charge peut être constatée soit par l’aiguille de l’ampèremètre proche de ‘0’, ou
parce que l’électrolyte de la batterie commence à bouillonner.
Vous pouvez aussi le constater avec un voltmètre (14,4V max pour une batterie 12V, et
28,8V max pour une batterie de 24V).
9-
Déconnexion
Remettez le sélecteur en position ‘0’, débrancher la prise secteur, ensuite déconnecter la
pince rouge (+)et enfin la pince noire (-).

Fonction booster démarreur
PROenerg 450
peut servir de booster en cas de batterie défectueuse, pour démarrer un
moteur thermique. Il n’est pas conçu pour remplacer votre batterie mais sert en cas de
dépannage.
Afin de ne pas endommager les équipements électroniques de votre véhicule, il est
important de bien lire le manuel d’instruction avant toute utilisation. Tous les véhicules ne
permettent pas l’usage d’un booster !
1-
S’assurer que tous les équipements électriques du véhicule sont éteints (radio, phares) et
que le contact de la voiture ne soit pas mis.
2-
S’assurer que les bornes de batterie sont parfaitement propres et que les cosses sont fermes
et sécurisées (pour assurer un contact parfait).
3-
l’appareil doit être débranché ! l’interrupteur en position ‘0’ !
3-
brancher le câble rouge (+) de l’appareil sur la borne 12V ou 24V de l’appareil en fonction
du voltage de la batterie à charger.
4-
Connecter la pince/câble rouge (+) sur le pôle (+).
5-
Connecter la pince/câble noir (-) sur le châssis du véhicule, à distance de la batterie et du
circuit de carburant.
6-
mettre l’interrupteur en position ‘booster’. Puis brancher l’appareil sur le secteur et
l’interrupteur principal en position ‘ON’.
7-
vérifier que rien ne gène le démarrage du moteur (câble ou autre) et démarrer le véhicule à
l’aide de la clé, par séquences de 5 essais de 5 sec, coupures de 2 min entre chaque démarrage.
8-
déconnexion : Remettez le sélecteur en position ‘0’, débrancher la prise secteur, ensuite
déconnecter la pince rouge (+)et enfin la pince noire (-).

Montage
Seules les roues (axe, 2 roues, 2 clips) et le manche sont à monter, le tout est livré avec
l’appareil et simple à assembler.
Glossaire
Symbole courant alternatif Symbole fusible
Symbole mise à la terre Symbole usage intérieur, ne pas exposer à la pluie
EMC :
LVD :
Importé par PROakcess
sprl
5, rue de l’innovation
7503 Froyennes
www.proakcess.com
V1 3/08/2020

Battery charger and booster starter 12V - 24V
PROenerg 450
is the ideal product to recharge your car, camper, boat, truck batteries,
and any rechargeable lead acid battery in 12V or 24V. It can also be used as a booster to
start an engine, if the engine battery is out of order.
! Read the operating manual before use!
Specifications
Input current: 230V - 50Hz
Output current: DC 12V / 24V
Max. load current 70A
Capacity of the batteries to be charged: 30 to 300 AH
Booster starting current max : 300A
Equipment Class 1: IP20
Safety Precautions
- This appliance is not intended for use by young children or persons who cannot read or understand
the manual, except under the supervision of a responsible person who ensures that they can use the
battery charger safely. Store and use this charger out of the reach of children and make sure they
cannot play with it.
- Check that the battery to be charged is properly rechargeable, that its voltage is 12V or 24V, and
that the battery is not damaged. The terminals must be clean and dry before connection. Not
suitable for recharging Lithium battery.
- During charging, the battery produces explosive gases. Keep away from any source of flame or
sparks during use. Always use in a cool, ventilated area. Do not smoke in the vicinity!
- Do not use inside the car or under the hood, do not cover, do not use in rain, snow, or sunlight.
- Always wear suitable gloves (rubber if possible) and goggles when working on the battery which
contains corrosive acid. Do not come into contact with battery acid.
- Do not use your unit if the clamps, cables, or cable jackets are damaged. If the product is
defective, it can only be repaired by a specialized technician.
- Never put the clamps in contact with each other or connect them to the same metal object (risk of
short circuit).
Battery charger function 12V - 24V
PROenerg 450
is equipped with a protection (a replacement fuse is delivered with the
device) in case of: overload, short circuit, polarity inversion.
The fuse is located at the back of the fuse button on the control panel.
1- vérifier la batterie à charger.
Elle doit être propre, sèche, non endommagée.
450
Table of contents
Languages:
Other PROakcess Batteries Charger manuals


