manuals.online logo
Brands
  1. Home
  2. •
  3. Brands
  4. •
  5. Denon
  6. •
  7. Home Theater System
  8. •
  9. Denon S-102 User manual

Denon S-102 User manual

TOKYO, JAPAN
Denon Brand Company, D&M Holdings lnc.
●For purposes of improvement, specifications and
design are subject to change without notice.
●Please use this service manual with referring to the
operating instructions without fail.
●Some illustrations using in this service manual are
slightly different from the actual set.
注 意
サービスをおこなう前に、このサービスマニュアルを
必ずお読みください。本機は、火災、感電、けがなど
に対する安全性を確保するために、さまざまな配慮を
おこなっており、また法的には「電気用品安全法」に
もとづき、所定の許可を得て製造されております。
従ってサービスをおこなう際は、これらの安全性が維
持されるよう、このサービスマニュアルに記載されて
いる注意事項を必ずお守りください。
●本機の仕様は性能改良のため、予告なく変更すること
があります。
●補修用性能部品の保有期間は、製造打切後 8 年です。
●修理の際は、必ず取扱説明書を参照の上、作業を行っ
てください。
●本文中に使用しているイラストは、説明の都合上現物
と多少異なる場合があります。
X0341 V.02 DE/CDM 0710
SERVICE MANUAL
DVD HOME ENTERTAINMENT SYSTEM
MODEL JP E3 E2 EK E2A E1C E1K EUT
S-102
333
Ver. 2
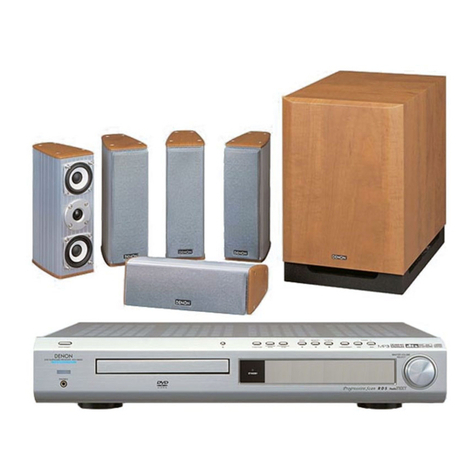
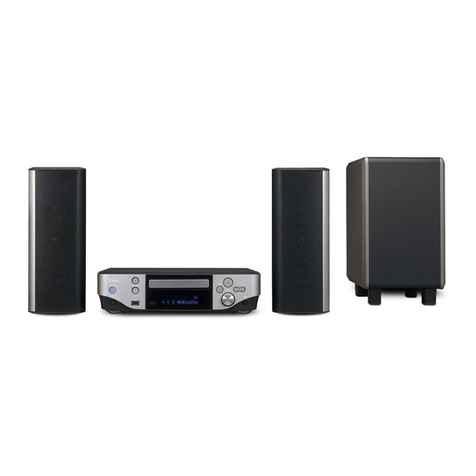
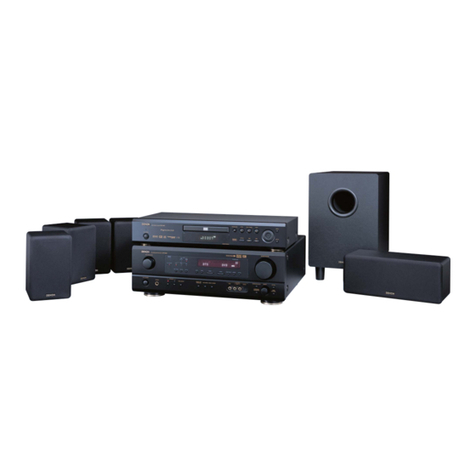
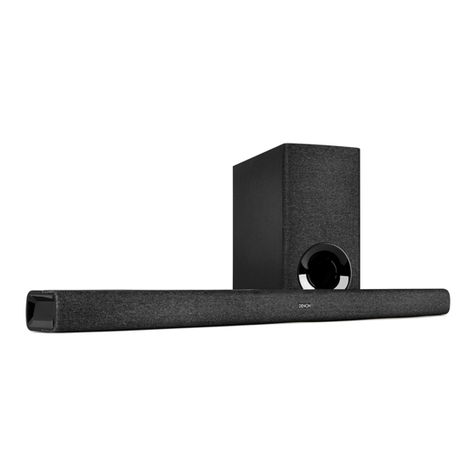
HOME ENTERTAINMENT SYSTEM (S-102) consists of DVD SURROUND RECEIVER
(ADV-S102), SUB WOOFER (DSW-S102) and SPEAKER SYSTEM (SC-S102)
Please refer to the
MODIFICATION NOTICE.
w
w
w
.
x
i
a
o
y
u
1
6
3
.
c
o
m
Q
Q
3
7
6
3
1
5
1
5
0
9
9
2
8
9
4
2
9
8
T
E
L
1
3
9
4
2
2
9
6
5
1
3
9
9
2
8
9
4
2
9
8
0
5
1
5
1
3
6
7
3
Q
Q
TEL 13942296513 QQ 376315150 892498299
http://www.xiaoyu163.com
2
S-102
Please heed the points listed below during servicing and inspection.
◎Heed the cautions!
Spots requiring particular attention when servicing, such as
the cabinet, parts, chassis, etc., have cautions indicated on
labels or seals. Be sure to heed these cautions and the cau-
tions indicated in the handling instructions.
◎Caution concerning electric shock!
(1) An AC voltage is impressed on this set, so touching inter-
nal metal parts when the set is energized could cause
electric shock. Take care to avoid electric shock, by for ex-
ample using an isolating transformer and gloves when
servicing while the set is energized, unplugging the power
cord when replacing parts, etc.
(2)There are high voltage parts inside. Handle with extra care
when the set is energized.
◎
Caution concerning disassembly and assembly!
Though great care is taken when manufacturing parts from
sheet metal, there may in some rare cases be burrs on the
edges of parts which could cause injury if fingers are moved
across them. Use gloves to protect your hands.
◎Only use designated parts!
The set's parts have specific safety properties (fire resis-
tance, voltage resistance, etc.). For replacement parts, be
sure to use parts which have the same properties. In particu-
lar, for the important safety parts that are marked ! on wiring
diagrams and parts lists, be sure to use the designated parts.
◎Be sure to mount parts and arrange the
wires as they were originally!
For safety reasons, some parts use tape, tubes or other insu-
lating materials, and some parts are mounted away from the
surface of printed circuit boards. Care is also taken with the
positions of the wires inside and clamps are used to keep
wires away from heating and high voltage parts, so be sure to
set everything back as it was originally.
◎Inspect for safety after servicing!
Check that all screws, parts and wires removed or discon-
nected for servicing have been put back in their original posi-
tions, inspect that no parts around the area that has been
serviced have been negatively affected, conduct an insulation
check on the external metal connectors and between the
blades of the power plug, and otherwise check that safety is
ensured.
(Insulation check procedure)
Unplug the power cord from the power outlet, disconnect the
antenna, plugs, etc., and turn the power switch on. Using a
500V insulation resistance tester, check that the insulation re-
sistance between the terminals of the power plug and the ex-
ternally exposed metal parts (antenna terminal, headphones
terminal, microphone terminal, input terminal, etc.) is 1MΩor
greater. If it is less, the set must be inspected and repaired.
Concerning important safety parts
Many of the electric and structural parts used in the set have
special safety properties. In most cases these properties are
difficult to distinguish by sight, and using replacement parts
with higher ratings (rated power and withstand voltage) does
not necessarily guarantee that safety performance will be pre-
served. Parts with safety properties are indicated as shown
below on the wiring diagrams and parts lists is this service
manual. Be sure to replace them with parts with the designat-
ed part number.
(1) Schematic diagrams ... Indicated by the ! mark.
(2) Parts lists ... Indicated by the ! mark.
Using parts other than the designated parts
could result in electric shock, fires or other
dangerous situations.
SAFETY PRECAUTIONS
The following check should be performed for the continued protection of the customer and service technician.
LEAKAGE CURRENT CHECK
Before returning the unit to the customer, make sure you make either (1) a leakage current check or (2) a line to chassis
resistance check. If the leakage current exceeds 0.5 milliamps, or if the resistance from chassis to either side of the power
cord is less than 460 kohms, the unit is defective.
LASER RADIATION
Do not stare into beam or view directly with optical instruments, class 3A laser product.
CAUTION
CAUTION
サービス、点検時にはつぎのことにご注意願います。
◎注意事項をお守りください!
サービスのとき特に注意を必要とする個所についてはキャ
ビネット、部品、シャーシなどにラベルや捺印で注意事項を
表示しています。これらの注意書きおよび取扱説明書などの
注意事項を必ずお守りください。
◎感電に注意!
(1) このセットは、交流電圧が印加されていますので通電時
に内部金属部に触れると感電することがあります。従っ
て通電サービス時には、絶縁トランスの使用や手袋の着
用、部品交換には、電源プラグを抜くなどして感電にご
注意ください。
(2) 内部には高電圧の部分がありますので、通電時の取扱に
は十分ご注意ください。
◎分解、組み立て作業時のご注意!
板金部品の端面の『バリ』は、部品製造時に充分管理をして
おりますが、板金端面は鋭利となっている箇所が有りますの
で、部品端面に触れたまま指を動かすとまれに怪我をする場
合がありますので十分注意して作業して下さい。手の保護の
ために手袋を着用してください。
◎指定部品の使用!
セットの部品は難燃性や耐電圧など安全上の特性を持った
ものとなっています。従って交換部品は、使用されていたも
のと同じ特性の部品を使用してください。特に配線図、部品
表に!印で指定されている安全上重要な部品は必ず指定の
ものをご使用ください。
◎部品の取付けや配線の引きまわしは、
元どおりに!
安全上、テープやチューブなどの絶縁材料を使用したり、プ
リント基板から浮かして取付けた部品があります。また内部
配線は引きまわしやクランパーによって発熱部品や高圧部
品に接近しないように配慮されていますので、これらは必ず
元どおりにしてください。
◎サービス後は安全点検を!
サービスのために取り外したねじ、部品、配線などが元どお
りになっているか、またサービスした個所の周辺を劣化させ
てしまったところがないかなどを点検し、外部金属端子部
と、電源プラグの刃の間の絶縁チェックをおこなうなど、安
全性が確保されていることを確認してください。
(絶縁チェックの方法)
電源コンセントから電源プラグを抜き、アンテナやプラグな
どを外し、電源スイッチを入れます。500V 絶縁抵抗計を用
いて、電源プラグのそれぞれの端子と外部露出金属部[アン
テナ端子、ヘッドホン端子マイク端子、入力端子など]との
間で、絶縁抵抗値が1 MΩ 以上であること、この値以下の
ときはセットの点検修理が必要です。
安全上重要な部品について
本機に使用している多くの電気部品、および機構部品は安全
上、特別な特性を持っています。この特性はほとんどの場合、
外観では判別つきにくく、またもとの部品より高い定格(定
格電力、耐圧)を持ったものを使用しても安全性が維持され
るとは、限りません。安全上の特性を持った部品は、この
サービスマニュアルの配線図、部品表につぎのように表示し
ていますので必ず指定されている部品番号のものを使用願
います。
(1) 配線図…!マークで表示しています。
(2) 部品表…!マークで表示しています。
指定された部品と異なるものを使用した場合に
は、感電、火災などの危険を生じる恐れがあり
ます。
注 意
注 意
w
w
w
.
x
i
a
o
y
u
1
6
3
.
c
o
m
Q
Q
3
7
6
3
1
5
1
5
0
9
9
2
8
9
4
2
9
8
T
E
L
1
3
9
4
2
2
9
6
5
1
3
9
9
2
8
9
4
2
9
8
0
5
1
5
1
3
6
7
3
Q
Q
TEL 13942296513 QQ 376315150 892498299
http://www.xiaoyu163.com
3
S-102
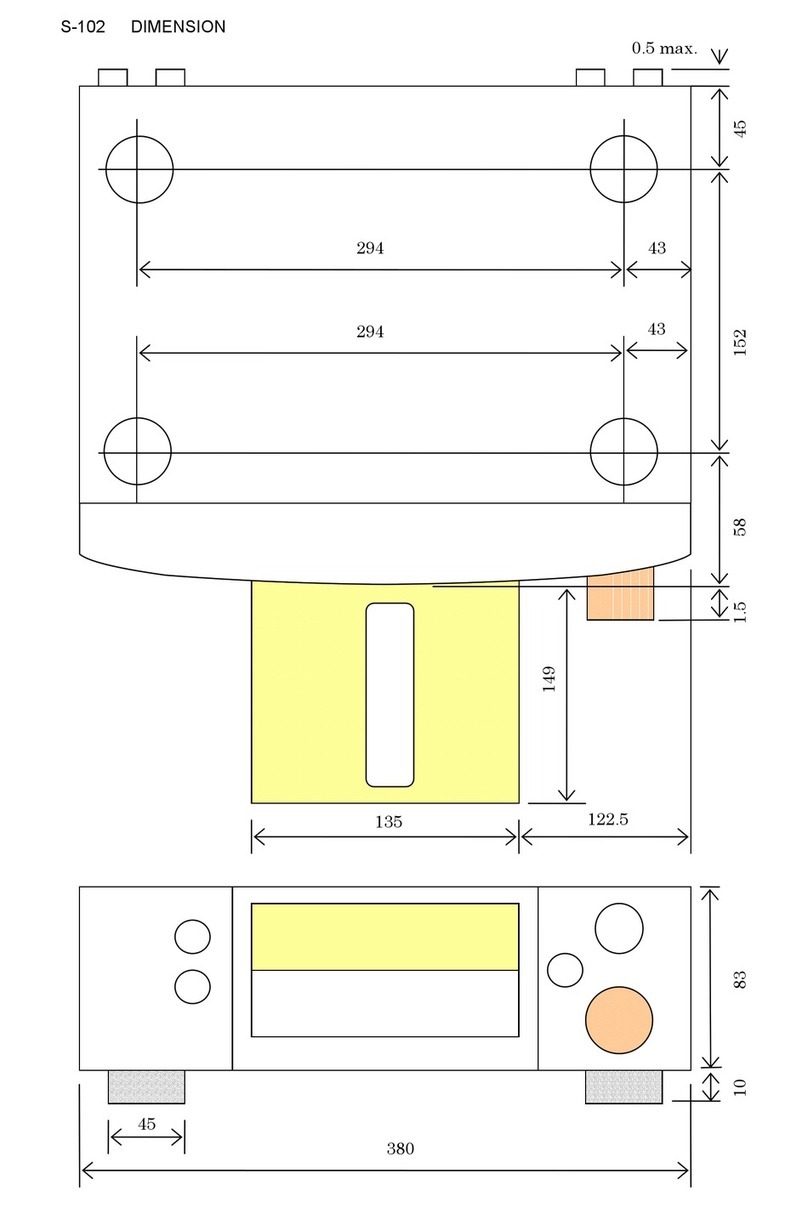
DIMENSION
ADV-S102
0.5 max.
83
149
10
380
135
45
58
1.5 45
122.5
43
294 43
294
152
w
w
w
.
x
i
a
o
y
u
1
6
3
.
c
o
m
Q
Q
3
7
6
3
1
5
1
5
0
9
9
2
8
9
4
2
9
8
T
E
L
1
3
9
4
2
2
9
6
5
1
3
9
9
2
8
9
4
2
9
8
0
5
1
5
1
3
6
7
3
Q
Q
TEL 13942296513 QQ 376315150 892498299
http://www.xiaoyu163.com
4
S-102
DSW-S102
287 6556
212
140
141
0.5
213
167.5
336.541
w
w
w
.
x
i
a
o
y
u
1
6
3
.
c
o
m
Q
Q
3
7
6
3
1
5
1
5
0
9
9
2
8
9
4
2
9
8
T
E
L
1
3
9
4
2
2
9
6
5
1
3
9
9
2
8
9
4
2
9
8
0
5
1
5
1
3
6
7
3
Q
Q
TEL 13942296513 QQ 376315150 892498299
http://www.xiaoyu163.com
5
S-102
SC-S102
257.5
103
76.3
103.5
60
w
w
w
.
x
i
a
o
y
u
1
6
3
.
c
o
m
Q
Q
3
7
6
3
1
5
1
5
0
9
9
2
8
9
4
2
9
8
T
E
L
1
3
9
4
2
2
9
6
5
1
3
9
9
2
8
9
4
2
9
8
0
5
1
5
1
3
6
7
3
Q
Q
TEL 13942296513 QQ 376315150 892498299
http://www.xiaoyu163.com
6
S-102
ワイヤー整形図
調整や部品の交換等により、ワイヤー類の結束をはずしたり移
動させた場合には、それらの作業が完了した時点でワイヤーの
整形をおこなってください。正しく整形されてないとノイズ発
生の原因となることがあります。
1. ADV-S102
① CW051 5P コネクターコードをフロントシャーシにクラン
プバンドで結束する。
② CW052 5P コネクターコードをフロントシャーシにクラン
プバンドで結束する。
③ CX031 3P コネクターコードをスタイルピンで基板に固定
する。
④ CW052 5P コネクターコードをスタイルピンで基板に固定
する。
⑤ CX211 の FFC をスタイルピンで押さえこむ。
⑥ CX021 2P コネクターコードを数回捩ってスタイルピンで
2 箇所を固定する。
⑥ CX061 6P コネクターコードをコードホルダーで固定す
る。
⑦ CX061 6P コネクターコードをスタイルピンで基板より浮
かせて固定する。
WIRE ARRANGEMENT
If wire bundles are untied or moved to perform adjustment or
parts replacement etc., be sure to rearrange them neatly as
they were originally bundled or placed afterward.
Otherwise, incorrect arrangement can be a cause of noise
generation.
1. ADV-S102
①Fasten the CW051 5P connector cord to the front chassis
with a clamp band.
②Fasten the CW052 5P connector cord to the front chassis
with a clamp band.
③Fasten the CX31 3P connector cord to the circuit board with
a style pin.
④Fasten the CW52 5P connector cord to the circuit board with
a style pin.
⑤Press the CX211 FFC in with a style pin.
⑥Twist the CX021 2P connector cord several times and
fasten it twice with a style pin.
⑥Fasten the CX061 6P connector with a cord holder.
⑦Float the CX061 6P connector code to the circuit board with
a style pin and fasten.
CX151
CX052
CX051
CX061
CX051
CX301
CX021
CX171
CX211
CX031
CW052
①⑤④③②
⑥
⑥
CX061
Ferrite Cramp
CX061
⑦⑦⑧
w
w
w
.
x
i
a
o
y
u
1
6
3
.
c
o
m
Q
Q
3
7
6
3
1
5
1
5
0
9
9
2
8
9
4
2
9
8
T
E
L
1
3
9
4
2
2
9
6
5
1
3
9
9
2
8
9
4
2
9
8
0
5
1
5
1
3
6
7
3
Q
Q
TEL 13942296513 QQ 376315150 892498299
http://www.xiaoyu163.com
7
S-102
2. DSW-S102
① CX041 4P コネクターコードをクランプバンドでシャーシ
に固定。
② CX041 4P コネクターコードと CX0818P コネクターコー
ドをクランプバンドでシャーシに固定。
③ クランプバンドで結束。
④ CX021 2P コネクターコードをクランプバンドでシャーシ
に固定。
2. DSW-S102
①Fasten the CX041 4P connector cord to the chassis with a
clamp band.
②Fasten the CX041 4P connector cord and CX081 8P con-
nector cord to the chassis with a clamp band.
③Fasten with a clamp band.
④Fasten the CX021 2P connector cord to the chassis with a
clamp band.
CX151
CX021
CX022
CX041 CX081
①②
④
③
w
w
w
.
x
i
a
o
y
u
1
6
3
.
c
o
m
Q
Q
3
7
6
3
1
5
1
5
0
9
9
2
8
9
4
2
9
8
T
E
L
1
3
9
4
2
2
9
6
5
1
3
9
9
2
8
9
4
2
9
8
0
5
1
5
1
3
6
7
3
Q
Q
TEL 13942296513 QQ 376315150 892498299
http://www.xiaoyu163.com
8
S-102
各部のはずしかた
(組み立てるときは、逆の順序でおこなってください。)
● ADV-S102
1. ローダーパネルのはずしかた
(1) 電源を入れ「 (OPEN/CLOSE)」ボタンを押して、
ディスクトレイを開きます。
(2) ローダーパネルを持ち上げてはずします。
2. サイドパネルのはずしかた
(1) 底面よりネジを 4 本はずします。
(2) 裏面よりネジを 4 本はずし、サイドパネルを矢印
の方向へはずします。
DISASSEMBLY
(Follow the procedure below in reverse order when
reassembling.)
●ADV-S102
1. Loader Panel
(1) Switch on, and press [ (OPEN/CLOSE)] button
to open the Disc tray.
(2) Detach the Loader Panel by lifting.
2. Side Panel
(1) Remove 4 bottom screws.
(2) Remove 4 rear screws, then detach Side Panel.
w
w
w
.
x
i
a
o
y
u
1
6
3
.
c
o
m
Q
Q
3
7
6
3
1
5
1
5
0
9
9
2
8
9
4
2
9
8
T
E
L
1
3
9
4
2
2
9
6
5
1
3
9
9
2
8
9
4
2
9
8
0
5
1
5
1
3
6
7
3
Q
Q
TEL 13942296513 QQ 376315150 892498299
http://www.xiaoyu163.com
9
S-102
3. トップカバーのはずしかた
(1) トップカバーを止めているネジ 9 本をはずし、
トップカバーを矢印の方向へはずします。
4. DVD メカユニットのはずしかた
(1) メカユニットを止めているネジ 4 本をはずしま
す。
(2) メカユニットを矢印の方向にはずします。
(3) DVD メカユニットを持ち上げ、コネクタと FFC
をはずします。
(4)
3. Top Cover
(1) Remove 9 screws, then detach Top Cover.
4. DVD Mecha. Unit
(1) Remove 4 screws fixing the DVD Mecha.
(2) Detach the DVD Mecha. to the arrow direction.
(3) Lift the DVD Mecha. and disconnect FFC and con-
nectors.
w
w
w
.
x
i
a
o
y
u
1
6
3
.
c
o
m
Q
Q
3
7
6
3
1
5
1
5
0
9
9
2
8
9
4
2
9
8
T
E
L
1
3
9
4
2
2
9
6
5
1
3
9
9
2
8
9
4
2
9
8
0
5
1
5
1
3
6
7
3
Q
Q
TEL 13942296513 QQ 376315150 892498299
http://www.xiaoyu163.com
10
S-102
5. フロントパネルのはずしかた
(1) フロントパネルからの基板とシャーシを止めてい
るネジを 6 本はずします。
(2) フロントパネル側面を止めているネジ 4 本(左右
各 2 本)をはずし、フロントパネルをはずしま
す。
6. バックパネルのはずしかた
(1) 各端子を止めているネジおよびバックパネルと
シャーシを止めているネジをはずし、バックパネ
ルをはずします。
5. Front Panel Ass’y
(1) Remove 6 Front panel screws, then detach P.W.B.
and chassis.
(2) Remove 4 Front panel side screws, then detach the
Front Panel Ass’y.
6. Back Panel Ass’y
(1) Remove each terminal screws, Back Panel screws
and Chassis screws, then detach the Back Panel.
w
w
w
.
x
i
a
o
y
u
1
6
3
.
c
o
m
Q
Q
3
7
6
3
1
5
1
5
0
9
9
2
8
9
4
2
9
8
T
E
L
1
3
9
4
2
2
9
6
5
1
3
9
9
2
8
9
4
2
9
8
0
5
1
5
1
3
6
7
3
Q
Q
TEL 13942296513 QQ 376315150 892498299
http://www.xiaoyu163.com
11
S-102
● DSW-S102
1. Rearpanel
(1) 底面側から 101 のねじ 10 本をはずします。
(2) Rearpanelをはずします。
2. SHIELDCOVER
(1) 側面側から 103 のねじ 8 本をはずします。
(2) マイナスドライバーでシールドカバーを持ち上げては
ずします。このとき、メインブラケットのつめを変形
させないように注意してください。
●DSW-S102
1. Rear panel
(1) Remove 10 screws 101 on the bottom side.
(2) Detach the Rear panel.
2. SHIELD COVER
(1) Remove 8 screws 103 on the Side.
(2) Lift the shield cover using a flat-headed screwdriver and
remove it. When doing this, be careful not to deform the
main bracket's hook.
101
103
103
103
w
w
w
.
x
i
a
o
y
u
1
6
3
.
c
o
m
Q
Q
3
7
6
3
1
5
1
5
0
9
9
2
8
9
4
2
9
8
T
E
L
1
3
9
4
2
2
9
6
5
1
3
9
9
2
8
9
4
2
9
8
0
5
1
5
1
3
6
7
3
Q
Q
TEL 13942296513 QQ 376315150 892498299
http://www.xiaoyu163.com
12
S-102
DIAGNOSTICS OF OPTICAL PICKUP
AND REPLACING TRAVERSE UNIT
Make failure diagnostics of the Optical Pickup as follows.
If the laser drive current (Iop) becomes more than 1.5 times of
the initial value, the Optical Pickup should be replaced.
The laser drive current initial value is checked by "Iop checked
Method" of next page.
In case of replacing the Pickup, change the whole part of the
Traverse Unit.
No mechanical adjustment is necessary after the replace-
ment.
光ピックアップの故障診断とトラバース
ユニットの交換
次の順序で故障診断を行ってください。
レーザー駆動電流 Iop 値が初期値の 1.5 倍以上になっている
場合は光ピックアップ交換の目安となります。
レーザー駆動電流初期値は、次ページ "Iop 値の確認方法 " で
確認できます。
ピックアップ交換の場合は、トラバースユニット単位での交
換となります。メカの調整は不要です。
レーザー駆動電流初期値 :
Laser drive current initial value:
FLDisplay(Thedisplaypartof13digits)
12345678910111213
T22―mmmm―nnnn
FLDisplay(Thedisplaypartof13digits)
12345678910111213
T2 1 ―mmmm―nnnn
Disc no read, unsteady playback, etc.
Laser drive current (Iop) check
HF wave form check
(Refer to WAVE FORMS)
Traverse Unit replacing
Laser current (Iop) memorizing after replacement
Present value exceeds the ini-
tial value by 1.5 times
ディスクを読み込まない
スムーズに再生しない、等
レーザー駆動電流 Iop 値の確認
HF 波形の確認
(WAVEFORMS参照)
トラバースユニット交換
交換後にレーザー電流値の記憶
現在値が初期値の
1.5 倍になっている
CD:
DVD:
w
w
w
.
x
i
a
o
y
u
1
6
3
.
c
o
m
Q
Q
3
7
6
3
1
5
1
5
0
9
9
2
8
9
4
2
9
8
T
E
L
1
3
9
4
2
2
9
6
5
1
3
9
9
2
8
9
4
2
9
8
0
5
1
5
1
3
6
7
3
Q
Q
TEL 13942296513 QQ 376315150 892498299
http://www.xiaoyu163.com
13
S-102
1. Iop checked Method
Select the laser ON/OFF (CD/DVD) mode of the test mode,
and check the lop value of DVD laser or CD laser.
(See page 13 for test mode.)
1.1. DVD laser current check
(1) Press the SKIP or button to display the la-
ser current value, and then select T22.
(2) Check the current value of Iop (nnnn).
(−: Off, DVD laser, Initial value: mm.mm [mA],
Current value: nn.nn [mA])
1.2. CD Laser current check
(1) Press the or button to display the laser
current value, and then select T21.
(2) Check the current value of Iop (nnnn).
(−: Off, CD laser, Initial value: mm.mm [mA],
Current value: nn.nn [mA])
2. Note for Handling the Laser Pick-Up
The protection for the damage of laser diode.
If you want to change the optical device unit from any other
units, you must keep the following.
(1) It should be done at the desk already took measures the
static electricity in care of removing the OPU's (Optical
device unit) connector cable.
(2) Workers should be put on the "Earth Band".
(3) It should be done to add the solder to the short land to
prevent the broken Laser diode before removing the 24P
FFC cable.
(4) Don't touch OPU's connector parts carelessly.
3. Replacement of the Laser Pick-up
(Traverse Unit)
Check the Iop (Laser drive current)
If the present Iop (current) value exceeds.+150% of the ini-
tial value, replace the Traverse unit (Laser Pick-up) with a
new one.
FLDisplay(Thedisplaypartof13digits)
12345678910111213
T2 L a s e r O n O f f
FLDisplay(Thedisplaypartof13digits)
12345678910111213
T22―mmmm―nnnn
FLDisplay(Thedisplaypartof13digits)
12345678910111213
T2 1 ―mmmm―nnnn
1. Iop 値の確認方法
レーザー駆動電流を確認する場合は、テストモードのレー
ザー ON/OFF(CD/DVD) モードを選択して、DVD レーザー
または CD レーザーの lop 値を確認します。
(詳細は 13 ページ、テストモード参照)
1.1. DVD レーザー電流確認
(1) レーザー電流値を表示する場合は、 ボタンまたは
ボタンを押し、T22 を選択します。
(2) 現在の lop 値 (nnnn) を確認します。
( −:消灯、DVD レーザー、初期値:mm.mm[mA],
現在値:nn.nn[mA])
1.2. CD レーザー電流確認
(1) レーザー電流値を表示する場合は、 ボタンまたは
ボタンを押し、T21 を選択します。
(2) 現在の lop 値 (nnnn) を確認します。
( −:消灯、CD レーザー、初期値:mm.mm[mA],
現在値:nn.nn[mA])
2. レーザーピックアップの取扱注意
レーザーダイオードの破壊防止。
光素子ユニットを交換するときは、以下を遵守してくださ
い。
(1) 光素子ユニットの接続ケーブルをはずすときは、静電対
策を行ったデスク上で作業してください。
(2) 作業者は、リストストラップを使用してください。
(3) レーザーダイオードの破壊防止のため、24PFFC ケーブ
ルをはずす前にランドを半田付けショートしてくださ
い。
(4) 光素子ユニットのコネクタ部に触れないでください。
3. レーザーピックアップ ( トラバースユニッ
ト ) の交換
Iop( レーザー駆動電流)をチェックします。
現在の Iop 値が初期値の 150%を越えている場合、トラバー
スユニット(レーザーピックアップ)を交換してください。
FL 管の表示 (13 桁の表示部 )
12345678910111213
T2 L a s e r O n O f f
FL 管の表示 (13 桁の表示部 )
12345678910111213
T22―mmmm―nnnn
FL 管の表示 (13 桁の表示部 )
12345678910111213
T2 1 ―mmmm―nnnn
w
w
w
.
x
i
a
o
y
u
1
6
3
.
c
o
m
Q
Q
3
7
6
3
1
5
1
5
0
9
9
2
8
9
4
2
9
8
T
E
L
1
3
9
4
2
2
9
6
5
1
3
9
9
2
8
9
4
2
9
8
0
5
1
5
1
3
6
7
3
Q
Q
TEL 13942296513 QQ 376315150 892498299
http://www.xiaoyu163.com
14
S-102
4. Rewriting the default value of the laser
current
To rewrite the default value of the laser current, press the
button for at least 5 seconds while the CD or DVD laser
current is displayed, then press the or button
to select T23. (For details, see "Iop checked Method" on
page 22.)
If the button is pressed while T23 is displayed, the cur-
rent value is displayed at "mmmm" and stored in the EE-
PROM.
5. Resetting the accumulated laser on time
To clear the accumulated laser on time, press the button
while the accumulated laser on time is displayed (TB1, TB2
: For details, see "Test Mode" on page 22.) until " *" ap-
pears at the fourth position, then press the or
button to select TB3.
If the button is pressed while TB3 is displayed, the ac-
cumulated laser on time of CD and DVD is cleared.
When TB1 or TB2 is selected with the or but-
ton, "nnnnnnn" is displayed as 0 so you can check.
(−: Off, Y:1: CD, 2: DVD, nnnnnnn: Hour [h])
FLDisplay(Thedisplaypartof13digits)
12345678910111213
T2 3―mmmm―――――
FLDisplay(Thedisplaypartof13digits)
12345678910111213
TBY―――nnnnnnn
4. レーザー電流初期値の書き換え方法
レーザー電流の初期値を書き換えるには、CD または DVD
レーザー電流が表示されている時に ボタンを5秒以上押
し、次に ボタンまたは ボタンを押して T23 を
選択します。(詳細は 22 ページ、Iop 値の確認方法参照)
T23 表示時に ボタンを押と、mmmm 部に現在値を表示
し、EEPROM に保存します。
5. レーザー ON 累積時間のリセット方法
レーザーON 累積時間をクリアするには、レーザーON 累
積時間表示 (TB1,TB2) の時(詳細は 22 ページ、テストモー
ド参照)に ボタンを 4 桁目に ' * ' が表示されるまで押
し、 ボタンまたは ボタンを押し TB3 を表示させ
ます。
TB3 表示時に ボタンを押すと、CD 及び DVD レーザー
ON 累積時間をクリアします。
ボタンまたは ボタンで TB1 または TB2 を選択
すると、nnnnnnn 部が 0 表示となり確認できます。
( −:消灯、Y:1:CD,2:DVD、nnnnnnn:時間 [h])
FL 管の表示 (13 桁の表示部 )
12345678910111213
T2 3―mmmm―――――
FL 管の表示 (13 桁の表示部 )
12345678910111213
TBY―――nnnnnnn
w
w
w
.
x
i
a
o
y
u
1
6
3
.
c
o
m
Q
Q
3
7
6
3
1
5
1
5
0
9
9
2
8
9
4
2
9
8
T
E
L
1
3
9
4
2
2
9
6
5
1
3
9
9
2
8
9
4
2
9
8
0
5
1
5
1
3
6
7
3
Q
Q
TEL 13942296513 QQ 376315150 892498299
http://www.xiaoyu163.com
15
S-102
HOW TO REPLACE TRAVERSE UNIT
Caution: The optical pickup can be damaged easily by
static electricity charged on human body.
Take necessary anti-static measures when
repairing around the optical pickup.
1. Guide Clamp Bracket disassembly
(1) Remove 2 screws.
(2) Remove Guide Clamp Bracket to arrow direction.
2. Tray disassembly
(1) Remove to arrow direction.
(2) Solder the short-circuit (see in the frame).
Solder to short-circuit
Short-circuit with Solder
半田ショート
半田ショート拡大図
3. Traverse Unit disassembly
(1) Remove 24P FFC, 15P FFC and 5P PH WIRE connect-
ing with from the Main P.W.B.
(2) Remove 4 screws fixing Damper.
(3) Remove Traverse Unit to arrow direction.
Note for disassembly Traverse Unit
(1) When assembling, reverse the order of the above.
(2) When inserting Tray, confirm boss on Slide Cam set to
ditch of the Tray (Compare with below drawing).
トラバースユニットの交換方法
注意 : 光ピックアップは、人体に帯電した静電気等で静電
破壊することがあります。光ピックアップ周辺を修
理する際は、必要な静電対策を行ってください。
1. ガイドクランプブラケットのはずしかた
(1) ねじ 2 本をはずします。
(2) ガイドクランプブラケットを矢印方向にとりはずしま
す。
2. トレイのはずしかた
(1) 矢印方向にとりはずします。
(2) 半田付けショートを行います。(枠内図参照 )
3. トラバースユニットのはずしかた
(1) メイン基板に接続している 24PFFC、15PFFC、5PPH
ワイヤをはずします。
(2) ダンパーを固定しているねじ 4 本をはずします。
(3) トラバースユニットを矢印方向にとりはずします。
トラバースユニット分解の注意
(1) 組み立てるときは、上記の逆の順序で行ってください。
(2) トレイ組込み時、スライドカムのボスがトレイの溝に
合っているか確認してください。(下図参照)
w
w
w
.
x
i
a
o
y
u
1
6
3
.
c
o
m
Q
Q
3
7
6
3
1
5
1
5
0
9
9
2
8
9
4
2
9
8
T
E
L
1
3
9
4
2
2
9
6
5
1
3
9
9
2
8
9
4
2
9
8
0
5
1
5
1
3
6
7
3
Q
Q
TEL 13942296513 QQ 376315150 892498299
http://www.xiaoyu163.com
16
S-102
SERVICE MODE
1. Aging Mode
1.1. preparation0
(1) Equipment used: Any one of DVD Karaoke Disc (containing more than 10 titles).
(ex : Heat run disc TDV-HR01)
(2) Unit setting : No spec other than the following procedure.
1.2. procedure
※Perform aging of the DVD.
(1) Pressing the and buttons simultaneously, plug the AC cord into a power outlet, then press the ON/STANDBY button
to turn the power on. This sets the aging mode.
• Once the aging mode is set, press the FUNCTION button to switch the mode.
(After the display is put out at the switch, it selects.)
(a) To select the normal aging mode ... Start from (2)
(b) To select the error rate display mode ... Start from (8)
(2) Press the button and play all the tracks recorded on the disc.
(3) Both the " " and " " indicators light on the fluorescent display tube.
(4) When the button is pressed once with the tray open, titles 1 and 10 recorded on the disc are played.
(5) The " " indicator flashes and the " " indicator lights on the fluorescent display tube.
(6) Once playback is completed, open and close the tray and repeat the operation in step (3) or (4).
(7) If there is an error while in the aging mode, the error is displayed and the stop mode is set with the status at that time.
NOTE)・The FUNCTION button on the main unit and the FUNCTION selector button on the remote control unit will not work
during the aging mode.
(If the function is switched, the DVD stops and the aging mode is canceled.)
・The ON/STANDBY buttons on the main unit and the remote control unit will not work during the aging mode.
(If the set's power is turned off, the DVD stops and the aging mode is canceled.
(8) When the error rate display mode is set, the final error rate information is displayed on the fluorescent display tube.
No. Error contents FL display
1 Bad DIsc
2 Forcus Error
3 Read Error
4 Tracking Error
5TrayError
6 Navigation Pack Read Error
7 Cmmunication Error
FLDisplay(Thedisplaypartof13digits)
12345678910111213
E7 XX XX XX
サービスモードについて
1. エージングモード
1.1. 準備
(1) 使用機器:DVD カラオケディスク (10 タイトル以上のもの)
(例:ヒートランディスク TDV-HR01)
(2) 本体設定:下記設定以外規定無。
1.2. 手順
※ DVD のエージングをおこなう。
(1) 本体の ボタンと ボタンを同時に押しながら、AC コードをコンセントへ接続し、ON/STANDBY ボタンを押してセット
の電源を入れると、エージングモードが設定される。
・ エージングモード設定後、FUNCTION ボタンを押して、モードを切り替える。
(切り替え時に表示を出してから選択する。)
(a) 通常のエージングモードを選択・・・(2) から開始
(b) エラーレート表示モードを選択・・・(8) から開始
(2) ボタンを押し、ディスクに収録されている全ての曲を再生する。
(3) FL 管の インジケーターと インジケーターが両方とも点灯する。
(4) トレイを開いた状態で ボタンを 1 回押して、ディスクに収録されているタイトル 1 とタイトル 10 を再生する。
(5) FL 管の インジケーターが点滅し、 インジケーターが点灯する。
(6) 再生終了後、トレイを開閉させ (3) または (4) の動作をする。
(7) エージングモード中にエラーが発生すると、エラーを表示し、その時の状態で停止する。
注 )・ エージングモード中は、本体の FUNCTION ボタンおよび、リモコンの FUNCTION 切替ボタンは動作しない。
(ファンクッションを変えると DVD が停止し、エージングモードが解除される。)
・ エージングモード中は本体およびリモコンの ON/STANDBY ボタンを動作しない。
(セットの電源を OFF にすると DVD が停止し、エージングモードが解除される。)
(8) エラーレート表示モードに入ると、最終エラーレート情報を FL 管に表示する。
No. エラー内容 FL 管表示
1 不良ディスク
2 フォーカスエラー
3 リードエラー
4 トラッキングエラー
5 トレイエラー
6 ナビゲーションパックエラー
7 コマンド通信エラー
FL 管の表示 (13 桁の表示部 )
12345678910111213
E7 XX XX XX
w
w
w
.
x
i
a
o
y
u
1
6
3
.
c
o
m
Q
Q
3
7
6
3
1
5
1
5
0
9
9
2
8
9
4
2
9
8
T
E
L
1
3
9
4
2
2
9
6
5
1
3
9
9
2
8
9
4
2
9
8
0
5
1
5
1
3
6
7
3
Q
Q
TEL 13942296513 QQ 376315150 892498299
http://www.xiaoyu163.com
17
S-102
2. Initial Setting Mode
2.1. Preparation
(1) Equipment used: None
(2) Unit setting: No spec other than the following procedure.
2.2. Procedure
●SYSTEM
※This initializes the data for the function, volume, DVD mechanism, etc.
(1) When the ON/STANDBY button is pressed to turn the set on while pressing the main unit's FUNCTION and buttons
simultaneously, the initialization mode is set.
(2) The standby indicator lights yellow and "INITIALIZE" is displayed on the fluorescent display tube.
(3) Once the entire initialization procedure has been completed, the set is in the normal mode with the power turned on.
●DVD
※This initializes the data for the DVD mechanism.
(1) With the power on, set the function to DVD, and in the playback stopped mode, press the and buttons simultaneously
for at least 2 seconds to set the DVD initialization mode.
(2) "INITIALIZE" is displayed on the fluorescent display tube.
3. µcom Firm Check Mode
3.1. Preparation
(1) Equipment used: None
(2) Unit setting: No spec other than the following procedure.
3.2. Procedure
※Use this to display the version information, etc.
(1) When, in the standby mode, the ON/STANDBY button is pressed to turn the set on while pressing the main unit's FUNCTION
and buttons simultaneously, the system check mode is set.
(2) Press the STATUS button on the remote control unit to display the following information, in this order: System microprocessor
version →Date of system microprocessor version updating →DSP version →Date of DSP version updating →Drive micropro-
cessor version of DVD mechanism →ESS version →Date of ESS version updating.
(3) Unplug AC cord to clear this mode.
NOTE) The DVD mechanism driver version and ESS version are not displayed un less the function is once set to DVD.
2. イニシャルモード
2.1. 準備
(1) 使用機器:無
(2) 本体設定:下記手順以外規定無。
2.2. 手順
● システム
※ ファンクション、VOL 等および DVD メカのバックアップデータの初期化をおこなう。
(1) 本体 FUNCTION ボタンと ボタンを同時に押しながら、ON/STANDY ボタンを押してセットの電源を入れるとイニシャ
ルモードが設定される。
(2) スタンバイ LED が黄色に点灯し、FL 管にINITIALIZEが表示される。
(3) 全ての初期化完了後、通常モードの電源 ON の状態になる。
●DVD
※ DVD のみのバックアップデータの初期化をおこなう。
(1) 電源 ON 時にファンクッションを DVD にし再生停止状態で、 ボタンと ボタンを 2 秒以上同時に押し続けると、
DVD 初期化モードが設定される。
(2) FL 管にINITIALIZEが表示される。
3. マイコンファームチェックモード
3.1. 準備
(1) 使用機器:無
(2) 本体設定:下記手順以外規定無。
3.2. 手順
※ バージョン表示等をおこなう。
(1) STANDBY 時に本体 FUNCTION ボタンと ボタンを同時に押しながら、ON/STANDBY ボタンを押してセットの電源を入
れると、システムチェックモードが設定される。
(2) リモコンの STATUS ボタンを押すと、システムマイコンのバージョン→システムマイコンのバージョンアップ日→ DSP の
バージョン→ DSP のバージョンアップ日→ DVD メカのドライブマイコンのバージョン→ ESS のバージョン→ ESS のバー
ジョンアップ日の順に表示される。
(3) AC コードを抜くことにより、システムチェックモードを解除する。
注 ) DVD メカのドライブバージョン、ESS のバージョンの表示については、一度ファンクッションを DVD にしないと表示
されない。
w
w
w
.
x
i
a
o
y
u
1
6
3
.
c
o
m
Q
Q
3
7
6
3
1
5
1
5
0
9
9
2
8
9
4
2
9
8
T
E
L
1
3
9
4
2
2
9
6
5
1
3
9
9
2
8
9
4
2
9
8
0
5
1
5
1
3
6
7
3
Q
Q
TEL 13942296513 QQ 376315150 892498299
http://www.xiaoyu163.com
18
S-102
4. Test mode
4.1. Entering the test mode
To enter the test mode, press the and buttons simultaneously while in the Aging mode. Not insert the disc.
(The Aging mode is entered by pressing the and buttons simultaneously to turn on the AC power.
When the Aging mode is set, the and indicators light.)
FL tube display when test mode entered
4.2. Selecting the mode
The following modes are available.
(1) Laser on/off (CD/DVD) mode : T2
(2) Servo adjustment value display mode : T3
(3) Trace mode (error rate display) : T7
(4) Accumulated laser on time : TB
①When the button is pressed after entering the test mode, the display switches in the order: T2, T3, T7, TB, T2 …
Press and buttons simultaneously
Power turns on
Press and buttons simultaneously Aging mode
Test mode button
button Set the disc
Set the disc button
button Aging mode start
After the TOC reading
button
Test mode start
FLDisplay(Thedisplaypartof13digits)
12345678910111213
TEST MODE
FLDisplay(Thedisplaypartof13digits)
12345678910111213
T2 L a s e r O n O f f
FLDisplay(Thedisplaypartof13digits)
12345678910111213
T3 S e r v o A d j
FLDisplay(Thedisplaypartof13digits)
12345678910111213
T7 T r a c e M o d e
FLDisplay(Thedisplaypartof13digits)
12345678910111213
TB L a s e r O n T i m
4. テストモード
4.1. テストモードの設定
テストモードの設定はエージングモード時に ボタンと ボタンを同時に押すことでおこなう。ディスクは挿入していな
いこと。
( エージングモードの設定は ボタンと ボタンを同時に押しながら、AC コードをコンセントへ接続し、セットの電源を入れ
る。エージングモードになると FL 管の インジケーターと インジケーターが点灯する。)
テストモード設定時の FL 管表示
4.2. モードの選択
モードには、次のモードがある。
(1) レーザー ON/OFF(CD/DVD) モード : T2
(2) サーボ調整値表示モード : T3
(3) トレースモード ( エラーレート表示 ) : T7
(4) レーザー ON 累積時間 : TB
①テストモード中に ボタンを押すと、T2,T3,T7,TB,T2…の順に表示される。
ボタンと ボタンの同時押し
電源 ON
ボタンと ボタンの同時押し エージングモード
テストモード ボタン
ボタン ディスクを載せる
ディスクを載せる ボタン
ボタン エージング開始
TOC リード後
ボタン
テストモード開始
FL 管の表示 (13 桁の表示部 )
12345678910111213
TEST MODE
FL 管の表示 (13 桁の表示部 )
12345678910111213
T2 L a s e r O n O f f
FL 管の表示 (13 桁の表示部 )
12345678910111213
T3 S e r v o A d j
FL 管の表示 (13 桁の表示部 )
12345678910111213
T7 T r a c e M o d e
FL 管の表示 (13 桁の表示部 )
12345678910111213
TB L a s e r O n T i m
w
w
w
.
x
i
a
o
y
u
1
6
3
.
c
o
m
Q
Q
3
7
6
3
1
5
1
5
0
9
9
2
8
9
4
2
9
8
T
E
L
1
3
9
4
2
2
9
6
5
1
3
9
9
2
8
9
4
2
9
8
0
5
1
5
1
3
6
7
3
Q
Q
TEL 13942296513 QQ 376315150 892498299
http://www.xiaoyu163.com
19
S-102
4.3. Setting the mode
With the mode selected, press the button to set that mode.
①In the laser on/off (CD/DVD) mode, laser on/off control is executed and the laser current is displayed.
Press the or button to switch the CD/DVD (T21, T22, T21. .).
To save the current laser current value, press and hold in the button for at least 5 seconds to turn off the "mmmm" section
of the display, then press the or button and select T23. When the button is pressed while T23 is displayed, the
data is displayed in the "mmmm" section.
For the CD laser
(−: Off, CD laser, Stored data: mm.mm [mA], Current value: nn.nn [mA])
For the DVD laser
(−: Off, DVD laser, Stored data: mm.mm [mA], Current value: nn.nn [mA])
②In the servo adjustment value display mode (See "Table 1 - Servo adjustment value display mode details")
(XX : Selection mode, n : Adjustment value (HEX))
③In the trace mode (error rate display), select the trace of the innermost circumference of 1 layer.
(F : When address and error rate not set, F is displayed.)
④Displaying the accumulated laser on time (stored in the EEPROM)
(Y : 1:CD, 2:DVD, nnnnn: Time [h])
※Fractions of hours are counted up one hour on the display.
FLDisplay(Thedisplaypartof13digits)
12345678910111213
T21―mmmm―nnnn
FLDisplay(Thedisplaypartof13digits)
12345678910111213
T22―mmmm―nnnn
FLDisplay(Thedisplaypartof13digits)
12345678910111213
T X X −−−−−−nnnn
FLDisplay(Thedisplaypartof13digits)
12345678910111213
T71FFFFFFFFFF
FLDisplay(Thedisplaypartof13digits)
12345678910111213
T B Y―――nnnnnnn
4.3. モードの確定
モードを選択してある状態で ボタンを押すとモードを確定する。
①レーザーON/OFF(CD/DVD) モードの場合、レーザーのON/OFF 制御を実行し、レーザー電流を表示する。CD/DVD の切り替
えは、 ボタンまたは ボタンを押す (T21、T22、T21..)。
現在のレーザー電流値を保存する場合、 ボタンを 5 秒以上押し続け、mmmm 部を非表示にし、 ボタンまたは
ボタンを押して、T23 を選択する。T23 を表示時に ボタンを押すと、mmmm 部にデータが表示される。
CD レーザーの場合
( −:消灯、CD レーザー、保存データ:mm.mm[mA],現在値:nn.nn[mA])
DVD レーザーの場合
( −:消灯、DVD レーザー、保存データ:mm.mm[mA],現在値:nn.nn[mA])
②サーボ調整値表示モードの場合 (表 1 サーボ調整値表示モード詳細参照)
(XX: 選択モード、n: 調整値 (HEX))
③トレースモード ( エラーレート表示 ) の場合は、1層内周のトレースを選択する。
(F: アドレス及びエラーレートは未確定時、F を表示する。)
④レーザー ON 累積時間 (EEPROM に記憶 ) を表示する。
(Y:1:CD、2:DVD、nnnnn: 時間 [h]) 
※ 1 時間未満は切り上げて表示する。
FL 管の表示 (13 桁の表示部 )
12345678910111213
T21―mmmm―nnnn
FL 管の表示 (13 桁の表示部 )
12345678910111213
T22―mmmm―nnnn
FL 管の表示 (13 桁の表示部 )
12345678910111213
TXX――――――nnnn
FL 管の表示 (13 桁の表示部 )
12345678910111213
T71FFFFFFFFFF
FL 管の表示 (13 桁の表示部 )
12345678910111213
T B Y―――nnnnnnn
w
w
w
.
x
i
a
o
y
u
1
6
3
.
c
o
m
Q
Q
3
7
6
3
1
5
1
5
0
9
9
2
8
9
4
2
9
8
T
E
L
1
3
9
4
2
2
9
6
5
1
3
9
9
2
8
9
4
2
9
8
0
5
1
5
1
3
6
7
3
Q
Q
TEL 13942296513 QQ 376315150 892498299
http://www.xiaoyu163.com
20
S-102
4.4. Change within the mode
Changes within modes are made by pressing the and buttons while the mode is set.
①In the laser on/off (CD/DVD) mode, laser on/off control is executed and the laser current is displayed.
For the CD laser
(−: Off, CD laser, Stored data: mm.mm [mA], Current value: nn.nn [mA])
For the DVD laser
(−: Off, DVD laser, mm.mm [mA], nn.nn [mA])
When there is no saved data (for the DVD laser)
(−: Off, DVD laser, nn.nn [mA])
To store the current value, press the button for at least 5 seconds, then press the or button to select T23.
If the button is pressed while T23 is displayed, the current value is displayed at "mmmm" and stored in the EEPROM.
(−: Off, DVD laser, nn.nn [mA])
If the current value is over 100 mA, the 4th and 9th digit sections are used.
②In the servo adjustment value display mode (See "Table 1 - Servo adjustment value display mode details")
(XX : Selection mode, n: Adjustment value (HEX))
For the adjustment values, 0's are added in front of the effective number of bytes.
(Ex.: If the value is 0x123 for 4-byte data, "00 00 01 23" is displayed.)
⑤In the trace mode (error rate display) (See "Table 2 - Trace mode details")
(YY : Selection mode [71 to 94], F: When address and error rate not set, F is displayed.)
⑥In the accumulated laser on time display
(Y : 1: CD, 2: DVD, nnnnnnn: Time [h])  ※If the current value is over 100 mA, the 4th and 9th digit sections are used.
To clear the accumulated laser on time, press the button while the accumulated laser on time is displayed (TB1, TB2) until
"*" appears at the fourth position, then press the or button to select TB3.
If the PLAY button is pressed while TB3 is displayed, the accumulated laser on time of CD and DVD is cleared.
When TB1 or TB2 is selected with the or button, "nnnnnnn" is displayed as 0 so you can check.
FLDisplay(Thedisplaypartof13digits)
12345678910111213
T21―mmmm―nnnn
FLDisplay(Thedisplaypartof13digits)
12345678910111213
T22―mmmm―nnnn
FLDisplay(Thedisplaypartof13digits)
12345678910111213
T2 2 ――――――nnnn
FLDisplay(Thedisplaypartof13digits)
12345678910111213
T2 3 ―mmmm―nnnn
FLDisplay(Thedisplaypartof13digits)
12345678910111213
TXX――nnnnnnnn
FLDisplay(Thedisplaypartof13digits)
12345678910111213
TYYFFFFFFFFFF
FLDisplay(Thedisplaypartof13digits)
12345678910111213
T B Y―――nnnnnnn
4.4. モード内での変更
モードを確定してある状態で ボタンまたは ボタンを押すとモード内での変更をおこなう。
①レーザーON/OFF(CD/DVD) モードの場合、レーザーのON/OFF 制御を実行し、レーザー電流を表示する。
CD レーザーの場合
( −:消灯、CD レーザー、保存データ:mm.mm[mA],現在値:nn.nn[mA])
DVD レーザーの場合
( −:消灯、DVD レーザー、mm.mm[mA],nn.nn[mA])
保存データなしの場合 (DVD レーザーの場合 )
( −:消灯、DVD レーザー、nn.nn[mA])
現在地を保存するには、 ボタンを 5 秒以上押し、次に ボタンまたは ボタンを押して、T23 を選択する。T23 表
示時に、 ボタンを押すと、mmmm 部に現在値を表示し、EEPROM に保存される。
( −:消灯、DVD レーザー、mm.mm[mA])
電流値が 100mA 以上の場合は、4 桁、9 桁部分を使用。
②サーボ調整値表示モードの場合 (表 1 サーボ調整値表示モード詳細参照)
(XX: 選択モード、n: 調整値 (HEX))
調整値は、有効バイト数分先頭に 0 をつける。
(例:4 バイトデータで値が 0x123 の場合は00000123)
③トレースモード ( エラーレート表示 ) の場合(表 2 トレースモード詳細参照)
(YY: 選択モード [71 〜 94]、F: アドレス及びエラーレートは未確定時、F を表示する。)
⑥レーザー ON 累積時間を表示場合
(Y:1:CD,2:DVD、nnnnnn: 時間 [h])  ※ 1 時間未満は切り上げて表示する。
レーザー ON 累積時間をクリアする場合、レーザー ON 累積時間表示時 (TB1、TB2) のとき、 ボタンを 4 桁目に*が表
示されるまで押し、 ボタンまたは ボタンを押し、TB3 を表示させる。TB3 表示時に ボタンを押すと CD および
DVD レーザー ON 累積時間をクリアする。 ボタンまたは ボタンを押して、TB1 または TB2 を選択すると、
nnnnnn 部が 0 表示になり確認できる。
FL 管の表示 (13 桁の表示部 )
12345678910111213
T21―mmmm―nnnn
FL 管の表示 (13 桁の表示部 )
12345678910111213
T22―mmmm―nnnn
FL 管の表示 (13 桁の表示部 )
12345678910111213
T22――――――nnnn
FL 管の表示 (13 桁の表示部 )
12345678910111213
T2 3 ―mmmm―――――
FL 管の表示 (13 桁の表示部 )
12345678910111213
TXX――nnnnnnnn
FL 管の表示 (13 桁の表示部 )
12345678910111213
TYYFFFFFFFFFF
FL 管の表示 (13 桁の表示部 )
12345678910111213
T B Y―――nnnnnnn
w
w
w
.
x
i
a
o
y
u
1
6
3
.
c
o
m
Q
Q
3
7
6
3
1
5
1
5
0
9
9
2
8
9
4
2
9
8
T
E
L
1
3
9
4
2
2
9
6
5
1
3
9
9
2
8
9
4
2
9
8
0
5
1
5
1
3
6
7
3
Q
Q
TEL 13942296513 QQ 376315150 892498299
http://www.xiaoyu163.com

Other manuals for S-102

9

This manual suits for next models

3

Other Denon Home Theater System manuals

Denon DHT-S416 User manual

Denon

Denon DHT-S416 User manual

Denon ADV-M51 User manual

Denon

Denon ADV-M51 User manual

Denon DHT-588BA User manual

Denon

Denon DHT-588BA User manual

Denon S-32 User guide

Denon

Denon S-32 User guide

Denon S-101 User manual

Denon

Denon S-101 User manual

Denon DHT-1000DV User manual

Denon

Denon DHT-1000DV User manual

Denon DHT-S316 User manual

Denon

Denon DHT-S316 User manual

Denon S-101 User manual

Denon

Denon S-101 User manual

Denon S-102 Administrator guide

Denon

Denon S-102 Administrator guide

Denon DHT-488BA Administrator guide

Denon

Denon DHT-488BA Administrator guide

Denon DHT FS5 - X-SPACE Surround System Home Theater Speaker... User manual

Denon

Denon DHT FS5 - X-SPACE Surround System Home Theater Speaker... User manual

Denon DHT-S316 User manual

Denon

Denon DHT-S316 User manual

Denon S-102 User manual

Denon

Denon S-102 User manual

Denon S-301 User manual

Denon

Denon S-301 User manual

Denon DHT-788BA User manual

Denon

Denon DHT-788BA User manual

Denon DRA CX3 - Audiophile Stereo AM/FM Lifier User guide

Denon

Denon DRA CX3 - Audiophile Stereo AM/FM Lifier User guide

Denon DHT-S514 User manual

Denon

Denon DHT-S514 User manual

Denon AVR-1909 User manual

Denon

Denon AVR-1909 User manual

Denon S-102 User manual

Denon

Denon S-102 User manual

Denon S-102 Administrator guide

Denon

Denon S-102 Administrator guide

Denon DHT-FS3 User manual

Denon

Denon DHT-FS3 User manual

Denon DHT-684XP User manual

Denon

Denon DHT-684XP User manual

Denon DHT-682XP User manual

Denon

Denon DHT-682XP User manual

Denon S-302 Administrator guide

Denon

Denon S-302 Administrator guide

Popular Home Theater System manuals by other brands

Magnat Audio VC 2 user manual

Magnat Audio

Magnat Audio VC 2 user manual

Bose 3-2-1 GS Series III owner's guide

Bose

Bose 3-2-1 GS Series III owner's guide

THOMSON DPL909VD user manual

THOMSON

THOMSON DPL909VD user manual

LG LHD687 owner's manual

LG

LG LHD687 owner's manual

Yamaha AV-S70 owner's manual

Yamaha

Yamaha AV-S70 owner's manual

Sony HT-XT1 operating instructions

Sony

Sony HT-XT1 operating instructions

Philips MCD759D user manual

Philips

Philips MCD759D user manual

Sony NHS-2000 installation manual

Sony

Sony NHS-2000 installation manual

LG HT964TZ owner's manual

LG

LG HT964TZ owner's manual

Philips HTS3562 manual 

Philips

Philips HTS3562 manual 

Panasonic SC-HT520 operating instructions

Panasonic

Panasonic SC-HT520 operating instructions

Sony HT-DDW650 operating instructions

Sony

Sony HT-DDW650 operating instructions

Pioneer XV-DV232 operating instructions

Pioneer

Pioneer XV-DV232 operating instructions

Philips HTD5580/51 user manual

Philips

Philips HTD5580/51 user manual

Sony DAV-DZ280 Quick setup guide

Sony

Sony DAV-DZ280 Quick setup guide

Philips Immersive 3000 series quick start guide

Philips

Philips Immersive 3000 series quick start guide

Sony HT-CT660 operating instructions

Sony

Sony HT-CT660 operating instructions

Philips HTB7255D/98 user manual

Philips

Philips HTB7255D/98 user manual

manuals.online logo
manuals.online logoBrands
  • About & Mission
  • Contact us
  • Privacy Policy
  • Terms and Conditions

Copyright 2025 Manuals.Online. All Rights Reserved.