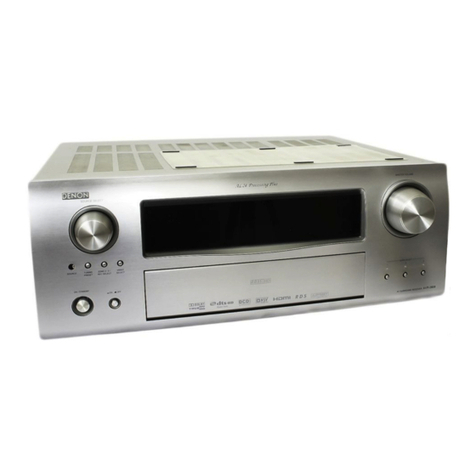
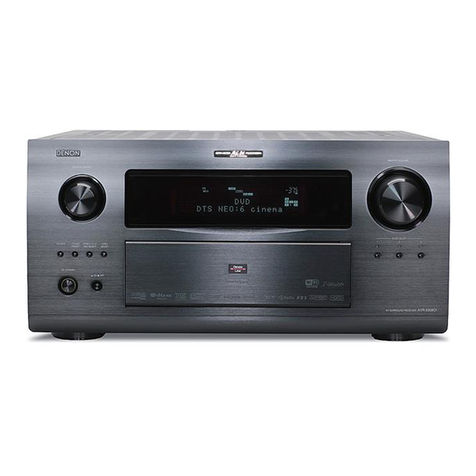
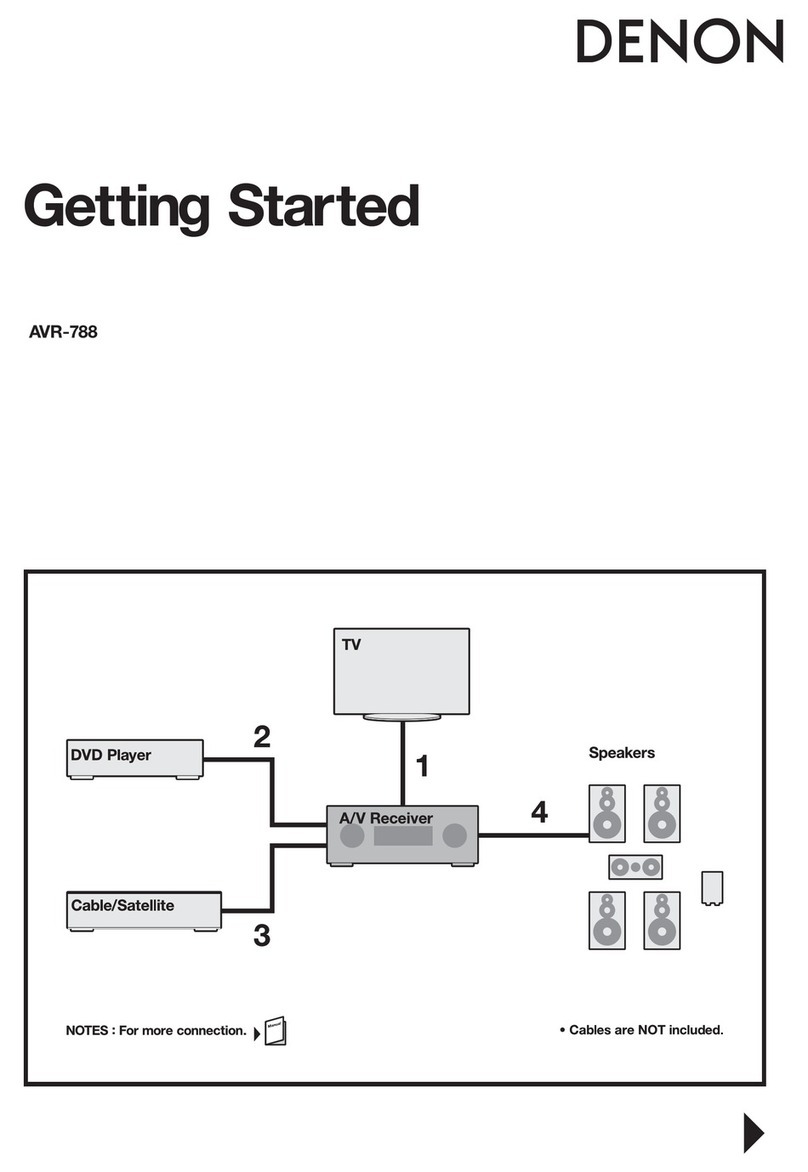
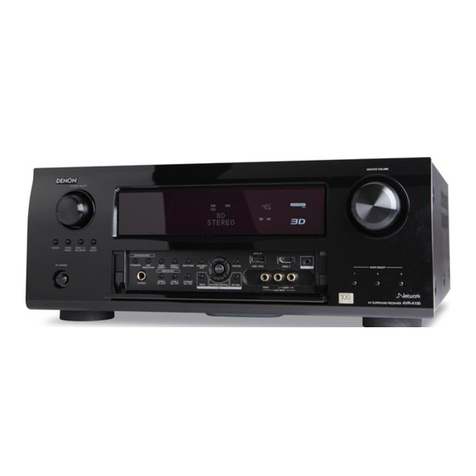
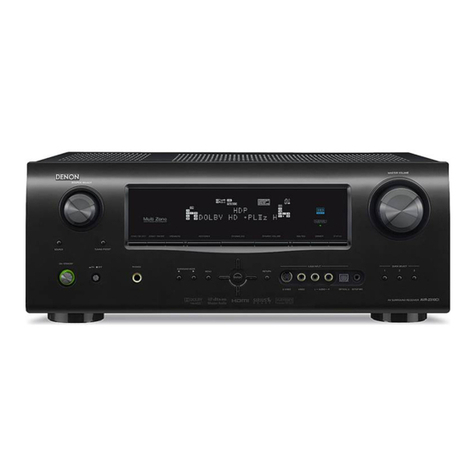
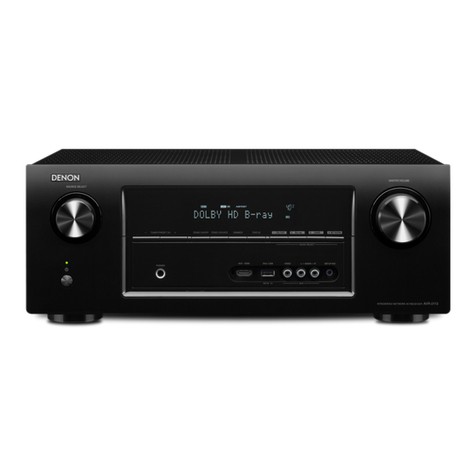
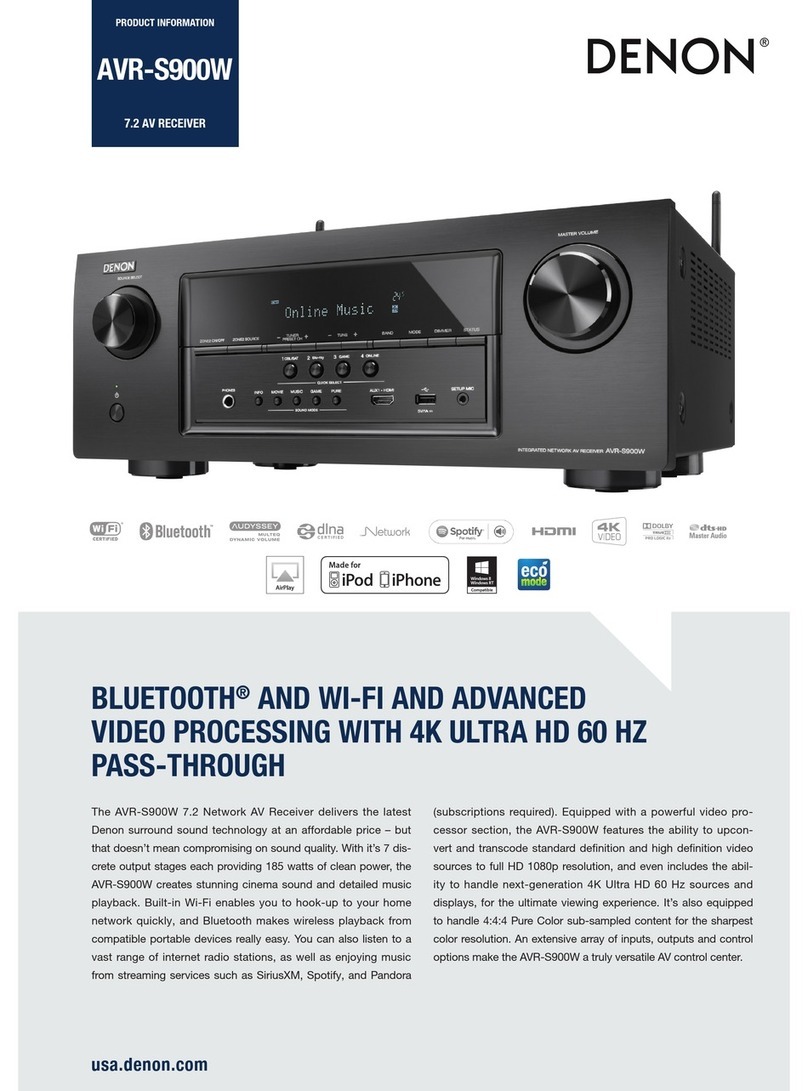
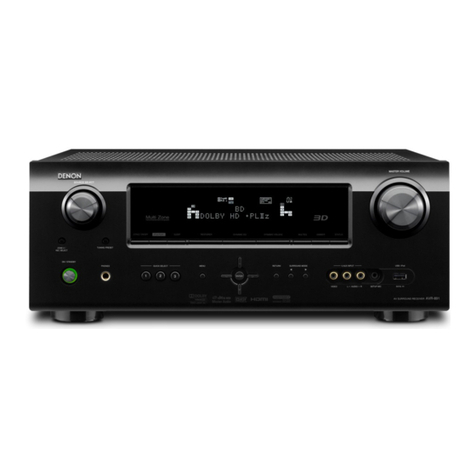
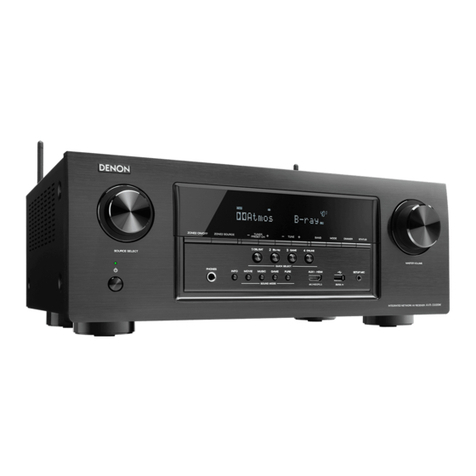
Denon AVR-390 User manual

AV SURROUND RECEIVER
AVR-390
Owner’s Manual
Bedienungsanleitung
Manuel de l’Utilisateur
Manual del usuario
Инструкция по эксплуатации
Instrukcja Obsługi
Kullanım Kılavuzu

I
CAUTION:
To completely disconnect this product from the mains, disconnect
the plug from the wall socket outlet.
The mains plug is used to completely interrupt the power supply
to the unit and must be within easy access by the user.
VORSICHT:
UmdiesesGerätvollständigvonderStromversorgungabzutrennen,
ziehen Sie bitte den Stecker aus der Wandsteckdose.
Der Netzstecker wird verwendet, um die Stromversorgung zum
Gerät völlig zu unterbrechen; er muss für den Benutzer gut und
einfach zu erreichen sein.
PRECAUTION:
Pour déconnecter complètement ce produit du courant secteur,
débranchez la prise de la prise murale.
La prise secteur est utilisée pour couper complètement
l’alimentation de l’appareil et l’utilisateur doit pouvoir y accéder
facilement.
PRECAUCIÓN:
Para desconectar completamente este producto de la alimentación
eléctrica, desconecte el enchufe del enchufe de la pared.
El enchufe de la alimentación eléctrica se utiliza para interrumpir por
completo el suministro de alimentación eléctrica a la unidad y debe
de encontrarse en un lugar al que el usuario tenga fácil acceso.
• DECLARATION OF CONFORMITY
We declare under our sole responsibility that this product, to which this
declaration relates, is in conformity with the following standards:
EN60065, EN55013, EN55020, EN61000-3-2 and EN61000-3-3.
Following the provisions of 2006/95/EC and 2004/108/EC Directive.
• ÜBEREINSTIMMUNGSERKLÄRUNG
Wir erklären unter unserer Verantwortung, daß dieses Produkt, auf das
sich diese Erklärung bezieht, den folgenden Standards entspricht:
EN60065, EN55013, EN55020, EN61000-3-2 und EN61000-3-3.
Entspricht den Verordnungen der Direktive 2006/95/EC und 2004/108/
EC.
• DECLARATION DE CONFORMITE
Nous déclarons sous notre seule responsabilité que l’appareil, auquel se
réfère cette déclaration, est conforme aux standards suivants:
EN60065, EN55013, EN55020, EN61000-3-2 et EN61000-3-3.
D’après les dispositions de la Directive 2006/95/EC et 2004/108/EC.
• DECLARACIÓN DE CONFORMIDAD
Declaramos bajo nuestra exclusiva responsabilidad que este producto al
que hace referencia esta declaración, está conforme con los siguientes
estándares:
EN60065, EN55013, EN55020, EN61000-3-2 y EN61000-3-3.
Siguiendo las provisiones de las Directivas 2006/95/EC y 2004/108/EC.
• СЕРТИФИКАТ СООТВЕТСТВИЯ
Мыгарантируем,чтоданныйпродукт,ккоторомуприлагаетсяданный
сертификат,соответствуеттребованиямследующихстандартов:
EN60065,EN55013,EN55020,EN61000-3-2иEN61000-3-3.
Согласноусловиямдиректив2006/95/ECи2004/108/EC.
• DEKLARACJA ZGODNOŚCI
Deklarujemy z pełną odpowiedzialnością, że produkt, którego dotyczy
niniejszadeklaracja,jestzgodnyznastępującyminormami:
EN60065, EN55013, EN55020, EN61000-3-2 oraz EN61000-3-3.
Zgodnośćzzaleceniamidyrektywy2006/95/ECoraz2004/108/EC.
• UYGUNLUK BEYANI
Sorumluluğutamamenkendimizeaitolarak;işbubeyankonusuürünün
aşağıdakistandartlarauygunolduğunubeyanederiz:
EN60065, EN55013, EN55020, EN61000-3-2 ve EN61000-3-3.
2006/95/ECve2004/108/ECsayılıYönergehükümlerinitakiben.
nSAFETY PRECAUTIONS
CAUTION
RISK OF ELECTRIC SHOCK
DO NOT OPEN
CAUTION:
TO REDUCE THE RISK OF ELECTRIC SHOCK, DO NOT REMOVE
COVER (OR BACK). NO USER-SERVICEABLE PARTS INSIDE.
REFER SERVICING TO QUALIFIED SERVICE PERSONNEL.
Thelightningashwitharrowheadsymbol,withinanequilateral
triangle, is intended to alert the user to the presence of
uninsulated “dangerous voltage” within the product’s enclosure
that may be of sufcient magnitude to constitute a risk of
electric shock to persons.
The exclamation point within an equilateral triangle is intended
to alert the user to the presence of important operating
and maintenance (servicing) instructions in the literature
accompanying the appliance.
WARNING:
TO REDUCE THE RISK OF FIRE OR ELECTRIC SHOCK, DO NOT
EXPOSE THIS APPLIANCE TO RAIN OR MOISTURE.
DENON EUROPE
Division of D&M Germany GmbH
An der Landwehr 19, Nettetal,
D-41334 Germany
ОСТОРОЖНО:
Длятогочтобыполностьюотключитьданныйпродуктотсети,
выньтештепсельнуювилкукабеляпитанияизрозеткиt.
При установке данного продукта убедитесь в том, что
используемаярозетканаходитсявзонедосягаемости.
UWAGA:
Wcelucałkowitegoodłączeniategourządzeniaodzasilania,należy
wyjąćwtyczkęzgniazdaelektrycznego.
Przewód zasilający umożliwia całkowite odłączenie dopływu
zasilania do urządzenia i musi być łatwo dostępny dla
użytkownika.
DİKKAT:
Ürününelektriklebağlantısınıtamamenkesmekiçinşi,duvardaki
prizdençekiniz.
Elektrik prizi, cihaza gelen elektriği bütünüyle kesmek için
kullanılmakta olup kullanıcının kolayca erişebileceği bir yerde
olmalıdır.
РУССКИЙ POLSKI TÜRKÇEDEUTSCH FRANCAISENGLISH ESPAÑOL
nFor EU countries

II
• Avoid high temperatures.
Allowforsufcientheatdispersionwheninstalledinarack.
• Vermeiden Sie hohe Temperaturen.
BeachtenSie, dasseineausreichendeBelüftunggewährleistet
wird, wenn das Gerät auf ein Regal gestellt wird.
• Eviter des températures élevées.
Tenircompted’unedispersiondechaleursufsantelorsde
l’installation sur une étagère.
• Evite altas temperaturas.
Permite la suciente dispersión del calor cuando está
instalado en la consola.
•Избегайтевысокихтемператур.
Учитывайте значительное распределение тепла при
установкеустройстванаполку.
• Unikaj wysokich temperatur.
Jeśliurządzeniejestustawione w szafce,należyzapewnić
odpowiedniącyrkulacjępowietrza.
•Yükseksıcaklıklardankaçınınız.
Bir raf içinde kuruluysa yeterli ısı dağılımı olmasına dikkat
ediniz.
• Handle the power cord carefully.
Hold the plug when unplugging the cord.
• Gehen Sie vorsichtig mit dem Netzkabel um.
Halten Sie das Kabel am Stecker, wenn Sie den Stecker
herausziehen.
• Manipuler le cordon d’alimentation avec précaution.
Tenir la prise lors du débranchement du cordon.
• Maneje el cordón de energía con cuidado.
Sostenga el enchufe cuando desconecte el cordón de
energía.
•Будьте осторожны при включении/отключении кабеля
питания.
Привключении/отключениикабеляпитанияберитесьза
вилку.
•Obchodźsięostrożniezprzewodemzasilającym.
Odłączając przewód z gniazda elektrycznego, trzymaj
zawszezawtyczkę.
•Güçkablosunudikkatlikullanınız.
Kabloyuştençekerkenprizdentutunuz.
• Keep the unit free from moisture, water, and dust.
• Halten Sie das Gerät von Feuchtigkeit, Wasser und Staub
fern.
• Protéger l’appareil contre l’humidité, l’eau et la poussière.
• Mantenga el equipo libre de humedad, agua y polvo.
•Неподвергайтеустройствовоздействиювлаги,водыи
пыли.
•Chrońurządzenieprzedwilgocią,wodąipyłem.
• Üniteyi nem, su ve tozdan uzak tutunuz.
• Unplug the power cord when not using the unit for long
periods of time.
• Wenn das Gerät längere Zeit nicht verwendet werden soll,
trennen Sie das Netzkabel vom Netzstecker.
• Débrancher le cordon d’alimentation lorsque l’appareil
n’est pas utilisé pendant de longues périodes.
• Desconecte el cordón de energía cuando no utilice el
equipo por mucho tiempo.
•Если устройство не будет использоваться в течение
длительноговремени,отключитекабельпитанияотсети.
•Odłączprzewódzasilającyzsieci,jeśliurządzenieniejest
używaneprzezdłuższyczas.
•Ünite uzun süre kullanılmayacaksa ünitenin kablosunu
prizdençekiniz.
* (For apparatuses with ventilation holes)
• Do not obstruct the ventilation holes.
• Decken Sie den Lüftungsbereich nicht ab.
• Ne pas obstruer les trous d’aération.
•Noobstruyalosoriciosdeventilación.
•Незакрывайтевентиляционныеотверстия.
• Nie zakrywaj otworów wentylacyjnych.
•Havalandırmadeliklerinikapatmayınız.
• Do not let foreign objects into the unit.
•
Lassen Sie keine fremden Gegenstände in das Gerät kommen.
• Ne pas laisser des objets étrangers dans l’appareil.
• No deje objetos extraños dentro del equipo.
•Следите, чтобы посторонние предметы не попадали
внутрьустройства.
•Zwróć uwagę, aby do środka urządzenia nie dostały się
żadneobceprzedmioty.
•Üniteyeyabancıcisimgirmesineizinvermeyiniz.
• Do not let insecticides, benzene, and thinner come in
contact with the unit.
• Lassen Sie das Gerät nicht mit Insektiziden, Benzin oder
Verdünnungsmitteln in Berührung kommen.
• Ne pas mettre en contact des insecticides, du benzène et
un diluant avec l’appareil.
• No permita el contacto de insecticidas, gasolina y
diluyentes con el equipo.
•Предохраняйте устройство от воздействия
ядохимикатов,бензинаирастворителей.
•Chroń urządzenie przed kontaktem z środkami
owadobójczymi,benzynąorazrozpuszczalnikiem.
•Böcekilacı,benzenvetinergibimaddeleriüniteyletemas
ettirmeyiniz.
• Never disassemble or modify the unit in any way.
• Versuchen Sie niemals das Gerät auseinander zu nehmen
oder zu verändern.
•Nejamaisdémonteroumodierl’appareild’unemanière
ou d’une autre.
•Nuncadesarmeomodiqueelequipodeningunamanera.
•Никогда не разбирайте и не модифицируйте
устройство.
•Nierozbieraj urządzenia oraz niedokonujwnimżadnych
modykacji.
•Üniteyiaslahiçbirşekildesökmeyinizveüzerindedeğişiklik
yapmayınız.
nNOTE ON USE / HINWEISE ZUM GEBRAUCH / OBSERVATIONS RELATIVES A L’UTILISATION / NOTAS SOBRE EL USO /
ЗАМЕЧАНИЯ ПО ЭКСПЛУАТАЦИИ / WSKAZÓWKI DOTYCZĄCE OBSŁUGI / KULLANIM NOTLARI
DEUTSCHFRANCAISESPAÑOLPOLSKITÜRKÇE ENGLISHРУССКИЙ
CAUTION:
• The ventilation should not be impeded by covering the ventilation openings with items,
such as newspapers, tablecloths, curtains, etc.
•Nonakedamesources,suchaslightedcandles,shouldbeplacedontheunit.
• Observe and follow local regulations regarding battery disposal.
•Donotexposetheunittodrippingorsplashinguids.
•Donotplaceobjectslledwithliquids,suchasvases,ontheunit.
ACHTUNG:
• Die Belüftung sollte auf keinen Fall durch das Abdecken der Belüftungsöffnungen durch
Gegenstände wie beispielsweise Zeitungen, Tischtücher, Vorhänge o. Ä. behindert
werden.
• Auf dem Gerät sollten keinerlei direkte Feuerquellen wie beispielsweise angezündete
Kerzen aufgestellt werden.
• Bitte beachten Sie bei der Entsorgung der Batterien die örtlich geltenden
Umweltbestimmungen.
• Das Gerät sollte keiner tropfenden oder spritzenden Flüssigkeit ausgesetzt werden.
• Auf dem Gerät sollten keine mit Flüssigkeit gefüllten Behälter wie beispielsweise Vasen
aufgestellt werden.
ATTENTION:
• La ventilation ne doit pas être gênée en recouvrant les ouvertures de la ventilation avec
des objets tels que journaux, rideaux, tissus, etc.
•Aucuneammenue,parexempleunebougie,nedoitêtreplacéesurl’appareil.
• Veillez à respecter les lois en vigueur lorsque vous jetez les piles usagées.
• L’appareil ne doit pas être exposé à l’eau ou à l’humidité.
• Ne pas poser d’objet contenant du liquide, par exemple un vase, sur l’appareil.
PRECAUCIÓN:
• La ventilación no debe quedar obstruida por haberse cubierto las aperturas con objetos
como periódicos, manteles, cortinas, etc.
•Nodebecolocarsesobreelaparatoningunafuenteinamablesinprotección,comovelas
encendidas.
• A la hora de deshacerse de las pilas, respete la normativa para el cuidado del medio
ambiente.
• No exponer el aparato al goteo o salpicaduras cuando se utilice.
• No colocar sobre el aparato objetos llenos de líquido, como jarros.
ОСТОРОЖНО:
•Незакрывайтевентиляционныеотверстиятакимипредметами,какгазеты,скатерти,
шторыидр.
•Не размещайте на поверхности аппарата источники открытого огня, например
свечи.
•Обратитевниманиенаэкологическиеаспектыутилизациибатарейпитания.
•Следите,чтобынаустройствонепроливаласьвода.
•Нерасполагайтеемкости,вкоторыхсодержитсявода,наустройстве.
UWAGA:
•Nienależyograniczaćwentylacjiurządzenia,np.poprzezzakrycieotworówwentylacyjnych
gazetami,obrusem,zasłonamiitp.
•Naurządzeniuniewolnostawiaćżadnychźródełotwartegoognia,np.zapalonychświec.
•Przestrzegajlokalnychprzepisówdotyczącychutylizacjibaterii.
•Chrońurządzenieprzezzachlapaniemlubkapaniemwszelkichcieczy.
•Niestawiajnaurządzeniużadnychprzedmiotównapełnionychwodą,np.wazonów.
DİKKAT:
•Havalandırma gazete, masa örtüsü, perde ve benzeri cisimlerle kapatılarak
engellenmemelidir.
•Yananmumgibiaçıkalevkaynağıcisimleriüniteyeyaklaştırmayınız.
•Pillerinatılmasıileilgiliyerelyasavedüzenlemelereriayetediniz.
•Üniteyi,üzerinesıvıdamlamaveyasıçramaihtimaliolanyerlerdebulundurmayınız.
•Vazogibisıvıyladolucisimleriüniteninüzerinekoymayınız.
A NOTE ABOUT RECYCLING:
This product’s packaging materials are recyclable and can be reused. Please dispose of any
materials in accordance with the local recycling regulations.
When discarding the unit, comply with local rules or regulations.
Batteries should never be thrown away or incinerated but disposed of in accordance with the local
regulations concerning battery disposal.
This product and the supplied accessories, excluding the batteries, constitute the applicable
product according to the WEEE directive.
HINWEIS ZUM RECYCLING:
Das Verpackungsmaterial dieses Produktes ist zum Recyceln geeignet und kann wieder verwendet
werden. Bitte entsorgen Sie alle Materialien entsprechend der örtlichen Recycling-Vorschriften.
Beachten Sie bei der Entsorgung des Gerätes die örtlichen Vorschriften und Bestimmungen.
Die Batterien dürfen nicht in den Hausmüll geworfen oder verbrannt werden; bitte entsorgen Sie
die Batterien gemäß der örtlichen Vorschriften.
Dieses Produkt und das im Lieferumfang enthaltene Zubehör (mit Ausnahme der Batterien!)
entsprechen der WEEE-Direktive.
UNE REMARQUE CONCERNANT LE RECYCLAGE:
Les matériaux d’emballage de ce produit sont recyclables et peuvent être réutilisés. Veuillez
disposer des matériaux conformément aux lois sur le recyclage en vigueur.
Lorsque vous mettez cet appareil au rebut, respectez les lois ou réglementations en vigueur.
Les piles ne doivent jamais être jetées ou incinérées, mais mises au rebut conformément aux lois
en vigueur sur la mise au rebut des piles.
Ce produit et les accessoires inclus, à l’exception des piles, sont des produits conformes à la
directive DEEE.
ACERCA DEL RECICLAJE:
Los materiales de embalaje de este producto son reciclables y se pueden volver a utilizar. Disponga de estos
materiales siguiendo los reglamentos de reciclaje de su localidad.
Cuando se deshaga de la unidad, cumpla con las reglas o reglamentos locales.
Las pilas nunca deberán tirarse ni incinerarse. Deberá disponer de ellas siguiendo los reglamentos de su localidad
relacionados con los desperdicios químicos.
Este producto junto con los accesorios empaquetados es el producto aplicable a la directiva RAEE excepto pilas.
III
ПРИМЕЧАНИЕ О ПЕРЕРАБОТКЕ:
Упаковочный материал данного продукта может быть переработан и повторно использован. Пожалуйста,
сортируйтематериалывсоответствиисместнымитребованиямипереработки.
Приутилизацииопределенныхблоковсоблюдайтеместныеправилаутилизации.
Невыбрасывайтеинесжигайтебатарейки,соблюдайтеместныеправилаутилизациихимическихотходов.
ДанныйпродуктиаксессуарывупаковкесоответствуютдирективеWEEE,исключаябатарейки.
INFORMACJE DOTYCZĄCE RECYKLINGU:
Opakowanieurządzeniazostałowykonanezmateriałównadającychsiędowtórnegoprzetworzenia.Utylizacjęwszelkich
materiałównależyprzeprowadzićzgodniezobowiązującymilokalnymiprzepisamidotyczącymirecyklingu.
Urządzenienależyzutylizowaćzgodniezlokalnymiprzepisami.
Bateriiniewolnowyrzucaćdośmiecilubpalić.Należyjezutylizowaćzgodniezobowiązującymizasadamidotyczącymi
utylizacji baterii.
Niniejszy produkt oraz dostarczone wraz z nim akcesoria (oprócz baterii) stanowią właściwy produkt, zgodnie z
dyrektywąWEEE.
GERİ DÖNÜŞÜME İLİŞKİN NOT:
Buürününambalajıgeridönüştürülebilirveyenidenkullanılabilirniteliktedir.Materyallerilütfenyerelgeridönüşüm
yasavedüzenlemelerineuygunbiçimdeatınız.
Üniteyihurdayaçıkartırkenmahalliyasavedüzenlemelereriayetediniz.
Pilleraslarastgeleatılmamalıveyakılmamalı,bununyerinepilatıklarınailişkinmahalliyasavedüzenlemelereuygun
biçimdeimhaedilmelidir.
Buürünveberaberindegelenaksesuarları,pillerihariçolmakkaydıyla,WEEEyönergesiuyarıncakapsamiçiürün
niteliğindedir.
РУССКИЙ POLSKI TÜRKÇEDEUTSCH FRANCAISENGLISH ESPAÑOL

ENGLISH
Accessories······················································································ 2
Cautions on Handling····································································· 2
Cautions on Installation································································· 2
About the Remote Control Unit ···················································· 3
Inserting the Batteries ··································································· 3
Operating Range of the Remote Control Unit······························· 3
Part Names and Functions····························································· 4
Front Panel····················································································· 4
Display ··························································································· 4
Rear Panel······················································································ 5
Remote Control Unit (RC-1115)····················································· 6
Preparations···················································································· 7
Cables Used for Connections························································ 7
Speaker Connections ····································································· 8
Speaker Installation ······································································· 8
Speaker Connections ···································································· 8
Connecting Equipment with HDMI Connectors························· 10
Connecting the Monitor······························································· 11
Connecting the Playback Components······································· 11
DVD Player··················································································· 11
CD Player ····················································································· 12
iPod®··························································································· 12
TV/CABLE Tuner··········································································· 12
Connecting the Recording Components····································· 13
Video Cassette Recorder····························································· 13
CD Recorder / MD Recorder / Tape Deck ··································· 13
Connections to Other Devices····················································· 13
Video Camera / Game Console ··················································· 13
Component with Multi-channel Output Connectors··················· 14
Antenna Terminals ······································································ 14
Connecting the Power Cord ························································ 14
Once Connections are Completed ·············································· 14
Menu Map ····················································································· 15 Selecting the Surround Mode······················································ 19
Stereo Playback ············································································ 19
Getting Started
Connections
Operations
Operations····················································································· 15
Example of Display of Default Values········································· 15
Power On Level············································································· 16
Menu Operations
System Setup
Surround Modes
Tone Control ················································································· 20
Bass ····························································································· 20
Treble··························································································· 20
Night Mode ··················································································· 21
Dolby PLgMusic··········································································· 21
Panorama····················································································· 21
Center Width ··············································································· 21
Dimension···················································································· 21
Parameter
Information ········································································· 21
nContents
Assign ···························································································· 16
iPod Assign
Speaker Conguration ································································· 16
Front Speaker ·············································································· 16
Center Speaker············································································ 16
Surround Speaker········································································ 16
Subwoofer ··················································································· 17
Subwoofer Mode Setup······························································· 17
Distance························································································· 17
Unit ······························································································ 17
Distance measurement ······························································· 17
Crossover Frequency···································································· 17
Speaker Setup
Channel Level Setup
Preparations·················································································· 22
Turning the Power On ································································· 22
Selecting the Input Source·························································· 22
Switching between Digital Audio Input and
Analog Audio Input······································································ 22
Operations During Playback························································ 23
Playing Video and Audio Equipment ·········································· 23
Basic Operation ··········································································· 23
Listening to FM/AM Broadcasts·················································· 23
Basic Operation ··········································································· 23
Automatically Presetting FM Stations (Auto Preset)··················· 23
Presetting FM/AM Stations Manually ········································· 24
Listening to Preset Stations ························································ 24
Performing Preset Search ··························································· 24
RDS (Radio Data System)···························································· 24
RDS Search·················································································· 25
PTYSearch ·················································································· 25
TP Search····················································································· 25
iPod®Playback············································································· 26
Preparations················································································· 26
Listening to Audio ······································································· 26
Viewing Still Pictures or Videos on the iPod ······························· 27
Playback
Adjusting the Current Channel Level·········································· 18
Memorizing the Adjusted Channel Levels·································· 18
Select the Channel Level······························································ 18

Connections Setup Playback Information Troubleshooting
ENGLISH
Specications
Check that the following parts are supplied with the product.
qOwner’s manual...................................................................... 1
wGetting Started........................................................................ 1
eService station list................................................................... 1
rRemote control unit (RC-1115) ............................................... 1
tR03/AAA batteries................................................................... 2
yFM indoor antenna.................................................................. 1
uAM loop antenna..................................................................... 1
ryu
Thank you for purchasing this DENON product. To ensure proper
operation, please read this owner’s manual carefully before using the
product.
After reading them, be sure to keep them for future reference.
Getting Started
Accessories
Getting Started
• Before turning the power switch on
Check once again that all connections are correct and that there are
no problems with the connection cables.
•
Power is supplied to some of the circuitry even when the unit is
set to the standby mode. When traveling or leaving home for long
periods of time, be sure to unplug the power cord from the power
outlet.
•About condensation
If there is a major difference in temperature between the inside of
the unit and the surroundings, condensation (dew) may form on
the operating parts inside the unit, causing the unit not to operate
properly.
If this happens, let the unit sit for an hour or two with the power
turned off and wait until there is little difference in temperature
before using the unit.
• Cautions on using mobile phones
Using a mobile phone near this unit may result in noise. If so, move
the mobile phone away from this unit when it is in use.
• Moving the unit
Turn off the power and unplug the power cord from the power
outlet.
Next, disconnect the connection cables to other system units
before moving the unit.
•
Note that the illustrations in these instructions may differ from the
actual unit for explanation purposes.
bNote
bWall
b
b
Cautions on Handling
Cautions on Installation
Note:
For proper heat dispersal, do not install this unit in a conned
space, such as a bookcase or similar enclosure.
Other Operations·········································································· 28
Recording on an External Device ················································ 28
Convenient Functions ·································································· 28
Adjusting Each Channel Level with Test Tone···························· 28
Personal Memory Plus Function ················································· 29
Last Function Memory ································································ 29
Backup Memory ·········································································· 29
Other Operations and Functions
Other Information ·························································· 30
Troubleshooting ······························································ 32
Specications···································································· 34
Resetting the Microprocessor ····················································· 29
Tuning Interval Change································································ 29
Special Mode

Connections Setup Playback Information Troubleshooting
ENGLISH
Specications
Inserting the Batteries
NOTE
•Replace the batteries with new ones if the set does not operate
even when the remote control unit is operated close to the unit.
•The supplied batteries are only for verifying operation.
•When inserting the batteries, be sure to do so in the proper direction,
following the “q” and “w” marks in the battery compartment.
•Topreventdamageorleakageofbatteryuid:
•Do not use a new battery together with an old one.
•Do not use two different types of batteries.
•Do not attempt to charge dry batteries.
•Do not short-circuit, disassemble, heat or dispose of batteries in
ames.
•Ifthebatteryuidshouldleak,carefullywipetheuidofftheinside
of the battery compartment and insert new batteries.
•Remove the batteries from the remote control unit if it will not be in
use for long periods.
•When replacing the batteries, have the new batteries ready and
insert them as quickly as possible.
30°
30°
Approx. 7 m
Operating Range of the Remote Control
Unit
Point the remote control unit at the remote sensor when operating
it.
NOTE
The set may function improperly or the remote control unit may not
operate if the remote control sensor is exposed to direct sunlight,
strongarticiallightfromaninvertertypeuorescentlamporinfrared
light.
About the Remote Control Unit
qLift the clasp and remove the rear cover.
ePut the rear cover back on.
R03/AAA
wLoad the two batteries properly as indicated
by the marks in the battery compartment.
Getting Started

Connections Setup Playback Information Troubleshooting
ENGLISH
Specications
For buttons not explained here, see the page indicated in parentheses ( ).
q ew r t y u i o Q0 Q1
Q2Q7 Q6 Q5 Q4 Q3
qPower operation button
(ON/STANDBY)··········································· (22)
wPower indicator ·········································· (22)
eHeadphone jack (PHONES)························ (23)
rSTATUS button ····································· (21, 23)
tPRESET buttons (df) ································ (24)
yTUNING buttons (df)································ (23)
uDIGITAL INPUTS button····························· (22)
iMEMORY / ENTER button ············· (15, 18, 24)
oV. AUX INPUT connectors
Remove the cap covering the connectors when
you want to use them.
Fit the cap when not using the V.AUX INPUT
connectors. Fitting the cap keeps out dust, etc.
Q0 NIGHT button·············································· (21)
Q1 SURROUND buttons ·································· (19)
Q2 MASTER VOLUME control knob ··············· (23)
Q3 SETUP button ············································· (15)
Q4 SELECT buttons (uio
p)························ (15)
Q5 Display··························································· (4)
Q6 Remote control sensor································· (3)
Q7 INPUT SELECT buttons······························ (22)
Front Panel
y t r e
q w
qDecoder indicators
These light when the respective decoders are
operating.
wDIGITAL input indicator
This lights when set to digital input (vpage
22).
ePRESET indicator
This lights when the input source is “TUNER”.
rMEMORY indicator
This lights when registering preset numbers
(vpage 23).
t Information display
y Tuner reception mode indicators
These light according to the reception conditions
when the input source is set to “TUNER”.
•RDS
This lights when receiving RDS broadcasts.
•TP
This lights when receiving TP broadcasts.
•PTY
ThisashesduringPTYsearch.
•ST.
In the FM mode, this lights when receiving
stereo broadcasts.
•TUNED
This lights when the broadcast is properly tuned
in.
Part Names and Functions
Display
Getting Started

Connections Setup Playback Information Troubleshooting
ENGLISH
Specications
q w e r t y u
i
o
Q0Q1
qDigital audio connectors
(OPTICAL / COAXIAL)························ (10 ~ 13)
wEXT. IN connectors····································· (14)
eAnalog audio connectors
(AUDIO) ··············································· (10 ~ 13)
rPRE OUT connector······································ (8)
tFM/AM antenna terminals
(TUNER ANTENNA) ···································· (14)
yVIDEO / S-VIDEO connectors············ (11 ~ 13)
uSpeaker terminals (SPEAKERS)··················· (8)
iPower cord ·················································· (14)
oCOMPONENT VIDEO connectors······ (11 ~ 13)
Q0 HDMI connectors································ (10 ~ 13)
Q1 DOCK CONTROL jack································· (12)
Rear Panel
Getting Started

Connections Setup Playback Information Troubleshooting
ENGLISH
Specications
d
f
q
w
e
r
t
y
u
i
o
Q0
Q1
Q2
Q3
Q4 W3
W4
W2
W1
W0
Q9
Q8
Q7
Q6
Q5
q Remote control signal transmitter·············· (3)
wPower buttons ············································ (22)
e Number buttons ········································· (24)
rPRESETS button ········································· (24)
tTest Tone button (TEST)····························· (28)
yDigital Input button (D. INPUTS)··············· (22)
uSURROUND PARAMETER button·············· (21)
iSETUP button ············································· (15)
oSelect buttons (uio p)··························· (15)
Q0
Memory (MEMO) / ENTER button
··· (15, 18, 24)
Q1 Channel select button (CH SEL)················ (18)
Q2 NIGHT button·············································· (21)
Q3 STEREO button··········································· (19)
Q4 SURROUND buttons (01)······················· (19)
Q5 Input select buttons ··································· (22)
Q6 BAND button··············································· (23)
Q7 STATUS button ····································· (21, 23)
Q8 DIMMER button·········································· (23)
Q9 Master volume control buttons················· (23)
W0 TONE button ··············································· (20)
W1 MUTE button··············································· (23)
W2 SEARCH button ···································· (25, 26)
W3 CHANNEL (+ –) buttons······························ (24)
W4 System button for iPod use······················· (27)
Remote Control Unit (RC-1115)
Getting Started

Getting Started Setup Playback Information Troubleshooting
ENGLISH
Specications
Audio cables Video cables
Coaxial digital connections
(Orange)
Coaxialdigital(75Ω/ohmspin-plug)cable
Optical digital connections
Optical cable
Analog connections (stereo)
(White)
(Red)
R
L
R
L
Stereo pin-plug cable
Analog connections (monaural, for subwoofer)
(Black)
Pin-plug cable
Speaker connections
Speaker cables
Component video connections
(Green)
(Blue)
(Red)
(Y)
(PB/CB)
(PR/CR)
Component video cable
S-Video connections
S-Video cable
Video connections
(Yellow)
75Ω/ohmspin-plugvideocable
Audio and video cables
HDMI connections
19-pin HDMI cable
Signal direction
Audio signal: Video signal:
Output
Input
Input
Output
Output
Input
Input
Output
Cables Used for Connections
Select the cables according to the equipment being connected.
Preparations
Connections
NOTE
•Do not plug in the power cord until all connections have been
completed.
•When making connections, also refer to the operating instructions
of the other components.
•Be sure to connect the left and right channels properly (left with left,
right with right).
•Do not bundle power cords together with connection cables. Doing
so can result in humming or noise.
Connections for all compatible audio and video signal formats
are described in this owner’s manual. Please select the types of
connections suited for the equipment you are connecting.
With some types of connections, certain settings must be made
on the AVR-390. For details, refer to the instructions for the
respective connection items below.
Connections

Getting Started Setup Playback Information Troubleshooting
ENGLISH
Specications
The illustration below shows a basic example of installation of the AVR-390 combined with 6 speakers
and a monitor.
Speaker Installation
Subwoofer Center speaker
Surround speakers
Front speakers
Place the front speakers to the
sides of the monitor or screen and
asushwiththescreensurfaceas
possible.
ThetablebelowshowsatypicalspeakercongurationfortheAVR-390.
FRONT CENTER SURROUND SUBWOOFER
L R L R
5.1-channels S S S S S S
3.1-channels S S S – – S
2.1-channels S S – – – S
2-channels S S – – – –
Speaker Connections
w q w q
w q w q
*/
w q
(R)(L)
(L) (R)
Speaker Connections
Front speakers Center speakerSubwoofer
Subwoofer
with built-in
amplier
bL : Left
R : Right
Surround speakers
Connections

Getting Started Setup Playback Information Troubleshooting
ENGLISH
Specications
Connecting the Speaker Cables
Carefully check the left (L) and right (R) channels and + (red) and
– (black) polarities on the speakers being connected to the AVR-390,
and be sure to interconnect the channels and polarities correctly.
1Peel off the sheath from the tip
of the speaker cable, then rmly
twist the wires by hand so that they
do not stick out and cause short-
circuits.
2Turn the speaker terminal counterclockwise
to loosen it.
3Insert the speaker cable’s core wire to the
hilt into the speaker terminal.
4Turn the speaker terminal clockwise to
tighten it.
NOTE
•Usespeakerswithanimpedanceof6to16Ω/ohms.
•Connect the speaker cables in such a way that they do not stick out
of the speaker terminals. The protection circuit may be activated if
the core wires touch the rear panel or if the + and – sides touch each
other (v“Protection circuit”).
•Never touch the speaker terminals while the power supply is
connected. Doing so could result in electric shock.
Protection circuit
If the core wires touch the rear panel and the screws etc., or the ±
sides touch each other, the protection circuit will be activated and
thepowerindicatorwillashredatintervalsof0.5secs.
If the protection circuit is activated, the speaker output is isolated,
and the power supply goes to the standby state. If the power
supply is turned off, after the power cord is withdrawn, please
conrmthatspeakercableandinputcableareconnected.
Also, if replaying large sound levels by using a speaker having an
impedancelessthanthatspecied(eg,4Ω/ohms),thetemperature
will rise, and the protection circuit might be activated. The power
supply will go into the standby state, and the power indicator will
ashredat2secondintervals.
In this case, please switch off the power supply, and wait until the
AVR-390 has cooled down, and the surrounding ventilation is good.
Even if there are no problems with the surrounding ventilation
and connections, in the event of the protection circuit becoming
activated, due to thinking that the AVR-390 has failed, please
contact DENON Service center after switching off.
Sheath
Connections

0
Getting Started Setup Playback Information Troubleshooting
ENGLISH
Specications
065
)%.*
*/
)%.*
"6%*0
"6%*0
3-
065 065
$0"9*"-
R
L
R
L
MonitorDVD player
bThe AVR-390 is equipped for HDMI version 1.3a. This version is compatible with other versions, allowing
connection to all components equipped with an HDMI connector.
bThe AVR-390 is compatible with 30- and 36-bit Deep Color.
bThe AVR-390 can be connected to a device equipped with an HDMI output connector using an HDMI
cable.
bTheAVR-390iscompatiblewithHDMIVer.1.3aDeepColorandxvYCC.
•The audio and video signals input to the AVR-390’s HDMI input connector are output unchanged from
the HDMI output connector. Because of this, the sound is output from the monitor connected using the
HDMI connectors, but in order to take full advantage of the AVR-390’s playback sound, turn the TV’s
volume down.
•If the connected monitor or DVD player only has a DVI-D connector, use an HDMI/DVI converter cable.
When using a DVI cable, no audio signals are transmitted.
•Use a Deep Color compatible cable for connection to Deep Color compatible devices.
When connecting with an HDMI/DVI converter cable (adapter)
•HDMI video signals are theoretically compatible with the DVI format.
When connecting to a monitor, etc., equipped with a DVI-D connector, connection is possible using
an HDMI/DVI converter cable, but depending on the combination of components in some cases the
video signals will not be output.
•When connecting using an HDMI/DVI converter adapter, the video signals may not be output properly
due to poor connections with the connected cable, etc.
NOTE
•The AVR-390 cannot be controlled from another device via the HDMI cable.
•Video signals are not output if the input video signals do not match the monitor’s resolution. In this
case, switch the DVD player’s resolution to a resolution with which the monitor is compatible.
•UseacableonwhichtheHDMIlogoisindicated(acertiedHDMIproduct)forconnectiontotheHDMI
connector. Normal playback may not be possible when using a cable other than one on which the HDMI
logoisindicated(anon-HDMI-certiedproduct).
•If the monitor or DVD player does not support Deep Color, deep color signal transfer is not possible.
•IfthemonitororDVDplayerdoesnotsupportxvYCC,xvYCCsignaltransferisnotpossible.
When HDMI input signals are sent to the monitor as HDMI output, both video and audio are output to
the monitor.
Connecting Equipment with HDMI Connectors
NOTE
The audio signal input to the HDMI input connector cannot be played on the AVR-390. Input the
audio signal to the digital audio input connector or analog audio input connector.
Connections

Getting Started Setup Playback Information Troubleshooting
ENGLISH
Specications
47*%&0
065
"6%*0 7*%&0
$0.10/&/57*%&0
: 1#13
7*%&0
065065
"6%*0
3-
065 065
)%.*
065
$0"9*"-
R
L
R
L
Select the terminal to use and connect the device.
47*%&0
*/
7*%&0
$0.10/&/57*%&0
: 1#13
7*%&0
*/
)%.*
*/ */
Monitor
Connecting the Monitor
NOTE
•The AVR-390 supports four video
input formats: HDMI, component
video, S-Video and video.
Because video signals are output
from the AVR-390’s monitor output
terminal in the same format as the
video input signals, the monitor
output terminal should be of the
same type as the terminal used
for input.
•The component video connectors
may be indicated differently on
your monitor. For details, see the
monitor’s operating instructions.
•To play the sound by AVR-390,
make analog or digital audio output
connections to AVR-390’s audio
input connectors.
GFlow of video signals inside the AVR-390H
High picture
quality playback HDMI connector
Component video
connectors
S-Video connector
Video connector
Monitor
HDMI connector
Component video
connectors
S-Video connector
Video connector
Video input terminals Monitor output
terminals
Carefully check the left (L) and right (R) channels and the inputs and outputs, and be sure to interconnect
correctly.
Connecting the Playback Components
DVD Player
Select the terminal to use and connect the device.
DVD player
ThesamemethodcanbeusedtoconnectanHDP(High-DenitionPlayer)suchasaBlu-rayDiscplayer.
NOTE
The audio signal input to
the HDMI input connector
cannot be played on the
AVR-390. Input the audio
signal to the digital audio
input connector or analog
audio input connector.
NOTE
Because video signals are output from the AVR-390’s monitor output terminal in the same format as the
video input signals, the monitor output terminal should be of the same type as the terminal used for
input.
Connections

Getting Started Setup Playback Information Troubleshooting
ENGLISH
Specications
"6%*0
"6%*0
3-
065065
$0"9*"-
R
L
R
L
CD Player
Select the terminal to use and connect the device.
CD player
iPod®
"4%/8
RL
RL
iPod
•With the default settings, the iPod can be used connected to the
VCR (iPod) connector.
•To assign the iPod to a connector other than VCR (iPod), make the
settings at “iPod Assign” – “Assign” (vpage 16).
Use a DENON control dock for iPod (ASD-1R, ASD-11R, ASD-3N or
ASD-3W, sold separately) to connect the iPod to the AVR-390. For
instructions on the control dock for iPod settings, refer to the control
dock for iPod’s operating instructions.
NOTE
To playback iPod Video or Photos on a TV monitor, connect the
TV to the S-Video Out terminal of AVR-390.
ASD-3N or
ASD-3W
47*%&0
3-
065
"6%*0 7*%&0
065
"6%*0 7*%&0
065
015*$"-
065 065
)%.*
$0.10/&/57*%&0
: 1#13
065
R
L
R
L
TV/CABLE Tuner
Select the terminal to use and connect the device.
TV Tuner
NOTE
The audio signal input to the HDMI input connector cannot be
played on the AVR-390. Input the audio signal to the digital audio
input connector or analog audio input connector.
NOTE
Because video signals are output from the AVR-390’s monitor output
terminal in the same format as the video input signals, the monitor
output terminal should be of the same type as the terminal used
for input.
Connections

Getting Started Setup Playback Information Troubleshooting
ENGLISH
Specications
Video Camera / Game Console
065
"6%*07*%&0
7*%&0 "6%*0
3-
065
R
L
R
L
Video camera /
Game console
Carefully check the left (L) and right (R) channels and the inputs
and outputs, and be sure to interconnect correctly.
Select the terminal to use and connect the device.
Connections to Other Devices
3- 3-
*/ 065
"6%*0"6%*0
"6%*0
R
L
R
L
R
L
R
L
CD Recorder / MD Recorder / Tape
Deck
Select the terminal to use and connect the device.
CD recorder /
MD recorder /
Tape deck
Connect AUDIO CD-R/TAPE OUT terminals when audio
recording. When connecting a CD recorder, MD recorder
or tape deck to AVR-390, be sure also to connect these
terminals beforehand.
Video Cassette Recorder
Select the terminal to use and connect the device.
•When recording via the AVR-390, the playback device’s cable must be of the
same type as the cable used to connect the AVR-390’s VCR OUT connector.
Example: DVD IN →Video cable : VCR OUT →Video cable
•Connect AUDIO and VIDEO VCR OUT terminals when video recording. When
connecting a video cassette recorder to AVR-390, be sure also to connect these
terminals beforehand.
47*%&0
3-
3-
*/*/
065
"6%*0 "6%*07*%&0 7*%&0
065
"6%*0
"6%*0 7*%&0 7*%&0
065
015*$"-
065 065
)%.*
$0.10/&/57*%&0
: 1#13
065
R
L
R
L
R
L
R
L
Video cassette recorder
Carefully check the left (L) and right (R) channels and the inputs and outputs, and
be sure to interconnect correctly.
Connecting the Recording Components
NOTE
Digital signals are not output from the REC OUT (CD-R/TAPE and VCR)
connector.
Connections

Getting Started Setup Playback Information Troubleshooting
ENGLISH
Specications
Antenna Terminals
An FM antenna cable plug can be connected directly.
Direction of broadcasting station
AM loop antenna
(supplied) FM antenna
75Ω/ohms
Coaxial cable
FM indoor
antenna
(supplied)
Ground
AM outdoor
antenna
NOTE
•Do not connect two FM antennas simultaneously.
•Even if an external AM antenna is used, do not disconnect the AM
loop antenna.
•Make sure the AM loop antenna lead terminals do not touch metal
parts of the panel.
-a -b
n AM loop antenna assembly
q :Remove the vinyl tie and take out the connection line.
w :Bend in the reverse direction.
e-a :With the antenna on top of any stable surface.
e-b :With the antenna attached to a wall.
Mount Installation hole Mount on wall, etc.
Connection of AM antennas
1. Push the lever. 2. Insert the conductor. 3. Return the lever.
Wait until all connections have been completed before connecting
the power cord.
Connecting the Power Cord
To household
power outlet
(AC 230 V, 50 Hz)
Power cord
NOTE
Insert the AC plugs securely. Incomplete connections could cause
noise.
Component with Multi-channel Output
Connectors
$&/5&3 46#
800'&3
'30/5
3-
463306/%
3-
"6%*0
R
L
R
L
R
L
R
L
DVD player / External decoder
•To play the analog input signals input to the EXT. IN connectors,
press the EXT. IN button (vpage 22).
•The video signal can be connected in the same way as a DVD player
(vpage 11).
•To play copyright-protected discs, connect the AVR-390’s EXT.
IN connector with the DVD player’s analog multi-channel output
connector.
Select the terminal to use and connect the device.
Turning the Power On (vpage 22)
Once Connections are Completed
Connections

Getting Started Playback Information Troubleshooting
ENGLISH
Specications
1Press SETUP.
“SYSTEM”isdisplayed.
2Press ui to select the item you want to set, then
press ENTER.
3Press ui again to select the item you want to set,
then press ENTER.
4To change the setting:
Press ui to select the item you want to change, then
press op to change the setting.
[Selectable items] SL
In lists of selectable items or adjustable ranges, the item
surrounded by a border is the default value.
d
f
SETUP ENTER
uiop
SETUPENTER
op ui
Button located on both the main unit and the remote
control unit BUTTON
Button only on the main unit <BUTTON>
Button only on the remote control unit [BUTTON]
Symbols used to indicate buttons in this manual
n To move to a setup item of another category
Press ui to select “RETURN“, then press ENTER.
•Returns to the setup menu.
•Perform steps 3 and 4.
nTo exit setup
Press SETUP while the setup menu is displayed.
•The display returns to normal.
Operations
The same operation is possible on the main unit or remote control
unit.
Menu Operations
Example of Display of Default
Values
Parameter (vpage 20, 21)
nTone Control
• Bass
• Treble
nNight Mode
nDolby PLgMusic
• Panorama
• Center Width
• Dimension
Menu Map
Operations
System Setup (vpage 16)
n Power On Level
iPod Assign (vpage 16)
nAssign
Speaker Setup (vpage 16, 17)
n Speaker Conguration
• Front Speaker
• Center Speaker
• Surround Speaker
• Subwoofer
n Subwoofer Mode Setup
nDistance
• Unit
• Distance measurement
n Crossover Frequency
Channel Level Setup (vpage 18)
n Adjusting the Current Channel Level
n Memorizing the Adjusted Channel Levels
n Select the Channel Level
Connections Setup

Getting Started Playback Information Troubleshooting
ENGLISH
Specications
System Setup
Power On Level
This sets the volume set when the main zone’s power is turned
on.
[Variable range]
LAST :Displays the volume before the power was turned off.
0 ~ 60 :Set the volume level when the power is turned on in units
of 1 dB.
iPod Assign
Assign
Assign control dock for iPod to this source.
[Assignable input source]
VCR DVD CD CD-R / TAPE z1AUX V.AUX z2OFF
z1: The display shows “CDR”.
z2: The display shows “V.A”.
Speaker Setup
Speaker Conguration
Selectspeakercongurationandsize(bassreproductioncapability).
Front Speaker
Select front speaker size.
Center Speaker
Select center speaker use and size.
Surround Speaker
Select surround speakers use and size.
[Selectable items] LSN
[Selectable items] LSN
[Selectable items] LS
[Display] [Display]
[Display]
•The display shows “MIN” when you select “0 dB”.
•When the volume is 60 dB or more, a 60 dB volume is resumed when
you turn the power off and then on again.
Connections Setup
For details on how to select, set and cancel settings for each menu, see “Menu Operations” (vpage 15).
Table of contents
Other Denon Receiver manuals

Denon
Denon DN-700AV User manual

Denon
Denon AVR-X3100W User manual

Denon
Denon AVR 2808CI - AV Receiver User manual

Denon
Denon AVR 1508 - AV Receiver Administrator guide

Denon
Denon DN-200AVB User manual

Denon
Denon AVR-X510BT User manual

Denon
Denon DN-200WS User manual

Denon
Denon DRA-697CI User manual

Denon
Denon AVR-588 Instruction Manual

Denon
Denon AVR-888 Administrator guide

Denon
Denon AVR-3806 Instruction Manual

Denon
Denon AVR-1804 User manual

Denon
Denon AVR-3806 Manual

Denon
Denon Ceol Piccolo DRA-N4 User manual

Denon
Denon IN-Command AVR-X4000 User manual

Denon
Denon AVR-A100 User manual

Denon
Denon AVR-1909 User manual

Denon
Denon AVR-S960H User manual

Denon
Denon AVR-888 User manual

Denon
Denon AVR-4810 User manual