manuals.online logo
Brands
  1. Home
  2. •
  3. Brands
  4. •
  5. Denon
  6. •
  7. Recording Equipment
  8. •
  9. Denon CDR-WI500 User manual

Denon CDR-WI500 User manual

CD RECORDER
CDR-WI500
OPERATING INSTRUCTIONS
MODE D’EMPLOI
INSTRUCCIONES DE OPERACION
FOR ENGLISH READERS PAGE 5-PAGE 35
POUR LES LECTEURS FRANCAIS PAGE 36-PAGE 66
PARA LECTORES DE ESPAtiOL PAGINA 67 - PAGINA 97
CAUTION:
TO REDUCE THE RISK OF ELECTRIC SHOCK, DO NOT REMOVE COVER
(OR BACK). NO USER SERVICEABLE PARTS INSIDE. REFER SERVICING
TO QUALIFIED SERVICE PERSONNEL.
A
The lightning flash with arrowhead symbol, withln an equilateral triangle, is intended to alert the
user to the presence of uninsulated “dangerous voltage” within the product’s enclosure that may
be of sufficient magnitude to constitute a risk of electric shock to persons.
A
The exclamation point wlthin an equilateral triangle ISintended to alert the user to the presence of
important operating and maintenance (servicing) instructions In the literature accompanying the
appliance.
WARNING:
TO REDUCE THE RISK OF FIRE OR ELECTRIC SHOCK, DO NOT EXPOSE
THIS APPLIANCE TO RAIN OR MOISTURE.
LABELS
(for US A model only)
l FOR U.S.A. & CANADA MODEL ONLY
CERTIFICATION
THIS PRODUCT COMPLIES WITH DHHS RULES 21 CFR
SUBCHAPTER J APPLICABLE AT DATE OF MANUFACTURE
CAUTION:
USE OF CONTROLS OR ADJUSTMENTS OR
PERFORMANCE OF PROCEDURES OTHER THAN THOSE
SPECIFIED HEREIN MAY RESULT IN HAZARDOUS
RADIATION EXPOSURE.
THE COMPACT DISC PLAYER SHOULD NOT BE ADJUSTED
OR REPAIRED BY ANYONE EXCEPT PROPERLY QUALIFIED
SERVICE PERSONNEL.
This device complles with Part 15 of the FCC Rules.
Operation ISsubject to the followlng two condltlons :
(1) This device may not cause harmful interference,
and (2) this device must accept any Interference
received. Including Interference that may cause
undesired operation
This Class B dIgItal apparatus meets all requirements
of the Canadian Interference-Causing Equipment
Regulations.
Cet appareil num&que de la classe 6 respecte toutes
les exlgences du Reglement sur le materiel brouilleur
du Canada.
CAUTION
TO PREVENT ELECTRIC SHOCK, MATCH WIDE
BLADE OF PLUG TO WIDE SLOT, FULLY
INSERT
l POUR LES MODELES AMERICAINS ET
CANADIENS UNIQUEMENT
ATTENTION
I
PouR
~VITER
LES ctiocs
ELECTRIQUES,
INTERODUIRE LA LAME LA PLUS LARGE DE LA
FICHE DANS LA BORNE CORRESPONDANTE DE
LA PRISE ET POUSSER JUSQU’ AU FOND.
1.
Read Instructions - All the safety and operating
instructions should be read before the appliance
is operated.
2. Retain Instructions - The safety and operating
instructions should be retalned for future
reference.
3. Heed Warning - All warnings on the appliance
and in the operating Instructions should be
adhered to.
4. FoIlowIng lnstructlons - All operating and use
instructions should be followed.
5. Water and Moisture - The appliance should not
be used near water - for example, near a
bathtub, washbbowl, kitchen sink, laundry tub, In
a wet basement, or near a swlmmlng pool, and
the like.
6. Carts and Stands -The appliance should be used
only with a cart or stand that ISrecommended by
the manufacturer.
6A An appliance and cart
combinatron should be
moved with care.
Quick stops, excessive
force, and uneven
surfaces may cause
the appliance and cart
combination to overturn.
7. Wall or Ceiling Mounting - The applrance should
be mounted to a wall or ceiling only as
recommended by the manufacturer
8. Ventllatlon -The appliance should be situated so
that its location or position does not interfere
with its proper ventilation. For example, the
appliance should not be situated on a bed, sofa,
rug, or similar surface that may block the
ventilation openings; or, placed In a built-in
installation, such as a bookcase or cabinet that
may Impede the flow of air through the
ventilation openings.
9.
10
Heat - The appliance should be situated away
from heat sources such as radiators, heat
registers, stoves, or other appliances (including
amplifiers) that produce heat.
Power Sources - The appliance should be
connected to a power supply only of the type
described in the operating lnstructlons or as
marked on the appliance.
SAFETY INSTRUCTIONS
11 Grounding or Polarization - Precautions should be
taken so that the grounding or polarization means
of an appliance ISnot defeated.
12. Power-Cord Protection - Power-supply cords
should be routed so that they are not likely to be
walked on or plnched by items placed upon or
against them, paying particular attention to cords
at plugs, convenience receptacles, and the point
where they exit from the appliance.
14. Cleaning - The appliance should be cleaned only
as recommended by the manufacturer.
15. Power Lines - An outdoor antenna should be
located away from power lines.
16. Outdoor Antenna Grounding - If an outslde
antenna ISconnected to the receiver. be sure the
antenna system IS grounded so as to provide
some protectlon against voltage surges and built-
up static charges. Article 810 of the Natlonal
Electrical Code, ANSl/NFPA 70, provides
InformatIon with regard to proper grounding of
the mast and supporting structure, grounding of
the lead-In wire to an antenna-discharge unit, size
of grounding conductors, locatlon of antenna-
discharge unit, connectlon to grounding
electrodes, and requirements for the grounding
electrode. See Figure A.
17. Nonuse Periods - The power cord of the
appliance should be unplugged from the outlet
when left unused for a long period of time.
18. Object and Liquid Entry - Care should be taken
so that objects do not fall and llqulds are not
spilled Into the enclosure through openings.
19. Damage Requlrlng Service - The appliance
should be serviced by qualified service personnel
when:
A. The power-supply cord or the plug has been
damaged; or
B. Objects have fallen, or liquid has been spilled
Into the appliance; or
C. The appliance has been exposed to rain; or
D.The appliance does not appear to operate
normally or exhibits a marked change In
performance; or
E The appliance has been dropped, or the
enclosure damaged.
20. Servicing - The user should not attempt to
service the appliance beyond that described In
the operating Instructions. All other servicing
should be referred to qualified service personnel.
2
FRONT PANEL
PANNEAU AVANT
PANEL FRONTAL
REAR PANEL
PANNEAU ARRIERE
PANEL TRASERO
DISPLAY
AFFICHAGE
VISUALIZADOR
3
NOTE ON USE / OBSERVATIONS RELATIVES A WTILISATION /
NOTAS SOBRE EL US0
l
Do not let foreign objects I” the set
l
Keep the set free from mastwe.
l
Ne ms lhsser des oblets Btranqers
water. and dust I’ ‘-
dans I’appareil.
l
AvoId high temperatures
l
Pr&ger I’apparell contre I’humldlt& e objetos extratios dentro del
Allow for sufflclent heat dispersion I’eau et lapousslere
when installed on a rack
l
Mantenga el equ~po llbre de
l
Evlter des temp&atures &v&s humedad, ag”a y polvo
Tenlr compte d’une dispersvan de
chaleur suffisante lors de
I’1nstallat10n sur une &g&e
l
Ewe altas temperaturas.
PermIte la suflclente dlsperslOn del
l
Do not let Insectndes. benzene.
calor cuando estd instalado en la
innlri
l
Unplug the power cord when not and thinner come I” contact with
using the set for long perlods of
~ l
‘,“:‘,‘,‘; mettle en contact des
l
DBbrancher le cordon d’allmentatlon Insectlcldes, du benzene et “n
lorsque i’apparw n’est pas utills& dlluant avec I’appare~l
pendant de longues perlodes
l
No perrmta el contacto de
l
Desconecte el cord6n de energia Insecticldas, gasollna y dlluyentes
cuando no utlhce el equ,po por
mucho tlempo
l
Handle the power cord carefully
Hold the plug when unplugging the
cord.
l
Manlpuler ie cordon d’allmen-tation
avec precaution
l
Never disassemble or modify the
Tenlr la prose lors du d&branchement * (For sets with ventllatlon holes1 set I” any way
du cordon.
l
Do not obstruct the ventllatlon
l
Ne jarwe d&nonter ou modifier
l
Manele el cordOn de energfa con holes. I’appareil d’une man16re ou d’une
culdado
l
Ne pas obstruer les trws d’a&atlon autre.
Sostenga el enchufe cuando
l
No obstruya 10s orlflcios de
l
Nunca desarme o modlflque el
desconecte el cordbn de energia VentllaclOn equlpo de nlnguna manera.
4
IMPORTANT TO SAFETY
WARNING:
TO PREVENT FIRE OR SHOCK HAZARD, DO
NOT EXPOSE THIS APPLIANCE TO RAIN OR
MOISTURE.
CAUTION:
1. Handle the power supply cord carefully
Do not damage or deform the power supply cord If it IS
damaged or deformed, it may cause electric shock or malfunction
when used When removing from wall outlet, be sure to remo”e
by holding the plug attachment and not by pulling the cord
2. Do not open the top cover
In order to prevent electric shock, do not open the top cover
If problems occw, contact your DENON DEALER
3. Do not place anything inside
Do not place metal objects or spill llquld nslde the CD recorder
Electric shock or malfunction may result
Please, record and ‘eta,” the Model name and ser,al number of your
set shown on the rating label.
Model No. CDR.W1500 Serial No
Thank you for purchasing th,s DENON CD recorder. Please read the
operating ~nstiuct~onsthoroughly I” order to acquaint yourself with the
CD recorder and achieve maximum satlsfactlon from it
Be sure to keep this manual for future reference. should any
questlow or problems arise.
Please check to make sure the following items are included
with the main unit in the carton:
II)
MaIn ““It 1
(21 Remote control urw RC-278 1
(31 RGP/AADry cell battery 2
I41 Connection cord 2
151oFWtl”g I”St‘UCtlO”S. .?
16) Service station list 1
TABLE OF CONTENTS
q
FEATURES 5
q
CAUTIONS DURING USE 5
q
ABOUT CD-R/RW DISCS ,., ., 5, 6
q
DISC HANDLING AND PRECAUTIONS 6.7
q
RESTRICTIONS RELATED TO THE
CD-R/RW STANDARDS 7
q
CONNECTIONS .7
q
PART NAMESAND FUNCTIONS 28.9
q
REMOTE CONTROL UNIT ., 9, 10
NOTE:
Th,s CD recorder uses the semiconductor laser. To allow you to
enjoy mwc at a stable operaon, it 1srecommended to use this in a
room of 10 “C (50 “FI - 30 “C 186“Fl
l
Place of installation
To ensure sufflclent ventilation, leave a space of at least 10 cm
between the front, sxles and back of the unn and walls or other
ob,ects which may obstruct vent~latlon.
El
1 FEATURES
1. Various copying functions
- This set IS equwed wth a number of convenent cowng
modes “DISC dubbing” for copying enwe discs, “Make CD
dubbing” for copy,ng a” ent,re disc then a”tomat~cally
f,nai,z,ng. “l-track dubbing” for copyl”g single tracks, and
“Scan record dubbing” for selecting the tracks you want to
record while scanrung CDs and copying the selected tracks
l
One of two copYl”g speeds can be selected’ normal speed
and double speed.
2. Recording from external devices
. Th,s set IS equpped with three convenient synchrowed
recording functions. “D,sc synchio iecoidlng” for record,ng
an album on the source side, “Make CD recording” for
automattcally flnalmng after synchronized recording of a disc,
and “Track synchro recording” for recording track at a tne It
ISalso possible to record manually.
3. An abundance of playback functions
. Thanks t,, the comb,nation of the CD and CD-R wxts, this set
is equipped wth three dlfferent play modes “Relay play” for
relay playback between the disc in the CD unit and the disc I”
the CD-R wt. “Mix play” for programmed or random playback
of the d,sc I” the CD “nit and the dw in the CD-R u”?t as ,f
they were a s,ngle d,sc, and “Dual play” with which the CD
and CD-R “n,ts can be Operated Ir&pendently
. This set ISequipped with the programmed play. random play.
and all-track, l-track and A-B repeat play modes
4. Rich Variety of Digital Input Jacks
. In addition to the analog input jacks, this ““,I ISequpped wth
a total of two dIgital input lacks. There IS one optical d’g,tal
Input ,ack for use with dlgltal sources such as CD, MD and
satellite broadcasts, and there ISone d,gltal coaxial input lack
5. Equipped with Sampling Rate Converter
. Thusconverter perme direct dlgltal input recording from DAT
or satellite broadcasts (32 kHz, 48 kHz) which have sampling
frequencies that differ from that of the 44 1 kHz used wth
CD
6. Text Entry and Display Function
- The album title and the track utle for ~ndudual tracks can be
q
SETUPMETHOD lo- 13 entered and dIsplayed for recorded CD-RIRW discs
q
COPYING PROCEDURE 13 ^ 15 7. Equipped with @@@‘, HDCD@(High Definition
- RECORDING FROM EXTERNAL DEVICES 15 - 19
NORMAL PLAYBACK 19
VARIOUS PLAYBACK FUNCTIONS 20 - 24
RELAY MODE. 24 - 27
FINALIZING CD-R/RW DISC .27
EDITING ..,.. .28 - 33
MENU MODE 33
MESSAGES ..34
TROUBLESHOOTING 35
MAIN SPECIFICATIONS 35
Compatible Digital’? decoder ICD unit)
m@‘, HDCD”, High Defntlon Compatible DIgItal@
and Pacific MicrosontcsTM are elther reglstered
trademarks or trademarks of Paaflc M~croson~cs. Inc I”
the Unlted States and/or other countries.
HDCD system manufactured under license from Paclflc
M~croson~cs. Inc. This product IS covered by one or
more of the followng. In the USA. 5.479.168.
5,638,074, 5.640.161. 5.808.574, 5.838.274,
5.854.600. 5.864.31 I, 5.872.531, and I” Australia
669114 Other patents pendlng.
q
CAUTIONS DURING USE
l
Durmg track selection, during search and when the recorder
sustains a strong Impact. the disc’s rotatIonal speed
changes greatly. causing a small no!se to be emitted This is
not a maifunctlon of the recorder.
l
If the CD recorder is operated while an FM or AM broadcast
IS bang received, there may be “use I” the FM 01 AM
ieception Please swtch the power to the CD recorder off at
such tomes
* The CDR.W1500 has a broad dynamic range. Please
exercise caution when turning up the volume on the
ampllfler I” cases when the playback volume IS low. If the
volume 1sturned up 100 high. It could damage the speakers.
l
Placlng this recorder or ITSconnectlo” cords near a TV or
other audIa dewce could cause a hummmg sound to be
emitted. If this occurs. relocate the recorder or reroute the
connect,on cords
l
Be sure to remove the dec from the recorder before mowng
,t The disc could be damaged If left in the recorder WI& it
ISbeing moved
l
Do not place any object I” the tray I” the pos,t,o” where the
dasc IS loaded, or open and close the tray with anything
lns!de Foreign objects I” the tray could damage the play
mechanwn
l
Do not move the recorder from a cold place to a warm place
suddenly If the recorder IS cold when brought Into a warm
room, condensation could form. preventing proper operat!on
of the recorder If condensation does form on the recorder
when It IS brought I”@ a warm room, wa,t at least 30
min”tes before use
q
ABOUT CD-R/RW DISCS
CD-R Discs and CD-RW Discs
Be sure to use discs that bear either of the following marks
when recording wth thls “n,l
and an indicaflon such as
“FDR CONSUMER”, “FOR
CONS”MER “SE” or “FOR
MUSIC “SE ONLY”.
% Recording w/l not be possible wth dtscs that do not bear
the aforementioned marks.
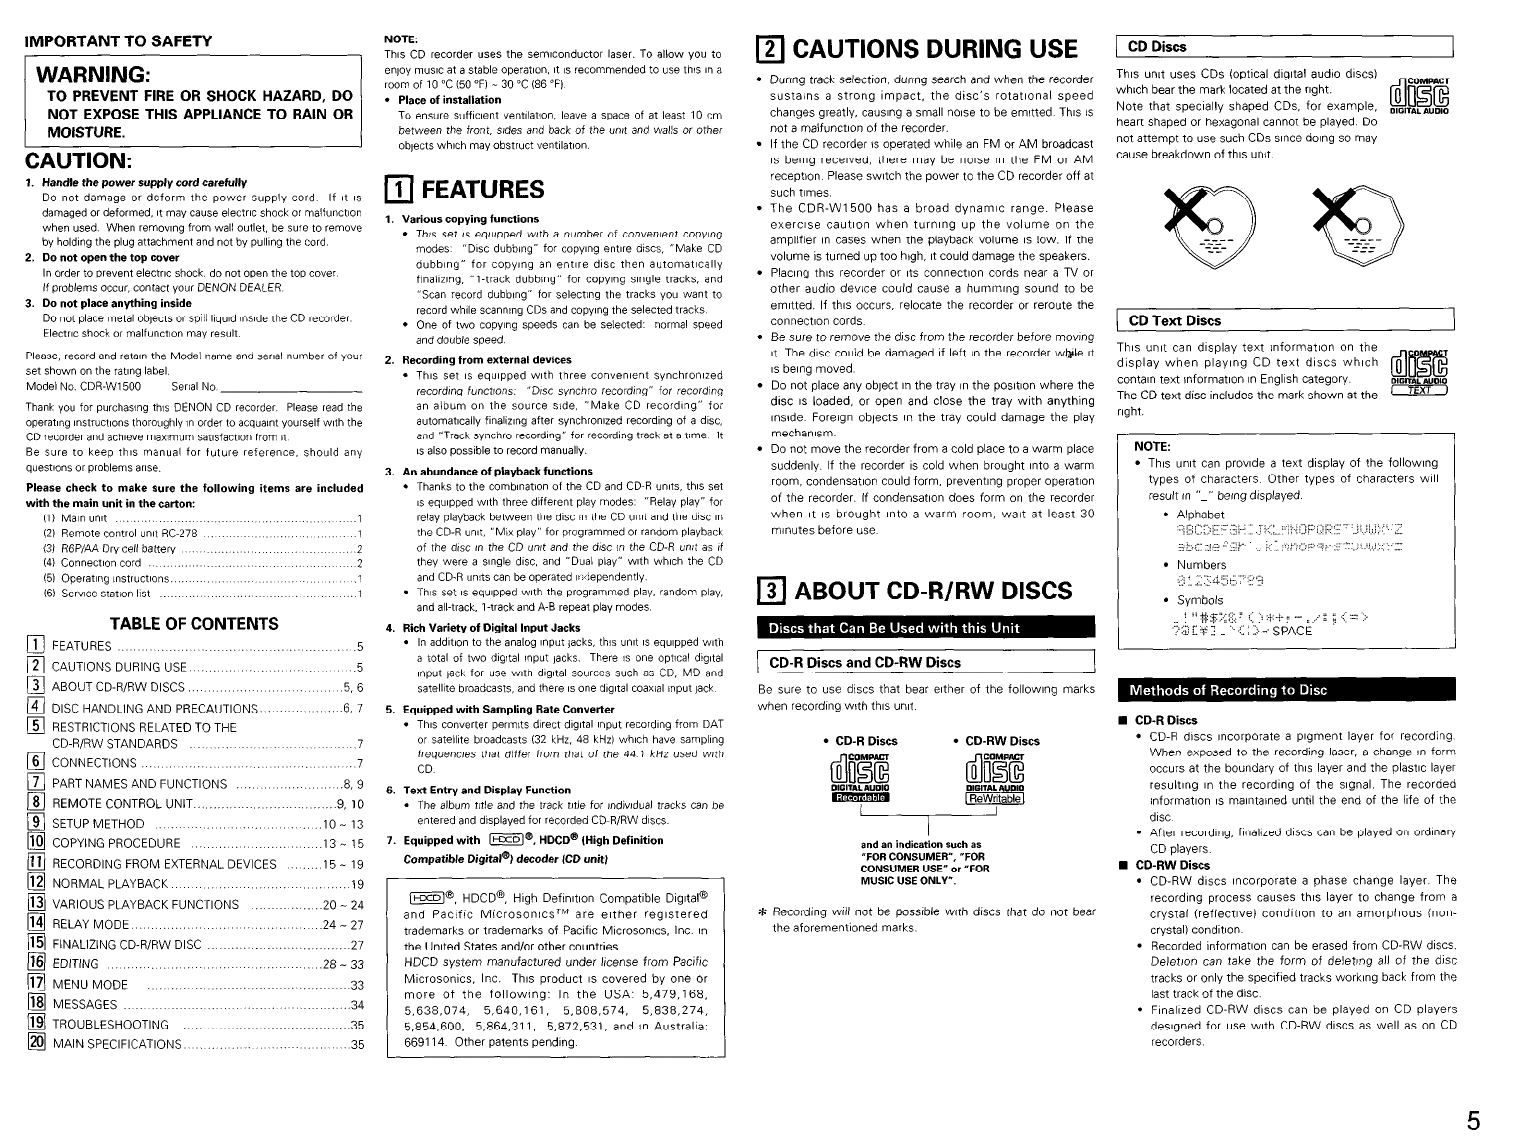
) CD Discs
This un,t uses CDs (optIcal dIgItal aud!o discs)
which bear the mark located at the right.
Note that specially shaped CDs, for example, mxrALA”DIO
heart shaped or hexagonal cannot be played. Do
not attempt to use such CDs since dang so may
cause breakdown of this unit
CD Text Discs
The unit can display text informatIon on the
display when playing CD text discs which
contan text nformatlon I” English category
The CD text disc includes the mark shown at the In
DIGRF~~
right.
l
Th,s un,t can prowde a text display ot the followlng
types of characters Other types of characters WIII
I
l
Numbers
_/.. i: :3
I
l
Symbols
l
CD-R discs wxorporate a pigment layer for recording
When exposed to the recording laser. a change I” form
OCCURSat the boundary of this layer and the plastic layer
resulting I” the recording of the sIgnal. The recorded
information IS maIntained unt!l the end of the life of the
disc
. After recording, finalized discs can be played on ordinary
CD players
n CD-RW Discs
l
CD-RW discs mcorpoiate a phase change layer. The
recordmg process causes this layer to change from a
crystal (reflectlvel condrtmn to an amorphous (non-
crystal) condltlon
l
Recorded lnformatlon can be erased from CD-RW discs.
D&t/on can take the form of deleting all of the disc
tracks or only the specifed tracks working back from the
last track of the disc.
l
Flnallzed CD-RW discs can be played on CD players
deslgned for “se with CD-RW discs as well as on CD
recorders
5
A CD-RIRW disc onto whtch has been recorded using the digltal Input cannot be further digitally recorded (I.% coped1 onto a
separate CD-R/RW disc or MD, etc.. This ISa standard establlshed by the SCMS (Serial Copy Management System). After the recording of a CD-R disc IS completed, finallzatlon
processing IS required to enable It to be played on an ordinary
CD player.
* Fiecordlng in the Synchro-recording mode (e.g.. disc Synchro-recording. track Synchro-recording. and auto finallzatlon recording)
results in the track numbers being automatIcally assoc!ated. The manner in which the track numbers are assoaated will differ as
follows for digital recording and for analog recording depending on the condltlons
n Recording from a digital input
l
When performIng dIgItal recording of a CD, track numbers are updated when the first sound IS detected after the track
switches.
l
When maklng a digital recording from a MD, a track number that ISthe same as the orIgInal track number WIII automatically
be associated.
l
When recording from a DAT. track numbers are glen when track swltchlng ISdetected using the start IDS.
l
When recording from a satellite broadcasts or other dlgltal equipment. the detectlon of a blank port1011of about 3 seconds or
longer. the same as when maklng recordtngs with an analog Input. WIII result I” the operation of the auto track function and
the automatic assoclatlon of the track number.
l
The track number might not switch correctly when there ISa lot of Norse in the blank portion between tracks.
l
The track number might change when the slgnal level ISvery low withln the track.
n Recording from an analog input
Track numbers will automatically be assoctated when a blank portion of about 3
seconds or longer is detected.
l
When the Input sIgnal IS affected by nase or there is some other Interference.
the track number might not change at the correct posltlon
l
The track number might change when the slgnal level IS very low within the
track. .
* The on/off setting of the wto track function IS possible I” manual recording. (See ;,;;R’RW P J
n1Ji7P -1,s:
“Setting of the Auto Track Mark” on Page 11.I
NOTES:
l
When recording an analog source that contains a very low level slgnal wIthIn the track, or a dIgItal source other than
CD/MD/DAT, switch off the auto track function then make a manual recording and asswate the track numbers manually.
l
When the recording level ISset too low while recording an analog source or a digltal source other than CD/MD/DAT. the
track numbers might not be associated at the correct posftlon. Please set a suitable recording level.
Recorded
disc
. Once a CD-R disc has been finalized, addItIonal
Lot be erased.
recording WIII no longer be possible.
l
The information that has been recorded to a CD-
CD-RW discs cannot be played on an ordinary CD player,
even with flnalizatnn processing. Playback IS possible
only on CD recorders or players swted for use with CD-
RW dwzs.They can only be played on a player that IS
sulted for use with CD-RW dws. Also note that CD-RW
discs can be erased after being flnallzed
“After Finalization”
Additional recording is not porrible.
ISpossible on an ardmaw
CD
q
DISC HANDLING AND PRECAUTIONS
AvoId touching the surface of the disc when lnsertlng or . Do not attach commercially available disc labels or
remo”l”g It other seals on the disc. Doing so may make It
-
n When the disc has become marked with fingerprints or dirt.
the disc. but the sound quality may drop and there may be
breaks in the sound. Note that when the surface of a CD-
woe It clean before use. The drrt WIII not affect the signal of
R/RW disc ISdirty. ,t may not record properly
. To wipe the disc clean, use one of the disc cleaning sets
a&able on the market or a soft cloth.
products. Do not “se benzene. thinner, or other
. Do not use record spray or static electricity prevention
volatile chemicals
I uuu
l
Be sure to eject the disc after playing.
l
Always return the disc to its case to avold dust, scratches,
and mlsshaplng
l
Do not leave the disc in the following places:
1. Where It will be exposed to direct sunlight for long
periods.
2. Where there ISa lot of dampness and dust.
3. Where It will be exposed to heat such as from a heater.
l
Do not allow fIngerprInts, oil, or dirt to adhere.
. Be careful not to scratch the surface, especially when
removing or returning the dasc to the case.
l
Do not bend the disc
l
Do not heat the disc.
l
Do not enlarge the center hole.
l
Do not wrote on the label surface (~.e.. prlnted side) wth a
ballpoint pen or pencil.
l
Water droplets may form on the surface of the disc when it
IS suddenly brought from a cold place such as outdoors to a
warm place. If this happens, do not dry the disc wth a bar
dryer.
6
l
Only load one disc. Loading two or more discs I” a layer WIII
cause breakdown and may also scratch the discs.
l
DISCSof the 8 cm sze should be carefully allgned wth the
recessed disc guide area and loaded wthout the “se of an
adapter. If not properly loaded, the disc may fall o”t or the
disc holder may cease to open.
l
Be careful not to get your finger caught when the disc
holder ISclang
l
Do not place anything other than a disc on the disc tray.
l
Do not use discs that are cracked, misshapen. or have been
repared wth an adhewe, etc.
l
Do not use discs that have adhewe coming out from
cellophane tape or the label of a rental disc, or adheswe
remanng after removal of the label. Use of a disc in this
condltlon may result I” the disc not bang ejected or I”
breakdown.
q
RESTRICTIONS RELATED TO THE CD-R/RW STANDARDS
* Standards concerned wth CD recorder playback have been established based on the ex,stl”g standards of CD players,
however. for recording, the method differs from that used with ewtfng cassette decks and MD recorders, etc. In view of this.
please gain a good understandlng of the followng restrfctaons associated wth CD-R/RW dascs and enjoy the medium.
l
Only audn CD-RIRW discs can be recorded with this urxt “IL&E: iiiiri i L ‘?: ” WIII be displayed when a disc other than one
for use with audto such as a CD-RIRW disc for use wth a personal computer or another type of disc !s loaded (See “DISCS that
Can Be Used with this Unit” on Page 5 )
l
CD-R discs can be recorded to only once The recorded InformatIon cannot be erased.
l
The recorded lnformatlon of CD-RW discs can be erased. When this disc has been flnallzed, erase after the flnallzatlon removal
operation has been performed (See “Cancellation of CD-RW disc flnallzlng” on Page 28 1
l
Recording mistakes made wth CD-R discs cannot be erased: therefore, It ISrecommended that a CD-RW disc be used until you
are accustomed to the recording operat,on.
l
The recording operation procedure ISthe same for CD-R discs and CD-RW discs
l
When maklng addlt!onal recording to a previously recorded disc, the end of the last track IS detected and recording IS started
from there
l
The record standby mode cannot be set for CD-RIRW discs with a recordable time of about 8 seconds or less remanlng.
c ” WIII be dIsplayed at this tune.
l
Songs with a recording time of less than 4 seconds cannot be recorded
l
A maxmum of 99 tracks can be recorded to one CD-RIRW disc When the recording reaches the 99th track, “Q 85. Fcil ” IS
displayed and recordings beyond this track WIII not be possible.
l
DIgItal recording IS not possible from CD-R/RW discs onto which have been dlgltally recorded, normal 1s!t possible from MD or
DAT. etc When a dlgltal recording ISattempted from such sources. “iaw ?ror-i 8h / -i” IS displayed. To record from these
dIgItal sources, make the recording from the analog Input. ISee “DIgital Copses” on Page 6.1
l
This unit cannot record CD-ROM and other non-audio signal sources. When an attempt IS made to record from such sources.
S(I.1 > ‘,.. --‘/. ,../I.- t t ” ,s dlsplaved
l
When a recording IS made from a disc that Includes data other than audio signals such as CD graphics or CD-TEXT, only the
audio slgnal 1srecorded; other data ISnot recorded
l
DVD (Dolby DIgItal, DTS, and other compressed audio signals) cannot be recorded.
l
Finalization processing on a CD-R disc that has been recorded with this unit will permit that disc to be played on ordinary CD
Player (See “Flnallzlng CD-R/RW DISC” on Page 27.)
l
Flnallzatlon processng on a CD-RW disc that has been recorded with this wxt will permit that disc to be played only on a CD player
designed to be used vwth CD-RW discs or on another CD recorder (See “Flnallzatlon Processing of CD-RW DISCS” on Page 6.1
NOTES:
’ TOassure accurate recording. record with an ambent temperature of 30 “C or less.
l
DO not obstruct the ventilation holes on the top.
l
Recording may stop if the unit IS subject to shocks during recording. If recording stops, It may no longer be possible to
“se the dasc normally.
q
CONNECTIONS
l
Use the supplied pin plug cable when
maklng connectlow with the analog
Input/output jacks.
a Input:
Connect the analog input jacks [ANALOG
IN) of this unit with the output jacks of
the ampllfler (MD or TAPE).
0 Output:
Connect the analog output jacks
(ANALOG OUTI of thfs unit with the
Input jacks of the amplIfter (MD or TAPEI.
@ CD-only output:
Only the CD side sound ISoutput.
Connect to the ampllfw’s input lacks
(CD, etc )
* In the dual mode, only the sound of
the CD-R side ISoutput from the
CD/CD-R output jacks. so th!s
connectnn ISrequwed.
Power
SUPPlY
outlet
Ampllfler en
Power
SUPPlY
outlet
12ov
60 Hz
-
120v
60 Hz
. Please use optlcal fiber cables, which IS
wallable on the market, when maklng
connectnns to the dytal (OPTICAL)
Input/output jacks
MD recorder
Use 75Qlohms pin plug cable, which IS
awlable on the market, when maklng
connect,ons to the dIgItal (COAXIAL)
Input/output jacks.
0 hmut: Power SUDDIVoutlet
Connections with Playback Equipment
such as the CD Players
The dIgItal Input jacks of this ““It (ather
DIGITAL IN OPTICAL or DIGITAL IN
COAXIAL) should be connected with the
dIgital output lacks of the CD player
(OPTICAL or COAXIALI.
0 Output:
Connections with Equipment having a
Digital Input such as the MD Recorder
The dIgItal output jacks of this u”,t (either
DIGITAL OUT OPTICAL or DIGITAL OUT
COAXIAL) should be connected wth the
dIgItal input jacks of the MD recorder or
other equipment (OPTICAL or COAXIAL)
@ CD-only output:
Only the CD side sound ISoutput.
Connect to the dIgItal Input jacks of an
MD recorder, etc
NOTES:
l
Do not plug the power plug Into the power outlet until all connectlow have been completed.
l
Connect the red plug of the p,n plug cable !“to the R (right) jack and the whtte plug Into the L (left) jack.
l
Do not make a connection to the PHONO jack of the amplrfler Doing so WIII lead to breakdown
l
Firmly plug I” the power plug. An Imperfect connection WIII cause Norse to be generated
l
Bundltng the connectlo” cables together with the power cable WIII cause hum or other no,se.
l
When the power plug ISdisconnected from the power outlet. Walt about 5 seconds before relnsenlng.
7
III
7
PART NAMES AND FUNCTIONS
Power button
l
Turns the CD recorder ON and OFF
Phones jack IPHONES)
l
Jack for headphones.
Phones level control (PHONES LEVEL)
l
Adjust the headphone volume.
Remote control sensor (REMOTE SENSOR)
l
Recewes signals from the remote control
Disc tray (CD)
l
Store-bought CDs and flnallzed CD-R/RW discs can be
played
Display select button (DISPLAY SELECT)
l
The display switches each time the button ISpressed.
Time display
r for both the --. CD only+ CD-R only
CD and CD-R
1
Title/Character button (TITLE/CHARACTER)
l
When pressed wh+z the display mode IS set to CD or
CD-R, the text information 1sdisplayed.
. When text ISbang Input. the characters change.
Input button (INPUT)
l
Selects input Scl”nx
l
Swtchlng WIII be as follows each time the button IS
pressed
r
&$&. ANALOG
1
* Swtchlng ISnot permitted during recording
CD unit operating buttons
.
Use this to start playback
n Use this to stop playback
II Use this to pause playback
I.., HI Use this to move to the begInnIng of
tracks
t Use this to open and close the disc holder
TIME Use this to switch between the elapsed
t,me, rema,n,ng track t,me and total
remanng t,me
CD-R operating buttons
.
Use this to start playback or recording.
n Use this to stop playback o‘ recording
II Use this to pause playback or recording
l44, HI Use this to move to the beglnmng of
tracks.
& : Use this to open and close the disc holder.
*If the text Information mput operation
has performed but not flnallzed. the disc
holder cannot be opened until all the test
lnformatlon has been deleted (See Page
10.1
TIME Durrng playback, “se thrs to svwtch
between the elapsed tne, rema”,ng track
t,me and total remalnlng t,me. During
recording. use this to watch between the
elapsed time per track and the total
remalnlng recording time.
Normal speed copy mode button
(DUBBING NORMAL)
l
The copy dubbing mode swatches each time this
button ISpressed
Disc Make CD l-track Scan record
dubbing-) dubbing --c dubbing- dubbing
Relay mode button (RELAY MODE)
l
The mode switches each time the button ISpressed
@ Double-speed copy mode button
(DUBBING HIGH)
l
The double-speed dubbing mode watches each time
this button ISpressed
r
Normal- ,~f~y,+ Mix DWil Disc Make CD l-track Scan record
IMIXI- (DUALI) 7 dubbing --) dubbing --c dubbing- dubbing 1
Menu button (MENU)
l
This button IS used when ,nputt,“g disc and track titles
and for such edmng operations as CD-RW DISC
ermng.
Multi Jog dial (MULTI JOG)
l
Recording level control (Recording).
l
Selects settings IMenu mode)
Record button (0 REC)
l
Press this button to record
l
The recording standby mode bs set when the record
button (0 REC) 1spressed alone
l
Press the play button (, PLAY) while in the recording
standby mode to start recording
l
To Stop recording or to cancel the recording standby
mode, press the stop button (m STOP)
Disc tray (CD-R)
Finalize button (FINALIZE)
l
Press this button to fInalwe.
Clear button (CLEAR)
l
Use this to delete programmed tracks 01 text ~np”t
characters
l
When pressed I” the menu mode, the set returns to
the ~rwous mode
$ Display
l
lnformatlon screen
Analog CD/CD-R output jacks
[ANALOG OUT CD/CD-R)
l
Connects to the lme Input of an ampllfler (left and
right).
l
In the dual mode, only the CD-R side sound ISoutput.
Analog input jacks (ANALOG IN CD-RI
l
Connects to the line output of an amplifier (left and
rlght)
Digital CD/CD-R output jack
(DIGITAL OUT CD/CD-R COAXIAL)
l
Connects to the dIgItal coawl Input of e.g. ampllfler or
recording device.
l
In the dual mode. only the CD-R side dIgItal data IS 0
output.
Digital CD/CD-R output jack
(DIGITAL OUT CD/CD-R OPTICAL)
l
Connects to the dIgItal coaxial !nput of e.# ampllfler or
recording device.
l
In the dual mode, only the CD-R side dIgItal data IS
output.
Digital input jack
(DIGITAL IN COAXIAL)
l
Connects to the dIgItal coaxial output of an external
dIgItal soun?s
Digital input jack
(DIGITAL IN OPTICAL)
l
Connects to the dqtal optlcal output of an external
dqtal source
Analog CD-only output jacks
(ANALOG OUT CD)
l
In all modes, only the CD side sound ISoutp”t
Digital CD-only output jack
(DIGITAL OUT COAXIAL)
l
In all modes, only the CD side dIgItal data ISoutput
Digital CD-only output jack
(DIGITAL OUT OPTICAL)
l
In all modes, only the CD side dIgItal data ISoutput
0
0 Mode display (CD-R)
l
CD.
CD ,a pre-recorded CD or finalized CD-R or CD-RW
dlsci ISloaded
l
CD-R
An unfinallzed CD-R disc ISloaded.
l
CD-RW:
An unflnallzed CD-RW disc ISloaded.
l ez
Lights during recording.
l ,:
Lights during playlrecordlng.
l
II:
pause function active.
l
PROG:
Lights I” program mode
l
1 Tr, SYNC:
Synchronized recording actwe
l
RAND:
Plays tracks I” random order.
l
A.T.M.:
Auto track mark Indicator
l
D.in:
This lndlcator lights when one of the digltal Inputs
(dlgltal) ISselected
If this flashes after performIng the recordng operation,
check the connections of the dIgItal Input jacks
l
FADE:
This flashes during the fade-In and fade-out recording
operation.
*A:
This lights when the CD-R unit’s time ISdisplayed
Mode display (CD)
l CD:
This lights when a disc ISloaded.
l
RAND:
Random indicator
l
PROG:
Program indicator.
l
II:
Pause indicator.
l .:
Play lndlcator
l A:
This lights when the CD unit’s t,me ISdlsplayed.
l
HDCD:
This lights when playing discs recorded in HDCD
format
Shared mode displays
l
REPEAT, 1:
Lights up when a track/complete disc (or program1 IS
repeated
*Off when both the CD and CD-R units’ times are
dlsplayed.
. REPEAT A-B:
This lights when ,n the A-B repeat play mode
*Off when both the CD and CD-R units’ t,mes are
displayed.
l
SINGLE, TOTAL:
Time mode lndlcator
*Off when both the CD and CD-R units’ times are
dIsplayed
l
DUBB:
This lights when in the normal speed dubbing mode
l
DUBB HIGH:
This lights when I” the double-speed dubbing
(copyIngI mode.
l
MIX:
Th6 lights when in the mtxed (CD and CD-R unes)
mode.
l
RELAY:
This lights when I” the relay play mode between the
CD and CD-R units
l
DUAL:
This lights when in the CD and CD-R unit dual mode
l
SKIP:
This lights when a track ISset to be skipped
l ON:
Th,s l,ghts when the skip play mode ISturned on
8
@ Input source display
l
Each press of the mput switching button (INPUT)
causesthe lndlcators to ltght as described below.
CD
1
OPT
I
This lights when the Input so”lce 1sset
to the nternal CD.
Th,s lights when the DIGITAL IN
1 OPTICAL ,nput jacks are selected
COAX This lights when the DIGITAL IN
1 COAXIAL Input jacks are selected
ANALOG Th,s lights when the ANALOG CD-R IN
,np”t jacks are selected
0 Music calendar display
l
Tracks on a disc or I” a program
l
Track I” playlrecordlng.
*Off when both the CD and CD-R tomes are displayed.
@ Multiple display
l
This display lndlcates the number of tracks, track
number, play tnvz, recording tome, VBIIOUSoperatlonal
Information. text messages, etc
l
When both the CD and CD-R times aie dlsplayed. the
CD-R time ISdisplayed
Q Level meter
l
Record level bar. lndlcates the audio signal level
l
When the CD-R unit IS set to the recording mode, the
Input level ISdIsplayed
@ Track No. display
l
When there IS text information, the track number IS
dlsplayed.
l
When both the CD and CD-R times are displayed. the
CD track number 1sdisplayed.
0 Time display
l
When there IStext Informatvan, the tme ISdisplayed
l
When both the CD and CD-R t!mes are displayed, the
CD time ISdIsplayed
cl
8 REMOTE CONTROL UNIT
n The included remote control unit (IX-278) can be used to operate the CDR-WI500 from a distance.
Inserting
the batteries
0 Remove the remote control unit’s back Ild
0 Insert the two R6P (AA) batteries I” the battery
compartment, I” the dIrectjon lndlcated by the marks InsIde
the compartment.
0 Put the back Ild back on
Using the remote control unit
Cautions on batteries
l
Use R6P (AA) batteries I” the remote contlol unit
l
The batteries should be replaced with new ones after
approximately one year, though this depends on the
frequency wth which the remote control un!t is used.
l
Even If the battews are less than a year old, replace
them with new ones If the remote control unit no
longer operates even from a short distance from the
main untt
l
The Included battery IS only for verlfylng operation
Replace It with a new batten/ as soon as possible.
l
When ,nsert,ng new batteries, wa!t about two
m,n”tes after removing the old batteries before
,nserting the new ones.
l
Be sure to set the batteries I” the proper “0” and
“0” directlons. as lndlcated by the marks in the
remote control unit’s battery compartment.
l
Remove the battera when not using the remote
control un,t for long perlods of t,me.
l
To avad explosions and fluId leakage:
l
Do not use one new battery with one old one.
. Do not “se two different types of battera
. Do not short-clrcut, disassemble, heat or dispose
of batteries I” flames.
l
If the battery fluld should leak, w~oe all the flud off
the battery compartment, then insert new batteries
l
When operating the remote control ““It. point It at
the man unit es shown I” the diagram.
l
The remote control unit can be operated from a
dnect dMance of approxnately 8 meters from
the ma,” “nit. This distance WIII be shortened.
however, if there are obstacles or when operated
from an angle.
(The remote control un,t WIII operate from a
horlrontal angle of up to about 30”.1
NOTES:
l
The remote control ““It may not operate If the remote
l
Do not press buttons on the ma,” ““It and on the remote
sensor is exposed to direct sunlight or strong artiflctal control “n,t at the same time. Doing so WIII result I”
light, or If there ISan obstacle between It and the remote malfunction.
sense
9
Names and Functions of Remote Control Unit Buttons
n Buttons not explained here function in the same way as the corresponding buttons on the main unit.
W Buttons marked 3” function regardless of the function selector switch.
n Inserting Disc
0 Press the OPEN/CLOSE button (5) to open the disc tray.
@ Insert a dw in the appropriate recess ,n the tray, label side
UP.
@ Press the OPEN/CLOSE button (&) 10 close the tray
. “” T:,E” lights up, followed by “-3.:: 2 : 6”
and the display WII show the type of drsc you tnserted
l
If you !“sert a blank 01 partly-recorded CD-R or
unflnallzed CD-RW, the CD recorder WIII calibrate the
disc for opt!m”m recording During this process the
drsplay ‘&III first show ““1. .I=“-“’ and then the
number of audio tracks Calibratton can take up to 60
seconds (CD-R/RW)
l
If a CD-RIRW IS flnaiized ,t WIII show “CD” on the
display. DISCtray
OPEN/CLOSE button
*
Normal speed
dubbing
1 ;II (DUBBING Q-
Clearbutton (CLEAR)
Function selector
switch
Switches the operation of
L
the buttons between the
CD and CD-R
-w
search and programmed playback. numbers of 11 or ova for direct
search and programmed playback
Manual search reverse and
forward buttons (44 and
NOTES:
. if your finger should get caught I” the drsc tray%vhen It closes, press the OPEN/CLOSE button (6)
l
Only Audio CDs WIII be accepted If a non-audio disc ISInserted. the display shows ” : i, i:i : 7 ‘1 “.
l
For recording it IS important that the blank disc IS completely free from dust particles or scratches. See “DISC cleaning”
on Page 6
l
When text lnformatlon IS entered but not flnailzed, the disc holder WIII not open until all of the text mformatw has been
deleted
,I ” -: .,,z -- 3k,” ,I
_. _ WIII be displayed for 2 seconds When the enter button IS pressed during this tnterval. the text
lnformatlon WIII be deleted and the disc holder can be opened.
Record button (0 REC) I
* Menu button (MENU)
* Enter button (ENTER) I
Stop button (m STOP)-- ( 11 Pause button (II PAUSE) 1
q
SETUP METHOD
* The 9 Items listed below can be set with the setup menu The following messages WIII be dlsplayed for the various setting
Items.
l
The contents of the set menu are stored, but this data might be lost If the umt ISdisconnected from the power source for 2 to 3
days
0 I>.; ,_ :I -. II Synchro recording mode.
0 ” “‘7:: ., Synchro recordmg level.
@ ,-i-,, - / - ,I Auto track mark.
@ “’ &de:’ Fade-in recordmg tome.
@ ,.c; .@-, ...._- il Fade-out recording r,me.
@I ” -i-..: -- // ” Scan recording ,ntro t,me
0” _-x 3: z. ” Custom Index.
Skip play.
Tamer playback
1; IreA-Bb”ttc.nIA-BI
Press this to perform A-B repeat
Program/direct button
(PROG/DIRECT)
Press this button to switch
between the program semng
mode and the dtrect search mode
Normally this ISset to the direct
search made
71
repeat playback and all-track
repeai playDacK I
1 Random button (RANDOM)
I
Press this button to play the track
I” random order
(See Page 22.)
Press this button Toswitch the
tme d,splay to the Me display
Input select
button
(INPUT)
Fader button (FADER) Time button (TIME) I
Press thts for fade-In and fade-out
171
10
11) Setup Method I31 Setting the Synchro Recording Level
(Man unttl (Remote control unit)
l
This sets the synchro record!ng start level when synchro recording ISused.
(See Page 18.1
1 2,3 2 2
1 Swtch on the power.
2
Press the menu button and turn the ,og dial on the main un,t 01 use the automaw search buttons on the remote control
unit to dtsplay “: : :i..,t= $e!-ii : ”
3
Press the enter button and enter the setup mode
(2) Setting the Synchro Recording Mode
* Perform the synchro recording mode settings. (See Page 18.1
(Man unit) WTnote control mt1
-
1
2
-
3
-
4
I I I t I
12,W
Z4
lr3
Set the unit to the setup mode, then turn the jog dial of the man unit 01 press the automatic search button of the
remote control to display ” ; ii”‘: -”
Press the enter button and set the synchro recording selecton mode
Turn the ,og dial of the ma,” unit 01 press the a”tomat,c search button of the remote control. then select the synchro
recording mode.
“3 :<‘y,,z”
‘.p:;,::,. II
-.... .=
z,/“i,;. I ,I,)“”
Press the enter button and set the synchro recording mode
I.-
* When usfng synchro recording, recording WIII start when the level of the Input slgnal exceeds a set value Recording V/III stop
when the signal cont,n”es to be at level that IS lower than the set value for 10 seconds 01 longer
(Man unit) (Remote control un~r)
t 4 I I I
1,2;3,4
U
1,3
1
Set the unit to the setup mode, then turn the jog dial of the man unit or press the automatic search button of the
remote control to display “: 1; -$.,‘Ey ”
I !
2 Press the enter button and set the synchro recording selection mode.
Turn the ,og dial of the ma” unit or press the automat,c search button of the remote control, then set the synchro
3
recording level.
l
The setup value ISdlsplayed in the multlple display area. “2~ - .: ”
* The Setting range ISfrom -54 dB to -30 d6. variable I” 6 dB steps
I I
4
Press the enter button and set the synchro recording level
. ” 1.J L ” wll be &splayed
(4) Setting of the Auto Track Mark (ATM)
(Main unit) IRemote control unit)
1,2;3,4
-2,4
-I,3
1
Set the unit to the setup mode, then turn the log dial of the Mann unit or press the automaw search button of the
remote control to display ‘lr- ~~‘; “la .?”
21
Press the enter button and set the auto track mark seiectlon mode
Turn the jog dial of the man unit or press the automatic search button of the remote control to select auto track mark
3
on or off
l
The selected mode lndicatlon WIII flash. ‘“i;i-~.XG C”
11
4
Press the enter button and set the auto track mark on or off.
. (,i: =Ts pi.: .I.*-.,) or ‘,L ; “”; r,,,iai. ; i’.’ ” will be dlsplayed
(51 Fade-in time setting
* To perform fade-In recording. set the fade-In time
6ee Page 19 )
(Main unit) (Remote control unit)
(7) Setting of the intro play time for scan recording
* To perform scan recording. set the r~tro scan play tome
6ee Page 15 )
(MN- unit)
I I I I I
1,ZW
.2,4
.I,3
1
Set the “n,t to the setup mode, then turn the ,og dial of the ma,” unit or press the a”tomatlc search button of the
remote control to d,splay “F 2.~4i -- mr ”
2
Press the enter button to set the fade-In t,me setting mode
Turn the jog dial on the Mann unit or use the automatrc search buttons on the remote control unit to set the fade-In time.
3
l
The sett,n<r is dIsplayed on the multwdlsplay sectlo” ” ...%. = ‘-‘+~%ji”
8 The sett,ng can be set between 1 and 15 seconds I” steps of 1 second.
4
Press the enter button to set the fade-In recording t,me.
. “‘Y.)jQjz >: ” WIII be dlsplayed
(61 Fade-out time setting (81 Setting of the Custom Index
* To perform fade-out recording. set the fade-out t,me
6ee Page 19.1
(Man unit) memote control unltl
* A dewed name can be associated with the Input lacks.
* This ISconvenent for checking which equnpment IS connected wth the Input jacks
(Mar unItI
I I I I I
1.2,3,4
,2,4
,I,3
1
Set the unit to the setup mode, then turn the log dnl of the man unit or press the automat!c search button of the
remote control to display “F .i zleCIi?- -. 7”
21
Press the enter button to set the fade-out tvne setting mode.
Turn the jog dial on the man unit or use the automatic search buttons on the remote control unit to set the fade-out
3
time.
’ The setting ISdIsplayed on the multi-display sectlo” ” s.~,,:,. +.i... ?,: ”
8 The setting can be set between 1 and 15 seconds I” steps of 1 second.
4
Press the enter button to set the fade-out recording t,me.
. ” ;I-.? Le.‘,: 2” w,ll be d,sp,,gyc+,.
I I I I
I
12,W
(Remote control unit)
,2,4
,I,3
I
1
Set the unit to the setup mode, then turn the jog dial of the Mann unit or press the automatic search button of the
remote control to display ” -‘:i’ :. <.z& “,
2
Press the enter button to set the Intro scan play time setting mode
Turn the log dial on the main unit or use the automatic search buttons on the remote control unit to set the !ntro scan
3
play t,me
l
The sen~ng ISdIsplayed on the multwdlspiay sect~o”. ‘2. =-- : ”
* The setting can be set between 5 and 30 seconds I” steps of 5 seconds
4
Press the enter button to set the Intro scan play time
. ” :iF 3:6” WIII be d,splayed
(Remote control wxt)
I I I
I
I I
5
l,Z3,4,5
2,4,5
1,3,5
5
1
Set the unit to the setup mode, then turn the jog dial of the Mann unit or press the automatlc search button of the
remote control to display “lip -? -j- z : ”
2 Press the enter button and set the custom Index entry mode
Turn the log dial of the ma,” unit or press the automaW search button of the remote control to select the jacks for
3
which a name will be associated
l
The selected jacks lndvzatlon vail flash. “.:?-:. -.;.a~.? -..;”
4 Press the enter button and set the jacks for which a name WIII be assoclated This wll set the name entry mode.
Select the entry mode with the character button, then turn the ,og dial of the ma” “nit or press the automaW search
5 button of the remote control to select the characters Enter one character at a t,me with the enter button.
l
See “Text edltlngs” on Page 31 for details of the character entry method, then perform operations 7 and 8
12
ISI Setting the Skip Play Mode
* This allows playback that skips over tracks to which you do not want to hsten.
(See ‘“Reglstration of the tracks to which you do not wsh to listen” on Page 29 for information on the setting of such tracks I
(Main unit) (Remote control unlt)
Z4
1,ZW
I,3
1
Set the unit to the setup mode, then turn the jog dtal of the man unit or press the automatic search button of the
remote control to display “‘- = : ” ”
2 Press the enter button and set the skip play selectlot- mode
3
Turn the ,og dial of the ma,” un,t 01 press the automat,c search button of the remote control to select skip play on or off
l
The selected mode Indication will flash. “- .”
4
Press the enter button and set the skip play to on or off.
. “E;F[I I ,I or,’ -x _ ” WIII be d&splayed.
NOTES:
l
Flnaltrlng the disc when tracks to which you do not want to lIsten have been reglstered, results in the skip play mode
automatlcally being swltched on
l
Skip play ISnot possible on CD players that lack a skip play function
l
Program play and random play are not possible when there has been ieglstration of tracks to which you do not want to
listen
(101 Timer play mode setting
* Timer playback ISpossible. (See Page 24 )
(Main unit) (Remote control unlt)
I 1 I I I
1
,ZW
Z4
I,3
1
Set the wt to the setup mode, then turn the jog dial of the man unit or press the automatic search button of the
remote control to display ” “.a: .- ”
2 Press the enter button and set the timer play selection mode
3
Turn the jog dial on the Mann unit or use the automaw search buttons on the remote control un11to turn the tfmer play
mode on or off
l
The selected mode lndicatlon wll flash. “‘I,? .“‘.’ ” ”
4
Press the enter button to set the timer play mode on 01 off
. “- / “-L; :. ..-ii-, ” 0‘ ” .:,.y.; : .: ” WIII be displayed
q
COPYING PROCEDURE
About copying
* Copying can be performed easily from the set’s CD unit onto the CD-R unit
* There are two copying speeds (normal and hIghI and four copying modes.
l
The mode switches as described below each time the normal speed copying button (NORMAL) or the high speed copying
button (HIGH) ISpressed.
Disc dubbing: In this mode, entire CDs can be copied onto CD-R/RW
(” --: 1 - I” ISdlsplayed 1
1 1
Make CD: In this mode, entIre CDs can be copled onto CD-R/RW then finalized automatically
(“,‘k,}!:,‘:[.ICw>c”ISd,sp,ayed.)
I 1
1TR dubbing: In this mode, single tracks on CDs can be copled
I”: .- Y I --.1” is displayed I
Scan REC dubbing: In this mode, the dewed tracks can be selected from CDs and copied
,-s; .i,z ,, ” ISdisplayed )
l
The recording level ISautomatically set to the default value (0 0 dB)
l
The repeat and random play modes are canceled when the copy mode ISset.
l
Dung normal speed copying you can llsten to the sound as you copy
l
Dung high speed copying no sound ISproduced
l
No signals are output from the dqtal outputs during high speed copywg.
. During copying, buttons other than the CD or CD-R stop buttons do not functlon
l
When CD TEXT compat<ble CDs are copied, the disc names and track names are also copled
NOTES:
l
Copying 1snormally performed with dIgItal signals, but If dtgltal copying is not possible due to SCMS restnctlons. copying
ISperformed with analog signals In addltlon. copying ISalways performed at normal speed (See Page 6.1
l
Analog slgnal copying ISalways performed in the normal speed mode.
l
If when the copying mode ISset the recordable tfme on the CD-FIRW is shorter than the time of the CD source you are
trying to copy, ” .; Isi,- ” ISdisplayed and both the CD and CD-R urxts are set to the stop mode If this happens,
check the disc’s recordable time
. If the disc name has already been Input on the disc on which you are recording. only the track names are copled
l
For some CDs, the text cannot be copled because of copyright protect,on In this case ” pi.:.::: =-i i 1 ” is
dlsplayed.
l
Do not turn off the power or unplug the power cord whtle ” -?- : .” ISdlsplayed after recording IS completed
Dang so may render the disc unusable
13
(11 Copying entire discs
(Man unItI (Remote control unttl
/ \
k----l
I I I I I-
5
1 42 5 5-
-4
-
-
1
Load the CD you want to copy Into the CD unit
2
Load the CD-RIRW onto whtch you want to record Into the CD-R unrt
Press the normal 01 high speed copyng button (NORMAL or HIGH) to display “!all
3 BiJl&“. T-- _‘i.i!x ” or “‘46’; = T
4
Press the enter button to set the copying mode.
l
The CD unit ISset to the pause mode, the CD-R unit to the recording standby mode
Press the CD or CD-R unit’s play button
l Copymg starts
l
If the “t4lai-e :E” mode has been selected, flnailzatlon starts automatically after copying IScompleted (See Page
27.) Once flnalwatlon IScompleted the stop mode ISset automatlcally
l
To stop I” the mlddle of copying. press the stop button on the CD or CD-R unit.
l
If the program modes are set for the CD unit beforehand. copyng ISperformed accordingly.
NOTE:
l
If you wtsh to (“put text data, select the “? --.- I.&r ” mode With CD-R discs, text data cannot be Input after the
disc has been flnallzed
(2) Copying one track at a time
(Man unlt) (Remote control unit)
6 1 .4 2 6
3-
5-
6-
’ I
Load the CD you want to copy ,nto the CD unit
2
Load the CD-R/RW onto which you want to record [“to the CD-R ““It.
3
Press the normal or high speed copyng button (NORMAL or HIGH) to display “Z-k- 1 ~:!x. ‘?P”
4
Press the enter button to set the copying mode.
. The CD unit ISset to the pause mode. the CD-R unit to the recording standby mode
51-
Use the CD unit’s automat,c search buttons to select the track you want to record
Press the CD or CD-R “nit’s play button.
6
l
Copying Salts.
l
When copying IScompleted, the CD-R unit ISstopped
l
To stop I” the mlddle of copytng. press the stop button on the CD or CD-R “nit
14
(3) Selecting tracks to be copied while scanning CDs and copying the selected tracks
* The intro scan playing t&me can be set at the setup men” (Page 12)
(Mann unIti
i
4;5 2 6-
i
2
3
4
5
6
-
(Remote control unit)
/
-4,5
Load the CD you want to copy Into the CD unit.
Load the CD-R/RW onto which you want to record Into the CD-R unit.
Press the normal or high speed copying button (NORMAL or HIGH) to display “5X:-* : : %!I ”
Press the enter button to set the copying mode
l
The CD-R unit 1sset to the recording standby mode, and intro scan playback starts on the CD unit
Set the tracks you want to record.
l
For tracks you want to record, press the enter button
l
For tracks you do no want to record, press the autcxnat~c search forward button.
* Once all the tracks have been scanned, the CD unft IS set to the pause mode, “‘*’ ::: I:?.‘“” IS d!splayed. and
the “PROG” lndlcator lights
l
Check the settings on the mus,c calendar, and if they are OK press the enter button
l
If the sett,ngs are wrong, press the stop button then repeat steps 1 to 5
Press the CD or CD-R unit’s play button
l
Copying starts
l
When copyng IScompleted, the CD-R unit is stopped
l
To stop ,n the middle of copying. press the stop button on the CD or CD-R unit
q
RECORDING FROM EXTERNAL DEVICES
l
When recording on an already recorded disc, recording automatIcally starts from the end of the secton last recorded. When
doing so, pay attentn” to the rema,n,ng ttme.
l
To clear the ent,re content of the d!sc and record from the begInnIng, first e‘ase the entn? disc. “(2) Erasing the tracks” Page
28.
l
To aswre accurate recording, record wth an amblent temperature of 30 “C or less.
l
Recording may stop If the ““It ISsublect to shocks dung recording If recording stops, It may no longer be possible to “se the
disc normally. (“c. zc F;_,-- :w “I
l
Switch to the normal or dual mode when recording Operation ISnot possible in the relay or mix mode
* Your recorder offers several recording modes.
* Setting is possible usfng the method of “Setup Method” on Page 11
recording of the complete disc 01 a program simply by
l
In this mode, flnallzatlon IS performed automatlcaily after synchronlred recording
of all the tracks
l
To manually start a recording wnply by piewng the REC button
:--. “..j ..,,,, ,_._ .-: :‘. i’.
,::; y: gz,,_:j/_ .:_j i,..l‘i’ ‘i
l
To make a synchronized recording of a single track simply by starting the source.
NOTES:
l
Analog recording ISnot possible I” the Make CD mode
l
Use the copy mode to record HDCDs. Such discs may not be recorded
properly when recording from the exterior.
. Do not turn off the power or unplug the power cord while “h10i.. ?i i
? i:z” ISdlsplayed after record,ng IS completed. Doing so may render the
disc unusable
Some remarks on recording:
l
When Auto track ISON (default setting). track numbers WIII automatically be vweased during recording
l
By programnxng the source first, a comptlatlon can be recorded.
15
1. Manual recording
(1) Starting analog recording
(Man unit)
Select the CD-R side. -
42
8
8-
6
5
-
8
-
-
I(
n
16
(Remote control unit)
f
12) Starting digital recording
l
This set Includes a sampling rate converter.
When recordtng DATs or satellite broadcasts (32 kHz or 48 kHz) whose dIgItal jnput slgnal sampling frequency ISdifferent from
that of CD (44 1 kHz), the sampling frequency ISautomatically converted to 44.1 kHr
(Main unlt) (Remote control mt)
Turn on the power
Load the CD-R/RW disc that 1sto be recorded
Perform the operation of “Setup Method 12)Setting the Synchro Recording Mode ” on Page 11 and select the Synchro
off mode
When “s!ng an already recorded DISC,press the TIME button to check the recordable time
l
The time display watches between the total recorded time and the recordable tfme each time the TIME button IS
pressed.
Press the (“put swltchlng button (INPUT) and select the analog source
l
The “ANALOG” display will Ilght.
Perform the operation of “Setup Method” on Page 11 and select on/off of the ATM function.
l
ATM Function on
The “ATM” display WIII light When a blank portlo” lof about 3 seconds 01 longer1 of the recording input s,gnal IS
detected, the track number ISautomatically associated and recorded
l
ATM Function off
This ISrecorded as the folIowIng track
Start playrng the selection you want to record on the CD player, cassette deck, etc.
Press the record button IO REQ.
l
The recording standby mode ISset.
Adjust the recording level with the ,og dial and press the enter button
. Adjust the Input level adlustment control (INPUT LEVEL) so that the “OVER” lndlcator does not light even when the
volume ISloudest. After adjusting. set the scwrce to be recorded to the standby mode
* The recording level can be
set
I” advance using the menu mode.
l
The set recording level WIII be stored I” memory. but thts data might be lost If the un!t is not connected to a power
swrce for 2 to 3 days
Press the play button 0 PLAY).
l
Recording starts
Start playng the selection you want to record on the CD player, cassette deck, etc.
Select the CD-R side.
42 8
8
’ I
Turn on the power
2
Load the CD-RIRW disc that is to be recorded
3
Perform the operat!on of “Setup Method 121Setting the Synchro Recording Mode” on Page 11 and select the Synchro off mode.
When us,ng an already recorded DISC.press the TIME button to check the recordable t,me
.
-1
The time d,splay watches between the total recorded tomeand the recordable tome each tome the TIME button ISpressed
5
Press the ,nput sw,tch!ng button (INPUT) and select the dlgltal source (Optical or Coaxiali
* The lndlcator for the selected ,nput source (“CD”, “OPT” or “COAX”) lkghts I
Perform the operation of “Setup Method” on Page 11 and select on/off of the ATM function
l
ATM Function on
6
The “ATM” display will light. When a blank portlo” (of about 3 seconds or longer, of the recording ,np”t signal ISdetected, the
track number ISautomatically associated and recorded
. ATM Functaonoff
This ISrecorded as the followng track
71
Start playing the selection you want to record on the CD player, MD recorder. etc I
8
Press the record button (0 RECI
* if the “D in” lndlcator 1sfiashlng. check the connect,ons to the dlgttal lnputjacks I
Adjust the recordtng level wth the ,og d,al and press the enter button
* Adjust the input level ad,“stment control (INPUT LEVEL) so that the “OVER” indicator does not lkghteve” when the volume IS
9
loudest. After adlustlng, set the swrce to be recorded to the standby mode
* The recording level can be set I” advance “sing the men” mode.
- The set recording level WIIIbe stored I” memory. but this data might be lost If the unit ISnot connected to a power source for 2
to 3 days
1
IO
Press the play button 0 PLAY)
l
Recording starts.
I1
Play the selecf~onto be recorded on the CD player, etc
NOTES:
* “CD” can be selected by pressing the Input selector button, but manual recording from the set’s CD unit ISonly possible !n the dual
mode. (Refer to “Dual mode” on Page 26. 27).
l
When you do not wish to change the dIgItal recording level, set the ,og d,a, so that “‘1,. 1.5. ’ a ,?-dE” ISdIsplayed The recording
WIIIbe made wthout changing the input slgnal level
* The recording level can be adjusted over a range of - - to +I2 dB for analog (“put recording and from -m to 0 dB for dlgltai input
recording Note that the dtsplayed sett\ng values may include a degree of error ,n terms of calculation processing
l
When the record,ng level IS- =e,“:,. -Ui /- -. --SE ” ISdIsplayed and audio 1snot output.
(3) Stopping recording
(Man unit)
Select the CD-R side. -
I I
1
During recording, press the stop button (m STOP)
l
The stop mode ISset automatically once the end of the recordable time is reached. I
NOTES:
l
When performlng dIgItal recording of CD or MD, the track numbers are recorded automatlcallv ISee Page 6 1
l
When recording digltal sources other than CD or MD, track numbers are automatlcallv added when blank Sections are
detected (See Page 6 )
l
During dIgItal recording from CD or MD, the track number may not change If the same track IS programmed twice In a
row or if the single track repeat mode ISset
l
It ISnot possible to make dlg,tal recordings of D,scs which have already been recorded dlgltally The CDR.W1500 includes
a serial copy management system This system llmlts reproduction of dIgItal signals on dIgItal audio devices to “one
generation” Use analog recording to record Discs orlglnally recorded dlgltally
* The CDR.W1500 IS for use I” pwate homes and may not operate properly if used (to record, etc.1 in combination with
professional equipment or other dewes not designed for use I” private homes.
l
To eject the Disc If the “1 L:_ II or ‘,Z ,,, : I- ” message IS displayed during dIgItal recording and
the recording pause mode is set. first press the stop button (m STOP), then press the open/close button (*
OPEN/CLOSE) to elect the Disc.
(4) Adding track numbers during recording
(Mann unit) (Remote control unit)
Select the CD-R s,de.
* Track numbers can be added during recording regardless of the recording mode.
Press the record b”m’” i. REC)
During recording. press the record button (0 RECI +
. When the record button (0 RECI IS pressed during recording, a
1
track number ISadded at that pant 1s track 2nd track
. A new track number cannot be added for approximately 4
seconds after the last track number
(51 Stopping recording temporarily
l
Record!ng can be stopped temporarily then resumed from the same point
During recording, press the pause button (II PAUSE)
. When the pause button (II PAUSE) IS pressed during 1sttrack 2ndwxk
2
recording, the pause mode IS ser at that point and the track
number changes
l
Press the play button 1, PLAY) to resume recording
l
A blank sectlo” of approximately 2 seconds 1sInserted before recording resumes
17
2. Synchronized recording of the Disc
(DISC SYNCHROI
* This mode ISused when recording all the tracks of the CD or MD on the playback side
(Mar” unit)
Select the CD-R side. -
1
Perform the operation of “Manual recording” on Page 16. perform the settings of the Input jacks and the recording
1
Perform the operato” of “Manual recording” on Page 16. set the Input jacks and the recording level. and set the stop
level, and set the stop mode. mode.
Perform the procedure at “Setup Method (2) Setting the Synchro Recording Mode” on Page 11 and select the disc Perform the operaton of “Setup Method (2) Setting the Synchro Recording Mode” on Page 11 and select the track
2
synchro mode or the make CD mode.
2
synchro mode.
l
The “SYNC” indication will Ilght.
l
The “1Tr SYNC” lndicatro” lights
3
Press the record button (0 REQ.
. The recording pause mode ISset and “i! i sip: Z-*-K+ --iz” or “i.tai ~1 ,I I” ISdlsplayed.
Use a CD player, cassette deck or other source to play the tracks that you wish to record.
4
l
Recording will start automatlcally.
l
In the make CD mode, flnalizatlon ISperformed automatically after recording stops.
* Please also see “Setup Method (3) Setting the Synchro Recording Level” on Page 11
3
Press the record button (0 REC)
l
Thus sets the record-pause mode and displays “: i _ .:, ,.y,,:/.‘,f.(r”
Use a CD player, cassette deck or other source to play the tracks that you wish to record.
4
l
Recording will start automatically.
* Please also see “Setup Method (3) Sertlng the Synchro Recording Level” on Page 11.
l
To stop synchro recording, press the stop button.
l
Please also see “Setup Method 13)Setting the Synchro Recording Level” on Page 11.
l
To stop synchro recording, press the stop button
l
Please also see “Setup Method (3) Setting the Synchro Recording Level” on Page 11.
NOTE:
l
If you wash to input text data. select the “I! i 5.: E.:*-or’-.-0” mode With CD-R discs, text data cannot be Input after
the disc has been finalized.
3. Synchronized recording of the single track
IlTr SYNCHRO)
* This mode IS used to record only one track
(Man unrt) (Remote control unit)
Select the CD-R side -
18
4. Fade-in and fade-out recording
* It ISpossible to record by gradually nzreaslng the volume (fade-In) or decreasing it (fade-out)
(1) Fade-in recording
1I
Perform the procedure at “Manual recording” step 1 to 8 (Page 16)
21
Start playng the selection you want to record on the CD player. cassette deck, etc
Press the fader button on the remote control unit.
3
l
‘% 38 I;?” ISdisplayed. and “FADE” flashes during the fade I” caper&on
l
The recorded sound ISgradually increased from a recording level of-m to the set recording level in the set time.
* Also refer to “Setup Method (5) Fade-In t,me setting” (Page 12).
(21 Fade-ouf recording
During recording. press the fader button on the remote control unit.
1
l
“Fade l:li~~i” ,s dIsplayed, and “FADE” flashes during the fade out operat,on.
l
The recorded sound is gradually decreased from the set recordtng level to a recording level of-w in the set t!me.
* Also refer to ‘“Setup Method 16)Fade-out time setting” (Page 12).
0
12 NORMAL PLAYBACK
1. Starting playback
First try playing the tracks in order.
Select the deck to be operated.
(Remote control unit)
II I
Load the disc to be played
l
Press the PLAY button 0) to start CD play
2
l
“)“llghts up and the track number and track time of the track I” play appear on the display.
l
Press the TIME button once, tw,ce or three t,mes to see:
Remalnlng track time, total remanng time. elapsed track tnx?.
NOTE:
l
‘3 ? i! ! i”3” wll be displayed at such tomes as when a disc IS not loaded, the disc cannot be read properly due to
scratches or dvt, or the disc ISloaded upside down
2. Starting playback
Press the stop button (m STOP)
3
l
Playback stops.
l
The stop mode ISset automaticallY once all the tracks on the disc have been played
19
0
13 VARIOUS PLAYBACK FUNCTIONS
In addition to normal playback, the CDR-W1500 also offers the playback functions described below.
1. Playing a certain track (remote control unit only) _.......................................................................... Direct Search
(Remote control unit)
f
- Select the deck to be operated
-1
Use the number buttons I1 to IO) and the cl 0 button to Input the number of the dewed track
1
l
For example:
Press button
q
to listen to the 4th track, buttons m and
q
to listen to the 12th track, m, m[ and KJ to
listen to the 30th track. Playback beglns from that track.
2. Finding the desired position while listening to the sound ..__._.__....._.__._........................................... Manual Search
l
Use this function to skip rapIdly through the disc while llstenlng to the sound.
This functton comes I” handy when you want to find a certan sectlo” wIthIn a long track
(Remote control unIti
f
2-
11) Searching forward
- Select tlhe deck tc‘be operated
1
During playback, press and hold I” the manual search forward
button (-1
l
Normal playback resumes from the point at which the button
ISreleased
1
. Playback stops If the end of the last track on the disc IS 2nd 3rd 4th
track track track
reached while pressing the manual search forward button
C-j.
’ For high-speed forward search wlthout hearing the sound,
press the manual search forward button (H) while I” the *,,+h+h,?,.J:$
pause mode Playback SklP SklP Sktp sap sap
(2) Searching backward
During playback, press and hold in the manual search reverse
button (+4).
l
Normal playback rewmes from the pant at which the button
ISreleased.
l
Manual search stops and playback starts If the begInnIng of
the first track on the disc IS reached while pressing the
manual search reverse button (~1.
l
For high-speed backward search wIthout hearing the sound.
I I
press the manual search averse button (U) while I” the ‘:: ‘;c’ ‘;c’ ‘j :* ,
pause mode. +,“..*,, ‘..*/ ‘..*,, ‘..&‘..J
SklP SklP SklP Skip SklP
NOTE:
l
There may be a slight break I” the sound when returning to normal playback from the manual search mode.
3. Finding the beginnings of tracks during playback ......... .. . .. . ........ ...... .... .. ............. .... ...... Automatic Search
a
(1) Moving ahead to the beginning of the next track
Select the deck to be operated -
(Main unit)
Press the automatic search forward button (WI + ~
1
l
During the search operat!o”. press the automatic search
forward button (W) aga,” to move further on to the 2nd track 3rd track 4th track
begInnIng of the following track. ‘L. .. __...I2
20

Other Denon Recording Equipment manuals

Denon DN-700R User manual

Denon

Denon DN-700R User manual

Denon DN-500R User manual

Denon

Denon DN-500R User manual

Denon CDR-1000 User manual

Denon

Denon CDR-1000 User manual

Denon CDR-M30 User manual

Denon

Denon CDR-M30 User manual

Denon DN-990R User manual

Denon

Denon DN-990R User manual

Denon DNSC2000 Installation and operating instructions

Denon

Denon DNSC2000 Installation and operating instructions

Denon DN-500R User manual

Denon

Denon DN-500R User manual

Denon DNSC2000 User manual

Denon

Denon DNSC2000 User manual

Denon DTR-80P User manual

Denon

Denon DTR-80P User manual

Denon DN-700R User manual

Denon

Denon DN-700R User manual

Denon DN-C550R User manual

Denon

Denon DN-C550R User manual

Denon DN-F450R User manual

Denon

Denon DN-F450R User manual

Denon DN-F650R User manual

Denon

Denon DN-F650R User manual

Denon DN-C550R User manual

Denon

Denon DN-C550R User manual

Denon CDR-M30 User manual

Denon

Denon CDR-M30 User manual

Denon DNSC2000 User manual

Denon

Denon DNSC2000 User manual

Denon CDR-W1500 User manual

Denon

Denon CDR-W1500 User manual

Denon DN-HC1000S - Serato Scratch Live Sub... User manual

Denon

Denon DN-HC1000S - Serato Scratch Live Sub... User manual

Denon CDR-W1500 Reference manual

Denon

Denon CDR-W1500 Reference manual

Denon DN-HC4500 - DJ Mixer USB Controller User manual

Denon

Denon DN-HC4500 - DJ Mixer USB Controller User manual

Denon CDR-W1500 User manual

Denon

Denon CDR-W1500 User manual

Denon CDR-W1500 User manual

Denon

Denon CDR-W1500 User manual

Denon DS1 User manual

Denon

Denon DS1 User manual

Denon DNSC2000 User manual

Denon

Denon DNSC2000 User manual

Popular Recording Equipment manuals by other brands

Avago MC68HC11 Application brief

Avago

Avago MC68HC11 Application brief

FTR Touch Quick reference card

FTR

FTR Touch Quick reference card

Sony DMX-R100 quick reference

Sony

Sony DMX-R100 quick reference

air avionics AIR Traffic Pilot's manual

air avionics

air avionics AIR Traffic Pilot's manual

Fluke PRO3000 user guide

Fluke

Fluke PRO3000 user guide

Preeflow eco-REMOTE Supplementary instructions

Preeflow

Preeflow eco-REMOTE Supplementary instructions

Harman Kardon CDR 20 Service manual

Harman Kardon

Harman Kardon CDR 20 Service manual

Ramsey Electronics ICI1 Assembly and instruction manual

Ramsey Electronics

Ramsey Electronics ICI1 Assembly and instruction manual

Focusrite Clarett 4 Pre USB user guide

Focusrite

Focusrite Clarett 4 Pre USB user guide

National Instruments NI VISION PCI-8254R user manual

National Instruments

National Instruments NI VISION PCI-8254R user manual

WesAudio Timbre user manual

WesAudio

WesAudio Timbre user manual

Avid Technology Pro Tools SYNC X Guide

Avid Technology

Avid Technology Pro Tools SYNC X Guide

Sierra Video ADM-188 owner's manual

Sierra Video

Sierra Video ADM-188 owner's manual

Cytron Technologies UC00A user manual

Cytron Technologies

Cytron Technologies UC00A user manual

Siemens PMI-2 installation instructions

Siemens

Siemens PMI-2 installation instructions

Clas Ohlson Tranwo C150 manual

Clas Ohlson

Clas Ohlson Tranwo C150 manual

National Instruments Cabled PCI Express Specification sheet

National Instruments

National Instruments Cabled PCI Express Specification sheet

Renu Electronics FlexiPanels Basicc FP2 Series user manual

Renu Electronics

Renu Electronics FlexiPanels Basicc FP2 Series user manual

manuals.online logo
manuals.online logoBrands
  • About & Mission
  • Contact us
  • Privacy Policy
  • Terms and Conditions

Copyright 2025 Manuals.Online. All Rights Reserved.