manuals.online logo
Brands
  1. Home
  2. •
  3. Brands
  4. •
  5. Denon
  6. •
  7. Stereo Receiver
  8. •
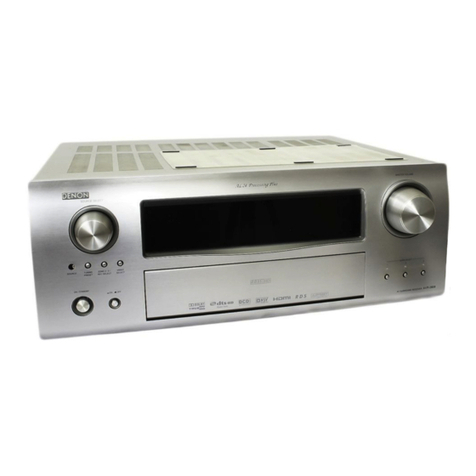
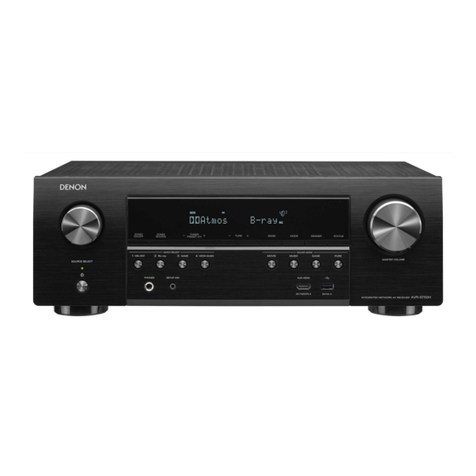
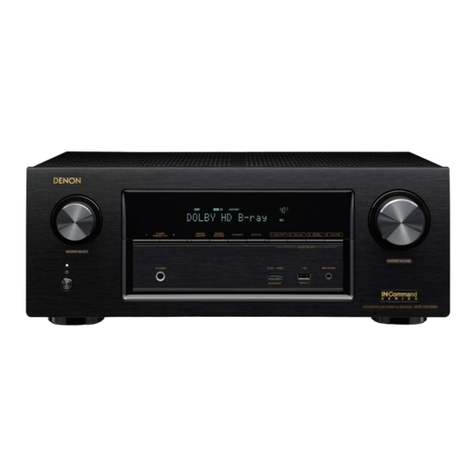
  9. Denon AVR-X3400H User manual

Denon AVR-X3400H User manual

Other manuals for AVR-X3400H

2

Other Denon Stereo Receiver manuals

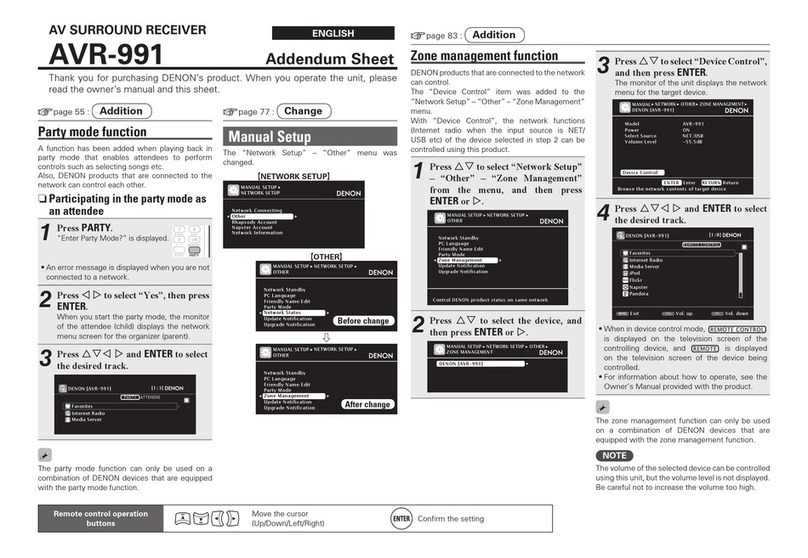
Denon AVR-1708 User manual

Denon

Denon AVR-1708 User manual

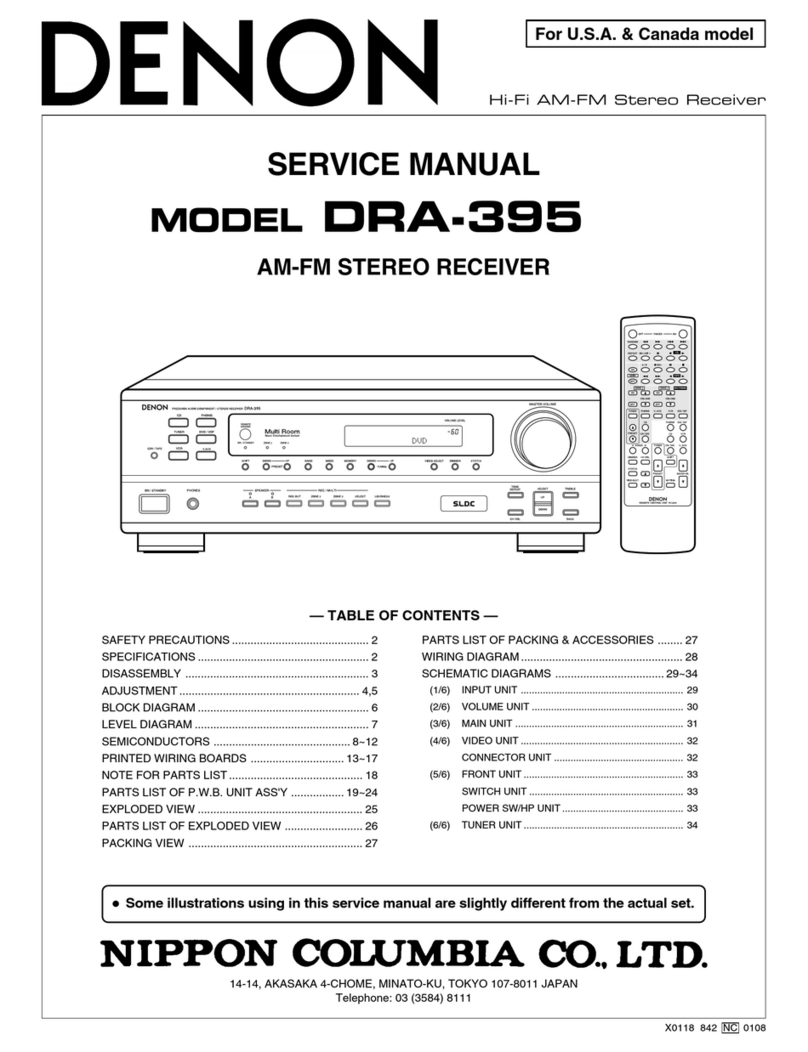
Denon AVR-391 User manual

Denon

Denon AVR-391 User manual

Denon AVR-1312 User manual

Denon

Denon AVR-1312 User manual

Denon AVR-S500BT User manual

Denon

Denon AVR-S500BT User manual

Denon AVC-X4800H User manual

Denon

Denon AVC-X4800H User manual

Denon AVR-1708 User manual

Denon

Denon AVR-1708 User manual

Denon AVR-2311CI User manual

Denon

Denon AVR-2311CI User manual

Denon AVR-E200 User manual

Denon

Denon AVR-E200 User manual

Denon AVR-S960H User manual

Denon

Denon AVR-S960H User manual

Denon AVR-1612 User manual

Denon

Denon AVR-1612 User manual

Denon AVR-983 User manual

Denon

Denon AVR-983 User manual

Denon AVR-900 User manual

Denon

Denon AVR-900 User manual

Denon AVR-688 User manual

Denon

Denon AVR-688 User manual

Denon AVR-2807 User manual

Denon

Denon AVR-2807 User manual

Denon AVR-991 User guide

Denon

Denon AVR-991 User guide

Denon DRA-697CI User manual

Denon

Denon DRA-697CI User manual

Denon AVR-1908 User manual

Denon

Denon AVR-1908 User manual

Denon AVR-X2600H DAB User manual

Denon

Denon AVR-X2600H DAB User manual

Denon AVR2310CIOM User manual

Denon

Denon AVR2310CIOM User manual

Denon AVR-791 User manual

Denon

Denon AVR-791 User manual

Denon AVR-2310 User manual

Denon

Denon AVR-2310 User manual

Denon AVR-2308 User manual

Denon

Denon AVR-2308 User manual

Denon AVR-790 User manual

Denon

Denon AVR-790 User manual

Denon AVR-X2600H Series User manual

Denon

Denon AVR-X2600H Series User manual

Popular Stereo Receiver manuals by other brands

Teac AG-680 Service manual

Teac

Teac AG-680 Service manual

Kenwood KR-V888D instruction manual

Kenwood

Kenwood KR-V888D instruction manual

Teac AGV1050 owner's manual

Teac

Teac AGV1050 owner's manual

Sony STR-435 operating instructions

Sony

Sony STR-435 operating instructions

Pioneer Elite SC-68 Service manual

Pioneer

Pioneer Elite SC-68 Service manual

Pioneer SX-1250 operating instructions

Pioneer

Pioneer SX-1250 operating instructions

Marantz CINEMA 70S owner's manual

Marantz

Marantz CINEMA 70S owner's manual

Kenwood KMDX92 instruction manual

Kenwood

Kenwood KMDX92 instruction manual

Yamaha RX-830 owner's manual

Yamaha

Yamaha RX-830 owner's manual

Pioneer AVH-Z7250BT owner's manual

Pioneer

Pioneer AVH-Z7250BT owner's manual

Sony XAV-1500 operating instructions

Sony

Sony XAV-1500 operating instructions

Radio Shack DX-399 owner's manual

Radio Shack

Radio Shack DX-399 owner's manual

Sony STR-DE535 - Fm Stereo/fm-am Receiver operating instructions

Sony

Sony STR-DE535 - Fm Stereo/fm-am Receiver operating instructions

Pioneer SX-1000TA operating instructions

Pioneer

Pioneer SX-1000TA operating instructions

Yamaha MusicCast TSR-5B3D owner's manual

Yamaha

Yamaha MusicCast TSR-5B3D owner's manual

Sony STR-DG500 - Multi Channel Av Receiver Service manual

Sony

Sony STR-DG500 - Multi Channel Av Receiver Service manual

Sherwood Newcastle RX-770 operating instructions

Sherwood

Sherwood Newcastle RX-770 operating instructions

Panasonic AJSD955B - DVCPRO50 STUDIO DECK Brochure & specs

Panasonic

Panasonic AJSD955B - DVCPRO50 STUDIO DECK Brochure & specs

manuals.online logo
manuals.online logoBrands
  • About & Mission
  • Contact us
  • Privacy Policy
  • Terms and Conditions

Copyright 2025 Manuals.Online. All Rights Reserved.

START::|sX3k6VQNaf/6VbQg1Aav9Q==|wlVsGA57pv59207KoZErBEBIqGW3t9mICuBHvWGVwgo=|XOIUVey ND
INTEGRATED NETWORK AV RECEIVER
AVR-X3400H
Service Manual
Click here!
On-line service parts list
http://dmedia.dmglobal.com/Document/DocumentDetails/23186
Online Parts List (P5 to P7)
WEB owner’s manual (Release schedule)
http://manuals.denon.com/AVRX3400H/NA/EN/index.php (May 2017)
http://manuals.denon.com/AVRX3400H/EU/EN/index.php (June 2017)
http://manuals.denon.com/AVRX3400H/AP/ZH/index.php (August 2017)
CAUTION IN SERVICING
ELECTRICAL
MECHANICAL
REPAIR INFORMATION
UPDATING
Ver. 2
•Forpurposesofimprovement,specicationsanddesignaresubjecttochangewithoutnotice.
•Pleaseusethisservicemanualwithreferringtotheoperatinginstructionswithoutfail.
•Someillustrationsusinginthisservicemanualareslightlydifferentfromtheactualset.
Please refer to the MODIFICATION NOTICE.
CAUTION IN SERVICING
SAFETY PRECAUTIONS
NOTE FOR SCHEMATIC DIAGRAM
NOTE FOR PARTS LIST
INSTRUCTIONS FOR HANDLING SEMICONDUCTORS AND OPTICAL UNIT
Online Parts List
Accessing the Parts List
Logging in to New SDI and Accessing the Parts List
Accessing the Part List from the Model Asset Screen
PRINTED CIRCUIT BOARDS Parts Table
Downloading the Parts List as an Excel File
Revision History
Searching Part Numbers or Ref. Numbers
CAUTION IN SERVICING.
Initializing This Unit
JIG FOR SERVICING
2
Caution in
servicing Electrical Mechanical Repair Information Updating
The following items should be checked for continued protection of the customer and the service
technician.
Leakage current check
Before returning the set to the customer, be sure to carry out either (1) a leakage current check or
(2) a line to chassis resistance check. If the leakage current exceeds 0.5 milliamps, or if the resistance
from chassis to either side of the power cord is less than 460 kohms, the set is defective.
Be sure to test for leakage current with the AC plug in both polarities, in addition, when the set's
power is in each state (on, off and standby mode), if applicable.
CAUTION Please heed the following cautions and instructions during servic-
ing and inspection.
◎ Heed the cautions!
Cautions which are delicate in particular for servicing are labeled on the cabinets, the parts and the
chassis, etc. Be sure to heed these cautions and the cautions described in the handling instructions.
◎ Cautions concerning electric shock!
(1) An AC voltage is impressed on this set, so if you touch internal metal parts when the set is energized,
you may get an electric shock. Avoid getting an electric shock, by using an isolating transformer and
wearing gloves when servicing while the set is energized, or by unplugging the power cord when
replacing parts, for example.
(2) There are high voltage parts inside. Handle with extra care when the set is energized.
◎ Caution concerning disassembly and assembly!
Through great care is taken when parts were manufactured from sheet metal, there may be burrs on the
edges of parts. The burrs could cause injury if ngers are moved across them in some rare cases. Wear
gloves to protect your hands.
◎ Use only designated parts!
The set's parts have specic safety properties (re resistance, voltage resistance, etc.). Be sure to use
parts which have the same properties for replacement. The burrs have the same properties. In particular,
for the important safety parts that are indicated by the z mark on schematic diagrams and parts lists,
be sure to use the designated parts.
◎ Be sure to mount parts and arrange the wires as they were originally placed!
For safety seasons, some parts use tapes, tubes or other insulating materials, and some parts are mount-
ed away from the surface of printed circuit boards. Care is also taken with the positions of the wires by
arranging them and using clamps to keep them away from heating and high voltage parts, so be sure to
set everything back as it was originally placed.
◎ Make a safety check after servicing!
Check that all screws, parts and wires removed or disconnected when servicing have been put back
in their original positions, check that no serviced parts have deteriorate the area around. Then make
an insulation check on the external metal connectors and between the blades of the power plug, and
otherwise check that safety is ensured.
(Insulation check procedure)
Unplug the power cord from the power outlet, disconnect the antenna, plugs, etc., and on the power.
Using a 500V insulation resistance tester, check that the insulation resistance value between the inplug
and the externally exposed metal parts (antenna terminal, headphones terminal, input terminal, etc.) is
1M Ω or greater. If it is less, the set must be inspected and repaired.
Many of the electric and the structural parts used in the set have special safety properties. In most cases
these properties are difcult to distinguish by sight, and the use of replacement parts with higher rat-
ings (rated power and withstand voltage) does not necessarily guarantee that safety performance will
be preserved. Parts with safety properties are indicated as shown below on the wiring diagrams and the
parts list in this service manual. Be sure to replace them with the parts which have the designated part
number.
(1) Schematic diagrams Indicated by the z mark.
(2) Parts lists Indicated by the z mark.
The use of parts other than the designated parts could cause electric shocks, res or other dangerous
situations.
CAUTION Concerning important safety parts
SAFETY PRECAUTIONS
3
Caution in
servicing Electrical Mechanical Repair Information Updating
WARNING:
Parts indicated by the z mark have critical characteristics. Use ONLY replacement parts recommended
by the manufacturer.
CAUTION:
Before returning the set to the customer, be sure to carry out either (1) a leakage current check or (2)
a line to chassis resistance check. If the leakage current exceeds 0.5 milliamps, or if the resistance from
chassis to either side of the power cord is less than 460 kohms, the set is defective.
WARNING:
DO NOT return the set to the customer unless the problem is identied and remedied.
NOTICE:
ALL RESISTANCE VALUES IN OHM. k=1,000 OHM / M=1,000,000 OHM
ALL CAPACITANCE VALUES ARE EXPRESSED IN MICRO FARAD, UNLESS OTHERWISE INDICATED. P
INDICATES MICRO-MICRO FARAD. N INDICATES NANO FARAD. EACH VOLTAGE AND CURRENT ARE
MEASURED AT NO SIGNAL INPUT CONDITION. CIRCUIT AND PARTS ARE SUBJECT TO CHANGE WITHOUT
PRIOR NOTICE.
1. Parts indicated by "nsp" on this table cannot be supplied.
2. When ordering a part, make a clear distinction between "1" and "I" (i) to avoid mis-supplying.
3. A part ordered without specifying its part number can not be supplied.
4. Part indicated by "@" mark is not illustrated in the exploded view.
WARNING: Parts indicated by the z mark have critical characteristics. Use ONLY replacement parts
recommended by the manufacturer.
Electrostatic breakdown of the semi-conductors or optical pickup may occur due to a potential differ-
ence caused by electrostatic charge during unpacking or repair work.
1. Ground for Human Body
Be sure to wear a grounding band (1 M ohm) that is properly grounded to remove any static electricity
that may be charged on the body.
2. Ground for Workbench
Be sure to place a conductive sheet or copper plate with proper grounding (1 M ohm) on the work-
bench or other surface, where the semi-conductors are to be placed. Because the static electricity
charge on clothing will not escape through the body grounding band, be careful to avoid contacting
semi-conductors with your clothing
<Incorrect>
CBA
Grounding Band
Conductive Sheet or
Copper Plate
1MΩ
1MΩ
<Correct>
CBA
NOTE FOR SCHEMATIC DIAGRAM
NOTE FOR PARTS LIST
INSTRUCTIONS FOR HANDLING SEMICONDUCTORS AND
OPTICAL UNIT
4
Caution in
servicing Electrical Mechanical Repair Information Updating
Online Parts List
Accessing the Parts List Logging in to New SDI and Accessing the Parts List
(1) Click the URL link on the cover of the service manual.
Examples of display
NOTE : If the web browser does not open automatically, copy the URL and paste it into the address bar
of the web browser and then press Enter.
(2) When the login screen is displayed, enter your username and password.
(3) Enter the 5 letters shown as the blue CAPTCHA code as single-byte characters.
If the text is unclear, click "Refresh" to change the CAPTCHA code, and enter it again.
(4) Press the "Login" button.
(1) Access New SDI from the URL below.
<http://dmedia.dmglobal.com>
(2) When the login screen is displayed, enter your username and password.
(3) Enter the 5 letters shown as the blue CAPTCHA code as single-byte characters.
If the text is unclear, click "Refresh" to change the CAPTCHA code, and enter it again.
(4) Press the "Login" button.
(5) When the Home screen is displayed, click "Advanced Search".
(6) Enter the following search conditions and click "Search".
Keyword : Model name Brand : brand name Asset Type : Part list
(7) Click the model name when the search results are displayed.
5
Caution in
servicing Electrical Mechanical Repair Information Updating
Accessing the Part List from the Model Asset Screen Downloading the Parts List as an Excel File
PRINTED CIRCUIT BOARDS Parts Table
Revision History
(1) Display Model Asset from New SDI.
(2) Click the section displayed as ▼ Link to Part Lists under the model name.
NOTE : If the ▼ Link to Parts List section is not displayed, download the parts table from the Asset list.
(1) Displays the Parts List. Click the Download icon.
(1) Display the Parts List. Click the PCB name in the blue bar to display the parts list for the board.
Left and right arrow icons are displayed if the circuit board name does not t in the blue bar.
Click these icons to display a different part of the name when necessary.
← Icons to move the circuit board name
left and right in the blue bar
(1) Click "Revision history" in the blue bar.
The following details are displayed.
Sheet : Name of the changed sheet
Description : Description of the changes
Remarks : Destination, color information
Factories : Factory number
Ver : Version number after revision if changes were made to the parts list
Date : Date of changes
6
Caution in
servicing Electrical Mechanical Repair Information Updating
Searching Part Numbers or Ref. Numbers
You can search a Parts List for part numbers or Ref. numbers.
(1) Enter the part number or Ref. number in the search window of the Parts List, and press the search
button.
(2) The search results are displayed.
The name of the sheet in which the search part is used and the part’s line are displayed.
(3) Next, click the "Sheet" section of the search results.
(4) The Board Part Table opens and the line on which the searched part number appears is highlighted.
7
Caution in
servicing Electrical Mechanical Repair Information Updating
Make sure to initialize this unit after replacing the microcomputer or any peripheral equipment, or the
digital PCB.
1. Press the power button to turn off the power.
2. While holding down buttons "ZONE2 SOURCE" and "DIMMER" simultaneously, press the power but-
ton to turn on the power.
3. Release the buttons after conrming that the display ashes at 1-second intervals.
* The unit is initialized.
Use network initialization mode to initialize the network related settings.
NOTE: • If the unit fails to enter the service mode in step 3, repeat the procedure from step 1.
• Initializing the device restores the customized settings to the factory settings. Write down
your settings in advance and recongure the settings after initialization.
Use the following jigs (extension cable kit) when repairing the PCBs.
Order with your dealer for the jigs your dealer if necessary.
8U-110084S : EXTENSION UNIT KIT : 1 Set
8U-110136S : EXTENSION UNIT KIT : 1 Set
(See JIG FOR SERVICING)
DIMMER
X
ZONE2
SOURCE
JIG FOR SERVICING
Initializing This Unit
CAUTION IN SERVICING.
8
Caution in
servicing Electrical Mechanical Repair Information Updating
ELECTRICAL
SCHEMATIC DIAGRAMS
SCH01_HDMI SW2
SCH02_HDMI SW1
SCH03_NET PHY
SCH04_CPU LEVEL CHG
SCH05_DIGITAL CNT
SCH06_CPU
SCH07_DSP
SCH08_ADV8003
SCH09_ADV8003 DDR
SCH10_D.SUPPY
SCH11_HDMI TX
SCH12_DIR A.PLD
SCH13_MAIN DAC
SCH14_VIDEO_PLD
SCH15_ADV7180
SCH16_INPUT1
SCH17_INPUT2
SCH18_F.HDMI
SCH19_VIDEO
SCH20_FRONT_CNT
SCH21_AMP1
SCH22_AMP2
SCH23_SPK
SCH24_REG
SCH25_RS CNT
SCH26_FRONT
SCH27_RS232
SCH28_SIDE_CNT
SCH29_SMPS
PRINTED CIRCUIT BOARDS
DIGITAL, F HDMI
INPUT, VIDEO, FRONT CNT
AMP
MAIN, RS CNT, GUIDE L、FH GUIDE
FRONT, CNT, RS232, FUNCTION, TOP GUIDE
SMPS
LEVEL DIAGRAM
FRONT ch
CENTER, SURROUND, SURR.BCK ch
SUBWOOFER ch
ZONE2 ch
ZONE2(LEGO) ch
BLOCK DIAGRAM
ANALOG AUDIO DIAGRAM
DIGITAL AUDIO DIAGRAM
VIDEO DIAGRAM
POWER DIAGRAM
WIRING DIAGRAM
SEMICONDUCTORS
1. IC's
2. FL DISPLAY
3. Remote Code Table
9
Caution in
servicing Electrical Mechanical Repair Information Updating
SCHEMATIC DIAGRAMS
SCH01_HDMI SW2
STBY POWER
ANALOG AUDIO DIGITAL AUDIO
TMDS SIGNAL
ANALOG VIDEO
DIGITAL VIDEO
GND LINE
POWER- LINE
POWER+ LINE
TX1-
TX1-
TX1-
TX1-
1NI_IMDH2NI_IMDH3NI_IMDH
IN1_5V
IN4_CK
RX4_5V
RX2_5V
RX1_5V
RX2_5V
RX6_5VRX2_2+
RX2_2-
CEC_COM RX2_1+
RX2_0-
RX2_C+
RX1_2+
RX1_1-
CEC_COM RX1_0+
H5VDET RX1_0-
HINSELB RX1_C+
HSCL
SW2_HINT
HPD4
HPD2
C1008 4.7U-K-1608
C1009 4.7U-K-1608
HDMI_IN4
D1038 OPEN D1026 OPEN D1013 OPEN D1001 OPEN
D1040 OPENIN3_CK
D1028 OPENIN2_CK
D1015 OPENIN1_CK
D1003 OPEN
R108647K
C1223100N-K R106810K
C1209100N-K
R1061 47 C1208100N-K
R1062 47
C1225100N-K C1206100N-K
C1226100N-K
R1064 OPEN
C1200100N-K
C1199100N-K
C1194100N-K
C1193100N-K
C1042 4.7U-K-1608C1056 4.7U-K-1608C1067 4.7U-K-1608 C1030 4.7U-K-1608 C1010 4.7U-K-1608
C1043 4.7U-K-1608C1057 4.7U-K-1608C1068 4.7U-K-1608 C1031 4.7U-K-1608 C1015 4.7U-K-1608
C1034 4.7U-K-1608
C1035 4.7U-K-1608
TX2+
TX2-
TX0_SHLD
TXC+
TXC-
N.C
DDC_SDA
+5V
TX2_SHLD
TX1+
TX0_SHLD
TX0-
TXC_SHLD
CE_REMOTE
DDC_SCK
GND
HP_DET
TX2_SHLD
TX1+
TX0_SHLD
TXC+
TXC-
DDC_SCK
GND
HP_DET
TX2_SHLD
TX1+
TX0_SHLD
TXC+
TXC-
CE_REMOTE
DDC_SCK
GND
HP_DET
R1107 0
R1082 0
R1045 0
R1021 0
RX4_2+
RX4_2-
RX4_1+
RX4_1-
RX4_C+
RX4_C-
RX4_5V
RX3_1+
RX3_1-
RX3_0+
RX3_0-
RX3_5V
RX2_1+
RX2_1-
RX2_C+
RX2_C-
RX2_5V
RX1_1+
RX1_1-
RX1_C+
RX1_C-
RX1_5V
RX4_DDCDA
RX3_DDCDA
RX4_2+
RX4_2-
RX4_1+
RX4_0-
RX4_C+
RX3_2+
RX3_1-
RX3_0+
RX3_0-
RX3_C+
RX2_DDCCL
RX1_DDCCL
RX4_5V
RXF_5V
R1067 OPEN
TO CPU
R1058 1K8
R1055 1K8
47KR1011
47KR1010
C1073100N-K
C1074100N-K
C1076100N-K
C1080100N-K
C1082100N-K
C1084100N-K
P1_D2-
P1_D1-
P1_D0-
P1_C-
RXF_5V
P0_D2+
P0_D1+
P0_D0+
P0_D0-
P0_C-
CEC5V
TX1+
TX0+
TX2_SHLD
TX1_SHLD
TX0-
CE_REMOTE
TXC_SHLD
DDC_SCK
HP_DET
GND
TX2+
TX2-
TX1_SHLD
TX0+
TXC+
TXC-
N.C
DDC_SDA
+5V
TX2-
TX1_SHLD
TX0+
TX2+
TX0-
TXC_SHLD
CE_REMOTE
N.C
DDC_SDA
+5V
TX2-
TX1_SHLD
TX0+
TX2+
TX0-
TXC_SHLD
N.C
DDC_SDA
+5V
IN4_HPD
IN4_5V IN3_5VIN2_5V
CEC
47K
R1103
Q1009
RT1N141C
10K
R1102
Q1004
RT1N141C
10K
R1070
47K
R1071
Q1002
RT1N141C
10K
R1039
47K
R1040
10K
R1014
47K
R1015
Q1000
RT1N141C
R1108 0
R1105
0
R1106
47K
100N-K
C1090
R1081 0
100N-K
C1087
R1075
0
R1076
47K
R1044 0
R1042
0
100N-K
C1070
R1043
47K
R1019 0
100N-K
C1032
R1017
0
R1018
47K
RX4_0+
RX4_0-
HPD4
RX3_2+
RX3_2-
RX3_C+
RX3_C-
HPD3
RX2_2-
RX2_0+
RX2_2+
RX2_0-
HPD2
RX1_2-
RX1_0+
RX1_2+
RX1_0-
HPD1
100N-K
C1089
D1024
OPEN-1608
R1097 0
RX3_5V
C1077
10P-J-1608
RX3_DDCCL
RX4_DDCCL
RX4_0+
RX4_1-
RX3_1+
RX3_2-
RX4_C-
RX3_C-
RX1_DDCDA
RX2_DDCDA
R1993
1K
R1066 OPEN
R1063
1M
RX3_5V
RX7_5V
RX5_5V
RX1_5V
SW2_HINT
R1073
10K
RX2_0+
RX2_1-
OPEN
R1074
RX1_2-
RX1_1+
RX2_C-
HINSELC
HINSELA RX1_C-
HPD3
HPD1
HSDA
SW2_RST
R1052 1K8
R1057 1K8
C1075100N-K
C1079100N-K
C1083100N-K
C1085100N-K
C1179 4.7U-K-1608
C1180 4.7U-K-1608
CB05YTYH221
L1016
P1_D2+
P1_D1+
P1_C+
P1_D0+
P0_D2-
CEC_COM
P0_C+
P0_D1-
DGND
IN4_DA
D1037 OPEN
D1039 OPEN
IN3_DA
D1025 OPEN
D1027 OPEN
IN2_DA
IN3_HPD D1012 OPEN
D1014 OPEN
IN1_DA
IN2_HPD D1000 OPEN
D1002 OPEN
IN1_HPD
RT1N441C
Q1010
RT1N441C
Q1005
RT1N441C
Q1003
RT1N441C
Q1001
10P-J-1608
C1078
R108910K
R109247K
R109310KR1060 47
1N-KC1086
C1205100N-K
C1227100N-K
R106510K
C1228100N-K
C1229100N-K
C1197100N-K
C1196100N-K
C1095100N-K
C1211
10U-K-2012(OPEN)
C1081100N-K
R1053 0
100U-K-3225(OPEN)
C1069
OPEN
TO
HDMI SW1
TO
HDMI TX
RX4_DDCDA
RX3_DDCCL
RX2_DDCCL
RX2_DDCDA
RX1_DDCCL
RX1_DDCDA
C1221100N-K
C1219100N-K
C1218100N-K
C1213100N-K
R1080 1K
P1_D1+
P1_D1-
P1_C+
P1_C-
P0_D1+
P0_D1-
P0_D0+
P0_D0-
AVDD11TX_2
PVDD33_2
AVDD11RX_2
AVDD33RX_2
AVDD11RX_2
CB05YTYH221L1004
L1001 FBMJ3216HL160NT
CB05YTYH221L1000
CEC1.1V2
RX4_DDCCL
R1101
1K
R1104
47K
RX3_DDCDA
R1069
1K
R1072
47K
R1038
1K
R1041
47K
R1013
1K
R1016
47K
R1096
2K2
R1099
8K2
C1220100N-K
C1222100N-K
C1216100N-K
C1217100N-K
C1210100N-K
10U-K-2012(OPEN)C1215
10U-K-2012(OPEN)C1212
P1_D2+
P1_D2-
P1_D0+
P1_D0-
P0_D2+
P0_D2-
P0_C+
P0_C-
AVDD33TX_2
VDD33_2
AVDD33RX_2
VDD11_2
FBMJ3216HL160NTL1006
CB05YTYH221L1005
CB05YTYH221L1003
CB05YTYH221L1002
CEC3.3V
STBY5V
HDMI SW2
10
11
12
13
141516
54
32
1 6
9
87
U1002
SN74CBT3251PWR
GND
VCC
B5
B6
B7
B8
S0
S1
S2
B4
B3
B2
B1
A
NC
OE
3
4 2
1
27MHz(FA-238,7P)
X1000
TO HDMI SW1
C1224100N-K
C1207100N-K
C1214
10U-K-2012(OPEN)
FROM
D.SUPPLY
191715131198765432 18161412101
A111989-A-01-T
N1001
191715131198765432 18161412101
A111989-A-01-T
N1002
191715131198765432 18161412101
A111989-A-01-T
N1003
191715131198765432 18161412101
A111989-A-01-T
N1004
144
143
142
140
138
136
134
132
130
128
127
126
125
124
123
122
121
119
117
115
113
111
109
1 2
107
3 4
105106
5
104
7
102
9
100
11
98
13
96
15
94
17
92
19
90
2120
8889
2322
8687
24
85
26
83
28
81
30
79
32
77
34
75
36
73
37
38
39
41
43
45
47
49
51
53
55
56
57
58
59
60
62
64
66
68
70
72
139
141
137
135
133
131
129
120
112
118
116
114
110
46
44
40
42
52
54
50
48
61
69
63
65
67
71
6
103108
148 10 12
95
10199 97
1816
9193
25 27 29
84 82 80
3531 33
7478 76
145
MN864788
U1000
RX2SCL
RX3SCL
TX1SCL
TX1SDA
VDD33
VSS
38:VDD33
71:RX2P5V
73:RX0P5V
74:RX3SDA
VDD11
72:RX1P5V
RX2SDA
TX0SDA
TX0HPD
CH1ASD0
CH1ALRCLK
CH1ABCLK
VSS
VDD11
P1TX2P
AVDD11TX
P1TX2M
P1TX1P
AVDD11TX
P1TX1M
P1TX0P
AVDD33TX
P1TX0M
P1TXCP
AVDD11TX
P1TXCM
VSS
VDD11
P0TX2P
AVDD11TX
P0TX2M
P0TX1P
AVDD11TX
P0TX1M
P0TX0P
AVDD33TX
P0TX0M
AVDD11TX
P0TXCM
VSS
VDD11
NIRQA1
37:NIRQA0
39:PVDD33
40:VSS
AVDD33RX3
P3RXCM
P3RXCP
AVDD11RX3
P3RX0M
P3RX0P
AVDD11RX3
P3RX1M
P3RX1P
AVDD11RX3
P3RX2M
P3RX2P
VSS
AVDD33RX2
P2RXCM
P2RXCP
AVDD11RX2
P2RX0M
P2RX0P
AVDD11RX2
P2RX1M
P2RX1P
AVDD11RX2
P2RX2M
P2RX2P
VSS
VDD11
NIRQ1
VDD33
RX3P5V
VDD11
AVDD33RX1
P1RXCM
AVDD11RX1
P1RXCP
P1RX0M
P1RX0P
AVDD11RX1
P1RX1M
P1RX1P
AVDD11RX1
P1RX2M
P1RX2P
VSS
AVDD33RX0
P0RXCM
P0RXCP
AVDD11RX0
P0RX0M
P0RX0P
AVDD11RX0
P0RX1M
P0RX1P
AVDD11RX0
P0RX2M
P0RX2P
VSS
RX1SDA
RX1SCL
RX0SDA
RX0SCL
109:CEC
110:TX1ARCIN
111:TX0ARCIN
VDD11
NTEST
HSCL0
NRESET
HSDA0
VDD33
SYSCLK/XI
NC/XO
VSS
VDD11
VSS
VDD11
LPSA1
LPSA0
VSS
MISO
NCS
CH0AMCLK
VDD33IO
CH0ABCLK
CH0ALRCLK
CH0ASD3
CH0ASD2
CH0ASD1
CH0ASD0
NC
VSS144:TX0SCL
143:TX1HPD
P0TXCP
A0
TO 0A
A1
TO 1A
A2
TO 2A
A3
TO 3A
A4
TO 4A
10
Caution in
servicing Electrical Mechanical Repair Information Updating