HOUSTON:
9747 Whithorn Drive,
Houston, Texas,
U.S.A. 77095
Tel: 281-821-3355
Fax: 281-821-0304
DENSO NORTH AMERICA
www.densona.com
VER 109.1
TORONTO:
90 Ironside Crescent,
Unit 12, Toronto,
Ontario, Canada M1X1M3
Tel: 416-291-3435
Fax: 416-291-0898
A Member of Winn & Coales International
The information given on this sheet is intended as a general guide only and should not be used for speciÄcation purposes. We believe the information to be accurate and reliable but do not guarantee it. We assume
no responsibility for the use of this information. Users must, by their own tests, determine the suitability of the products and information supplied by us for their own particular purposes. No patent liability can be assumed.
VER 1311.05
Application
1.0 Air Supply
1.1 Confirm the quick-disconnect
fitting is the proper size for your air
supply hose. Other fittings may be
substituted if needed.
1.2 Attach air supply hose to the
compress air inlet. Minimum of 14
CFM air compressor is required.
The air supply pressure should be
90 - 110 psi.
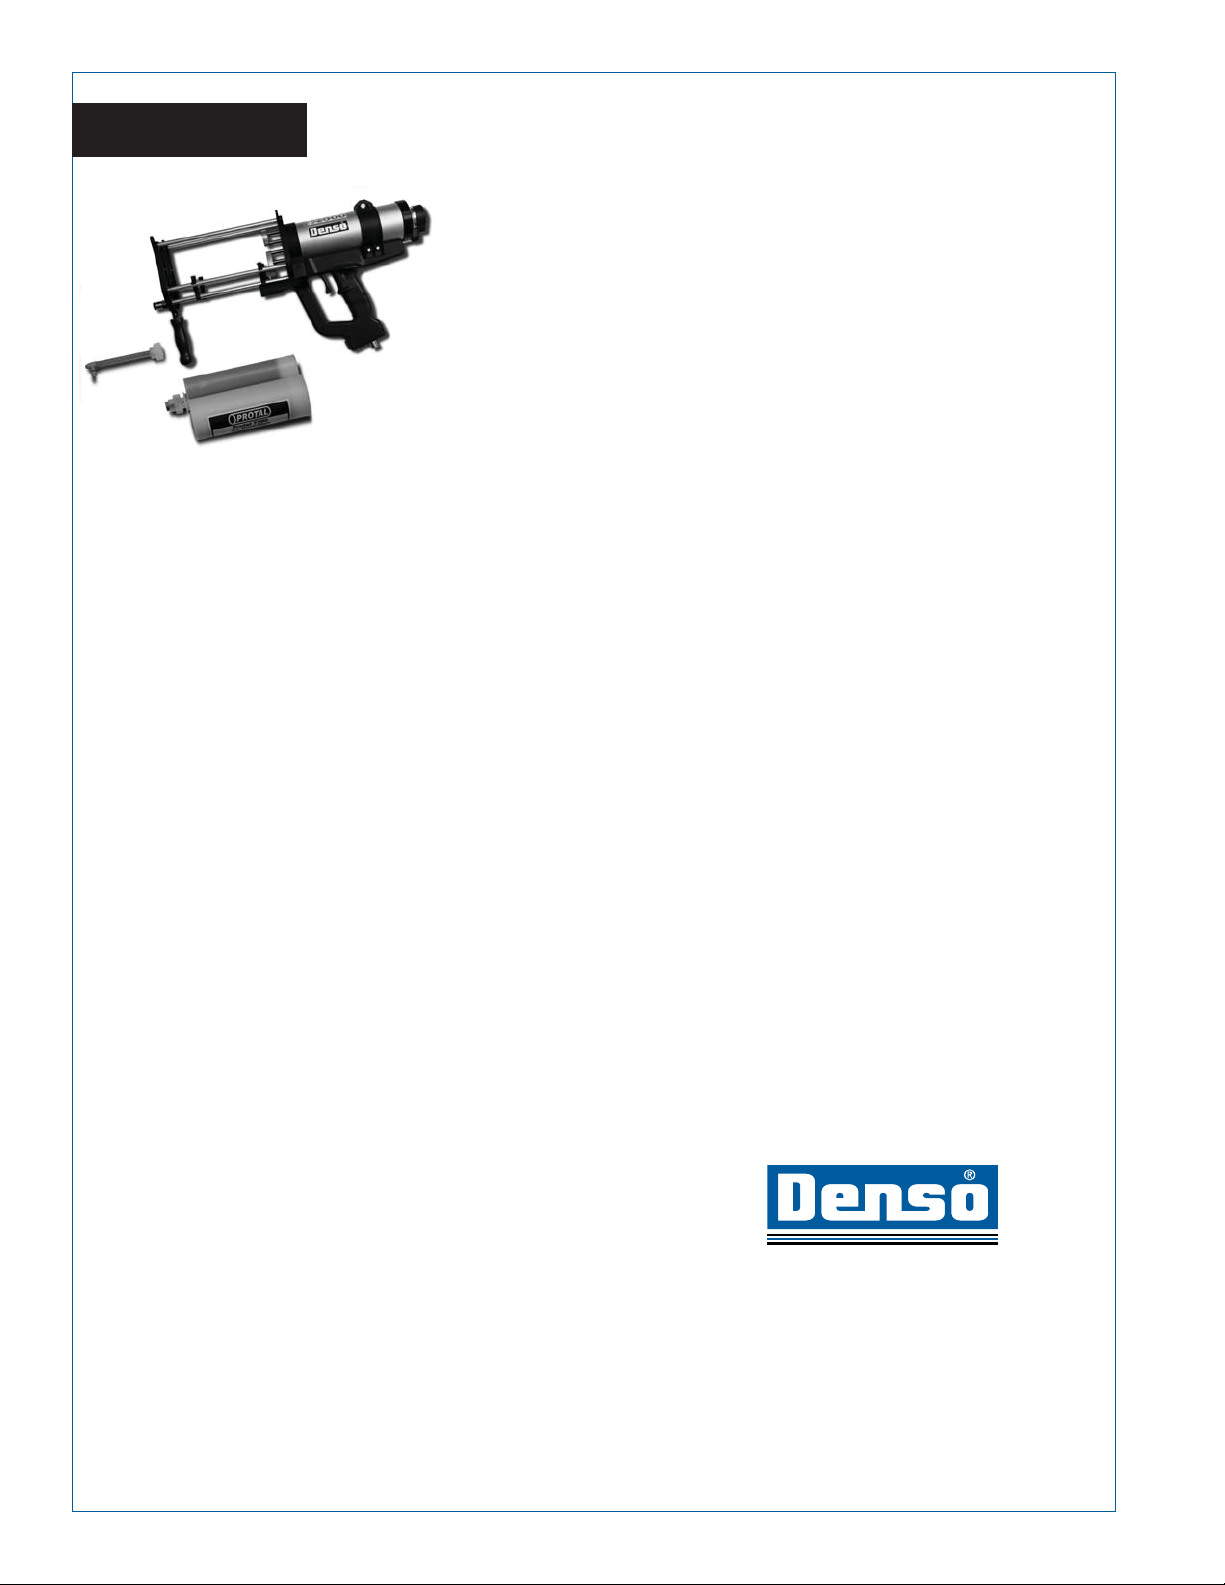
2.0 Install Cartridge In Applicator
2.1 Heat and check temperature of
"Part A" Protal Repair Cartridge to
approx. 120°F to 135°F (49°C to
54°C) in a microwave, convection
oven, weld rod box or other methods.
(Do not overheat and check with an
infrared gun).
2.2 Place the bell end of the static
mixing tip over the cartridge outlet.
Press firmly to seat the tip.
2.3 Tighten the lock assembly
clockwise onto the cartridge outlet
and tighten securely until it snaps in
place.
2.4 Before installing cartridges into
gun, hold gun in an upright position
while pointing the nozzle in a safe
direction away from yourself and
other personnel. This will reduce the
chance of material drooling into the
mixer bell housing causing premature
cure of material in mixer.
2.5 Place the large end of the
cartridge assembly (piston seal end)
over the two ejector plates of the
applicator, pushing the cartridge
assembly towards the air cylinder,
snapping the cartridge into place.
Ensure that the cartridge assembly is
properly seated in cradle of gun and
ejector plates and rod assembly are
properly aligned in applicator.
2.6 Connect quick-lock coupling air
hose firmly onto the mixing tip air
inlet.
3.0 Using the Protal Air Cartridge
Gun
3.1 Set fluid setting dial to #2 to #4.
3.2 Adjust the atomizing air pressure
dial to #3 to #5.
Note: When spraying with right
angle tip, it may require an
increase in air pressure.
3.3 Purge cartridge and nozzle by
first pulling the trigger half-way, just
long enough to fill the mix nozzle
with material.
3.4 Pull trigger completely to begin
spraying. Release half-way to
temporarily stop spraying. Release
trigger completely when cartridge is
empty.
4.0 Remove Cartridge from
Applicator
4.1 Press the red button to retract
the ejector plates from the cartridge.
4.2 Disconnect quick lock coupling
on air hose from mixing tip air inlet
4.3 Partially-used cartridges may be
reused by removing and discarding
the mixing tip, wipe clean and
resealing the cartridge with the
original plug and nut assembly. Be
sure to re-align the plug according to
the A and B compounds.
Note: Refer to the Protal 7200
MSDS (Parts A and B) and
applicable regulations or
authorities for waste disposal.
5.0 Cleaning
5.1 Wipe off excess coating material
with a clean rag and a small amount
of solvent, avoiding getting solvent
on regulator and piston housing.
6.0 Troubleshooting
6.1 Contact a Denso representative
for help.
Note: The manufacture, Sulzer,
continues to make improvements to
the spray gun so pressure settings
may vary.


