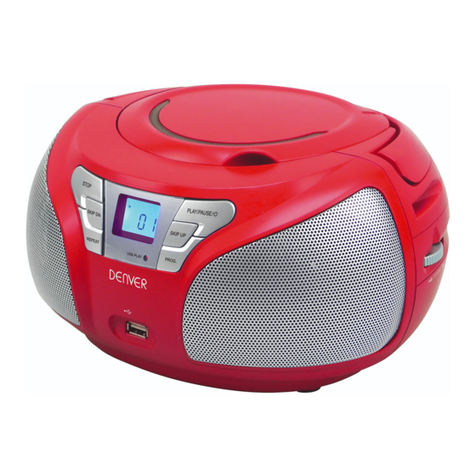
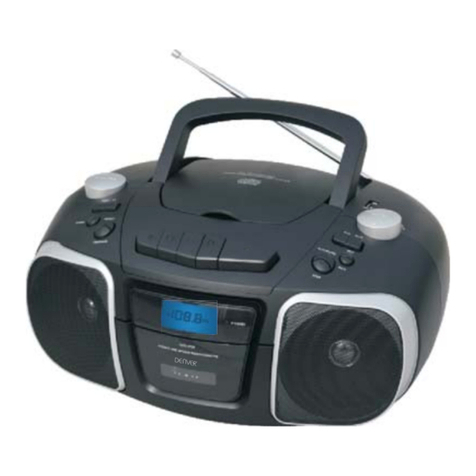
Denver TCU-209 User manual

English -
1
1. FUNCTION SWITCH
AUX/CD/TAPE (OFF)/RADIO
2. BAND SWITCH
3. FM ANTENNA
4. CD DOOR
5. TUNING KNOB
6. BASS BOOST BUTTON
7. CD SKIP/SEARCH FORWARD
BUTTON
8. CD SKIP/SEARCH BACKWARD
BUTTON
9. CD PROGRAM BUTTON
10. CD MODE BUTTON
11. CD STOP BUTTON
12. CD PLAY/PAUSE BUTTON
13. CD LCD DISPLAY
14. STEREO HEADPHONE JACK
15. VOLUME CONTROL KNOB
16. AC SOCKET
17. BATTERY DOOR
18. FM STEREO LED INDICATOR
19. CASSETTE COMPARTMENT
20. CASSETTE RECORD BUTTON
21. CASSETTE PLAY BUTTON
22. CASSETTE REWIND BUTTON
23. CASSETTE FAST FORWARD
BUTTON
24. CASSETTE STOP/EJECT BUTTON
25. CASSETTE PAUSE BUTTON
26. SPEAKER LEFT
27. SPEAKER RIGHT
28. FOLDER BUTTON
29. CD /SD/USB BUTTON
30. AUX IN JACK
31. USB PORT
32. SD/MMC CARD SLOT

English -
2
AC OPERATION
Before operation please be sure that the voltage on the set corresponds to
the voltage of your local area. Unravel the AC Line Cord, insert one end into
the AC jack on the set, and the other end into a standard AC outlet.
Remarks : 1) In case of malfunction due to electrostatic discharge (ESD), reset the unit
by reconnecting the AC cord again to resume to normal operation.
2) When not in use – Unplug the AC power cord completely from the AC
power socket.
BATTERY OPERATION
Disconnect the AC Cord Set completely. Open the BATTERY DOOR and insert
UM-2/ “C” size x 8 batteries (not supplied) making sure that the indicated
battery polarity is observed.
When not in use – Remove all the batteries if the unit will not be used for
several months or more.
RADIO OPERATION
Slide the FUNCTION SWITCH to the “RADIO” position. Slide the BAND
SWITCH to the desired waveband. Turn the TUNING KNOB to your desired
radio station. Adjust the sound level by rotating the VOLUME CONTROL KNOB.
To turn off the radio, simply slide the FUNCTION SWITCH to “TAPE (OFF)”
position.
Note : Radio frequency is shown on the TUNING KNOB.
FM STEREO INDICATOR
When tuned to a FM Stereo broadcast the “FM ST. LED INDICATOR” will light
up. In weak signal areas the FM Stereo signal may not be strong enough and
can cause excessive background noise. In this case, slide the BAND SWITCH
to “FM” position.
ANTENNAS
For best reception, fully extend the FM ANTENNA to receive FM stations. For
AM reception, the unit has a built-in antenna, turn the whole unit for best
reception.
BASS BOOST
For increased bass at all volume levels, slide the BASS BOOST BUTTON to
“ON” position to boost the low frequency tone for an emphasized bass sound.
To release the super bass, simply slide the button to “OFF” position.

English -
3
AUXILIARY (AUX) MODE
1. Slide the FUNCTION SWITCH to the “AUX” position.
2. Connect the earphone socket from the Auxiliary unit (e.g. MP3 player or
MD player) into AUX-IN jack on the rear of this product via an Audio Line
Cord (3.5mm plug on both ends; not supplied).
3. Play the Auxiliary unit. Music from the Auxiliary unit can be listened
through the speaker of this product.
STEREO HEADPHONE JACK
For private listening, insert the plug of a Stereo Headphone into the STEREO
HEADPHONE JACK and adjust the VOLUME CONTROL KNOB accordingly.
During the use of a headphone, the Speakers are automatically disconnected.
CASSETTE OPERATION
Tape Playback
Depress the STOP/EJECT BUTTON to open the cassette door. Insert a
cassette tape into the CASSETTE COMPARTMENT and push the cassette door
to close. Slide the FUNCTION SWITCH to TAPE position. Depress the PLAY
BUTTON. Adjust the VOLUME CONTROL KNOB to your desired listening level.
To stop the tape, depress the STOP/EJECT BUTTON.
Fast Forward and Rewind
The tape can be FAST FORWARDED or REWOUND by depressing the FAST
FORWARD BUTTON or REWIND BUTTON respectively.
Pause Function
During playback or recording, the tape can be stopped temporarily by
depressing the PAUSE BUTTON. To continue playback or recording, press the
PAUSE BUTTON once again.
Auto Stop System
When the tape runs to its end during playback or recording, the cassette
operation will be stopped automatically.
Caution
To avoid damage to the cassette mechanism or to the cassette tapes, always
depress the STOP/EJECT BUTTON between each operation!

English -
4
Recording from the Radio
1. Tune to a desired radio program as described in the “RADIO
OPERATION” Section.
2. Insert a blank cassette tape into the CASSETTE COMPARTMENT.
3. Press the PAUSE BUTTON.
4. Press the RECORD BUTTON. The PLAY BUTTON is engaged
simultaneously to start recording. With the built-in Automatic Level
Control (ALC), the best recording quality is automatically adjusted.
Changing the volume level will not affect the recording. Release the
PAUSE BUTTON to begin recording.
5. To stop recording temporarily, press the PAUSE BUTTON. To continue
the recording, press the PAUSE BUTTON once again.
6. Press the STOP/EJECT BUTTON to stop recording.
7. When the tape runs to its end, the cassette operation will be stopped
automatically.
CD OPERATION
PLAYING COMPACT DISC (CD-R/RW PLAYBACK COMPATIBLE)
Getting Started
Note: Should skipping of tracks occur during CD playing, try turning the
volume down.
When CD is playing, do not open the CD DOOR.
1. Open the CD DOOR by pulling up the CD DOOR. Put a CD disc into the
CD Compartment and close the CD DOOR. Set the FUNCTION SWITCH to
“CD” position.
Note : Ensure the CD DOOR is closed properly
and locked in place.
2. When the CD DOOR is closed with a CD inside, total
number of the tracks in the disc will be shown on
the CD LCD DISPLAY and will go to stop mode. (ex.
Total 17 tracks inside the disc). The “DISC”
indicator will always be shown on the LCD DISPLAY.
3. If there is no disc inside, the LCD DISPLAY will
show “ ” and go to stop mode.
4. If the CD DOOR is not closed, the DISPLAY will
show “ ”.

English -
5
Play/Pause Mode
1. When the PLAY/PAUSE BUTTON is pressed during CD stop mode, the first
track will be played. The Play Indicator “” will be
shown on the LCD DISPLAY. The CD LCD DISPLAY
will show the specific number of track being played.
2. For interruption while the CD is playing, press the
CD PLAY/PAUSE BUTTON once. The Play Indicator
“” will blink continuously on the LCD DISPLAY.
3. Though the sound stops, the disc will continue to
spin. To re-start playing, press the CD PLAY/PAUSE
BUTTON once again. The music will start from the
exact position where it was interrupted.
4. To stop the CD, press the CD STOP BUTTON once
whether the CD is in Play or Pause mode. The LCD DISPLAY will show the
total number of tracks of the disc again.
5. To turn off the unit, slide the FUNCTION SWITCH to “TAPE (OFF)”
position.
Skip and Search Mode
1. During play or pause mode, when CD SKIP/SEARCH or CD
SKIP/SEARCH BUTTON is pressed once, it will go to the next track or
go back to the beginning of the track.
2. During play mode, when CD SKIP/SEARCH or CD SKIP/SEARCH
BUTTON is pressed and held, it will search the track with audible high-
speed forward or backward playback.
Repeat Mode
1. Repeat 1 :
When the MODE BUTTON is pressed once, the
Repeat Indicator “ ” will be shown on the LCD
DISPLAY. This single track of music will be
repeated.
2. Repeat All:
When the MODE BUTTON is pressed twice, the
Repeat All Indicator “ ” will be shown on the
LCD DISPLAY. The whole disc can be played
continuously.
3. To cancel the Repeat Function
Press the MODE BUTTON repeatedly until the
Repeat Indicator disappears from the LCD DISPLAY.

English -
6
Random Play Mode
This feature allows the track on the disc to be played
in a random order.
1. During the CD stop mode, press the MODE
BUTTON three times, the “ ” indicator
will be shown on the LCD DISPLAY and all music
will be played in random order automatically.
2. To cancel the random play function, press the MODE BUTTON again,
“” Indicator will disappear from the LCD DISPLAY.
Program Mode
1. During the CD stop mode, press the PROGRAM
BUTTON once. The “PROGRAM” indicator and the
number of Program to be memorized starts from
the first program “ ” will light up and blink
continuously.
Press the CD SKIP/SEARCH or SKIP/SEARCH BUTTON to your
desired musical track, the CD LCD DISPLAY will show the appropriate
track number. Press the PROGRAM BUTTON to store this track in memory.
2. Repeat above procedure until all desired tracks have been programmed.
A total of 20 tracks can be stored in memory.
Remarks :
Whenever CD SKIP/SEARCH FORWARD or
BACKWARD BUTTON is pressed, it will always
show the last programmed track first to recall
your memory.
After complete programming, LCD DISPLAY will show “PROGRAM_ _ _”
and flash continuously.
3. Press the CD PLAY/PAUSE BUTTON once to start
the program playback and the CD Play Indicator
“” will light up.
4. To check the program you have stored after
complete programming, press the PROGRAM
BUTTON once during CD stop mode, then press
the CD SKIP/SEARCH FORWARD BUTTON once, the LCD DISPLAY will
show the first programmed track number. Repeat above procedure to
read all the programmed memory.
5. To cancel the programmed memory :
¾During the CD stop mode, press the CD STOP BUTTON once.
OR
¾Open the CD DOOR during the CD stop mode.
The Program Indicator “ ” will disappear from the LCD DISPLAY.
English -
7
PLAYING MP3 DISC
Getting Started
Note: Should skipping of tracks occur during MP3 Disc playing, try turning
the volume down.
When MP3 disc is playing, do not open the CD DOOR.
1. Open the CD DOOR by pulling up the CD DOOR. Put a MP3 disc into the
CD compartment and close the CD DOOR. Set the FUNCTION SWITCH to
“CD” position.
Note : Ensure the CD DOOR is closed properly and locked in place.
2. When the CD DOOR is closed with a MP3 disc
inside, total number of the tracks in the disc will be
shown on the CD LCD DISPLAY and go to stop
mode. The “DISC” indicator will always be shown
on the LCD DISPLAY.
3. If there is no disc inside, the DISPLAY will show
“” and go to stop mode.
4. If the CD DOOR is not closed, the DISPLAY will show “ ”.
Play/Pause Mode
1. When the PLAY/PAUSE BUTTON is pressed during CD stop mode, the first
track will be played. The Play Indicator “”will be
lighted. The “ ” Indicator will be shown as well
to indicate MP3 Disc is being played. The LCD
DISPLAY will show the specific track number being
played.
2. To select the specific musical tracks inside the MP3 Disc.
MP3 music can be stored
into CD Disc with or without
folders according to your
“MP3 burning method”.
a. If the MP3 disc is
downloaded without
dividing into folder, all
track number will be shown directly in the LCD DISPLAY. The Album
number will only show after pressing the FOLDER BUTTON.
b. If the music is stored into different folders, then you’ve to select the
specific Album number first by pressing the FOLDER BUTTON;
afterwards press the CD SKIP/SEARCH FORWARD or BACKWARD
BUTTON to select the specific Track number music inside this Album.

English -
8
example: To select Album # 4, track # 3.
STEP – 1: Press the FOLDER BUTTON to
select the Album # 4.
STEP – 2: Press the CD SKIP/SEARCH
FORWARD or BACKWARD BUTTON
to select the Track # 3 inside this
Album # 4.
3. For interruption while MP3 disc is playing, press the CD PLAY/PAUSE
BUTTON once. The Play Indicator “” will blink continuously on the LCD
DISPLAY.
4. Though the sound stops, the disc will continue to spin. To re-start playing,
press the CD PLAY/PAUSE BUTTON once again. The music will start from
the exact position where it was interrupted.
5. To stop the MP3 disc, press the CD STOP BUTTON once whether the MP3
disc is in Play or Pause mode.
6. To turn off the unit, slide the FUNCTION SWITCH to “TAPE (OFF)”
position.
Repeat Mode
1. Repeat 1:
When the MODE BUTTON is pressed once, the
Repeat Indicator “ ” will light. This single track
of music will be repeated.
2. Repeat Folder:
When the MODE BUTTON is pressed twice, the
“” and “ ” indicator will be shown. This
specific folder will be played repeatedly.
Remarks: The folder number and the track number
will be shown every 2 seconds alternatively.
3. Repeat All:
When the REPEAT BUTTON is pressed three times,
the Repeat All Indicator “ ” will be shown. The
whole disc can be played continuously.
4. To cancel the Repeat Function
Press the MODE BUTTON repeatedly until the
Repeat Indicator disappears from the LCD DISPLAY.

English -
9
Random Play Mode
This feature allows the tracks on the disc to be played
in a random order.
1. During the CD Stop mode, press the MODE
BUTTON four times, the “ ” Indicator will
show on the LCD DISPLAY and all music will be
played in random order automatically.
2. To cancel the Random Play function, press the MODE BUTTON again,
“” Indicator will disappear from the LCD DISPLAY.
Skip and Search
1. During play or pause mode, when CD SKIP/SEARCH or CD
SKIP/SEARCH BUTTON is pressed once, it will go to the next track or
go back to the beginning of the track.
2. During play mode, when CD SKIP/SEARCH or CD SKIP/SEARCH
BUTTON is pressed once and held, it will search the track with audible
high speed forward or backward playback.
Program Mode
1. During the CD stop mode, press the PROGRAM
BUTTON once. The “PROGRAM” indicator and the
number of Program to be memorized starts from the
first program “ ” will light up and blink
continuously. Press the FOLDER BUTTON, then press
the CD SKIP/SEARCH FORWARD or BACKWARD BUTTON to select your
desired musical track, CD LCD DISPLAY will show the track number of
this specific Album to be programmed. Press the PROGRAM BUTTON to
store this track in memory.
2. Repeat above procedure until all desired tracks have been programmed.
Remarks: Whenever the FOLDER BUTTON is pressed, it will always
show the last programmed Album number first to recall
your memory.
A total of 20 tracks can be stored in memory. After complete
programming, LCD DISPLAY will show “PROGRAM _ _ _” and blink
continuously.
3. To start the Programmed playback, press the CD PLAY/PAUSE BUTTON
once and the CD Play Indicator “”, “PROGRAM” and the track number
of the specific Album will light up.

English -
10
example: Album # 3, Track # 2.
4. To check the program you have stored after complete programming,
press the PROGRAM BUTTON once during the CD Stop mode. The LCD
DISPLAY will show “ ” and blink continuously. Press the FOLDER
BUTTON to read the Album number, then press the CD SKIP/SEARCH
FORWARD or BACKWARD BUTTON to read the specific track number of
said Album. Press the PROGRAM BUTTON again, LCD DISPLAY will show
“” and blink continuously. Repeat above procedure to check all
programs being stored.
5. To cancel the programmed memory:
¾During the CD stop mode, press the CD STOP BUTTON once.
OR
¾Open the CD Door during the CD stop mode.
The “PROGRAM” Indicator will disappear from the LCD DISPLAY.
Recording from CD Player
1. Slide the FUNCTION SWITCH to “CD” position.
2. Put a CD into the CD compartment with the label side upward.
3. Insert a cassette into the cassette compartment and press PAUSE
BUTTON of the cassette deck.
4. Press RECORD BUTTON and PLAY BUTTON simultaneously for recording
stand-by. With the built-in ALC, the best recording quality is adjusted
automatically.
5. Activate the CD player, playing in a desired track as described in the
COMPACT DISC PLAYER OPERATION section. Release the PAUSE
BUTTON of the cassette deck to start recording.
6. To stop recording temporarily, press the PAUSE BUTTON. To continue
recording, press the PAUSE BUTTON again.
7. Press STOP/EJECT BUTTON of the cassette deck to stop recording. Then
stop CD playback by pressing the CD STOP BUTTON of the CD player.

English -
11
SD/MMC CARD PLAYBACK
IMPORTANT NOTE:
This unit supports most of the common MP3 interface but not 100% because
there are too many different formats keep on changing in the market.
1. Slide the FUNCTION SWITCH to “CD” position.
2. Press the CD/SD/USB BUTTON once, LCD
DISPLAY will show “CARD” indicator.
Remarks: When there has no SD/MMC card inside
the CARD SLOT, LCD DISPLAY will
show “no”.
3. Insert a SD/MMC card into the SD/MMC CARD
SLOT, total number of music will be shown on the
LCD DISPLAY.
4. Press the CD PLAY/PAUSE BUTTON to start
playing the music.
5. Operate all the CD control buttons same as
mentioned in above section “PLAYING MP3 DISC”, they have same
function and operational method.
6. To exit from the SD/MMC CARD playback mode, press the CD/SD/USB
BUTTON twice. It will go back to CD Disc mode again.
USB OPERATION
IMPORTANT NOTE:
This unit supports most of the common MP3 interface but not 100% because
there are too many different formats keep on changing in the market.
1. Slide the FUNCTION SWITCH to “CD” position.
2. Press the CD/SD/USB BUTTON twice, LCD DISPLAY
will show “USB” indicator.
Remarks: When there has no MP3 Player or Flash
drive connecting to the USB PORT, LCD
DISPLAY will show “no”.
3. Insert the USB plug of an Auxiliary unit (e.g.: Portable MP3 Player or Flash
Drive) into the USB PORT in this unit, total number
of music will be shown on the LCD DISPLAY.
4. Press the CD PLAY/PAUSE BUTTON to start playing
the music.

English -
12
5. Operate all the CD control buttons same as mentioned in above section
“PLAYING MP3 DISC”, they have same function and operational method.
6. To exit from the USB playback mode, press the CD/SD/USB BUTTON again.
It will go back to CD Disc mode again.
MAINTENANCE
CLEANING THE TAPE HEADS
Clean the heads frequently to remove dust and tape residue. Dirt on the
heads will impair the sound quality of both recording and playback.
WARNING:
TO PREVENT FIRE OR SHOCK HAZARD, DO NOT EXPOSE THE APPLIANCE TO RAIN
OR MOISTURE. DO NOT REMOVE COVER; PILOT LAMPS SOLDERED IN PLACE. NO
USER SERVICEABLE PARTS INSIDE. REFER SERVICING TO QUALIFIED SERVICE
PERSONNEL.
Instructions on environment protection
Do not dispose of this product in the usual household
garbage at the end of its lifecycle; hand it over at a collection
point for the recycling of electrical and electronic appliances.
The symbol on the product, the instructions for use or the
packing will inform about the methods for disposal.
The materials are recyclable as mentioned in this marking. By
recycling, material recycling or other forms of re-utilization of
old appliance, you are making an important contribution to
protect our environment.
Please inquire at the community administration for the authorized disposal
location.

LOCALIZACIÓN DE CONTROLES
1. INTERRUPTOR DE FUNCIONES
AUX/CD/TAPE (OFF)/RADIO
2. SELECTOR DE BANDA
3. ANTENA FM
4. PUERTA DEL CD
5. BOTÓN DE SINTONIZACIÓN
6. TECLA DE AMPLIFICADOR DE GRAVES
7. TECLA DE SALTO/BUSQUEDA HACIA
DELANTE DE UNA PISTA DEL CD
8. TECLA DE SALTO/BUSQUEDA HACIA
DETRAS DEUNA PISTA DEL CD
9. TECLA DE PROGRAMACION DEL CD
10. TECLA DE MODE DEL CD
11. TECLA DE PARADA DEL CD
12. TECLA DE REPRODUCCION/PAUSA DEL
CD
13. DISPLAY DEL CD
14. TOMA DE AURICULARES ESTÉREO
15. CONTROL DE VOLUMEN
16. ENCHUFE AC (PARA ALIMENTACION
DE RED)
17. PUERTA DEL COMPARTIMENTO DE LAS
PILAS
18. INDICADOR DE FM ESTÉREO
19. COMPARTIMENTO DEL CASSETTE
20. BOTÓN DE GRABACIÓN DEL
CASSETTE
21. BOTÓN DE REPRODUCCIÓN DEL
CASSETTE
22. BOTÓN DE REBOBINADO DEL
CASSETTE
23. BOTÓN DE AVANCE RÁPIDO DEL
CASSETTE
24. BOTÓN DE PARADA/EXPULSIÓN DEL
CASSETTE
25. BOTÓN DE PAUSA DEL CASSETTE
26. ALTAVOZ IZQUIERDO
27. ALTAVOZ DERECHO
28. BOTÓN FOLDER
29. BOTÓN CD /SD/USB
30. TOMA AUX IN
31. PUERTO USB
32. RANURA PARA TARJETAS SD/MMC
Español - 1

FUNCIONAMIENTO CON ALIMENTACION DE RED
Antes de poner en funcionamiento el aparato, compruebe cuidadosamente
que el voltaje del equipo corresponde al de la red local, introduzca un
extremo a la toma de red local y el otro extremo en la toma AC del aparato.
Observaciones : 1) Si se produce algún fallo debido a descargas
electrostáticas (ESD), reinicie la unidad volviendo a
conectar el cable CA para reanudar el funcionamiento
normal.
2) Cuando no esté en uso – Desenchufe el cable de
alimentación CA de la toma eléctrica CA.
FUNCIONAMIENTO CON PILAS
Desconecte el cable AC. Abra el compartimento de las pilas en introduzca 8
pilas tamaño UM-2 / “C”, asegurándose que la polaridad es la correcta.
Cuando no esté en uso - Retire todas las pilas si no va a utilizar el equipo
durante varios meses o más.
FUNCIONAMIENTO DE LA RADIO
Deslice el Interruptor de Funciones a la posición RADIO. Deslice el Selector
de Bandas a la banda de frecuencia que desee (AM ó FM). Gire el botón de
sintonización hacia la emisora que desee. Ajuste el nivel del sonido rotando
la tecla de control de volumen. Para apagar la radio, deslice el interruptor de
funciones a la posición TAPE.
INDICADOR FM ESTÉREO
Para escuchar una emisora de FM estéreo, deslice el selector de bandas a la
posición “FM ST”. El indicador de FM estéreo se encenderá si la emisora se
recibe en estéreo. En cierta área, la fuerza de la señal de la emisora FM
puede ser débil o variable, y ésto puede causar un ruido de fondo excesivo.
En este caso, deslice el selector de bandas a la posición “FM”.
ANTENAS
Para mejorar la recepción, extienda completamente la antena de FM para
recepcionar las emisoras de FM. Para recepcionar AM, el aparato lleva
incorporada una antena, gire el aparato para obtener la recepción óptima.
AMPLIFICADOR DE GRAVES (BASS BOOST)
Para escuchar música a niveles bajos de volumen, ponga el botón de
amplificación de graves en posición ON para amplificar las frecuencias bajas
para mejorar el sonido grave. Para quitarlas, vuelva a pulsar este botón.
Español - 2

MODO AUXILIAR (AUX)
1. Coloque el INTERRUPTOR DE FUNCIÓN en la posición “AUX”.
2. Conecte la toma para auriculares de la unidad auxiliar (p. ej., un
reproductor de MP3 o un reproductor de MD) a la toma AUX-IN-JACK de
parte trasera de equipo con un cable de línea de audio (clavija de 3,5 mm
en ambos extremos; no incluido).
3. Reproduzca la unidad auxiliar. La música de la unidad auxiliar se puede
escuchar a través del altavoz de este equipo.
FUNCIONAMIENTO DEL CASSETTE
REPRODUCCION
Presione el botón de PARADA/EXPULSION (STOP/EJECT) para abrir la puerta
del compartimento. Introduzca una cinta en el compartimento y empuje la
puerta para cerrarla.
Deslice el Interruptor de Funciones a la posición TAPE. Presione el botón de
Reproducció “PLAY”. Ajuste el volumen con el botón de control de volumen
al nivel que desee. Para parar la cinta, presione el botón “STOP/EJECT”.
REBOBINADO Y AVANCE RÁPIDO
La cinta se puede avanzar o rebobinar presionando los botones “FFW” ó
“REW” respectivamente.
PAUSA
Durante la reproducción ó grabación, la cinta se puede detener
temporalmente presionando el botón de PAUSA. Para reanudar la
reproducción ó grabación, presione de nuevo el botón.
SISTEMA DE AUTO STOP
Cuando la cinta llega al final durante la reproducción ó grabación, el
funcionamiento del cassette se detendrá automáticamente.
PRECAUCION
Para evitar dañar el mecanismo del cassette ó las cintas, presione siempre el
botón STOP/EJECTen cada operación.
GRABACIÓN DE LA RADIO
1. Sintonice l programa de radio tal como se describe en la sección
“FUNCIONAMIENTO DE LA RADIO”.
2. Introduzca una cinta virgen en el compartimento del cassette.
3. Presione la tecla de grabación “RECORD” y automáticamente queda
pulsada la tecla de REPRODUCCIÓN. Este aparato dispone de un control
Español - 3

automático de nivel (ALC) que ajusta la mejor calidad de grabación. El
cambio del nivel de volumen, no afectará a la grabación.
4. Para detener la grabación temporalmente, presione la tecla de PAUSA.
Para reanudar la grabación, vuelva a presionarla.
5. Presione la tecla STOP/EJECT cuando quiera para de grabar.
6. Cuando la cinta llega a su final, el cassette se parará automáticamente.
FUNCIONAMIENTO DEL CD
REPRODUCCIÓN DE DISCOS COMPACTOS (COMPATIBLE CON LA
REPRODUCCIÓN DE CD-R/RW)
Empezar
Nota: Si durante la reproducción del CD se producen saltos de pista,
pruebe a bajar el volumen.
No abra la TAPA del reproductor de CD cuando esté reproduciendo
un CD.
1. Levante la tapa del CD para abrirlo. Coloque un CD en la bandeja de CD
y cierre la tapa. Coloque el INTERRUPTOR DE FUNCIÓN en la posición
“CD”,
Nota: Asegúrese de que la tapa del CD queda
correctamente cerrada.
2. Cuando se cierra la tapa del CD y en el interior hay
un CD, en la pantalla LCD se muestra el número
total de pistas del disco y el reproductor pasa al
modo de parada. (ex. total 17 pistas en el disco).
Siempre se mostrará el indicador “DISC” en la
pantalla LCD.
3. Si no hay ningún disco dentro, en la pantalla LCD
se muestra “ ” y el reproductor pasa al modo de
parada.
4. Cuando la tapa del CD no está cerrada, en la
PANTALLA se puede ver “ ”.
Modo de Reproducción / Pausa
1. Cuando el CD está en el modo de parada y se pulsa
el botón PLAY/PAUSE, se inicia la reproducción de
la primera pista. En la pantalla LCD aparece el
indicador de reproducción “”. La pantalla LCD del
CD muestra el número de la pista que se está
reproduciendo.
Español - 4

2. Para detener momentáneamente la reproducción, pulse el botón
PLAY/PAUSE del CD una vez. El indicador de reproducción “” de la
pantalla LCD empezará a parpadear.
3. Aunque el sonido se detiene, el disco continúa girando. Para reanudar la
reproducción, vuelva a pulsar el botón PLAY/PAUSE del CD. La música se
empezará a escuchar desde la posición exacta en que fue interrumpida.
4. Para parar el CD, pulse una vez el botón STOP del CD, tanto si el CD está
en modo de reproducción como en modo de pausa. La pantalla LCD
volverá a mostrar el número total de pistas del disco.
5. Para apagar el sistema, deslice el interruptor de funciones a la posición
TAPE (OFF).
Modo de Salto y Búsqueda
1. En el modo de reproducción o pausa, cuando se pulsa una vez el botón
SKIP/SEARCH o SKIP/SEARCH del CD, el reproductor salta a la
siguiente pista o vuelve al principio de la pista.
2. En el modo de reproducción, cuando se pulsa y mantiene pulsado el
botón SKIP/SEARCH o SKIP/SEARCH del CD, el reproductor busca
la pista y se percibe el sonido de la reproducción con avance o retroceso
a alta velocidad.
Modo de Repetición
1. Repetición de 1 pista:
Cuando se pulsa el botón MODE una vez, en la
pantalla LCD aparece el indicador de repetición
“” y la pieza de música de la pista se repite.
2. Repetición de todas las pistas:
Cuando se pulsa el botón MODE dos veces, en la
pantalla LCD aparece el indicador de repetición de
todas las pistas “ ” y el disco completo se
reproduce de forma continua.
3. Cancelar la función de repetición
Pulse el botón MODE repetidamente hasta que el
indicador de repetición desaparezca de la pantalla LCD.
Modo de Reproducción Aleatoria
Esta función permite escuchar las pistas de un disco
en orden aleatorio.
1. Con el CD en el modo de parada, pulse el botón
MODE tres veces, en la pantalla LCD aparece el
indicador “ ” y automáticamente se
reproducirá toda la música en orden aleatorio.
Español - 5

2. Para cancelar la función de reproducción aleatoria, vuelva a pulsar el
botón MODE, el indicador “ ” desaparecerá de la pantalla LCD.
Modo de Programación
1. En el modo de parada del CD, pulse el botón PROGRAM una vez. El
indicador “PROGRAM” y el número de programa a memorizar,
empezando por el primer programa “ ”, se
iluminan y parpadearán continuamente.
Pulse el botón skip/SEARCH ( o skip/SEARCH ( del
CD hasta llegar a la pieza musical deseada, en la
pantalla LCD se mostrará el número de pista
correspondiente. Pulse el botón PROGRAM para guardar esta pista en la
memoria.
2. Repita el procedimiento anterior hasta haber programado todas las pistas
deseadas. En la memoria se pueden guardar hasta 20 pistas.
Comentarios:
Cuando se pulse el botón SKIP/SEARCH FORWARD
o BACKWARD del CD, en primer lugar se mostrará
la última pista programada para su recuperación
de la memoria.
Una vez terminada la programación, la pantalla LCD mostrará “
” y parpadeará continuamente.
3. Pulse el botón PLAY/PAUSE del CD una vez para
iniciar la reproducción programada, el indicador de
reproducción “” del CD se iluminará.
4. Para comprobar el programa guardado después de
finalizar la programación, con el CD en modo de
parada pulse una vez el botón PROGRAM y, a
continuación, pulse el botón SKIP/SEARCH FORWARD del CD una vez, en
la pantalla LCD aparecerá el primer número de pista programado. Repita
el procedimiento anterior para leer toda la memoria programada.
5. Cancelar la memoria programada:
¾En el modo de parada del CD, pulse el botón STOP del CD una vez.
O
¾Abra la tapa del CD cuando esté en modo de parada.
El indicador de programación “ ” desaparecerá de la pantalla LCD.
Español - 6

REPRODUCCIÓN DE DISCOS MP3
Empezar
Nota: Si durante la reproducción del disco MP3 se producen saltos de
pista, pruebe a bajar el volumen.
Cuando se esté reproduciendo un disco MP3, no abra la tapa del CD.
1. Levante la tapa del CD para abrirlo. Coloque un disco MP3 en la bandeja
de CD y cierre la tapa. Coloque el INTERRUPTOR DE FUNCIÓN en la
posición “CD”.
Nota: Asegúrese de que la tapa del CD queda correctamente cerrada.
2. Cuando se cierra la tapa del CD y en el interior hay
un disco MP3, en la pantalla LCD se muestra el
número total de pistas del disco y el reproductor
pasa al modo de parada. Siempre se mostrará el
indicador “DISC” en la pantalla LCD.
3. Si no hay ningún disco dentro, en la pantalla LCD
se muestra “ ” y el reproductor pasa al modo de parada.
4. Cuando la tapa del CD no está cerrada, en la pantalla se puede ver
“”.
Modo de Reproducción / Pausa
1. Cuando el CD está en el modo de parada y se pulsa
el botón PLAY/PAUSE, se inicia la reproducción de
la primera pista. Se ilumina el indicador de
reproducción “”. También aparece el indicador
de “ ” indicando que se está reproduciendo un disco MP3. En la
pantalla LCD se muestra el número de la pista que se está reproduciendo.
2. Seleccionar una pista musical concreta del disco MP3:
La música en MP3 se puede guardar en un CD con o sin carpetas, según
el “método de grabación del MP3” utilizado.
a. Si el disco MP3 se
descarga sin dividirlo en
carpetas, en la pantalla
LCD se muestra
directamente el número
de todas las pistas. En
número de Álbum sólo
se mostrará después de pulsar el botón FOLDER.
b. Si la música se guarda en varias carpetas, primero hay que seleccionar
el número concreto de Álbum pulsando el botón FOLDER y, a
continuación, el botón SKIP/SEARCH FORWARD o BACKWARD del CD
para seleccionar el número específico de pista de este Álbum.
Español - 7
Other manuals for TCU-209
2
Table of contents
Languages:
Other Denver CD Player manuals

Denver
Denver MCU 5210 User manual

Denver
Denver MC-5220PURPLE User manual

Denver
Denver MC-5220 MK2 User manual

Denver
Denver DM-17 User manual

Denver
Denver TC-12 User manual

Denver
Denver MCA-230M K2 User manual

Denver
Denver MCA-230MK2 User manual

Denver
Denver MCI-5402 User manual

Denver
Denver MC5220 User manual

Denver
Denver DMP370 User manual

Denver
Denver TCU-206RED User manual

Denver
Denver TDC-280 User manual

Denver
Denver DM-24MK2 User manual

Denver
Denver TCM-103C2 User manual

Denver
Denver DMP-391 User manual

Denver
Denver MC-5220 MK2 User manual

Denver
Denver DMP-389 Quick guide

Denver
Denver TCM-230C User manual

Denver
Denver TCU-206 User manual

Denver
Denver TDA-65 User manual