manuals.online logo
Brands
  1. Home
  2. •
  3. Brands
  4. •
  5. Denver
  6. •
  7. CD Player
  8. •
  9. Denver TDA-65 User manual

Denver TDA-65 User manual

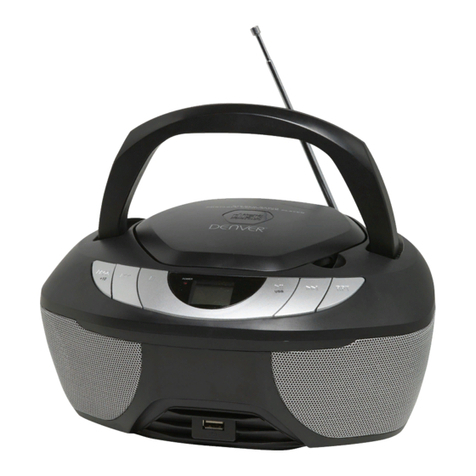
TDA-65
Product Overview
Front
view
Back view
1/MODE button 10 REPEAT/SNOOZE button
2PREV/TUN- button 11 CD compartment
3NEXT/TUN+ button 12 On/Off witch
4PRESET/PROG button 13 Tele copic antenna
5PLAY/SCAN button 14 AC-In ocket
6STOP/SELECT button 15 Volume knob
7MENU/INFO button 16 Line In jack
8ALARM button 17 Battery compartment
9LCD di play
AC Power connection
1. For fir t u e, open the CD compartment on the top panel, and remove the cardboard hipping protector.
2. Connect the power cable into the AC-In ocket on the back of the boom box and connect the power cable plug into the
main power wall ocket
3. Fully extend the tele copic antenna on the back of the boom box to receive the be t po ible radio reception.
B ttery power connection (option l)
The boom box can be operated either by AC power or battery power.
Note: Before in erting the batterie (not included), en ure that the boom box i di connected from the main power
upply.
1. Remove the battery compartment cover on the bottom of the boom box.
2. In ert correctly 6 x 1.5V C- ize (al o known a LR-14) batterie according to the ‘+’ and ‘-’ marking .
3. Replace the battery compartment cover while en uring that it click to place.
Power on or off
•To connect power, pu h the On/Off witch on the back of the boom box to the On po ition.
•To di connect power, pu h the On/Off witch on the back of the boom box to the Off po ition.
•When connecting power, pre and hold the /MODE button to witch the boom box on or to tandby.
Autom tic lly storing DAB r dio st tions
1. Switch on the boom box, then pre briefly the /MODE button to witch to DAB radio mode.
2. The fir t time you witch on the boom box or if no DAB radio tation i tored, the boom box automatically begin to
can for DAB radio tation . A canning progre bar i di played to how the progre of the can, and the number
of DAB radio tation found i al o di played.
When the can i complete, the boom box automatically broadca t the fir t available tation. DAB radio tation are
tored and arranged in numerical and then alphabetical order by default.
Selecting DAB r dio st tion
In DAB mode:
1. Pre the PREV or NEXT button to elect available DAB radio tation .
2. When the elected DAB radio tation i di played, wait a hort while to let the boom box tune to the elected radio
tation, or ju t pre the SELECT button.
Sc nning for DAB r dio st tions
With DAB radio, additional tation and ervice regularly become available. Perform a manual can occa ionally to make
ure that the boom box tore the mo t up to date DAB radio tation .
If the boom box i relocated to another place, e.g. travelling with you, it i al o recommended to perform a manual can.
In DAB mode:
1. Pre the SCAN button on the boom box to begin a earch for DAB radio tation . ‘Scanning...’ i di played, and a
canning progre bar i di played to how the progre of the can, and the number of DAB radio tation found i
al o di played.
M nu lly storing DAB r dio st tions
The boom box can tore up to 10 DAB radio tation for in tant acce to your favorite radio tation .
1. Select a DAB radio tation that you wi h to pre et.
2. Pre and hold the PRESET button for approximately 2 econd until ‘Pre et Store’ i di played.
3. Pre the PREV or NEXT button to allocate a number (1-10) to the current DAB radio tation.
4. Pre the SELECT button to confirm. ‘Pre et X tored’ i di played (‘X’ i the number of the pre et).
Note: If there i already an exi ting DAB tation tored under a pre et number, the newly tored DAB tation
overwrite the pre et.
Selecting preset DAB r dio st tion
In DAB mode:
1. Pre the PRESET button. ‘Pre et Recall’ i di played together with the current pre et number.
2. Pre the PREV or NEXT button to elect a pre et DAB radio tation.
3. Pre the SELECT button to confirm. The pre et DAB radio tation begin to broadca t.
Note: If no DAB tation i tored under a pre et number, ‘Pre et Empty’ i di played, then the previou ly elected
DAB radio tation i broadca t.
FM R dio
Check that the boom box i in FM radio mode. If not, pre briefly the /MODE button until the FM mode i elected
(check the di play). When li tening to FM radio tation , RDS (Radio Data Sy tem) information can be di played if the
radio tation i broadca t with RDS information. RDS information normally include the tation name, detail about the
program and the current time.
M nu lly storing FM r dio st tions
The boom box can tore up to 10 FM radio tation for in tant acce to your favorite radio tation .
1. In FM radio mode, tune to a FM radio tation that you wi h to pre et.
2. Pre and hold the PRESET button for approximately 2 econd until ‘Pre et Store’ i di played.
3. Pre the PREV or NEXT button to allocate a number (1-10) to the current FM radio tation.
4. Pre the SELECT button to confirm. ‘Pre et X tored’ i di played (‘X’ i the number of the pre et).
Note: If there i already an exi ting FM tation tored under a pre et number, the newly tored FM tation overwrite
the pre et.
Selecting preset FM r dio st tion
In FM mode:
1. Pre the PRESET button. ‘Pre et Recall’ i di played together with the current pre et number.
2. Pre the PREV or NEXT button to elect a pre et FM radio tation.
3. Pre the SELECT button to confirm. The pre et FM radio tation begin to broadca t.
Note: If no FM tation i tored under a pre et number, ‘Pre et Empty’ i di played, then the previou ly elected FM
radio tation i broadca t.
CD Mode
Check that the boom box i in CD mode. If not, pre briefly the /MODE button until the CD mode i elected (check
the di play). ‘NO DISC’ i di played if no di c i in the CD compartment.
Pl ying CD
1. Lift up the lid of the CD compartment on the top panel. ‘OPEN’ i di played.
2. Place an audio CD into the CD compartment, with the label ide facing up.
3. Clo e the lid of the CD compartment. ‘READING.’ i di played.
4. CD playback tart automatically. The current track number and the elap ed time of the current track are di played.
CD pl yb ck control
In CD mode, you can u e the following control on the boom box.
•During CD playback, pre the PLAY button to tart or pau e play. In pau e mode the elap ed time of the current track
fla he .
•During CD playback, pre the PREV or NEXT button to elect a previou or next track.
•During CD playback, pre the STOP button to top playback.
Listen to n extern l device
You can li ten to an external audio device through the peaker of the boom box.
1. U ing an audio cable with 3.5mm plug (not included), connect the Line In jack on the boom box to the headphone jack
on an external audio device.
2. Pre briefly the /MODE button until the AUX mode i elected (check the di play).
3. Start to play the external device.
Plea e notice - All product are ubject to change without any notice. We take re ervation for error and
omi ion in the manual.
ALL RIGHTS RESERVED, COPYRIGHT DENVER ELECTRONICS A/S
Electric and electronic equipment and included batterie contain material , component and ub tance that
can be hazardou to your health and the environment, if the wa te material (di carded electric and electronic
equipment and batterie ) i not handled correctly.
Electric and electronic equipment and batterie i marked with the cro ed out tra h can ymbol, een above.
Thi ymbol ignifie that electric and electronic equipment and batterie hould not be di po ed of with other
hou ehold wa te, but hould be di po ed of eparately.
A the end u er it i important that you ubmit your u ed batterie to the appropriate and de ignated facility. In
thi manner you make ure that the batterie are recycled in accordance with legi lature and will not harm the
environment.
All citie have e tabli hed collection point , where electric and electronic equipment and batterie can either be
ubmitted free of charge at recycling tation and other collection ite , or be collected from the hou ehold .
Additional information i available at the technical department of your city.
Hereby, Inter Sale A/S declare that the radio equipment type TDA-65 i in compliance with Directive
2014/53/EU. The full text of the EU declaration of conformity i available at the following internet addre :
http://www.denver-electronics.com/denver-tda-65/
Operating Frequency Range:
Max Output Power:
DENVER ELECTRONICS A/S
Omega 5A, Soeften
DK-8382 Hinnerup
Denmark
www.facebook.com/denverelectronic

This manual suits for next models

1

Other Denver CD Player manuals

Denver MC5220 User manual

Denver

Denver MC5220 User manual

Denver DMP370 User manual

Denver

Denver DMP370 User manual

Denver TCM-230C User manual

Denver

Denver TCM-230C User manual

Denver MCI-5402 User manual

Denver

Denver MCI-5402 User manual

Denver DMP-391 User manual

Denver

Denver DMP-391 User manual

Denver TCP-40 User manual

Denver

Denver TCP-40 User manual

Denver DMP-395B User manual

Denver

Denver DMP-395B User manual

Denver DM-75 User manual

Denver

Denver DM-75 User manual

Denver DM-24MK2 User manual

Denver

Denver DM-24MK2 User manual

Denver TCU-206 User manual

Denver

Denver TCU-206 User manual

Denver TCU-61 User manual

Denver

Denver TCU-61 User manual

Denver DM-17 User manual

Denver

Denver DM-17 User manual

Denver MCA-230M K2 User manual

Denver

Denver MCA-230M K2 User manual

Denver TCU-209 User manual

Denver

Denver TCU-209 User manual

Denver MCU 5210 User manual

Denver

Denver MCU 5210 User manual

Denver TC-23C User manual

Denver

Denver TC-23C User manual

Denver TCU-206RED User manual

Denver

Denver TCU-206RED User manual

Denver TCM-103C2 User manual

Denver

Denver TCM-103C2 User manual

Denver TCU-207 User manual

Denver

Denver TCU-207 User manual

Denver DMP-389 Quick guide

Denver

Denver DMP-389 Quick guide

Denver DMT-400 User manual

Denver

Denver DMT-400 User manual

Denver TC-12 User manual

Denver

Denver TC-12 User manual

Denver TCP-37 User manual

Denver

Denver TCP-37 User manual

Denver TC-13 User manual

Denver

Denver TC-13 User manual

Popular CD Player manuals by other brands

Philips EXP401 Expanium Specifications

Philips

Philips EXP401 Expanium Specifications

Sharp MD-MS701H2 Operation manual

Sharp

Sharp MD-MS701H2 Operation manual

Onkyo C-05 Service manual

Onkyo

Onkyo C-05 Service manual

NAD 502 Specification sheet

NAD

NAD 502 Specification sheet

Philips AZ8052 owner's manual

Philips

Philips AZ8052 owner's manual

Sony D-NF610 ATRAC  Guide operating instructions

Sony

Sony D-NF610 ATRAC Guide operating instructions

JVC RV-DP200BK Service manual

JVC

JVC RV-DP200BK Service manual

Marantz PMD350 user guide

Marantz

Marantz PMD350 user guide

Advance Paris X-CD9 quick start

Advance Paris

Advance Paris X-CD9 quick start

Omnitronic CDP-500 user manual

Omnitronic

Omnitronic CDP-500 user manual

Arcam DiVA CD92 Handbook

Arcam

Arcam DiVA CD92 Handbook

Denon DVM-2845CI Service manual

Denon

Denon DVM-2845CI Service manual

CAMBRIDGE CXU manual

CAMBRIDGE

CAMBRIDGE CXU manual

Sony CDX-R30M - Fm/am Compact Disc Player operating instructions

Sony

Sony CDX-R30M - Fm/am Compact Disc Player operating instructions

Philips AZ1826 Quick use guide

Philips

Philips AZ1826 Quick use guide

Philips AZ6840/05 user manual

Philips

Philips AZ6840/05 user manual

Philips AX2411/07 Specifications

Philips

Philips AX2411/07 Specifications

Hitachi HTDK170EUK instruction manual

Hitachi

Hitachi HTDK170EUK instruction manual

manuals.online logo
manuals.online logoBrands
  • About & Mission
  • Contact us
  • Privacy Policy
  • Terms and Conditions

Copyright 2025 Manuals.Online. All Rights Reserved.