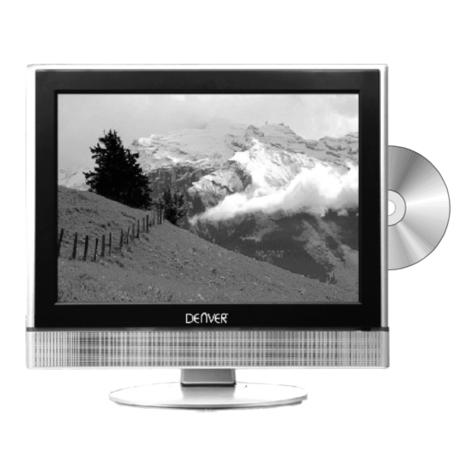
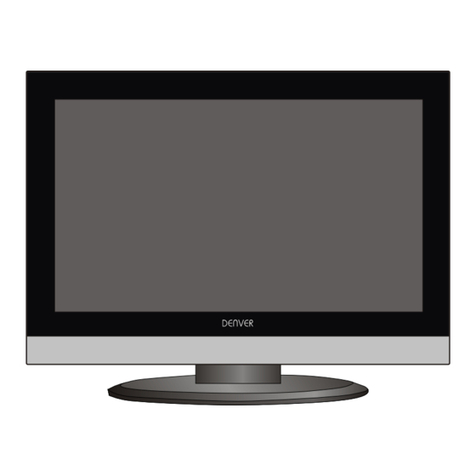
Denver DFT-1912DVBT User manual

Operating Instructions
DFT-1912DVBT
19" TFT LCD TV+DVBT
TERMINALS INPUT: HDMI,YPBPR ,AV,SCART,PC.
AC 110-240V 50/60Hz
TELETEXT
PAL/SECAM B/G,D/K,I
¼ò ½é¼ò ½é


Table Of Contents
1
Table of Contents 1
2
Specifications
3
Installation
4
Important Safety Instruction
Warnings and Cautions 5-7
8
Functional Parts(TV)
10-12
Connecting External Equipment
Basic Operation
16-17
Advanced Functions
18-23
Troubleshooting Tips 24
Rear View Of TV Set 9
Operation-Remote Control 13-15

Specifications
2
Receiving System:
Colour System:
LCD Panel:
Ext.Antenna:
Ext. In/Out:
Speaker:
Audio Output:
Power Supply:
75 Ohm Coaxial Cable
8 OHM
AC 110-240V 50/60Hz
Dimension:
Net Weight:
W480XD195.8XH398(mm)
5.50KG
<3W X 2
PAL,SECAM
B/G, D/K, I
Power consumption: 55W
Standby power consumption: <3W
Note:Design and specifications are subject to change without prior notice.
482.6mm(19 inch) diagonal
HDMI, AV, YPbPr, SCART, PC(VGA/AUDIO)IN, EARPHONE

3
Thank you verymuch for yourpurchase of thisproduct, the mostnatural Colour TelevisionReceiver.
Toenjoy your setto the fullfrom the verybeginning, read thismanual carefully andkeep it handyfor ready
reference.
INSTALLATION
Locate the receiverin the roomwhere direct lightdoes not strikethe screen.
Totaldarkness or areflection on thepicture screen cancause eyestrain. Softand indirect lightingis
recommended for comfortableviewing.
Allow enoughspace between thereceiver and thewall to permitventilation.
Avoid excessively warm locationsto prevent possibledamage to thecabinet or prematurecomponent
failure.
This TV operates on a DC supply provided by the AC-DC adaptor. The voltage is as Indicated on the label
on the backcover.Only usethe AC-DCadaptor supplied withthe TV and never applyan ACmains to theTV
directly. The AC-DC adaptor operateson andAC mains supply, the voltageis as indicatedon the labelof
the AC-DCadaptor. Connectthe DC plugof theAC-DC adaptor tothe DC 12Vsocket at theback of theTV.
Connect theAC-DC adaptor andits mains cord.Insert the mainsplug in thewall socket havinga mains
voltage of 110-240V.
Do not installthe receiver ina location nearheat sources suchas radiator,air ducts, directsunlight ,or
in a placesomewhere like closecompartment and closearea.
Do not coverthe ventilation openingswhen using theset.
CAUTION
Never tamper withany components insideyour set, orany other adjustmentcontrols not mentionedin
this manual. The LCD panelused in thisproduct is madeof glass. Therefore,it can breakWhen the product
is dropped orapplied with impact.Be careful notto be injuredby broken glasspieces in casethe LCD panel
breaks.When you cleanup dust orstick of awater drop onthe LCD panel.The power cord should bepulled
out from theplug receptacle, thenwipe the receiverwith dried softcloth .During thunderand lighting ,
unplug the powercord and antennacord to preventyour TV set from damage.All televisionreceivers are
high voltage instruments.All "insidework" on yourreceiver should beperformed only bythe TV service
personnel.
If some abnormalphenomena happens ,may be youhave some mis-opertion,pleasetake off power and
restart your TV set .
Installation

4
CAUTION
Never tamper withany components insideyour set, orany other adjustmentcontrols not mentionedin
this manual. The LCD panel used in this product is made of glass. Therefore,it can break When the
product is dropped or applied with impact. Be careful not to be injured by broken glass pieces in case
the LCD panel breaks.When you clean up dust or stick of a water drop on the LCD panel. The power
cord should be pulled out from the plug receptacle, then wipe the receiver with dried soft Cloth.
During thunder and lighting ,unplug the power cord and antenna cord to prevent your TV set from
damage. All television receivers are high voltage instruments. All "inside work" on your receiver should
be performed only by the TV service personnel.
If some abnormalphenomena happens ,may be youhave some mis-opertion,pleasetake off power and
restart your TV set .
WARNING: TO REDUCE THE RISK OF ELECTRIC SHOCK DO NOT EXPOSE THIS
APPARATUS TO RAIN OR MOISTURE AND OBJECTS FILLED WITH LIQUIDS,
SUCH AS VASES, SHOULD NOT BE PLACED ON THIS APPARATUS.
The lighting flash with arrow head within a triangle is intended to tell the user that
parts inside the product are a risk of electric shock to persons.
The exclamation point within a triangle is intended to tell the user that important
operating and servicing instructions are in the papers with the appliance.
RISK OF ELECTRIC SHOCK
DO NOT OPEN
WARNING
WARNING: TO REDUCE THE RISK OF ELECTRIC SHOCK DO NOT
REMOVE COVER OR BACK. NO USER-SERVICEABLE PARTS INSIDE.
REFER SERVICING TO QUALIFIED SERVICE PERSONNEL.
Important Safety Instruction

¼ò ½é¼ò ½é
5
Caution
Do not dropor push objects into the television cabinet slots
or openings. Neverspill any kind of liquid on the television
receiver.
Caution
Do not insertanything in theventilation holes. Ifmetal or
something flammable enters,it may resultin fire orelectric shock.
Caution
Do not placeobjects on thisunit, it maydamage the screensurface.
Caution
Do not squashpower supply cordunder the televisionreceiver.
Caution
Do not throwanything at theset. The screen glass mayexplode by
impact and causeserious injury.
Warnings And Cautions
¼ò ½é¼ò ½é
¼ò ½é¼ò ½é
¼ò ½é¼ò ½é
¼ò ½é¼ò ½é

6
Caution
Never stand on,lean on, or suddenly push the television or its
stand. You should pay special attention to children. Serious injury
may result ifit should fall.
Caution
Do not placeyour television onan unstable cart, stand ,shelf or
table. Serious injuryto an individual,and damage tothe television,
may result ifit should fall.
Caution
When the televisionreceiver is notused for anextended period of
time, it isadvisable to disconnectthe ACpower cord from the AC
outlet .
Caution
Do not blockthe ventilation holesin the backcover.
Adequate ventilation isessential to preventfailure of electrical
component.
Warning
Avoid exposing the television receiverto direct sunlightand other
source of theheat. Do notstand the televisionreceiver directly on
other produces whichgive off heat .E.g.video cassetteplayers.
Audio amplifiers. Donot place nakedflame sources, suchas
lighted candle onthe television. Donot expose theLCD screen
surface to thesun, it maydamage the screensurface.
Warnings And Cautions
¼ò ½é¼ò ½é
¼ò ½é
¼ò ½é
¼ò ½é¼ò ½é
¼ò ½é¼ò ½é

Warnings And Cautions
7
Takecare not toconnect many appliancesto the samemains
socket as thiscould result infire or electricshock.
High voltages areused in theoperation of thistelevision receiver.
Do not removethe cabinet back from your set. Refer servicing to
qualified service personnel.
Toprevent fire orelectrical shock hazard,Do not exposethe
television receiver torain or moisture.
For you ownsafety, Do not touchany part ofthe set, mainlead or
aerial lead duringlighting storms.
Caution
If the televisionis to bebuilt into aCompartment or similarly
enclosed, the minimumdistances must bemaintained.
Heat build-up canreduce the servicelife of yourtelevision, and can
also be dangerous.
Warning
Warning
Warning
Warning
¼ò ½é¼ò ½é
¼ò ½é¼ò ½é
¼ò ½é¼ò ½é

Functional Parts( TV )
Front View of LCD Set
Toturn the TV power ON
Put the TV set onthe correct place,then connect theDC plug ofthe AC-DCadaptor to theDC 12V socket
at the backof the TV set. Connectthe adaptor maincord to thewall outlet ,thenthe LED indicatorlamp
turns red/green andthe TV set is atStandby/work Mode. At Standby Mode, if Standby Button is pressed
the power indicatorwill change togreen. It takesa few secondsbefore the pictureappears.
Toturn the TV power OFF
Press the StandbyButton to makethe TV set in Standby Mode, then disconnect the power plug from the
wall outlet.
NOTE:
If TV is the selected input without signal received and NO operation is performed for about 5 minutes
continuously, the TV set will enter standby mode. For any inputs other than TV, the TV set will not enter
standby mode automatically without users instruction. If you are not going to use this TV set for a long
time, switch off the set and disconnect the power plug from the wall outlet.
8
2. Remote Sensor
1. LED indicator lamp
3. Standby Button
4. ButtonSource
5. MENU Button
6. P+ Button
7. P- Button
8. V+Button
9. V- Button
9 8 7 6 5 4
V- V+ P- P+ MENU SOURCE
¼ò ½é¼ò ½é
1
¼ò ½é¼ò ½é
3 2

9
Rear View Of TV Set
DC IN 12V
HDMI
VGA
VIDEO
YPbPr
SCART
TUNER
NOTE:
Precautions when connecting to other equipment
When using external equipment with this TV set, please read the instruction manual of the external equipment.
Switch off all power supplies to the equipment and TV set before connection.
Always ensure that the input and output terminals are correctly connected.
The UPDATE terminals just use to update the system software.
TUNER PC-A IN SCART
VIDEO L R
VGA HDMI DC-12V
UPDATE
Y
Pb Pr

10
Connecting External Equipment
Connecting a PC
When your PCis connected tothe TV with D-SUB cable and audio cable.
You can view and listen to the PC's video and audio output on the TV. Use theVASE 1440 X 900@60Hz
format to obtain the best image quality for your TV.
Connecting a VCRor other device(E.G.DVD/Digital cable Box/SatelliteReceiver) with composite
video connectors.
Connect the videooutput of thedevice to thecomposite video input (yellow RCA) on the TV. Connect the
line-level audio outputof the deviceto the audio inputs( Red and White RCA) on the TV with AV cable.
BOTTOM
BOTTOM
Note: Cable are oftencolor-coded to connectors.Connect red tored, white towhite ,etc.
TUNER PC-A IN SCART VIDEO
L
RVGA HDMI DC-12V
UPDATE Y
Pb
Pr TUNER PC-A IN SCART VGA HDMI DC-12V
UPDATE VIDEO
L
R
Y
Pb
Pr

TUNER PC-A IN SCART Y
Pb
Pr VGA HDMI DC-12V
UPDATE
Connecting External Equipment
Connecting a DVDPlayer or otherdevice (E.G. VCR/Digitalcable Box/Satellite Receiver) with
Component Video Connectors .
Use a componentvideo cable toconnect the DVDplayer's YPbPr jacks to the TV's YPbPr jacks.
Use an audiocable to connectthe DVD player'sAUDIO OUTjacks to theTV's AUIDOIN jacks . Be sure
to use thesame row ofinput that youused for thevideo connection.
Note: The YPbPr jacks on yourDVD player aresometimes labeled YCbCr, or Y, B-Y and R-Y. if so,
connect the cablesto like colors.
Note: Cable are oftencolor-corded to connectors.Connect red tored, white towhite, etc.
BOTTOM
DVD PIAYER
Connecting a VCRor other device(E.G. DVD/Digital CableBox/ Satellite Receiver)withScart
connectors
Use a SCART video cable to connect the VCR SCART jacks to the TV'S SCART jacks.
Scart cable
BOTTOM
TUNER PC-A IN SCART Y
Pb
Pr VGA HDMI DC-12V
UPDATE VIDEO
L
R
VIDEO
L
R
11

12
TUNER PC-A IN SCART Y
Pb
Pr VGA HDMI DC-12V
UPDATE
Connecting External Equipment
Connecting a DVDwith High-definition multimediaconnectors
Use HDMI cableconnect the DVDHDMI jack tothe TV's HDMI jack.
HDMIHDMI
YY
COAXIALCOAXIAL
U/PbU/Pb
V/PrV/Pr
VIDEOVIDEO
S-VIDEOS-VIDEO
LEFTLEFT
RIGHTRIGHT
DVD PIAYER
Connecting a televisionsystem and earphone
Use RF cableconnect the antenna / set top box /satellite R.F output jack to the TV's TUNER jack.
Use stereo audiocable to connect the earphone to the TV's earphone jack.
Satellite
Receiver
Toantenna or
set top
box/satellite
R.Foutput.
BOTTOM
BOTTOM
HDMI cable
TUNER PC-A IN SCART Y
Pb
Pr VGA HDMI DC-12V
UPDATE VIDEO
L
R
VIDEO
L
R

13
Operation-Remote Control
Insert Batteries intothe Remote Control
Insert two sizeAAAbatteries by matching the and onthe batteries tothe diagram insidethe battery
compartment.
Precaution on batteryuse
Improper use ofbatteries can result in a leakage of chemicals and/or explosion. Be sure to follow the
instructions below.
Place batteries withtheir terminals corresponding to the (+) and (-) indications.
Different types ofbatteries have differentcharacteristics .Do notmix batteries ofdifferent types.
Do not mixold and new batteries. Mixing old and new batteries can shorten the life of new batteries
and/or cause oldbatteries to leak chemicals.
Remove batteries assoon as they are non-operable. Chemicals that leak from batteries can cause a
rash .If chemicalleakage is found, wipe with the product may have a shorter life expectancy due to storage
conditions.
If the remotecontrol is not used for an extended period of time, remove the batteries from the remote
control.
Using the RemoteControl
Use the remotecontrol by control by pointing it towards the remote sensor window of the set. Objects
between the remotecontrol and sensor window may prevent proper operation.
Cautions regarding useof remote control:
Do not exposethe remote control to shock. In addition, do not expose the remote control to liquids , and
do not placein an area with high humidity.
Do not installor place the remote control under direct sunlight. Theheat may causedeformation of the
unit.
The remote controlmay not workproperly if theremote sensor windowof the mainunit is under direct
sunlight or stronglighting. In such a case, change the angle of the lighting or TV set, or operate the remote
control closer tothe remote sensor window.
Note:This above illustation is for reference only. The remote sensor may be in differentlocations on
different models.
¼ò ½é¼ò ½é

¼ò ½é¼ò ½é¼ò ½é¼ò ½é
14
Operation-Remote Control
BUTTON DESCRIPTIONS
1. POWER
Turn the unit on or off
2. GUIDE
Toaccess the ProgramGuide in DTVmode
3. 0-9 number buttons
Use these numberbutton to selectchannel or input
password
4. P.P button
Use to changethe desired picturemode
5. INFO/Display button
Toaccess the programinformation
6. SMODE
Tochange the desiredsound mode
7. AUDIO/NICAM button
Tochange stereo soundmode in ATV channels.
Toselect audio languagein DTV channels
8. LIST
Todisplay the channellist in DTV/TVmode
9. Q.view(REVEAL)
Toswitch between thecurrently tuned channeland
the previously tunedchannel.
Toreveal answers thehidden information forsome
Teletextpages(e.g answers topuzzles or riddles).
Press again tohide the information
10. HOLD
Tostop the automaticpage change fromTeletext.
11. MIX
Toenter the mixmode. (For SUBTITLEor
NEWSFLASH teletext page,please use mixmode).
Please again toexit.
12. RADIO
Toswitch to RADIO program from DTV program in
DTV mode. Pressagain to return.
13. SIZE
Press repeatedly tochange the screendisplay mode
in the teletextmode.
14. INDEX
Togo to theindex page inthe teletext mode
15. TEXT
Press to enteror exit theteletext mode.
POWER
P. PP. P
MENU
PROG+
PROG-
VOL+
Q.
VIEW
Q.
VIEW
VOL-
MUTE
NICAM
SOURCE
EXIT
AUDIO
SMODE
ENTER
LIST
INFO
MIX SIZE RADIO
HOLD
SUB.PAGE
TEXTINDEX
SLEEP
FAV ASPECT
SUB.T
OK
2
1
3
8
4
5
6
7
9
10
11
13
12
14
15
16
17
18
19
20
21
22
23
24
25
26
27
REVEAL
GUIDE

15
16. SUB.PAGE
Toenter or exitthe sub.page in the teletext mode
17. MUTE
Tomute the sound
18. SOURCE
Toselect the signalinput source
19.
MENU:Toaccess the Menumain page
PROG+/PROG-:Toselect channels upward or
downward , ormove upward or downward in menu
operation.
VOL+/VOL-:Toadjust volume orselected menu item
in menu operation;To move leftor right in menu
operation.
20. OK(ENTER)
Toconfirm or alterthe settings of the selected menu
item
21 EXIT
Toexit menu
22 SUB.T
Toselect subtitle language or turn on subtitle display
in DTV mode.
23 FAV
Todisplay a desiredfavorite channel list
24 SLEEP
Toset the timeof television toautomatically turn off
25 ASPECT
Tochoose a properscreen aspect ratio
26 color buttons
Used to controlsome operation inmenu item or
teletext mode.
27 direction buttons
Used to directionoperation for MHEG5 program
Operation-Remote Control
BUTTON DESCRIPTIONS
POWER
P. PP. P
MENU
PROG+
PROG-
VOL+
Q.
VIEW
Q.
VIEW
VOL-
MUTE
NICAM
SOURCE
EXIT
AUDIO
SMODE
ENTER
LIST
INFO
MIX SIZE RADIO
HOLD
SUB.PAGE
TEXTINDEX
SLEEP
FAV ASPECT
SUB.T
OK
2
1
3
8
4
5
6
7
9
10
11
13
12
14
15
16
17
18
19
20
21
22
23
24
25
26
27
REVEAL
GUIDE

Basic Operation
Turning On/Off
Turning On
First, connect correctlythe power adapter and power cord.
Press STANDBY on the TV or POWER button on the remote control
Turing Off
Press on theTV or POWER button on the remote control
The TV enters standby mode and the image on the screen disappears.
NOTE: The TV will still consume some power as long as the power cord is still inserted into the power outlet.
If you arenot going touse this TV for a long period of time , be sure to remove the power cord from the power
outlet.
AUTO Searcher Programming
Before you beginwatching television, you must first change the input source to DTV or ATV and allowthe
television to performauto tuning.
1. Press theSOURCE button on the remote control.
2. Press thePROG+/PROG- and OK to select the DTV or ATV.
3. Press theMENU button onthe remote control.
4. Press theVOL+/VOL- to selectthe TV Setting menu.
5. Press thePROG- to select[auto tuning]item and VOL+ to confirm
and continue.
6. Press thePROG+/- to selectcorrectly the country.
7. Press theVOL- select [start]item will be highlighted and Press
OK button.
8. Please waitingsome minutes ,when the TV is searching channels.
9. Press theOK(ENTER) button to save the programs,when the auto
tuning is completed.
Analog And Digital Channels
This television iscapable of receiving the full rang of analog and digital channels available today.
Selecting Channels
You can select analog and digital channels in several ways.
Method 1 Using PROG+/PROG- on the remote Control or P+/P-
Press the PROG+/PROG-or P+/P- tocycle among all Available channels.Only those
channels marked withTick symbol can be selected by the PROG+/PROG- or CH+/CH- button.
Method 2 Using Q_View on the remote control
Press Q_View to switch to the previously tuned channel.
Press Q_View again to switch to back to the currently tunedchannel.
Method 3 Using 0-9 and ENTER on the remote control
¡¤For analog TV channel
Press the 0-9number buttons to input a channel number and confirm with ENTER to select
up to 100channel for analog channel
¡¤For digital TV channel
Press the 0-9number buttons to input a channel number and confirm with ENTER to select .
Method 4 Using master channel list
Press the LISTbutton on theremote control todisplay the masterchannel with the
PROG+/PROG- and ENTERbuttons.
Methon 5 Using favorite channel list
Press the FAV button to display a desired favorite channel list ,youmay select channel with the
PROG+/PROG- and ENTERbuttons.
PROG-
PROG+
POWER
Q.
VIEW
Q.
VIEW
LIST
FAV
EXITEXIT
MENU
RETURN
Auto Tuning
DTV Manual Tuning
ATV Manual Tuning
Programme Edit
TV SETTING
Please select country first,
Then select Start to update info.
Country selection UK
Start Cancel
OK ENTER
16

Basic Operation
Adjusting Volume
Using VOL+/VOL- onthe remote controlor V+/V- on the TV
Press the VOL+/VOL-or V+/V-to increase or decrease the volume.
Using MUTE onthe remote control
Press the MUTEthe button tomute the sound. Press it again to cancel the mute.
Source Select
Press the SOURCEbutton on theremote control or on the TV, and select theinput source with
the PROG+/PROG- orP+/P- and ENTER/V+ buttons. The Input Source options is shownbelow.
Menu Navigation
Operating The Menu on the remote control
1.Press to displaythe main menu.
2.Press to highlight the menu items.
3.Press to enter the sub-menu field.
4.Press to select items in the sub-menu.
Press to adjust the selected items or enter sub-menu.
5.Press to confirm your operation .
6.Press to return to the previous screen.
7.Press to return to normal picture.
Using the ASPECT button
Press ASPECT repeatedly to choose a proper screen aspect ratio. The following mode
may available for your choice.
Aspect radio:Auto/4:3/16:9/zoom/16:9FS/Panorama.For PC mode only AUTO/4:3
Note:When you choose AUTO to view a 4:3 program, two black bars appear on the left and right of the screen.
for additional protection to the screen,when you are viewing a 4:3 program, please DO NOT use the
AUTO feature for a long period of time.
Input Source
DTV
ATV
AV
SCART
YPbPr
PC
HDMI
EXIT OK
Select to view digital TV programs.
Select to viewanalog TV programs.
Select to viewprograms from VIDEO input.
Select to viewprograms from SCART input.
Select to viewprograms from YPbPr input.
Select to viewprograms from D-SUB input.
Select to viewprograms from HDMI input.
PROG-
PROG+
VOL-
VOL+
PROG-
VOL-
VOL+
VOL-
VOL+
SOURCE
MUTE
MENU
ENTER
OK
MENU
EXIT
ASPECT
17

Advanced Functions
Depending on thesignal tuned, youmay see different MENU options on your screen. For example ,
Menus displayed beloware based onATV mode.
Picture Control
Accessing the PictureMenu
1.Press MENU.......
2.Highlight thePICTURE icon use VOL+/- button.
3.Press PROG-.......
To highlight an optionand to changesettings, press VOL+/- PROG+/- .
Press MENU returnto previous menu press EXIT to exit.
Adjusting Picture Settings
1.Picture Mode
Select to choosea picture modeto best match the TV environment, which can vary due to room
brightness, type ofprogram watched orthe type of image input formexternal equipment.
Standard Select for anormal picture.
Dynamic Select for enhancedpicture contrast and sharpness.
Soft Select for ahighly defined image in a normally bright room.
User Select to customizethe picture as desired.
Note: Toquickly change thePicture mode, press the P.P button repeatedly.
2.Contrast Select to adjustpicture contrast.
3.Brightness Select to adjustpicture brightness.
4.Tint Select to adjustnatural flesh tones.Used for 480i format only.
5.Colour Select to adjustpicture colour.
6.Sharpness Select to adjustclarity of outline detail.
7.Colour Temp Select to adjust picture colour temperature mode Normal/Warm/Cool mode.
8.PC Setup
Using the PROG+/-buttons to selectthe item[H-offset][V-offset][Size][Phase]
[Auto adjust] .pressVOL+/- button toadjust them.
H-offset Center the imageby moving itleft or right.
V-offset Centre the imageby moving itup or down.
Size Adjust the screensize.
Phase Adjust when charactershave low contrastor when theimage flickers.
Auto Adjust Press the OKbutton to setit automatically.
EXITEXIT
MENU
RETURN OK ENTER
PICTURE
Picture Mode Standard
Contrast 50
Brightness 50
Tint 0
Colour 50
Sharpness 50
Colour Temp. Normal
PC Setup
MENU
VOL-
VOL+
PROG-
18
Table of contents
Other Denver LCD TV manuals

Denver
Denver DVB 750 User manual

Denver
Denver DFT-2242 User manual

Denver
Denver TFD-2211 User manual

Denver
Denver DFT-2010DVBT User manual

Denver
Denver DFT-3218 User manual

Denver
Denver DFT-506 User manual

Denver
Denver LDD-2251DVBT User manual

Denver
Denver TFD-2470 User manual

Denver
Denver DFT-2614 User manual

Denver
Denver DFT-3218 User manual

Denver
Denver TFD-2226DVBT User manual

Denver
Denver DFT-505 User manual

Denver
Denver TFD-1505 User manual

Denver
Denver TFD-2627M FULL HD User manual

Denver
Denver DFT-3719HD User manual

Denver
Denver DFT-1544DVBT User manual

Denver
Denver TFD-2206 User manual

Denver
Denver TFD-2245M User manual

Denver
Denver TFD-1945DVBT User manual

Denver
Denver DFT-1504 BLACK User manual