Desalto Sail 301 User manual

Istruzioni di montaggio
Assembly instruction
Montageanleitung
Instructions de montage
Instrucciones de montaje
Sail 301/302
design by Caronni + Bonanomi
system

1
SAIL 301 / SAIL 302
2 3Desalto - Sail 301 / 302 Desalto - Sail 301 / 3012

2
3
4
4 5Desalto - Sail 301 / 302 Desalto - Sail 301 / 3012
VERSIONE CON MENSOLA
VERSION WITH SHELF
VERSION MIT KABELKANAL
VERSION AVEC RAINURE PUOR PASSAGE DES CÂBLES
VERSIÓN CON CANAL PASACABLES
VERSIONE CON MENSOLA
VERSION WITH SHELF
VERSION MIT KABELKANAL
VERSION AVEC RAINURE PUOR PASSAGE DES CÂBLES
VERSIÓN CON CANAL PASACABLES

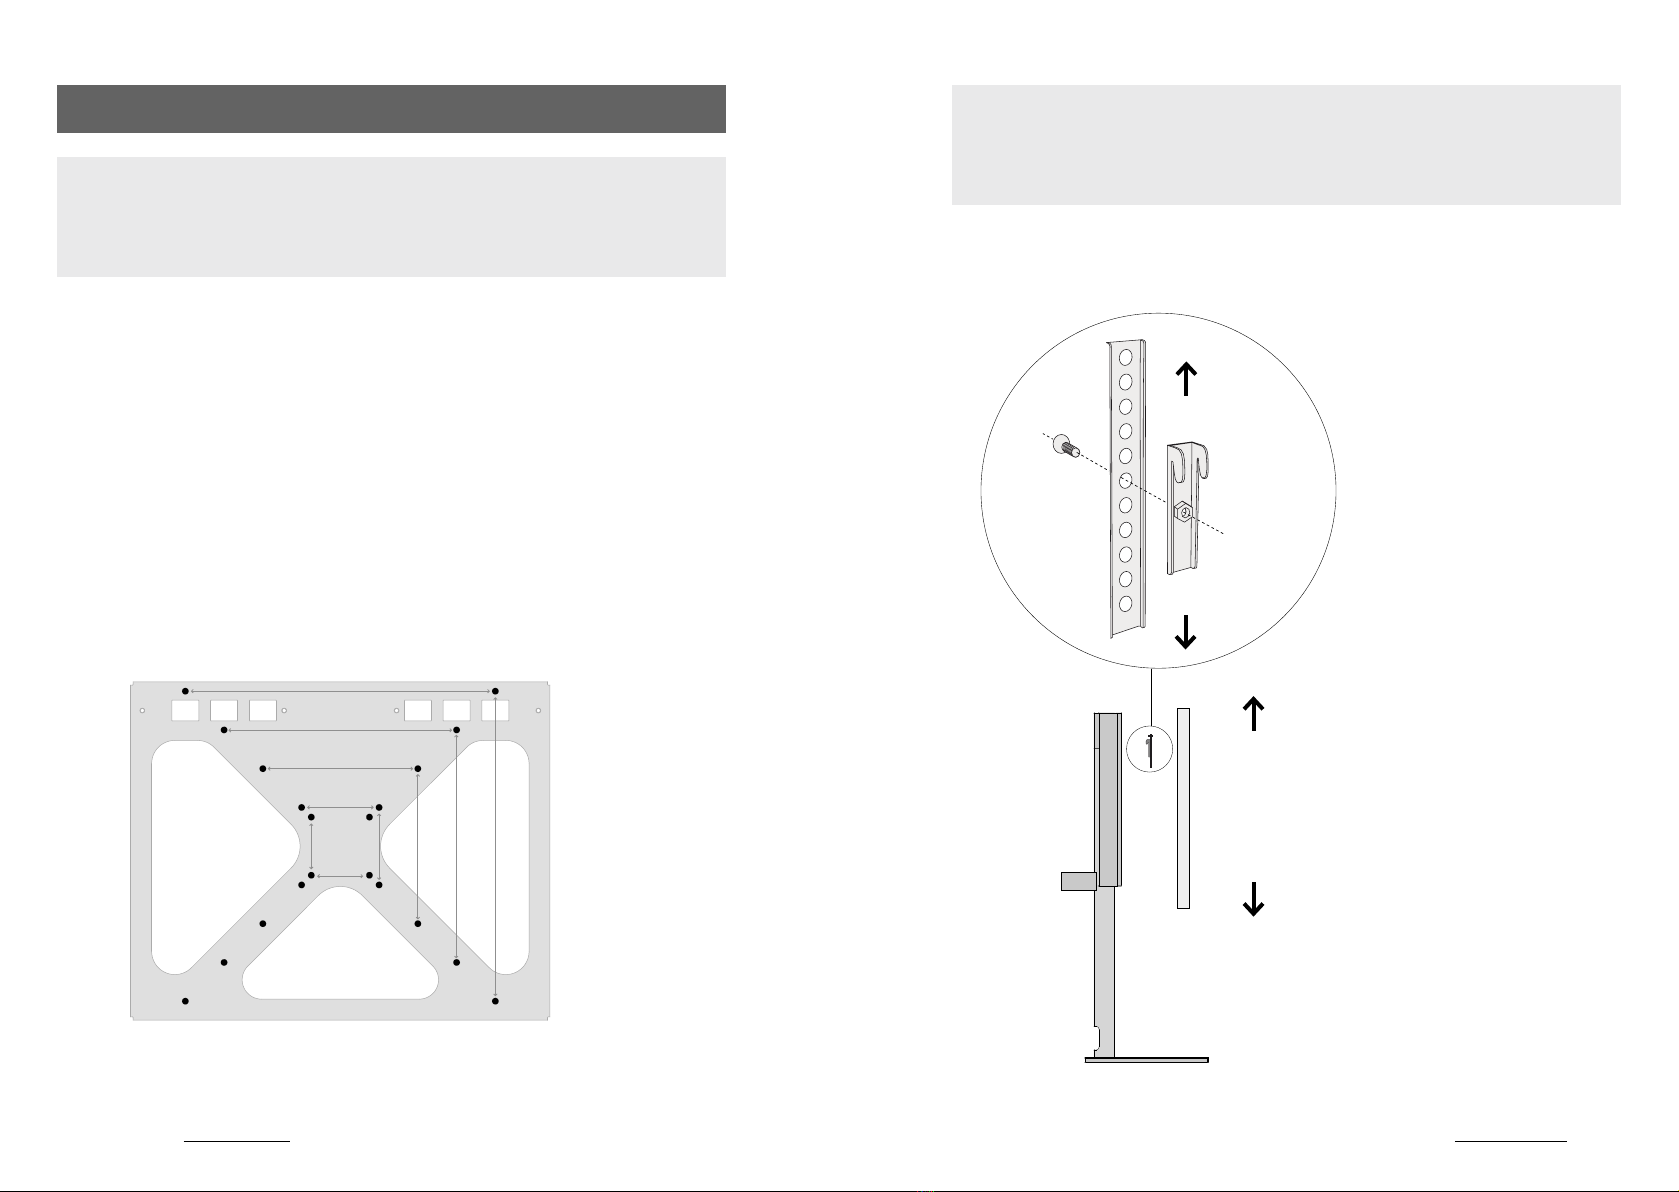
Se il piano non risultasse perfettamente orizzontale, regolare agendo sul grano
all’interno del tubo verticale nel seguente modo:
A) Allentare le viti della piastra;
B) Regolare il grano all’interno del tubo agendo dal foro posteriore;
C) Stringere nuovamente le viti della piastra.
If the shelf is not perfectly aligned, act on the regulation mechanism inside the
vertical tube as follows:
A) Loosen the screws of the plate;
B) Regulate the threaded nuts that are inside the tube by acting from the rear hole;
C) Tighten again the screws of the plate.
A / C
B
6 7Desalto - Sail 301 / 302 Desalto - Sail 301 / 3012
VERSIONE CON MENSOLA
VERSION WITH SHELF
VERSION MIT KABELKANAL
VERSION AVEC RAINURE PUOR PASSAGE DES CÂBLES
VERSIÓN CON CANAL PASACABLES
VERSIONE CON MENSOLA
VERSION WITH SHELF
VERSION MIT KABELKANAL
VERSION AVEC RAINURE PUOR PASSAGE DES CÂBLES
VERSIÓN CON CANAL PASACABLES

5 6
8 9Desalto - Sail 301 / 302 Desalto - Sail 301 / 3012
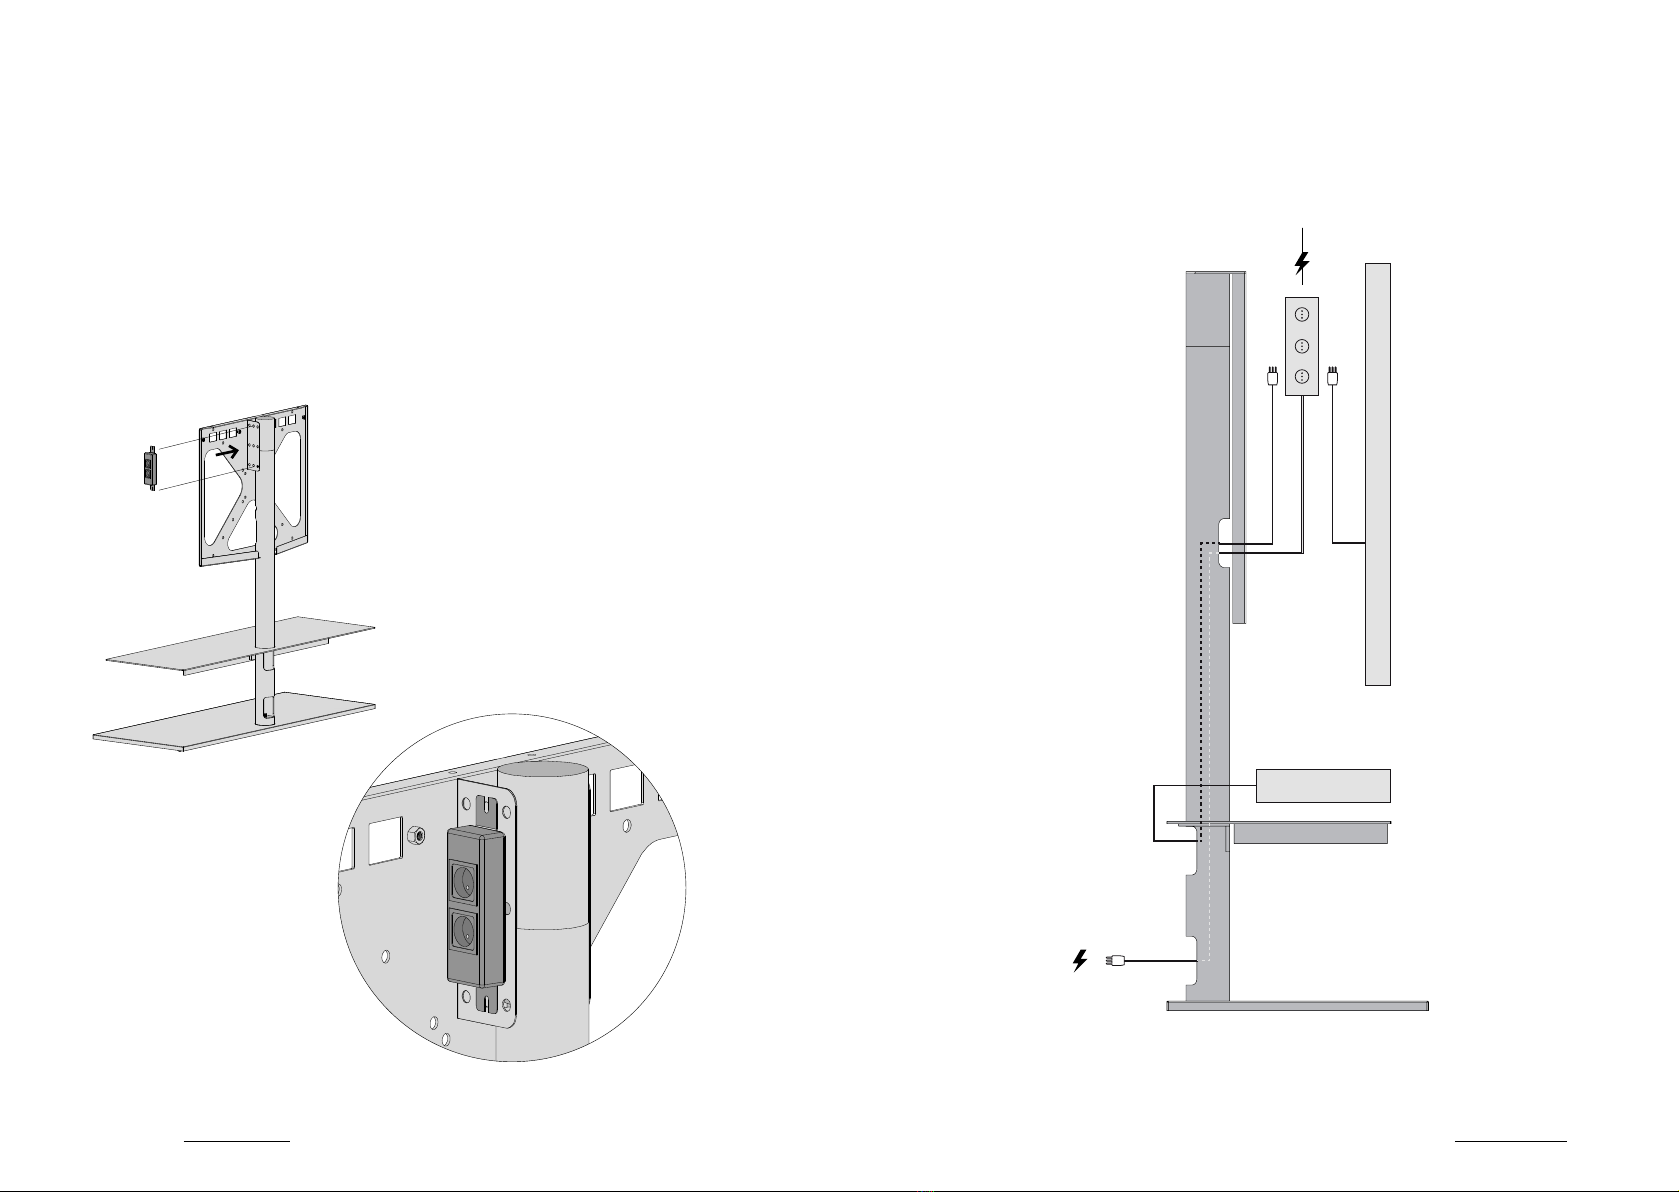
Fissare l’eventuale presa elettrica multipla all’apposito supporto
(con viti o fascette non incluse).
Fix the multiple socket, if necessary, to the suitable support
(with screws or small bands, which are not included).
Die Mehrfachsteckdose zu der entsrpechenden Halterung befestigen
(mit Schrauben oder Bändchen - nicht dabei).
Fixer l’éventuelle prise électrique multiple à son support
(avec vis ou bandes pas inclues).
Fijar el eventual ladrón eléctrico al soporte especial
(con tornillos o abrazaderas no incluidos).
7.1 7. 2
TV
HI-FI
DEVICE
PRESA ELETTRICA
SOCKET
MEHRFACHSTECKER
PRISE ÈLECTRIQUE
ENCHUFE
10 11
Desalto - Sail 301 / 302 Desalto - Sail 301 / 3012

8
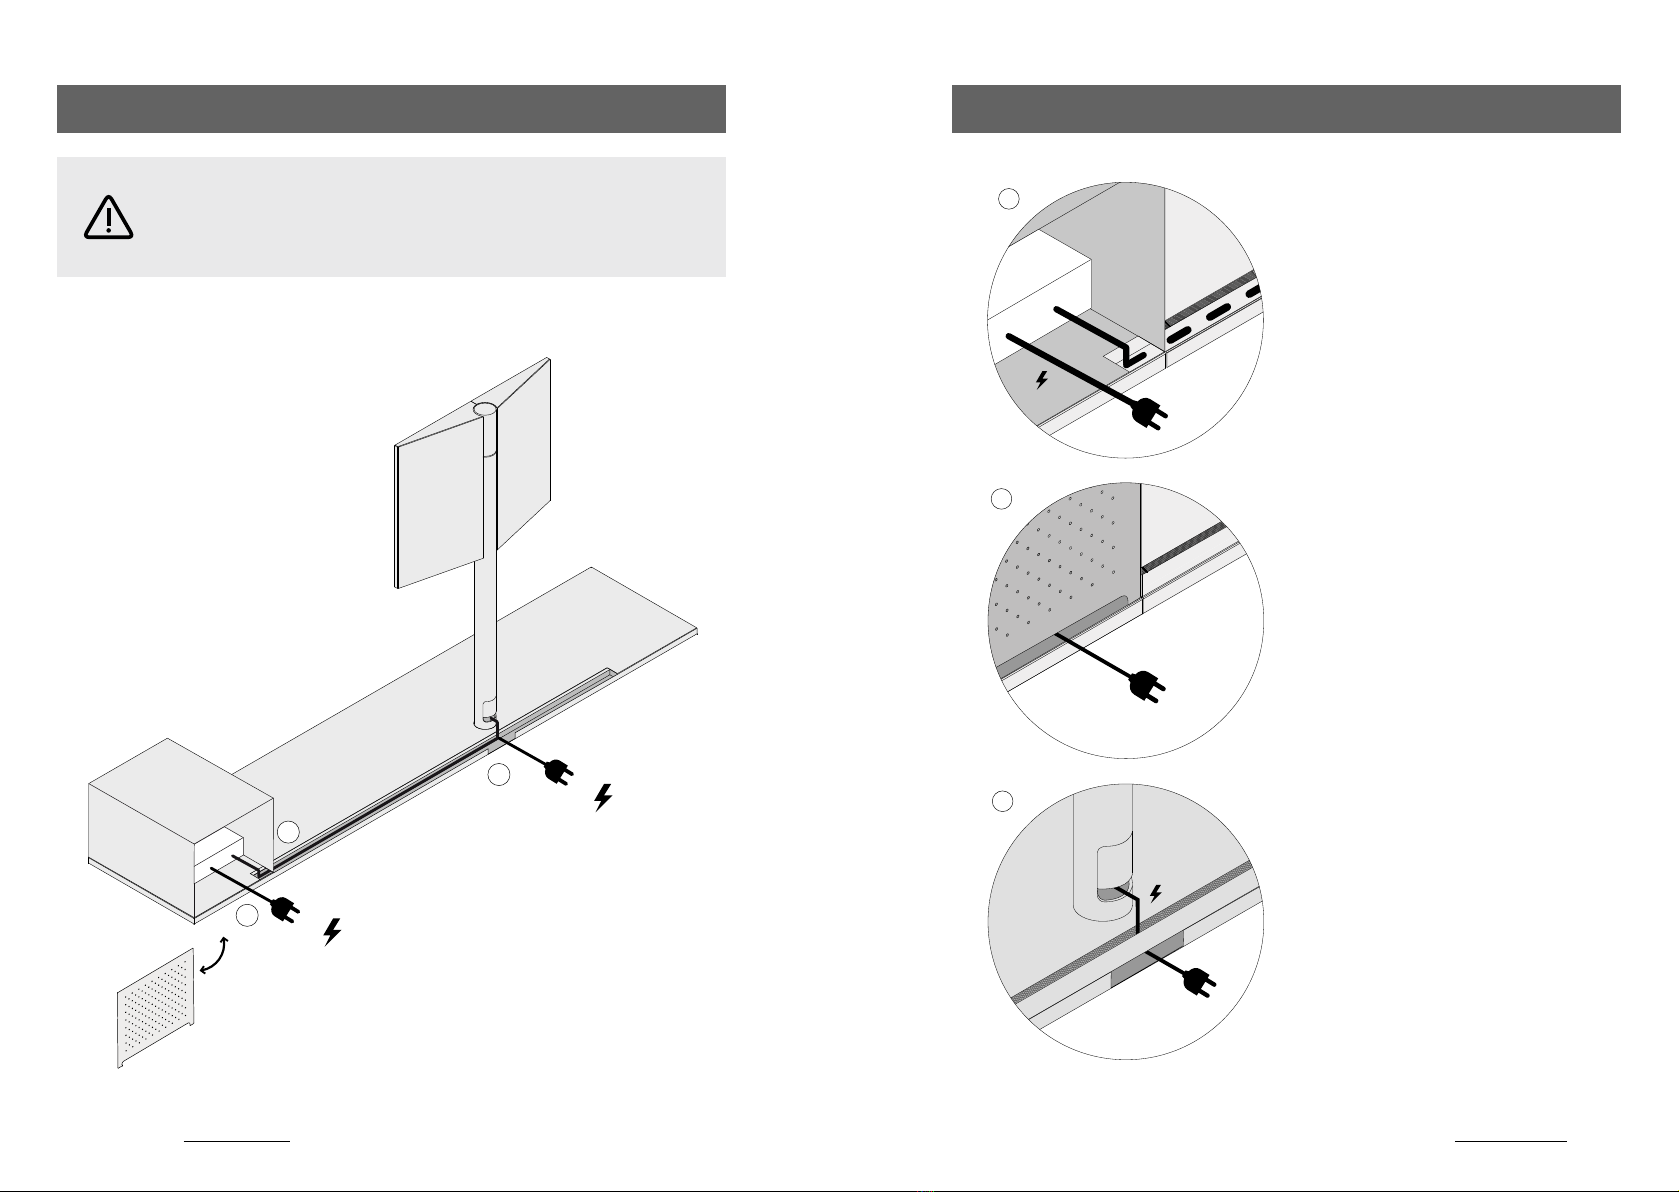
Il copri canalina si posiziona effettuando una leggera pressione verticale, dall’alto verso
il basso.
Place the cover of the cable management light pressure.
Die Kanalabdeckung wird mit einer leichten vertikalen Druck, von oben nach unten positioniert.
Positionner le couvre-rainure en faisant une légère pression verticale, de haut en bas.
La tapa del canal pasacables puede ser colocada con una ligera presión vertical, de arriba
hacia abajo.
9
SAIL 302
12 13Desalto - Sail 301 / 302 Desalto - Sail 301 / 3012
VERSIONE CON CANALINA PASSACAVI
VERSION WITH CABLE MANAGEMENT
VERSION MIT KABELKANAL
VERSION AVEC RAINURE PUOR PASSAGE DES CÂBLES
VERSIÓN CON CANAL PASACABLES pag. 13 / 17
B
C
A
Schienale metallico ad aggancio magnetico.
Metal back with magnetic hooking.
Metallrücken mit magnetischer Aufhängung.
Fond en métal à fixation magnétique.
Respaldo en metal con gancho magnético.
OPZ. 1
Passaggio cavi contenitore-canalina.
Storage unit - cable management.
Passaggio presa elettrica con contenitore
chiuso.
Electrical socket passing through metal back.
Passaggio presa elettrica con copri canalina
chiusa.
Electrical socket passing through cable
management.
A
B
C
HI-FI
DEVICE
SAIL 302SAIL 302
14 15Desalto - Sail 301 / 302 Desalto - Sail 301 / 3012
PASSAGGIO CAVI NELLA VERSIONE CON CONTENITORE.
CABLE PASSING, VERSION WITH STORAGE UNIT.
KABELFÜHRUNG, VERSION MIT CONTAINER.
PASSAGE DES CÂBLES DANS LA VERSION AVEC ÉLÉMENT DE RANGEMENT.
PASAJE DE LOS CABLES EN LA VERSIÓN CON CONTENEDOR.

E
D
Schienale metallico ad aggancio magnetico.
Metal back with magnetic hooking.
Metallrücken mit magnetischer Aufhängung.
Fond en métal à xation magnétique.
Respaldo en metal con gancho magnético.
OPZ. 2
PASSAGGIO CAVI NELLA VERSIONE CON CONTENITORE.
CABLE PASSING, VERSION WITH STORAGE UNIT.
KABELFÜHRUNG, VERSION MIT CONTAINER.
PASSAGE DES CÂBLES DANS LA VERSION AVEC ÉLÉMENT DE RANGEMENT.
PASAJE DE LOS CABLES EN LA VERSIÓN CON CONTENEDOR.
E
D
HI-FI
DEVICE
Passaggio cavi contenitore-canalina.
Storage unit - cable management.
Kabeldurchgang zwischen den Container
und den Kabelkanal.
Passage des câbles entre le récipient et
la rainure.
Paso para los cables entre el contenedor
y el canal.
Passaggio presa elettrica con copri
canalina chiusa.
Electrical socket passing through cable
management.
Durchgang der Steckdose mit
geschlossener Kabelabdeckung.
Passage prise électrique avec couvercle
de la rainure fermé.
Paso para la toma de electricidad con la
cubierta del canal cerrada.
SAIL 302SAIL 302
16 17Desalto - Sail 301 / 302 Desalto - Sail 301 / 3012
10
n° dis.
data
agg.
descrizione :
materiale :
design
scala :
note :
redazione
verifica
approvazione
tolleranze :
Desalto S.p.a. - Via per Montesolaro - 22063 Cantù
tel. 031.78.32.211 - fax 031.7832.290 - www. desalto.it
1:2/1:1
± 0.3
C205/55
01.03.13
xxx
misure in mm.
xxx
SAIL Struttura porta tv x carter
PROGETTO DI MASSIMA
11
18 19Desalto - Sail 301 / 302 Desalto - Sail 301 / 3012
ATTACCHI VESA
VESA BRACKETS
ANSCHLUSSELEMENTE VESA
ENGANCHE VESA
FIXATION VESA
OPZ. 1
100
75
300
200
400
75x75
100x100
200x200
300x300
400x400
Fissare il TV direttamente alla piastra frontale Sail.
Passi di foratura VESA supportati:
Fix the TV directly to the Sail front plate.
Vesa step holes:
Das TV direkt zu der frontalen Platte Sail befestigen.
Für VESA gelten folgende Gewindebohrungen:
Fixer la TV directement à la plaque frontale du Sail.
Les perforations pour Vesa sont:
Colocar el TV directamente al panel frontal del Sail.
Los pasos de agujerado Vesa soportados son:
OPZ. 2
Regolare in altezza le guide forate
per ottenere il posizionamento del TV
desiderato.
Adjust height of holed guides to dene
the best TV regulation.
Stellen Sie die Höhe der gebohrten
Führungen so ein, Bis die jeweils
gewünschte Position des Fernsehers
erzielt wird.
Pour obtenir la position désirée de la TV
régler les guides percés en hauteur.
Atornillar las guìas agujereadas para
obtener la posicìon deseada del TV.
+
_
ATTACCO UNIVERSALE
UNIVERSAL BRACKET
UNIVERSALANSCHLUSS
FIXATION UNIVERSELLE
ENGANCHE UNIVERSAL
I
T V AS S E M B LY
20 21Desalto - Sail 301 / 302 Desalto - Sail 301 / 3012

TV
II III IV
22 23Desalto - Sail 301 / 302 Desalto - Sail 301 / 3012
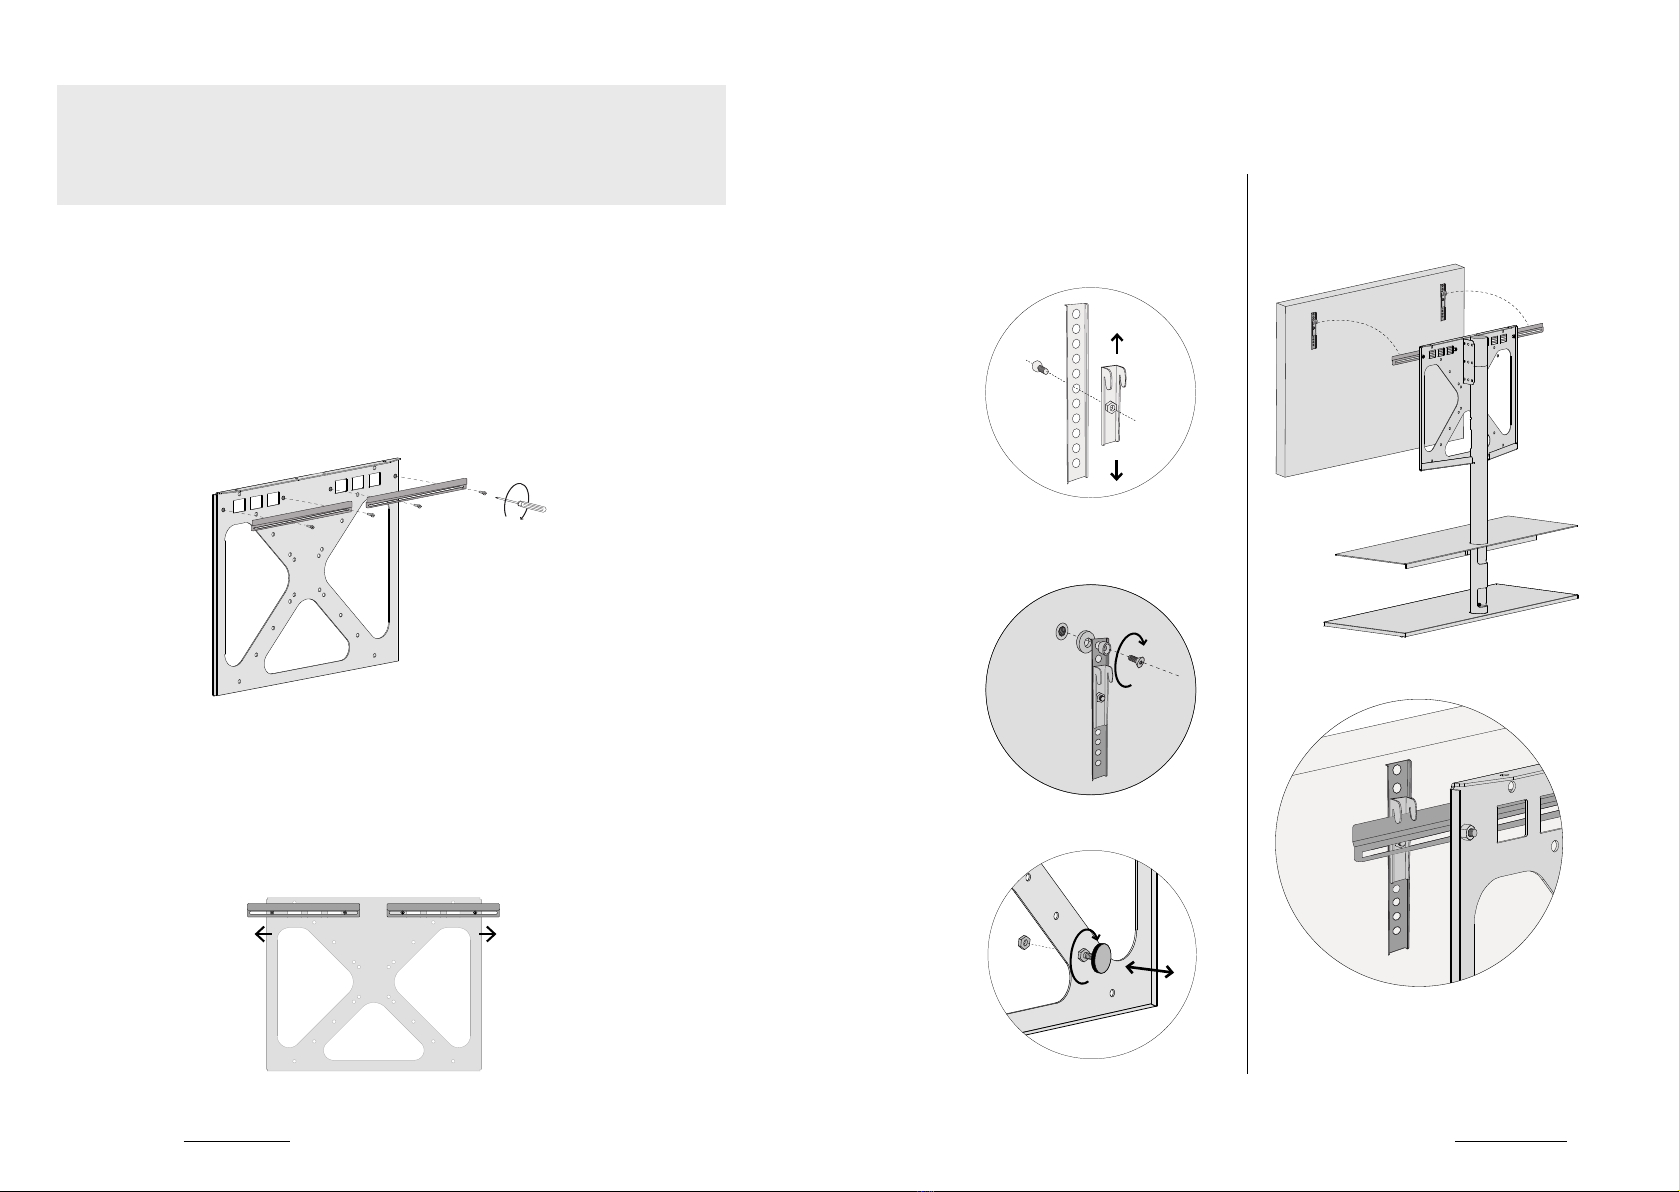
ATTACCO UNIVERSALE + PIASTRE REGOLABILI
UNIVERSAL BRACKET + ADJUSTABLE BARS
UNIVERSALANSCHLUSS + ZERLEGBARE PLATTEN
FIXATION UNIVERSELLE + BARRES RÉGLABES
ENGANCHE UNIVERSAL + PLACAS REGULABLES
Regolare in orizzontale ciascuna piastra secondo le necessità.
Set horizontally each bar according to your needs.
Regulieren Sie je Platte waagerecht bei Bedarf.
Régler en horizontal chaque plaque selon nécessité.
Ajustar en horizontal cada placa de acuerdo con las necesidades.
Qualora lo spazio sulla piastra Sail non fosse suciente, utilizzare le due piastre regolabili
aggiuntive.
If the space on the Sail plate is not enought, you can x the two adjustable addictional bars.
Wenn der Raum auf der Platte Sail nicht genug ist, befestigen Sie die zwei zusätzlichen
verstellbaren Platten.
Si l’espace de la plaque Sail n’est pas susant, xer les deux barres réglabes additionnelles.
Si n o ha y es p aci o su c iente en e l pa ne l Sai l , j ar ta mbi én l as d os p lac as re g ul abl es a dic ion ale s .
I
OPZ. 3
100
75
300
200
400
II III
24 25Desalto - Sail 301 / 302 Desalto - Sail 301 / 3012

Qualora fosse necessario centrare in altezza il televisore alla Piastra Sail, ssare una
piastra regolabile aggiuntiva all’altezza desiderata, utilizzando i fori VESA indicati (Fig.A).
If it is necessary to center in heght the TV to the Sail Plate, x an additional adjustable plate
to the desired height, by using the indicated VESA holes (Picture.A)
S’il est nécessaire de centrer le téléviseur en hauteur sur la plaque du Sail, xez une plaque
réglable supplémentaire à la hauteur désirée, en utilisant les trous VESA indiqués (Fig.A).
Wenn es notwendig ist das TV in der Höhe zu der Platte zu zentrieren, befestigen Sie
eine zusätzliche verstellbare Platte zu der gewünschten Höhe, mit der Benutzung von den
angegebenen VESA Bohrungen . ( Figur A )
En caso de que fuera necesario centrar en altura el televisor a la placa del Sail, jar una placa
regulable adjuntada en la altura deseada, utilizando los agujeros VESA indicados (Fig.A).
I
ATTACCO UNIVERSALE + PIASTRE REGOLABILI
UNIVERSAL BRACKET + ADJUSTABLE BARS
UNIVERSALANSCHLUSS + ZERLEGBARE PLATTEN
FIXATION UNIVERSELLE + BARRES RÉGLABES
ENGANCHE UNIVERSAL + PLACAS REGULABLES
A
II III
OPZ. 4
26 27Desalto - Sail 301 / 302 Desalto - Sail 301 / 3012

Desalto Spa
via per Montesolaro
22063 Cantù - CO
Italy
T +39 031 7832211
F +39 031 7832290
info@desalto.it
www.desalto.it 03 / 2019
This manual suits for next models
1
Other Desalto TV Mount manuals


