Design SCENTED INTERIORS ARC 2 User manual

ARC 2
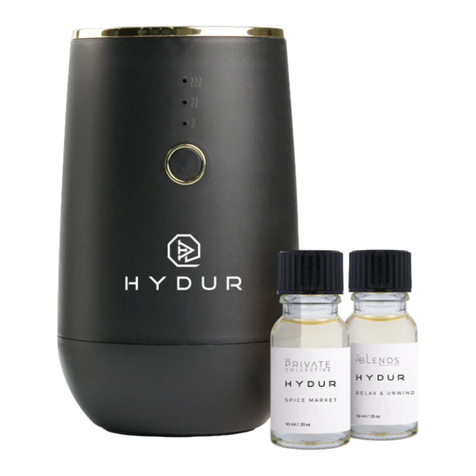
Scent Diffuser
User Manual & Installation

FEATURES:
•State-of-the-art cold-air diffusion ensures even scent
distribution
•Patented nozzle guarantees the best atomization possible to
ensure that scent mist will not leave any residue
•Simple lift-up lid provides easy access for oil bottle refill and
maintenance of unit
•The modern, wide-angel LCD allows for easy set up and
optimal control over your desired settings
•Whisper-quiet efficient motor consumes little power
•9 scent concentration levels to accommodate spaces up to
141,260 cubic feet
•Built-in timer allows you to automatically set the time the
unit will turn on and off
SAFETY:
The following basic safety precautions should always be observed.
Warning: Fire hazard. Can cause electrical shock or other injury
if mishandled, including property damage. In cases of severe
weather conditions, unplug your device immediately.
•Ensure wire is in optimal condition
•Make sure that diffuser is on an even and stable surface
•Keep away from any open heat sources
Note: Our oils are specifically designed to work with each of our
scent diffusing systems. Use of any oils other than those made by
Scented Interiors By Design may damage the machine and will
void the one-year warranty.
!2

!
SETTING UP YOUR DIFFUSER:
1. Find the ideal HVAC location for your diffuser. Make certain
that there is an electrical outlet in the location.
2. Using the diffuser handle, lift the diffuser lid.
3. Unscrew the empty bottle and replace with your Scented
Interiors By Design fragrance oil bottle. Keep the empty
bottle for future cleanings
4. Return the diffuser lid to its original position.
FRAGRANCE BOTTLE INSTALLATION:
!3

PROGRAMMING YOUR DIFFUSER:
⬥Connect the adapter to the unit and power source
Diffuser will power on when it connects to the adapter and can
also be powered on and off by holding down the ENT key or using
the on/off switch on the side of the diffuser.
The LCD screen will turn off after 1 minute of inactivity; unit will
still continue to operate as programmed. Press any key to light
the screen.
TO SET YOUR PASSWORD:
⬥Press and hold the ENT and BACK keys for approximately 3
seconds
⬥Input the desired password or bypass this step and press the
ENT key
⬥Repeat the password and press ENT key to save the setting, or
just hit the ENT key to move to the next screen
Note: When setting the password, the RIGHT arrow key will move
the cursor to the right, the UP arrow key will set the desired
number.
!4

LOCAL TIME AND DATE SETTING:
⬥Press the RIGHT arrow key twice to enter the local time interface
⬥Press the ENT key, the hour will be flashing. Press the UP
arrow and the RIGHT arrow keys at the same time to set the hour,
minute, year, month and day.
⬥Press the ENT key to save and finish the setting
DIFFUSOR WORKING PERIOD AND CONCENTRATION LEVEL
SETTING:
•The diffusor operates on Military time with the hours of
0-24.
•Up to 3 different programs can be set per day
⬥While the machine is operating, press the RIGHT arrow key
once
⬥Press the ENT key
⬥When the ‘day’ flashes, press the UP arrow key to change the
preferred day
⬥Press RIGHT arrow key to move the cursor, then set start time
(ST), press UP arrow key to change flashing hour or minute, press
RIGHT arrow key to move to next placement. Once the start (ST)
time is set, continue pressing the RIGHT arrow key to set the end
time (ED).
*NOTE: The RIGHT arrow key will move the cursor to the setting,
the UP arrow key will set the desired time.
⬥Press the RIGHT arrow key to move the cursor to the misting
concentration level. Use the UP arrow key to change the
concentration level (there are a total of 9 levels). Refer to the table
below to determine the desired concentration level for your space.
!5

⬥Press the RIGHT arrow key until the screen shows a number 2
to the left of the misting level. This represents the second
program of the day.
⬥Follow the same steps as the first program. The RIGHT arrow
key moves the cursor to the next placement, and the UP arrow
key moves the cursor to select the desired number.
⬥Once you complete the start time, end time and misting level
for the second program, press the RIGHT arrow key for the third
program.
⬥If three programs are not necessary for the day, make sure you
set the desired number of programs, and the remaining programs
should be set with a start (ST) time and end (ED) time of 00:00
⬥After you have finished setting the third program, press the
ENT key to save the settings.
NOTE: If all of the programs from Monday-Sunday are the same,
you need only set the programs for Monday, and the following
days will automatically be set as such.
⬥If the programs are different for each day, you will need to set
the daily programs individually by repeating the above steps for
each day.
!6

MAINTENANCE:
Cleaning the Unit:
Cleaning should be done before the first use and regularly after
every 3-6 months, depending on frequency of use
1. Using the empty bottle, fill with standard rubbing alcohol,
secure bottle in diffuser
2. Reattach the atomizer to the base, ensuring correct alignment
3. Allow the diffuser to work 10 minutes with the rubbing alcohol
Make certain the unit is unplugged before cleaning the interior.
Simply separate the atomizer lid from the unit and wipe inside
and out with a soft, dry cloth.
Clean the nozzle, sprayer tube and connector using rubbing
alcohol. Do not use any corrosive products, detergents or
thinners to clean your diffuser. These products can harm the
unit, particularly the plastic parts which are susceptible to
corrosion.
Do not use any oils other than Scented Interiors by Design
Ltd. oils. Using other products may damage the unit and will
void the warranty.
Please visit our website for a full listing of our Scent Systems and
Custom Fragrance Collection
!7

SCENT DIFFUSER
HVAC INSTALLATION GUIDE
An electrical outlet is required to operate this machine and needs to be in the area
where the air handler and duct are located.
⬥Find the best place to tap HVAC ductwork (diffuser location).
⬥Make sure you tap the main duct, past the air handler.
⬥If you only want to scent a portion of the area that the air handler covers, find
the branch in the duct that covers your target area to install the diffuser.
⬥Drill a ¼” hole in the duct at the tap point
⬥Insert hose 2-3” into the duct. Use foil tape to secure hose in place.
⬥Close insulation around hose and use foil tape to seal insulation and hose in
place.
⬥Connect other end of hose to nozzle at top of diffuser.
⬥Make certain that the unit is plugged in.
!
!8
Table of contents
