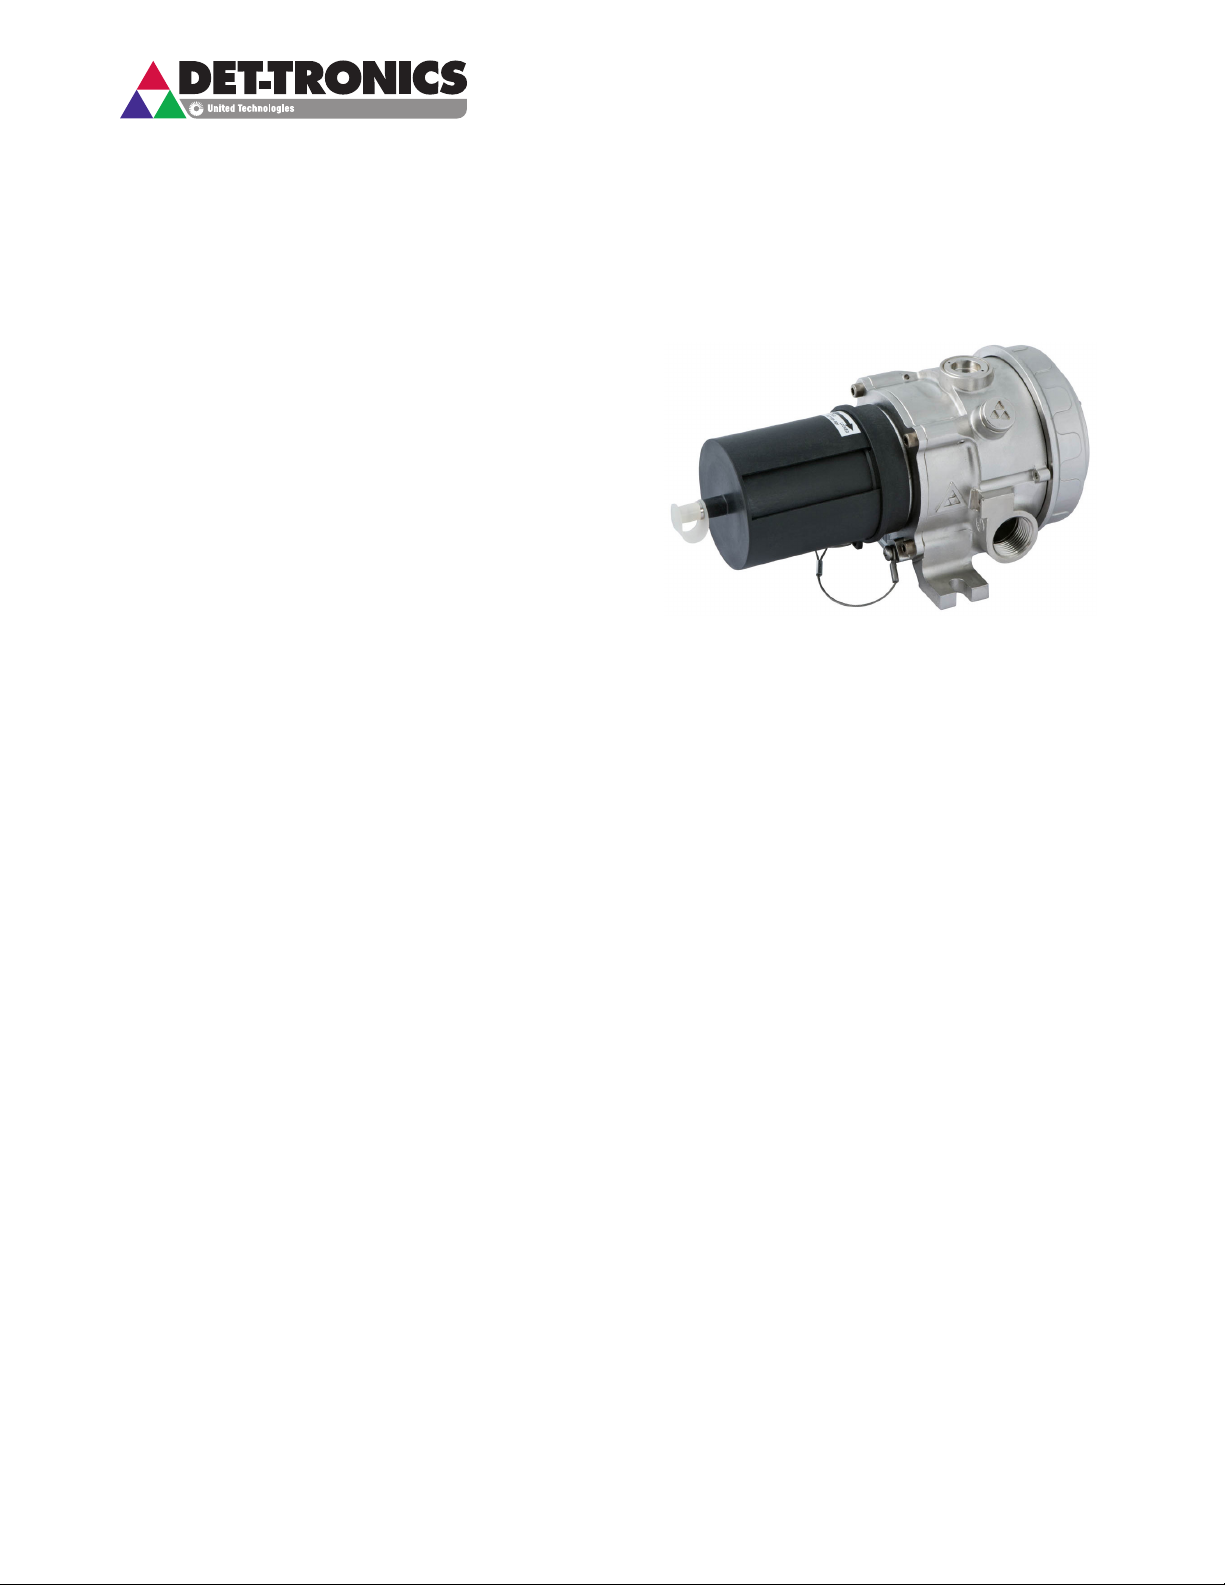
Det-Tronics PointWatch Eclipse PIRECL User manual

3.1 Rev: 3/17 95-8676
Instructions
Infrared Carbon Dioxide Gas Detector
PointWatch Eclipse
®
Model PIRECL
®

APPLICATION ..............................1
OPERATION OVERVIEW......................1
Theory of Operation .......................1
Detectable Gases.........................2
Outputs ................................2
Data Logging Capability ....................2
Optional Third Party Addressable Modules .....2
SPECIFICATIONS ...........................3
IMPORTANT SAFETY NOTES..................5
INSTALLATION..............................6
Wiring..................................6
Identication of Detector Mounting Locations ...6
Physical Installation Requirements ...........6
24 Vdc Power Supply Requirements ..........7
Wiring Cable Requirements .................7
Power Wiring Size and Maximum Length.......7
Optional Relays ..........................8
Wiring Procedure .........................8
Remote Calibration Wiring . . . . . . . . . . . . . . . . . . 8
DESCRIPTION.............................12
Internal Magnetic Switch ..................12
HART Communication ....................12
Tri-Color LED . . . . . . . . . . . . . . . . . . . . . . . . . . . 13
Weather Baffle Assembly ..................13
Clock .................................13
History Logs ............................13
Remote Calibration Option .................14
OPERATION...............................16
Factory Default Settings ...................16
Operating Modes . . . . . . . . . . . . . . . . . . . . . . . . 16
4-20 mA Current Loop Output ..............16
Fault Indication..........................17
STARTUP .................................18
PIRECL Startup/Commissioning Checklists....18
CALIBRATION .............................19
Calibration Overview .....................19
Calibration Initiation ......................20
Detailed Calibration Procedure using Magnetic
Switch .............................20
Time Out ..............................21
Calibration Abort ........................21
MAINTENANCE ............................22
Routine Inspection .......................22
Weather Baffle Cleaning ..................22
Optics Cleaning .........................22
O-Ring ................................22
Protective Caps and Covers ................22
TROUBLESHOOTING .......................23
REPLACEMENT PARTS .....................23
DEVICE REPAIR AND RETURN ...............23
ORDERING INFORMATION ..................24
PointWatch Eclipse CO2 Detector............24
Calibration Equipment ....................24
Spare Parts ............................24
Assistance .............................24
APPENDIX A — CSA APPROVAL .............A-1
APPENDIX B — ATEX / CE APPROVAL ........B-1
APPENDIX C — IECEx APPROVAL ...........C-1
APPENDIX D — INMETRO APPROVAL ........D-1
APPENDIX E — HART COMMUNICATION ......E-1
APPENDIX F — MODBUS COMMUNICATION ...F-1
APPENDIX G — WARRANTY ................G-1
APPENDIX H — CONTROL DRAWING ........H-1
Table of Contents

IMPORTANT
Be sure to read and understand the entire
instruction manual before installing or operating
the gas detection s
ystem. This product is intended
to provide early warning of the presence of carbon
dioxide gas. Proper device installation, operation,
and maintenance is required to ensure safe and
effective opera
tion.
If this equipment is used
in a manner not specied in this manual, safety
protection may be impaired.
APPLICATION
NOTE
The normal outdoor level of CO2is approximately
370 ppm. Indoor levels are typically less than
1000 ppm, but can be higher depending on the
efficiency of the ventilation system. Keep this in
mind when varied CO2levels are detected within
a building.
The PointWatch Eclipse®Model PIRECL CO2
Detector is a diffusion-based, point-type infrared
gas detector that provides continuous monitoring
of Carbon Dioxide (CO2) gas concentrations in the
range of 0-2%/volume (0-20000 ppm).
Two basic configurations are available:
• 4-20 mA output with HART communication protocol
and RS-485 MODBUS communications.
• 4-20 mA output with HART communication protocol
and RS-485 MODBUS communications, with two
alarm relays and one fault relay.
All units are powered from 24 Vdc, and are furnished with
an onboard "status indication" LED, an internal magnetic
calibration switch and an external calibration line for use
with the optional PIRTB remote calibration termination
box.
The Eclipse
CO2
detector
is ideal for use in harsh
outdoor environments and is certified for use in Class I,
Division 1 (CSA), and Zone 1 (ATEX/IECEx) hazardous
areas. It can be used as a stand-alone detector, or as
part of a larger facility protection system.
OPERATION OVERVIEW
THEORY OF OPERATION
Carbon dioxide gas is diffused through the weather
baffle assembly into the internal measurement chamber,
which is illuminated by an infrared (IR) source. As
the IR passes through the gas within the chamber,
certain IR wavelengths are absorbed by the gas,
while other IR wavelengths are not. The amount of IR
absorption is determined by the concentration of the
carbon dioxide gas. A pair of optical detectors and
associated electronics measure the absorption. The
change in intensity of the absorbed light (active signal)
is measured relative to the intensity of light at a non-
absorbed wavelength (reference signal). See Figure 1.
The microprocessor computes the gas concentration
and converts the value into a 4 to 20 milliampere current
output or digital process variable signal, which is then
communicated to external control and annunciation
systems.
INSTRUCTIONS
Infrared Carbon Dioxide Gas Detector
PointWatch Eclipse®
Model PIRECL
3.1 ©Detector Electronics Corporation 2017 Rev: 3/17 95-8676

295-86763.1
DETECTABLE GASES
The model PIRECL detector is capable of detecting
CO2(Carbon Dioxide).
OUTPUTS
Standard
The standard version provides an isolated/non-isolated
4-20 mA current loop for connection to analog input
devices.
Optional Relays
An optional relay output board providing two
programmable alarm relay outputs and one fault
relay output can be factory installed with the standard
version. All relays are sealed and provide form C (NO/
NC) contacts. The high and low alarm relay settings
are programmable and can be set for latching or non-
latching operation. The low alarm cannot be set above
the high alarm threshold. Alarm configuration can be
done with the HART or MODBUS interface.
The onboard tri-color LED indicates a LOW alarm
condition via a flashing red color, and a HIGH alarm
condition via a steady red color. The Eclipse internal
magnetic switch or HART Field Communicator can be
used to reset latched alarms. A short-duration magnetic
switch activation of 1 second will reset latched alarms.
Holding the magnetic switch closed for 2 seconds will
start the calibration sequence. The external calibration
line will not reset latched alarm relays.
When the optional relay output board is specified, the
PIRECL’s approval rating is Ex d only.
NOTE
Refer to “Alarm Relays” in the Specifications
section of this manual for important information
regarding alarm relays.
DATA LOGGING CAPABILITY
Non-volatile memory is provided to save the 10 most
recent calibrations, alarm/fault events, and minimum/
maximum operating temperature history. An hour meter
(running operational hours since startup) is provided to
record operating service time and to give an indication
of the relative time between events. This information is
accessible using HART or MODBUS communication.
OPTIONAL THIRD PARTY ADDRESSABLE MODULES
The PIRECL is electrically compatible with third party
addressable modules, provided the module fits within
the PIRECL wiring compartment. Whenever a third party
addressable module is installed, the PIRECL’s Ex e rating
is void, and only the Ex d rating is valid. Installation of
a third party addressable module requires a specially
labeled PIRECL model to ensure valid product approvals.
SIGNAL PROCESSING
ELECTRONICS
GAS
CONCENTRATION
(%/Volume or PPM)
IR SOURCE
IR TRANSPARENT
WINDOW
OPTICAL
BEAM SPLITTER
MEASUREMENT
SIGNAL DETECTOR
REFERENCE
SIGNAL DETECTOR
OPTICAL
FILTERS
PERMEABLE
GAS CELL
SAPPHIRE
MIRROR
Figure 1—Measurement Scheme for Infrared Gas Detector

395-86763.1
SPECIFICATIONS
INPUT VOLTAGE (All Models)—
24 Vdc nominal. Operating range is 18 to 32 Vdc.
Ripple cannot exceed 0.5 volts Peak-to-Peak.
POWER CONSUMPTION (All Models)—
Detector without Relays
4.0 watts nominal @ 24 Vdc
7.5 watts peak @ 24 Vdc
10.0 watts peak @ 32 Vdc.
Detector with Relays
5.5 watts nominal @ 24 Vdc
8.0 watts peak @ 24 Vdc
10.0 watts peak @ 32 Vdc.
TEMPERATURE RANGE—
Operating: See CSA, ATEX/CE, and IECEx Appendices.
Storage: –55°C to +85°C (–67°F to +185°F).
HUMIDITY—
0 to 99% relative humidity (Det-Tronics verified).
GAS DETECTION RANGE—
0-2%/vol factory default
DETECTABLE GAS—
Carbon Dioxide (CO2)
DETECTOR CONFIGURATION OPTIONS—
A significant number of PIRECL configuration parameters
are field programmable including measurement
range, alarm setpoints, tag number, special notations,
password protection, etc. Details are provided in the
HART Communication Appendix. Two PIRECL field
configuration programming methods are supported:
– HART Communication
– RS-485 MODBUS Communication
THIRD PARTY ADDRESSABLE MODULE
(Optional)—
Input Voltage: 30 Vdc.
Input Current: 30 mA.
WARM-UP TIME (All Models)—
Device enters normal mode after two minutes upon cold
power-up. One hour warm-up time is recommended
for optimum performance. Signal output level during
warm-up is programmable.
CURRENT OUTPUT—
Linear 4-20 mA (current source/sink, isolated/non-
isolated) rated at 600 ohms maximum loop resistance @
24 Vdc operating voltage.
VISUAL STATUS INDICATOR (All Models)—
Tri-color LED:
Red = Low alarm, high alarm, or calibration.
See Table 1 for Details.
Green = Power on / OK
Yellow = Fault or warm-up.
RELAY OUTPUTS (Optional)—
Available on Ex d approved models only.
ALARM RELAYS—
Low and High
Form C Type (NO/NC).
De-Energized during Normal mode, Energized on Alarm.
Contact Rating: 5 amperes at 30 Vdc.
Programmable for Latching or Non-Latching Operation.
Setpoint Range (both): 10-60% of range.
Factory Default Settings:
Low: 40% of range – Non-latching
High: 60% of range – Non-latching
Alarm relay programming can be accomplished using
HART or MODBUS.
CAUTION
The PIRECL CO2Gas Detector should be used in
conjunction with an appropriate certied Control
Unit and congured for a non-latching high alarm.
The control unit must always latch and require a
deliberate manual action to clear a high gas alarm.
When used as a stand alone device, the high alarm
must always be programmed for latching operation.

495-86763.1
FAULT RELAY—
Form C Type (NO/NC). Energized during Normal mode,
De-Energized on Fault or loss of power.
Contact Rating: 5 amperes at 30 Vdc.
Non-Latching Operation only — not programmable.
DIGITAL OUTPUT (Optional)—
Modbus digital communication.
CALIBRATION—
All units are factory set and calibrated to carbon dioxide.
Routine calibration of the Eclipse CO2detector after
completion of initial commissioning is supported, but
not absolutely required. Generally, an annual gas bump
test or full calibration will ensure proper sensitivity and
response.
NOTE
Frequent visual inspections of the detector are
recommended to conrm that there are no external
impediments to proper detection capability.
Four methods of initiating Calibration are supported:
– On-Board magnetic reed switch
– HART communication
– Remote calibration line for remote switch
– MODBUS communication
RESPONSE TIME (Det-Tronics Veried)—
T50 = 6 seconds.
VIBRATION—
PIRECL successfully passes Sinusoidal Vibration
Testing in accordance with MIL-STD-810C, Method
514.2, Paragraph 4.5.1.3, Figure 514.2-7 Curve AW, and
C22.2 No. 152-M1984, and also DET NORSKE VERITAS
Certification Notes – No. 2.4 dated May 1995.
ACCURACY (Det-Tronics Veried)—
0-20000 ppm or 0-2%/vol:
±10% Full Scale @ 25°C
.
SELF-DIAGNOSTIC TEST—
Fail-Safe operation ensured by performing all critical
tests once per second.
INGRESS PROTECTION—
IP66/IP67 (DEMKO Verified).
DETECTOR HOUSING MATERIAL—
316 stainless steel (CF8M).
SURFACE PREPARATION—
Electropolish.
CONDUIT ENTRY OPTIONS—
Two entries, 3/4 inch NPT or M25.
HART COMMUNICATION PORT (Optional)—
Intrinsically Safe (I.S.). For live maintenance, follow
Control Drawing 011975-001 in Appendix H.
OPTICS PROTECTION—
The three-layer weather baffle assembly is UV-resistant,
static-dissipating black Polythalimide plastic. The
standard weather baffle version, recommended for most
outdoor and indoor applications, includes an internal
hydrophobic filter. The standard weather baffle includes
a 3/16” (4.8mm) barb fitting for attaching a 3/16” I.D.
hose during calibration.
Heated optics minimize condensation to ensure reliable
operation through temperature extremes.
WIRING TERMINALS—
Field wiring screw terminals are UL/CSA rated for up to
14 AWG wire, and are DIN/VDE rated for 2.5 mm2wire.
Screw terminal required torque range is 3.5–4.4 in.-lbs.
(0.4-0.5 N·m).
ELECTRICAL SAFETY CLASSIFICATION—
Installation Category (Overvoltage Category) II
& Pollution Degree 2 per ANSI/ISA-S82.02.01,
EN 61010-1 & IEC 61010-1.

595-86763.1
CERTIFICATION—
For complete approval details, refer to the appropriate
Appendix:
Appendix A - CSA
Appendix B - ATEX/CE
Appendix C - IECEx
Appendix D - INMETRO
DIMENSIONS—
See Figure 2.
SHIPPING WEIGHT (Approximate)—
11.5 pounds (5.2 kg).
WARRANTY—
Five year limited warranty from date of manufacture.
See Appendix G for details.
IMPORTANT SAFETY NOTES
CAUTION
The wiring procedures in this manual are intended
to ensure proper functioning of the device under
normal conditions. However, because of the
many variations in wiring codes and regulations,
total compliance to these ordinances cannot be
guaranteed. Be certain that all wiring complies
with the NEC as well as all local ordinances. If
in doubt, consult the authority having jurisdiction
before wiring the system. Installation must be
done by a properly trained person.
CAUTION
This product has been tested and approved
for use in hazardous areas. However, it must
be properly installed and used only under the
conditions specified within this manual and
the specific approval certificates. Any device
modication, improper installation, or use in a faulty
or incomplete conguration will render warranty
and product certications invalid.
CAUTION
The detector contains no user serviceable
components. Service or repair should never be
attempted by the user. Device repair should be
performed only by the manufacturer or trained
service personnel.
LIABILITIES
The manufacturer’s warranty for this product is
void, and all liability for proper function of the
detector is irrevocably transferred to the owner or
operator in the event that the device is serviced or
repaired by personnel not employed or authorized
by Detector Electronics Corporation, or if the
device is used in a manner not conforming to its
intended use.
CAUTION
Observe precautions for handling electrostatic
sensitive devices.
NOTE
The PointWatch Eclipse CO2model is intended for
detection of carbon dioxide only. The device will
not detect hydrogen or hydrocarbon gases.
4.5
(11.4)
5.2
(13.2)
9.3
(23.6)
4.6
(11.7)
D2055
3/16” (4.8mm) BARB FITTING
(STANDARD WEATHER BAFFLE)
Figure 2—Dimensions of Eclipse Detector in Inches (Centimeters)
®

695-86763.1
INSTALLATION
Before installing the PointWatch Eclipse detector,
define the following application details:
WIRING
The detector must be installed per local installation
practices. For IEC/ATEX hazardous areas, it may be
acceptable to utilize Ex e wiring practices with the
PIRECL (non-relay versions).
IDENTIFICATION OF DETECTOR MOUNTING
LOCATIONS
Identification of the most likely leak sources and leak
accumulation areas is typically the first step in identifying
the best detector mounting locations. In addition,
identification of air current / wind patterns within the
protected area is useful in predicting gas leak dispersion
behavior. This information should be used to identify
optimum sensor installation points.
Because CO2 is heavier than air, the sensor should be
placed close to the floor for optimal detection. Note that
air currents may cause CO2gases to rise under some
conditions. Heated gases may also exhibit the same
phenomenon.
The most effective number and placement of detectors
varies depending on the conditions at the job site. The
individual designing the installation must often rely on
experience and common sense to determine the detector
quantity and best locations to adequately protect the
area. Note that it is typically advantageous to locate
detectors where they are accessible for maintenance,
and also where the Eclipse status indication LED can
easily be seen. Locations near excessive heat / vibration
sources should be avoided if possible.
Final suitability of possible gas detector locations should
be verified by a job site survey. Gas detector area of
coverage is a subjective evaluation, and may require
long-term empirical data to confirm effectiveness. A
typical rule of thumb is that one detector can cover a 900
square foot area.
However, this rule of thumb is subject to change
depending upon specific application properties and
requirements.
NOTE
For additional information on determining the
quantity and placement of gas detectors in a
specic application, refer to the IEC 60079-29-2
standard.
PHYSICAL INSTALLATION REQUIREMENTS
The detector is provided with built-in mounting feet
that will accept 3/8 inch (M8) diameter mounting bolts.
Always ensure that the mounting surface is vibration-free
and can suitably support the total weight of the detector
without assistance from electrical cabling or conduit
system.
The detector must be installed per local installation
practices. For IEC/ATEX hazardous areas, it may be
acceptable to utilize Ex e wiring practices with the
Eclipse.
Device Mounting Orientation
It is highly recommended that the Eclipse be installed
in the horizontal position. The detector is not position-
sensitive in terms of its ability to detect gas. However, the
weather baffle assembly provides superior performance
when the Eclipse is installed with the baffle in a horizontal
position.
LED Visibility
Select a mounting orientation where the PIRECL status
indication LED is visible to personnel within the area.
CORRECT
INCORRECT
Recommended Orientation of Eclipse Detector

795-86763.1
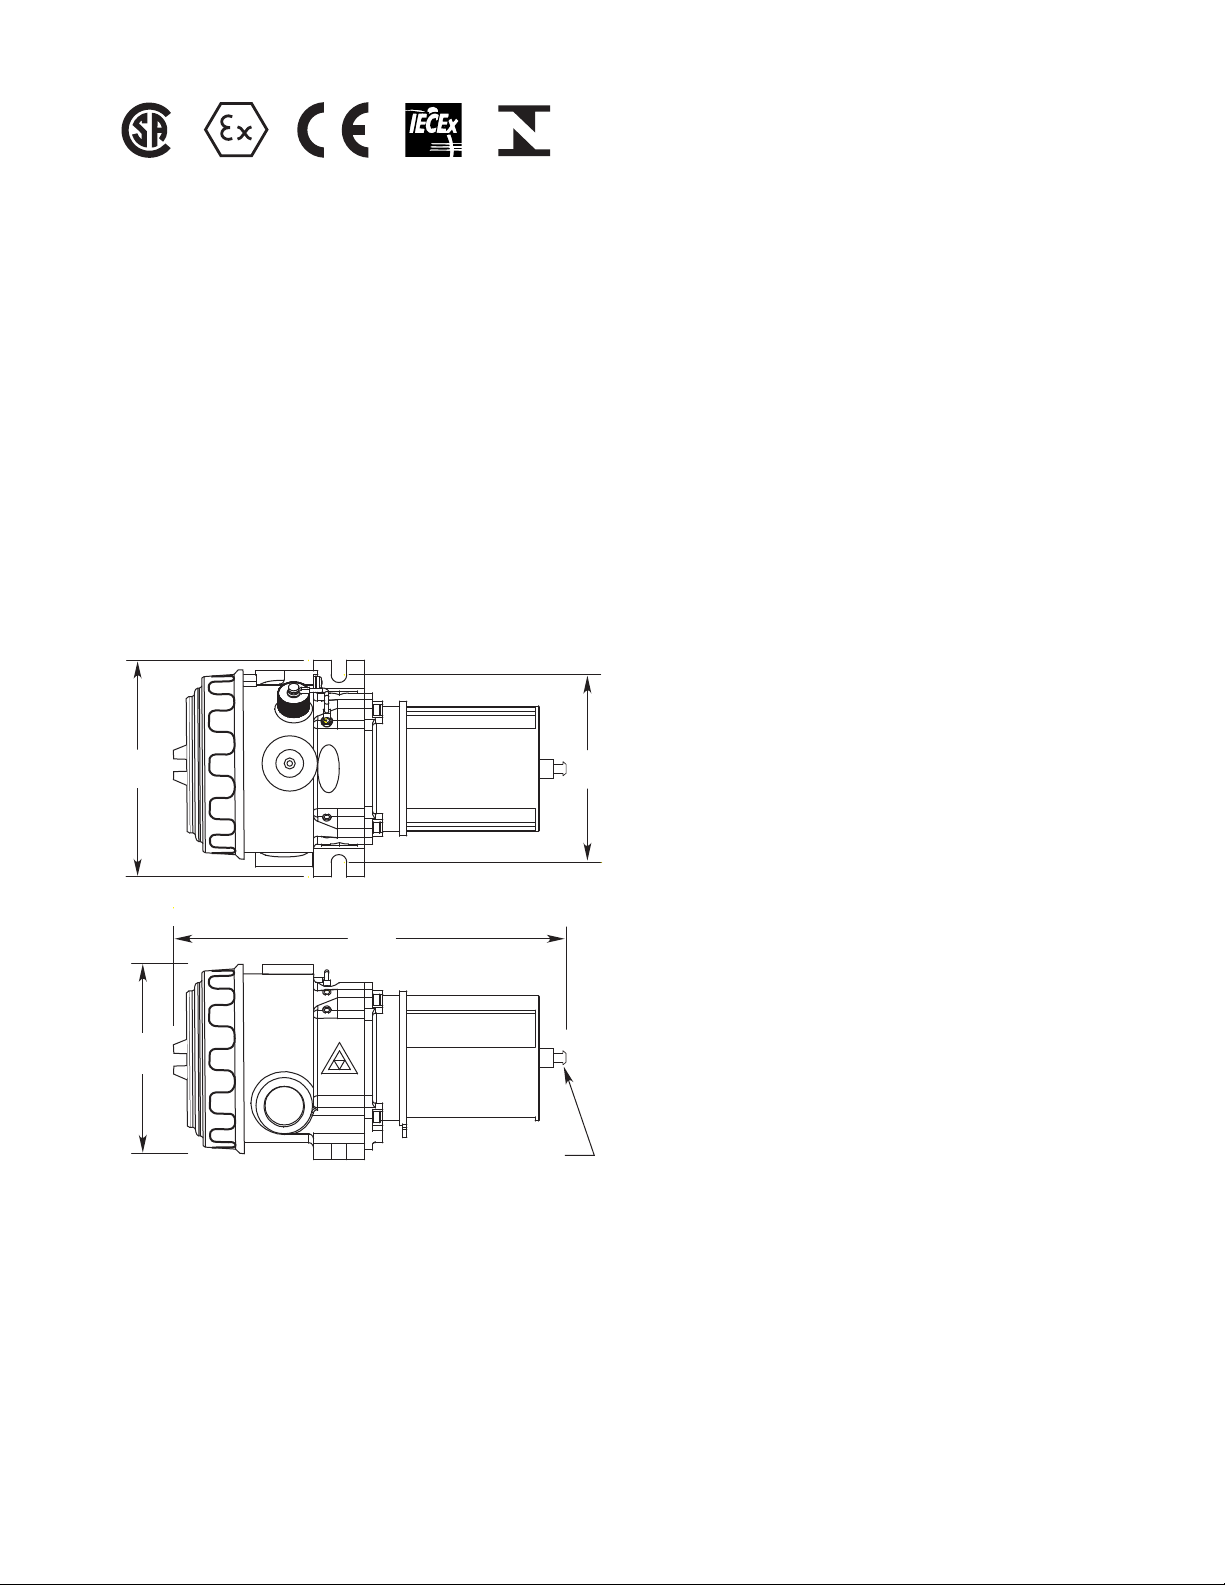
Calibration Gas Port Cover
A protective cover for the calibration gas injection port is
provided to ensure that contaminants are not accidently
introduced into the Eclipse optics. Ensure that this cover
is properly installed over the port when calibration is not
being performed.
NOTE
Failure to install the calibration gas port cover
or the use of a damaged cover may result in
nuisance faults and require cleaning the detector
optics.
24 VDC POWER SUPPLY REQUIREMENTS
Calculate the total gas detection system power
consumption rate in watts from cold start-up. Select a
power supply with adequate capability for the calculated
load. Ensure that the selected power supply provides
regulated and filtered 24 Vdc output power for the entire
system. If a back-up power system is required, a float-
type battery charging system is recommended. If an
existing source of 24 Vdc power is being utilized, verify
that system requirements are met.
WIRING CABLE REQUIREMENTS
Always use proper cabling type and diameter for input
power as well as output signal wiring. 14 to 18 AWG
shielded stranded copper wire is recommended.
Always install a properly sized, master power fuse or
breaker on the system power circuit.
NOTE
The use of shielded cable in conduit or shielded
armored cable is required. In applications where
the wiring is installed in conduit, dedicated conduit
is recommended. Avoid low frequency, high
voltage, and non-signaling conductors to prevent
nuisance EMI problems.
CAUTION
The use of proper conduit installation techniques,
breathers, glands, and seals is required to prevent
water ingress and/or maintain the explosion-proof
rating.
POWER WIRING SIZE AND MAXIMUM LENGTH
1. The Eclipse detector must receive 18 Vdc
minimum to operate properly. 24 Vdc minimum is
recommended.
2. Always determine voltage drops that will occur to
ensure that 24 Vdc is delivered to the Eclipse.
3. Normally, nothing smaller than 18 AWG (0.75 mm2
)
is recommended by Det-Tronics for Eclipse power
cabling.
Wire size requirements are dependent upon power
supply voltage and wire length.
The maximum distance between the Eclipse detector
and its power supply is determined by the maximum
allowable voltage drop for the power wiring loop. If the
voltage drop is exceeded, the device will not operate.
To determine the maximum power loop voltage drop,
subtract the minimum operating voltage for the device
(18 Vdc) from the minimum output voltage of the power
supply.
To determine the actual maximum wire length:
1. Divide the maximum allowable voltage drop by the
maximum current draw of the Eclipse (0.31 A),
2. Divide by the resistance of the wire (ohms/foot value
available in wire manufacturer’s specification data
sheet),
3. Divide by 2.
For example: Consider an installation using 18 AWG
wiring with a power supply providing 24 Vdc.
Power supply voltage = 24 Vdc,
Eclipse minimum operating voltage = 18 Vdc
24 – 18 = 6 Vdc
Maximum Voltage Drop = 6
Maximum Current = 0.31 A
Wire Resistance in Ohms/Foot = 0.006523
6 ÷ 0.31 ÷ 0.006523 ÷ 2 = 1484 feet
NOTE
For CSA/ATEXIECEx Certied systems using HART
communication, the maximum wiring distance is
2000 feet.
Maximum Voltage Drop
÷
Maximum Current
÷
Wire Resistance in Ohms/
Foot
÷
2
Maximum Wire Length =
Maximum Power Loop
Voltage Drop =
Power Supply Voltage
Minus
Minimum Operating Voltage

895-86763.1
OPTIONAL RELAYS
Optional relay contacts are “dry”, meaning that the
installer must provide the voltage to the common terminal
of the relay output.
AC voltage should not be switched directly using the
Eclipse relays. The use of an external relay is required if
AC voltage must be switched by the Eclipse relays.
In order to change alarm relay settings from the factory
default settings, it is recommended to utilize a HART
Field Communicator. Contact the factory for further
assistance.
NOTE
Refer to “Alarm Relays” in the Specifications
section of this manual for important information
regarding alarm relays.
The relay board must temporarily be removed from
the Eclipse termination compartment to connect the
relay output field wiring cables. After the relay wiring
is connected, re-install the relay board using the three
captive screws. Refer to Figure 3.
WIRING PROCEDURE
Ensure that all cables are terminated properly. PointWatch
Eclipse screw terminal torque range is 3.5–4.4 in.-lbs.
(0.4–0.5 N·m).
Conductor insulation should be stripped off with a bare
conductor length of 0.2 inch (5 mm) minimum and 0.7
inch (18 mm) maximum.
Cable shield, if used, should be properly terminated. If
not terminated, clip the shield wire off short and insulate
it within the detector housing to prevent the shield wire
from accidentally contacting the detector housing or any
other wire.
Figure 4 shows the wiring terminal strip located inside the
detector’s integral junction box.
Figure 5 shows the wiring terminal configuration for the
Eclipse CO2without relays.
Figure 6 shows the wiring terminal configuration for the
Eclipse CO2with relays.
Figures 7 through 10 show the 4-20 mA output of the
Eclipse detector in various wiring schemes.
Figure 11 shows the Eclipse wired for benchtop testing/
programming using HART protocol.
NOTE
The Eclipse housing must be electrically
connected to earth ground. A dedicated earth
ground lug is provided for this purpose.
REMOTE CALIBRATION WIRING
If it is desired to initiate calibration using the remote
calibrate line, the use of the Det-Tronics Model PIRTB
Termination Box is highly recommended for optimum
ease of installation and calibration. The PIRTB module
includes a magnetic reed switch, indicating LED, and
wiring terminal block. Refer to “Remote Calibration
Option” in the “Description” section of this manual for
details.
Figure 12 shows the location of the wiring terminals, reed
switch and LED inside the calibration termination box.
See Figure 13 for wiring details.
WARNING
Do not attempt to physically connect or touch
the calibration lead wire to DCV common in the
field to begin calibration. This practice is often
less than precise, and may result in a spark or
other undesirable results. For optimum ease of
installation and calibration, always utilize a Det-
Tronics junction box with magnetic reed-switch,
indicating LED, and termination block (Model
PIRTB).
Figure 3—Eclipse Wiring Termination Compartment
with Optional Relay Board Removed
FACTORY INSTALLED WIRING
TO RELAY BOARD
(DO NOT REMOVE)
CAPTIVE SCREWS (3)
RELAY TERMINAL BLOCK
A2133

995-86763.1
EARTH GND LUG
A2084
Figure 4—Terminal Strip Located Inside Wiring Compartment
24 VDC –
24 VDC –
24 VDC +
24 VDC +
CALIBRATE
+ 4-20 MA
– 4-20 MA
RS-485 A
RS-485 B
RELAY POWER (RED)
FAULT (ORANGE)
LOW ALARM (WHITE)
HIGH ALARM (YELLOW)
LOW ALARM
RELAY
HIGH ALARM
RELAY
FAULT
RELAY
WIRING TO OPTIONAL
RELAY BOARD
NO USER CONNECTION
RELAY BOARD TERMINALS
(OPTIONAL)
1
2
3
4
5
6
7
8
9
10
11
12
13
B2054
NO
NC
C
NO
NC
C
NO
NC
C
Figure 6—Wiring Terminal Identication
for Eclipse with Relays
24 VDC –
24 VDC –
24 VDC +
24 VDC +
CALIBRATE
+ 4-20 MA
– 4-20 MA
RS-485 A
RS-485 B
RELAY POWER
FAULT
LOW ALARM
HIGH ALARM
NO USER CONNECTION
1
2
3
4
5
6
7
8
9
10
11
12
13
A2054
Figure 5—Wiring Terminal Identication
for Eclipse without Relays

10 95-86763.1
24 VDC
+–
+–
24 VDC –
24 VDC –
24 VDC +
24 VDC +
CALIBRATE
+ 4-20 MA
– 4-20 MA
RS-485 A
RS-485 B
RELAY POWER
FAULT
LOW ALARM
HIGH ALARM
1
2
3
4
5
6
7
8
9
10
11
12
13
NO USER CONNECTION
4 to 20 MA
B2051
*
*TOTAL LOOP RESISTANCE = 250 OHMS MINIMUM, 600 OHMS MAXIMUM.
DO NOT INSTALL RESISTOR WITHIN PIRECL ENCLOSURE IN EEx e APPLICATIONS.
Figure 8—Eclipse Detector Wired for Non-Isolated
4-20 mA Current Output (Sourcing)
24 VDC
+–
+
–
24 VDC –
24 VDC –
24 VDC +
24 VDC +
CALIBRATE
+ 4-20 MA
– 4-20 MA
RS-485 A
RS-485 B
RELAY POWER
FAULT
LOW ALARM
HIGH ALARM
1
2
3
4
5
6
7
8
9
10
11
12
13
NO USER CONNECTION
4 to 20 MA
B2050
*TOTAL LOOP RESISTANCE = 250 OHMS MINIMUM, 600 OHMS MAXIMUM.
DO NOT INSTALL RESISTOR WITHIN PIRECL ENCLOSURE IN EEx e APPLICATIONS.
*
Figure 7—Eclipse Detector Wired for Non-Isolated
4-20 mA Current Output (Sinking)
24 VDC
+–
24 VDC
+–
24 VDC –
24 VDC –
24 VDC +
24 VDC +
CALIBRATE
+ 4-20 MA
– 4-20 MA
RS-485 A
RS-485 B
RELAY POWER
FAULT
LOW ALARM
HIGH ALARM
1
2
3
4
5
6
7
8
9
10
11
12
13
NO USER CONNECTION
+–
4 to 20 MA
B2053
*
*TOTAL LOOP RESISTANCE = 250 OHMS MINIMUM, 600 OHMS MAXIMUM.
DO NOT INSTALL RESISTOR WITHIN PIRECL ENCLOSURE IN EEx e APPLICATIONS.
Figure 10—Eclipse Detector Wired for Isolated
4-20 mA Current Output (Sourcing)
24 VDC
+–
24 VDC
+–
24 VDC –
24 VDC –
24 VDC +
24 VDC +
CALIBRATE
+ 4-20 MA
– 4-20 MA
RS-485 A
RS-485 B
RELAY POWER
FAULT
LOW ALARM
HIGH ALARM
1
2
3
4
5
6
7
8
9
10
11
12
13
NO USER CONNECTION
+
–
4 to 20 MA
B2052
*
*TOTAL LOOP RESISTANCE = 250 OHMS MINIMUM, 600 OHMS MAXIMUM.
DO NOT INSTALL RESISTOR WITHIN PIRECL ENCLOSURE IN EEx e APPLICATIONS.
Figure 9—Eclipse Detector Wired for Isolated
4-20 mA Current Output (Sinking)

11 95-86763.1
CALIBRATE SWITCH
B2056
HOLD CALIBRATION MAGNET
AT OUTSIDE BASE OF JUNCTION
BOX AT THIS LOCATION
TO ACTIVATE CALIBRATION SWITCH
REMOTE LED
Figure 12—Remote Calibration Switch and LED in Optional
Det-Tronics PIRTB Termination Box
Figure 11—Wiring the Eclipse Detector for Benchtop Testing/
Programming Using HART Protocol
24 VDC –
24 VDC –
24 VDC +
24 VDC +
CALIBRATE
+ 4-20 MA
– 4-20 MA
RS-485 A
RS-485 B
RELAY POWER
FAULT
LOW ALARM
HIGH ALARM
NO USER
CONNECTION
1
2
3
4
5
6
7
8
9
10
11
12
13
A2203
24 VDC
+
–
250 TO 500 OHMS
24 VDC –
24 VDC –
24 VDC +
24 VDC +
CALIBRATE
+ 4-20 MA
– 4-20 MA
RS-485 A
RS-485 B
RELAY POWER
FAULT
LOW ALARM
HIGH ALARM
NO USER CONNECTION
FACTORY WIRING ONLY
1
2
3
4
5
6
7
8
9
10
11
12
13 A2057
CAL
SIGNAL
24 VDC –
SPARE
CAL
SIGNAL
24 VDC –
24 VDC + 24 VDC +
24 VDC
+
–
MAGNETIC REED SWITCH
FOR REMOTE CALIBRATION
TYPICALLY
NO CONNECTION
NOTE: IF REQUIRED, POWER AND 4 TO 20 MA
SIGNAL OUTPUT MAY BE ROUTED
THROUGH REMOTE CALIBRATION MODULE
USING SHIELDED CABLING.
Figure 13—PIRTB Wired to PointWatch Eclipse

12 95-86763.1
CALIBRATION MAGNET
CALIBRATION NOZZLE
WEATHER BAFFLE
TRI-COLOR LED
OPTIONAL HART COMMUNICATION
PORT (COVER INSTALLED)
PLACE CALIBRATION MAGNET
HERE TO ACTIVATE INTERNAL
REED SWITCH
E2058
EARTH GND LUG
Figure 14—PointWatch Eclipse
HART COMMUNICATOR CONNECTED
TO I.S. HART PORT
C2490
Figure 15—Eclipse Models with Optional I.S. HART Port
DESCRIPTION
INTERNAL MAGNETIC SWITCH
An internal magnetic switch is provided for resetting
latched alarms and initiating calibration. See Figure 14
for switch location. Momentary switch activation will reset
alarms, while holding the switch closed for 2 seconds or
longer will start the calibration sequence. The switch can
also be used to enter "live" calibration mode or terminate
the calibration sequence (see "Calibration" section).
HART COMMUNICATION
An optional intrinsically safe HART communication port
provides a non-intrusive means for connecting the HART
Communicator to the Eclipse. Refer to Figure 15.
Alternatively, the HART communicator can be connected
across a 250 ohm resistor in the 4-20 mA loop.
NOTE
A 250 ohm resistor must be present within the
4-20 mA loop for HART communication to work.
In many cases, this resistor is already present in
the control panel. For a bench test or a situation
where the 4-20 mA loop is not active, this resistor
must still be installed for HART communication to
function properly (see Figure 11).
If a PIRTB Remote Calibration Termination Box is utilized,
the HART Communicator can be connected at the PIRTB.
Note that this connection requires removal of the PIRTB
cover.
Connect the HART Communicator, then turn it on by
pressing the ON/OFF key. The communicator will indicate
when the connection is made. If the connection is not
made, the communicator will indicate that no device was
found. Refer to the HART Appendix in this manual for
complete information.
WARNING
For Division applications, do not open cover when
explosive gas atmosphere may be present.
Refer to Appendix E in this manual for complete
information regarding HART communication with Eclipse.

13 95-86763.1
TRI-COLOR LED
An onboard tri-color LED is provided for indicating
faults, alarms, and calibration status. See Table 1. LED
operation for fault status is non-latching. LED operation
for alarms is configurable for latching/non-latching.
WEATHER BAFFLE ASSEMBLY
The black weather baffle is provided to prevent debris
and water from entering the optics, while allowing gas to
enter readily. An O-ring is provided on the main Eclipse
body to ensure a proper seal with the weather baffle.
The weather baffle version with hydrophobic filter is for
most outdoor and indoor applications, especially wet
and/or dirty applications. When compared to the weather
baffle version without the hydrophobic filter, it provides
optimum protection against airborne water and dirt, with
minimal reduction in speed of gas alarm response.
The weather baffle assembly is not field-serviceable,
but is easily replaceable. To remove the plastic weather
baffle from the Eclipse body, rotate it one quarter turn
counter-clockwise and pull.
The weather baffle is furnished with a calibration gas
nozzle for direct injection of gas to the sensor, allowing
the operator to apply gas to the detector without going
through the weather baffle.
NOTE
Always cover the calibration gas nozzle with the
cap during normal operation, and ensure that the
cap is not damaged.
CLOCK
An hour meter is provided to give a relative indication of
time for historical logs. The meter is zeroed at the time of
manufacture and only increments while power is applied.
HART or MODBUS communication is required to view the
running hours.
HISTORY LOGS
All history logs are saved in non-volatile memory and
retained through power cycles. HART or MODBUS
communication is required to view the history logs.
Event Log (Alarms and Faults)
An event log saves the ten most recent alarms and a
selected group of faults with an hour meter time stamp.
HART or MODBUS communication is required to view the
log. Types of logged events include:
• Low Alarms
• High Alarms
• Optics Fault
• Warm-up
• Calibration Fault
Calibration Log
A log of the ten most recent calibrations with time stamp
is saved. HART or MODBUS communication is required
to view the log. Types of calibration records include:
• Zero Only Calibration
• Complete Calibration
• Failed Calibration
Min/Max Temperature History
Ambient minimum and maximum exposed temperature
measurements are stored in non-volatile memory, and are
accessible via HART or MODBUS communication. The
measurements are time tagged with respect to total hours
of powered operation. The temperature log may be reset,
in which case all min/max exposed temperature logs are
cleared.
Table 1—LED Status Indication
LED Device Status
Green Normal operation.
Red Blinking indicates Low Alarm.
On steady indicates High Alarm.
Yellow Fault condition or warmup.

14 95-86763.1
REMOTE CALIBRATION OPTION
In most applications, it is recommended to install the
PointWatch Eclipse CO2model where it will contact the
gas of interest as quickly as possible. Unfortunately,
the best location for early warning can often result in
accessibility problems for the operator when calibration
is required. In these applications, the Model PIRTB
Termination Box is highly recommended to provide the
ability to calibrate the detector from a remote location.
The PIRTB consists of a termination/circuit board, housed
within an explosion-proof junction box. The circuit board
contains a magnetic reed switch for initiating calibration,
an indicating LED to signal the operator when to apply
and remove the calibration gas, and a wiring terminal
block. A version of the junction box is furnished with
a small viewing window that enables calibration to be
performed without hazardous area de-classification.
The PIRTB may be installed up to 100 feet away from
the Eclipse. Refer to Figure 16 for remote calibration
configuration options.
NOTE
The remote calibration switch is intended for
initiating calibration only. Resetting latching alarm
outputs using the remote calibration switch cannot
be accomplished without entering the Calibration
mode.
The following recommendations are provided to enhance
operator ease and convenience of remote calibration
configurations:
1. Install the Eclipse in such a manner that the onboard
LED is visible whenever possible. This will aid in
checking device status "at a glance."
2. The Eclipse is provided with a calibration gas nozzle
on the weather baffle, which allows the use of
permanently attached calibration gas delivery tubing
(either polyethylene or stainless steel). The tubing is
typically routed in parallel with the remote calibration
cabling to the same location as the PIRTB termination
box. This arrangement enables a technician to
initiate calibration and deliver the calibration gas to
the Eclipse from a single location.
3. When permanently installed calibration gas tubing
is utilized, always install a shut-off valve at the open
end to prevent unwanted gas or debris from entering
the tubing.
4. Always purge the permanent tubing with pure
nitrogen prior to and immediately after calibration
to ensure that residual carbon dioxide gases are
cleared. Always close the shutoff valve after post-
calibration purging is complete. This will ensure
that all the carbon dioxide gas is eliminated from the
Eclipse optics.
5. Note that permanently installed calibration gas
tubing will increase the calibration gas consumption
rate as a function of total tubing length.
Other methods of remote Eclipse calibration include
utilizing HART or MODBUS communications. Refer to
the HART and MODBUS appendices for details.

15 95-86763.1
WRONG
HAZARDOUS LOCATION NON-HAZARDOUS LOCATION
24 VDC +
24 VDC –
4-20 MA SIGNAL
24 VDC +
24 VDC –
4-20 MA SIGNAL
24 VDC +
24 VDC –
4-20 MA SIGNAL
24 VDC +
24 VDC –
+ 4-20 MA
– 4-20 MA
PIRECL
PIRECL
HART
COMMUNICATOR
HART
COMMUNICATOR
HART
COMMUNICATOR
HART
COMMUNICATOR
PIRTB
PIRTB
E2060
NOTE: THE TOTAL WIRING DISTANCE FROM THE HART COMMUNICATOR
THROUGH THE POINTWATCH ECLIPSE TO THE SIGNAL RECEIVER
MUST NOT EXCEED 2000 FEET (610 METERS).
CAL GAS
24 VDC, CAL
PIRECL
PIRTB ISOLATED 4-20 MA
CAL GAS
PIRECL
PIRTB NON-ISOLATED 4-20 MA
NON-ISOLATED 4-20 MA
Figure 16—Remote Calibration Conguration Options

16 95-86763.1
OPERATION
FACTORY DEFAULT SETTINGS
The PointWatch Eclipse CO2model is shipped from
the factory pre-calibrated and set for carbon dioxide at
0-2%/vol (0-20000 ppm).
OPERATING MODES
The Eclipse has three operating modes: warm-up,
normal, and calibrate.
Warm-up
Warm-up mode is entered upon application of 24 Vdc
operating power. During warm-up, the 4-20 mA current
loop output will indicate warm-up, the indicating LED is
yellow, and the alarm outputs are disabled. The warm-
up mode lasts nominally two (2) minutes after power-up.
Normal
After warm-up mode is completed, the device
automatically enters the Normal mode, and all analog
and alarm outputs are enabled.
Calibrate
Calibration of the Eclipse is normally not required;
however, the user has the option to verify proper
calibration or to perform calibration procedures if
necessary. Guidelines for when to perform a calibration
or a response test are listed in Table 2. The user has
the choice of three methods to place the device into the
Calibrate mode. Refer to the "Calibration" section in this
manual for details.
4-20 mA CURRENT LOOP OUTPUT
Eclipse provides an isolated, linear current loop output
that is proportional to the detected gas level. Fault and
calibration status are also indicated by this output.
The factory setting for full-scale 2%/vol output is 20 mA.
HART and MODBUS interfaces also have the ability to
calibrate the 4 mA and 20 mA levels.
When the default setting is selected, the
CO2
% Volume
for a given current reading can be calculated using the
formula:
% CO2 = (X – 4) x 0.125 X = Current reading
in milliamperes
Example: Device reads 12 mA.
% CO2= (12 – 4) x 0.125 = 1%/vol
Normally, the current loop output is proportional to the
selected standard gas type only.
Table 2—Calibration or Response Test
Function
Calibration Response
Test
Startup X
Replace any part X
Constant zero offset X
Periodic Functional Testing
(at least once a year) X

17 95-86763.1
FAULT INDICATION
There are three modes of signaling faults using the
4-20 mA analog signal output:
• Eclipse (Factory default setting)
• User Defined
• PIR9400
Fault signaling mode can be selected using the HART or
MODBUS interface. Table 3 shows the current levels for
each fault mode.
Eclipse Fault Mode
Eclipse mode follows conventional fault signaling
practice. The current loop output indicates the
presence of a fault, but does not attempt to identify
a specific fault with a specific current output value.
Identification of a specific fault type is done through
the HART Communicator or MODBUS.
User Dened Fault Mode
This mode is intended for users who wish to program
unique current levels for faults and calibration signals.
User defined current levels can be set from 0.0 to 24.0
mA. and can be programmed from HART or MODBUS
interfaces. Four unique current levels are available:
warm-up, general fault, calibration, and blocked optics.
PIR9400 Fault Mode
PIR9400 mode is provided for compatibility with existing
Det-Tronics PointWatch gas detectors. When using the
Eclipse CO2detector, this mode is not recommended
because HART communication will be lost when the
milliamp signal goes below 1 mA.
Table 3—Output Levels of 4-20 mA Current Loop and Corresponding Status Indications
Condition Eclipse Fault Mode User Dened Fault Mode PIR9400 Fault Mode
(Not Recommended)
Gas Level (-10% to 120% Full scale) 2.4 to 20.5 2.4 to 20.5 2.4 to 20.5
Warm-up 1.00 Warm-up 0.00
Reference Sensor Saturated 1.00 General Fault 0.20
Active Sensor Saturated 1.00 General Fault 0.40
Calibration line active on power-up 1.00 General Fault 0.60
Low 24 volts 1.00 General Fault 0.80
Low 12 volts 1.00 General Fault 1.20
Low 5 volts 1.00 General Fault 1.20
Dirty Optics 2.00 Blocked Optics 1.00
Calibration Fault 1.00 General Fault 1.60
Calibration complete 1.00 Calibration 1.80
Span calibration, apply gas 1.00 Calibration 2.00
Zero calibration in progress 1.00 Calibration 2.20
Negative signal output fault 1.00 General Fault 2.40
Flash CRC 1.00 General Fault 1.20
Ram Error 1.00 General Fault 1.20
EEPROM Error 1.00 General Fault 1.20
IR Source Failure 1.00 General Fault 1.20

18 95-86763.1
STARTUP
When the Eclipse is installed and wired as described in
the “Installation” section, it is ready for commissioning.
If the application requires that specific changes be
made to the configuration settings, HART or MODBUS
communication will be required. Refer to the appropriate
Appendix for details.
NOTE
Ensure that controller alarm outputs are inhibited
for a minimum of 10 seconds after system
power-up to prevent unwanted output actuation.
NOTE
The safety function (gas input-to-actuation/
notification) must always be verified upon
completion of installation and/or modication.
PIRECL STARTUP/COMMISSIONING CHECKLISTS
Electrical Checklist
• All 24 Vdc power conductors are properly sized and
are properly terminated.
• The 24 Vdc power supply provides sufficient load
capacity for all gas detectors.
• Using a DC voltmeter, 24 Vdc has been measured at
the detector.
• All signal output conductors are properly terminated,
and the jumper wire is installed if a non-isolated
signal output is desired.
• All relay contact output signal conductors are
properly terminated if applicable.
• All screw terminals have been tightened and all wires
pull-tested to confirm proper termination has been
accomplished.
Mechanical Checklist
• PIRECL detector is mounted to a solid surface not
prone to high vibration, shock, traumatic impact or
other undesirable condition.
• PIRECL detector is installed in proper orientation
(horizontal).
• PIRECL detector is installed to achieve weatherproof
status, e.g. conduit seals or cable glands have been
properly installed. If there is an unused conduit
entry, this entry has been sealed with a weathertight
plug.
• PIRECL detector threaded covers are tightened to
engage all O-rings.
• The hex head set screw is tightened to secure the
cover and prevent access to the wiring compartment
without the use of a tool.
Gas Detection and Measurement Checklist
• Area(s) of coverage have been identified, and
optimum detector locations for installation are
documented.
• Detector installation location is suitable for intended
purpose, e.g. no obvious impediments to contact
with the gas of interest exist or are likely to exist.
• Proper calibration gas is available to perform proof of
response test or calibration during commissioning.
• HART communicator or similar field communicator
is available if field programming is expected or
required.
• Calibration magnet is available to initiate quick
calibration or reset.
Table of contents
Other Det-Tronics Gas Detector manuals

Det-Tronics
Det-Tronics Open Path Eclipse OPECL User manual

Det-Tronics
Det-Tronics FlexSight LS2000 User manual

Det-Tronics
Det-Tronics GT3000 Series User manual

Det-Tronics
Det-Tronics Eagle Quantum 95-8470-05 User manual

Det-Tronics
Det-Tronics GTXSM26N4 User manual

Det-Tronics
Det-Tronics FlexSight LS2000 User guide
Popular Gas Detector manuals by other brands

BRUEL & KJAER
BRUEL & KJAER 1306 instruction manual

Crowcon
Crowcon SF6 Installation, operating and maintenance instructions

Riken Keiki
Riken Keiki RX-8700 quick start guide

Dräger
Dräger X-AM 2500 Instructions for use

Dräger
Dräger PEX 1000 Instructions for use

Bacharach
Bacharach IAM-100 Installation and operation manual